Doorbell Wired - Doorbells IMOU - Free user manual and instructions
Find the device manual for free Doorbell Wired IMOU in PDF.
User questions about Doorbell Wired IMOU
0 question about this device. Answer the ones you know or ask your own.
Ask a new question about this device
Download the instructions for your Doorbells in PDF format for free! Find your manual Doorbell Wired - IMOU and take your electronic device back in hand. On this page are published all the documents necessary for the use of your device. Doorbell Wired by IMOU.
USER MANUAL Doorbell Wired IMOU
Doorbell Wired - DB11
natural_image
Line drawing of a mobile phone with a circular button and dotted button (no text or symbols)Welcome
EN
Thank you for choosing IMOU.
We are devoted to providing you easy smart home products. If you have problems using the product, please contact our service team before returning your product.
Our service mail: service.global@imoulife.com
Frequently asked questions can be found at imoulife.com/support/help

text_image
QR code image containing encoded data, no visible human-readable text
natural_image
Illustration of a person sitting on a sofa with a coffee table and a QR code in the background (no text or symbols)Packing List
EN
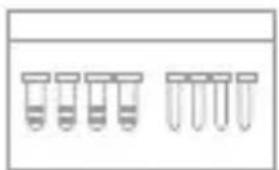
Quick Start Guide x1Chime Kit x1
natural_image
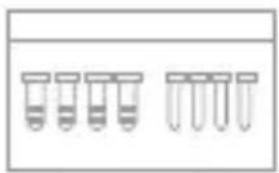
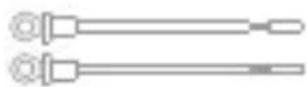
Simple line drawing of six test tubes arranged in a row (no text or labels)Screw Package x1
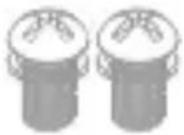
Door Frame Screws x3
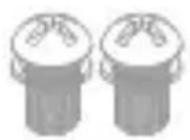
Power Port Screws x2
natural_image
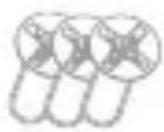
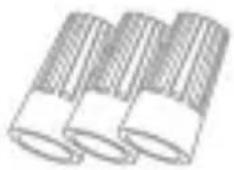
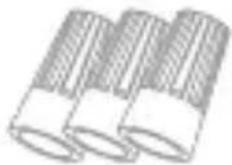
Illustration of three cylindrical objects with textured surfaces (no text or symbols)Wire Caps x3
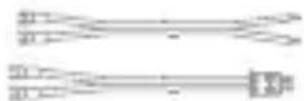
Chime Cables x2Doorbell Cable x2
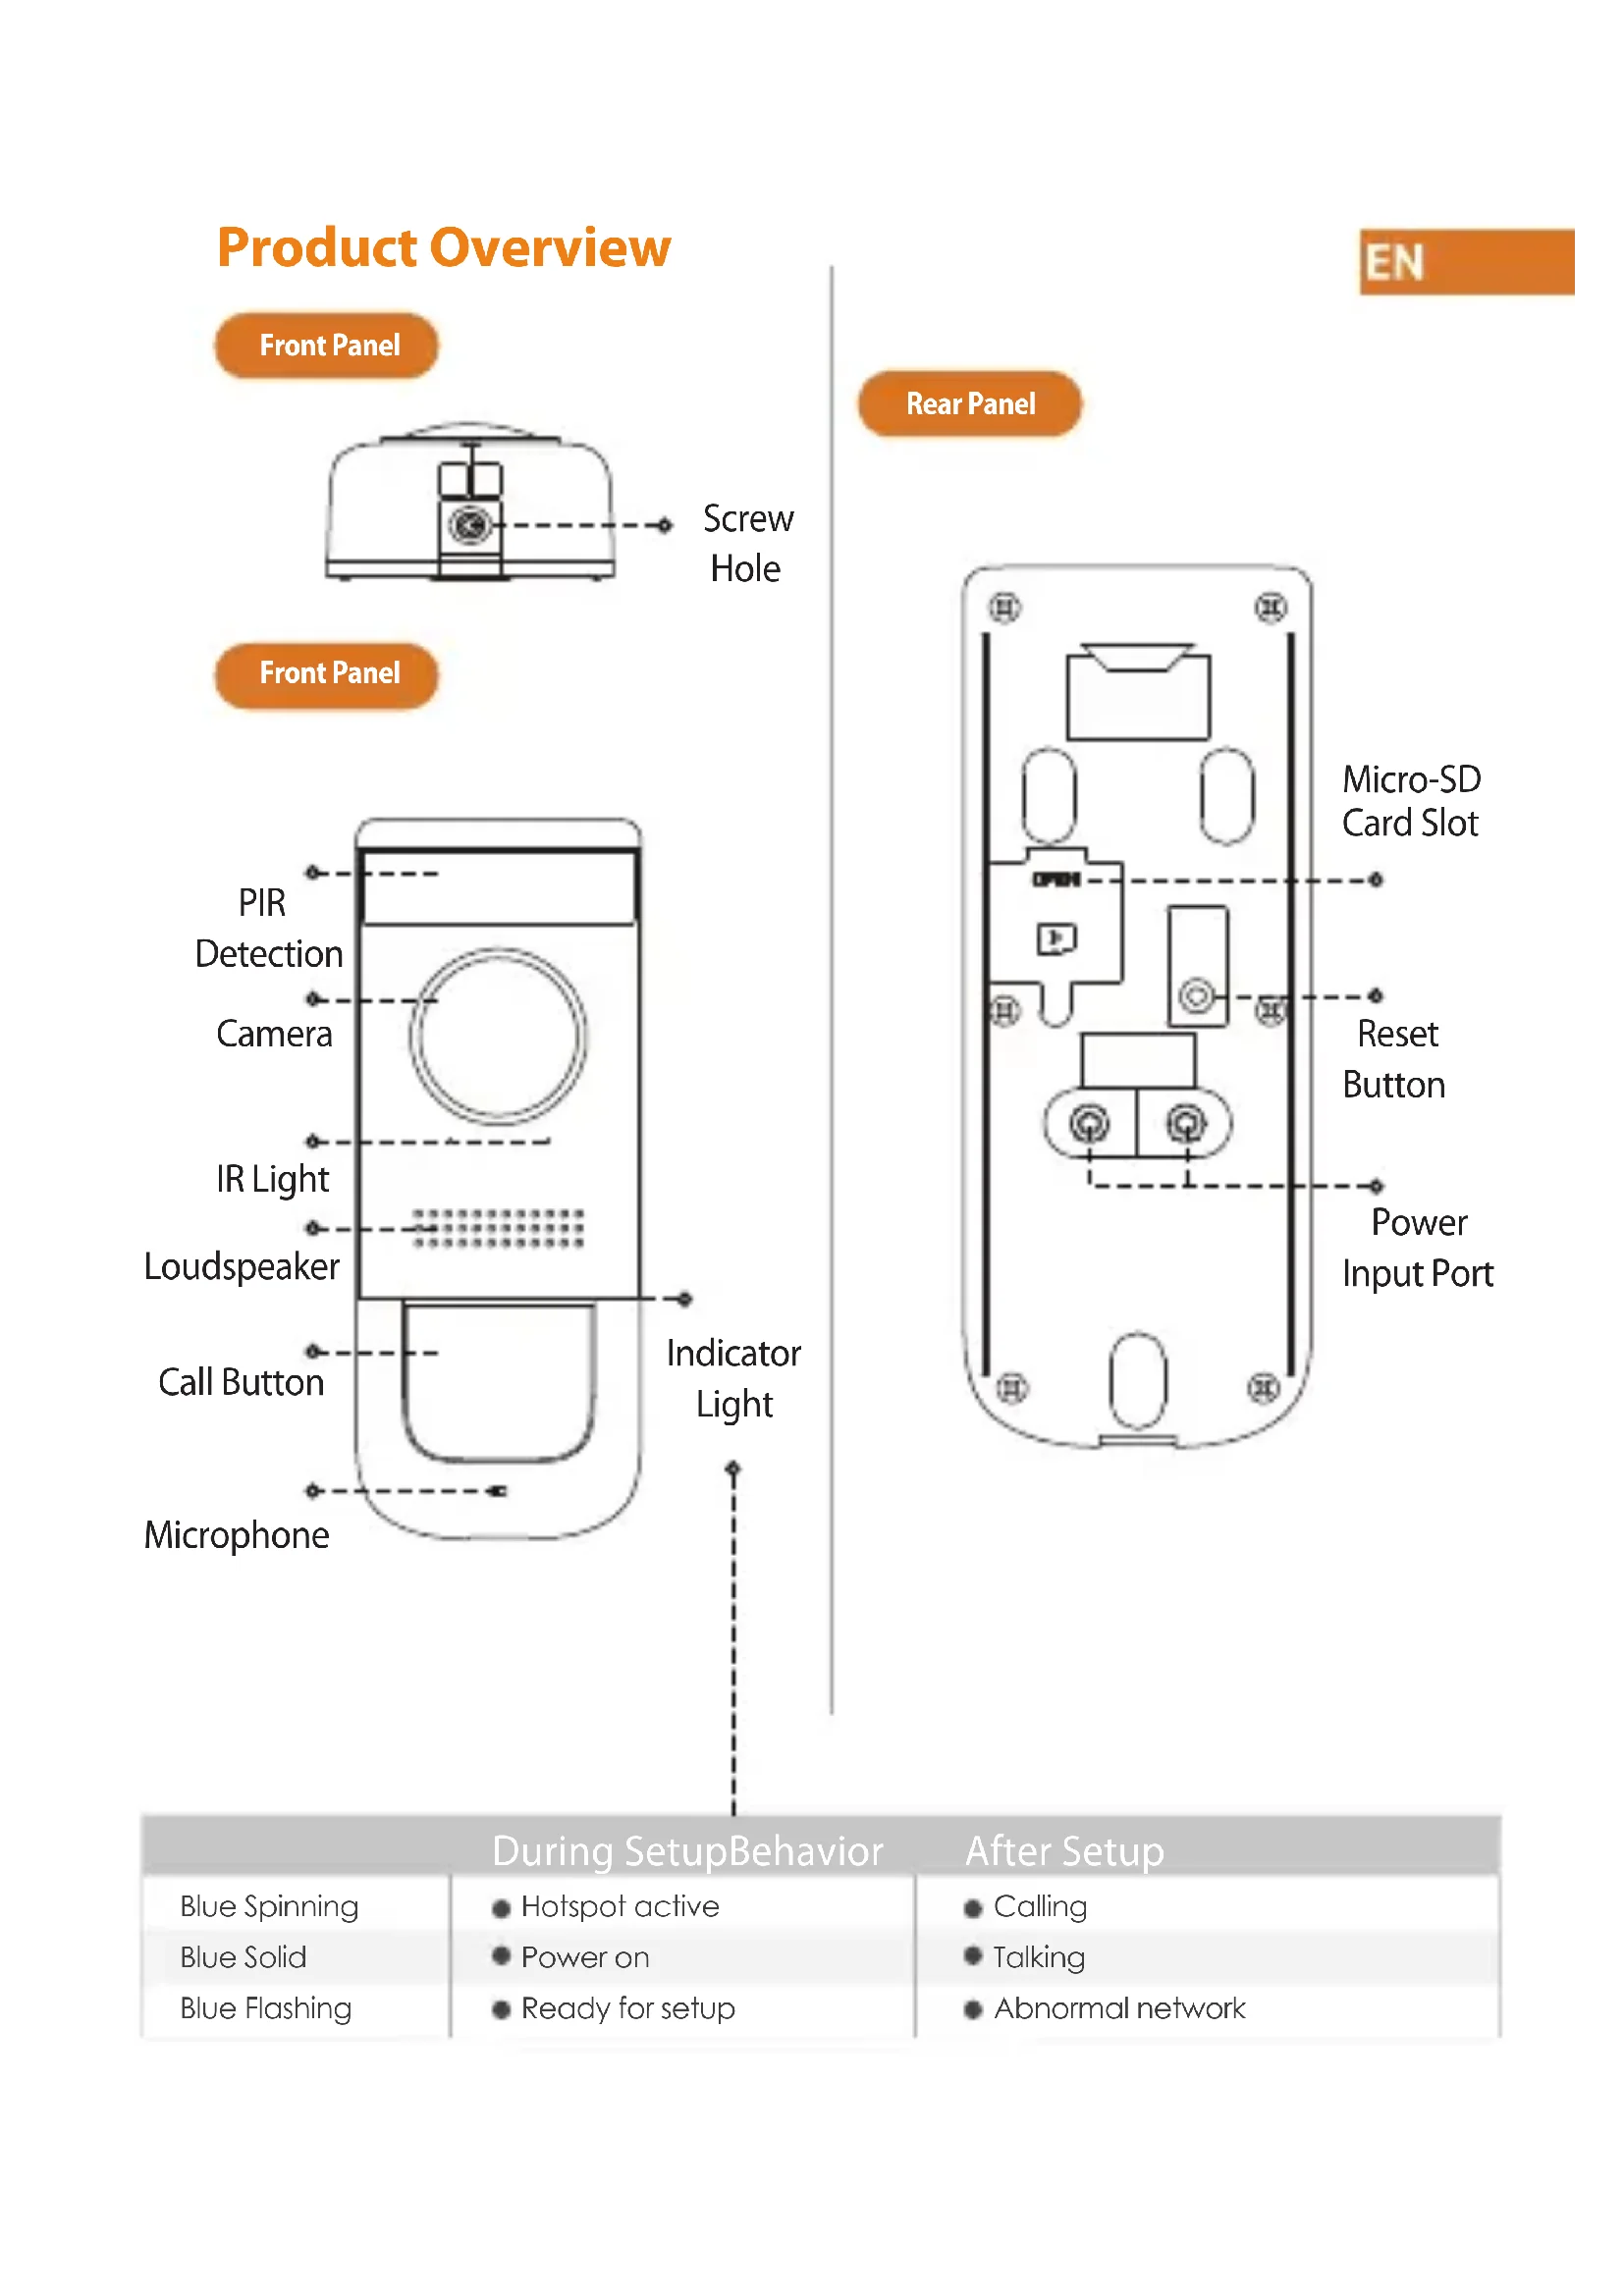
Product Overview
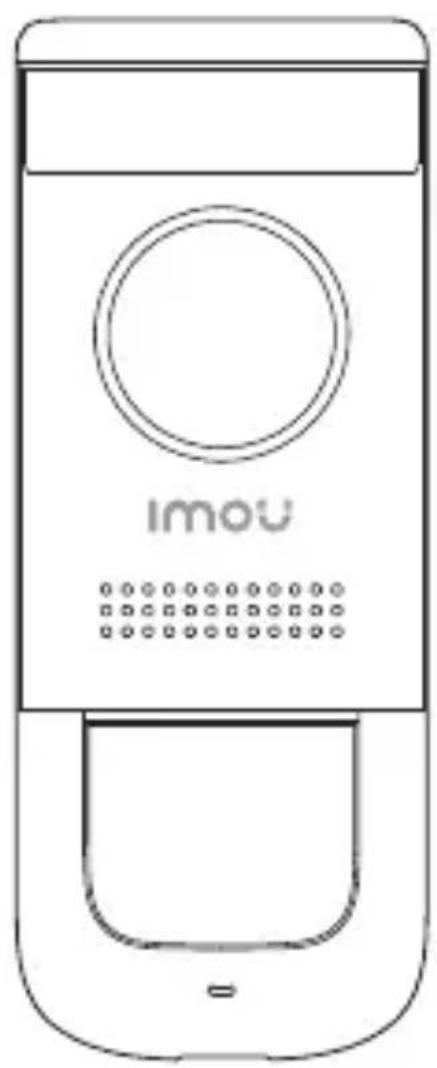
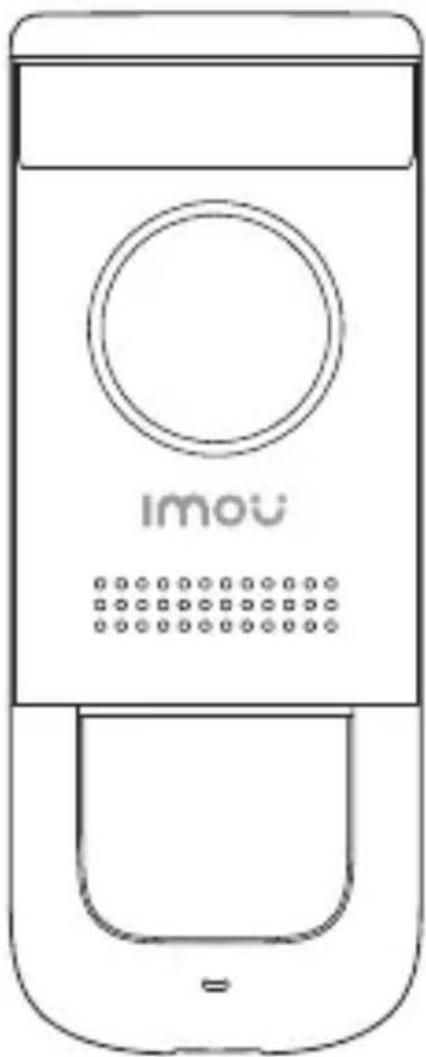
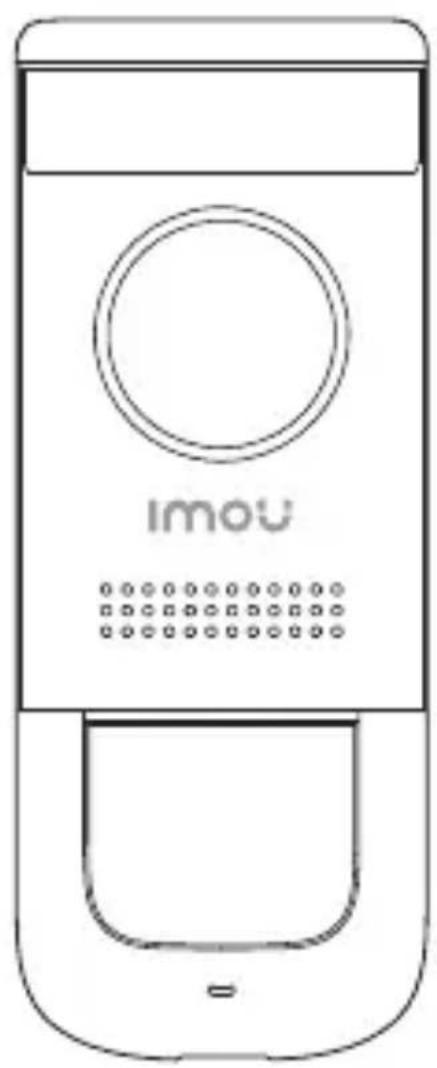
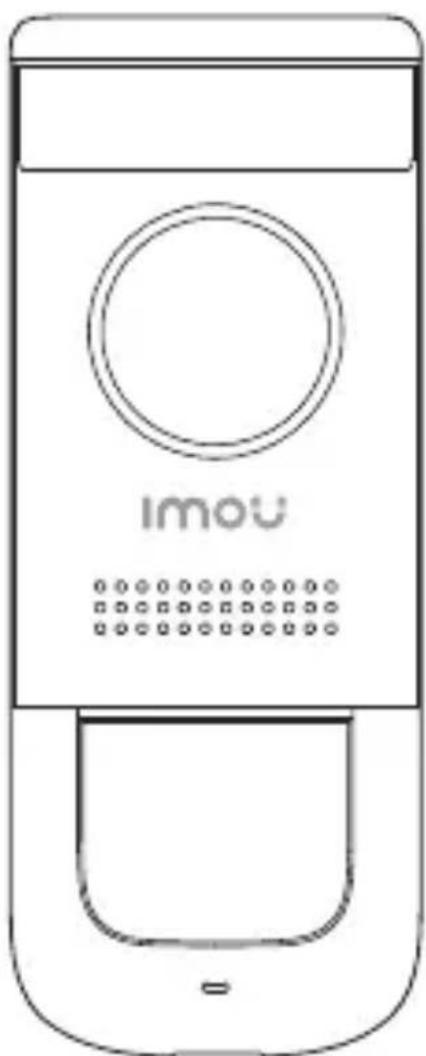
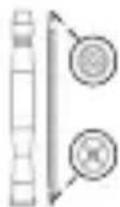
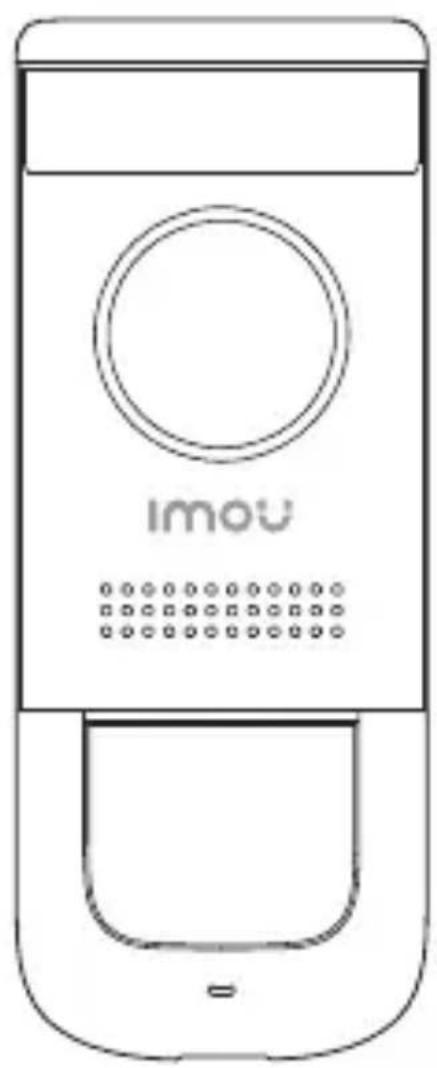
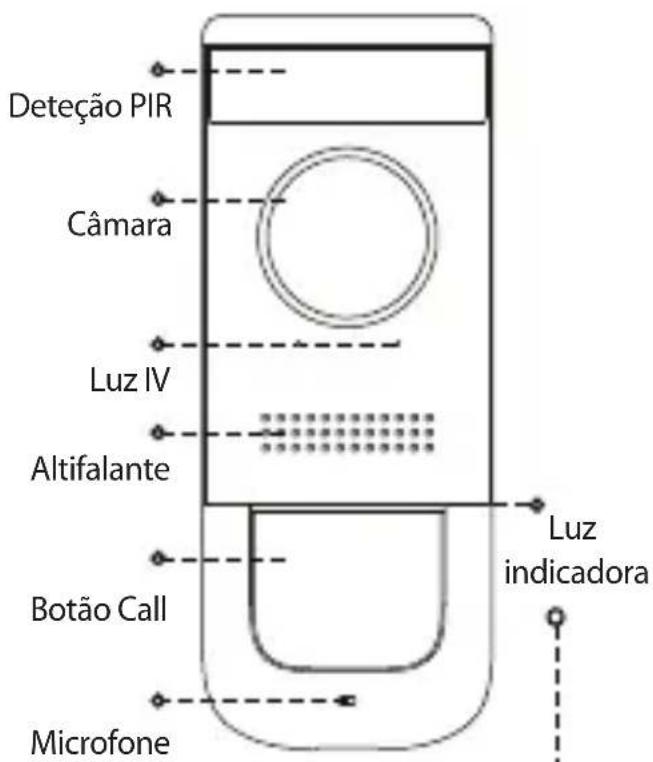
Front Panel
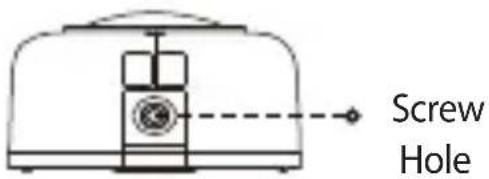
text_image
Screw HoleFront Panel
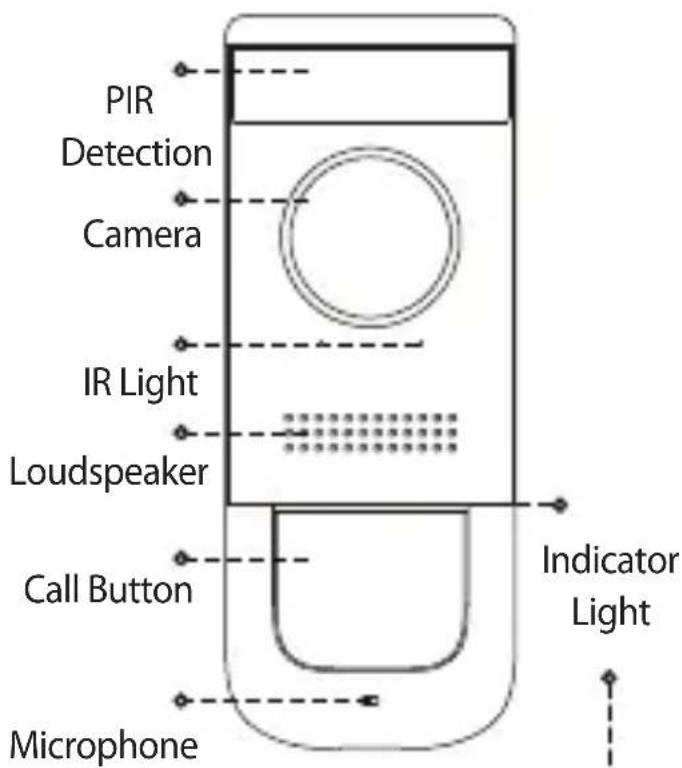
text_image
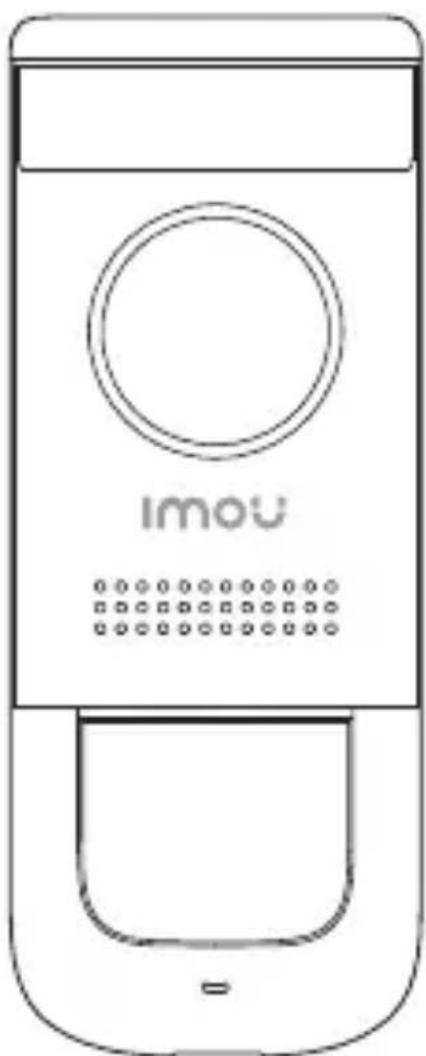
PIR Detection Camera IR Light Loudspeaker Call Button Microphone Indicator LightEN
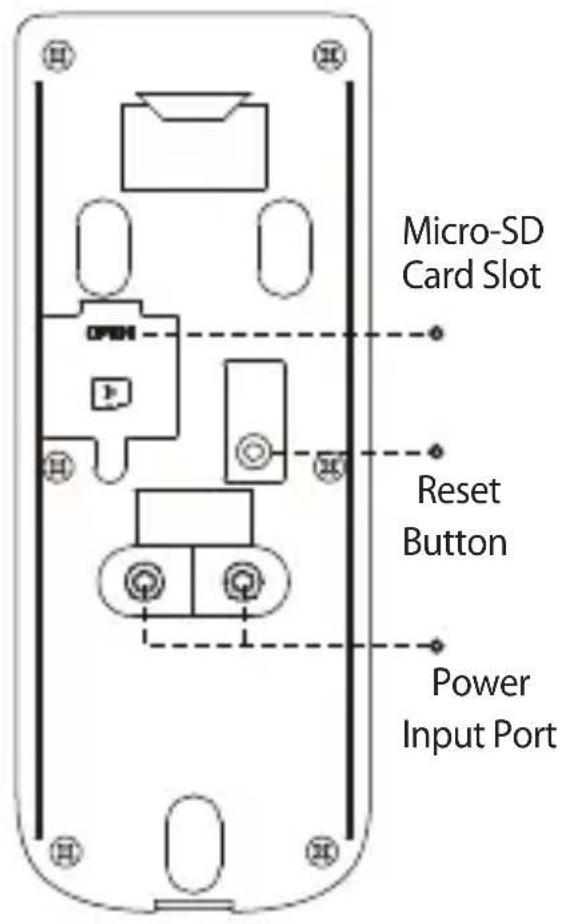
Rear Panel
text_image
Micro-SD Card Slot Reset Button Power Input PortDuring SetupBehavior
Blue Spinning
Blue Solid
Blue Flashing
- Hotspot active
Power on
- Ready for setup
After Setup
- Calling
- Talking
• Abnormal network
1
Preparation
EN
Before beginning setup, there are some essential preparations to make.
- Turn off the power Running to your existing doorbell and chime box at the breaker.
- Remove your existing doorbell and disconnect wiring.
natural_image
Diagram showing a wall-mounted switch with a directional arrow indicating rotation, next to a separate electrical outlet with wires (no text or symbols)i
Tips
Bend the power cables so they do not fall through the hole in the wall. Remove the metal mounting plate from the back of the doorbell.
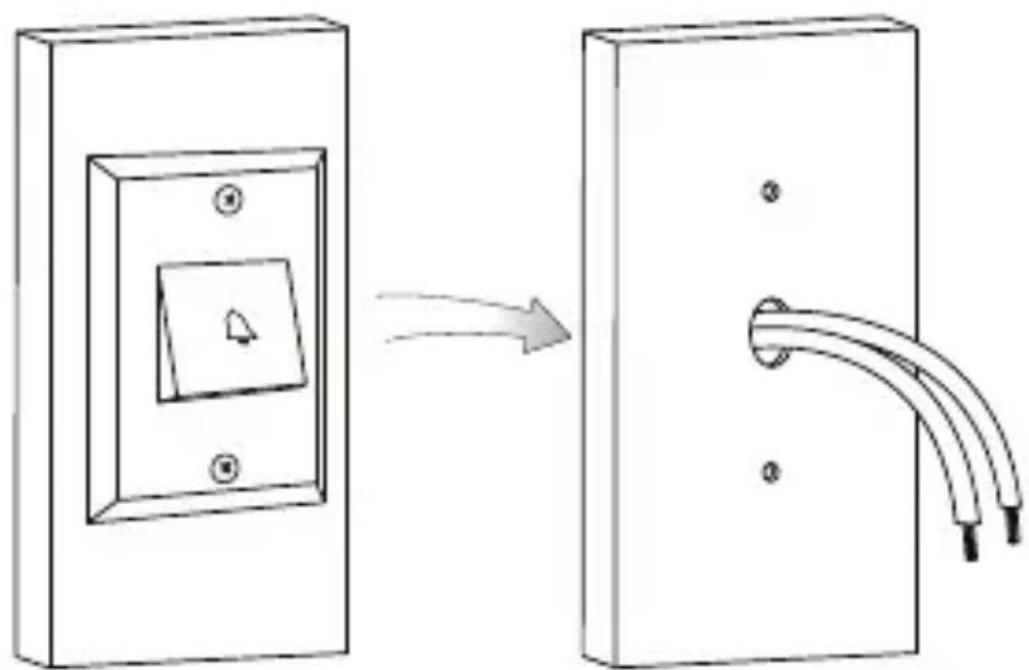
2
Secure the mounting bracket
Next, use the mounting bracket to mark holes for mounting. Use the mounting accessories specified below depending on mounting location.
installing on brick ins
EN
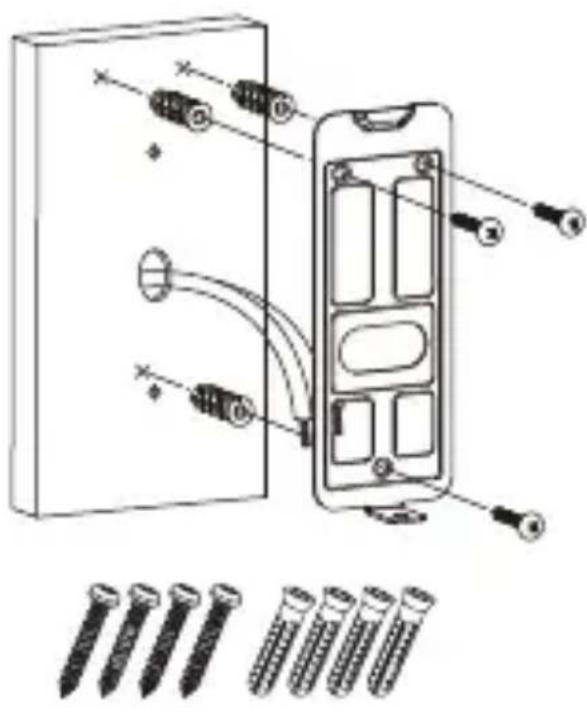
text_image
Diagram showing components of a device with labeled parts and screwdriver placements, including pins and connectors.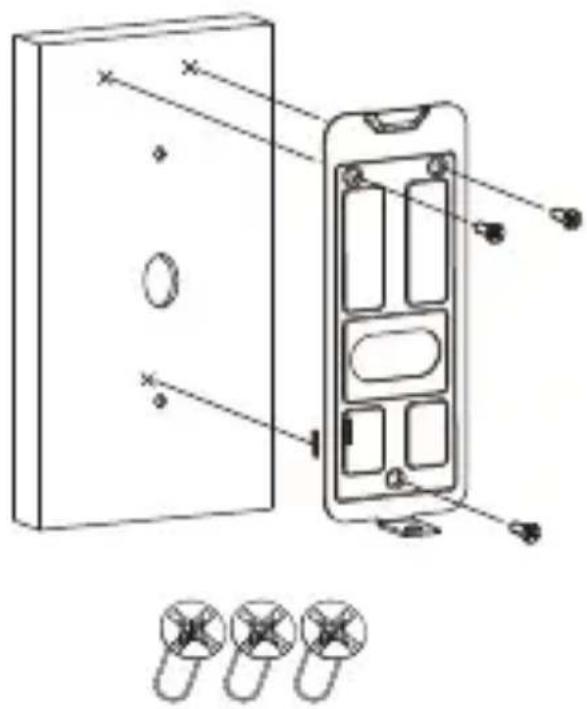
text_image
Technical diagram of a device with labeled components and exploded view, showing internal compartments and mounting points.Note: For both installations, ensure the power cables from the wall fit comfortably through the hole in the mounting bracket.
natural_image
Diagram of a mobile phone socket with two cables inserted, showing internal components (no text or symbols)3
Add Doorbell to Imou Life App
EN
a
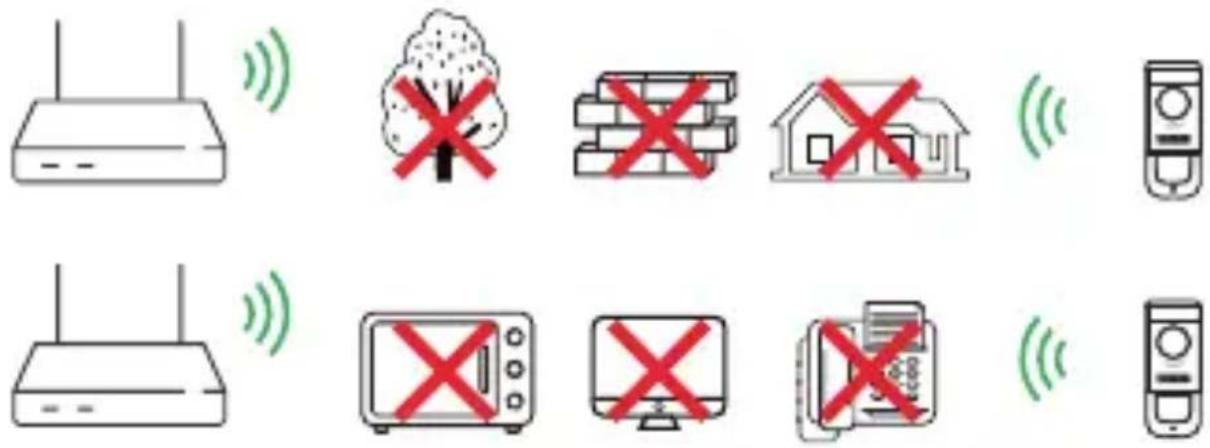
text_image
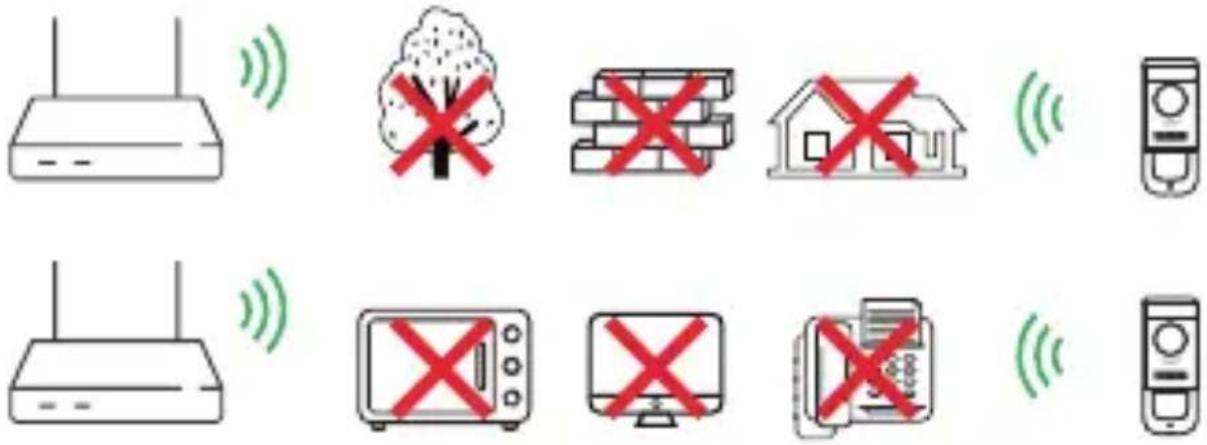
Diagram showing various household and utility devices with wireless signal icons and prohibition symbolsTo ensure the best possible wireless performance, please make sure there are no obstacles and electromagnetic interference between the Doorbell and router.
b
EN
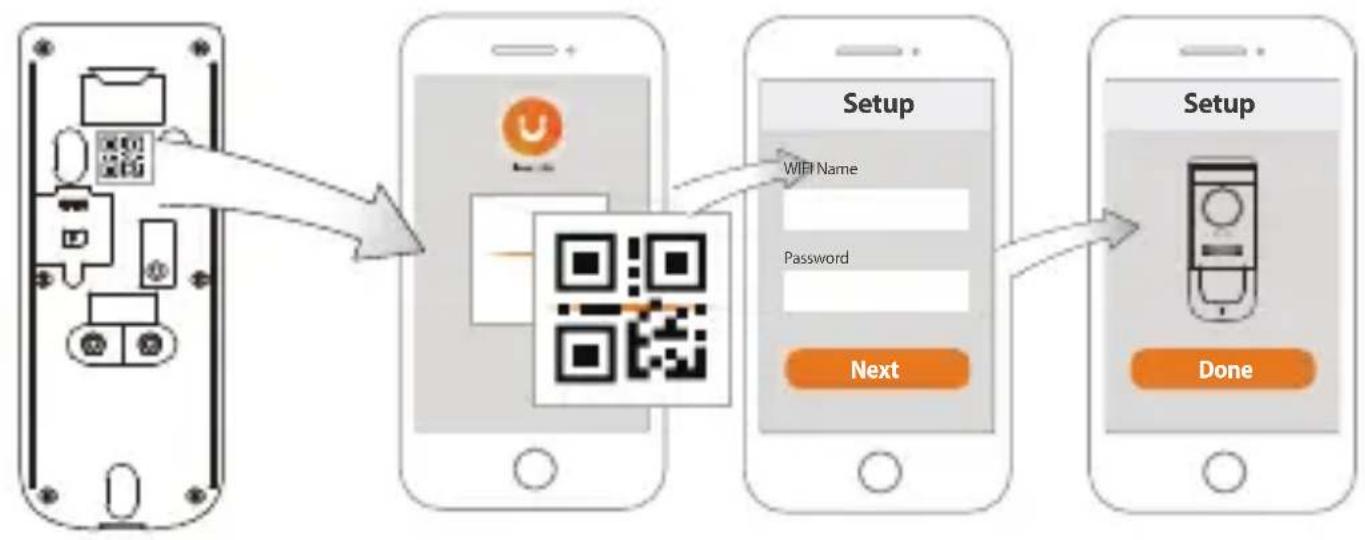
flowchart
graph LR
    A["Device Input"] --> B["Setup Setup"]
    B --> C["Next Setup"]
    C --> D["Done Setup"]
    style A fill:#f9f,stroke:#333
    style B fill:#ccf,stroke:#333
    style C fill:#cfc,stroke:#333
    style D fill:#fcc,stroke:#333
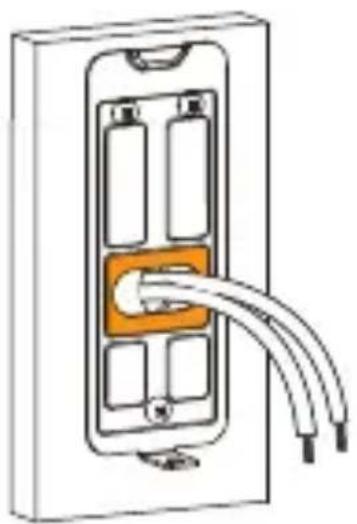
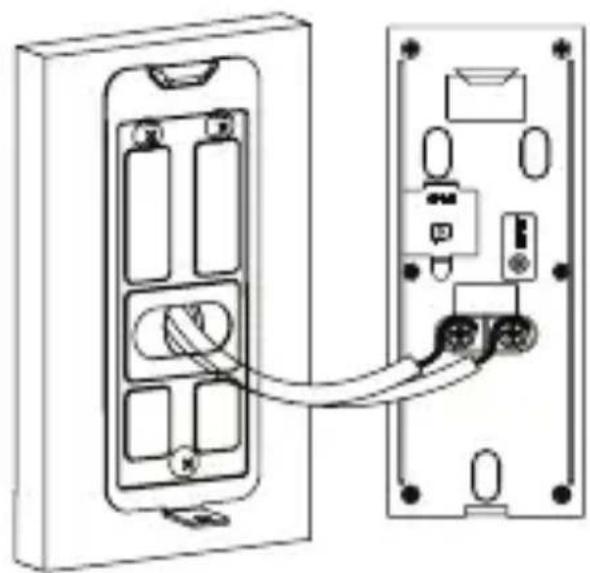
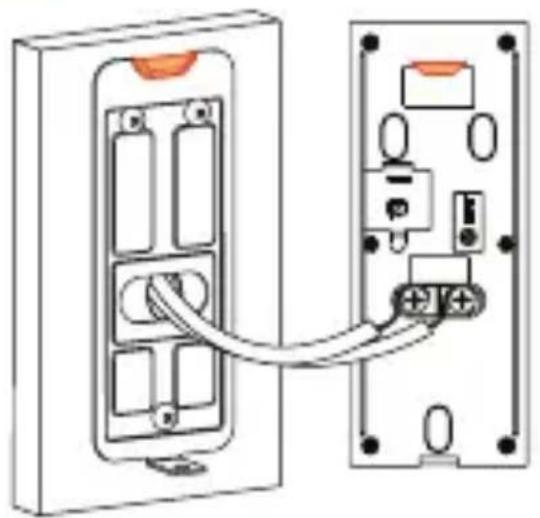
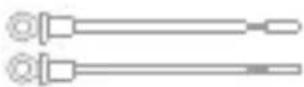
4 Wiring the doorbell
Next, you will complete the wiring for your new doorbell.
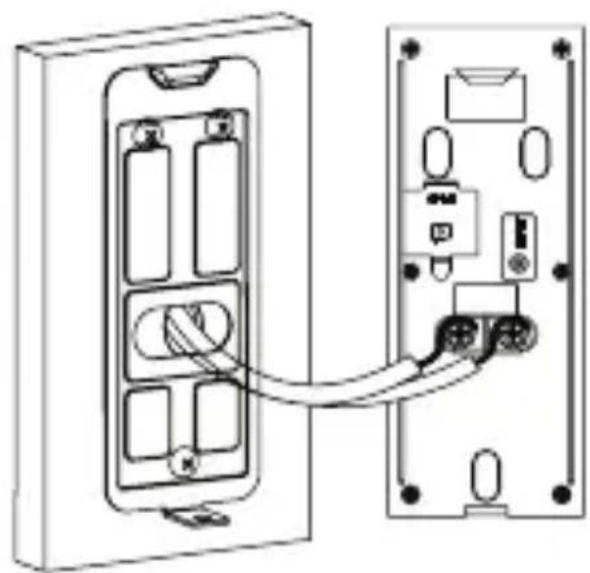
a
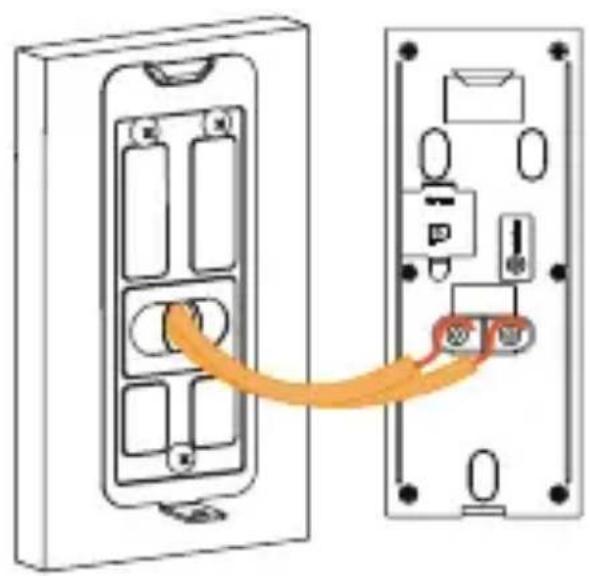
text_image
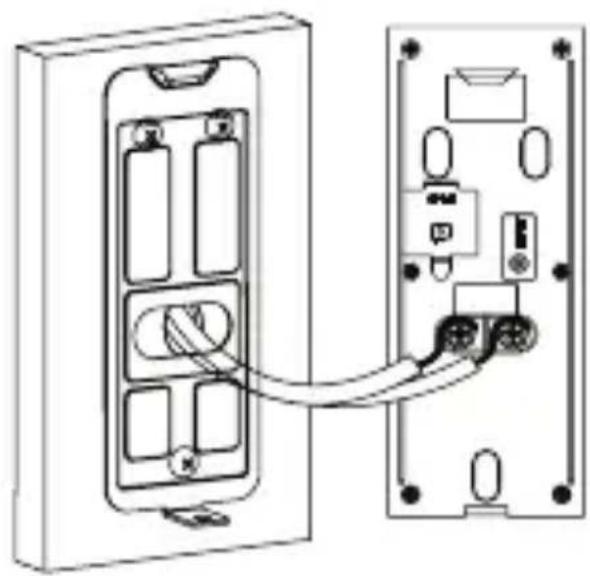
Diagram showing a device connection between two internal compartments with labeled ports and connectorsb
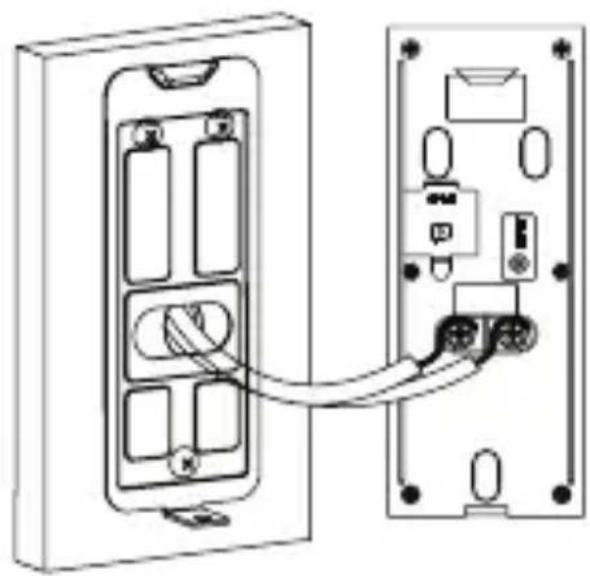
natural_image
Diagram of a device showing two connected components with connectors and ports (no text or symbols)C

natural_image
Diagram of a device showing two connected components with connectors and ports (no text or symbols)d
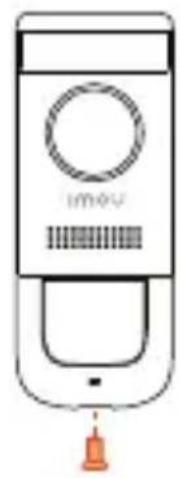
natural_image
Line drawing of a handheld device with a circular button and a hanging bell (no text or symbols)EN
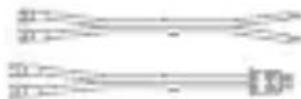
Note: If the power cables in the wall are not long enough, use the optional power cable connectors and wire caps.
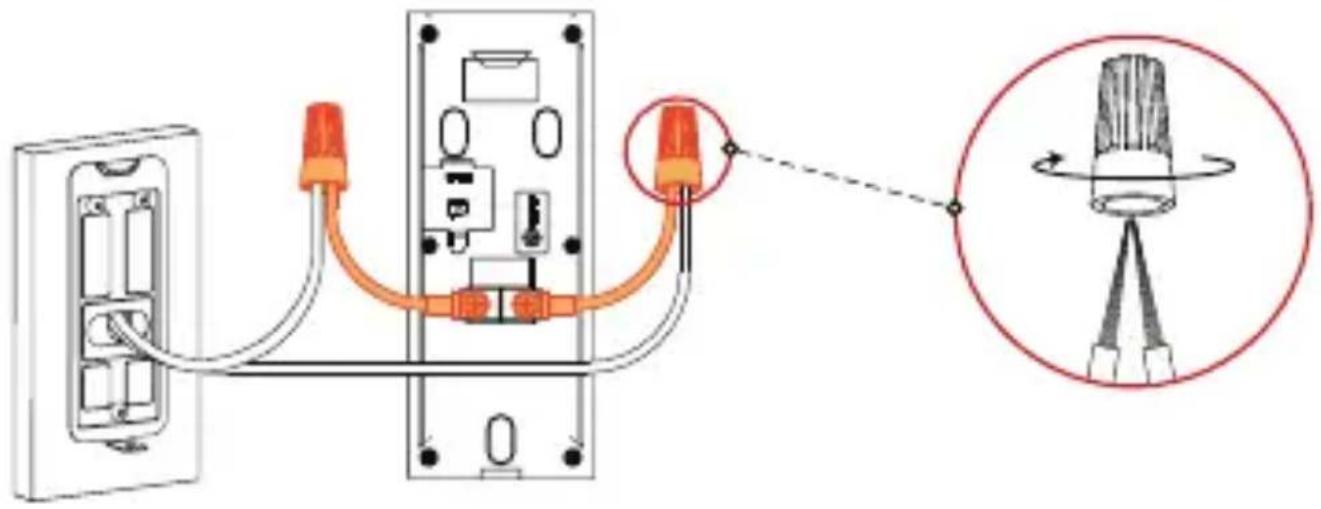
text_image
Diagram showing cable connection to a wall-mounted device with a magnified view of the component's tip and cable assembly.Ensure there is enough space to fit the cable connetors and wire caps into the hole in your wall or dor frame.

text_image
DC 12V1ATroubleshooting
EN
| Question Answer | |
| The device cannot boot up? | ·Please confirm whether power voltage of the device is normal, and whether power cable is well connected. |
| Connection is overtime? | ·The device, mobile phone and router are too far away. Please put them within 30cm (12 inches) when configuring.·Please reset the device to factory defaults and follow the guide on App page to try again. |
| The device is not online? | ·Please check the state of device indicator light. If blue light flickers all the time, it means that the device fails to connect the network. Please check whether wireless router can connect the network; connect your mobile phone with this wireless network to test it. If it can connect the network, please reset the device and configure again. |
| There is no message when PIR motion detection is triggered? | ·Please check whether alarm subscription is enabled.·If it is enabled, please check whether corresponding PIR zone is enabled.·Please check whether zone detection distance is set to be a relatively small range. |
| How to restore factory settings? | ·Please press Reset Button on the rear panel of the device for 5s. Blue light will be on for 3s and then turn off; the device will reboot automatically and restore factory default settings. |
Safety Tips and Warnings
EN
The following description is the correct application method of the device. Please read the manual carefully before use, in order to prevent danger and property loss. Strictly conform to the manual during application and keep it properly after reading.

Caution
- Please don't place and install the device in an area exposed to direct sunlight or near heat generating device.
- Please don't install the device in a humid, dusty or fuliginous area. Please keep its horizontal installation, or install it at stable places, and prevent it from falling.
- Please don't drip or splash liquids onto the device; don't put on the device anything filled with liquids, in order to prevent liquids from flowing into the device.
- Please install the device at well-ventilated places; don't block its ventilation opening.
- Use the device only within rated input and output range.
- Please don't dismantle the device arbitrarily.
- Please transport, use and store the device within allowed humidity and temperature range.
- Products with category I structure shall be connected to grid power output socket, which is equipped with protective grounding.
Disclaimers
- This doorbell includes an Auto Mechanical IR Cut Filter. When the camera changes between Day/Night viewing modes, an audible clicking noise may be heard from the doorbell. This clicking is normal, and indicates that the camera filter is working.
Kurzanleitung
Doorbell Wired - DB11

natural_image
Line drawing of a mobile phone with a circular button and dotted button (no text or symbols)Willkommen
DE
text_image
QR code image containing encoded data, no visible human-readable text
text_image
Illustration of a person sitting on a sofa with a QR code in the background, likely representing a mobile app or service.Packungsinhalt
DE
Video-
Türklingel x1
Schraubendreher x1
Gong-Kit x1
Kurzanleitung ×1
natural_image
Simple line drawing of six test tubes arranged in two rows (no text or labels)natural_image
Diagram showing a door switch with a square vent and two wires inserted, connected by an arrow (no text or symbols)
Tips
text_image
Diagram of a device panel with labeled components and connectors, showing internal wiring connections.
natural_image
Illustration of multiple screw nails arranged in two rows (no text or symbols)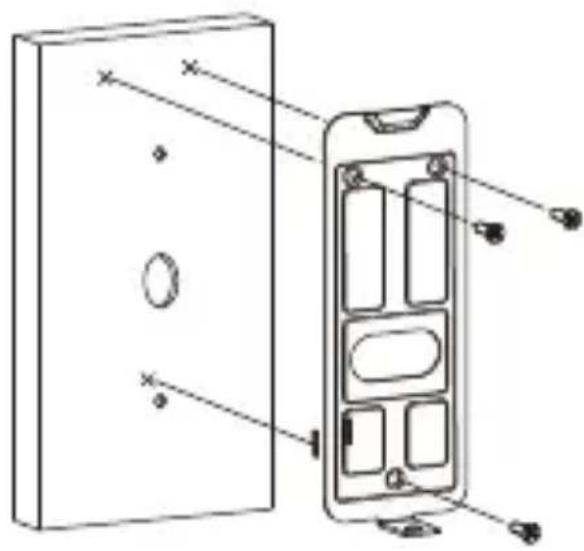
text_image
Technical diagram of a device panel with labeled components and cross-sectional view
natural_image
Diagram of a wall-mounted electrical switch with orange socket and connecting wires (no text or symbols)
text_image
Diagram showing various household and utility devices with wireless signal icons, including a router, tree, brick house, TV, microwave, computer, and remote.text_image
Diagram showing a device connection between two panels with an orange arrow indicating the cable or connector.b

natural_image
Diagram of a device showing two connected components with connectors and ports (no text or symbols)C

natural_image
Diagram of a device showing two connected components with connectors and ports (no text or symbols)d

natural_image
Line drawing of a handheld device with a circular button and a bell, no text or symbols presentDE
Hinweis:
text_image
Diagram showing cable connection to a wall-mounted device with a magnified view of the component being twisted.Doorbell Wired - DB11
natural_image
Line drawing of a mobile phone with a circular button and dotted button (no text or symbols)Bienvenido
ES
text_image
QR code image containing encoded data, no visible human-readable text
text_image
Illustration of a person sitting on a sofa with a coffee table, next to a QR code, likely representing a mobile app or website.natural_image
Simple line drawing of six test tubes arranged in two rows (no text or labels)natural_image
Diagram showing a door switch with a directional arrow indicating movement, next to a separate electrical outlet with wires (no text or symbols)
Tips
text_image
Diagram of a device panel with labeled components and connectors, showing internal wiring and connection points.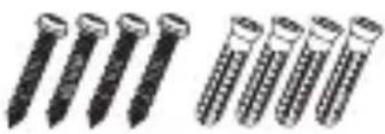
natural_image
Illustration of multiple screwdrivers with different thread designs (no text or symbols)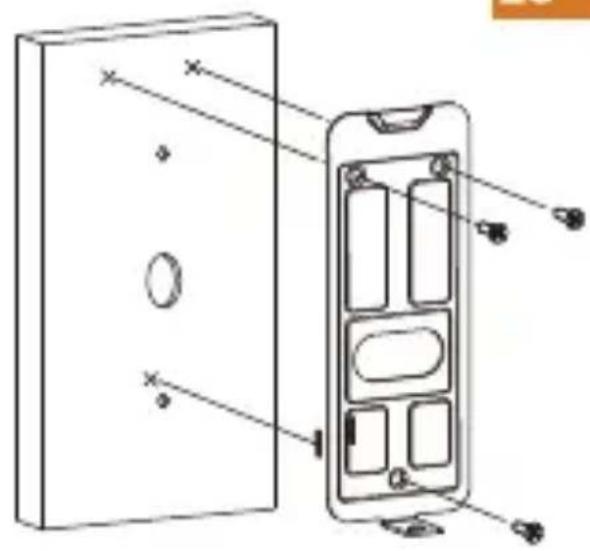
text_image
Technical diagram of a device with labeled components, showing internal structure and mounting points.
ES
natural_image
Diagram of a wall-mounted electrical switch with orange socket and connecting wires (no text or symbols)text_image
Imou Life Download on the App Store GET IT ON Google play Windows
Tips
text_image
Diagram showing various household and home devices with wireless signal icons and prohibition symbolstext_image
Diagram showing a device panel connected to an output port, with an orange arrow indicating the connection.b
natural_image
Diagram showing two electronic device panels connected by a cable, with internal components visible (no text or symbols)C

natural_image
Diagram of two electrical panel connectors with wiring and socket components (no text or symbols)d

natural_image
Line drawing of a handheld device with a circular button and a bell, no text or symbols presentES
Nota:
text_image
Diagram showing cable connection to a device with orange connectors and a magnified view of the component's tip.Doorbell Wired - DB11
natural_image
Line drawing of a mobile phone with a circular button and dotted button (no text or symbols)Bienvenue
text_image
QR code image containing encoded data, no visible human-readable textnatural_image
Simple line drawing of six test tubes arranged in two rows (no text or labels)Paquet de vis ×1
natural_image
Illustration of three cylindrical objects with textured surfaces (no text or symbols)natural_image
Diagram showing a door switch with a directional arrow indicating movement, next to a separate electrical outlet with wires (no text or symbols)
Tips
text_image
Diagram showing cable connector connections to a device panel with labeled pins and connectors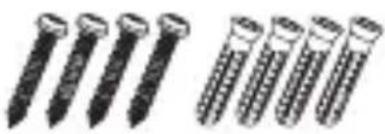
natural_image
Illustration of multiple screwdrivers with different thread patterns (no text or symbols)allique
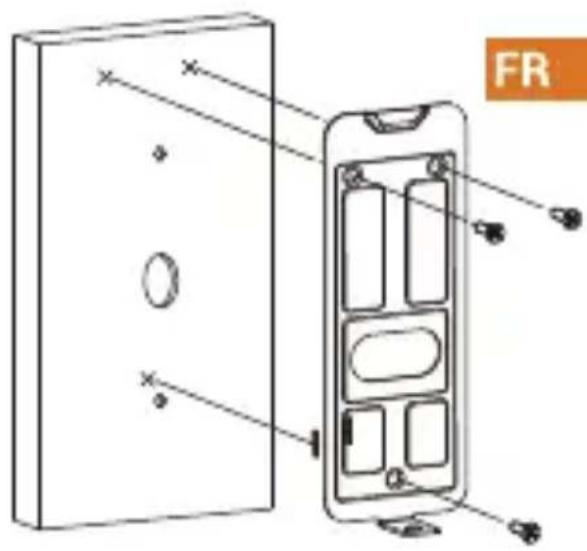
text_image
FR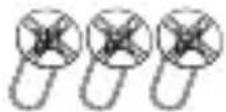
natural_image
Diagram of a wall-mounted electrical outlet with two cables inserted, showing internal components (no text or labels)text_image
Diagram showing various household and remote devices with wireless signal icons and prohibition symbolstext_image
Diagram showing a device panel connected to an output port, with an orange arrow indicating the connection.b
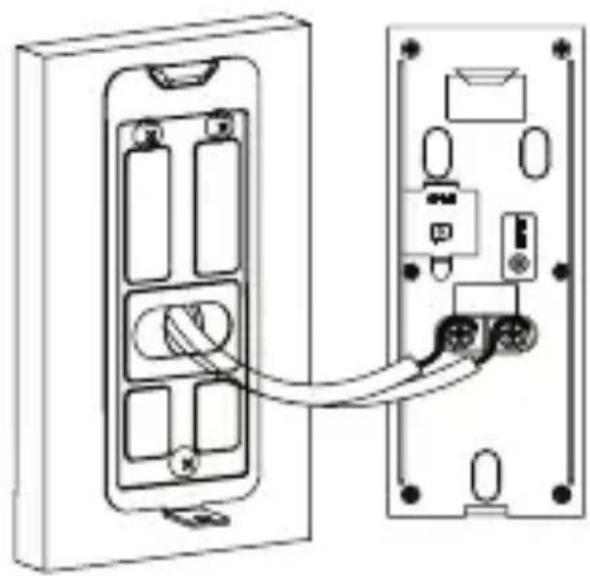
natural_image
Diagram showing two electronic device panels connected by a cable, with internal components visible (no text or symbols)C

natural_image
Diagram of two electrical panel connectors with wiring and socket components (no text or symbols)d

natural_image
Line drawing of a handheld device with a circular button and a hanging bell (no text or symbols)FR
Remarque:
text_image
Diagram showing cable connection to a device with labeled components and a magnified view of the component's tip.Doorbell Wired - DB11
IT
natural_image
Line drawing of a mobile phone with a circular button and dotted button (no text or symbols)Benvenuti
text_image
QR code image containing encoded data, no visible human-readable text
natural_image
Illustration of a person sitting on a sofa with a coffee table and a QR code in the background (no text or symbols)natural_image
Simple line drawing of six test tubes arranged in two rows (no text or labels)Kit di viti ×1
natural_image
Illustration of three cylindrical objects with textured surfaces (no text or symbols)morsetti x3
natural_image
Diagram showing a door switch with a directional arrow indicating movement, no text or symbols presentIT

Tips
natural_image
Diagram of a mobile phone wall socket with orange socket and connecting cables (no text or symbols)text_image
Diagram showing various household and home devices with wireless signal icons and prohibition symbolstext_image
Diagram showing a device panel connected to an output port, with an orange arrow indicating the connection.b
natural_image
Diagram showing two electronic device panels connected by a cable, with internal components visible (no text or symbols)C
natural_image
Diagram of two electrical panel connectors with wiring and socket components (no text or symbols)d

natural_image
Line drawing of a handheld device with a circular button and a hanging bell (no text or symbols)IT
text_image
Diagram showing cable connection to a device with orange connectors and a magnified view of the component's tip.Doorbell Wired - DB11
NL
natural_image
Line drawing of a mobile phone with a circular button and dotted button (no text or symbols)Welkom
text_image
QR code image containing encoded data, no visible human-readable text
natural_image
Illustration of a person sitting on a sofa with a coffee table and a smartphone, no text or symbols present.Inhoud verpakking

videodeurbel x1
natural_image
Simple line drawing of test tubes arranged in two rows (no text or symbols)
Schroevenset ×1 Deubikovijmdebrbefki3 x1 Schroevendraaier x1
Binnendeurbelkabel x2Deurbelkabel x2
natural_image
Diagram showing a door switch with a directional arrow indicating movement, next to a separate electrical outlet with wires (no text or symbols)NL

Tips
natural_image
Diagram of a mobile phone wall-mounted switch with orange socket and white cable (no text or symbols)text_image
Diagram showing a smartphone scanning a QR code with an arrow pointing to it, labeled 'NL' in the corner.
Imou Life


i
Tips
text_image
Diagram showing various household and home devices with wireless signal icons and red X marks indicating prohibition or prohibition.text_image
Diagram showing a device panel connected to a wall-mounted device with an orange arrow indicating the connection point.b
natural_image
Diagram showing two connected electronic devices with internal components and wiring (no text or symbols)C

natural_image
Diagram of two electrical panel connectors with internal components and wiring, no text or symbols presentd
natural_image
Line drawing of a handheld device with a circular button and a bell, no text or symbols presentNL
text_image
Diagram showing cable connection to a device with labeled connectors and a magnified view of the component's tip.Doorbell Wired - DB11
PT
natural_image
Line drawing of a mobile phone with a circular button and dotted button (no text or symbols)Bem-vindo
text_image
QR code image containing encoded data, no visible human-readable text
text_image
Illustration with QR code and a person sitting on a sofa, likely for digital access or app download.natural_image
Simple line drawing of six test tubes arranged in two rows (no text or labels)natural_image
Simple line drawing of a toaster oven with no text or symbolsPainel dianteiro
natural_image
Diagram showing a door switch with a directional arrow indicating movement, no text or symbols presentPT

Tips
natural_image
Diagram of a mobile phone socket with orange socket and connecting cables (no text or symbols)text_image
Diagram showing various household and commercial devices with wireless signal icons, including a router, tree, brick house, and monitor.text_image
Diagram showing a device connection between two panels with an orange arrow indicating the cable or connector.b

natural_image
Diagram of a device showing two connected components with connectors and ports (no text or symbols)C

natural_image
Diagram of two electrical panel connectors with wiring and socket components (no text or symbols)d
natural_image
Line drawing of a handheld device with a circular button and a hanging bell (no text or symbols)PT