IAN 103760 - Weight bench CRIVIT - Free user manual and instructions
Find the device manual for free IAN 103760 CRIVIT in PDF.
User questions about IAN 103760 CRIVIT
0 question about this device. Answer the ones you know or ask your own.
Ask a new question about this device
Download the instructions for your Weight bench in PDF format for free! Find your manual IAN 103760 - CRIVIT and take your electronic device back in hand. On this page are published all the documents necessary for the use of your device. IAN 103760 by CRIVIT.
USER MANUAL IAN 103760 CRIVIT
Instructions for use
图
träningsBänk
Bruksorvisningen
Banc d'entraînement
Before reading, fold out the ilustration page and get to know all of the functions of your unit.
OE/IE Instruction and Safety Notice Page 06
Fl Kayo a npralisuohoeet Snu 10
Items delivered/description of parts 6
Technical data 6
Intended use 6
Safety instructions 6-7
Assembly 7
General training instructions 7
General training planning 8
Exercises 8-9
Maintenance, storage 9
Disposal instructions 9
3 Years Warranty 9
SE
i Congratulations! With your purchase you have decided on a high-quality product. Get to know the product before you start to use it. Carefully read the following instructions for use. Use the product only as described and only for the given areas of application. Keep these instructions safe. When passing the product on to a third party, always make sure that the documentation is included.
Failure to follow the safety instructions could lead to serious injury.
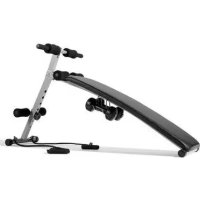
Items delivered/ description of parts (fig. A)
(1) 1 × Base with training bands
(2) 1 × Handle
(3) 2 × Large plastic nuts
(4) 1 × Assembly bolt
(5) 1 × Security pin
(6) 1 × Washer
(7) 1 x Footrest
(8) 2 × Dumbbells
(9) 1 × Bar
(10) 1 × Workout bench
(11) 1 × Hex-key, size 6
(12) 1 × Open-ended wrench, size 17 1 × Instructions for use
Technical data

Maximum user load: 110kg

Maximum additional wed: 3kg
Weight of training bench (excluding dumbbells): 8kg
Weight of dumbbells: approx. 3kg
Dimensions: assembled
$$ \text {a p p r o x .} 1 3 6 \times 5 7 \times 6 4 - 7 8 \mathrm {c m} (\mathrm {L} \times \mathrm {W} \times \mathrm {H}) $$
Class H training equipment (Home area)
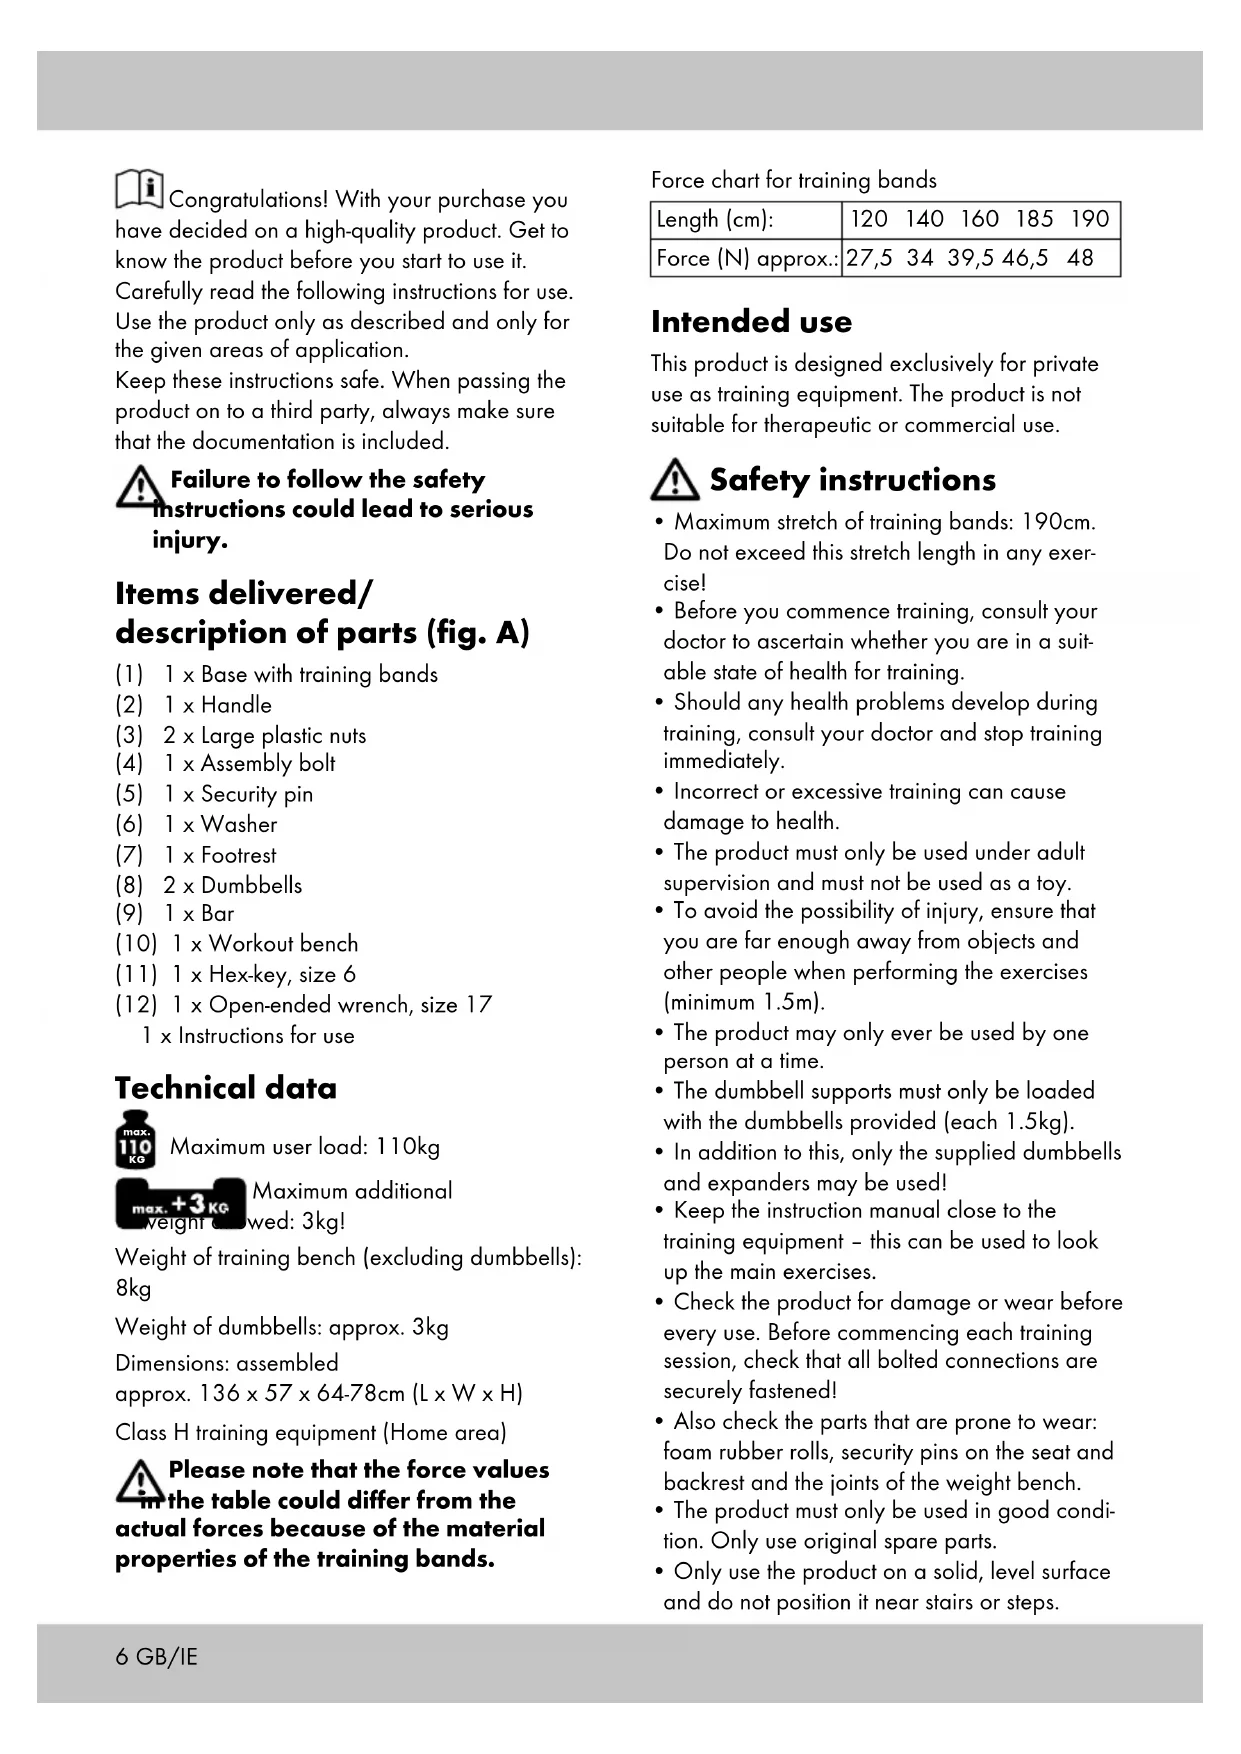
Please note that the force values in the table could differ from the actual forces because of the material properties of the training bands.
Force chart for training bands
| Length (cm): | 120 140 160 185 190 |
| Force (N) approx.: | 27,5 34 39,5 46,5 48 |
Intended use
This product is designed exclusively for private use as training equipment. The product is not suitable for therapeutic or commercial use.
Safety instructions
Maximum stretch of training bands: 190cm. Do not exceed this stretch length in any exercise!
- Before you commence training, consult your doctor to ascertain whether you are in a suitable state of health for training.
- Should any health problems develop during training, consult your doctor and stop training immediately.
- Incorrect or excessive training can cause damage to health.
- The product must only be used under adult supervision and must not be used as a toy.
- To avoid the possibility of injury, ensure that you are far enough away from objects and other people when performing the exercises (minimum 1.5m).
The product may only ever be used by one person at a time.
- The dumbbell supports must only be loaded with the dumbbells provided (each 1.5kg ).
- In addition to this, only the supplied dumbbells and expanders may be used!
- Keep the instruction manual close to the training equipment - this can be used to look up the main exercises.
- Check the product for damage or wear before every use. Before commencing each training session, check that all bolted connections are securely fastened!
- Also check the parts that are prone to wear: foam rubber rolls, security pins on the seat and backrest and the joints of the weight bench.
- The product must only be used in good condition. Only use original spare parts.
- Only use the product on a solid, level surface and do not position it near stairs or steps.
- Parents and other supervisors should be aware of their responsibility, since children's natural love of playing and experimentation can lead to situations and behaviour for which the training equipment was not designed.
- If you allow children on the equipment, you should bear in mind their mental and physical development and, in particular, their temperament. Children should be supervised as appropriate and, in particular, the correct usage of the equipment should be pointed out to them. This training equipment is not, under any circumstances, suitable to be used as a toy.
- Ensure that you use an appropriate underlay when using the equipment on sensitive floors, in order to protect the floor from damage.
Assembly
For the most part, the training bench is already preassembled. Only the front stand pipe needs to be assembled.
Tools required
1 x Hex-key, size 6
1 x Open-ended wrench, size 17
Step 1 (fig. B, C, D)
Push the base (1) into the bar (9) and secure this connection using the footrest (7) and the plastic nut (3).
Note: You can change the position of the footrest (7) and the position of the exercise bench (10) depending on your height and experience.
Please ensure that you tighten the connection securely again following adjustment.
Step 2 (fig. E)
Now mount the already assembled stand pipe onto the training bench (10).
Step 3 (fig. F)
Fasten the stand pipe (1/9) using the assembly bolt (4) provided, and tighten this securely.
Step 4 (fig. G)
Next, fasten the security pin (5) as shown.
Note! This pin prevents the whole base from collapsing.
Step 5 (fig. H)
Attach the handle (2) to the upper end of the stand pipe (1/9) and fasten it with the second plastic nut (3) and the washer (6) provided.
Note! For exercise K and N, attach the handle (2) with the adjustment screw facing outwards. For all other exercises, the adjustment screw should face the bench cushion.
Step 6
A storage bracket for the dumbbells is located underneath the training bench.
Turn the bracket downwards and screw it tightly in place.
Fold mechanism
To fold the base, pull out the security pin (5) and gently push the base forward. The base can then be folded.
General training instructions
The following exercises are only a selection. Additional exercises can be found in relevant specialist literature.
- Wear comfortable sports clothing and trainers.
- Warm up before every training session and gradually reduce the intensity of training.
- Increase the intensity of training slowly and ensure that you take sufficient breaks between exercises.
Perform the exercises at a steady pace. Breathe calmly.
- Perform all exercises steadily - not awkwardly and quickly.
- Be sure to breathe steadily. Breathe out when straining and breathe in when relaxing.
Note!
Should you experience any discomfort or feel unwell, stop the exercises immediately and contact your doctor. When performing exercises with the training bands, be careful not to stretch the bands further than 190cm . The force chart shows the force needed in order to pull the training bands to the appropriate length. The range of tolerance for this force is ± 20% (Force chart for training bands, see technical data).
General training planning
- A set of exercises consists of 10 - 20 repetitions of an exercise.
Each set of exercises can be repeated 2-4 times. - Between each of the sets of exercises, you should take a break of 1 - 3 mins.
Each exercise should be begun with a warm-up set using a very low weight load.
Exercises
Caution! Exercise 3 may not be feasible, or may only be partially feasible for people taller than 190cm .
Exercise 1 (fig. I)
This exercise trains your front abdominal muscles.
Adjust the height of the front base so that you can set your feet under the lower padded cross bar and at the same time lie flat with the backs of your knees on the padded rolls at the top of the seat.
Now sit upright on the training bench and set your feet on the lower padding, with the backs of your knees lying on the padding on top of the training bench.
Slowly lower your upper body using the tension of your abdominal muscles, until your upper body is parallel with the floor. Maintain this tension and raise your upper body by approx. 45^ and then slowly lower it again.
Note! Be very careful not to arch your back.
Exercise 2 (fig. J)
This exercise trains your front and side abdominal muscles.
Adjust the height of the front base again so that you can set your feet under the lower padded cross bar and at the same time lie flat with the backs of your knees on the padded rolls at the top of the seat.
Now sit upright on the training bench and set your feet on the lower padding, with the backs of your knees lying on the padding on top of the training bench.
Slowly lower your upper body using the tension of your abdominal muscles, until your upper body is parallel with the floor.
Maintain this tension and raise your upper body by approx. 45^ whilst turning your upper body alternately to the left and right. Doing this will also train your side abdominal muscles.
Note! Be very careful not to arch your back.
Exercise 3 (fig. K)
This exercise trains your lower abdominal muscles.
Caution! For this exercise, attach the handle (2) so that the adjustment screw faces away from the equipment. It must not be facing the surface of the seat.
Lie on your back on the training bench, with your head at the top. Your head should still be on the training bench rest.
Lift your arms above and behind your head and hold onto the handles/the uppermost cross bar. Now pull your legs up using the tension of your abdominal muscles, with your knees facing towards your head.
Then lower your legs again, but without your feet touching the floor. Be careful not to arch your back!
Exercise 4 (fig. L)
This exercise trains your arm, chest, shoulder and abdominal muscles.
Position yourself to face the bar with one leg next to the training bench and the other one knelt on top of it.
Hold the dumbbell in the hand which is furthest from the equipment; with the other hand, hold on to the upper cross bar.
Now pull your arm up until your upper arm is roughly parallel with the floor. The hand holding the dumbbell should be pointing vertically downwards.
The movement only comes from your shoulder.
After several repetitions, change sides.
Exercise 5 (fig. M)
This exercise trains your biceps (front upper-arm muscles).
Caution! Do not exceed the maximum stretch of the training bands.
Position yourself on the training bench as shown, with your feet on the base of the training bench to keep it on the ground!
Grab the expander grips - the palms of your hands should be facing upwards. Hold your elbows close to your body and pull the expanders upwards at the same time, in gentle movements.
When lowering your arms, be sure to maintain a smooth, controlled movement.
Only let the expanders drop as far as they can whilst still maintaining tension.
Exercise 6 (fig. N)
This exercise trains the muscles in your arms and shoulders.
Caution! Do not exceed the maximum stretch of the training bands.
Caution! For this exercise, attach the handle (2) so that the adjustment screw faces away from the equipment. It must not be facing the surface of the seat.
Sit on the training bench with your back to the bar. Brace yourself with your feet and grab the expander grips.
Move your arms out to the side starting position. The palms of your hands should be facing upwards. Now raise your upper arms out to the side until your hands are at head height.
Now move both arms down into the starting position at the same time, then up again.
Maintenance, storage
Do not forget that regularly maintaining and cleaning your weight bench ensures its safety and preservation. Always store the product at room temperature in a clean, dry condition.
IMPORTANT! Only clean with water, and never with abrasive cleaning products. Afterwards, wipe dry with a cleaning cloth.
Disposal instructions
Please dispose of the packaging and the product in an environmentally acceptable way, taking care to sort the materials for recycling.
Dispose of the product using an approved waste disposal firm or your community's municipal administration. Please observe the regulations which are currently in force.
3 years warranty
The product was produced with great care and under constant supervision. You receive a three-year warranty for this product from the date of purchase. Please retain your receipt.
The warranty applies only to material and workmanship and does not apply to misuse or improper handling. Your statutory rights, especially the warranty rights, are not affected by this warranty.
With regard to complaints, please contact the following service hotline or contact us by e-mail.
Our service employees will advise as to the subsequent procedure as quickly as possible.
We will be personally available to discuss the situation with you.
Any repairs under the warranty, statutory guarantees or through goodwill do not extend the warranty period. This also applies to replaced and repaired parts. Repairs after the warranty are subject to a charge.
IAN:103760
GB Service Great Britain
Tel.: 0871 5000 720
(£ 0.10/Min.)
E-Mail: deltasport@lidl.co.uk
IE Service Ireland
Tel.: 1890 930 034
(0,08 EUR/Min., (peak))
(0,06 EUR/Min., (off peak))
E-Mail: deltasport@lidl.ie
You can also find spare parts for your product at: www.delta-sport.com, category Service - Lidl Spare Parts Service