
SHD 7.4 A1 - Vacuum Cleaner SILVERCREST - Free user manual and instructions
Find the device manual for free SHD 7.4 A1 SILVERCREST in PDF.
| Product type | Cordless hand vacuum cleaner |
| Brand | SilverCrest |
| Model | SHD 7.4 A1 |
| Article number (IAN) | 384464_2107 |
| Power supply | Lithium-ion battery 7.4 V (2 x 3.7 V), 2000 mAh, charging via 9 V, 0.5 A power supply unit |
| Runtime | Approximately 15 minutes after full charge |
| Charging time | 4 to 6 hours for a full charge |
| Suction technology | Cordless, with dust filter |
| Included accessories | 2-in-1 nozzle (brush nozzle and crevice tool), power supply unit |
| Main functions | Stand function via closure cap, charge control indicator, automatic shut-off when charging |
| Maintenance | Empty and clean the dust container, wash the filter if necessary |
| Safety | Do not vacuum liquids, sharp objects, or flammable substances; batteries not replaceable |
| Replacement parts | 2-in-1 nozzle, dust filter, power supply unit (reference JOD-S-090050GS-C-2) |
| After-sales service France | 0800 919270, kompernass@lidl.fr |
| Recycling | Do not dispose of appliance and power supply unit in household waste; fixed integrated batteries |
Frequently Asked Questions - SHD 7.4 A1 SILVERCREST
User questions about SHD 7.4 A1 SILVERCREST
0 question about this device. Answer the ones you know or ask your own.
Ask a new question about this device
Download the instructions for your Vacuum Cleaner in PDF format for free! Find your manual SHD 7.4 A1 - SILVERCREST and take your electronic device back in hand. On this page are published all the documents necessary for the use of your device. SHD 7.4 A1 by SILVERCREST.
USER MANUAL SHD 7.4 A1 SILVERCREST
CORDLESS HAND-HELD VACUUM CLEANER DESIGN-AKKU-HANDSTAUBSAUGER ASPIRATEUR À MAIN DESIGN SANS FIL SHD 7.4 A1
GB IE
CORDLESS HAND-HELD VACUUM CLEANER
Short manual
FR BE
ASPIRATEUR À MAIN DESIGN SANS FIL
Guide abrégé
CZ
DESIGNOVÝ AKÚMULÁTOROVÝ RUCNÍ VYSAVAC
Stručný návod
SK
AKUMULÁTQROVÝ RUČNÝ VYSÁVAČ
Krátky návod
DK
HÄNDST∅VSUGER MED BATTERI I FLOT DESIGN
Kvikvejledning
HU
AKKUS KÉZI PORSZÍVÓ
Rövid útmutató
DE AT CH
DESIGN-AKKU- HANDSTAUBSAUGER
Kurzanleitung
NL BE
DESIGN ACCU-KRUIMELDIEF
GB/IE Short manual Page 1
| DE/AT/CH Kurzanleitung Seite 19 | |||
| FR/BE Guide abrégé Page 37 | |||
| NL/BE Beknopte gebruiksaanwijzing Pagina 55 | |||
| CZ | Stručný | návod | |
| PL | Skrócona instrukcja obstugi | Strona | 91 |
| SK | Krátky návod | Strana | 109 |
| ES | Guía breve | Página | 127 |
| DK | Kvikvejledning | Side | |
| IT | Istruzioni brevi | Pagina | 163 |
| HU | Rövid útmutató | Oldal | |
| SI | Kratka navodila | Stran | |
14:
181
Contents
Information about this short manual .... 2
Proper use....2
Safety information....3
Package contents and transport inspection ..... 7
Appliance description 8
Technical specifications 9
Use 1
Charging the batteries....1 1
Charge indicator lamp 13
2-in-1 suction nozzle 13
Handling and operation 15
Disposal....16
Disposal of the appliance 16
Disposal of the packaging 17
Service....18
Importer 18
Information about this short manual
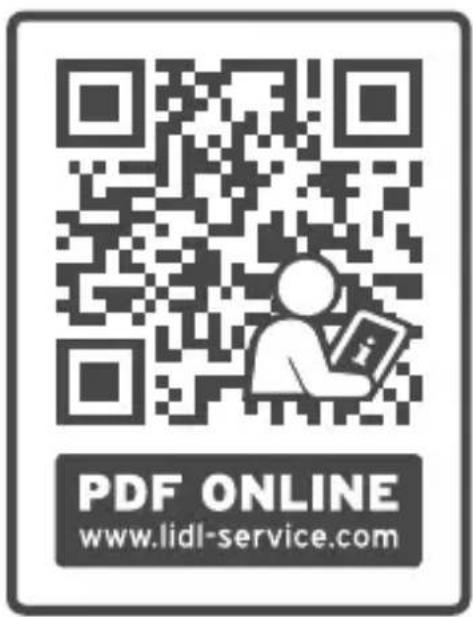
This document is a shortened print version of the complete operating instructions.
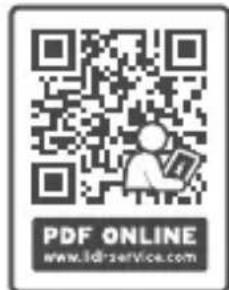
Scanning the QR code will take you directly to the Lidl Service page (www.lidl-service.com), where you can view and download the full version of the operating instructions by entering the article number (IAN) 384464_2107.
WARNING!
Observe the information in the complete operating instructions and the safety instructions to avoid personal injury and damage to property.
The short manual is an integral part of this product. Before using the product, please familiarise yourself with all operating and safety instructions. Keep the short manual in a safe place and hand over all documents when passing the product on to any future owner/user. I documents when passing the product on to any future owner/user.
Proper use
This appliance has been designed exclusively for vacuum cleaning dry surfaces and dry material. Do not use the appliance on people or animals. The appliance is not intended for use in commercial or industrial environments.
Claims of any kind for damages resulting from misuse, improper repairs, unauthorised modifications or the use of unauthorised spare parts are excluded. The risk is borne solely by the user.
Safety information
- Connect the mains adapter of the appliance only to a properly installed and easily accessible mains power socket supplying a mains power voltage of 100–240 V \~, 50/60 Hz.
▶ Never use the appliance if the mains cable, plug or housing are damaged.
▶ To prevent accidents, have defective plugs and/or mains cables replaced immediately by an authorised specialist, our customer service or a similarly qualified person.
▶ Have all repairs carried out by a specialist workshop. Under no circumstances should you open the appliance yourself. Repairs that are not carried out by a specialist workshop could lead to physical injuries.
▶ Never touch the mains adapter, mains cable or the appliance with wet or damp hands.
- Do not use the mains adapter with an extension cable; connect the mains adapter directly to a mains socket.

not charge or use the appliance outdoors.

WARNING! RISK OF INJURY!
▶ Do not use the appliance for vacuuming up:
-pointed or sharp-edged objects, e.g. nails or broken glass
-burning matches, glowing ashes or cigarette butts
-chemical products, stone dust, plaster, cement, printer toner or similar substances
-flammable and explosive substances
-liquids.
▶ Do not change any accessories while the appliance is switched on.
▶ Under extreme conditions, leaks in the battery cells may occur. In the event that battery fluid comes into contact with skin or eyes, the affected area must be rinsed off with water immediately. Seek medical attention.
WARNING! RISK OF INJURY!
This appliance may be used by children aged 8 years and above and by persons with limited physical, sensory or mental capabilities, or lack of experience and knowledge, provided that they are under supervision or have been told how to use the appliance safely and are aware of the potential risks.
- Cleaning and user maintenance tasks may not be carried out by children unless they are supervised.
▶ Do not allow children to play with the appliance.
▶ Take special care when using the appliance on the stairs.
ATTENTION! PROPERTY DAMAGE!
▶ Use only accessories recommended by the manufacturer.
▶ Do not use the appliance without the dust filter inserted.

ATTENTION! PROPERTY DAMAGE!
▶ Never put down the appliance next to or on radiators, ovens or other heated appliances or surfaces.
▶ Make sure that the ventilation slits are never obstructed. A blocked ventilation circuit can result in overheating and damage to the appliance.
▶ Always grip the mains plug to disconnect the appliance from the mains supply.
- Do not use the mains adapter for a different product and do not attempt to charge this appliance using a different charger. Use only the mains adapter supplied with this appliance.

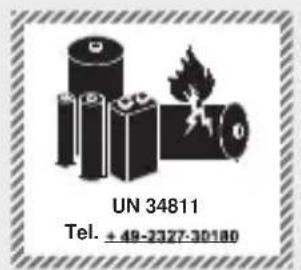
The product is equipped with lithium-ion batteries. Do not throw the batteries into a fire and do not subject them to high temperatures.
There is a risk of an explosion!
- Do not attempt to remove the batteries from the appliance. The batteries in this appliance are permanently installed and cannot be replaced.
Package contents and transport inspection

DANGER!
▶ Do not allow children to play with packaging materials. There is a risk of suffocation.
- Remove all parts of the appliance and the short manual from the packaging. - Remove all packaging materials from the appliance.
The package contents include the following components (see fold-out page for illustrations):
• Cordless hand-held vacuum cleaner
• 2-in-1 suction nozzle
- Mains adapter
• Short manual (not shown)
NOTE
▶ Check the package for completeness and signs of visible damage.
▶ If the delivery is incomplete or damage has occurred as a result of defective packaging or during transport, contact the customer service hotline (see section Service).
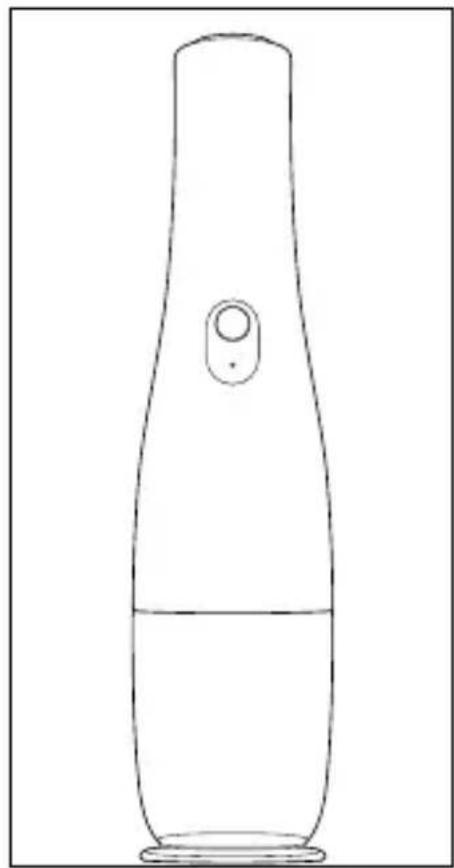
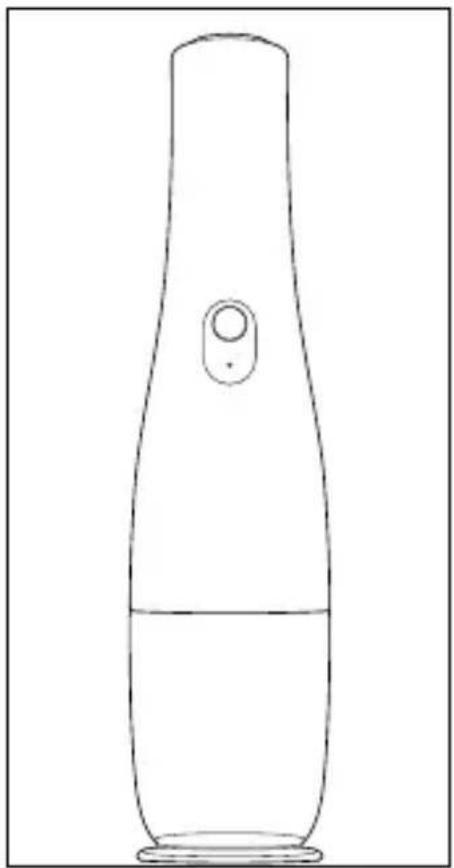
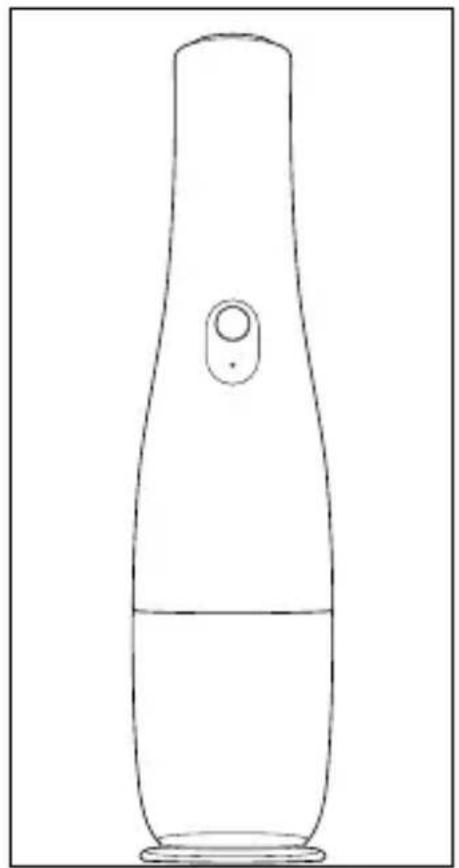
Appliance description
(See fold-out page for illustrations)
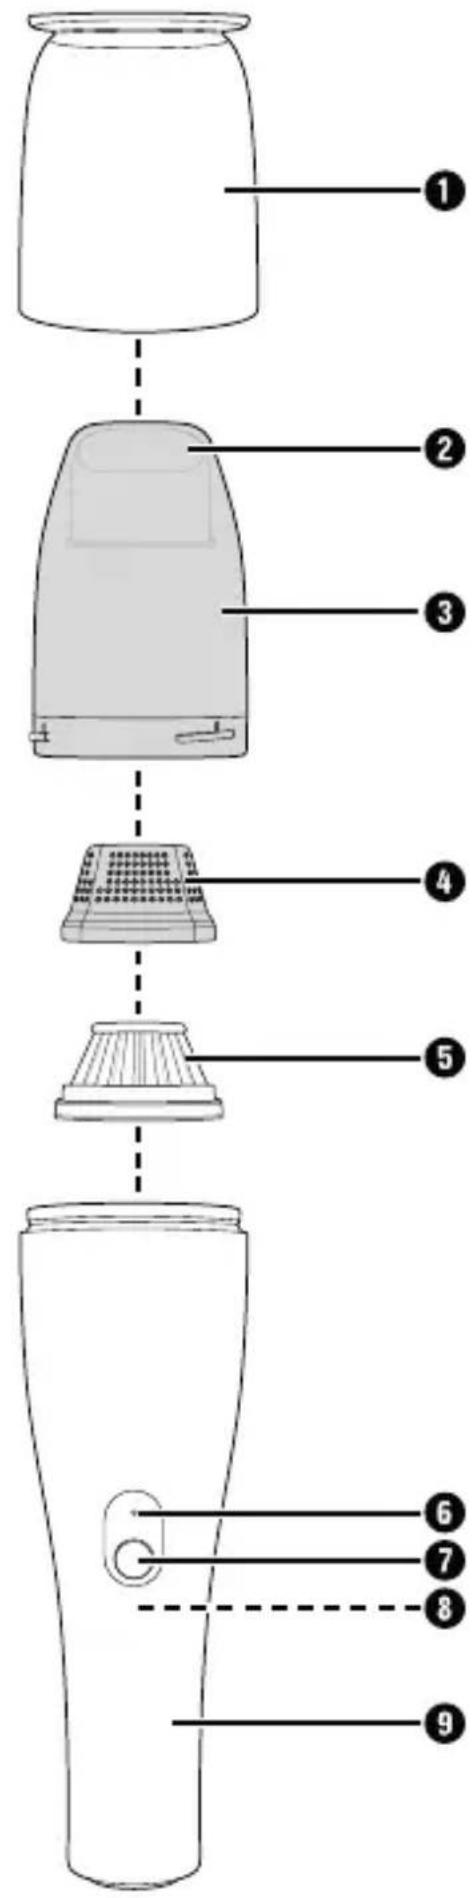
① Cap (with stand function)
② Suction opening
③ Dirt container
4 Filter housing
⑤ Dust filter
6 Charge indicator lamp (blue)
⑦ On/Off switch ①
⑧ Charging socket (on the underside of the appliance)
9 Handle
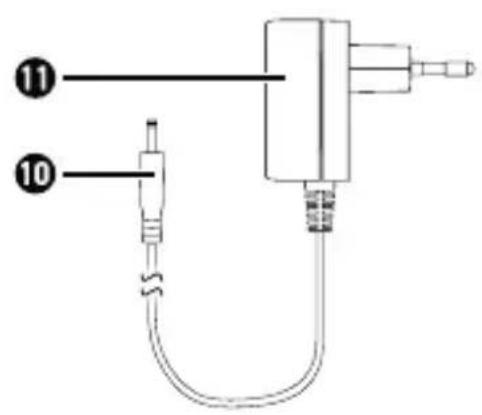
10 Barrel plug
11 Mains adapter (with mains plug and mains cable)
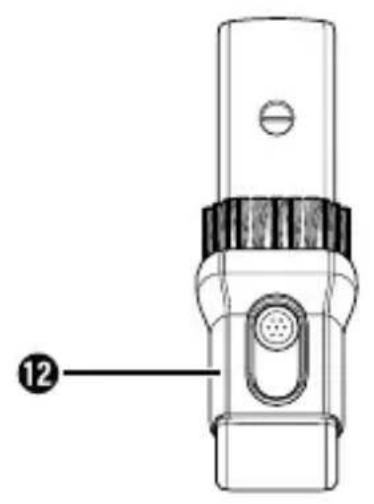
12 2-in-1 suction nozzle (brush nozzle/crevice tool)
NOTE
This appliance is supplied with non-charged batteries. Charge the batteries completely before using the appliance for the first time (see section Charging the batteries).
Technical specifications
| Mains adapter | |
| Manufacturers | Shenzhen Jodeway Technology Co., Ltd., 43rd Rifu Road, Baishixia East Area, Fuyong Street, Baoan District, Shenzhen, Guangdong, P. R. China Commercial register number: 91440300MA5DLY5R8L |
| Importer: KOMPERNASS HANDELS GMBH, BURGSTRASSE 21, 44867 BOCHUM, GERMANY Registered court: AG Bochum Register number: HRB 4598 | |
| Model JOD-S-090050GS-C-2 | |
| Input voltage | 100-240 V ~ (AC) |
| Input AC frequency 50/60 Hz | |
| Output voltage 9.0 V | (DC) |
| Output current 0.5 A | |
| Output power 4.5 W | |
| Average operating efficiency | 77.1% |
| No-load power consumption | 0.10 W |
| Input current 0.2 A | |
Mains adapter
| Polarity of the barrel plug |  (positive inside, negative outside) (positive inside, negative outside) |
| Protection class | II/□(double insulation) |
| Efficiency class |  |
| Protection type | IP20: Protection against solid objects with a diameter of more than 12.5 mm. |
| Nominal ambient temperature (ta) | 40°C |
Appliance
| Input voltage 9.0 V (DC) |  |
| Input current 0.5 A | |
| Polarity |  (positive inside, negative outside) (positive inside, negative outside) |
Batteries
| Capacity 2000 mAh | |
| Rechargeable batteries | 7.4 V === (DC)(2 x 3.7 V lithium-ion batteries) |
NOTE
▶ No user action is required to switch the product between 50 and 60 Hz. The product switches automatically to either 50 or 60 Hz.
Use
Charging the batteries
NOTE
The appliance runs on rechargeable lithium-ion batteries. The batteries must be charged before using the appliance for the first time.
If the batteries are completely discharged, the charge indicator lamp ⑥ flashes blue for approx. 3 seconds before the appliance switches off.
The charging process can take up to 4–6 hours if the batteries are completely discharged.
The operating life with fully charged batteries is approx. 15 minutes.
▶ Disconnect the appliance from the mains supply again as soon as the batteries are fully charged.
The appliance switches off automatically as soon as charging begins and cannot be used while charging.
Connect the barrel plug 10 of the mains adapter 11 to the charging socket 8 on the underside of appliance (see Fig. 1). Plug the mains plug of the mains adapter 11 into the socket. The charge indicator lamp 6 starts flashing blue and the charging process begins.
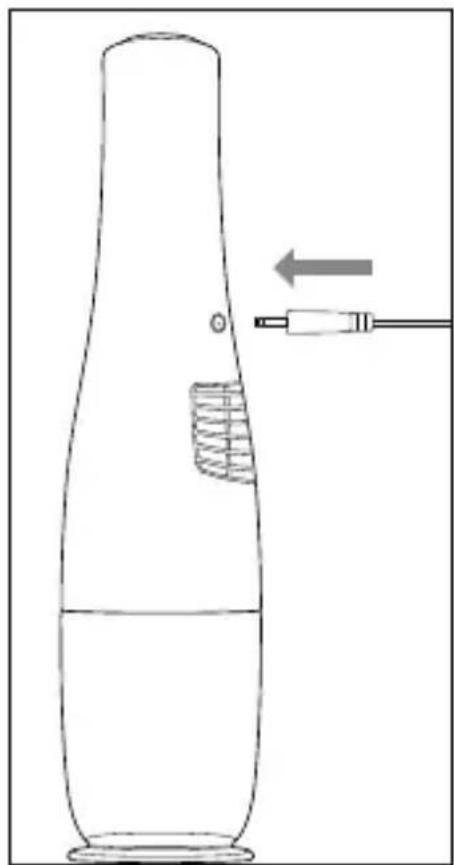
natural_image
Line drawing of a laboratory flask with a pipette inserted, showing fluid flow direction (no text or symbols)Fig. 1
As soon as the batteries are fully charged, the charge indicator lamp ⑥ turns off. Connect the barrel plug ⑩ of the mains adapter ⑪ to the charging socket ⑧ on the underside of appliance.
Do not recharge the batteries again until the suction power of the appliance becomes appreciably weaker and the charge indicator lamp ⑥ flashes blue.
Charge indicator lamp
The charge indicator lamp ⑥ supplies the following information on the charge status of the batteries:
| Charge indicator lamp Meaning | |
| Flashes blue | The batteries are charging. |
| The batteries are low or fully discharged and should be charged soon. | |
| Lights up blue The appliance is in operation. | |
2-in-1 suction nozzle
NOTE
▶ Switch the appliance off before attaching or removing the 2-in-1 suction nozzle ⑫.
The appliance's 2-in-1 suction nozzle ^12 has two different nozzles for different applications. Choose the appropriate nozzle depending on your needs:
Brush nozzle
Use the brush nozzle to clean soft and/or delicate surfaces.
Crevice tool
Use the crevice tool to clean narrow and hard to reach locations.
- Hold the appliance by the handle ⑨ and pull the cap ① off the appliance.
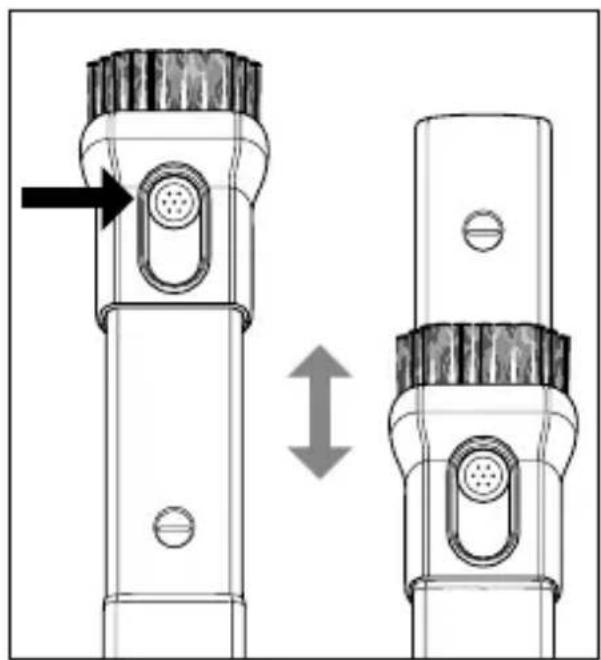
Insert the 2-in-1 suction nozzle ⑫ into the suction opening ② of the appliance. Make sure that the button for adjusting the brush nozzle is facing upwards (see Fig. 2).
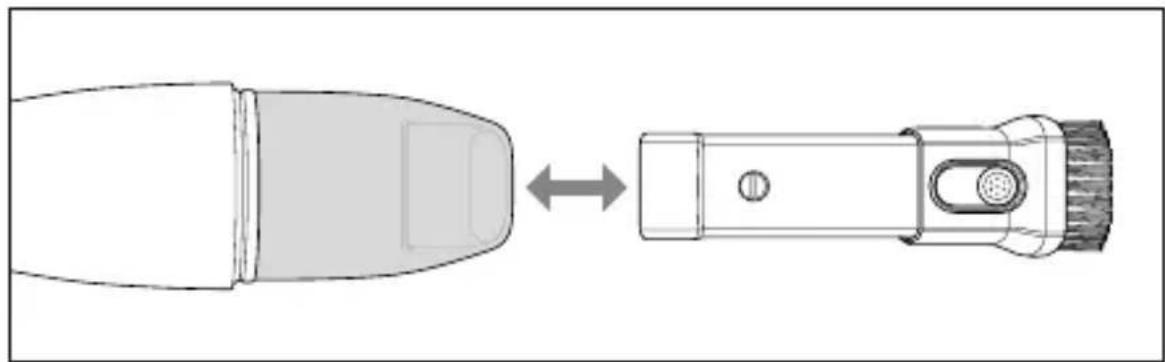
natural_image
Diagram of a device with a connector and internal components, showing an arrow indicating transformation (no text or symbols present)Fig. 2
To adjust the 2-in-1 suction nozzle ⑫, hold down the button on the brush nozzle. Slide the brush nozzle forward if you want to use the brush nozzle. Slide the brush nozzle backward if you want to use the crevice tool (see Fig. 3).
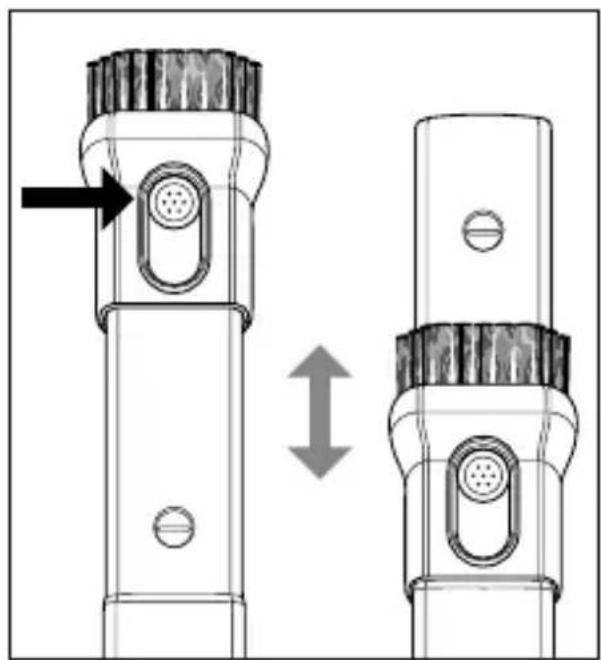
natural_image
Diagram of two identical mechanical components with circular ports and a bidirectional arrow indicating alignment (no text or symbols)Fig. 3
To remove the 2-in-1 suction nozzle ⑫, pull it out of the suction opening ② (see Fig. 2).
Handling and operation
ATTENTION! PROPERTY DAMAGE!
The suction opening ^2 must be kept free at all times and may not be blocked. A blocked suction opening ^2 can result in overheating and damage to the appliance.
▶ Do not use the appliance to vacuum liquids. They can cause a short-circuit and damage the appliance beyond repair.
NOTE
▶ Always make sure that the dust filte ^5 is properly inserted before you use the appliance.
- Hold the appliance by the handle ⑨ and pull the cap ① off the appliance (see Fig. 4).
- If required, insert the 2-in-1 suction nozzle ⑫ into the suction opening ② (see section 2-in-1 suction nozzle).
- Press the On/Off switch ① ⑦ to switch on the appliance. The charge indicator lamp ⑥ lights up blue.
- Press the On/Off switch ① ⑦ to switch off the appliance after use. The charge indicator lamp ⑥ turns off.
- Push the cap ① back onto the appliance (see Fig. 4).
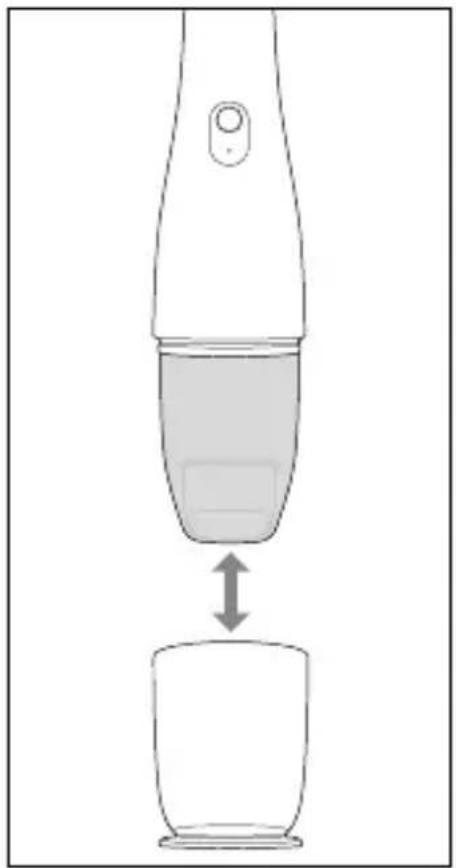
- For storage, stand the appliance on the cap ①, which can also be used as a stand (see Fig. 5).
natural_image
Diagram of a device with a lid and arrow indicating compression or shift (no text or symbols)Fig. 4 Fig. 5

natural_image
Line drawing of a cylindrical device with a handle and circular button (no text or symbols)Disposal
Disposal of the appliance

natural_image
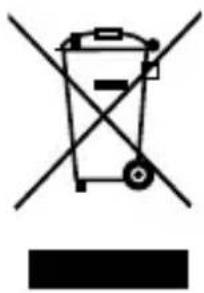
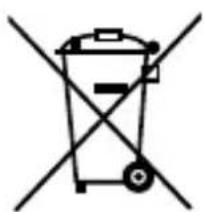
Simple line drawing of a trash bin with two crossed lines indicating no waste or prohibition (no text or symbols)Never dispose of the appliance in your normal domestic waste.
This product is subject to the provisions of European Directive 2012/19/EU.
Dispose of the appliance via an approved disposal company or your municipal waste facility. Please comply with all applicable regulations. Please contact your waste disposal facility if you are in any doubt.
Your local community or municipal authorities can provide information on how to dispose of the product.

The product is recyclable, subject to extended producer responsibility and is collected separately.
NOTE
The integrated rechargeable batteries in this appliance cannot be removed for disposal.
natural_image
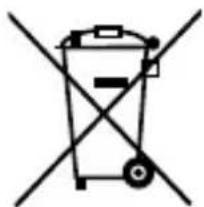
Symbol of a trash bin with crossed lines indicating no waste or discharge (no text or labels)Do not dispose of the mains adapter in your normal domestic waste.
This product is subject to the provisions of European Directive 2012/19/EU.
Dispose of the mains adapter via an approved disposal company or your municipal waste facility. Please comply with all applicable regulations.
Disposal of the packaging
The packaging materials have been selected for their environmental friendliness and ease of disposal and are therefore recyclable.
Dispose of packaging materials that are no longer needed in accordance with applicable local regulations.
Dispose of the packaging in an environmentally friendly manner.
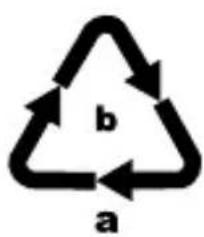
Note the labelling on the packaging and separate the packaging material components for disposal, if necessary. The packaging materials are labelled with abbreviations (a) and numbers (b) with the following meanings:
1-7:plastics,
20-22: paper and cardboard,
80-98: composites.
Service
Service Great Britain
Tel.: 0800 404 7657
E-Mail: kompernass@lidl.co.uk
Servicelreland
Tel.: 1890 930 034
(0,08 EUR / Min., (peak))
(0,06 EUR / Min., (off peak))
E-Mail: kompernass@lidl.ie
IAN 384464_2107
Importer
Please note that the following address is not the service address. Please use the service address provided in the operating instructions.
KOMPERNASS HANDELS GMBH
BURGSTRASSE 21
44867 BOCHUM
GERMANY
www.kompernass.com
Inhaltsverzeichnis
natural_image
Line drawing of a laboratory instrument with a probe inserted, showing a curved top and base (no text or symbols)Abb. 1
natural_image
Diagram of a device with a connector and internal components, showing an arrow indicating transformation (no text or symbols present)Abb. 2
natural_image
Technical illustration of two mechanical components with arrows indicating assembly or alignment (no text or symbols)Abb. 3
natural_image
Diagram of a device being lifted from a cup, showing liquid level and upward arrow (no text or symbols)Abb. 4 Abb. 5

natural_image
Line drawing of a cylindrical device with a handle and circular button (no text or symbols)Entsorgung
natural_image
Simple line drawing of a trash bin with two crossed lines indicating no waste or prohibition (no text or symbols)natural_image
Symbol of a trash bin with crossed lines indicating no waste or discharge (no text or labels)KOMPERNASS HANDELS GMBH
BURGSTRASSE 21
44867 BOCHUM
DEUTSCHLAND
www.kompernass.com
Table des matières
natural_image
Line drawing of a laboratory flask with a test tube inserted, showing fluid flow direction (no text or symbols)Fig. 1
natural_image
Top-down schematic of a device showing a connector and internal components (no text or symbols)Fig. 2
natural_image
Diagram of two identical mechanical components with circular ports and a bidirectional arrow indicating alignment (no text or symbols)Fig. 3
natural_image
Diagram of a device being lifted from a cup, showing liquid level and upward arrow (no text or symbols)Fig. 4 Fig. 5

natural_image
Line drawing of a cylindrical device with a handle and circular button (no text or symbols)Recyclage
natural_image
Symbol of a trash bin crossed with a diagonal line, representing no waste or discharge (no text or labels)natural_image
Symbol of a trash bin crossed with a diagonal line and a horizontal bar below (no text or labels)KOMPERNASS HANDELS GMBH
BURGSTRASSE 21
44867 BOCHUM
ALLEMAGNE
www.kompernass.com
Inhoud
WAARSCHUWING! LETSELGEVAAR!
⚠ WAARSCHUWING! LETSELGEVAAR!
natural_image
Line drawing of a laboratory flask with a test tube inserted, showing fluid flow direction (no text or symbols)Afb. 1
natural_image
Diagram of a device with a connector and internal components, showing an arrow indicating transformation (no text or symbols present)Afb. 2
natural_image
Technical illustration of two mechanical components with arrows indicating assembly or alignment (no text or symbols)Afb. 3
natural_image
Diagram of a device with a lid and arrow indicating compression or shift (no text or symbols)Afb. 4 Afb. 5
natural_image
Line drawing of a cylindrical device with a lid and circular button (no text or symbols)Afvoeren
natural_image
Simple line drawing of a trash bin with crossed lines indicating no waste or restriction (no text or symbols)natural_image
Symbol of a trash bin with crossed lines indicating no waste or discharge, and a solid black rectangle below (no text or labels)KOMPERNASS HANDELS GMBH
BURGSTRASSE 21
44867 BOCHUM
DUITSLAND
www.kompernass.com
Obsah
⚠️ POZOR! HMOTNÉ ŠKODY!
POZOR! HMOTNÉ ŠKODY!

natural_image
Line drawing of a cylindrical device with a handle and internal structure, connected to a cable with an arrow indicating motion (no text or symbols)Obr. 1
natural_image
Diagram of a device with a connector and internal components, showing an arrow indicating transformation (no text or symbols present)Obr. 2
natural_image
Diagram of two identical mechanical components with circular ports and a bidirectional arrow indicating alignment (no text or symbols)Obr. 3
POZOR! HMOTNÉ ŠKODY!
natural_image
Diagram of a device with a lid and arrow indicating compression or shift (no text or symbols)Obr. 4 Obr. 5

natural_image
Line drawing of a cylindrical device with a handle and circular button (no text or symbols)Likvidace
Likvidace prístroje

natural_image
Simple line drawing of a trash bin with two crossed lines indicating no waste or prohibition (no text or symbols)natural_image
Symbol of a trash bin with crossed lines indicating no waste or discharge, and a solid black rectangle below (no text or labels)KOMPERNASS HANDELS GMBH
BURGSTRASSE 21
44867 BOCHUM
NĚMECKO
www.kompernass.com
Spis treści
Dysza ssqca 2-w-1.... 103
natural_image
Line drawing of a laboratory instrument with a probe inserted, showing a curved top and base with a textured handle (no text or symbols)Rys. 1
natural_image
Diagram of a device with a connector and internal components, showing an arrow indicating transformation (no text or symbols present)Rys. 2
natural_image
Technical illustration of two mechanical components with arrows indicating assembly or alignment (no text or symbols)Rys. 3
natural_image
Diagram of a device with a lid and arrow indicating compression or shift (no text or symbols)Rys. 4 Rys. 5
natural_image
Line drawing of a cylindrical device with a handle and circular button (no text or symbols)Utylizacja
natural_image
Symbol of a trash bin crossed with no text or labelsnatural_image
Symbol of a trash bin with crossed lines indicating no waste or discharge (no text or labels)KOMPERNASS HANDELS GMBH
BURGSTRASSE 21
44867 BOCHUM
NIEMCY
www.kompernass.com
Obsah
natural_image
Line drawing of a cylindrical device with a handle and internal structure, connected to a cable with an arrow indicating motion (no text or symbols)Obr. 1
natural_image
Diagram of a device with a connector and internal components, showing an arrow indicating transformation (no text or symbols present)Obr. 2
Na prestavenie sacej hubice 2 v 1 ⑫ podržte tlačidlo na hubici s kefou stlačený. Ked' chcete použit' hubicu s kefou, posuňte ju dopredu. Ak chcete použit' štrbinovú hubicu, posuňte hubicu s kefou spät' (pozri obr. 3).
natural_image
Diagram of two identical mechanical device components with circular ports and a bidirectional arrow indicating alignment (no text or symbols)Obr. 3
natural_image
Diagram of a device with a lid and arrow indicating compression or shift (no text or symbols)Obr. 4 Obr. 5
natural_image
Line drawing of a cylindrical device with a handle and circular button (no text or symbols)Likvidácia
natural_image
Simple line drawing of a trash bin with crossed lines indicating no waste or restriction (no text or symbols)natural_image
Symbol of a trash bin with crossed lines indicating no waste or discharge (no text or labels)KOMPERNASS HANDELS GMBH
BURGSTRASSE 21
44867 BOCHUM
NEMECKO
www.kompernass.com
Índice
natural_image
Line drawing of a laboratory flask with a test tube inserted, showing fluid flow direction (no text or symbols)Fig. 1
natural_image
Diagram of a device with a connector and internal components, showing an arrow indicating transformation (no text or symbols present)Fig. 2
natural_image
Technical illustration of two identical mechanical components with internal features, showing a bidirectional arrow indicating alignment (no text or symbols present)Fig. 3
natural_image
Diagram of a device being lifted from a cup, showing liquid level and upward arrow (no text or symbols)Fig. 4 Fig. 5

natural_image
Line drawing of a cylindrical device with a handle and circular button (no text or symbols)Desecho
Desecho del aparato
natural_image
Simple line drawing of a trash bin with crossed lines indicating no waste or prohibition (no text or symbols)natural_image
Simple line drawing of a trash bin with crossed lines indicating no waste or discharge (no text or symbols)KOMPERNASS HANDELS GMBH
BURGSTRASSE 21
44867 BOCHUM
ALEMANIA
www.kompernass.com
Indholdsfortegnelse
natural_image
Line drawing of a cylindrical device with a handle and internal structure, connected to a wire (no text or symbols)Fig. 1
natural_image
Diagram of a device with a connector and internal components, showing an arrow indicating transformation (no text or symbols present)Fig. 2
natural_image
Diagram of two identical mechanical device components with circular ports and a bidirectional arrow indicating alignment (no text or symbols)Fig. 3
natural_image
Diagram of a device being lifted from a cup, showing liquid level and upward arrow (no text or symbols)Fig. 4 Fig. 5

natural_image
Line drawing of a cylindrical device with a handle and circular button (no text or symbols)Bortskaffelse
natural_image
Symbol of a trash bin crossed with no text or labelsnatural_image
Simple line drawing of a trash bin with crossed lines indicating no waste or discharge (no text or symbols)KOMPERNASS HANDELS GMBH
BURGSTRASSE 21
44867 BOCHUM
TYSKLAND
www.kompernass.com
Indice
natural_image
Line drawing of a laboratory flask with a test tube inserted, showing fluid flow direction (no text or symbols)Fig. 1
natural_image
Diagram of a device with a connector and internal components, showing an arrow indicating transformation (no text or symbols present)Fig. 2
natural_image
Technical illustration of two mechanical components with arrows indicating assembly or alignment (no text or symbols)Fig. 3
natural_image
Diagram of a device being lifted from a cup, showing liquid level and upward arrow (no text or symbols)Fig. 4 Fig. 5

natural_image
Line drawing of a cylindrical object with a handle and circular opening, resembling a stylized lamp or device (no text or symbols)Smaltimento
natural_image
Symbol of a trash bin crossed with two crossed lines, representing waste or discharge (no text or labels)natural_image
Simple line drawing of a trash bin with crossed lines indicating no waste or discharge (no text or symbols)KOMPERNASS HANDELS GMBH
BURGSTRASSE 21
44867 BOCHUM
GERMANIA
www.kompernass.com
Tartalomjegyzék
natural_image
Line drawing of a laboratory flask with a pipette inserted, showing fluid flow direction (no text or symbols)- ábra
natural_image
Diagram of a device with a connector and internal components, showing an arrow indicating transformation (no text or symbols present)- ábra
natural_image
Technical illustration of two identical mechanical components with circular ports and a bidirectional arrow indicating alignment (no text or symbols)- ábra
natural_image
Diagram of a device being lifted from a cup, showing liquid level and upward arrow (no text or symbols)- ábra 5. ábra

natural_image
Line drawing of a cylindrical device with a handle and circular button (no text or symbols)Ártalmatlanítás
natural_image
Symbol of a trash bin crossed with no text or labelsnatural_image
Symbol of a trash bin with crossed lines indicating no waste or discharge (no text or labels)KOMPERNASS HANDELS GMBH
BURGSTRASSE 21
44867 BOCHUM
NÉMETORSZÁG
www.kompernass.com
Kazalo
Informacije o teh kratkih navodilih .....200
Predvidena uporaba....200
Varnostna navodila....201
Vsebina kompleta in pregled po prevozu ..... 205
Opis naprave .... 206
natural_image
Line drawing of a cylindrical device with a handle and internal structure, connected to a cable with an arrow indicating motion (no text or symbols)Slika 1
natural_image
Diagram of a device with a connector and internal components, showing an arrow indicating transformation (no text or symbols present)Slika 2
natural_image
Technical illustration of two identical mechanical components with circular ports and a bidirectional arrow indicating alignment (no text or symbols)Slika 3
natural_image
Diagram of a device being lifted from a cup, showing liquid level and upward arrow (no text or symbols)Slika 4 Slika 5

natural_image
Line drawing of a cylindrical object with a handle and circular opening, resembling a stylized lamp or device (no text or symbols)Odstranjevanje med odpadke
Odstranjevanje naprave med odpadke
natural_image
Symbol of a trash bin crossed with no text or labelsNaprave nikakor ne odvrzite med običajne gospodinjske odpadke.
natural_image
Simple line drawing of a trash bin with crossed lines indicating no waste or restriction (no text or symbols)KOMPERNASS HANDELS GMBH
BURGSTRASSE 21
44867 BOCHUM
NEMČIJA
www.kompernass.com
Pooblaščeni serviser

ServisSlovenija
Tel.: 01 888 9273
E-Mail: kompernass@lidl.si
IAN 384464_2107

KOMPERNASS HANDELS GMBH
BURGSTRASSE 21
44867 BOCHUM
GERMANY
www.kompernass.com
Last Information Update · Stand der Informationen · Version des informations
Stand van de informatie · Stav informací · Stan informacji · Stav informácií
Estado de las informaciones · Tilstand af information · Versione delle informazioni
