Heat Supreme - Heating SUNTEC - Free user manual and instructions
Find the device manual for free Heat Supreme SUNTEC in PDF.
| Product type | Micathermic radiant panel heater / towel warmer |
| Brand | Suntec |
| Model | Heat Supreme |
| Rated voltage | 230 V AC |
| Frequency | 50/60 Hz |
| Protection rating | IP24 |
| Heating technology | Micathermic (radiation) |
| Operating modes | Manual, Programming, Automatic |
| Temperature range | 5 °C (antifreeze) to 32 °C |
| Antifreeze function | Yes (setting at 5 °C) |
| Mounting | Wall-mounted (bracket included) |
| Minimum installation height | 70 cm above floor |
| Safety distance | 1 m in front, no objects above |
| Maintenance | Vacuum cleaner and dry cloth, no detergent |
| Safety instructions | Do not cover, do not use outdoors, unplug after use |
| Warranty | 24 months |
| Manufacturer | Suntec Wellness GmbH, Holzstraße 2, 40221 Düsseldorf, Germany |
Frequently Asked Questions - Heat Supreme SUNTEC
User questions about Heat Supreme SUNTEC
0 question about this device. Answer the ones you know or ask your own.
Ask a new question about this device
Download the instructions for your Heating in PDF format for free! Find your manual Heat Supreme - SUNTEC and take your electronic device back in hand. On this page are published all the documents necessary for the use of your device. Heat Supreme by SUNTEC.
USER MANUAL Heat Supreme SUNTEC
GB This product is not suitable as the main heater. This product is only suitable for well-insulated rooms or for occasional use.
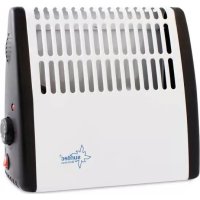
natural_image
Exterior view of a gray industrial fan or solar panel with grid pattern and two curved metal bands (no text or symbols visible)Gebrauchsanweisung
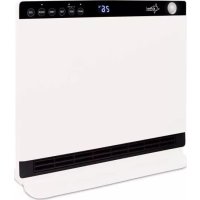
text_image
6 5 2 4 3 1 12:30 ON OFF MODE + - SET ①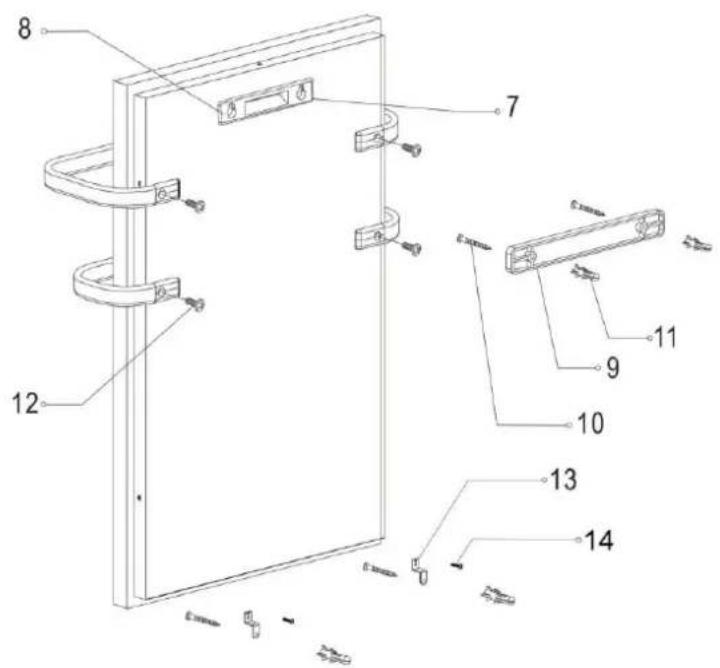
text_image
8 7 12 0 13 14 9 10 11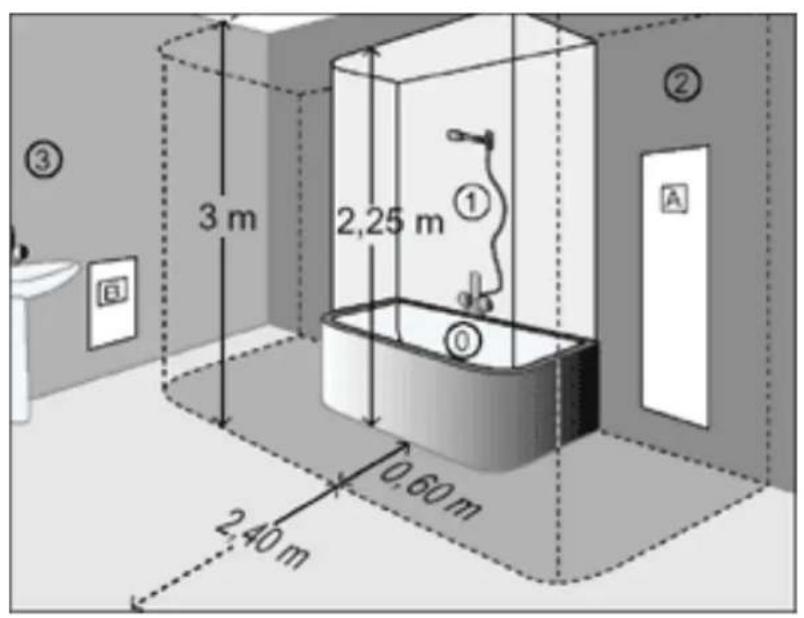
text_image
3 m 2,25 m 0.60 m 2.40 m ③ ② ASicherheitshinweise
This appliance can be used by children aged from 8 years and above and persons with reduced physical, sensory and mental capabilities or lack of experience and knowledge if they have been given supervision or instruction concerning use of the appliance in a safe way and understand the hazards involved. Cleaning and user maintenance shall not be made by children without supervision.
Children of less than 3 years should be kept away unless continuously supervised.
Children aged from 3 years and less than 8 years shall only switch on/off the appliance provided that it has been placed or installed in its intended normal operating position and they have been given supervision or instruction concerning use of the appliance in a safe way and understand the hazards involved.
Children aged from 3 years and less than 8 years shall not plug in, regulate and clean the appliance or perform user maintenance.
-
To avoid burns, do not touch the hot surfaces of the heater when it is in use. Use handle when moving this heater. Keep combustible materials, such as drapery and other furnishings at least 3 feet (0.9m) from the front of the heater and away from the side and rear.
-
Extreme caution is necessary when any heater is used by children, near children or invalids whenever the heater is operating or unattended.
-
Do not use outdoor.
- This heater is intended for use in bathrooms, laundry areas or similar indoor locations. Never put heater where it may fall into a bathtub or other water container.
- This heater has hot and arcing or sparking parts inside. Do not use in an area where gasoline, paint or flammable liquids are used or stored.
- Do not insert or allow foreign objects to enter any ventilation or exhaust opening as this may cause an electric shock, fire, or damage the heater.
- Always unplug heater when not in use. To disconnect heater, remove plug from outlet or disconnect the power from the mains.
- Using of extension cord is not recommended as it may overheat and cause a risk of fire. However, if an extension cord has to be used, the conductor wire inside the cord must be at least 1mm in diameter and rate not less than 10A.
- Do not run cord under carpet and do not cover cord with throw rugs, runners, or the like. Place the cord away from traffic area and where it will not be tripped over.
- Please refrain from further usage if the power cord, power plug or the appliance are damaged and contact your seller.
- Connect the heater to properly grounded outlets only.
- Use this heater only as described in this manual.
Any other use not recommended by the manufacturer may cause fire, electric shock, or injury to persons.
- Do not use this heater with a programmer, timer or any other device that switches the heater on automatically.
- Do not use the heater in the immediate surroundings of a bath, a shower or a swimming pool.
- The heater must not be located immediately below a socket outlet.
- To avoid over-heating since a fire risk exists, do not cover the heater.
- Only Do not attempt to repair, disassemble or change the appliance by yourself.
- CAUTION: In order to avoid hazard due to inadvertent resetting of the thermal cut-out, this appliance must not be supplied through an external switching device, such as a timer, or connected to a circuit that is regularly switched on and off by the utility.
- Never immerse the appliance, it's cord and plug into water or other liquids.
Warning: In order to avoid overheating, do not cover the heater!
INTRODUCTION
This new type of heater uses MICATHERMIC heating element. The latest leading technology using radiant energy: the appliance heats up objects and surrounding walls instead of just warming up the air. Objects absorb heat energy and then gradually warm up the room.
Special Features
- Instantly to full power of heating
- Degrees of protection: IP 24
- Electronic thermostat control setting
- Anti-Frost function
- Safety thermal cut off
- Light weight
- Quiet
- No oil-leakage
- Towel rails to hang and dry towels
SPECIFICATIONS for HEAT SUPREME
Voltage rating: 230V AC, 50/60Hz
Power consumption: 1000W
Unit size: ca. 59.5cm(L) × 80cm(H) × 21.5cm(W)
Unit weight: ca. 9,35 kgs
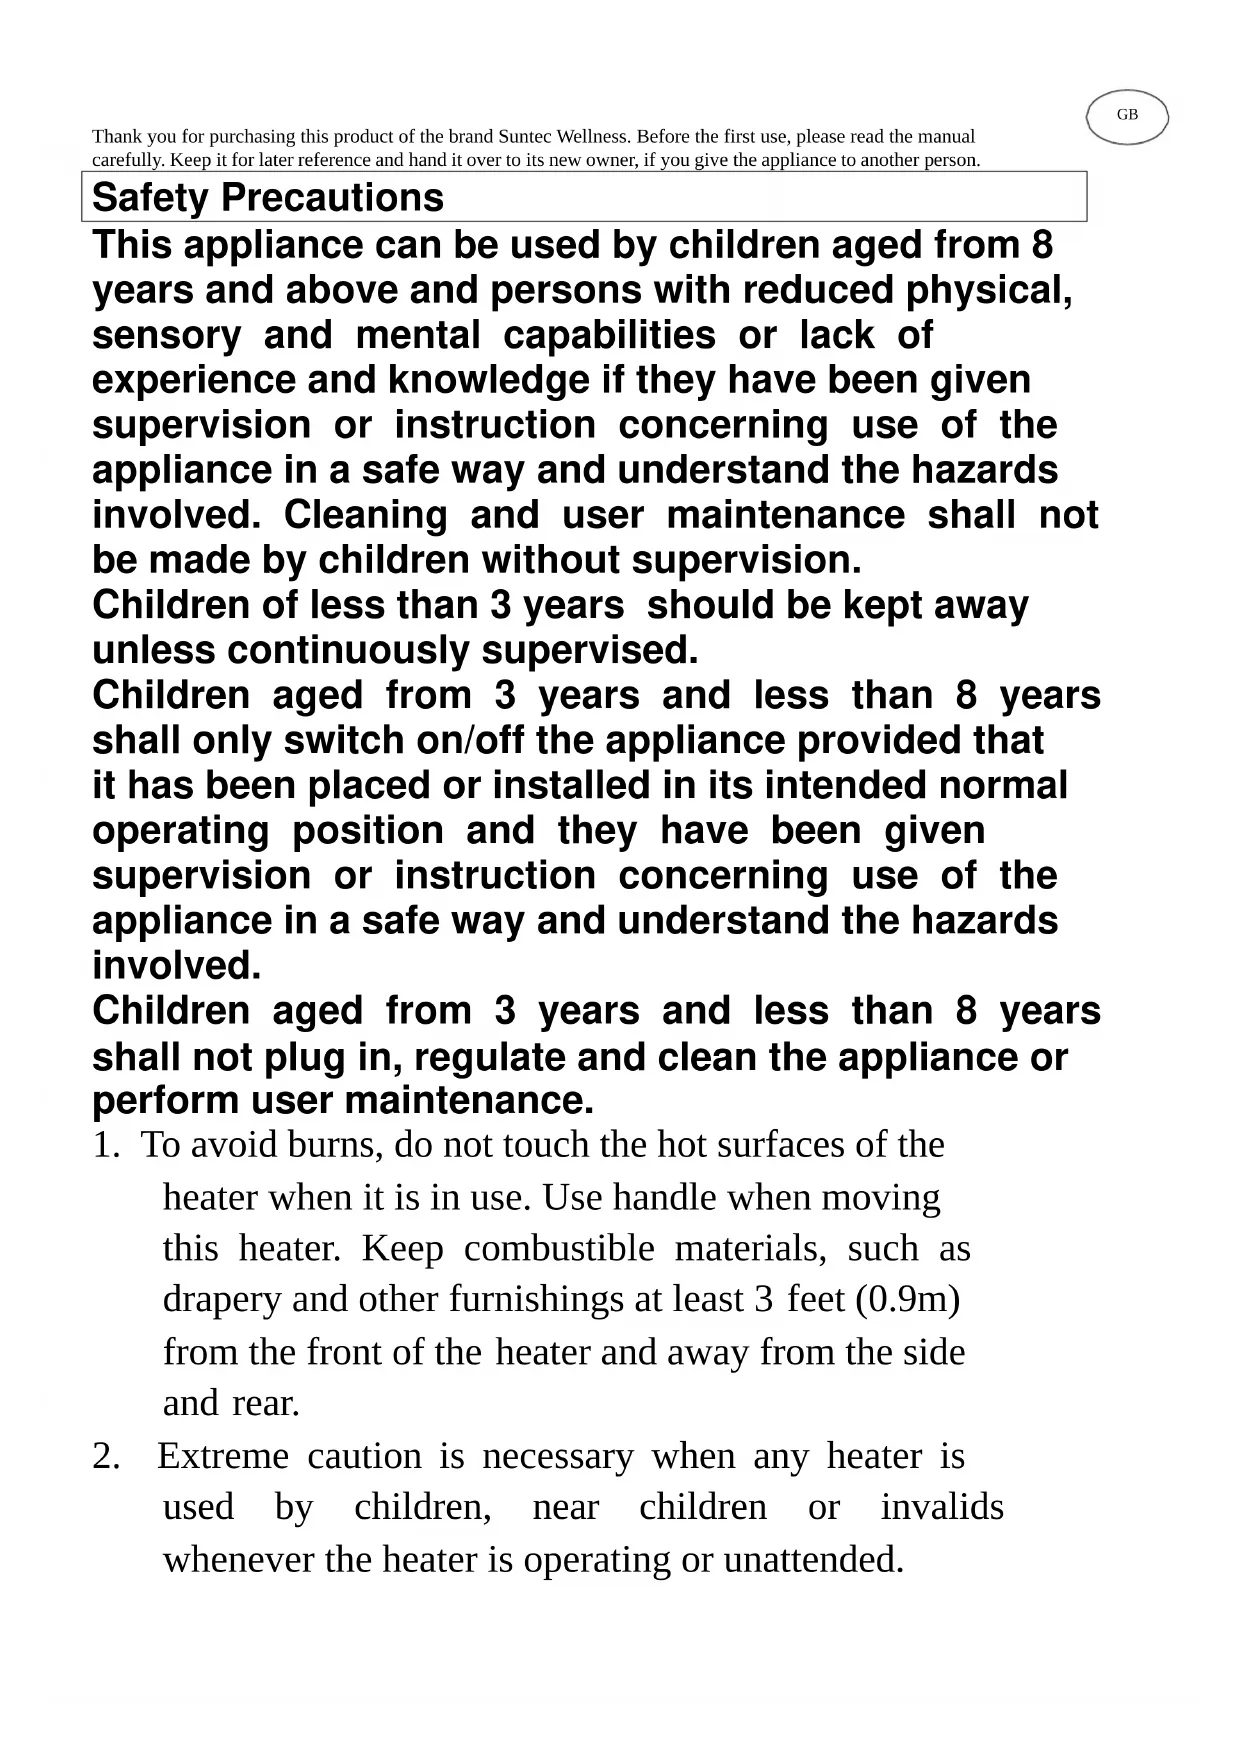
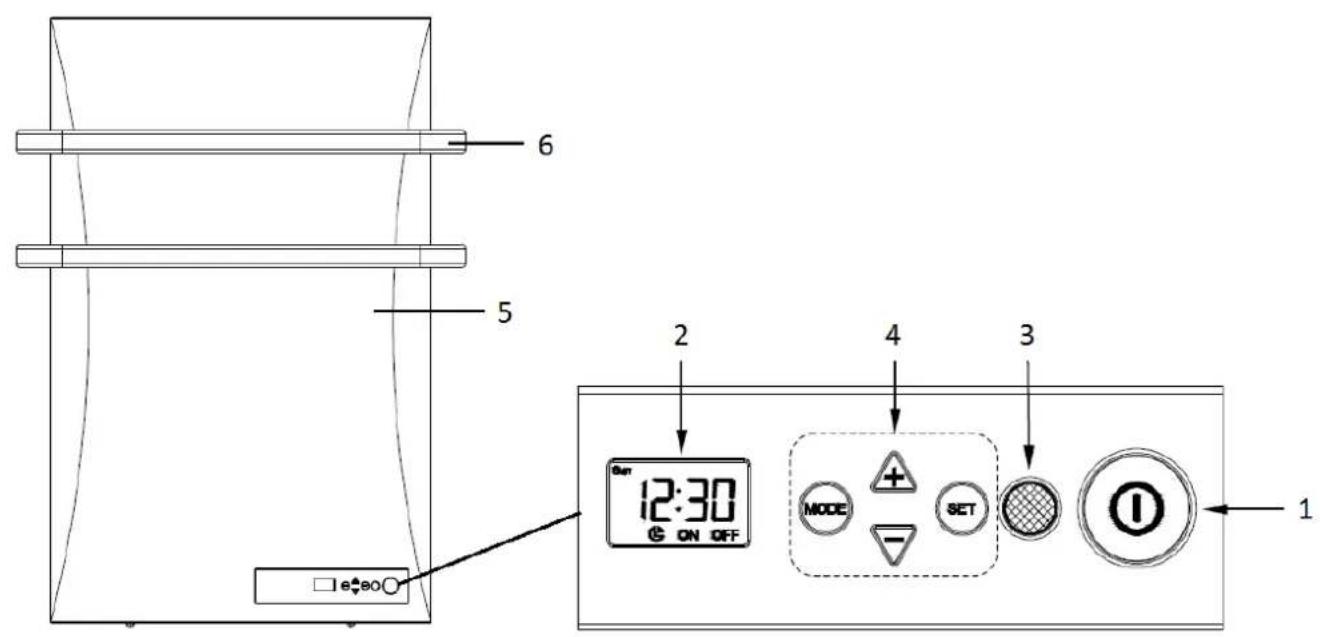
Unit Layout Electronic version (HEAT SUPREME)
| 1. | On/off switch | 7. | Built-in Handle |
| 2. | LCD display | 8. | Mounting Hole |
| 3. | Power light indicator | 9. | Mounting Support |
| 4. | Function buttons | 10. | Screws |
| 5. | Metal grid | 11. | Mounting Anchor for wall mounting |
| 6. | Rails | 12. | Screws for rails installation |
| 13. | Lower wall mounting support | ||
| 14. | Small screw for lower wall mounting |
REMOVE PACKAGING
Please read all the instructions before using this heater
- Take out the heater from gift box.
- Remove the polyfoam and polybag.
- Inside are: 1 bag with 1 Mounting Support, 4 screws, 4 Mounting Anchors for wall mounting
- 4 screws to fix the rails. Save the packaging for storage when the heater is not been used or in summer season.
RACKS INSTALLATION
Screw the rails on the heater using the 4 special screws. It has to be done before the installation of the heater on the wall.
LOWER WALL MOUNTING SUPPORT INSTALLATION
In the same polybag than the screws, there are 2 metal parts to fix at the bottom of the rear of the heater. Use the 2 small screws, tighten firmly.
INSTALLATION
Heater has to be mounted minimum 0.7m from the floor and no object (e.g. Shelf) should be placed within 1m from the top of the heater.
We recommend to install the heater in the bathroom area at least 0.6m away from shower OR bathtub as shown in the picture (volume 3). The figure 0.6m is a suggested distance; the actual distance from the shower and bathtub should follow national standard in each country
Once the racks are mounted, you can start the following steps to install the heater on the wall.
STEP I: Mark the left or right screw hole position using a pencil on the wall (about 1.5 meter from floor)
STEP II: Drill a hole
STEP III: Hammer the screw anchor into the hole
STEP IV: Screw lightly the mounting support on the wall
STEP V: Mark another screw hole on the wall at the same level than the first one and at a distance of 138mm approximately
STEP VI: Drill second hole
STEP VII: Hammer another screw anchor into the hole
STEP VIII: Screw tightly the mounting support
STEP IX: Install the heater on the mounting support. Using a pencil, mark the screw holes (left and right)
positions for the lower wall mounting support. Then remove the heater from the wall mounting support.
STEP X: Drill both holes.
STEP XI: Hammer the 2 remaining anchors into the holes.
STEP XII: Install the heater on the wall mounting support and screw tightly the 2 remaining screws of the lower wall mounting support.
OPERATION
Please read all the instructions before using this heater.
- Please make sure the power switch is on "OFF" position.
- Plug the power cord into a suitable electrical outlet. (Rating is not less than 10A)
- Please press the main switch to "ON". Press and hold the "MODE" and "SET" buttons for 10 seconds to reset the programming (this step only needs to be done during the initial start-up for switching on).
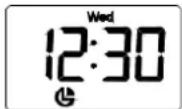
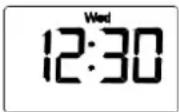
- Please use the "SET", "+" and "-" buttons to set the current time and day. You can also use these buttons to set the weekly program for switching the unit on and off, as well as the target temperature. Example: Programming on Sunday "Sun", switch-on time "ON" 7:30 h, switch-off time "OFF" 10:00 h, target temperature 20°C

text_image
Sun 7:30 ON Sun 10:00 OFF Sun 20- Press the button "MODE" to select the operation mode:
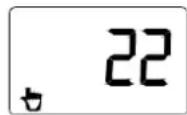
- Manual mode: The display shows a hand symbol. The preset target temperature is 22^ C. Please use the "+" and "-" keys to set your desired target temperature to either 5^ C (anti-frost function) or 10^ C- 32^ C. If the room temperature is lower than your target temperature, the heating switches on. If the room temperature is higher than the target temperature, the heater turns off. Heating continues as so room temperature is at least 3^ C lower than the target temperature.
- Program mode: The unit activates the saved week program.
- Auto mode:
In auto mode, the saved week program is activated in the same way as in program mode. In addition, the switch-on time is automatically adjusted to the difference between the room temperature and the target temperature in order to reach the target temperature more quickly at the set time:
If the room temperature is 5^ C lower than the target temperature, the unit switches on 30 minutes before the programmed switch-on time.
If the room temperature from 6^ C is lower than the target temperature, the unit switches on 60 min. before the programmed switch-on time.
Anti Frost Function
It will keep the room temperature above "Freezing Point". Please set the temperature to 5^ C in manual mode. This prevents pipe breakage due to ice.
User Advice:
• If you will be away for several hours, consider reducing the temperature setting.
- If you have several appliances in one room, do not let them operate simultaneously. Therefore you will obtain a more homogeneous temperature without increasing your electricity consumption.
- When you are airing a room, switch off the appliance.
CLEANING
- Before cleaning, turn off the heater, unplug the power cord and allow the heater to cool down.
-
Do not immerse power cord and plug or heater in water or other liquid. Do not pour water or other liquid over the heater.
-
Use a vacuum cleaner to remove dust and lint on the metal grid of the heater.
- Wipe the heater with a dry cloth to remove dust and a damp cloth (not wet) to clean off strains.
- Do not use detergents, abrasive cleaning powder or polish of any kind on the body of the heater, as these can damage the finish.
STORAGE
Store the heater in a cool dry place. To prevent dust and dirt getting in the heater, use the old packaging to repack the unit.
If the heater is not used regularly or if it is store uncovered, the heater may produce small amounts of smoke and/or smell upon first use. This is normal; it is due to the accumulation of humidity and dust on the heating element.
CHECK THE HEATER BEFORE REPAIRING
Heater not warm
- Check if the heater is turned on or not?
- Check the Thermostat Control Knob is on maximum position or not?
- Check if any objects are covering the unit or not?
Heater not operating
- Check if the power cord is plugged into an electrical outlet or not?
- Check if the electrical supply in the house or the main fuse is working or not?
- Make sure the power switch is on.
- Check if the Thermostat Control Knob is on maximum position. (Ensure the light indicator is on)
If after following the above checks the heater is still not operating please contact the manufacturers' service agent. All repairs must be referred to authorized personnel from authorized retailer.
Important: Any tampering with the appliance will invalidate the warranty. Repairs carried out improperly and by unqualified persons may have serious consequences for the user.
In case of complaint
• You can claim the device within 24 months from date of purchase (receipt).
- A free replacement or repair will be excluded from prior improper product handling.
- Defects in wear parts, consumables, as well as cleaning, maintenance or replacement of said parts are therefore with costs.
- If you want to make a complaint, please bring the entire device in its original packaging and with proof of purchase to your dealer. For a timely and convenient service register, visit our website www.suntec-wellness.de and learn more.
• Without a proof of purchase, generally there will be no repair or replacement.
- In the event that the complaint case is analogous to our terms of service, all defects of the device or its accessories due to material or manufacturing defects will be eliminated by repair or, at our discretion, replacing the unit.
- The damage of accessories does not automatically lead to a free exchange of the whole device. In these cases, please contact your dealer. Glass breakage, or breakage of plastic parts are always to charge.
- The dealer or repair service can perform the repair after the expiration of warranty against charge.
Note concerning protection of environment
This product must not be disposed of via normal household waste after its service life, but must be taken to a collection station for the recycling of electrical and electronic devices. The symbol on the product, the operating instructions or the packaging indicates such disposal procedures. The materials are recyclable in accordance with their respective symbols. By means of re-use, material recycling or any other form of recycling old appliances you are making an important contribution to the protection of our environment.
Please ask your local council where your nearest disposal station is located.
As part of our extended producer responsibility, this product is indicated in accordance to the European Directive 2012/19/EU on Waste Electrical and Electronic Equipment (WEEE). The aim is to avoid, reduce, and environmentally friendly disposal of electronic waste. Please help actively to protect the environment and dispose electronic waste through local collection points. The packaging and this manual can be recycled.
EC declaration of conformity
The device meets the essential health and safety requirements of the European Union. The EC declaration of conformity is the basis for CE marking this unit.
With publication of this manual supersedes all previous their validity. SUNTEC, SUNTEC Wellness, KLIMATRONIC and the Sun-Logo are registered trademarks. © 2020/01 SUNTEC WELLNESS GMBH
Liability is excluded for all printing errors and omissions.
Consommation: 1000 W
Dimensions: env. 59.5 cm (L) × 80 cm (H) × 21.5 cm (l)
Poids: env. 9,35 kg
Présentation
© 2020/01 SUNTEC WELLNESS GMBH
© 2020/01 SUNTEC WELLNESS GMBH
MILIEUBESCHERMING:
For this appliance we assure 24 months warranty.
During the 24 months warranty we guarantee to repair your appliance free of charge or to provide your seller the spare parts free of charge if the appliance fails to work due to production failure.
Other claims are excluded from this warranty. We will not be liable for any defects caused by acts of nature, improper use, neglection of the instruction manual, damage from continuous use and damages during transportation.
This warranty card is only applicable with the according invoice.
In case of service please bring your purchased product to your seller.
Product name:
Serial number:
Name of buyer:
Date of purchase:
Stamp and signature of seller:
Manufacturer:
Suntec Wellness GmbH
Holzstraße 2
40221 Düsseldorf
Germany