MX 4 Plus - Food Processor STEBA - Free user manual and instructions
Find the device manual for free MX 4 Plus STEBA in PDF.
User questions about MX 4 Plus STEBA
0 question about this device. Answer the ones you know or ask your own.
Ask a new question about this device
Download the instructions for your Food Processor in PDF format for free! Find your manual MX 4 Plus - STEBA and take your electronic device back in hand. On this page are published all the documents necessary for the use of your device. MX 4 Plus by STEBA.
USER MANUAL MX 4 Plus STEBA
natural_image
Exterior view of a Steba blender and its kitchen blender (no text or symbols visible on the main objects)220 - 240V\~; 50/60Hz; 1.200W
Standmixer
MX 4 Plus
Instructions for use 14
Mode d'emploi 28
text_image
Exploded view diagram of a blender with numbered parts for identification
text_image
Diagram of a 3D printer with labeled parts, showing front and back views with numbered annotations.natural_image
Line drawing of a blender with lid and handle, no text or symbols present
natural_image
Line drawing of a blender with two parts stacked vertically, no text or symbols present
natural_image
Line drawing of a blender with handle and side blades, showing rotation arrow (no text or symbols)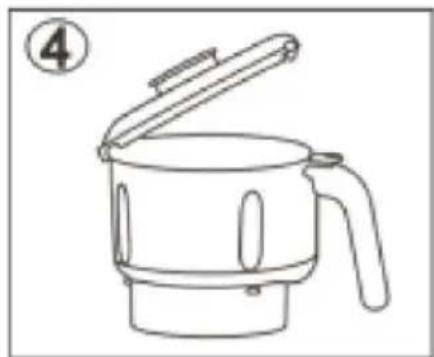
natural_image
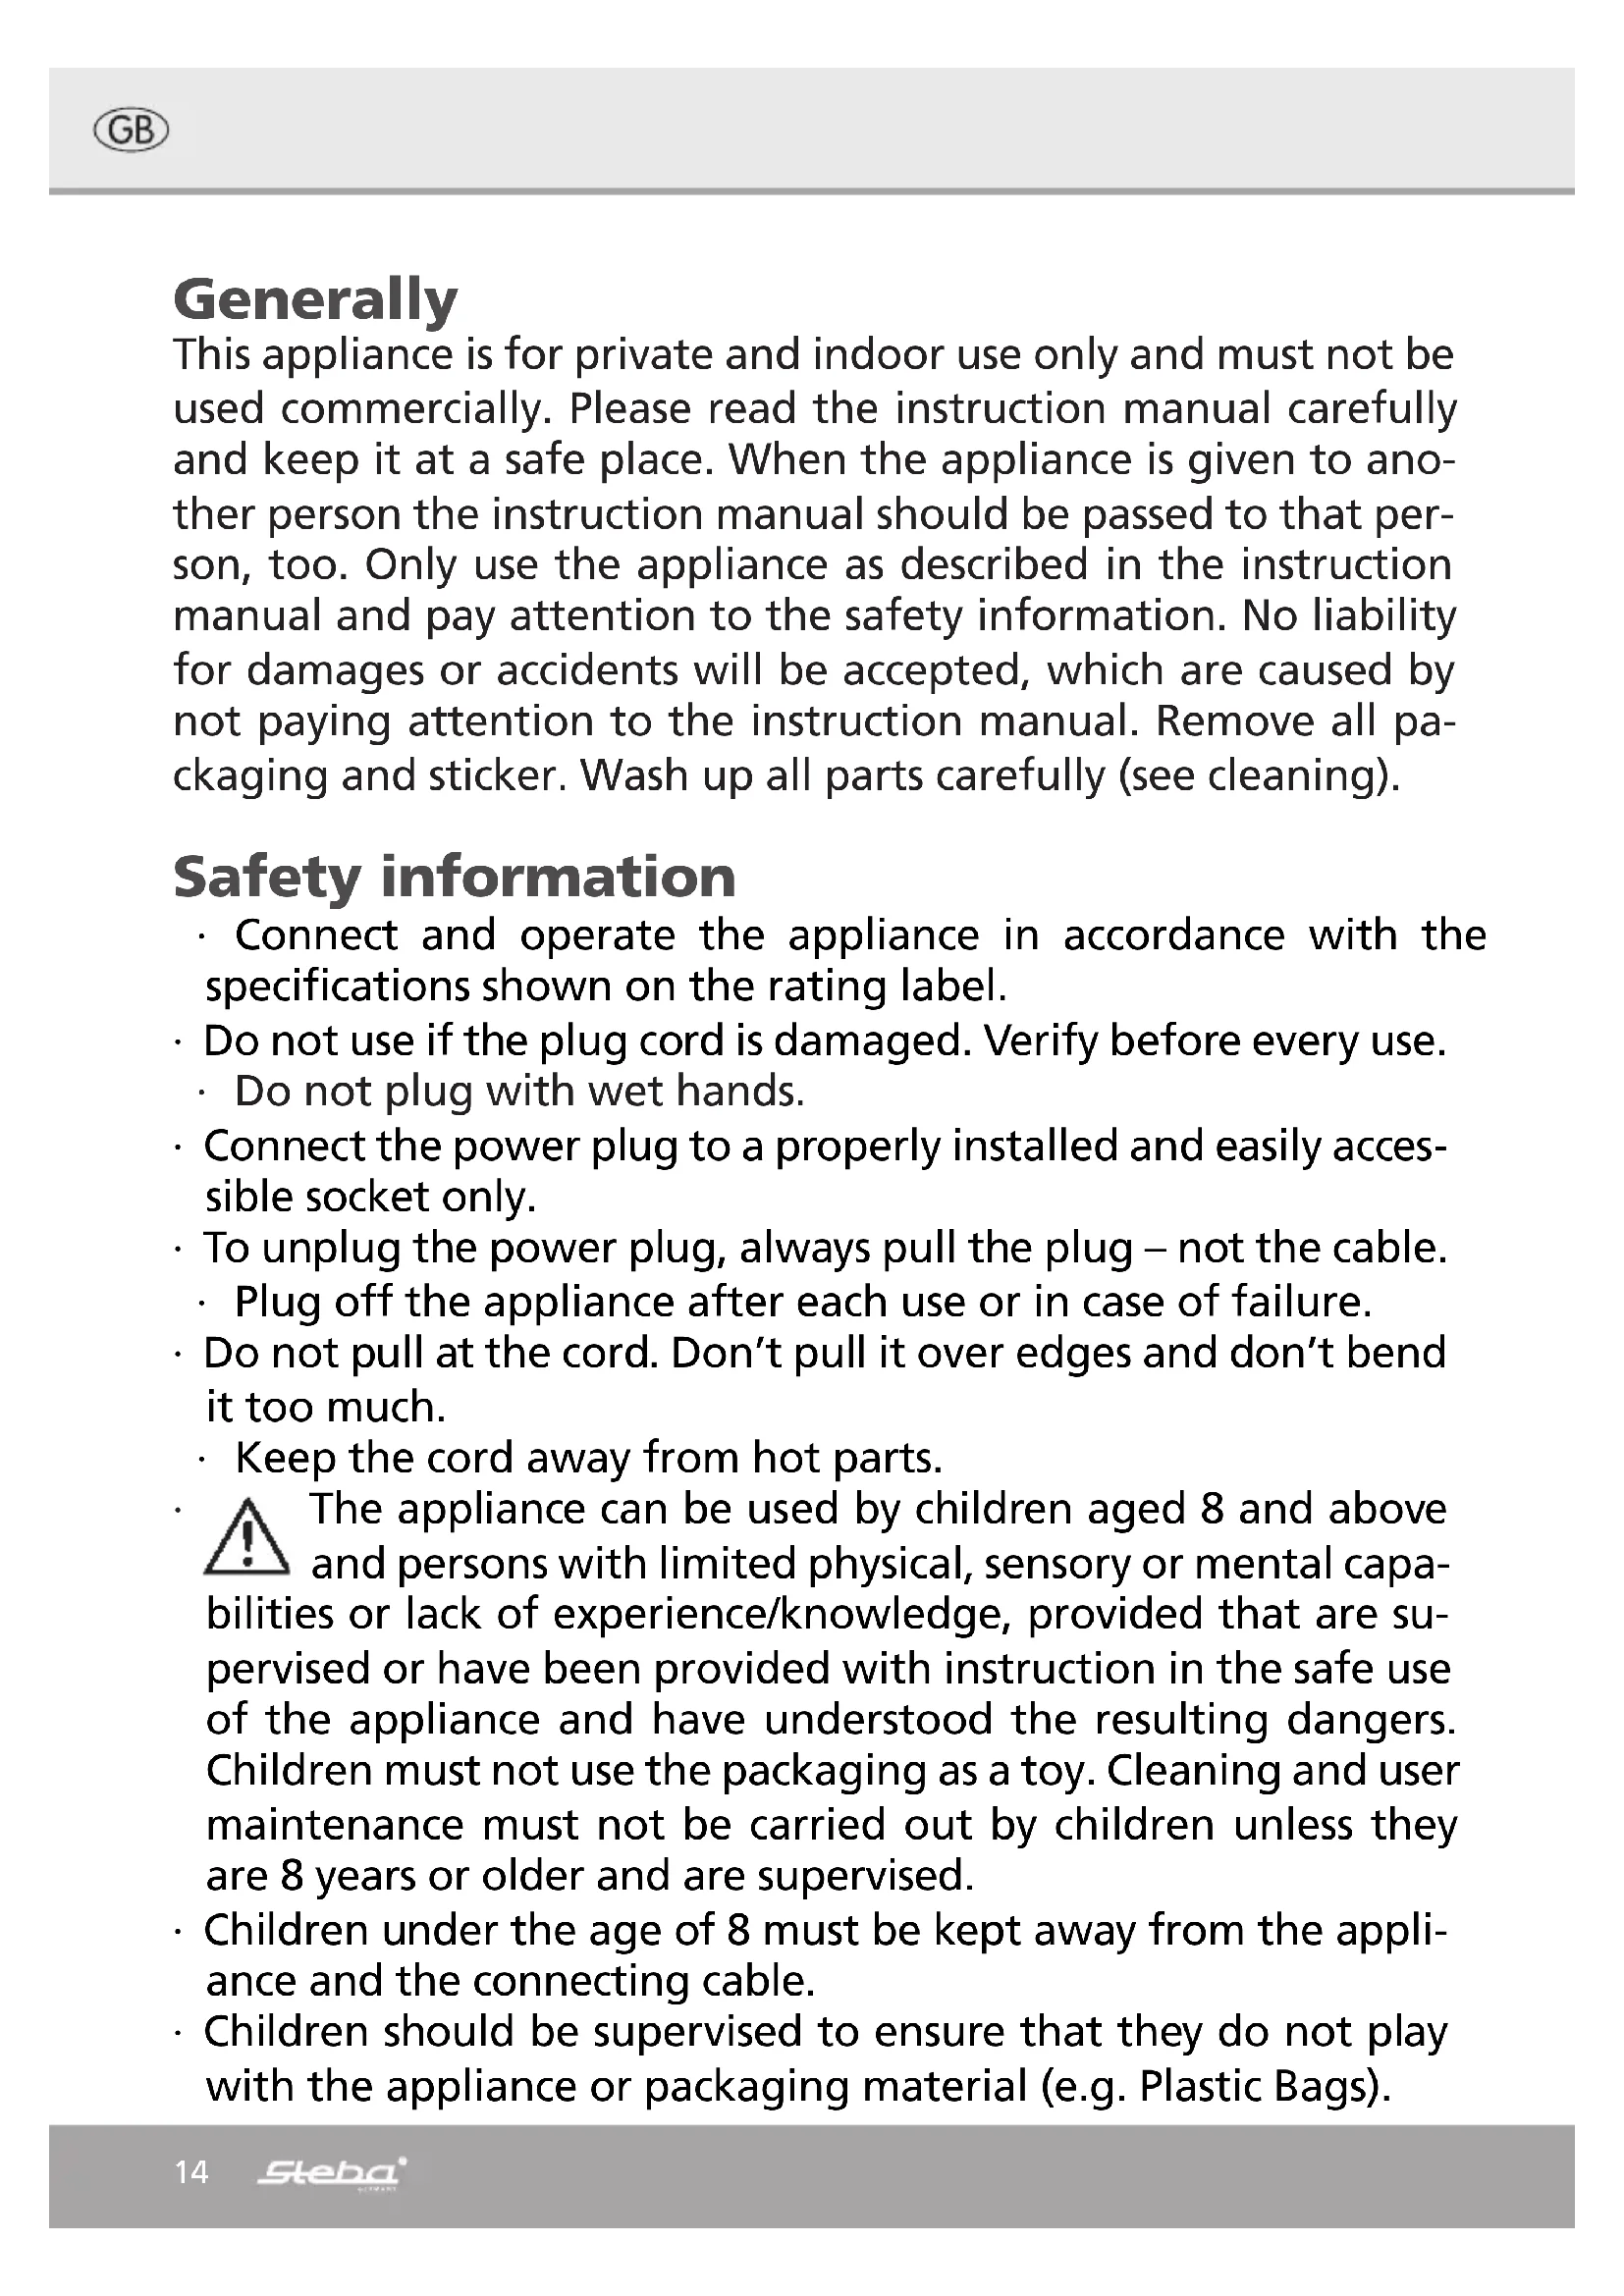
Line drawing of a portable kitchen pot with lid open, labeled with number 4 (no text or symbols on the diagram itself)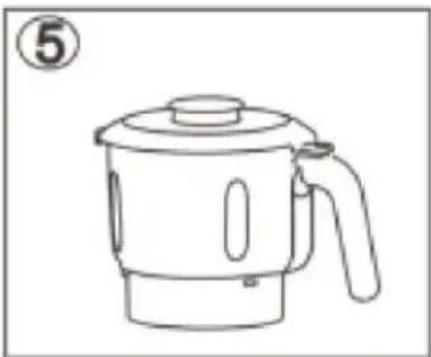
natural_image
Line drawing of a portable water heater with lid and handle, labeled with number 5 (no text or symbols on the device itself)
natural_image
Line drawing of a blender with a handle and top base, showing a rotating press mechanism (no text or symbols)Sicherheitskontakte
text_image
Technical diagram showing a blender with internal components and a close-up of its mechanical assembly, labeled in Chinese.This appliance is for private and indoor use only and must not be used commercially. Please read the instruction manual carefully and keep it at a safe place. When the appliance is given to another person the instruction manual should be passed to that person, too. Only use the appliance as described in the instruction manual and pay attention to the safety information. No liability for damages or accidents will be accepted, which are caused by not paying attention to the instruction manual. Remove all packaging and sticker. Wash up all parts carefully (see cleaning).
Safety information
- Connect and operate the appliance in accordance with the specifications shown on the rating label.
- Do not use if the plug cord is damaged. Verify before every use.
- Do not plug with wet hands.
- Connect the power plug to a properly installed and easily accessible socket only.
- To unplug the power plug, always pull the plug – not the cable.
- Plug off the appliance after each use or in case of failure.
- Do not pull at the cord. Don't pull it over edges and don't bend it too much.
- Keep the cord away from hot parts.
The appliance can be used by children aged 8 and above and persons with limited physical, sensory or mental capabilities or lack of experience/knowledge, provided that are supervised or have been provided with instruction in the safe use of the appliance and have understood the resulting dangers. Children must not use the packaging as a toy. Cleaning and user maintenance must not be carried out by children unless they are 8 years or older and are supervised. - Children under the age of 8 must be kept away from the appliance and the connecting cable.
-
Children should be supervised to ensure that they do not play with the appliance or packaging material (e.g. Plastic Bags).
-
The appliance must not be operated using a timer or a separate remote system!
- Never leave the appliance unattended when in use.
- Do not leave the appliance outdoors or in a damp area.
- Never immerse the unit in water.
- Never use the device after a malfunction, e.g. if it felt down or has been damaged in any other manner.
- The manufacturer is not liable for damage which is occurring due to the usage of the appliance in a different way as described or a mistake in the handling has been made.
- To prevent injury, repairs such as replacing a damaged cord, should only be carried out by a customer service. Only original spare parts have to be used.
- Only use the device as described in this manual.
- This appliance is intended to be used in household and similar applications such as:
o staff kitchen areas in shops, offices and others working environments
o by clients in hotels, motels and other residential type environments
o bed and breakfast type environments.
- Before initial use: clean all parts carefully and leave to dry.
- If an extension cable is used, it has to have a cross-section of 1,5mm^2 . A cable drum must always be unwound.
- If a GS-tested 16 A multi-pin extension is used, it may not be charged with more than 3680 watts due to fire hazard.
- Make sure that children do not tease the cable or that a trip hazard occurs.
- The device must always be disconnected from the power supply if it is not supervised and before assembling, disassembling or cleaning.
- Hygiene: Please always clean the device to avoid bacteria and mold formation.

Safety shutdown: if the lid is opened during operation, the device turns off.
Cleaning
Attention! Pull the plug before cleaning.
- Never immerse the unit into water.
- Food residues must be removed for reasons of hygiene.
- Put warm water with some detergent in the glass jar and mix for a while. Then rinse thoroughly.
- Clean and dry the lid and the lid insert.
- Attention! Blades are sharp!
- Clean the housing with a damp cloth.
- Do not use abrasive or acidic cleaning agents, as well as steel sponges.
Workplace
Important:
Never place this device on or next to hot surfaces (e.g. hot stoves). Only use it on a even, stable and a heat resisting surface. It is important that no inflammable items are near to the device. Do not place the device on the edge of the table so that it cannot be touched by children or fall down when touched.

text_image
Exploded view diagram of a blender with numbered parts for identification
text_image
Diagram of a 3D printer with labeled parts, showing front and back views with numbered annotations.natural_image
Line drawing of a blender with lid and handle, no text or symbols present
natural_image
Line drawing of a blender with two sides, showing internal structure and top view (no text or symbols)
natural_image
Line drawing of a blender with handle and side blades, showing rotation arrow (no text or symbols)
natural_image
Line drawing of a portable kitchen pot with lid open, labeled with circled number 4 (no text or symbols on the diagram itself)
natural_image
Line drawing of a portable water heater with lid and handle, labeled with number 5 (no text or symbols on the device itself)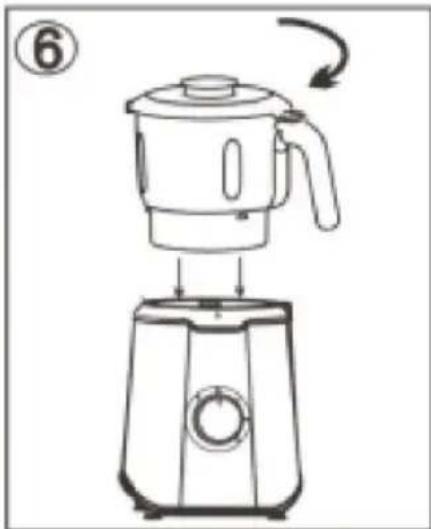
natural_image
Line drawing of a blender with a handle and top base, showing a rotating press mechanism (no text or symbols)Safety Contacts
- The device is equipped with 2 contacts on the lid of the jar, in order that the device can not be opened during operation.
1) place the jar with the handle on the right side onto the motor part and engage with a rotary motion.
2) Place the lid on the jar and let it engage into the hooks on the handle with a rotary motion.

The device can only be put into operation if all contacts are correctly engaged!
- If the motor is in continuous operation for more than 2 minutes, the circuit breaker switches the device off. Unplug the device and allow to cool down for about 10 minutes.
Getting started
- Put the ingredients into the jar and place the lid on it. Close the lid with the measuring cup.

text_image
Technical diagram showing a blender with labeled parts and a close-up of its internal structure, likely illustrating a mechanical or electrical assembly.- Only fill the appliance with solid food up to 1250ml and add some liquid. Liquid food can be mixed up to 1750ml.
- Only use the device when fully assembled!
- Never let the device run empty or without liquids.
- Do not pour liquids that are hotter than 60^ C into the cold jar so that the glass does not break.
- Only open the refill opening in the lid during mixing if liquids or spices are to be added.
- The maximum mixing time should not exceed 2 minutes, then pause for 1 minute.
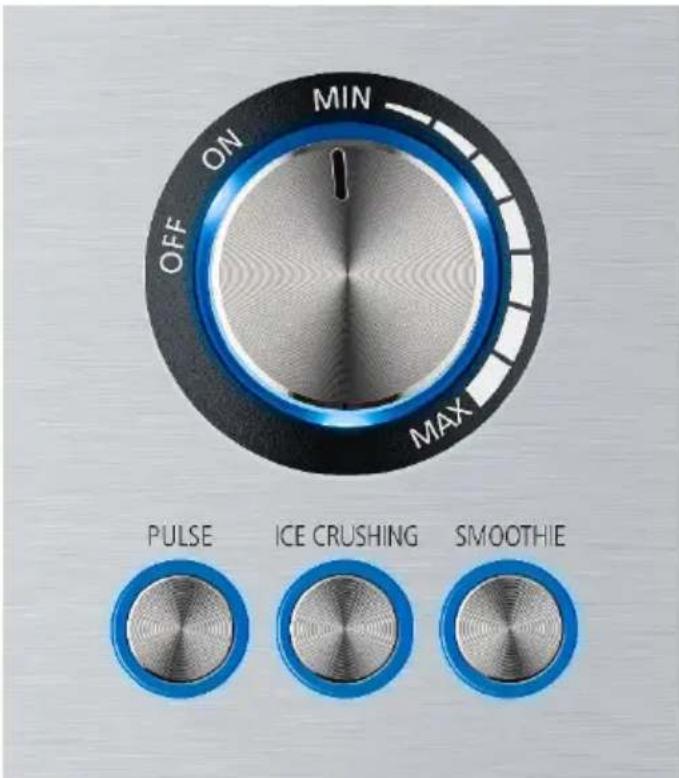
ON/OFF button
- Turn the switch to ON, the 3 buttons light blue.
- Turn the switch further and select the speed between MIN and MAX, depending on the food.
- Note: empty the glass jar after mixing. Do not store the food in it for a long time and carefully clean the jar.
Crushed Ice
- To crush ice, fill the glass jar with ice cubes or frozen fruits.
- Press the button, "Ice crushing" lights up. The pre-set program runs at intervals.
- After 60 seconds, the device switches off automatically.
text_image
MIN OFF ON MAX PULSE ICE CRUSHING SMOOTHIE- If the program needs to be stopped, press the button once again.

Do not put more than 8 ice cubes (20 x 20 x 20mm) in the jar at once.
Smoothie
- Fill the glass jar with fruit and liquid.
- Press the button, the pre-set program begins to run.
• After 60 seconds, the device switches off automatically. - If the program needs to be stopped, press the button once again.
Pulse button
- By pressing the Pulse button, you determine the working interval at the highest speed by yourself. As long as the button is pressed, the device works.
The device is not suitable for:
- Juicing fruits and vegetables
- Beat egg whites
- Mix solid doughs
- Puree boiled potatoes
Should the device be blocked or work unusual slowly, please switch it off, unplug it and remove the stuck food with a plastic cooking spoon.
Grinder
A grinder is available for this appliance. It can be used for grinding herbs, nuts, etc.
Usage:
Fill the food into the grinder and close the lid. Engage the complete unit on the motor block with a slight twisting motion. The grinder must only be removed once the appliance stopped completely.
Usage example:
The grinder is suitable for small amounts.
Example:
Peanuts, Almonds, coffee beans.
Do not completely fill the container, close it and lock it on the motor block. Press the pulse button (P) by the second until the food is chopped as desired. If necessary, remove the grinder from the motor block, shake it and replace it so that unevenly distributed food can be shredded.
Pesto:
Add basil leaves, Parmesan cheese, pine nuts and oil to the container. Everything else as mentioned above.
Troubleshooting
Dear Client,
Thank you for buying this STEBA product. The following table will help you with problems that may occur when using your device. For many problems there is a simple solution, because not everything that appears like a malfunction must be serious.
Please check the following list before contacting our customer service.
| Problem Reason Suggestion | ||
| Device does not start | It is not connectedLid is not closed pro-perly | Plug in the deviceCheck the fuse |
| Device turns off | Motor is overcharged | Unplug the device and let it cool down for ap-prox. 10 minutes, then restart it |
Peach drink
Ripe peaches
Sirup of grenadine
Cold Sparkling wine
Wash peaches, dry, peel and seed. Mix fruits and a splash of sirup on level 5 and add the sparkling wine.
Pina Colada
White rum
Pineapple juice
Coconut cream
Cream
Slices of pineapple
Ice cubes
Crush the ice and fill in cocktail glasses.
Mix all other ingredients and top on the ice.
Red drink (non-alcoholic)
Ripe strawberries
Banana juice
Peach juice
Cream
Ice cubes
Mix all ingredients for about 1 minute and fill in glasses.
Pineapple- strawberry drink
Ripe strawberries
Pineapple juice
lcing sugar
Cool sparkling wine
Wash strawberries and mix with pineapple juice and icing sugar. Add to a champagne cup and fill up with sparkling wine.
Blue drink
Vodka
Pineapple juice
Coconut cream
Cream
Blue curacao
Ice cubes
Crush ice and fill in cocktail glasses. Mix well all other ingredients and add on the ice.
Smoothie Hawaii
12 honeydew melon (peeled and seeded)
Filet of oranges
Honey
Ginger powder
Crème fraiche
5 ice cubes
Mix well everything.
Smoothie Portugal
12 can of peaches
30gr. Frozen blackberries
3-4 tbsp. port wine
Honey
5 ice cubes
Mix well all ingredients.
Nutcracker smoothie
12 pear and 12 apple
6 walnut cores
Lemon juice
5 tbsp. plain yoghurt
Milk
Honey
5 ice cubes
Mix well all ingredients.
Vegetable soup
Ingredients: 2 boiled potatoes
2 tomatoes
2 carrots
Leek
1 pepper
Celery
Cucumber
Bouillon cube
Cream + yolk
Add all ingredients to the jar and top up with hot water. Mix well on level 5.
Celery soup
Ingredients: Celeriac (peeled, chopped and boiled)
1 onion
Clove of garlic
Crème fraiche
Vegetable stock
Salt, pepper, thyme
Mix celery, onion, garlic and part of the vegetable stock. Season with crème frai-che and the spices.
Tomato soup
Ingredients: 1 big can of peeled tomatoes
1 garlic clove, minced
3 shallots, minced
Ca. 12 I vegetable stock
Basil leafs
Salt, pepper, sugar
2 Tbspn olive oil
Creme fraiche
Mix all ingredients and season to taste. Heat into a pot and add some crème frai-che by serving.
Pepper-crème-soup
Ingredients: 6 red pepper, seeded
2 shallots
1 garlic clove
1 Tbsp. sweet paprika
Chili powder, salt, sugar
2 Tbsp. olive oil
Ca 3/4 I vegetable stock
1 can cream
Mince shallots and garlic, sauté in olive oil. Add the red pepper and continue sautéing for 15 minutes. Deglaze with vegetable stock. Mash into the blender. Insert into a pot and season with salt chili, paprika and sugar and heat. Stir in the cream. Attention: soup should not boil!
Yoghurt dressing
Ingredients: 3 stalks of parsley
2 cloves of garlic
Lemon juice
100gr. Sheep cheese
150gr. Yoghurt
2 tbsp. olive oil
Salt, pepper
Mix well all ingredients and season with the spices.
Avocado-dip
Ingredients: 2 cloves of garlic
1 ripe avocado, seeded
Lemon juice
Yoghurt
Mayonnaise
Oil
Chili, seeded
Salt
Mix well all ingredients and season with the spices.
Herb sauce (cold)
Ingredients: 3 green pepper, seeded
2 hands of mixed herbs
(e.g. parsley, basil, chives,
chervil, lovage)
1 garlic clove, peeled
Ca 5 Tbsp. olive oil
1 Tsp. lemon juice
Salt, pepper
2 eggs, boiled and minced
Mix all ingredients (except eggs) into the
jar. Then fold in the eggs.
Correct Disposal of this product

This marking indicates that this product should not be disposed with other household wastes throughout the EU. To prevent possible harm to the environment or human health from uncontrolled waste disposal, recycle it responsibly to promote the sustainable reuse of material resources. To return your used device, please use the return and collection systems or contact the retailer where the product was purchased. They can take this product for environmental safe recycling.
Packaging disposal: Do not throw away the package materials. Please put it in the recycling bin.


Gift box: Paper, should be put to the old paper collection point. Plastic packaging material and foils should be collected in the special collection containers.
Service and Repair:
If the appliance must be repaired, please get in touch with your trader or with the manufacturer:
text_image
Exploded view diagram of a blender with numbered parts for identification
text_image
Diagram of a 3D printer with labeled parts, showing front and back views with numbered annotations.natural_image
Line drawing of a blender with lid and handle, no text or symbols present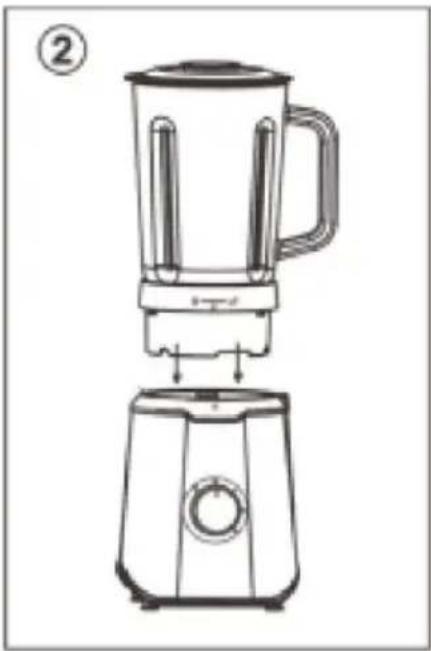
natural_image
Line drawing of a blender with two sides, showing internal structure and top view (no text or symbols)
natural_image
Line drawing of a blender with handle and side blades, showing rotation arrow (no text or symbols)
natural_image
Line drawing of a portable kitchen pot with lid open, labeled with number 4 (no text or symbols on the diagram itself)
natural_image
Line drawing of a portable water heater with lid and handle, labeled with number 5 (no text or symbols on the device itself)
natural_image
Line drawing of a blender with a handle and top base, showing a rotating press mechanism (no text or symbols)text_image
Technical diagram showing a blender with labeled parts and a close-up of its internal structure, likely illustrating a mechanical or electrical assembly.text_image
MIN ON OFF MAXPULSE

ICE CRUSHING

SMOOTHIE

Red Drink (sans alcool)
Fraises mûres
Jus de banana
Jus de pèches
Crème
Glaçons
(persil, cive, basilic,
cerfeuil, livèche)
1 gousse d'ail
text_image
Exploded view diagram of a blender with numbered parts for identification
text_image
Diagram of a 3D printer with labeled parts, showing front and back views with numbered annotations.natural_image
Line drawing of a blender with lid and handle, no text or symbols present
natural_image
Line drawing of a blender with two sides, showing internal structure and top view (no text or symbols)
natural_image
Line drawing of a blender with handle and side blades, showing rotation arrow (no text or symbols)
natural_image
Line drawing of a portable kitchen pot with lid open, labeled with number 4 (no text or symbols on the diagram itself)
natural_image
Line drawing of a portable water heater with lid and handle, labeled with number 5 (no text or symbols on the device itself)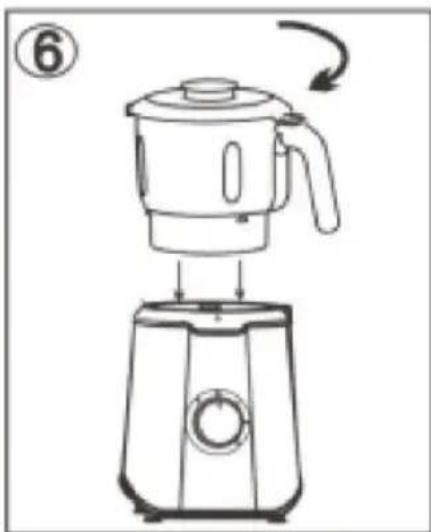
natural_image
Line drawing of a blender with a handle and base, showing the process of rotation (no text or symbols)Veiligheid
text_image
Technical diagram showing a blender with a lid and a side-view assembly, illustrating the process of lifting or disassembly.text_image
MIN ON OFF MAXPULSE

ICE CRUSHING

SMOOTHIE

basilicum, bieslook, kervel,
lavas)
1 teentje knoflook,
fijngemaakt
Ca 75ml olijfolie
Ca 15ml citroensap
Zout, peper
text_image
Exploded view diagram of a blender with numbered parts for identification
text_image
Diagram of a 3D printer with labeled parts, showing front and back views with numbered annotations.1) Mätglas
2) Lock
3) Kanna
4) Knivinsats
5) Mixerpackning
6) Låsring
7) Motor
8) LED ljus
9) Vridknapp
10) Funktionsknappar
11) Lock till medföljande hackare
12) Hackare i rostfritt stål

natural_image
Line drawing of a blender with lid and handle, no text or symbols present
natural_image
Line drawing of a blender with two sides, showing internal structure and base (no text or symbols)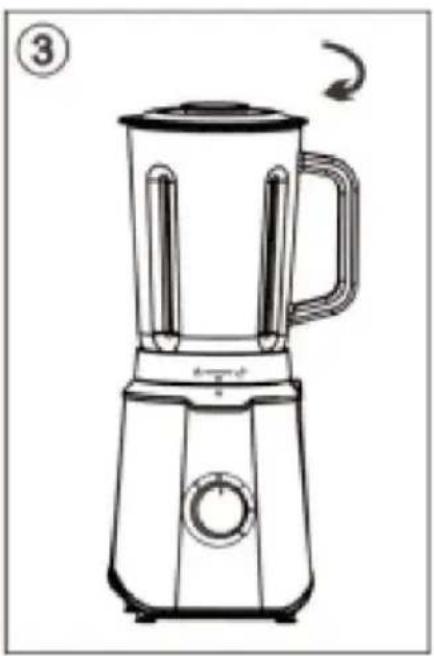
natural_image
Line drawing of a blender with handle and control knob, showing rotation arrow (no text or symbols)
natural_image
Line drawing of a portable kitchen pot with lid open, labeled with number 4 (no text or symbols on the device itself)
natural_image
Line drawing of a portable water heater with handle and lid, labeled with number 5 (no text or symbols on the device itself)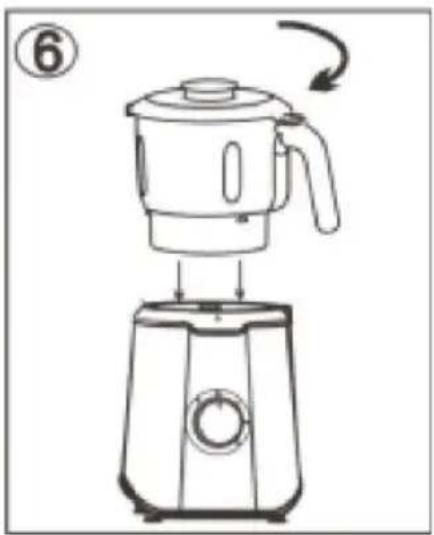
natural_image
Line drawing of a blender with a rotating handle and base, no text or symbols presentSäkringar
text_image
Technical diagram showing a blender with internal components and a close-up of its internal structure, likely illustrating a mechanical or electrical assembly.text_image
MIN ON OFF MAXSMOOTHIE
PULSE
ICE CRUSHING


Ingredienser: Rotselleri
Salt, peppar, timjan
1 matsked citron juice
Salt, peppar