
PLEM 20 A3 - Rangefinder PARKSIDE - Free user manual and instructions
Find the device manual for free PLEM 20 A3 PARKSIDE in PDF.

| Product type | Laser distance meter |
| Brand | Parkside |
| Model | PLEM 20 A3 |
| Measuring range | 0.075–20 m (starting point upper edge) 0.175–20 m (starting point lower edge) |
| Measurement accuracy (typical) | ± 3.0 mm |
| Smallest display unit | 1 mm |
| Laser class | 2 |
| Laser wavelength | 620–690 nm |
| Maximum laser power | < 1 mW |
| Power supply | 2 LR03 (AAA) batteries 1.5 V |
| Operating temperature | 0 °C to 40 °C |
| Max. relative humidity | ≤ 75% |
| Weight (without batteries) | 72 g |
| Dimensions | 10 x 3.8 x 2.45 cm |
| Protection class | IP20 |
| Main functions | Distance measurement, continuous measurement, single measurement, unit selection (m, in, ft, ft/in), reference point change |
| Package contents | 1 laser measuring device, 2 LR03 (AAA) batteries, 1 user manual |
| Maintenance and cleaning | Clean the lens with a gentle air stream or a slightly dampened cotton swab. Do not use solvents. |
| Safety | Laser class 2, do not stare into the beam, keep out of reach of children, battery precautions |
| Warranty | 3 years |
| After-sales service France | Tel.: 0800 919270, e-mail: owim@lidl.fr |
| After-sales service Belgium | Tel.: 070 270 171 (0.15 EUR/min), e-mail: owim@lidl.be |
Frequently Asked Questions - PLEM 20 A3 PARKSIDE
User questions about PLEM 20 A3 PARKSIDE
0 question about this device. Answer the ones you know or ask your own.
Ask a new question about this device
Download the instructions for your Rangefinder in PDF format for free! Find your manual PLEM 20 A3 - PARKSIDE and take your electronic device back in hand. On this page are published all the documents necessary for the use of your device. PLEM 20 A3 by PARKSIDE.
USER MANUAL PLEM 20 A3 PARKSIDE
LASER-ENTFERNUNGSMESSER 20 M PLEM 20 A3 / LASER DISTANCE MEASURER 20 M PLEM 20 A3 / TÉLÉMÈTRE LASER 20 M PLEM 20 A3
DE AT CH
LASER-ENTFERNUNGS- MESSER 20 M PLEM 20 A3
Operation and safety notes
NL BE
LASERAFSTANDSMETER 20 M PLEM 20 A3
GB / IE Operation and safety notes Page 20
Intended use......Page 22
Parts description......Page 22
Scope of delivery....Page 23
Technical data......Page 23
General safety instructions......Page 24
Safety instructions for batteries / rechargeable batteries......Page 25
Before using......Page 27
Inserting / replacing the batteries......Page 27
Start-up Page 27
Switching on/off Page 27
Selecting the unit of length ......Page 28
Measuring lengths ......Page 28
Changing measurement mode......Page 29
Continuous measurement mode......Page 29
Single measurement mode....Page 29
Error, faults & troubleshooting......Page 29
Maintenance and cleaning......Page 30
Storage Page 30
Disposal Page 31
Warranty and service......Page 32
Warranty Page 32
Warranty claim procedure......Page 33
Service Page 33
| List of pictograms used | |
 | Read the instruction manual. |
 | Danger of explosion! |
 | Wear protective gloves! |
 | Attention! |
 | Protect yourself from laser radiation! |
 | Do not stare into the laser beam! |
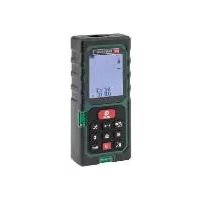
Laser distance measurer 20 m PLEM 20 A3
- Introduction
We congratulate you on the purchase of your new product. You have chosen a high quality product. The instructions for use are part of the product. They contain important information concerning safety, use and disposal. Before using the product, please familiarise yourself with all of the safety information and instructions for use. Only use the product as described and for the specified applications. If you pass the product on to anyone else, please ensure that you also pass on all the documentation with it.
Intendeduse
This product is suitable for measuring distances, lengths and heights in indoor spaces. Any other use or product modification shall be considered improper use and hold considerable safety hazards. The manufacturer assumes no liability for damages due to improper use. Not intended for commercial use.
Partsdescription
1 Receiver lens
2 Laser beam output opening
3 Display
4 MEASbutton (Switch on and off, single measurement, continuous measurement)
5 Reference / Unit button (changing the measurement reference point, changing unit)
6a Battery compartment cover
6b Battery compartment
Display
7 Laser on
8 Battery charge level display
9 First (previous) measured value
10 Length unit
11 Second (latest) measured value
12 Reference plane
12a The measurement is taken from the top side of the product
12b The measurement is taken from the bottom side of the product
Note: First (previous) measured value will move to the top row when the second (latest) measurement is successfully started.
- Scope of delivery
1 Laser distance measurer
2 1.5 V-batteries LR03 (AAA)
1 Instructions for use
●Technicaldata
Measurement range: 0.075–20 m* (reference point
top side)
0.175-20 m* (reference point
bottom side)
Measuring accuracy (typical): ± 3,0 mm**
Smallest display unit: 1 mm
Operating temperature: 0 °-40 °C (For indoor use)
Relative humidity max.: ≤ 75 %
Laser category: 2
Wavelength of the laser ( ): 620–690 nm
Maximum power P max: <1 mW
Operating voltage: 3 V= (Direct current)
Batteries: 2 x 1.5 V LRO3 (AAA)
Weight: 72 g (without batteries)
Dimensions: 10 × 3.8 × 2.45 cm
Degree of protection: IP20
*) The range improves the better the laser light is returned from the surface of the target (dispersing, not reflecting) and the brighter the laser is compared to the ambient light (interior rooms, twilight).
** In unfavourable conditions such as strong sunlight or poorly reflective surfaces, the maximum deviation is ± 8 mm at 20 m. In favourable conditions, a deviation influence of ± 0.1 mm/m must be taken into account.

General safety instructions
■ CHOKING HAZARD! Packaging material (e. g. foils or polystyrol) are not to be toyed with. Keep children away from packaging material. The packaging material is not a toy.
Do not use the product in locations where there is a risk of fire or explosion, e.g. in the vicinity of inflammable liquids or gases.
This product can be used by children aged from 8 years and above and persons with reduced physical, sensory or mental capabilities or lack of experience and knowledge if they have been given supervision or instruction concerning use of the appliance in a safe way and understand the hazards involved. Children shall not play with the appliance. Cleaning and user maintenance shall not be made by children without supervision.
- Do not leave the product unattended when switched on, and switch off the product directly after use. Other people could be blinded by the laser beam.
■ Protect the product from wetness or direct sunlight.
Do not expose the product to any extremes of temperature or temperature fluctuations. For example, do not leave it in a car for extended periods. After exposure to large temperature fluctuations, allow the product to acclimatise before using it again. The precision of the product can be adversely affected by extreme temperatures or temperature fluctuations.
- Avoid hefty knocks or dropping the measuring tool.
WARNING!
Protect yourself from laser radiation!
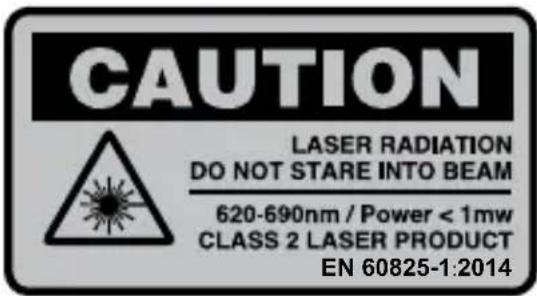
■ CAUTION LASER RADIATION! DO NOT STARE INTO BEAM! CLASS 2 LASER PRODUCT!
■ Never look directly into the laser beam or into the opening from which it emerges.
WARNING!
Looking at a laser beam through optical instruments (e.g. magnifying glasses etc.) can cause eye injuries.
■ ATTENTION! If operating and adjustment equipment is used or procedures other than those specified here are carried out, this may result in hazardous radiation exposure.
■ Never aim the laser beam at reflective surfaces, people or animals. Even brief visual contact with a laser beam can result in eye injuries.

Safety instructions for batteries / rechargeable batteries
■ DANGER TO LIFE! Keep batteries/rechargeable batteries out of reach of children. If accidentally swallowed seek immediate medical attention.
DANGER OF EXPLOSION! Never recharge non-rechargeable batteries. Do not short-circuit batteries/rechargeable batteries and/or open
them. Overheating, fire or bursting can be the result.
■ Never throw batteries / rechargeable batteries into fire or water.
Do not exert mechanical loads to batteries / rechargeable batteries.
Risk of leakage of batteries / rechargeable batteries
- Avoid extreme environmental conditions and temperatures, which could affect batteries / rechargeable batteries, e.g. radiators / direct sunlight.
If batteries / rechargeable batteries have leaked, avoid contact with skin, eyes and mucous membranes with the chemicals! Flush immediately the affected areas with fresh water and seek medical attention!
WEAR PROTECTIVE GLOVES! Leaked or

damaged batteries / rechargeable batteries can cause burns on contact with the skin. Wear suitable protective gloves at all times if such an event occurs.
In the event of a leakage of batteries/rechargeable batteries, immediately remove them from the product to prevent damage.
Only use the same type of batteries / rechargeable batteries. Do not mix used and new batteries / rechargeable batteries.
■ Remove batteries / rechargeable batteries if the product will not be used for a longer period.
Risk of damage of the product
■ Only use the specified type of battery / rechargeable battery!
- Insert batteries / rechargeable batteries according to polarity marks (+) and (-) on the battery / rechargeable battery and the product.
- Clean the contacts on the battery / rechargeable battery and in the battery compartment before inserting!
■ Remove exhausted batteries / rechargeable batteries from the product immediately.
Before using
- Check the consignment for completeness and for signs of visible damage.
☐ Remove all packaging material from the product.
- Inserting / replacing the batteries
When the low battery icon appears in the display 3, you can still make measurements. As soon as the battery icon turns empty, however, you must replace the batteries. Measurements are no longer possible.
Open the battery compartment cover 6a by gently pushing down the battery compartment cover latch.
☐ Remove the used batteries from the battery compartment 6b, if necessary.
☐ Insert the (new) batteries. Ensure the correct polarity as shown on the diagram inside the battery compartment 6b.
☐ Replace the battery compartment cover 6a as shown (fig. A).
- Start-up
- Switching on / off
☐ To switch the product on, press the MEAS button ⚠️ 4.
When the product is switched on, the laser beam is activated.
To switch the product off, press and hold the MEAS button 4 for approx. 5 seconds until the "OFF" is shown on display. If no button is pressed for about 3 minutes, the product turns off automatically to save the batteries.
☐ To switch measuring reference point: Press the reference / unit button 5 to change measurement base from the top side of the product to its bottom side or vice versa.
- Selecting the unit of length
- Press and hold the REF/UNIT button 5 for more than 3 seconds.
- The unit will change on the display.
- Repeat the step 1 until the desired unit appears on the display.
Note: Following units of length are available:
m meter in inch ft foot/feet "feet/inches
• Measuring lengths
Briefly press the MEAS button 4 again to activate the laser beam. Once the laser is switched on, this is indicated on the top left corner of the display by the icon 7.
Note: If laser beam is already activated, the above mentioned step can be skipped.
Now aim the laser at the target point. Briefly press the MEAS button 4 again. If the measurement is successful the measured value will be shown on the bottom line of the display and the laser beam will be turned off.
☐ If needed to measure another distance, repeat above steps.
□ Newly measured value will be shown on the bottom line of the display and the previous measured value will be shown
in the middle of the display. Now, the laser beam will be turned off.
● Changing measurement mode
Continuous measurement mode
☐ Under single measurement mode, press and hold the MEAS button 4 for 3 seconds to enter continuous measurement mode.
☐ Laser icon flashes in continuous measurement mode
- Single measurement mode
☐ Under continuous measurement mode, press and hold the MEAS button 4 for 3 seconds to enter single measurement mode.
☐ Laser icon stays on in single measurement mode.
- Error, faults & troubleshooting
| Faults Cause Solution | |
| — Calculation error P | ay attention to the correct operating measuring range. |
| 301 Operating temperature too low or too high | Pay attention to the correct operating temperature range (0° -40°C). |
| 401 Hardware failure If the icon appears despite repeated switching on and off, take the product to a specialist workshop | |
● Maintenance and cleaning
The product is maintenance-free.
■ CAUTION! Never submerse the product in water or other liquids. Do not allow any moisture to penetrate into the product during cleaning.
Clean the laser beam output opening and the receiver lens 1 with a gentle air stream. In the case of more serious contamination, remove the dirt with a damp cotton swab. Do not exert any strong pressure!
■ Never use petrol, solvents or cleaning agents that attack plastic.
WARNING should only be opened by a qualified person for repairs.
☐ To clean the casing, use a soft dry cloth.
- Keep the product clean to ensure fault-free operation.
Storage
☐ If you decide not to use the product for a long period, remove the batteries and store it in a clean, dry place away from direct sunlight.
●Disposal
The packaging is made entirely of recyclable materials, which you may dispose of at local recycling facilities.
Observe the marking of the packaging materials for waste separation, which are marked with abbreviations (a) and numbers (b) with following meaning: 1–7: plastics / 20–22: paper and fibreboard / 80–98: composite materials.

The product and packaging materials are recyclable, dispose of it separately for better waste treatment. The Triman logo is valid in France only.

Contact your local refuse disposal authority for more details of how to dispose of your worn-out product.

To help protect the environment, please dispose of the product properly when it has reached the end of its useful life and not in the household waste. Information on collection points and their opening hours can be obtained from your local authority.
Faulty or used batteries / rechargeable batteries must be recycled in accordance with Directive 2006/66/EC and its amendments. Please return the batteries / rechargeable batteries and / or the product to the available collection points.

Environmental damage through incorrect disposal of the batteries / rechargeable batteries!
Batteries / rechargeable batteries may not be disposed of with the usual domestic waste. They may contain toxic heavy metals and are subject to hazardous waste treatment rules and regulations. The chemical symbols for heavy metals are as follows:
Cd = cadmium, Hg = mercury, Pb = lead. That is why you should dispose of used batteries / rechargeable batteries at a local collection point.
● Warranty and service
Warranty
The product has been manufactured to strict quality guidelines and meticulously examined before delivery. In the event of product defects you have legal rights against the retailer of this product. Your legal rights are not limited in any way by our warranty detailed below.
The warranty for this product is 3 years from the date of purchase. Should this product show any fault in materials or manufacture within 3 years from the date of purchase, we will repair or replace it – at our choice – free of charge to you.
The warranty period begins on the date of purchase. Please keep the original sales receipt in a safe location. This document is required as your proof of purchase. This warranty becomes void if the product has been damaged, or used or maintained improperly.
The warranty applies to defects in material or manufacture. This warranty does not cover product parts subject to normal wear, thus possibly considered consumables (e.g. batteries) or for damage to fragile parts, e.g. switches, rechargeable batteries or glass parts.
● Warranty claim procedure
To ensure quick processing of your case, please observe the following instructions:
Please have the till receipt and the item number (e.g.
IAN 123456_7890) available as proof of purchase.
You will find the item number on the type plate, an engraving on the front page of the instructions (bottom left), or as a sticker on the rear or bottom of the appliance.
If functional or other defects occur, please contact the service department listed either by telephone or by e-mail.
You can return a defective product to us free of charge to the service address that will be provided to you. Ensure that you enclose the proof of purchase (till receipt) and information about what the defect is and when it occurred.
Service
GB Service Great Britain
Tel.: 0800 404 7657
E-Mail: owim@lidl.co.uk
IE Service Ireland
Tel.: 1890 930 034
(0,08 EUR / Min., (peak)) (0,06 EUR / Min.,
(off peak))
E-Mail: owim@lidl.ie
CE
7 Laser is ingeschakeld
Presnost' merania (typicky): ± 3,0 mm**
Najmenšia jednotka
zobrazenia: 1 mm
- LASER-ENTFERNUNGSMESSER 20 M PLEM 20 A3 / LASER DISTANCE MEASURER 20 M PLEM 20 A3 / TÉLÉMÈTRE LASER 20 M PLEM 20 A3
- LASER-ENTFERNUNGS- MESSER 20 M PLEM 20 A3
- LASERAFSTANDSMETER 20 M PLEM 20 A3
- General safety instructions......Page 24
- Before using......Page 27
- Start-up Page 27
- Changing measurement mode......Page 29
- Error, faults & troubleshooting......Page 29
- Maintenance and cleaning......Page 30
- Storage Page 30
- Disposal Page 31
- Warranty and service......Page 32
- Laser distance measurer 20 m PLEM 20 A3
- - Introduction
- Intendeduse
- Partsdescription
- Display
- - Scope of delivery
- ●Technicaldata
- General safety instructions
- WARNING!
- Safety instructions for batteries / rechargeable batteries
- Risk of leakage of batteries / rechargeable batteries
- Risk of damage of the product
- Before using
- - Inserting / replacing the batteries
- - Start-up
- - Switching on / off
- - Selecting the unit of length
- • Measuring lengths
- ● Changing measurement mode
- Continuous measurement mode
- - Single measurement mode
- - Error, faults & troubleshooting
- ● Maintenance and cleaning
- Storage
- ●Disposal
- Environmental damage through incorrect disposal of the batteries / rechargeable batteries!
- ● Warranty and service
- Warranty
- ● Warranty claim procedure
- Service
- GB Service Great Britain
- IE Service Ireland
Brand : PARKSIDE
Model : PLEM 20 A3
Category : Rangefinder