
GCM 18V305 GDC Professional - Saw BOSCH - Free user manual and instructions
Find the device manual for free GCM 18V305 GDC Professional BOSCH in PDF.
| Product Type | Cordless Miter Saw |
| Brand | Bosch |
| Model | GCM 18V305 GDC Professional |
| Power Supply | 18V lithium-ion battery (compatible with GBA 18V and ProCORE18V) |
| No-load Speed | 3000–4000 rpm (ECO mode: 2550 rpm) |
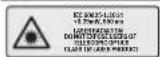
| Blade Diameter | 305 mm |
| Blade Bore | 30 mm |
| Blade Body Thickness | 1.7–2.6 mm |
| Max. Cutting Width | 3.2 mm |
| Miter Angle (Horizontal) | -52° to +60° |
| Bevel Angle (Vertical) | 47° left to 47° right |
| Max. Workpiece Dimensions (0°/0°) | 104 x 341 mm (height x width) |
| Max. Cutting Depth | 120 mm |
| Weight (according to EPTA 01:2014) | 26.9–27.8 kg (depending on battery) |
| Sound Level (Sound Pressure) | 93 dB(A); power 106 dB(A) |
| Integrated Laser | Class 1M, 650 nm, < 1 mW, two beams |
| Bluetooth | Bluetooth 4.2 Low Energy, max. range 30 m |
| Control Panel | Speed, temperature, charge status, connectivity display |
| Main Functions | Cross cuts, rip cuts, miter cuts, bevel cuts, grooving; sliding arm; clamp; chip guard; transport safety |
| Maintenance and Cleaning | Clean ventilation slots, protective guard and sliding roller; replace worn chip guards |
| Safety | Anti-restart protection, spindle lock, battery auto-off, pendular protective guard |
| Spare Parts and Accessories | Saw blades (wood, aluminum, fiber cement), dust bag, GTA work stands, GCY 42 Bluetooth module |
| Operating Temperature | -20 °C to +50 °C |
Frequently Asked Questions - GCM 18V305 GDC Professional BOSCH
User questions about GCM 18V305 GDC Professional BOSCH
0 question about this device. Answer the ones you know or ask your own.
Ask a new question about this device
Download the instructions for your Saw in PDF format for free! Find your manual GCM 18V305 GDC Professional - BOSCH and take your electronic device back in hand. On this page are published all the documents necessary for the use of your device. GCM 18V305 GDC Professional by BOSCH.
USER MANUAL GCM 18V305 GDC Professional BOSCH
General Power Tool SafetyWarnings
WARNING
Read all safety warnings, instructions, illustrations and specifica
tions provided with this power tool. Failure to follow all instructions listed below may result in electric shock, fire and/ or serious injury.
Save all warnings and instructions for future reference.
The term "power tool" in the warnings refers to your mains-operated (corded) power tool or battery-operated (cordless) power tool.
Work area safety
- Keep work area clean and well lit. Cluttered or dark areas invite accidents.
- Do not operate power tools in explosive atmospheres, such as in the presence of flammable liquids, gases or dust. Power tools create sparks which may ignite the dust or fumes.
- Keep children and bystanders away while operating a power tool. Distractions can cause you to lose control.
Electrical safety
Power tool plugs must match the outlet. Never modify the plug in any way. Do not use any adapter plugs with earthed (grounded) power tools. Unmodified plugs and matching outlets will reduce risk of electric shock.
- Avoid body contact with earthed or grounded surfaces, such as pipes, radiators, ranges and refrigerators. There is an increased risk of electric shock if your body is earthed or grounded.
Do not expose power tools to rain or wet conditions. Water entering a power tool will increase the risk of electric shock.
Do not abuse the cord. Never use the cord for carrying, pulling or unplugging the power tool. Keep cord away from heat, oil, sharp edges or moving parts. Damaged or entangled cords increase the risk of electric shock.
When operating a power tool outdoors, use an extension cord suitable for outdoor use. Use of a cord suitable for outdoor use reduces the risk of electric shock.
If operating a power tool in a damp location is unavoidable, use a residual current device (RCD) protected supply. Use of an RCD reduces the risk of electric shock.
Personal safety
Stay alert, watch what you are doing and use common sense when operating a power tool. Do not use a power tool while you are tired or under the influence of drugs, alcohol or medication. A moment of inatten
tion while operating power tools may result in serious personal injury.
Use personal protective equipment. Always wear eye protection. Protective equipment such as a dust mask, non-skid safety shoes, hard hat or hearing protection used for appropriate conditions will reduce personal injuries.
Prevent unintentional starting. Ensure the switch is in the off-position before connecting to power source and/or battery pack, picking up or carrying the tool. Carrying power tools with your finger on the switch or energising power tools that have the switch on invites accidents.
- Remove any adjusting key or wrench before turning the power tool on. A wrench or a key left attached to a rotating part of the power tool may result in personal injury.
Do not overreach. Keep proper footing and balance at all times. This enables better control of the power tool in unexpected situations.
Dress properly. Do not wear loose clothing or jewellery. Keep your hair and clothing away from moving parts. Loose clothes, jewellery or long hair can be caught in moving parts.
If devices are provided for the connection of dust extraction and collection facilities, ensure these are connected and properly used. Use of dust collection can reduce dust-related hazards.
Do not let familiarity gained from frequent use of tools allow you to become complacent and ignore tool safety principles. A careless action can cause severe injury within a fraction of a second.
Power tool use and care
Do not force the power tool. Use the correct power tool for your application. The correct power tool will do the job better and safer at the rate for which it was designed.
Do not use the power tool if the switch does not turn it on and off. Any power tool that cannot be controlled with the switch is dangerous and must be repaired.
- Disconnect the plug from the power source and/or remove the battery pack, if detachable, from the power tool before making any adjustments, changing accessories, or storing power tools. Such preventive safety measures reduce the risk of starting the power tool accidentally.
- Store idle power tools out of the reach of children and do not allow persons unfamiliar with the power tool or these instructions to operate the power tool. Power tools are dangerous in the hands of untrained users.
- Maintain power tools and accessories. Check for misalignment or binding of moving parts, breakage of parts and any other condition that may affect the power tool's operation. If damaged, have the power tool repaired before use. Many accidents are caused by poorly maintained power tools.
- Keep cutting tools sharp and clean. Properly maintained cutting tools with sharp cutting edges are less likely to bind and are easier to control.
Use the power tool, accessories and tool bits etc. in accordance with these instructions, taking into account the working conditions and the work to be performed. Use of the power tool for operations different from those intended could result in a hazardous situation. - Keep handles and grasping surfaces dry, clean and free from oil and grease. Slippery handles and grasping surfaces do not allow for safe handling and control of the tool in unexpected situations.
Battery tool use and care
- Recharge only with the charger specified by the manufacturer. A charger that is suitable for one type of battery pack may create a risk of fire when used with another battery pack.
Use power tools only with specifically designated battery packs. Use of any other battery packs may create a risk of injury and fire. - When battery pack is not in use, keep it away from other metal objects, like paper clips, coins, keys, nails, screws or other small metal objects, that can make a connection from one terminal to another. Shorting the battery terminals together may cause burns or a fire.
Under abusive conditions, liquid may be ejected from the battery; avoid contact. If contact accidentally occurs, flush with water. If liquid contacts eyes, additionally seek medical help. Liquid ejected from the battery may cause irritation or burns.
Do not use a battery pack or tool that is damaged or modified. Damaged or modified batteries may exhibit unpredictable behaviour resulting in fire, explosion or risk of injury.
Do not expose a battery pack or tool to fire or excessive temperature. Exposure to fire or temperature above 130^ may cause explosion.
Follow all charging instructions and do not charge the battery pack or tool outside the temperature range specified in the instructions. Charging improperly or at temperatures outside the specified range may damage the battery and increase the risk of fire.
Service
Have your power tool serviced by a qualified repair person using only identical replacement parts. This will ensure that the safety of the power tool is maintained.
- Never service damaged battery packs. Service of battery packs should only be performed by the manufacturer or authorized service providers.
SafetyWarnings for Mitre Saws
Mitre saws are intended to cut wood or wood-like products, they cannot be used with abrasive cut-off wheels for cutting ferrous material such as bars, rods,
studs, etc. Abrasive dust causes moving parts such as the lower guard to jam. Sparks from abrasive cutting will burn the lower guard, the kerf insert and other plastic parts.
Use clamps to support the workpiece whenever possible. If supporting the workpiece by hand, you must always keep your hand at least 100mm from either side of the saw blade. Do not use this saw to cut pieces that are too small to be securely clamped or held by hand. If your hand is placed too close to the saw blade, there is an increased risk of injury from blade contact.
The workpiece must be stationary and clamped or held against both the fence and the table. Do not feed the workpiece into the blade or cut "freehand" in any way. Unrestrained or moving workpieces could be thrown at high speeds, causing injury.
- Push the saw through the workpiece. Do not pull the saw through the workpiece. To make a cut, raise the saw head and pull it out over the workpiece without cutting, start the motor, press the saw head down and push the saw through the workpiece. Cutting on the pull stroke is likely to cause the saw blade to climb on top of the workpiece and violently throw the blade assembly towards the operator.
- Never cross your hand over the intended line of cutting either in front or behind the saw blade. Supporting the workpiece "cross handed" i.e. holding the workpiece to the right of the saw blade with your left hand or vice versa is very dangerous.
Do not reach behind the fence with either hand closer than 100mm from either side of the saw blade, to remove wood scraps, or for any other reason while the blade is spinning. The proximity of the spinning saw blade to your hand may not be obvious and you may be seriously injured.
Inspect your workpiece before cutting. If the workpiece is bowed or warped, clamp it with the outside bowed face toward the fence. Always make certain that there is no gap between the workpiece, fence and table along the line of the cut. Bent or warped workpieces can twist or shift and may cause binding on the spinning saw blade while cutting. There should be no nails or foreign objects in the workpiece.
Do not use the saw until the table is clear of all tools, wood scraps, etc., except for the workpiece. Small debris or loose pieces of wood or other objects that contact the revolving blade can be thrown with high speed.
Cut only one workpiece at a time. Stacked multiple workpieces cannot be adequately clamped or braced and may bind on the blade or shift during cutting.
Ensure the mitre saw is mounted or placed on a level, firm work surface before use. A level and firm work surface reduces the risk of the mitre saw becoming unstable.
Plan your work. Every time you change the bevel or mitre angle setting, make sure the adjustable fence is set correctly to support the workpiece and will not interfere with the blade or the guarding system. Without
18|English
turning the tool "ON" and with no workpiece on the table, move the saw blade through a complete simulated cut to assure there will be no interference or danger of cutting the fence.
- Provide adequate support such as table extensions, saw horses, etc. for a workpiece that is wider or longer than the table top. Workpieces longer or wider than the metre saw table can tip if not securely supported. If the cut-off piece or workpiece tips, it can lift the lower guard or be thrown by the spinning blade.
Do not use another person as a substitute for a table extension or as additional support. Unstable support for the workpiece can cause the blade to bind or the workpiece to shift during the cutting operation pulling you and the helper into the spinning blade.
The cut-off piece must not be jammed or pressed by any means against the spinning saw blade. If confined, i.e. using length stops, the cut-off piece could get wedged against the blade and thrown violently.
Always use a clamp or a fixture designed to properly support round material such as rods or tubing. Rods have a tendency to roll while being cut, causing the blade to "bite" and pull the work with your hand into the blade.
Let the blade reach full speed before contacting the workpiece. This will reduce the risk of the workpiece being thrown.
If the workpiece or blade becomes jammed, turn the mitre saw off. Wait for all moving parts to stop and disconnect the plug from the power source and/or remove the battery pack. Then work to free the jammed material. Continued sawing with a jammed workpiece could cause loss of control or damage to the mitre saw.
After finishing the cut, release the switch, hold the saw head down and wait for the blade to stop before removing the cut-off piece. Reaching with your hand near the coasting blade is dangerous.
Hold the handle firmly when making an incomplete cut or when releasing the switch before the saw head is completely in the down position. The braking action of the saw may cause the saw head to be suddenly pulled downward, causing a risk of injury.
Do not let go of the handle once the saw head has reached the lowest position. Always guide the saw head back to the top position by hand. There is a risk of injury if the saw head moves in an uncontrolled manner. - Keep your work area clean. Material mixtures are particularly hazardous. Light metal dust may catch fire or explode.
Do not use dull, cracked, bent or damaged saw blades. Unsharpened or improperly set saw blades produce narrow kerf causing excessive friction, blade binding and kickback.
Do not use saw blades made from high speed steel (HSS). Such saw blades can easily break.
Always use saw blades with correct size and shape (diamond versus round) of arbour holes. Saw blades
that do not match the mounting hardware of the saw will run off-centre, causing loss of control.
- Never remove cuttings, wood chips, etc. from the cutting area while the power tool is running. Always guide the tool arm back to the neutral position first and then switch the power tool off.
Do not touch the saw blade after working before it has cooled. The saw blade becomes very hot while working.
In case of damage and improper use of the battery, vapours may be emitted. The battery can set alight or explode. Ensure the area is well ventilated and seek medical attention should you experience any adverse effects. The vapours may irritate the respiratory system.
Do not open the battery. There is a risk of short-circuiting.
The battery can be damaged by pointed objects such as nails or screwdrivers or by force applied externally. An internal short circuit may occur, causing the battery to burn, smoke, explode or overheat.
Only use the battery with products from the manufacturer. This is the only way in which you can protect the battery against dangerous overload.

Protect the battery against heat, e.g. against continuous intense sunlight, fire, dirt, water and moisture. There is a risk of explosion and short-circuiting.
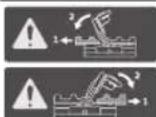
- Never make warning signs on the machine unrecognisable.
The power tool is delivered with a laser warning sign (see table: "Symbols and their meaning").

Do not direct the laser beam at persons or animals and do not stare into the direct or reflected laser beam yourself. You could blind somebody, cause accidents or damage your eyes.
If laser radiation hits your eye, you must close your eyes and immediately turn your head away from the beam.
- Do not use any optical instruments such as binoculars to view the radiation source. Doing so can damage your eye.
Do not direct the laser beam at persons who are looking through binoculars or similar instruments. Doing so can damage their eye.
Do not make any modifications to the laser equipment. The setting options described in these operating instructions can be used safely.
- Do not use the laser goggles (accessory) as protective goggles. The laser goggles make the laser beam easier to see; they do not protect you against laser radiation.
Do not use the laser goggles (accessory) as sunglasses or while driving. The laser goggles do not provide full UV protection and impair your ability to see colours.
Warning! If operating or adjustment devices other than those specified here are used or other procedures are carried out, this can lead to dangerous exposure to radiation.
Do not replace the integrated laser with a laser of another type. A laser that is not compatible with this power tool could pose a risk to persons.
- Caution! When using the power tool with Bluetooth, a fault may occur in other devices and systems, aeroplanes and medical devices (e.g. pacemakers, hearing aids). Also, damage to people and animals in the immediate vicinity cannot be completely excluded. Do not use the power tool with Bluetooth in the vicinity of medical devices, petrol stations, chemical plants, areas with a potentially explosive atmosphere or in blasting areas. Do not use the power tool with Bluetooth in aircraft. Avoid using the product near your body for extended periods.
The Bluetooth® word mark and logos are registered trademarks owned by Bluetooth SIG, Inc. and any use of such marks by Robert Bosch Power Tools GmbH is under license.
Symbols
The following symbols may be important for the operation of your power tool. Please take note of these symbols and their meaning. Correctly interpreting the symbols will help you to operate the power tool more effectively and safely.
Symbols and their Meaning
Laser radiation
Do not view directly with telescopic optical probe
Laser class 1M

Keep hands away from the cutting area while the power tool is running. Contact with the saw blade can lead to injuries.

Wear a dust mask.

Wear safety goggles.

Wear hearing protection. Exposure to noise can cause hearing loss.
Symbols and their Meaning

Danger area! Keep hands, fingers and arms away from this area.

Keep your fingers away from the moving parts of the glide arm. There is a risk of fingers being crushed and severely injured.
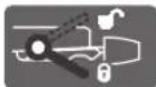
Take note of the dimensions of the saw blade. The hole diameter must fit the tool spindle without play. If it is necessary to use reducers, ensure that the dimensions of the reducer are suitable for the base blade thickness and the saw blade hole diameter, as well as the tool spindle diameter. Wherever possible, use the reducers provided with the saw blade. The saw blade diameter must match the information specified on the symbol.
Shows the rotational direction of the SDS bolt for tightening the saw blade (anti-clockwise) and for loosening the saw blade (clockwise).

When transporting the power tool, hold it only at the locations indicated (recessed handles) or by the transport handle.

Never carry the power tool using the handle of the glide arm.
For bevel angles, you need to adjust the left/right fence extension or completely remove it.

In combination with the ProCORE-18V rechargeable batteries, the new high-performance motor offers a comparable performance to that of the motors of corded power tools.
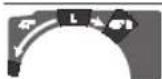
Clamping handle open: Bevel angles can be adjusted.

Clamping handle closed: The set bevel angle of the glide arm is locked.
Indicates the individual steps for adjusting the bevel angle.
- Loosen the clamping handle
- Swivel the glide arm slightly to the left
20 | English
Symbols and their Meaning
- Set the required bevel angle range using the rotary knob
Setting the bevel angle ranges using the rotary knob:

Saw blade inclination to the left (45° to 0°)

Saw blade inclination to the right (0° to 45°)
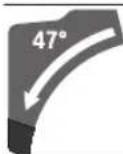
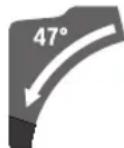
Entire swivel range of the glide arm (-47^ to +47^
Product Description and Specifications

Read all the safety and general instructions. Failure to observe the safety and general instructions may result in electric shock, fire and/or serious injury.
Please observe the illustrations at the beginning of this operating manual.
Intended Use
The power tool is intended as a stationary machine for making straight cuts in wood with and against the grain. It is possible to cut metre angles of -52^ to +60^ and bevel angles of 47^ (to the left) to 47^ (to the right).
The power tool is designed with sufficient capacity for sawing hardwood and softwood as well as chipboard and fibreboard.
When using appropriate saw blades, sawing aluminium profiles and plastic is also possible.
With the Bluetooth Low Energy Module GCY 42 inserted, power tool data and settings can be transferred between the power tool and a mobile device by means of Bluetooth wireless technology.
Product features
The numbering of the product features refers to the diagram of the power tool on the graphics page.
(1) Handle
(2) Lock-off function for on/off switch
(3)User interface
(4) Protective guard
(5) Retracting blade guard
(6) Adjustable fence
(7) Fence
(8) Saw table extension
(9) Mounting holes
(10) Insert plate
(11) Locking clamp
(12) Locking knob for various metre angles
(13) Mitre pre-setting lever
(14) Clamping handle for various bevel angles
(15) Detents for standard litre angles
(16) Recessed handles
(17) Hex key (6 mm/4 mm)
(18) Hex key (2 mm)
(19) Screw clamp
(20) Guide roller
(21) Angle indicator for right-hand bevel angle range (0° to 47°)
(22) Chip deflector
(23) SDS bolt
(24) Chip ejector
(25) Glide mechanism clamping lever
(26) Dust extraction adapter
(27) Depth stop adjusting screw
(28) Depth stop
(29) Laser warning label
(30) Laser protection cap
(31) Cover for GCY 42 Bluetooth Low Energy Module
(32) Rechargeable batterya)
(33) Battery release button
(34) Glide arm
(35) Transport safety lock
(36) Scale for bevel angle
(37) Angle indicator for left-hand bevel angle range (47^ to 0^)
(38) Adjustment knob for 22.5^ bevel angle
(39) Locking screw for length stop
(40) Length stop
(41) Scale for metre angles
(42) Saw table
(43) Rotary knob for adjusting the bevel angle range
(44) Saw blade
(45) Laser beam outlet aperture
(46) Battery charge indicator (user interface)
(47) ECO mode indicator (user interface)
(48) Speed preselection button (user interface)
(49) Speed setting/mode indicator (user interface)
(50) Smartphone indicator (user interface)
(51) Power tool status indicator (user interface)
(52) Temperature indicator (user interface)
(53) Spindle lock
English|21
(54) Hex socket screw for mounting the saw blade
(55) Clamping flange
(56) Inner clamping flange
(57) Clamping lever of the saw table extension
(58) Locking screw for the adjustable fence
(59) Damper
(60) Set screws for damping
(61) Holes for screw clamp
(62) Wing bolt
(63) Threaded rod
(64) Angle indicator for metre angles
(65) On/off switch
(66) Screws for insert plate
(67) Clamping screw for length stop
(68) Set screws for positioning the laser (flush alignment)
(69)/ Set screws for 0^ basic setting (bevel angle)
(70)/
(71)
(72) Set screw for 45^ basic setting (left-hand bevel angle)
(73) Set screw for 45^ basic setting (right-hand bevel angle)
(74) Set screws for litre angle scale
(75) Screw for mitre angle indicator
(76) Set screw for adjusting the clamping force of the clamping handle for any bevel angle
a) Accessories shown or described are not included with the product as standard. You can find the complete selection of accessories in our accessories range.
Technical Data
| Sliding litre saw GCM 18V-305 GDC | ||
| Article number | 3601 M430.. | |
| Rated voltage V= 18 | ||
| No-load speedA) | min-1 | 3000-4000 |
| No-load speed in ECO modeA) | min-1 | 2550 |
| Laser type nm 650 | ||
| mW < 1 | ||
| Laser class 1M | ||
| Divergence of laser line mrad | 1.0 | |
| (full angle) | ||
| Weight according to EPTA-Pro-cedure 01:2014B) | kg 26.9-27.8 | |
| Recommended ambient tem-perature during charging | °C 0 to +35 | |
| Permitted ambient temperature during operation and during storage | °C -20 to +50 | |
| Sliding litre saw GCM 18V-305 GDC | ||
| Recommended rechargeable batteries | GBA 18V... ProCORE18V... | |
| Recommended chargers GAL 18... | GAX 18... GAL 36... | |
| Data transmission | ||
| Bluetooth° | Bluetooth 4.2 (Low Energy)° | |
| Signal interval s 8 | ||
| Max. signal rangeE) | m | 30 |
| Dimensions of suitable saw blades | ||
| Saw blade diameter mm 305 | ||
| Base blade thickness mm 1.7-2.6 | ||
| Max. cutting width mm | 3.2 | |
| Hole diameter | mm 30 | |
A) Measured at 20-25°C with rechargeable battery ProCORE18V 8.0Ah.
B)Depends on battery in use
C) Limited performance at temperatures < 0^
D) The mobile terminal devices must be compatible with Bluetooth Low Energy devices (version 4.2) and support the Generic Access Profile (GAP).
E) The signal range may vary greatly depending on external conditions, including the receiving device used. The Bluetooth® range may be significantly weaker inside closed rooms and through metallic barriers (e.g. walls, shelving units, cases, etc.).
Permitted workpiece dimensions (maximum/minimum): (see "Permissible workpiece dimensions", page 28)
Noise Information
Noise emission values determined according to EN 62841-3-9.
Typically, the A-weighted noise level of the power tool is: Sound pressure level 93 dB(A); sound power level 106 dB(A). Uncertainty K = 3 dB.
Wear hearing protection!
The noise emission value given in these instructions has been measured in accordance with a standardised measuring procedure and may be used to compare power tools. It may also be used for a preliminary estimation of noise emissions.
The noise emission value given represents the main applications of the power tool. However, if the power tool is used for other applications, with different application tools or is poorly maintained, the noise emission value may differ. This may significantly increase noise emissions over the total working period.
To estimate noise emissions accurately, the times when the tool is switched off, or when it is running but not actually being used, should also be taken into account. This may significantly reduce noise emissions over the total working period.
Assembly
- Remove the battery from the power tool before carrying out work on the power tool (e.g. maintenance, changing tool, etc.). The battery should also be removed for transport and storage. There is risk of injury from unintentionally pressing the on/off switch.
Items Included

See the list of items included at the start of the operating manual.
Check to ensure that all the parts listed below have been supplied before using the power tool for the first time:
- Sliding litre saw with fitted saw blade (44)
- Locking knob (12)
- Hex key (17)
- Hex key (18)
Screw clamp (19) - SDS bolt (23)
Dust bag
Note: Check the power tool for possible damage. Before continuing to use the power tool, carefully check that all protective devices or slightly damaged parts are working perfectly and according to specifications. Check that the moving parts are working perfectly and without jamming; check whether any parts are damaged. All parts must be fitted correctly and all the conditions necessary to ensure smooth operation must be met. If the protective devices or any parts become damaged, you must have them properly repaired or replaced by an authorised service centre.
Extra tools required (not included in the delivery):
Cross-headed screwdriver
- Open-ended spanner (size: 8 mm)
- Ring spanner, open-ended spanner or socket spanner (sizes: 10 mm and 17 mm)
Activating the Bluetooth® Low Energy Module GCY 42
Read the corresponding operating instructions for information about the Bluetooth® Low Energy Module GCY 42.
Activating the Button Cell
- Remove the cover for the Bluetooth® Low Energy Module GCY 42 (31).
- Remove the insulation between the button cell and the Bluetooth® Low Energy Module GCY 42.
- Close the cover (31) to prevent dirt from getting in.
- Remove the cover for the Bluetooth® Low Energy Module GCY 42 on the power tool, e.g. using a screwdriver or a large coin. Using unsuitable objects can damage the electronics or the cover.
Battery Charging
Use only the chargers listed in the technical data. Only these chargers are matched to the lithium-ion battery of your power tool.
Note: The battery is supplied partially charged. To ensure full battery capacity, fully charge the battery in the charger before using your power tool for the first time.
The lithium-ion battery can be charged at any time without reducing its service life. Interrupting the charging process does not damage the battery.
The lithium-ion battery is protected against deep discharge by the "Electronic Cell Protection (ECP)". When the battery is discharged, the power tool is switched off by means of a protective circuit: The application tool no longer rotates.
Do not continue to press the On/Off switch after the power tool has automatically switched off. The battery can be damaged.
Follow the instructions on correct disposal.
Removing the Battery
The battery (32) is equipped with two locking levels to prevent the battery from falling out if the battery release button (33) is pressed unintentionally. The battery is held in place by a spring when fitted in the power tool.
To remove the battery, press the release button and pull the battery out of the power tool. Do not use force to do this.
Battery charge indicator
The green LEDs on the battery charge indicator indicate the state of charge of the battery. For safety reasons, it is only possible to check the state of charge when the power tool is not in operation.
Press the button for the battery charge indicator or show the state of charge. This is also possible when the battery is removed.
If no LED lights up after pressing the button for the battery charge indicator, then the battery is defective and must be replaced.
Note: The state of charge of the battery is also displayed on the user interface (3).
Battery model GBA 18V...

LEDs Capacity
3 × continuous green light 60 - 100%
2× continuous green light 30 - 60%
1× continuous green light 5-30%
1× flashing green light 0 - 5%
Battery model ProCORE18V...

LEDs Capacity
5 × continuous green light 80 - 100%
4× continuous green light 60-80%
3× continuous green light 40-60%
2 × continuous green light 20 - 40%
1 × continuous green light 5 - 20%
1× flashing green light 0 - 5%
Fitting individual components
- Carefully remove all parts included in the delivery from their packaging.
- Remove all packing material from the power tool and the accessories provided.
Fitting the locking knob (see figure a)
Screw the locking knob (12) into the corresponding hole above the lever (13).
Always tighten the locking knob (12) firmly before sawing. Otherwise the saw blade can become wedged in the workpiece.
Stationary or flexible mounting
To ensure safe handling, the power tool must be mounted on a flat, stable work surface (e.g. work bench) before use.
Mounting on a work surface (see figure b1)
- Use suitable screw fasteners to secure the power tool to the work surface. The holes (9) are used for this purpose. or
- Firmly clamp the base of the power tool to the work surface with commercially available screw clamps.
Mounting on a Bosch saw stand (see figure b2)
(GTA 2500 W, GTA 2500 Compact, GTA 2600, GTA 3800)
With the height-adjustable legs, Bosch GTA saw stands provide firm support for the power tool on any surface. The workpiece supports of the saw stand are used for underlaying long workpieces.
Read all the warnings and instructions included with the saw stand. Failure to observe the warnings and follow instructions may result in electric shock, fire and/or serious injury.
- Assemble the saw stand properly before mounting the power tool. Correct assembly is important to prevent the risk of collapsing.
- Mount the power tool on the saw stand in the transport position.
Dust/Chip Extraction
The dust from materials such as lead paint, some types of wood, minerals and metal can be harmful to human health. Touching or breathing in this dust can trigger allergic reactions and/or cause respiratory illnesses in the user or in people in the near vicinity.
Certain dusts, such as oak or beech dust, are classified as carcinogenic, especially in conjunction with wood treatment additives (chromate, wood preservative). Materials containing asbestos may only be machined by specialists.
-
Use a dust extraction system that is suitable for the material wherever possible.
-
Provide good ventilation at the workplace.
- It is advisable to wear a P2 filter class breathing mask.
The regulations on the material being machined that apply in the country of use must be observed.
- Avoid dust accumulation at the workplace. Dust can easily ignite.
The dust/chip extraction system can be blocked by dust, chips or fragments of the workpiece.
- Switch the power tool off and remove the battery.
- Wait until the saw blade has come to a complete stop.
- Determine the cause of the blockage and eliminate it.
External Dust Extraction
You can also attach a dust extraction hose (35 mm diameter) to the extraction adapter (26) for extraction.
- Connect the dust extraction hose to the extraction adapter (26).
The dust extractor must be suitable for the material being worked.
When extracting dry dust that is especially detrimental to health or carcinogenic, use a special dust extractor.
Cleaning the dust extraction adapter
To ensure optimum extraction, the dust extraction adapter (26) must be cleaned regularly.
Pull the dust extraction adapter (26) off the chip ejector (24) with a twisting motion.
- Remove workpiece fragments and chippings.
- Reattach the dust extraction adapter to the chip ejector with a twisting motion until it engages above the chip ejector holding ring.
Changing the Saw Blade
- Remove the battery from the power tool before carrying out work on the power tool (e.g. maintenance, changing tool, etc.). The battery should also be removed for transport and storage. There is risk of injury from unintentionally pressing the on/off switch.
Wear protective gloves when fitting the saw blade.
There is a risk of injury when touching the saw blade. Only use saw blades that have a maximum permitted speed higher than the no-load speed of the power tool.
24 | English
Only use saw blades that match the specifications given in this operating manual and that have been tested and marked in accordance with EN 847-1.
Only use saw blades that are recommended by the power tool manufacturer and are suitable for use on the material you want to saw. This will prevent the saw teeth overheating when sawing.
Assembly with hex socket screw (see figures c1-c4) Removing the Saw Blade
- Bring the power tool into the work position.
- Swivel the retracting blade guard (5) to the back and hold it in this position.
- Turn the hex socket screw (54) with the hex key (4 mm) (17) and at the same time push the spindle lock (53) until it engages.
- Keep holding the spindle lock (53) and loosen the hex socket screw (54) by turning it clockwise (left-hand thread).
- Remove the clamping flange (55).
- Remove the saw blade (44).
- Slowly push the retracting blade guard back down.
Fitting the saw blade
When fitting the saw blade, make sure that the cutting direction of the teeth (arrow direction on the saw blade) matches the direction of the arrow on the protective guard.
If required, clean all the parts you want to fit before installing them.
- Swivel the retracting blade guard (5) to the back and hold it in this position.
- Place the new saw blade on the inner clamping flange (56).
- Fit the clamping flange (55) and the hex socket screw (54). Press the spindle lock (53) until it engages and tighten the hex socket screw by turning it anticlockwise.
- Slowly push the retracting blade guard back down.
Assembly with SDS bolt (see figure d)
For bevel cuts when using the SDS bolt (23), before sawing, first make sure that the SDS bolt cannot come into contact with the surface of the workpiece at any time by making a suitable adjustment to the depth stop (28). This prevents damage to the SDS bolt and/or the workpiece.
Removing the saw blade
- Bring the power tool into the work position.
- Swivel the retracting blade guard (5) to the back and hold it in this position.
- Turn the SDS bolt (23) while pressing the spindle lock (53) until it engages.
- Press and hold the spindle lock (53) and unscrew the SDS bolt (23) by turning it clockwise (left-hand thread).
- Remove the clamping flange (55).
-
Remove the saw blade (44).
-
Slowly push the retracting blade guard back down.
Fitting the saw blade
- When fitting the saw blade, make sure that the cutting direction of the teeth (arrow direction on the saw blade) matches the direction of the arrow on the protective guard.
If required, clean all the parts you want to fit before installing them.
- Swivel the retracting blade guard (5) to the back and hold it in this position.
- Place the new saw blade on the inner clamping flange (56).
- Attach the clamping flange (55) and the SDS bolt (23). Press the spindle lock (53) until it engages and tighten the SDS bolt by turning it anticlockwise.
- Slowly push the retracting blade guard back down.
Operation
- Remove the battery from the power tool before carrying out work on the power tool (e.g. maintenance, changing tool, etc.). The battery should also be removed for transport and storage. There is risk of injury from unintentionally pressing the on/off switch.
Transport Safety Lock (see figure A)
The transport safety lock (35) makes it easier to handle the power tool when transporting it to various working locations.
Unlocking the Power Tool (Work Position)
- Press the glide arm (34) down slightly by the handle (1) to release the transport safety lock (35).
- Pull the transport safety lock (35) all the way out.
- Slowly guide the glide arm (34) upwards.
Locking the Power Tool (Transport Position)
- Slide the glide arm (34) all the way back and secure it in this position.
- Guide the glide arm downwards until you can press the transport safety lock (35) all the way in.
Further information: (see "Transport (see figure Z)", page 30)
Locking the Glide Arm
The glide mechanism of the glide arm (34) can be locked with the clamping lever (25). The glide arm can be placed in two positions:
- Glide arm pushed all the way back (for cross cuts)
- Glide arm pulled all the way forward (for a compact transport position)
Unlocking the Glide Arm (see figure B1)
After unlocking the glide arm (34), the whole gliding mechanism is ready for operation.
- Press the clamping lever (25) all the way down.
- The clamping wedge of the clamping lever releases the two articulated parts at the bottom of the glide arm.
Securing the Glide Arm (see figure B2)
Glide arm pushed all the way back:
- Push the glide arm (34) all the way back.
- The two articulated parts at the top of the glide arm are now upright and closed.
Pull the clamping lever (25) upwards until the clamping wedge is positioned between the two articulated parts at the bottom of the glide arm. - This locks the glide arm (34), which is pushed all the way back.
Glide arm pulled all the way forward:
- Pull the glide arm (34) all the way forward.
- The glide mechanism is now completely extended.
- Pull the clamping lever (25) upwards until the clamping wedge is positioned between the two articulated parts at the bottom of the glide arm.
When sawing mitre and/or bevel angles, you have to pull the left-hand or right-hand adjustable fence (6) outwards depending on the cutting direction, or remove it completely.
| Bevel angle Mitre angle | ||
| 0°-47°(left) | ≤ 44°(right/left) | - Loosen the locking screw (58).- Pull the left-hand adjustable fence (6) all the way out. |
| 0°-47°(left) | ≥ 45°(right/left) | - Loosen the locking screw (58).- Pull the left-hand adjustable fence (6) all the way out.- Lift the adjustable fence upwards and out of the way.- Remove the locking screw (58). |
| 0°-47°(right) | ≤ 44°(right/left) | - Loosen the locking screw (58).- Pull the right-hand adjustable fence (6) all the way out. |
| 0°-47°(right) | ≥ 45°(right/left) | - Lift the adjustable fence upwards and out of the way. |
Adjusting the damping of the glide arm (see figure F)
The glide mechanism of the glide arm (34) is preset at the factory and is not damped when the power tool is delivered.
The damping of the glide mechanism can be adjusted using the damper (59):
Hard - for more controlled work movements;
Soft - for fast saw cuts.
- For softer damping, loosen the two set screws (60) using the hex key (4 mm) (17)
-or - tighten the two set screws (60) for harder damping.
Clamping the workpiece (see figure G)
To ensure maximum safety while working, the workpiece must always be firmly clamped.
Do not saw workpieces that are too small to clamp firmly.
- Press the workpiece firmly against the fences (7) and (6).
- Insert the supplied screw clamp (19) into one of the corresponding holes (61).
- Loosen the wing bolt (61) and adjust the screw clamp to the workpiece. Tighten the wing bolt again.
- Tighten the threaded rod (63) to fix the workpiece in place.
Releasing the workpiece
- To loosen the screw clamp, turn the threaded rod (63) anticlockwise.
Adjusting the Mitre Angle
Setting Standard Mitre Angles (see figure H)
For quick and precise setting of commonly used mitre angles, detents (15) are provided on the saw table:
Leftward Rightward
0^
45°; 31.6°; 22.5°; 15° 15°; 22.5°; 31.6°; 45°; 60°
- Loosen the locking knob (12) if it is tightened.
- Pull the lever (13) and rotate the saw table (42) left or right to the required detent.
- Release the lever again. The lever must be felt to engage in the detent.
- Retighten the locking knob (12).
Setting Any Mitre Angle (see figure I)
The mitre angle can be set between 52^ (left side) and 60^ (right side).
- Loosen the locking knob (12) if it is tightened.
26 | English
- Pull the lever (13) and at the same time press the locking clamp (11) until this clicks into the slot provided for it. This means the saw table can now move freely.
- Turn the saw table (42) left or right by the locking knob until the angle indicator (64) shows the required mitre angle.
- Retighten the locking knob (12).
- To loosen the lever (13) again (for setting standard metre angles), pull the lever upwards. The locking clamp (11) springs back into its original position and the lever (13) can click back into the detents (15).
Adjusting Bevel Angles
The bevel angle can be set between 47^ (left side) and 47^ (right side).
For quick and precise setting of frequently used bevel angles, stops have been provided for the angles 0^ , 22.5^ , 45^ and 47^ .
Setting the Left-hand Bevel Angle range (45^ to 0^)
L
- Pull the left-hand adjustable fence (6) all the way out.
- Loosen the clamping handle (14).
- Use the handle (1) to swivel the glide arm (34) to the left until the angle indicator (37) shows the required bevel angle.
- Hold the glide arm (34) in this position and retighten the clamping handle (14).
The clamping force of the clamping handle must hold the glide arm securely in place at any bevel angle.
Setting the Right-hand Bevel Angle Range (0^ to 45^) (see figure J)
45°R
- Pull the right-hand adjustable fence (6) all the way out.
- Loosen the clamping handle (14).
- Use the handle (1) to tilt the glide arm (34) slightly to the left from the 0^ position and turn the rotary knob (43) until the required bevel angle range is shown.
- Use the handle (1) to swivel the glide arm (34) to the right until the angle indicator (21) shows the required bevel angle.
- Hold the glide arm (34) in this position and retighten the clamping handle (14).
The clamping force of the clamping handle must hold the glide arm securely in place at any bevel angle.
Setting the Standard 0^ bevel angle
To enable the standard 0^ bevel angle to be reset easily, the rotary knob (43) engages in the left-hand bevel angle range.
- Swivel the glide arm (34) from the right to the 0^ position.

Setting the entire bevel angle range (-47^ to +47^)
- Pull both adjustable fences (6) all the way out.
- Loosen the clamping handle (14).
- Use the handle (1) to tilt the glide arm (34) slightly to the left from the 0^ position and turn the rotary knob (43) until the required bevel angle range is shown.
- Use the handle (1) to swivel the glide arm (34) to the left or right until the angle indicator (37) or (21) shows the required bevel angle.
- Hold the glide arm (34) in this position and retighten the clamping handle (14).
The clamping force of the clamping handle must hold the glide arm securely in place at any bevel angle.
Setting the Standard 22.5^ Bevel Angle (see figure K)
Pull the adjustment knob (38) all the way out and turn it 90^ .
Then use the handle (1) to swivel the glide arm (34) until you hear the glide arm engage.
Setting metre and bevel angles
Start-up
Inserting the Battery
Use only original Bosch lithium-ion batteries with the voltage stated on the type plate of your power tool. Using other batteries can lead to injuries and pose a fire hazard.
- Push the charged battery (32) into the battery bay of the power tool until the battery is securely locked.
Switching on (see figure L)
- To switch on the power tool, first slide the lock-off button (2) to the middle and then press and hold the on/off switch (65).
Note: For safety reasons, the on/off switch (65) cannot be locked; it must remain pressed during the entire operation.
Switching off
- To switch off, release the on/off switch (65).
ECO mode
If the power tool is operated in the energy-saving ECO mode, the battery life may be up to 20% longer.
If the ECO mode is active, the symbol E is shown on the speed setting/mode indicator (49). In addition, the ECO mode indicator (47) lights up.
User interface
The user interface (3) is used to preselect the speed and to indicate the status of the power tool.
Speed preselection
An ECO mode and three speed settings are preset.
English | 27
| You can use the button for speed preselection (48) to preselect the required speed, even during operation. | Speed setting Speed [min]1 | ||
| Speed setting Speed [min]1 | 1 | 3000 | |
| 2 | 3500 | ||
| Eco | 2550 | 3 | 4000 |
| Status indications | |||
| Battery charge indicator Meaning/cause Solution (user interface) (46) | |||
| Green (2 to 5 bars) Battery charged - | |||
| Yellow (1 bar) Battery almost empty Replace or charge battery soon | |||
| Red (1 bar) Battery empty Replace or charge battery | |||
| Temperature indicator (52) Meaning/cause Solution | |||
| Yellow Critical temperature has been reached (motor, electronics, battery) | Run the power tool at no load and allow it to cool down | ||
| Red Power tool is overheated and will switch off Leave the power tool to cool down | |||
| Smartphone indicator(50) Meaning/cause Solution and Power tool status indicator (51) | |||
| Yellow Service reminder For more information see Bosch Toolbox App or Service | |||
| Power tool status Meaning/cause Solution indicator (51) | |||
| Green Status OK - | |||
| Yellow Critical temperature has been reached or battery is almost empty | Run the power tool at no load and allow it to cool down, or replace or charge the battery soon | ||
| Red Power tool is overheated or battery is empty Allow the power tool to cool down, or replace or charge the battery | |||
| Flashing red | Restart protection is triggered | Turn the power tool off and on again; if necessary, remove the battery and reinsert it. | |
Connectivity functions
In conjunction with the GCY 42 Bluetooth® Low Energy Module, the following connectivity functions are available for the power tool:
- Registration and personalisation
- Status check, output of warning messages
General information and settings - Management
- Setting the speed levels
Read the corresponding operating instructions for information about the Bluetooth® Low Energy Module GCY 42.
The smartphone indicator (50) lights up when the power tool sends information (e.g. temperature warning) to a mobile device via Bluetooth® wireless technology.
Practical advice
General sawing instructions
Always tighten the locking knob (12) and the clamping handle (14) firmly before sawing. Otherwise the saw blade can become wedged in the workpiece.
Always tighten the locking knob (12) and the clamping lever firmly before sawing. Otherwise the saw blade can become wedged in the workpiece.
For all cuts, it must first be ensured that the saw blade at no time can come in contact with the fence, screw clamps or other machine parts. Remove any mounted auxiliary stops or adjust them accordingly.
- With the Bluetooth® Low Energy Module GCY 42, the power tool is equipped with a radio interface. Local operating restrictions, e.g. in aircraft or hospitals, must be observed.
28 | English
In areas where the Bluetooth® wireless technology is not allowed to be used, the Bluetooth® Low Energy Module GCY 42 and the button cell must be removed.
The free end of long and heavy workpieces must have something placed underneath it or be supported.
Do not saw warped/bent workpieces. The workpiece must always have a straight edge to face against the fence.
Only saw materials which are permitted within the scope of the intended use.
Protect the saw blade against impact and shock. Do not subject the saw blade to lateral pressure.
Make sure that the retracting blade guard operates properly and that it can move freely. The retracting blade guard must open when the tool arm is guided downwards. When the tool arm is guided upwards, the retracting blade guard must close again over the saw blade and lock in the uppermost position of the tool arm.
Marking the Cutting Line (see figure M)
Two laser beams indicate the cutting line of the saw blade. This allows for exact positioning of the workpiece for sawing, without having to open the retracting blade guard.
- To do this, switch on the laser beams by briefly pressing the on/off switch (65) without pressing the lock-off button (2).
- Position your mark on the workpiece between the two laser lines.
Note: Before sawing, check if the cutting line is still indicated correctly (see "Adjusting the laser", page 29). Vibrations during intensive use, for example, can cause the laser beams to become misaligned.
Position of the operator (see figure N)
Do not stand in line with the saw blade in front of the power tool. Always stand to the side of the saw blade.
This protects your body against possible kickback.
- Keep hands, fingers and arms away from the rotating saw blade.
- Do not reach one hand across the other when in front of the tool arm.
Replacing insert plates (see figure O)
The insert plates (10) can become worn after prolonged use of the power tool.
Replace faulty insert plates.
- Bring the power tool into the work position.
- Loosen the screws (66) using the hex key (18) and remove the old insert plates.
- Insert the new right-hand insert plate.
Screw the insert plate as far as possible to the right with the screws (66) so that the saw blade does not come into contact with the insert plate over the entire length of the possible slide motion.
- Repeat the work steps in the same manner for the new left-hand insert plate.
Permissible workpiece dimensions
| Mitre angle Bevel angle Height x width [mm] | |
| 0° 0° 104 x 341 | 45 x 400A 120 x 200B 180 x 40 |
| 45° (left) 0° 104 x 240 | 180 x 20 |
| 0° 45° (left) 60 x 341 | |
| 0° 45° (right) 40 x 341 | |
| 45° 45° (left) 60 x 240 | |
| 45° 45° (right) 40 x 240 | |
A) With horizontal spacer (height x width: 60 mm x 400 mm)
B) With vertical spacer (height x width: 72 mm x 50 mm)
Minimum workpiece dimensions (= all workpieces that can be secured left or right of the saw blade using the supplied screw clamp (19)): 160 mm x 35 mm (length x width)
Maximum cutting depth (0^ / 0^) .. 120mm
Sawing
Sawing without slide movement (cutting off) (see figure P)
- Slide the glide arm (34) all the way back and secure it in this position.
Make sure that the depth stop (28) is pressed all the way in and that the adjusting screw (27) fits through the recess without touching the depth stop when moving the glide arm. - Firmly clamp the workpiece as appropriate for its dimensions.
- Set the required metre and/or bevel angle as necessary.
- Switch on the power tool.
- Slowly guide the glide arm (34) downwards using the handle (1).
- Saw through the workpiece applying uniform feed.
- Switch off the power tool and wait until the saw blade has come to a complete stop.
- Slowly guide the glide arm (34) upwards.
Sawing with Slide Movement (see figure Q)
- Maintain a firm grip on the handle before switching the power tool on and during the entire sawing process. Ensure that the movement of the glide arm is controlled during sawing. The glide arm is very easy to move and a moment of inattention could result in serious injury.
- Unlock the glide arm (34).
Check if the complete glide mechanism is operative by sliding the glide arm (34) back and forth.
- Firmly clamp the workpiece as appropriate for its dimensions.
-
Set the required metre and/or bevel angle as necessary.
-
Pull the glide arm (34) away from the fence (7) by the handle (1) until the saw blade is in front of the workpiece.
- Switch on the power tool.
- Slowly guide the glide arm (34) downwards using the handle (1).
Now push the glide arm (34) towards the fence (7) and saw through the workpiece with uniform feed. - Switch off the power tool and wait until the saw blade has come to a complete stop.
- Slowly guide the glide arm (34) upwards.
Sawing workpieces of the same length (see figure R)
The length stop (40) (accessory) can be used for easily sawing workpieces of the same length.
The length stop can be mounted on either side of the saw table extension (8).
- Loosen the locking screw (39) and move the length stop (40) over the clamping screw (67).
- Re-tighten the locking screw (39).
- Set the saw table extension (8) to the required length.
Adjusting the Depth Stop (Sawing the Groove) (see figure S)
The depth stop needs to be adjusted if you wish to saw a groove or use a spacer.
- Swivel the depth stop (28) outwards.
- Use the handle (1) to swivel the glide arm (34) into the required position.
Turn the adjusting screw (27) until the end of the screw touches the depth stop (28).
- Slowly guide the glide arm (34) upwards.
Special workpieces
When sawing curved or round workpieces, these must be especially secured against slipping. At the cutting line, there should be no gap between the workpiece, fence and saw table.
If necessary, you will need to manufacture special fixtures.
Working on mouldings
Mouldings can be sawn in two different ways:
| Positioning of workpiece | Base moulding Crown moulding |
| - Placed against the fence | |
| -Lying flat on the saw table |
Furthermore, you can cut with or without the slide movement depending on the width of the moulding.
Always check the set litre and/or bevel angle first by making trial cuts in scrap wood.
Checking and Adjusting the Basic Settings
To ensure precise cuts, the basic settings of the power tool must be checked and adjusted as necessary after intensive use.
Experience and suitable special tools are required for this.
A Bosch after-sales service point will handle this work quickly and reliably.
Adjusting the laser
Note: To test the laser function, the power tool must be connected to the power supply.
While adjusting the laser (e.g. when moving the tool arm), never activate the on/off switch. Starting the power tool accidentally can lead to injuries.
- Bring the power tool into the work position.
Turn the saw table (42) to the 0^ detent (15). The lever (13) must be felt to engage in the detent.
Checking (see figure T1)
- Draw a straight cutting line on the workpiece.
- Slowly guide the glide arm (34) downwards using the handle (1).
- Position the workpiece so that the teeth of the saw blade line up with the cutting line.
- Hold the workpiece in this position and slowly guide the glide arm upwards.
- Clamp the workpiece.
- Switch on the laser beams with the switch.
The laser beams must be the same distance away (left and right) from the cutting line marked on the workpiece along their entire length, even when lowering the glide arm.
Setting (see figure T2)
- Adjusting the right-hand laser beam:
Turn the right-hand set screw (68) using the hex key (18) until the entire length of the right-hand laser beam is flush with the cutting line marked on the workpiece. This also moves the left-hand laser beam.
One rotation anticlockwise moves the laser beam from left to right; one rotation clockwise moves the laser beam from right to left. - Adjusting the left-hand laser beam:
Turn the left-hand set screw (68) using the hex key (18) until the left-hand laser beam is the same distance away from the cutting line marked on the workpiece as the right-hand laser beam.
One rotation anticlockwise moves the laser beam from left to right; one rotation clockwise moves the laser beam from right to left.
Setting the Standard 0^ Bevel Angle
- Bring the power tool into the transport position.
Turn the saw table (42) to the 0^ detent (15). The lever (13) must be felt to engage in the detent.
Checking (see figure U1)
- Set an angle gauge to 90^ and place it on the saw table (42).
30 | English
The leg of the angle gauge must be flush with the saw blade (44) along its entire length.
Setting (see figure U2)
- Loosen the clamping handle (14).
- Loosen the two set screws (69) (by at least one turn) using a socket spanner (10 mm).
- Loosen the set screw (71) (by approx. three turns) using the hex key (4 mm) (17).
- Tighten or loosen the set screw (70) using the hex key (4 mm) (17) until the leg of the angle gauge is flush with the saw blade along its entire length.
- Retighten the clamping handle (14). Then tighten the set screw (71) followed by the set screws (69).
If the angle indicators (37) and (21) are not in line with the 0^ marks on the scale (36) following adjustment, loosen the fastening screws on the angle indicators using a cross-headed screwdriver and align the angle indicators with the 0^ marks.
Setting the Standard 45^ Mitre Angle (left)
- Bring the power tool into the work position.
Turn the saw table (42) to the 0^ detent (15). The lever (13) must be felt to engage in the detent. - Pull the left-hand adjustable fence (6) all the way out.
- Loosen the clamping handle (14) and swivel the glide arm to the left stop (45^) by the handle (1).
Checking (see figure V1)
- Set an angle gauge to 45^ and place it on the saw table (42).
The leg of the angle gauge must be flush with the saw blade (44) along its entire length.
Setting (see figure V2)
- Tighten or loosen the set screw (72) using an open-ended spanner (8 mm) until the leg of the angle gauge is flush with the saw blade along its entire length.
- Retighten the clamping handle (14).
If the angle indicators (37) and (21) are not in line with the 45^ marks on the scale (36) following adjustment, first check the 0^ setting for the bevel angle and the angle indicators once more. Then repeat the adjustment of the 45^ bevel angle.
Setting the Standard 45^ Mitre Angle (right)
- Bring the power tool into the work position.
Turn the saw table (42) to the 0^ detent (15). The lever (13) must be felt to engage in the detent. - Pull the right-hand adjustable fence (6) all the way out.
- Loosen the clamping handle (14).
- Use the handle (1) to tilt the glide arm slightly to the left from the 0^ position and turn the rotary knob (43) until the right-hand bevel angle range is shown.
- Swivel the glide arm to the right stop (45^) by the handle (1).
Checking (see figure W1)
- Set an angle gauge to 135^ and place it on the saw table (42).
The leg of the angle gauge must be flush with the saw blade (44) along its entire length.
Setting (see figure W2)
- Tighten or loosen the set screw (73) using an open-ended spanner (8 mm) until the leg of the angle gauge is flush with the saw blade along its entire length.
- Retighten the clamping handle (14).
If the angle indicators (37) and (21) are not in line with the 45^ marks on the scale (36) following adjustment, first check the 0^ setting for the bevel angle and the angle indicators once more. Then repeat the adjustment of the 45^ bevel angle.
Aligning the scale for mitre angles
- Bring the power tool into the work position.
Turn the saw table (42) to the 0^ detent (15). The lever (13) must be felt to engage in the detent.
Checking (see figure X1)
- Set an angle gauge to 90^ and position it between the fence (7) and the saw blade (44) on the saw table (42). The leg of the angle gauge must be flush with the saw blade (44) along its entire length.
Setting (see figure X2)
- Loosen all four set screws (74) using the hex key (4 mm) (17) and turn the saw table (42) together with the scale (41) until the leg of the angle gauge is flush with the saw blade along its entire length.
- Re-tighten the screws again.
If the angle indicator (64) is not aligned with the 0^ mark on the scale (41) following adjustment, loosen the screw (75) using a cross-headed screwdriver and align the angle indicator along the 0^ mark.
Adjusting the Clamping Force of the Clamping Handle (14) (see figure Y)
The clamping force of the clamping handle (14) can be adjusted.
Checking
- The clamping force of the clamping handle must hold the glide arm securely in place at any bevel angle.
Setting
- Loosen the clamping handle (14).
- Use a socket spanner (17 mm) to turn the set screw (76) anticlockwise to reduce the clamping force or clockwise to increase the clamping force.
- Set a bevel angle, retighten the clamping handle (14) and check whether the required clamping force has been reached.
Transport (see figure 2)
Before transporting the power tool, the following steps must be carried out:
- Slide the glide arm (34) all the way back and secure it in this position.
English | 31
- Make sure that the depth stop (28) is pressed all the way in and that the adjusting screw (27) fits through the recess without touching the depth stop when moving the glide arm.
Guide the glide arm downwards until you can press the transport safety lock (35) all the way in - Slide the saw table extensions (8) all the way in.
- Set the bevel angle to 0^ and tighten the clamping handle (14).
- Turn the saw table (42) as far as possible to the left and tighten the locking knob (12).
- Remove all accessories that cannot be securely fitted to the power tool.
- If possible, transport unused saw blades in an enclosed container.
- For transport, hold the power tool by the recessed handles (16) on either side of the saw table.
- When transporting the power tool, only use the transport fixtures. Never carry the power tool by the protective devices, the glide arm or the handle.
Maintenance and servicing
Maintenance and Cleaning
- Remove the battery from the power tool before carrying out work on the power tool (e.g. maintenance, changing tool, etc.). The battery should also be removed for transport and storage. There is risk of injury from unintentionally pressing the on/off switch.
To ensure safe and efficient operation, always keep the power tool and the ventilation slots clean.
The retracting blade guard must always be able to move freely and retract automatically. It is therefore important to keep the area around the retracting blade guard clean at all times.
Always remove dust and chips after working by blowing out with compressed air or using a brush.
Clean the guide roller (20) regularly.
Accessories
| Article number | |
| Dust bag 1 609 B05 010 | |
| GTA 2500 W saw stand 0 601 B12 100 | |
| GTA 2500 Compact saw stand 0 601 B12 400 | |
| GTA 2600 saw stand 0 601 B12 300 | |
| GTA 3800 saw stand 0 601 B24 000 | |
| 3 601 M43 000: Saw blades for wood and fibreboard, panels and strips | |
| Standard for Wood | 2 608 837 741 |
| 305 x 2.2/1.6 x 30 mm, 40 teeth | |
| Standard for Wood | 2 608 837 742 |
| 305 x 2.2/1.6 x 30 mm, 60 teeth | |
| Article number | |
| Standard for Wood305 x 2.2/1.6 x 30 mm, 96 teeth | 2 608 837 744 |
| Expert for Wood305 x 2.2/1.6 x 30 mm, 42 teeth | 2 608 644 527 |
| Expert for Wood305 x 2.2/1.6 x 30 mm, 60 teeth | 2 608 644 528 |
| Expert for Wood305 x 2.2/1.6 x 30 mm, 96 teeth | 2 608 644 529 |
| 3 601 M43 000: Saw blades for aluminium | |
| Standard for Aluminium305 x 2.4/1.8 x 30 mm, 96 teeth | 2 608 837 782 |
| Expert for Aluminium305 x 2.4/1.8 x 30 mm, 96 teeth | 2 608 644 547 |
| 3 601 M43 000: Saw blades for fibre-cement plates | |
| Expert for Fibre Cement305 x 2.2/1.6 x 30 mm, 8 teeth | 2 608 644 559 |
After-Sales Service and Application Service
Our after-sales service responds to your questions concerning maintenance and repair of your product as well as spare parts. You can find explosion drawings and information on spare parts at: www.bosch-pt.com
The Bosch product use advice team will be happy to help you with any questions about our products and their accessories.
In all correspondence and spare parts orders, please always include the 10-digit article number given on the nameplate of the product.
Malaysia
Robert Bosch Sdn. Bhd.(220975-V) PT/SMY
No.8A,Jalan 13/6
46200 Petaling Jaya
Selangor
Tel.: (03) 79663194
Toll-Free: 1800 880188
Fax: (03) 79583838
E-Mail: kiathoe.chong@my.bosch.com
www.bosch-pt.com.my
You can find further service addresses at:
www.bosch-pt.com/serviceaddresses
Transport
The contained lithium-ion batteries are subject to the Dangerous Goods Legislation requirements. The batteries are suitable for road-transport by the user without further restrictions.
When shipping by third parties (e.g.: by air transport or forwarding agency), special requirements on packaging and labelling must be observed. For preparation of the item being shipped, consulting an expert for hazardous material is required.
Dispatch battery packs only when the housing is undamaged. Tape or mask off open contacts and pack up the bat
32 | Français
terry in such a manner that it cannot move around in the packaging. Please also observe the possibility of more detailed national regulations.

Power tools, rechargeable batteries, accessories and packaging should be sorted for environmental-friendly recycling.
Do not dispose of power tools and batteries/re-chargeable batteries into household waste!
Battery packs/batteries:
Li-ion:
Please observe the notes in the section on transport (see "Transport", page 31).
Français
(GTA 2500 W, GTA 2500 Compact, GTA 2600, GTA 3800)
Transport (voir figure Z)
Robert Bosch Morocco SARL
53, Rue Lieutenant Mahmoud Mohamed
20300 Casablanca
Tel.: +212529314327
E-Mail: sav.outillage@ma.bosch.com
www.bosch-pt.com/serviceaddresses
Transport
(GTA 2500 W, GTA 2500 Compact, GTA 2600, GTA 3800)
www.bosch-pt.com/serviceaddresses
Transporte
(GTA 2500 W, GTA 2500 Compact, GTA 2600, GTA 3800)
Calle Robert Bosch No. 405
C.P. 50071 Zona Industrial, Toluca - Estado de Mexico
Tel.: (52) 55 528430-62
Tel.: 800 6271286
www.bosch-pt.com/serviceaddresses
Transporte
(GTA 2500 W, GTA 2500 Compact, GTA 2600, GTA 3800)
www.bosch-pt.com/serviceaddresses
Transporte
(GTA 2500 W, GTA 2500 Compact, GTA 2600, GTA 3800)
www.bosch-pt.com/serviceaddresses
搬运
(GTA 2500 W, GTA 2500 Compact, GTA 2600, GTA 3800)
www.bosch-pt.com/serviceaddresses
搬運
"w"w"lwn"luununueu w"lnwn
wnnnnwnnuwauwauwauwauwauwauwauwauwauwauwauwauwauwauwauwauwauwauwauwauwauwauwauwauwauwauwauwauwauwauwauwauwauwauwauwauwauwauwauwauwauwauwauwauwauwauwauwauwauwauw
aannnnnnaanennnnnnnnnn
inannnnnnaaennnnnnaeaaanen
aalwauu uuuuunnulwauu uuuu uuuu uuuu uuuu uuuu uuuu uuuu uuuu uuuu uuuu uuuu uuuu uuuu uuuu uuuu uuuu uuuu uuuu uuuu uuuu uuuu uuuu uuuu uuuu uuuu uuuu uuuu uuuu uuuu uuuu uuuu uuuu uuuu uuu uuuu uuuu uuuu uuuu uuuu uuuu uuuu uuuu uuuu uuuu uuuu uuuu uuuu uuuu uuuu uuuu uuuu uuuu uuuu uuuu uuuu uuuu uuuu uuuu uuuu uuuu uuuu uuuu uuuu uuuu uuuu uuuu uuuu
yauuovnu uuvnuaugnn
nannnnnaaunnnnnnnnnnnnnnnnnnnnnnnnnnnnnnnnnnnnnnnnnnnnnnnnnnnnnnnnnnnnnnnnnnnnnnnnnnnnnnnnnnnnnnnnnnnnnnnnnnnnnnnnnnn
aannnnnnaanennn
1 1
nauuunnnnnnnnnnnnnnnnnnnnnnnnnnnnnnnnnnnnnnnnnnnnnnnnnnnnnnnnnnnnnnnnnnnnnnnnnnnnnnnnnnnnnnnnnnnnnnnnnnnnnnnnnnnnnnnnnnnnnnnnnnnnnnnnnnnnnnnnnnnnnnnnnnnnnnnnn
auiuauovulwngnduwaaayuanuundu nnunuunnuuovolwnnnaeannnnn nwn
aannnnnnaanennnnnnae aannnnnnnnnnnne
1 1
nlaanrannnnnaaennnnnnae nnnnnnnae nnnnnnnae nnnnnnnae nnnnnnnae nnnnnnnae nnnnnnnae nnnnnnnae nnnnnnnae nnnnnnnae nnnnnnnae nnnnnnnae nnnnnnnae nnnnnnnae nnnnnnnae nnnnnnnae nnnnnnnae nnnnnnnaee
7777777777
nwnnnnnaaannnnnnaanennnnnnnnnnnnnnnnnnnnnnnnnnnnnnnnnnnnnnnnnnnnnnnnnnnnnnnnnnnnnnnnnnnnnnnnnnnnnnnnnnnnnnnnnnnnnnnnnnnnnnnnnnnnnnnnnnnnnnnnnnnnnnnnnnnnnnnnnnnnn nn nannnnaaannnnaannnnaanannnnaanannnnaanannnnaanannnnaanannnnaanannnnaanannnnaanannnnaanannnnaanannnnaanannnnaanannnnaanannnnaanannnnaanannnnaanannnnaanannnnaanannnnaanannnnaanannnnaanannnnaanannnnaanannnnaanannnnaanannnna an annnannee
Jnunnnnnae nnnnne nnne ne nnnnne nnnnne nnnnne nnnnne nnnnne nnnnne nnnnne nnnnne nnnnne nnnnne nnnnne nnnnne nnnnne nnnnne nnnnne nnnnne nnnnne nnnnne nnnnne nnnnne nnnnne nnnnne nnnnne nnnnne nnnnne nnnnnee
Jauunrnnnnaaannnuuulnuu aannnnuuulna
134nnu
Wu /wouwuun wuaanauva nwnnnaaun nn nnnnnae
Uunuovnuuuvnuuuvnuuauuuuuaaannnnaa uunuuvnuuulwunuunuunuunuunuunuunuunuunuunuunuunuunuunuunuunuunuunuunu
aunnnaanannnnnnaanennnnnnaanannnnnnaanannnnnnaanannnnnnaanannnnnnaanannnnnnaanannnnnnaanannnnnnaanannnnnnaanannnnnnaanannnnnnaanannnnnnaanannnnnnaanannnnnnaanannnnnnaanannnnnnaanannnnnnaanannnnnnaanannnnnnaanannnnnnaanannnnnnaanennnnnnaanannnnnnaanannnnnnaanannnnnnaanannnnnnaanannnnnnaanannnnnnaanannnnnnaanannnnnnaanannnnnnaanannnnnnaanannnnnnaanannnnnnaanannnnnnaanannnnnnaanannnnnnaanannnnnnaanannnnnnaanann
Hnnaaannnnnnaan ane nnne nnnnnaan ane annnnnnaan ane ane ane ane ane ane ane ane ane ane ane ane ane ane ane ane ane ane ane ane ane ane ane ane ane ane ane ane ane ane ane ane ane ane ane ane ane ane ane ane
nnaaovolwnuovnnnnuovnu nnnnnae nnnuuauu uuuuauuauuauuauuauuauuauuauuauuauuauuauuauuauuauuauuauuuuuuuuuuuuuuuuuuuuuuuuuuuuuuuuuuuuuuuuuuuuuuuuuuuuuuuuuuuuuuuuuuuuuuuuuuuuuuuuuuuuuuuuuuuuuuuuuuuuuuuuuuuuuuuuuuuuuuuuuuuuuuuuuuuuuuuuuuuuuuuuuuuuuuuuuuuuuuuuuuuuuuuuuuuuuuuuuuuuuuuuuuuuuuuuuuuuuuuUU
y
nnaaannnnnne nolw
aovnuuauuauuulwunlauuulwunn novvnuuunnuuuvnu uauuulwunn nnnuuul
aalwaaalwaaanranaanranaanranaanranaanranaanranaanranaanranaanranaanranaanranaanranaanranaanranaanranaanranaanranaanranaanranaanranaanranaanranaanranaanranaanranaanranaanranaanranaanranaanranaanranaanranaanranaanrana an
nauuunnuuunnuuunnuuuu uuuu
aannnnae aen nnnnne eanennnne ennnnne ane annnnnne ane ane ane ane ane ane ane ane ane ane ane ane ane ane ane ane ane ane ane ane ane ane ane ane ane ane ane ane ane ane ane ane ane ane ane ane ane ane ane ane
Uunnnnnaaalwwnnnnaanennnnae nannnnnnaaannnnnnaaannnnnnaaannnnnnaaannnnnnaaannnnnnaaannnnnnaaannnnnnaaannnnnnaaannnnnnaaannnnnnaaannnnnnaaannnnnnaaannnnnnaaannnnnnaaannnnnnaaannnnnnaaannnnnnaaannnnnnaaannnnnnaaannnnnnaanennnnaaannnnnnaaannnnnnaaannnnnnaaannnnnnaaannnnnnaaannnnnnaaannnnnnaaannnnnnaaannnnnnaaannnnnnaaannnnnnaaannnnnnaaannnnnnaaannnnnnaaannnnnnaaannnnnnaaannnnnnaaannnnnnaaannnnnnaaann
Iaonnnnnaanennnnnnae annnnnne aannn nnnnnnnaaannnnnnaaannnnnnaaannnnnnaaannnnnnaaannnnnnaaannnnnnaaannnnnnaaannnnnnaaannnnnnaaannnnnnaaannnnnnaaannnnnnaaannnnnnaaannnnnnaaannnnnnaaannnnnnaaannnnnnaaannnnnnaaannnnnnaaannnnnnaaennnnnnaaannnnnnaaannnnnnaaannnnnnaaannnnnnaaannnnnnaaannnnnnaaannnnnnaaannnnnnaaannnnnnaaannnnnnaaannnnnnaaannnnnnaaannnnnnaaannnnnnaaannnnnnaaannnnnnaaannnnnnaaannnnnnaaannnnnnaa
aannnnnnaanennnnnnnnnnnnnnnnnnnnnnnnnnnnnnnnnnnnnnnnnnnnnnnnnnnnnnnnnnnnnnnnnnnnnnnnnnnnnnnnnnnnnnnnnnnnnnnnnnnnnnnnnnnnnnnnnnnnnnnnnnnnnn
nnaaannnnnnaeennnnnne
Wnwnnnnnaeennnnnne nnnnnnne nnne nnnnnnne nnnnnnne nnnnnnne nnnnnnne nnnnnnne nnnnnnne nnnnnnne nnnnnnne nnnnnnne nnnnnnne nnnnnnne nnnnnnne nnnnnnne nnnnnnne nnnnnnne nnnnnnne nnnnnnne nnnnnnne nnnnnnne nnnnnnne nnnnnnee
1nnaalwwnnnnaaennnnnnaa nnnn nn nnnnnnnnnnnnnnnnnnnnnnnnnnnnnnnnnnnnnnnnnnnnnnnnnnnnnnnnnnnnnnnnnnnnnnnnnnnnnnnnnnnnnnnnnnnnnnnnnnnnnnnnnnnnnnn
auiuunnnnnaeauu uinnnuuuaaunu uannnuuueauu uuuuauuauu uuuuuuuuuuuuuuuuuuuuuuuuuuuuuuuuuuuuuuuuuuuuuuuuuuuuuuuuuuuuuuuuuuuuuuuuuuuuuuuuuuuuuuuuuuuuuuuuuuuuuuuuuuuuuuuuuuuuuuuuuuuuuuuuuuuuuuuuuuuuuuuuuuuuuuuuuuuuuuuuuuuuuuuuuuuuuuuuuuuuuuuuuuuuuuuuuuuuuuuuuUU
nnaaannnnnnaananaananaananaananaananaananaananaananaananaananaananaananaananaananaananaananaananaananaananaananaananaananaananaananaananaananaananaananaananaananaananaananaananaananaananaananaananaananaananaananaananaananaananaananaananaananaananaananaananaananaanaraannnna
y
130°C
1 11111111111111111111111111111111111111111
m
aovvovwovwnnnnannnnnna wouuauunnuau nolwlnnau uwwu uanuaunnuuulnnae owlwuguanwaa
y
aannnnnnaananaananaananaananaan
aannnnnnaan an annnnnnaan an nnnnnaan an nnnnnnnaan an nnnnnnaan an nnnnnnnaan an nnnnnnnaan an nnnnnnnaan an nnnnnnnaan an nnnnnnnaan an nnnnnnnaan an nnnnnnnaan an nnnnnnnaan an nnnnnnnaan an nnnnnnnaan an nnnnnnnaan an nnnnnnnaan an nnnnnnnaan an nnnnnnnaan an nnnnnnnnaan an nnnnnnnaan an nnnnnnnaan an nnnnnnnaan an nnnnnnnaan an nnnnnnnaan an nnnnnnnaan an nnnnnnnaan an nnnnnnnaan an nnnnnnnaan an nnnnnnnaan an nnnnnnnaan an nnnnnnnaan an nennnnnnaan an nannnnnnaan an nannnnnnaan an nannnnnnaan an nannnnnnaan an
nululalnlunauuunnuuunlunrnnnnae nannnnnne nnnnnnnnne nnnnnnnnne nnnnnnnnne nnnnnnnnne nnnnnnnnne nnnnnnnnne nnnnnnnnne nnnnnnnnne nnnnnnnnne nnnnnnnnne nnnnnnnnne nnnnnnnnne nnnnnnnnne nnnnnnnnne nnnnnnnnne nnnnnnnnne nnnnnnnnne
yuvnuovu uuaqunauunuunnuu nuuuza zao uauuuvuunuuluuuauanu "nui" auuunu uuuunnnnaunu uauuulnueunuunnuuunnuu
nnaaannnnnnaananaananaananaananaananaananaananaananaananaananaananaananaananaananaananaananaananaananaananaananaananaananaananaananaananaananaananaananaananaananaananaananaananaananaananaananaananaananaananaananaananaananaananaananaananaananaananaananaananaananaanaraannnnaaaannnnnnaaaannnnnnaaaannnnnnaaaannnnnnaaaannnnnnaaaannnnnnaaaannnnnnaaaannnnnnaaaannnnnnaaaannnnnnaaaannnnnnaaaannnnnnaaaannnnnnaaaannnnnnaaaannnnnnaaaannnnnnaaaannnnnnaaaannnnnnaaaannnnnnaaaannnnnnaaaann
yunuununununununununununununununununununununununununununununununununununununununununununununun
yauuunnuu uuuuunnuu uuuuuvu uuuu uuuu uuuu uuuu uuuu uuuu uuuu uuuu uuuu uuuu uuuu uuuu uuuu uuuu uuuu uuuu uuuu uuuu uuuu uuuu uuuu uuuu uuuu uuuu uuuu uuuu uuuu uuuu uuuu uuuu uuuu uuuu uuuu uuu uuuu uuuu uuuu uuuu uuuu uuuu uuuu uuuu uuuu uuuu uuuu uuuu uuuu uuuu uuuu uuuu uuuu uuuu uuuu uuuu uuuu uuuu
Tnannnnnnnnnnnnnnnnnnnnnnnnnnnnnnnnnnnnnnnnnnnnnnnnnnnnnnnnnnnnnnnnnnnnnnnnnnnnnnnnnnnnnnnnnnnnnnnnnnnnnnnnnnnnnnnnnnnnnnnnnnnnnnnnnnnnnnnnnnnnnnnnnnnnnnnnnnnnnnn nn nannn nn nannn nn nannn nn nannn nn nannn nn nannn nn nannn nn nannn nn nannn nn nannn nn nannn nn nannn nn nannn nn nannn nn nannn nn nannn nn nannn nn nannn nn nannn nn nannn nn nannn nn nannn nn nannn nn nannn nn nannn nn nennn nn nannn nn nannn nn nannn nn nannn nn nannn nn nannn nn nannn nn nannn nn nannn nn nannn nn nannn nn nannn nn nannn nn nannn nn nannn nn nannn nn nannn nn nannn nn nannn nn nannn nn nannn nn nannn nn nannn nn nannn nn n ann
aaiiiaaiinaiinaiinaiinaiinaiinaiinaiinaiinaiinaiinaiinaiinaiinaiinaiinaiinaiinaiinaiinaiinaiinaiinaiinaiinaiinaiinai
H
nauuunnuanannnnnnaaannnnnnnnnnnnnnnnnnnnnnnnnnnnnnnnnnnnnnnnnnnnnnnnnnnnnnnnnnnnnnnnnnnnnnnnnnnnnnnnnnnnnnnnnnnnnnnnnnnnnnnnnnnnnnnnnnnnnnnnnnnnnnnnnnnnnnnnnnnnnnnnnnnnnn
77777777777777777777777777777777777777777777777777777777777
1
136
nunnnnnnnnnnnnnnnnnnnnnnnnnnnnnnnnnnnnnnnnnnnnnnnnnnnnnnnnnnnnnnnnnnnnnnnnnnnnnnnnnnnnnnnnnnnnnnnnnnnnnnnnnnnnnnnnnnnnnnnnnnnnnnnnnnnnnnnnnnnnnnnnnnnnnnnnnnnnnnnnnnnnnnnnnnnnn
Duaanannnanaanannnnnaaannnnnnaan annnnnnnnnnnnnnnnnnnnnnnnnnnnnnnnnnnnnnnnnnnnnnnnnnnnnnnnnnnnnnnnnnnnnnnnnnnnnnnnnnnnnnnnnnnnnnnnnnnnnnnnnnnnnnnnnnnnnnnnnnnnnnnnnnnnnnnnnnnnnn
nauuunnuuunnuuunnuuunnuuunnuuunnuuunnuuunnuuunnuuunnuuunnuuunnuuunnuuunnuuunnuuunnuuunnuuunnuuunnuuunnuuunnuuunnuuunnuuunnuuunnuuunnuuunnuuunnuuunnuuunnuuunnuuunnuuunnuuunnu
yauuun
nunnuuunnuuunnuunnuunnuunnuunnuunnuunnuunnuunnuunnuunnuunnuunnuunnuunnuunnuunnuunnuunnuunnuunnuunnuunnuunnuunnuunnuunnuunnuunnuunnuunnuunnuunnuunnuunnuunnu
aannnnnnaan anananaan anan anan anan anan anan anan anan anan anan anan anan anan anan anan anan anan anan anan anan anan anan anan anan anan anan anan anan anan anan anan anan anan anan anan
yauuunnnnnaaunnnnnaaunnnnnaaunnnnnaaunnnnnaaunnnnnaaunnnnnaaunnnnnaaunnnnnaaunnnnnaaunnnnnaaunnnnnaaunnnnnaaunnnnnaaunnnnnaaunnnnnaaunnnnnaaunnnnnaaunnnnnaaunnnnnaaunnnnnaanannnnnnaaunnnnnaaunnnnnaaunnnnnaaunnnnnaaunnnnnaaunnnnnaaunnnnnaaunnnnnaaunnnnnaaunnnnnaaunnnnnaaunnnnnaaunnnnnaaunnnnnaaunnnnnaaunnnnnaaunnnnnaaunnnnnaaunnnnnaa
aunnnnnaeannnnnneennnnnneennnnnne nnnn
nnaannnnnnaaennnnnnae nnnnnnnnnnnnne
yauuunnnaaunnuuunnnnun
Speed Steel, HSS)
1uuaaunauauauuunnuuunnuuauu (uuuuuuuuuuuuuuuu) uuuuuuuuuuuuu
y
aunnnnnaanannnnnnae annnnaaennnnnne aannnnnnnnnnnnnnnnnnnnnnnnnnnnnnnnnnnnnnnnnnnnnnnnnnnnnnnnnnnnnnnnnnnnnnnnnnnnnnnnnnnnnnnnnnnnnnnnnnnnnnnnnnnnnnnnnnnnnnnnnnnnnnnnnnnnnn
aannnnnnaa aannnnnnaaennnnnnae
aannnnnnaananaan anananaananaananaananaananaananaananaananaananaananaananaananaananaananaananaananaananaananaananaananaananaananaananaananaananaananaananaananaananaananaananaananaananaananaananaananaananaananaananaananaananaananaananaananaananaananaananaananaananaananaan anaannannannannannannannannannannannannannannannannannannannannannannannannannannannannannannannannannannannannannannannannannannannannannannannannannannannannannannannannannannannannannannannannannannannannannannannannannannannannann
A
nunauu u. u. uu uuuu uuuu uuuu uuuu uuuu uuuu uuuu uuuu uuuu uuuu uuuu uuuu uuuu uuuu uuuu uuuu uuuu uuuu uuuu uuuu uuuu uuuu uuuu uuuu uuuu uuuu uuuu uuuu uuuu uuuu uuuu uuuu uuuu uuu uuuu uuuu uuuu uuuu uuuu uuuu uuuu uuuu uuuu uuuu uuuu
1uuaaunauanr:uuannnunnuuunnnu uunnuuunuunnuunnuunnuunnu
unuunnnnnaaannnnnnaa a n. u. uuuuunnnnnaananaanauauauauauauuauuauuauuuuuuuuuuuuuuuuuuuuuuuuuuuuuuuuuuuuuuuuuuuuuuuuuuuuuuuuuuuuuuuuuuuuuuuuuuuuuuuuuuuuuuuuuuuuuuuuuuuuuuuuuuuuuuuuuuuuuuuuuuuuuuuuuuuuuuuuuuuuuuuuuuuuuuuuuuuuuuuuuuuuuuuuuuuuuuuuuuuuuuuuuuuuuuuuuuuuuuuuuUU
aannnnnnaeennnnnne nnnnne
1 1
a
aannnnnnaananaananaananaananaananaananaananaananaananaananaananaananaananaananaananaananaananaananaananaananaananaananaananaananaananaananaananaananaananaananaananaananaananaananaananaananaananaananaananaananaananaananaananaananaananaananaananaananaananaananaanara an
777777777

nunnnnnnnnnnnnnnnnnnnnnnnnnnnnnnnnnnnnnnnnnnnnnnnnnnnnnnnnnnnnnnnnnnnnnnnnnnnnnnnnnnnnnnnnnnnnnnnnnnnnnnnnnnnnnnnnnnnnnnnnnnnnnnnnnnnnnnnnnnnnnnnnnnnnn
nouuunnnnnnnnnnnnnnnnnnnnnnnnnnnnnnnnnnnnnnnnnnnnnnnnnnnnnnnnnnnnnnnnnnnnnnnnnnnnnnnnnnnnnnnnnnnnnnnnnnnnnnnnnnnnnnnnnnnnnnnnnnnnnnnnnnnnn
- uunuunununununununununununununununununununununununununununununununununununun
-(12)
-(17)
- 18
-uuu(19)
-SDS (23)
-
HnHnHnHnHnHnHnHnHnHnHnHnHnHnHnHnHnHnHnHnHnHnHnHnHnHnHnHnHnHnHnHnHnHnHnHnHnHnHnHnHnHnHnHnHnHnHnHnHnHnH
nunnnnnae nnne nnnnne ne nnnnne nnnnne nnnnne nnnnne nnnnne nnnnne nnnnne nnnnne nnnnne nnnnne nnnnne nnnnne nnnnne nnnnne nnnnne nnnnne nnnnne nnnnne nnnnne nnnnne nnnnne nnnnne nnnnne nnnnne nnnnne nnnnnee nnnnne nnnnne nnnnne nnnnne nnnnne nnnnne nnnnne nnnnne nnnnne nnnnne nnnnne nnnnne nnnnne nnnnne nnnnne nnnnne nnnnne nnnnne nnnnne nnnnne nnnnne nnnnne nnnnne nannnee
- -13:7n7y(77a:8u.)
-1uunau 12uununun uunununun (un: 10nn. nann 17nn.)
Wu Bluetooth® Low Energy Module GCY 42
aannnnnnaeennnnae nnnnnae Btueoth Low Energy Module GCY 42 nannnnnnae ananrnnn
dunun
-Bluetooth® Low Energy Module GCY 42 (31)
- nnnnns nnnnns nnnnssn 8000000000000000000000000000000000000000000000000000000000000000000000000000000000000
-(31)
nanaananaanuBleetoh Low Energy Module GCY 42 mawalwnaanlul wannwnnnnnaaun nn nnnnnnnnnnnnnnnnnnnnnnnnnnnnnnnnnnnnnnnnnnnnnnnnnnnnnnnnnnnnnnnnnnnnnnnnnnnnnnnnnnnnnnnnnnnnnnnnnnnnnnnnnnnnnnnnnnnnnnnnnnn
nnaaannnnn
Wnwnnnn nn nnnnnnnnnnnnnnnnnnnnnnnnnnnnnnnnnnnnnnnnnnnnnnnnnnnnnnnnnnnnnnnnnnnnnnnnnnnnnnnnnnnnnnnnnnnnnnnnnnnnnnnnnnnnnnnnnnnnnnnnnnnnnnnnnnnnnnnnnnnnnnnnnnnnnnnnn
In LED 1000000000000000000000000000000000000000000000000000000000
nnaaannnnnnaanennnnae nnnnnnnnnnnnnnnnnnnnnnnnnnnnnnnnnnnnnnnnnnnnnnnnnnnnnnnnnnnnnnnnnnnnnnnnnnnnn
naannnnnnuuulwauanrnnnnaaunnnnnaa nILED uuuuuaaennnnnnnnnnnnnnnnnnnnnnnnnnnnnnnnnnnnnnnnnnnnnnnnnnnnnnnnnnnnnnnnnnnnnnnnnnnnnnnnnnnnnnnnnnnnnnnnnnnnnnnnnnnnnnnnnnnnnnnnnnnnnnnnnnnnnn
WuTH: 1nunnnnnnnnnnnn User Interface (3)
GBA 18V...


LED
3×60-100%
Wnauuunnuuulnaaunnu nauuunnuu uuuuuuuuuuuuuuuuuuuuuuuuuuuuuuuuuuuuuuuuuuuuuuuuuuuuuuuuuuuuuuuuuuuuuuuuuuuuuuuuuuuuuuuuuuuuuuuuuuuuuuuuuuuuuuuuuuuuuuuuuuuuuuuuuuuuuuuuuuuuuuuuuuuuuuuuuuuuuuuuuuuuuuuuuuuuuuuuuuuuuuuuuuuuuuuuuuuUU
(GTA 2500 W, GTA 2500 Compact, GTA 2600, GTA 3800)
GTA 1
nnaaannnnnnaanennnnnnnnnnnnnnnnnnnnnnnnnnnnnnnnnnnnnnnnnnnnnnnnnnnnnnnnnnnnnnnnnnnnnnnnnnnnnnnnnnnnnnnnnnnnnnnnnnnnnnnnnnnnnnnnnnnnnnnnnnnnnnnnnnnnnnnnnnnnnnnnnnnnnnnnnnnnnnnnnn
1
-
nun/
nunnnnnae nnu nannnnnnae nnu nnu nnu nnu nnu nnu nnu nnu nnu nnu nnu nnu nnu nnu nnu nnu nnu nnu nnu nnu nnu nnu nnu nnu nnu nnu nnu nnu nnu nnu nnu nnu nnu nnu nnu nnu nnu nnu nnu nnu nnu nnu nnu nnu nnu nnu nnu nnu nnu nnu n\n\n
-13:100000000000000000000000000000000000000000000
- 1nnnnaaannnnaanennnnaananaananaananaananaananaananaananaananaananaananaananaananaananaananaananaananaananaananaananaananaananaananaananaananaananaananaananaananaananaananaananaananaananaananaananaananaananaananaananaananaananaananaananaananaananaananaananaananaananaananaanaraannnnaaa
aannnnnnaanennnnnne nwnnnnnnnnnnnnnnnnnnnnnnnnnnnnnnnnnnnnnnnnnnnnnnnnnnnnnnnnnnnnnnnnnnnnnnnnnnnnnnnnnnnnnnnnnnnnnnnnnnnnnnnnnnnnnnnnnnnnnnnnnnnnnnnnnnnnnnnnnnnnnnnnnnnnnnnn nn
aunnuuauuuaanuauuuuauuuuuuuuuuuuuuuuuuuuuuuuuuuuuuuuuuuuuuuuuuuuuuuuuuuuuuuuuuuuuuuuuuuuuuuuuuuuuuuuuuuuuuuuuuuuuuuuuuuuuuuuuuuuuuuuuuuuuuuuuuuuuuuuuuuuuuuuuuuuuuuuuuuuuuuuuuuuuuuuuuuuuuuuuuuuuuuuuuuuuuuuuuuUU
y
iow:ui
Wauunuuluaaauauanlalnnnnuwuu (wnvannrnuuul) uuuu uuuu uuuuuuuuuuuuuuuuuuuuuuuuuuuuuuuuuuuuuuuuuuuuuuuuuuuuuuuuuuuuuuuuuuuuuuuuuuuuuuuuuuuuuuuuuuuuuuuuuuuuuuuuuuuuuuuuuuuuuuuuuuuuuuuuuuuuuuuuuuuuuuuuuuuuuuuuuuuuuuuuuuuuuuuuuuuuuuuuuuuuuuuuuuuuuuuuuuuuuUU
nannnnnnnnnnnnnnnnnnnnnnnnnnnnnnnnnnnnnnnnnnnnnnnnnnnnnnnnnnnnnnnnnnnnnnnnnnnnnnnnnnnnnnnnnnnnnnnnnnnnnnnnnnnnnnnnnnnnnnnn
- nunuovnuulnuuuvnuu (5) uunnuu uauuunnuuuvnuu uuuu uuuu
- 152nuluulnuiunnuuauuulu (56)
-
55) uanwnnnnnu (54) nannn nn (53) uunu uunuunnnnnnnnnnnnnnnnnnnnnnnnnnnnnnnnnnnnnnnnnnnnnnnnnnnnnnnnnnnnnnnnnnnnnnnnnnnnnnnnnnnnnnnnnnnnnnnnnnnnnnnnnnnnnnnnnnnnnnnnnnnnnnnnnnnnnnnnnnnnnnnnn
mnnn nn SDs (nnnnna d)
anannnnaa annnnnnaa aenannnnnnae SDS (23) anannnnaa annnnnnaa anannnnae (28) anannnnaa annnnnnae SDS nnuu nnrnnnnae annnnnnae annnnnnae annnnnnae
mnnnnae
-
maunauuunau uauanlalnnnnuu (naunnuanuunu) uuuu uuuuuuuuuuuuuuuuuuuuuuuuuuuuuuuuuuuuuuuuuuuuuuuuuuuuuuuuuuuuuuuuuuuuuuuuuuuuuuuuuuuuuuuuuuuuuuuuuuuuuuuuuuuuuuuuuuuuuuuuuuuuuuuuuuuuuuuuuuuuuuuuuuuuuuuuuuuuuuuuuuuuuuuuuuuuuuuuuuuuuuuuuuuuuuuuuuuuuuuuuUU
nannnnnnae nn nnnnnaaee 2nne aenennnne
- nunuunnuuunuunuunnunu (5) uunun uunuunuunuunuunuunuunuunuunuunuunu
-uvuudnuuunnuuuuu (56)
- 55) uuaaSDS (23) nannnnn (53)uunuunuauuuuSDS luunnuuun
- 1
nui
aannnnnnaanennnnnnae nnnnnnnnnn nn nnnnnnnnnnnnnnnnnnnnnnnnnnnnnnnnnnnnnnnnnnnnnnnnnnnnnnnnnnnnnnnnnnnnnnnnnnnnnnnnnnnnnnnnnnnnnnnnnnnnnnnnnnnnnnnnnnnnnnnnnn
aannnnnnaaennnnn (nannnnnnaA)
(35)mnaananaananaananaananaananaananaananaananaananaananaananaananaananaananaananaananaananaananaananaananaananaananaananaananaananaananaananaananaananaananaananaananaananaananaananaananaananaananaananaananaananaananaananaananaananaananaananaananaananaananaan
nnae (chunwirnu)
mnuuunnuunnuunn (nuuunnuun) uuuuuuuuuuuuuuuuuuuuuuuuuuuuuuuuuuuuuuuuuuuuuuuuuuuuuuuuuuuuuuuuuuuuuuuuuuuuuuuuuuuuuuuuuuuuuuuuuuuuuuuuuuuuuuuuuuuuuuuuuuuuuuuuuuuuuuuuuuuuuuuuuuuuuuuuuuuuuuuuuuuuuuuuuuuuuuuuuuuuuuuuuuuuuuuuUU
-(6)
-(14)
-nyuuaueaou (34) 1yuaueaueaueaueaueaueaueaueaueaueaueaueaueaueaueaueaueaueaueaueaueaueaueaueaueaueaueaueaueaueaueaueaueaueaueaueaueaueaueaueaueaueaueaueaueaueaueaueaueaueaueaae
-uuuun (34) 1nunnu uanu nnu
nu (14) nnnnnnnnne
nuuuvnuuunnuuauuauu uuuuuuuuuuuuu
aannnnaananaananaananaananaananaananaananaananaananaananaananaananaananaananaananaananaananaananaananaananaananaananaananaananaananaananaananaananaananaananaananaananaananaananaananaananaananaananaananaananaananaananaananaananaananaananaananaananaananaananaanara
y
1
nwnnnn nnnnnnnnnnnnnnnnnnnnnnnnnnnnnnnnnnnnnnnnnnnnnnnnnnnnnnnnnnnnnnnnnnnnnnnnnnn
aannnnnnaananaananaananaananaanana
Wunun
u:
- n7an=1uuaa=
一 -
一
anuunnuuauu uuaa Bluetooth Low Energy Module GCY 42 nannnnnnae nnne
Wuuuauuunwuu (50) uuuuuuuuuuuuuuuuuuuuuuuuuuuuuuuuuuuuuuuuuuuuuuuuuuuuuuuuuuuuuuuuuuuuuuuuuuuuuuuuuuuuuuuuuuuuuuuuuuuuuuuuuuuuuuuuuuuuuuuuuuuuuuuuuuuuuuuuuuuuuuuuuuuuuuuuuuuuuuuuuuuuuuuuuuuuuuuuuuuuuuuuuuuuuuuuuuuuuUU
yuaununnnnnu
nunwnuunnuunnu
JUANODON (12) uanuunu (14) uuuu nnuaa
n(12)uunwuuuunuaa
unnnnnae nnne nnnnnae nnnnnae nnnnnae nnnnnae nnnnnae nnnnnae nnnnnae nnnnnae nnnnnae nnnnnae nnnnnae nnnnnae nnnnnae nnnnnae nnnnnae nnnnnae nnnnnae nnnnnae nnnnnae nnnnnae nnnnnaee
uovulwblueoht Low Energy Module GCY 42 uuvununununnuu uunnuuunununununununun unu. u.u uuuu
luuulnunnuuulnuuulnuu uluu uuuu uuuu uuuu uuuu uuuu uuuu uuuu uuuu uuuu uuuu uuuu uuuu uuuu uuuu uuuu uuuu uuuu uuuu uuuu uuuu uuuu uuuu uuuu uuuu uuuu uuuu uuuu uuuu uuuu uuuu uuuu uuuu uuuu uuuuu
-
nuiuuaunueaunuean:
-
nnuuunnuuunnuu (68) 7nuuunnuuunnuu (18) nuuunnuuunnuuunnuu uuuuuuuuuuuuuuuuuuuuuuuuuuuuuuuuuuuuuuuuuuuuuuuuuuuuuuuuuuuuuuuuuuuuuuuuuuuuuuuuuuuuuuuuuuuuuuuuuuuuuuuuuuuuuuuuuuuuuuuuuuuuuuuuuuuuuuuuuuuuuuuuuuuuuuuuuuuuuuuuuuuuuuuuuuuuuuuuuuuuuuuuuuuuuuuuuuuuuuuuuUU
nannuunnnnnnnnnn nn nnnnnnnnnnnnnnnnnnnnnnnnnnnnnnnnnnnnnnnnnnnnnnnnnnnnnnnnnnnnnnnnnnnnnnnnnnnnnnnnnnnnnnnnnnnnnnnnnnnnnnnnnnnnnnnnnnnnnnnnnnnnnnnnnnnnnnnnnnn
y
-
nuiuuaanruii
-
nnuuunnuuuuu (68) nuuunnuuunnuuu (18) uunnuunnuuuuuuuuuuuuuuuuuuuuuuuuuuuuuuuuuuuuuuuuuuuuuuuuuuuuuuuuuuuuuuuuuuuuuuuuuuuuuuuuuuuuuuuuuuuuuuuuuuuuuuuuuuuuuuuuuuuuuuuuuuuuuuuuuuuuuuuuuuuuuuuuuuuuuuuuuuuuuuuuuuuuuuuuuuuuuuuuuuuuuuuuuuuuuuuuuuuuuuuuuUU
manyulunumuunmnn
luuunuunuuuuuu (37) uu (21) luuuluuu u 45° wuuuunuuu (36) luuunuunuuuuu u 0° aunuuuuuuuuuuuuuuuuuuuuuuuuuuuuuuuuuuuuuuuuuuuuuuuuuuuuuuuuuuuuuuuuuuuuuuuuuuuuuuuuuuuuuuuuuuuuuuuuuuuuuuuuuuuuuuuuuuuuuuuuuuuuuuuuuuuuuuuuuuuuuuuuuuuuuuuuuuuuuuuuuuuuuuuuuuuuuuuuuuuuuuuuuuuuuuuu uu
45° (m)
-27nnaaunnnnnn
- nuiu (42) luuunnuynn (15) annu 0°
-(6)
- 14
- 1000000000000000000000000000000000000000000000000000000000000000000000000
-nyuunuaueaunnuu(1)wnnuu(45°)
nannnnn (nannnnnW1)
lununuunuunuunuunu (64) luangluuuaaun 0°
nuuunuunu (41) uuuuug (75) nn
nuuunuunu un uauuuuuuuuuuuuuuuuuuuuuuuuuuuuuuuuuuuuuuuuuuuuuuuuuuuuuuuuuuuuuuuuuuuuuuuuuuuuuuuuuuuuuuuuuuuuuuuuuuuuuuuuuuuuuuuuuuuuuuuuuuuuuuuuuuuuuuuuuuuuuuuuuuuuuuuuuuuuuuuuuuuuuuuuuuuuuuuuuuuuuuuuuuuuuuuuuuuuuuuuuUU
Keselamatan personnel
(GTA 2500 W, GTA 2500 Compact, GTA 2600, GTA 3800)
Palma Tower 10th Floor
Jalan RA Kartini II-S Kaveling 6
Pondok Pinang, Kebayoran Lama
www.bosch-pt.com/serviceaddresses
Transpor
(GTA 2500 W, GTA 2500 Compact, GTA 2600, GTA 3800)
Voi cac chan co the dieu chinh duoc chieu cao, giacua GTA Bosch tao duoc su vung chac cho dung cu dien khi dat tren bat ky be mat nao. Chi tietgia cong htro cua giacua duoc su dung de lam nen do cho vat gia cong dai.
Hay doc moi canh bao va huong dan dinh kemgia cua. Khong tuan thu cac canh bao an toan va huong dan co the dan den vioc bi dien giut, chay va/hoac gay ra thuong tich nghiem trong.
Lap rapgia cua dung cach truck hi gan dung cu dien. Su lap rapi hao hao la quan trong de ngan ngua nguy co bi sap.
-Gan lap dung cu dien len len giacu a tu the vancuyen.
Hut Dam/Bui
Mat bui tucac vat lieu ducc son phu ngoai co chu a
chi tren mot so loai go, khoang vat va kim loai co
the gay nguy hai den suc khoe con nguroi. Dung
cham hay hit thocac bui nay co the lam nguroi sur
dung hay dung gan bi di ung va/hoac gay nhiem
trung he hohap.
Môt sô mat bui cu the, vú du nuh bui gô sôi hay dαu, duçc xem lá chat gay ung thu, dac biét lá có lién quant dén cac chat phu gia dung xu ly gô (chat cromat, chat bao quán gô). Co the chi nén de tho chuyen mon gia cóng cac loai vát lieu co chuá amiäng.
-Cach xa o muc co the duoc, su dung he thong hut thich hop cho loai vat lieu.
-Tao khong khi thong thoang nao lam viec.
-Khuyén nghi nèn mang màn phong doc có bó loc cap P2.
Tuan thu cac qui dinh cua quoc gia ban lien quan den loai vat lieu gia cong.
Tranh khong de rac tich tu tai noi lam viec. Rac co the de dang bat lua.
Su hut bui/dam co the bi bui, dam hay cac manh nho cua vat gia cong lam cho tac nghen lai.
Tat dung cu dien va thao pin.
-Hay cho cho den khi luoi cua dung han.
-Xac dinh nguyen nhan lam tac nghen va chinh sua lai.
May Hút Bui Ngoài
Trén dαu nδi hút (26) ban cung co the lap môt voi hút bui (0 35 mm) dé hút.
-Ganonghutbui voiaodu noi hut (26).
May hut bui phai thich hop dang cho loai vat lieu dang gia cong.
Khi hut bui kho loai dac biét gay nguy hai dén suc khoe hoac gay ra ung thu, hyay sudung may hut bui loai chuyen dung.
Thao Khoa May (Vi Tri Hoat Dong)
- Day nhe can truot (34) xuong bang tay nam (1) de nhá khoa an toan dung khi di chuyen (35).
-Kéo khoa an toan dung khi di chuyen (35) rôi hān ra ngoài.
Day tu tu can truot (34) huong len tren.
Bao Vé An Toàn May (Vi Trí Di Chuyen)
Day can truot (34) hoan toan ra phia sau va co dinh no o vi tri nay.
Day can truot hóng xuǒng cho dén khi khoa an toàn dung khi di chuyén (35) co they hét vào bèn trong.
Huang dan chi tiét: (xem, Van chuyen (xem Hinh Z), Trang 186)
Khoa CAn Truot
Co the khoa co che truot cua can truot (34) nho su h tro cua can kep (25). Can truot co the nam o hai vi tri:
- Can truot duoc day hoan toan vê phia sau (décat d'ut doan)
- Can truot duoc kéo hoan toan vé phia truc (dé vān chuyén duoc gong gang)
www.bosch-pt.com/serviceaddresses
Vanhuyen
Pin co chu Li-Ion la doi tuo ng phai tuan theo cac qui dinh cua Phap Luat ve Hang Hoa Nguyen Hiem. Nguoi su dung co the v an chuyen pin hop khoi bang duong bo ma khong can them yeu cau nao khac.
Khi duoc van chuyen thong qua ben thu ba (vd.
v an chuyen bang dong hang khong hay dai ly giao
nhan), thai tuan theo cac yeu cau dac biét ve dong
goi va dan nhan. Thai tham v an chuyen gia ve
hang hoa nguy hiem khi chuan bi goi hang.
Chi gui pin hop khoi khi v o ngoai khong bi hu hong.
Dan bang keo hay che kin cac diem tiep xuc h va dong goi pin hop khoi theo cach sao cho pin khong the xedich khi nam trong bao bi. Ngoai ra, xin vui long chap hanh cac qui dinh chi tiét co the duoc bo sung them cua quoc gia.
188 | Tiēng Viét
Su thai bo

Dung cu dien, pin, phu kien va bao bi can duoc tai su dung theo quy dinh v mei truong.
Ban khong duoc ném dung cu dien v a pin vao thung racgia dinh!
Pin/ac quy:
Li-Ion:
Tuan tu nhung hong dan trong phan van chuyen (xem, Van chuyen, Trang 187).
Iooaal jno yolll Jaaowu yao
aJ 10000000000000000000000000000000000000000000000000
Uoal ju 10a caiaiJI JuiJ 0aLgU
Jol
oJl psswlg ala lo qilg ubjns 1s 100000000000000000000000000000000000000000000000000000000000000000000000000000000000000000000
Jg .aassssll aasll ljjj 1s j 4
aalalil jagl s Jd. aglg Ula lai
Jalal g jall Jo aaggl glios aasss
Jd ggl g jgllg jjI Jgll
jao aajg kll ooll Jaaai I ggb
J 1000000000000000000000000000000000000000000000000000000000000000000000
g,12uill g 1c liaoLaiy uylSJI. gJgJgJg
j 1000g 100000000000000000000000000000000000000000000000000
Jouy .aueuuljpeauuag J 1 1 1 1 1 1 1 1 1 1 1 1 1 1 1 1 1 1 1 1 1 1 1 1 1 1 1 1 1 1 1 1 1 1
J 8.aaiaaia aai jai J 100000000000000000000000000000000000000000000000000000000000
Jgllg baw jzj jI 1 qalaiw aiug aggo gil no sliq
bawl jzj pwl adw Jy .pW Jk
Lg yaiy g auiy jg klll pssu 1
jaii jaoi jaii jaoi bai 8
. dai aiaaaai ayuay iaiy oaiy
oaiy abwuy iaiy jiy g jay jay jay
jaydai jay
e o 1s i aui jy sll paaa 4
U
auiu jss sall aole uloi Ujdu
Jgallg Jolalg
A
. 10000000000000000000000000000000000000000000000000000
UaIg aJdI UaIaI IaI
g psslll (auijseSs) albdo aag
aigogall ayuus Ss sdd, auydill Ubsal
(auijseSs asu uU Ls abwlg) ayuueSs asu uU
uLs u) asy oogjoll ayuueSs ssll uug
.(auijseSs auiu
JusuI Jka Jlo
JUWdLgU 1JooJIuBjU
1gJgJgJgJgJgJgJgJg
g j g j l s k 1 k j k j k j k j k j k j k j k j k j k j k j k j k j k j k j k j k j k j k j k j k j k j k j k j k j k j k j k j k j k j k j k j k j k j k j k j
blll jLs, Jauu J So aaij Eaia Jn Jn Jn Jn Jn Jn Jn Jn Jn Jn Jn Jn Jn Jn Jn Jn Jn Jn Jn Jn Jn Jn Jn Jn Jn Jn Jn Jn Jn Jn Jn Jn
g aai jiaai jai paaai x
jai gai gai gai gai aai ai
aai jai gai aai i jai ai 13 jai ai
i i g i j i i i i i i i i i i i i i i i i i i i i i i i i i i i i i i i i i
eJwU wUJI A uWl (JUJI 3g0JI JUJIJI UJU.(HSS 3g)aJIJI AJguuu
Jsw 13 Jwai pds wai Ie loa J (jssu u Lao ylo) nnw wlaog awwiai juiiai Uai. gglglaill
g 9 g jj 1c cnnn w gwh bghw g jw g jwll aabg g jwll oaw .jwll oaiy coi y oaiy
gbalg
jaii jai jai jai jai jai jai jai jai jai jai jai jai jai jai jai jai jai jai jai jai jai jai jai jai jai jai jai jai jai jai jai jai jai jai jai jai jai jai jai jai jai jai jai jai jai jai jai jai jai jai jali jali jali jali jali jali jali jali jali jali jali jali jali jali jali jali jali jali jali jali jali jali jali jali jali jali jali jali
jgsl jf Cw ggl wJw
aJai
100aJjLjwaiIe
.0jaiIjgljlluiiaoi jao
4.
ggl gawgao jswll aebb c1s 1
wgaal waii plssuw Lbaa p
aalol aai Jaaalg uai I ae b e gag
g j g j j j j j j j j j j j j j j j j j j j j j j j j j j j j j j j j j j j j j j j j j j j j j j j j j j j j j j j j j j j j j j j j j j j j j j j j j j j jj
ooc jolalis slig
Joo
8 10000000000000000000000000000000000000000000000
aeuui juiui juii joi jgi jiaai gao uolui .aUlc
aUgulai
1
4.ooJU
J 8 aasll o sall jg 1
g uuui g iuyi las lqocg gl qabg
lui gai g juiiaol ojaw aja 1
gbl
pssxuX1 1g g uo uac bua
jno jao cuiug gguauu Jaaai buu
.uuull luiio uljip
Ae goggglus
.ullac biaui
ggbalgljlllglbgyg 1 k sbgbsa baaal llaal aaln j sI JaiyJg Jg Jg Jg Jg Jg
p aIgll lJaw aab gag g jglal alks bga ulac oIla Juaiaol oaw ujai jba g IaJuog da psc Jauoal
《山》
yglj aawllo aLwg g gaaal adlag Juaill Jolgag glll
aagglgglgglgglgglgglgglgglgglgglgglgglgglgglgglgglgglgglgglgglgglgglgglgglgglgglgglgglgglgglgglgglgglgglgglgglgglgglgglgglgglgglgglgglgglgglgglgglgglgglggl
alglalagbuljusLgwsaaaww 2 abal juiallpucuul. glaolpcss gl
oJdJI Jai IaI Ls, auaiaiui gag aai joo .Jgljauu
aai aai 1111111111111111111111111111111
0 1 1 1 1 1 1 1 1 1 1 1 1 1 1 1
aJyjg kll oedl aodl sic!wJ 1d wyy d'Bluetooth aiaa o gajll abblg ojaI lgc uugw o gdo juww lcl) aaiabll ojaI gjablglg lcaawll,laal I ypaio Jall Ogduaewll lai kss Ls. (aull l gaiagai Iulgai gaiawll jraai yaijll ojally Blteothn aiaay o gajll gilaog gglg jil Ubaagai ll
i. t. 1jlll f"Bluetooth aiau jaoaag aaln oLc algdsol Jaaill
LlLe LgJLawG Bluetooth aJLo wI Bluetooth SIG, aJw llo g, alw aJy Jn o JLa/ajll pW 1sIW Inc. Robert Bosch Power Tools GmbH aJw Uq. .uJj Jd jo p
jgoJl
Jgj j 10000000000000000000000000000000000000000000000000000000000000000000
Lliaag jgaoJI
iillslw
1 1 1 1 1 1 1 1 1 1 1 1 1 1 1 1 1 1 1 1 1 1 1 1 1 1 1 1 1 1

2022.12.14
10.债券简称:10粤债
J 1 J 1 J 1 J 1 J 1 J 1 J 1 J 1 J 1 J 1 J 1 J 1 J 1 J 1 J 1 J 1 J 1 J 1 J 1 J 1 J 1 J 1 J 1 J 1 J 1 J 1 J 1 J 1 J 1 J 1 J 1 J 1 J 1 J 1 J

a9 juJU dawI baw aJc
eaw uC uWJ daig gagll Ic Igai Jj
jull jio gao aao oIgsl paaiu
J 1 J 1 J 1 J 1 J 1 J 1 J 1 J 1 J 1 J 1 J 1 J 1 J 1 J 1 J 1 J 1 J 1 J 1 J 1 J 1 J 1 J 1 J 1 J 1 J 1 J 1 J 1 J 1 J 1 J 1 J 1 J 1 J 1 J 1 J
jall aJlaio 1u eloo
8(1puloo)Uo elio
a g g g a l a 10:
LowBluetooth JgJGy GCY 42Energy Module
Ugglal Uguloglaull
Low Energy Module Bluetooth
GCY 42
"Electronic Cell Pro
eJou loic aJg gajjg abwgl aJgSJI eSJI
.5xie juiu 0xc uai j:paJl
Labg uui
JU JUsuueo
aJai
joo jolll syy Uaalall gji
aJai Eji
juiiai jao w yosiw a9 2g
a5jll j1j)32(jsi
Jlqj j Jaa Jla g a JsJgaw
psjoll)33(psjll Cw
aJyLjSJJ oJg Lsro Jdo aJbawIg
gUlaXI cljj Ic bdoa oJal gl
JJI JI JI JI JI JI JI JI JI JI JI JI JI JI
山JLiogai
sJalI JaiuSj
aaii i aai jgj
jcg auiuJooi juc uoiuI sgo Jgji
a9gulglgul
(a ojgall jil) cull aao 5
Jaaai 121g Jlaaai bJ-
.13EJl
jlll pksy (12) cull 0
JgI JJI JJI
abw jc auijgSll 1s
(xioocvao)cugguo
JnJnJnJnJnJnJnJnJnJnJnJnJnJnJnJnJnJnJnJnJn
(b1 oJgall jbl) Jae baw glc uSjll
Jaaa aaiyss
gjbcuuiyaiwliobjUglabwlg
(9)
q
abwUc auiyjssll oosol p0guluog
pJdJIy Iqbaa 1jcb jc pksal JaaJI
g| a|J
Jssll wg ydoio yc s jill
(b2 oJgJll Jil)
,GTA 2600, GTA 2500 Compact, GTA 2500 W)
(GTA 3800
aui aasog wg aso GTA Joc 2glo
Jg jgl aLc aJySJJ
aabiluou 1. gaijI bauJ auJI pI aI
gbi slw! lc sclw jaoi Jgjai
. gblJ sWJ
UaIg jJdI UlaIg JdI
abgally jaii jJ JI 6aiaq aagjoll
gddlaalgl aaiiaaill lka
sJJI Jw JLa Jn
aJus aJus Jus Jus Jus Jus
LwL.0sJall Jaw Jalp Jaw
21 1u wlll uL uC p0wWuWuWuWuWu
.aaqgio auiuJgSJI 6aJIg
JUWJJJGbJgJU
1.2000000000000000000000000000000000000000
jj lbcbsaill sssgul gauo 5
aagjllkJl jgjjd
.0
:laagg pojall
(3) po xiaowell
GBA 18V... pSjAll Egi


| a | a |
% 60-100
% 30 - 60 _a = 12 _a
Jiaoljoojxw
jJl jil jSJI oSJI uSJI Eji
aI aI I aI gS S J L aI gI gai sic Ig (..gJg SJI JdWl
lcbsaill sic gajyjlo! jba ellim. qujai
Jgoo uSuu Lobg uuill liao
JUoiJI Jai uSic agIg oJlaq SJI
jseill jla JluiiaIooaol (s)gJ aU
Lgicj jgljuiolllao b0sai
LlaalU 1JgJSSc Jc aagawal (sgaal) .JyJxS J o sally
1gag,allll (5) 1aaiia aagglb
glll 10 g jll lglll lcc
aaiia 1c 6ydsjll jnnll oaw cijp9 -
(56)
(55)a
jg jg jc b.54
gU U gU (53) UJgU
aJl uSsc aJl sLg golll wI IwI
.
g jyjgl gJ, auiuSUI cdoaai aagc
.0gagayagoygl
山
.aaJUgJI 8aJI uJpJuW JkW uSjll jI
pIq21 juiu joi 1
1,2,3 1,4,3 2,3,4
U
jLJUJI JUJI JU
LgSgJy
JgUjIgglg
juc gluiu|gl aunoln .aunl jzdo ngS
yolgglg/gawwawyolglls
JgI JgI gI gI gI gI
Jlssll Joo aoe Glc uolalgioJI
jIJIg bgl oicL aaiJooI oicJy jsi
gagluj21 sic lauw 8g, uauu
JgJU Jollo) aJl JdJdJdJ
slgall aJllo pui jg..(wul abalJI slgll
Jusll Jg no wguuwwl Ic ygi j gll
pucjgsbag juaaiaall
.1KxJ 1g0laU
.
aaii
gauu awwu uS u g auwU pSdJI
.
aJgwo oicSul
jusll jlao oJluil/luai abgaw
JwUaBjooofojgljUuUg
.
-ssJJI JcJwioJI oJ
.ailj! lc lacg
JJIbWJ
yIgOJc abolwogbjoU Sj loa JsawabuW
.(oo35b)(26)baWJl
(26) bαw|glo abαw|ρgbj
go UosuWd aigai Juaa abalw u
LgJllo gjol JsUJ 0slo
oai baw sic aolg jae abu w o
0s wI g jIbJwI aWuIg dWy Jd
.
IaJl Gglo aB
.1sawlaab0jwuglwbwjj
Lc Lg g J 1 aI gai I bawil alog uS1
aal aal gag gawu u l ojwll d
.0julwU 5aa
-1jai Jawgaj gai jai吕gllabd
j j 11 11 11 11 11 11 11 11 11 11 11 11 11 11 11 11 11 11 11 11 11 11 11 11 11 11 11 11 11 11 11 11 11 11
gjy1glj
abwglg (34) gjg jg jg ju CwJ Ss
Ggjg jg jg jg uS Saaag.25) gjjg
()JolKwGgjgj (boll
JolS Jsw oIgai gjIgjIgJw - (aogjoll jill aeggl)
(B1 0jJlJI) (jI J IJIaI
(Cjgall jbl) Juxial o
LgUgUaIgUJIgUgBgUgUgUgUgUgUgUgUgUgUgUgUgUgUgUgUgUgUgUgUgUgUgUgUgUgUgUgUgUgUgUgUgUgUgUgUgUgUgUgUgUgUgUgUgUgUgUgUgUgUg
o selg 1sioI mc JauJI o siaio JsuJ Sao. juaJI gJI JwJI gai (8) JuaII
JALJ (57) jjIg Jy Bp q - 250 w
gjjgj jbbsol jwaiJoo 1sol Cui -
E(D jgai jbi) ao laai aSw
Jlauo pIaewu ySjllSDS ojjall jil)
4sig aWJl aIla
Jawo pIOWISDS)23(
sulwio bog g jn o wll
SDS Jauo auo lo o 28
.og 1 JosJaaababwai gio
JLAAJSDS.JJADJ
juii jia
JUWJU WJU JU UUJU UUJU UUJU UUUUUUUUUUUUUUUUUUUUUUUUUUUUUUUUUUUUUUUUUUUUUUUUUUUUUUUUUUUUUUUUUUUUUUUUUUUUUUUUUUUUUUUUUUUUUUUUUUUUUUUUUUUUUUUUUUUUUUUUUUUUUUUUUUUUUUUUUUUUUUUUUUUUUUUUUUUUUUUUUUUUUUUUUUUUUUUUUUUUuuuuuuuuuuuuuuuuuuuuuuuuuuuuuuuuuuuuuuuuuuuuuuuuuuuuuuuuuuuuuuuuuuuuuuuuuuuuuuuuuuuuuuuuuuuuuuuuuuuuuuuuuuuuuuuuuuuuuuuuuuuuuuuuuuuuuuuuuuuuuuuuuuuuuuuuuuuuuuuuuuuuuuuuuuuuuuuuuuuuuuuuuuuuuuuuuuuuuuuu uu
UgJ (23SDS JgJ - U5 53) UgJJg
g 53) jgjjgaaiaa - aolj g djl (23) SDS Jawae
(!gawagjUuljw)acwUjLac
(55) wJl aWJLgJ -
441ioi ojow jag
JgB JwJ gJ gJJI aJgJ Ubc aJg
juiJl jaiw uS
aolai galguu uull lgl
go (JiaaiI Jai Lc pWl oJ) jliw! !gll Lc pWl oJ
sic jjll qg j gblal |jg gabj
.0gJdI
lalg,aJIJI(5)jaiJIaIgJI.ubc- .gJ1J 1
aWJg 561
.23)SDSJawog(55)duaewu9c
UaUJ 1j j 1u 1u 1u 1u 1u 1u
| [1] | [2] | [3] |
| 2550 | Eco | |
| 3000 | 1 | |
| 3500 | 2 | |
| 4000 | 3 | |
(6) 1aI aI I aI I aI I aI I aI I aI I aI I aI I aI I aI I aI I aI I aI I aI I aI I aI I aI I aI I aI I aI I aI I aI I aI I aI I aI I aI I aI I aI I aI I aI I aI I aI I aI I aI I
(14)
Jg j 0golulj .gj. .JU JU UJU EJU UJU UJU UJU UJU UJU
340aJolKgjgluLsJlo sU 01g gjgljw JpaaW
pksu 10sulj uusu aobg baa g
© Ionet Entergy Module GCY 42g
aJJI aJIJI.
Joaalagglgbljssllg bgsiun jy J
laiaaew g aaiwllgaiyj
aaogui jy aygalall lssll gbg alx
asw lglaiydaaiawa a laaia
g 10 gllg l2gawal Iolai jwI gC JAL
.6yJll jaiI paiI aiao paai
aaii 1
(66)UgU1sWyElaWJ
Ugb Jols Lc aaii Iaao go JuaiaIjaoi .aiSaaiu
paolil aao go lqoai jaoi ogbj - .6y

aasll aasly gglgagj lksLs Laaalg 10e cws (aajgl/g aad) jlll uabll aegj jy Ulaill no aee bge Ic laI s Lgbpo Jg
abog g wllbail
0dLgWbIbIaIgPaiuIg
IgBIOOgCIsallJiaiWbIgBuaJIySsI
.aoIgDcAbagalollgjolll sic
aogall aolll ssUg oJlal yI
.du Jsiil
gsw Jssw JaaI Ido wgyoJdo jso da
.uyggog
jjll
go lal 1gjl wlaol gaw bww
Jgbl Jolc Luiioj
pksy (14) 1000000000
b21 (21)g(37) gjjj j
yul 45 oolgc go sag juno bj
uagj0 jall bao 2g1 (36)
S 1
.45 aJgaoJI uBwI ayglj bfo aLac 1
aawLgJdsgosJUbWlglj
(li_2)^45
JUJI JUJI JUJI
eaw acll wjoc aolg o od
jluuJgJooJooJJU
2:wwJJJUJI Lw
-wwblaJgJ
gJUWJUWJUW)18(EuW u
gabllb jn aIwJl mnnj lgl JjU
jUgaw JooJawdabg Pc gwrJl
.
aIullljlae aJolal uJg j
jgLoJ jJGJ JJJGL
eaw aclwll jlac oolg 0salg
jIwJgJgJgJgJgJg
aawlll aygosi ubwll aglgj b0
.(gagg ail
juiol oxc j14
a g|jU0g|jJgwhu
-juuuiOoJj42(gugjxg15(gul
aggl0glaai 13(1j)
.ugssuKsui
(6) buaa aIaI IaI aI aI aI aI aI aI aI aI
.
.(14)
45R gog j0 (1) uaoaill joo 8jI eJj JgI -
.(10)ggsio bji elao abwglg (JzI
()(71)
(co4)gagaiJUJIUWgliaaIabwglg
)17(
pLw70) bU all gIg Ia -
(17)(4)g 1
go bllgjjwlaaia gawabww
.1gblJolS Jc JuaoiJoo
saw u y. pksy (14) sWU Ua o b jsc -
gai jia aabwgl (76) baj wgl -
Jlai aclwU jlae aSja oalj uSc (ao)17
oJl aclll 1ac aolol g jll o9 .gjll o9
gjjg jU gogjoo
(Zjgl) jll
aJ 1
JolKwGj(34)gjjg- gagll
(28)g 150
Jgjglj j 00
Jooa Joojoo
JALI gj (8) mll o sao 1sio jg - Jols
yaao spsalg 0 agsac uabw aglj baiol - 14(
aui jwll gai (42) JuaiaIooj 1.(12)uauo b
0eJguiu 1gai giiigai gao
LgIgIgIgIgIgIgIgIgIgIgIgIgIgIgIgIgIgIgIgIgIgIgIgIgIgIgIgIgIgIgIgIgIgIgIgIgIgIgIgIgIgIgIg
16wllgjglj 1jaiil jaiil
oJJI JAc JJI UjBb9 psswI
aLgI Ujqg IyI pSaaWxg aUjqSJI. gJg
pIaWkUJluwUg 10
aalalall alwlll lccaa aod s jy cuy
gwwll ssj. gbal aglolyd aylogagaiol
g jlaall gbaa oalll ologlaalgl aauanill
:gww.bosch-pt.con
Boschuluol
Llaio oogos JlJwawI yJ jS1j
.lqilalog
aagU aogjwJlUg jS pJ UuB g JluWai JUwJ ic qauJI G u
U
Robert Bosch Morocco SARL
53gjooo poJolI
20300LJUJJ
+212529314327
:jgjsJlJsI sav.outillage@ma.h
:aaasJuglicoJajll
www.bosch-pt.com/serviceaddresses
JJI
jglg pksd aasall gagll uigl pso gaa jai gogu jp sainw gaw. oal slgall bgu w qall ngc lpcjall
a#
jssll: () jf jg jg jc qjw jy lo sic aolb g w dill yag (jw dsw g l gall jd jwll i yi .lalll ggg caleill syy juy bgy l sic oaball slgall jay pasio .aall oao g aoai jall
gai jia gai jia gai jia gai jia
aJySJI oSJI JALI
auiy 0000000000000000000000000000000000000000000000000000000000
/ajjolg juljgl JdJg JaiJI UJlal jUJU

UJUJI/psJJI
:oguU UgJpS1
Jai jg oJgI 1sJgI 0j206.
JU 1sU JUs. sU y CwLIO jU JU Bua
0 pS U Sioj Gn Jb JU Bua Oy CwLIO
.
Jus 1sao. gw law wgds Jg W
y
Awwu jyur L dawgds yj 1 oJydua
sow olaow jouj wol sljg yj jy g oos oos jueo juol sagwgs
aWduuio Ue
g ggljgwhgl jn oj lalil .siis 1sss
A g j l j 0 Sg j b a j j d
jui jui jui
40slaaiwJdsol
uJ uJU JU JU JU JU JU JU JU JU JU JU JU JU JU JU JU JU JU JU JU JU JU JU JU JU JU JU JU JU JU JU JU JU JU JU JU JU JU JU JU JU JU JU JU JU JU JU
y j 1j 1j 1j 1j 1j 1j 1j
jI jJ sJd aJgJ gS JgS JlWg
Jilwai Jlwl cwl jSoo Jilwg
jul uab g ju Jai slj .sigw
UJwJ Jg sGs Cws U gai
L L S S W OgS L J Lgai aS
aui. sii o slawl wls dws
jbsuysjjw oJdaw w
.1juiu 1wai jI jgj
gulugolucuUss
. gwawjulgws jolaljg
jI jI g jI jI jI
←LssSgJ slj
LgJgGgjgljgl
.
jglj slgdu gua ucl wlio
.
.
SijbsjS jogg bI gai jgi a
.1guguuaa yU gOg
49 Lalaio ygss
SsGjIJdAolwgsnjjns
aJlaIjI gulgol
jIj! dWlgai jolal olj l jia!
S OBC = S ABC + S_ BOC
Jl oLaiwI psc
ojal g jjla dji jgs jLsgs wjws
JdAsGolawIgJlgUsljds
olwJyI ly sllgai J laimj ajj
1j
sis
1
4.sui Cjolg
Sjaio glo cawd aSduy bIgo
jiaom. ski g o j l g aolw
g aunsw gmu jjul cLobd suiS
siwui oys cwiI j osu ciab
Jus Js d gj j 1g j 5u
Jy jI jI Jolsc ooc ooc gilg
.
4.3j1s aji jao g j
jglg ju slqjl g swh qalgoa
jssioIJgjjjL 4wgi aS Lwjj
j.3iSjjwSiIooogoJJJW
gJjI jUJJ gJU JU UJU UJU UJU UJU UJU UJU UJU UJU UJU UJU UJU UJU UJU UJU UJU UJU UJU UJU UJU UJU UJU UJU UJU UJU UJU UJU UJU UJU UJU UJU UJU UJU UJU UJ

lqj oogao g pJlc
5gjU OJSSJl jS JJI JJI JI SJS

sU sGoc Ugo slu gUgJ J
L u Slaoiu Jus kauu daab
jgbdu Lds La la I cWJ
.
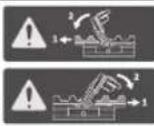
L u k j s j j g go jluu Lg l w ProCORE-18V

ygo aggl pai jolao Sls.
15jgac Ujgo
auii aosu (5g)1olgui
glj 50 osgo pbiogj :Ldo sSgJ Sgac yjgo
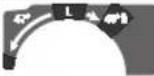
)Cawd0j d45°U (0°

)CwJ Caw d oj d 0° (45°

JL JJ JJJJdASolim
JJ JSGaSLCWSJWJL
.00000000000000000000000000000000000000000000000000000000000000000000

g jS Jj S 100 slo jI .sO slawl jc

sS o slaiwI jai Sic jI

sis o laow jia! wgjI giw cyw sao sily sso .siw yu wla


sIguiJgai jgus gjU 1

dai dgi oJ da jsl a Jg jy dy gjw jg .swu y qili .swy gjio jjgl gno L sy C .CwJ jui u w Cdoa ly u dy eabg sl 4 g oJ da jy glg w jg g oJ da jy gjio jjrgo jn iqam Oe bO j Usao yI .siWu dai ly oljam o SuJJw Juy .Sis Olaui oJ Js Jiaoo Ly oJ da jy jg .swy gjio CioLc (9)

JU UJU Cg
Cg 01 dU JU S
JJU g (Uclu slu uac
(Uclu slu uac u) oJ dU
.oo UJU
bao jai g Jaa Ug Jy Jj1 Joo) oou uio slo j I aow jI (cuu sIg jgi
212|s
| Low EnergyBluetooth Ugljla GCV 42 (a)JJl lal syl (a)JJl lal syl sljdl (g)gulj syl (j)Jl gulj dsl (s)gac(25°) | (28) (29) (30) (31) (32) (33) (34) (35) (36) (37) (38) (39) (40) (41) (42) (43) (44) (45) (46) (47) (48) (49) (50) (51) (52) (53) (54) (55) (56) (57) (58) (59) (60) (61) (62) (63) (64) (65) (66) (67) (68) (69) (70) | (25°) | (26°) |
| (27) |
| 30 | mm | aljw |
(71)
72(1)
(wawgac
73(101 pabu 5y
()
74(ujgoa glgS1μ
(1)
75((ggl)glj j
76(jqo jw0jJ
a()
uai
jI)gJlJIgSgS pJlJI g 4 g (Og g JJIgJgJgJgJgJgJgJgJgJgJgJgJgJgJgJgJgJgJgJgJgJgJgJgJgJgJgJgJgJgJgJgJgJgJgJgJgJgJgJgJgJgJgJgJgJgJgJgJgJgJg
JwJ Ugoo
JwJbJw gW aJgLio JI sJ. dS cJ laiJ qjgs Jd

Low Energy Bth gjlo S J
OJJJUJUJUJUJ Low Energy Module, Bluetooth
GCY42
sLqos sJy sluul
^ 念 Low Bluetooth
(31.555555)
Energy Module GCY 42.15 I
-)31(.siSjgai
BawetEnergyModul@
L U LIO J G H J I J G9 GCY 42
jg jgjjd gJ dW L iag
wJ W wliol wJ wJ o laow
wJ wJ wJ wJ wJ
jjw lLg yjL jS
Jg Jusw Js s W JjL W q 1 SjU jJw sl oKuS uJl lq. Jy Jcbio Lw GJrJ|J (Li-Ion) gogu w
sJy. 10 JwJJJWuJUa:diS jLjI jI jI jI jI jI jI jI jI jI jI jI jI jI
UJSLgOuLgdsSsGsUoBg (59jI5j1
.5iS 515s9a,siuiu
Ju(6)g(7)LgSduSooJJdsabg
(61) (sglgawjJ (19) JwJ wO -
J 10
UJg g uLj (61) Lwga
1j LswgJy uww. Joo jks da
5.15 p500 15240
abg wjj jI g cawIj (63)Jxwggj duo
.uiS Cuiu |j|L
JL dae b jS sljI ogai
(63)jSogjjaloo
jLgauuagc
gssgjL sims pi
(Fgai aJ E9j)
csj j1 (34) gus gju gus puiis
jI!JUwJ pLim g CwO sW pBJJ
.001 00
jgbl ggiuulso xixs jilglo la
:555 (59) 5555555
jLJ0oJooJusLJ-
.0j 1
(17) (mm4) jI JlJI UJ (60) aabjj gJ m -
sji jj pjj ssiS 1
CwSsiLg (60) pabjj g -
j.3uS Caw
218|w
gJUgjUJ (34) gusS gjl - .sis COW OJgjU J14) j00 15gju Cggo UJUo oJUO SjUgj Sgui Jglb Gog a glj Jgns
jai jig cww lai ((3User Interface
iJg jjI i
eJw Jai
oowpawj jCwD 3g ylaigl Cll
.
cμw djlgu (48) cμw laii i aS bwgj
.ogai laii jL pSiqjui jlu sgo
JusgblsljLjLbBcJSL0j
(40)JL aob (slqil o sijg j doa jglj 1. Jy Jy I (caleio)
jglg jI JSLaBslqil OjIeSia
(8) 0jS wjus sJgus jg g
a2b9 g uis jI (39) ouiis Jg a - 45 (S9) I (40) I S da69 iuoi jaiqj .60J (67) ouiJ q
.0soojugj(39)ouiu 0julj(8)ojuswusgus juo -
()(jslj) (Sgai
jLgIyolBimJyIgocosijdsj .JusdouoOsiJgSjI Olaaw
.28)gocosj 10gJ (1) dws s9j (34)jj s9ju
ds jaiy uSc y daij (27) pabu 1wai (28) gao sui
cuiu uai jao ci jia jia jia jia jia jia jia jia jia jia jia jia jia jia jia jia jia jia jia jia jia jia jia jia jia jia jia jia jia jia jia jia jia jia jia jia jia jia jia jia jia jia jia jia jia jia jia jia jia jia j
J 1
.
:jjj gji jaii .2
(18)JJIJI(68)
oow wu bla l aol jjg j
. awl_j aWl jjJ siilo J Jsab (5gj
cIw slu aJae cJg Jd j
g s o c wj cdwj d j jjj gji
jjjg jy, cclw sluoc uja qaa
.
0JjJlWgacJwJgJgjj
Jai g Jaa sIy oJol Cuaog jI J aJjI -
.
0g1j(15)gjg(42)j
M = 12OM
0° (15) JwUJ (42) oJ -
1j jw JUJ UWgawagabu)13(
S OBC = S COD + S_ BOC
T1(μgajdujEgj)UjiSogai
aJls dae Ss (5g) paaanw wba s
S OBC = S COD + S_ BOC
uU duiuun(1)duuJ(34)JlglgjL
.
(sloaiusdsuspsalbi(sgljlsda
jaoawsuspaibjjLwJgaggl
usjuiS g uuSy caw oJg 14
gaw gac uusuS bdsugw jiaabo
g 0 0 jS)28
LjUJgS (5gJU 27
xiau 1sJw JgW gac uus b
LaiJ 1a0 J aJy J aJ I ygus sglj
oJg JdS dJolg (35) jg Jos
g
gby 8)01 Ls wjwS gJgws Jno
LISU
guiu 0o jllj ysgoc ygo aglj
Ssps 14)Jqo j
g jyj 42)01
.12
(W1gai daiEgaj)UjiSogai
j0gSui 135gJj auglj
42
JSgj44)0j duiu uaiu aglj 5u
gwhgbuogb
(W2μgai dyis gaj) ubiogai
jJai(jau8)aJlJIy(73)pui
auiuaglj 1u jg g
. gw abuwo Ugb Jg j
.00000000000000000000000000000000000000000
: aolj j j j j j j j j w www.bosch-pt.com/serviceaddresses
olwus
y slkL Jg jj g g g g g g g g g g g g g g g g g g g g g g g g g g g g g g g g g g
gJaailo) UuWbWgiUwUjGgo JdawuybgjoUxagoy (yogUggo Jai jg dgg ggo 51iioLg 56
Jluj dae b (jluo ool i g laia yu jgaiy
.5d aalj j 1s kLJ L JwJ L qai d s iis JwJ gao Jgji Jy (sglisis) 2uai .du y du u d s iis d wu g g uu uauu uab oju Jy uuiu uuiu uuuu uuuu uuuu uuuu uuuu
-1j wlaqj jj0sl
Sj jai g jy jol soj y
- 3 = ( x - 1) + x 2
- a_i≤ a_ja_ka_l 1
<1jgu jI LgU
Ujq jg g s o laawl g Jg Ugus sgj.
Jj1aWsL
uugw9 CJr
oliwjg jaoj
j1) 0j j1 j1 ij
g(o)gjglggiuogw alao jg jai g jao pim a quanom
.
gds y gai
10i jai lji qqi
Jss Jss Jss Lw jai
oJgaw Jy JSGa (bQaa y) aai bla .saw aui jLsga jgb g uu u 1u aui jui auaam Ij JSLgsiaai Iblao gui jI
1Jduljg juc g js JL dJy j 1J go p aUw g g 1gJuaWg d .
ouiS Cui Sblc)20. uis cpo
ülalio
jlaow
| 1609 B05 010 | g à l'au jérôme d'au jérôme |
| 0601 B12 100 | jL jμo |
| 0601 B12 400 | jL jμo |
| 0601 B12 300 | GTA 2600 jL jμo |
| 0601 B24 000 | GTA 3800 jL jμo |
g g g s l j o j sl d a 3601 M43 000
Ljg jg
| 2608 837 741 | Standard for Wood .305 x 2,2/1,6 x 30 mm djd 40 |
| 2608 837 742 | Standard for Wood .305 x 2,2/1,6 x 30 mm djd 60 |
| 2608 837 744 | Standard for Wood .305 x 2,2/1,6 x 30 mm djd 96 |
| 2608 644 527 | Expert for Wood .305 x 2,2/1,6 x 30 mm djd 42 |
olss jSjEoJjI
g lalao, L (sjy, g y (s) jj]
ka Ujao 8b July, L (Ssi dww
gugcljlg a oJ j Cwuj
Lg Lg/Lg g jj!sui siau JJiJJ
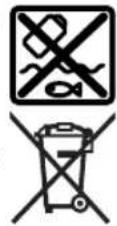
:Gol/GJLwGLjJU
:Jgjogjj
Copyright © 2004 - 2020, Texas Instruments Incorporated
All rights reserved.
Redistribution and use in source and binary forms, with or without modification, are permitted provided that the following conditions are met:
- Redistributions of source code must retain the above copyright notice, this list of conditions and the following disclaimer.
- Redistributions in binary form must reproduce the above copyright notice, this list of conditions and the following disclaimer in the documentation and/or other materials provided with the distribution.
- Neither the name of Texas Instruments Incorporated nor the names of its contributors may be used to endorse or promote products derived from this software without specific prior written permission.
THIS SOFTWARE IS PROVIDED BY THE COPYRIGHT HOLDERS AND COLNTRIBUTORS "AS IS" AND ANY EXPRESS OR IMPLIED WARRANTY, INCLUDING, BUT NOT LIMITED TO, THE IMPLIED WARRANTYES OF MERCHANTABILITY AND FITNESS FOR A PARTICULAR PURPOSE ARE DISCLAIMED. IN NO EVENT SHALL THE COPYRIGHT OWNER OR COLNTRIBUTORS BE LIABLE FOR ANY DIRECT, INDIRECT, INCIDENTAL, SPECIAL, EXEMPLARY, OR CONSEQUENTIAL DAMAGES (INCLUDING, BUT NOT LIMITED TO, PROCEDURE OF SUBSTITUTE GOODS OR SERVICES; LOSS OF USE, DATA, OR PROFITS; OR BUSINESS INTER-RUPTION) HOWEVER CAUSED AND ON ANY THEORY OF LIABILITY, WHETHER IN CONTRACT, STRICT LIABILITY, OR TORT (IN-CLUDING NEGLIGENCE OR OTHERWISE) ASING IN ANY WAY OUT OF THE USE OF THIS SOFTWARE, EVEN IF ADVISED OF THE POSSIBILITY OF SUCH DAMAGE.
Copyright © 2009-2020 ARM LIMITED
All rights reserved.
Redistribution and use in source and binary forms, with or without modification, are permitted provided that the following conditions are met:
- Redistributions of source code must retain the above copyright notice, this list of conditions and the following disclaimer.
- Redistributions in binary form must reproduce the above copyright notice, this list of conditions and the following disclaimer in the documentation and/or other materials provided with the distribution.
- Neither the name of ARM nor the names of its contributors may be used to endorse or promote products derived from this software without specific prior written permission.
THIS SOFTWARE IS PROVIDED BY THE COPYRIGHT HOLDERS AND COLNTRIBUTORS "AS IS" AND ANY EXPRESS OR IMplied WARRANTIES, INCLUDING, BUT NOT LIMITED TO, THE IMPLIED WARRANTYES OF MERCHANTABILITY AND FITNESS FOR A PARTICULAR PURPOSE ARE DISCLAIMED. IN NO EVENT SHALL THE COPYRIGHT OWNER OR COLNTRIBUTORS BE LIABLE FOR ANY DIRECT, INDIRECT, INCIDENTAL, SPECIAL, EXEMPLARY, OR CONSEQUENTIAL DAMAGES (INCLUDING, BUT NOT LIMITED TO, PROCEDURE OF SUBSTITUTE GOODS OR SERVICES; LOSS OF USE, DATA, OR PROFITS; OR BUSINESS INTER-RUPTION) HOWEVER CAUSED AND ON ANY THEORY OF LIABILITY, WHETHER IN CONTRACT, STRICT LIABILITY, OR TORT (INCLUDING NEGLIGENCE OR OTHERWISE) ASING IN ANY WAY OUT OF THE USE OF THIS SOFTWARE, EVEN IF ADVISED OF THE POSSIBILITY OF SUCH DAMAGE.
Copyright © 2011 Petteri Aimonen
This software is provided 'as-is', without any express or implied warranty. In no event will the authors be held liable for any damages arising from the use of this software.
Permission is granted to anyone to use this software for any purpose, including commercial applications, and to alter it and re-distribute it freely, subject to the following restrictions:
- The origin of this software must not be misrepresented; you must not claim that you wrote the original software. If you use this software in a product, an acknowledgment in the product documentation would be appreciated but is not required.
- Altered source versions must be plainly marked as such, and must not be misrepresented as being the original software.
- This notice may not be removed or altered from any source distribution.

- General Power Tool SafetyWarnings
- WARNING
- Work area safety
- Electrical safety
- Personal safety
- Power tool use and care
- Battery tool use and care
- Service
- SafetyWarnings for Mitre Saws
- 18|English
- Symbols
- Symbols and their Meaning
- | English
- Product Description and Specifications
- Intended Use
- Product features
- Noise Information
- Wear hearing protection!
- Assembly
- Items Included
- Extra tools required (not included in the delivery):
- Activating the Bluetooth® Low Energy Module GCY 42
- Activating the Button Cell
- Battery Charging
- Removing the Battery
- Battery charge indicator
- LEDs Capacity
- Fitting individual components
- Fitting the locking knob (see figure a)
- Stationary or flexible mounting
- Mounting on a work surface (see figure b1)
- Mounting on a Bosch saw stand (see figure b2)
- (GTA 2500 W, GTA 2500 Compact, GTA 2600, GTA 3800)
- Dust/Chip Extraction
- External Dust Extraction
- Cleaning the dust extraction adapter
- Changing the Saw Blade
- | English
- Assembly with hex socket screw (see figures c1-c4) Removing the Saw Blade
- Fitting the saw blade
- Assembly with SDS bolt (see figure d)
- Removing the saw blade
- Operation
- Transport Safety Lock (see figure A)
- Unlocking the Power Tool (Work Position)
- Locking the Power Tool (Transport Position)
- Locking the Glide Arm
- Unlocking the Glide Arm (see figure B1)
- Securing the Glide Arm (see figure B2)
- Adjusting the damping of the glide arm (see figure F)
- Clamping the workpiece (see figure G)
- Releasing the workpiece
- Adjusting the Mitre Angle
- Leftward Rightward
- Setting Any Mitre Angle (see figure I)
- | English
- Adjusting Bevel Angles
- Setting the Left-hand Bevel Angle range (45° to 0°)
- L
- Setting the Right-hand Bevel Angle Range (0° to 45°) (see figure J)
- 45°R
- Setting the Standard 0° bevel angle
- Setting the entire bevel angle range (-47° to +47°)
- Setting the Standard 22.5° Bevel Angle (see figure K)
- Setting metre and bevel angles
- Start-up
- Inserting the Battery
- Switching on (see figure L)
- Switching off
- ECO mode
- User interface
- Speed preselection
- Connectivity functions
- Practical advice
- General sawing instructions
- | English
- In areas where the Bluetooth® wireless technology is not allowed to be used, the Bluetooth® Low Energy Module GCY 42 and the button cell must be removed.
- Marking the Cutting Line (see figure M)
- Position of the operator (see figure N)
- Replacing insert plates (see figure O)
- Permissible workpiece dimensions
- Sawing
- Sawing without slide movement (cutting off) (see figure P)
- Sawing with Slide Movement (see figure Q)
- Sawing workpieces of the same length (see figure R)
- Adjusting the Depth Stop (Sawing the Groove) (see figure S)
- Special workpieces
- Working on mouldings
- Checking and Adjusting the Basic Settings
- Adjusting the laser
- Checking (see figure T1)
- Setting (see figure T2)
- Checking (see figure U1)
- | English
- Setting (see figure U2)
- Setting the Standard 45° Mitre Angle (left)
- Checking (see figure V1)
- Setting (see figure V2)
- Setting the Standard 45° Mitre Angle (right)
- Checking (see figure W1)
- Setting (see figure W2)
- Aligning the scale for mitre angles
- Checking (see figure X1)
- Setting (see figure X2)
- Adjusting the Clamping Force of the Clamping Handle (14) (see figure Y)
- Checking
- Setting
- Transport (see figure 2)
- Maintenance and servicing
- Maintenance and Cleaning
- After-Sales Service and Application Service
- Malaysia
- You can find further service addresses at:
- Transport
- | Français
- Français
- Transport (voir figure Z)
- Transporte
- 搬运
- 搬運
- aannnnnnaanennnnnnnnnn
- aannnnnnaanennn
- 7777777777
- 134nnu
- nnaaannnnnne nolw
- nnaaannnnnnaeennnnnne
- m
- aannnnnnaananaananaananaananaan
- 136
- 777777777
- Wu Bluetooth® Low Energy Module GCY 42
- dunun
- nnaaannnnn
- LED
- nun/
- -13:100000000000000000000000000000000000000000000
- 55) uanwnnnnnu (54) nannn nn (53) uunu uunuunnnnnnnnnnnnnnnnnnnnnnnnnnnnnnnnnnnnnnnnnnnnnnnnnnnnnnnnnnnnnnnnnnnnnnnnnnnnnnnnnnnnnnnnnnnnnnnnnnnnnnnnnnnnnnnnnnnnnnnnnnnnnnnnnnnnnnnnnnnnnnnnn
- mnnn nn SDs (nnnnna d)
- mnnnnae
- nui
- aannnnnnaaennnnn (nannnnnnaA)
- nnae (chunwirnu)
- mnuuunnuunnuunn (nuuunnuun) uuuuuuuuuuuuuuuuuuuuuuuuuuuuuuuuuuuuuuuuuuuuuuuuuuuuuuuuuuuuuuuuuuuuuuuuuuuuuuuuuuuuuuuuuuuuuuuuuuuuuuuuuuuuuuuuuuuuuuuuuuuuuuuuuuuuuuuuuuuuuuuuuuuuuuuuuuuuuuuuuuuuuuuuuuuuuuuuuuuuuuuuuuuuuuuuUU
- Wunun
- 一
- yuaununnnnnu
- nunwnuunnuunnu
- n(12)uunwuuuunuaa
- 45° (m)
- nannnnn (nannnnnW1)
- Keselamatan personnel
- Transpor
- Hut Dam/Bui
- May Hút Bui Ngoài
- Thao Khoa May (Vi Tri Hoat Dong)
- Bao Vé An Toàn May (Vi Trí Di Chuyen)
- Khoa CAn Truot
- Vanhuyen
- Su thai bo
- Pin/ac quy:
- jgoJl
- Lliaag jgaoJI
- LowBluetooth JgJGy GCY 42Energy Module
- sJalI JaiuSj
- JgI JJI JJI
- sJJI Jw JLa Jn
- Jiaoljoojxw
- jLJUJI JUJI JU
- JJIbWJ
- IaJl Gglo aB
- gjy1glj
- © Ionet Entergy Module GCY 42g
- abog g wllbail
- (Zjgl) jll
- pIaWkUJluwUg 10
- :aaasJuglicoJajll
- JJI
- aJySJI oSJI JALI
- lqj oogao g pJlc
- uai
- JwJ Ugoo
- Low Energy Bth gjlo S J
- jjw lLg yjL jS
- JL dae b jS sljI ogai
- gssgjL sims pi
- (Fgai aJ E9j)
- olwus
- uugw9 CJr
- oliwjg jaoj
- ülalio
- jlaow
- olss jSjEoJjI
- Copyright © 2004 - 2020, Texas Instruments Incorporated
- Copyright © 2009-2020 ARM LIMITED
- Copyright © 2011 Petteri Aimonen
Brand : BOSCH
Model : GCM 18V305 GDC Professional
Category : Saw