
Omni Scan - To scan ION - Free user manual and instructions
Find the device manual for free Omni Scan ION in PDF.
| Brand | ION |
| Model | Omni Scan |
| Product type | Negative and slide scanner |
| Power supply | USB port (5V) via USB cable or USB power adapter (included) |
| Internal memory | 16 MB |
| External storage support | Flash memory card (not included) |
| Image resolution | Up to 10 megapixels (interpolation): 5 MP or 10 MP |
| Scanning formats | Slides, negative strips (min. 3 frames), single negatives (with single negative holder) |
| Color settings | Color, negative, black and white |
| Exposure settings | EV -2 to +2 (in 1-step increments) |
| Image rotation | 90° counterclockwise (Rotate Left) and 90° clockwise (Rotate Right) |
| Operating modes | Capture, Playback, USB, Configuration |
| Display | Yes, built-in display screen |
| Connectivity | USB port, flash memory card slot |
| Display languages | French, English, German, Italian, Spanish, Traditional Chinese, Simplified Chinese, Japanese |
| Box contents | OMNI SCAN, single negative holder, negative strip guide, negative extraction strip, USB cable, USB AC adapter, user guide, safety instructions and warranty |
| Maintenance and cleaning | Clean the film before insertion; clean the interior glass with a clean, dry cotton swab; disconnect the USB cable if not used for an extended period |
| Safety | Preferably use a direct USB port on the computer; avoid USB hubs for sufficient power |
| Repairability | Not specified by the manufacturer; spare parts not listed |
| Warranty | Safety instructions and warranty information included in the box |
Frequently Asked Questions - Omni Scan ION
User questions about Omni Scan ION
0 question about this device. Answer the ones you know or ask your own.
Ask a new question about this device
Download the instructions for your To scan in PDF format for free! Find your manual Omni Scan - ION and take your electronic device back in hand. On this page are published all the documents necessary for the use of your device. Omni Scan by ION.
USER MANUAL Omni Scan ION
We recommend cleaning your film before inserting it into the scanner so dust or dirt does not mar the image. If you do not have the materials to do this properly, consult a professional film store.
We recommend using a clean, dry cotton swab to clean the glass surface inside the FILM HOLDER SLOT periodically.
- When OMNI SCAN is left unused for a long period of time, disconnect the USB cable.
- When connecting OMNI SCAN to your computer, try connecting it to a USB port on your computer's rear panel.
If you have too many other USB devices connected to your computer (or if OMNI SCAN is connected to a USB hub), there may not be enough power for OMNI SCAN to operate properly.
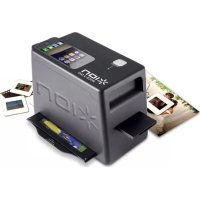
OMNI SCAN
Single Frame Holder
- Strip Film Guide
Film Retrieval Strip
USB Cable
USB Power Adapter
Quickstart Guide
Safety Information & Warranty Booklet
BOX CONTENTS:
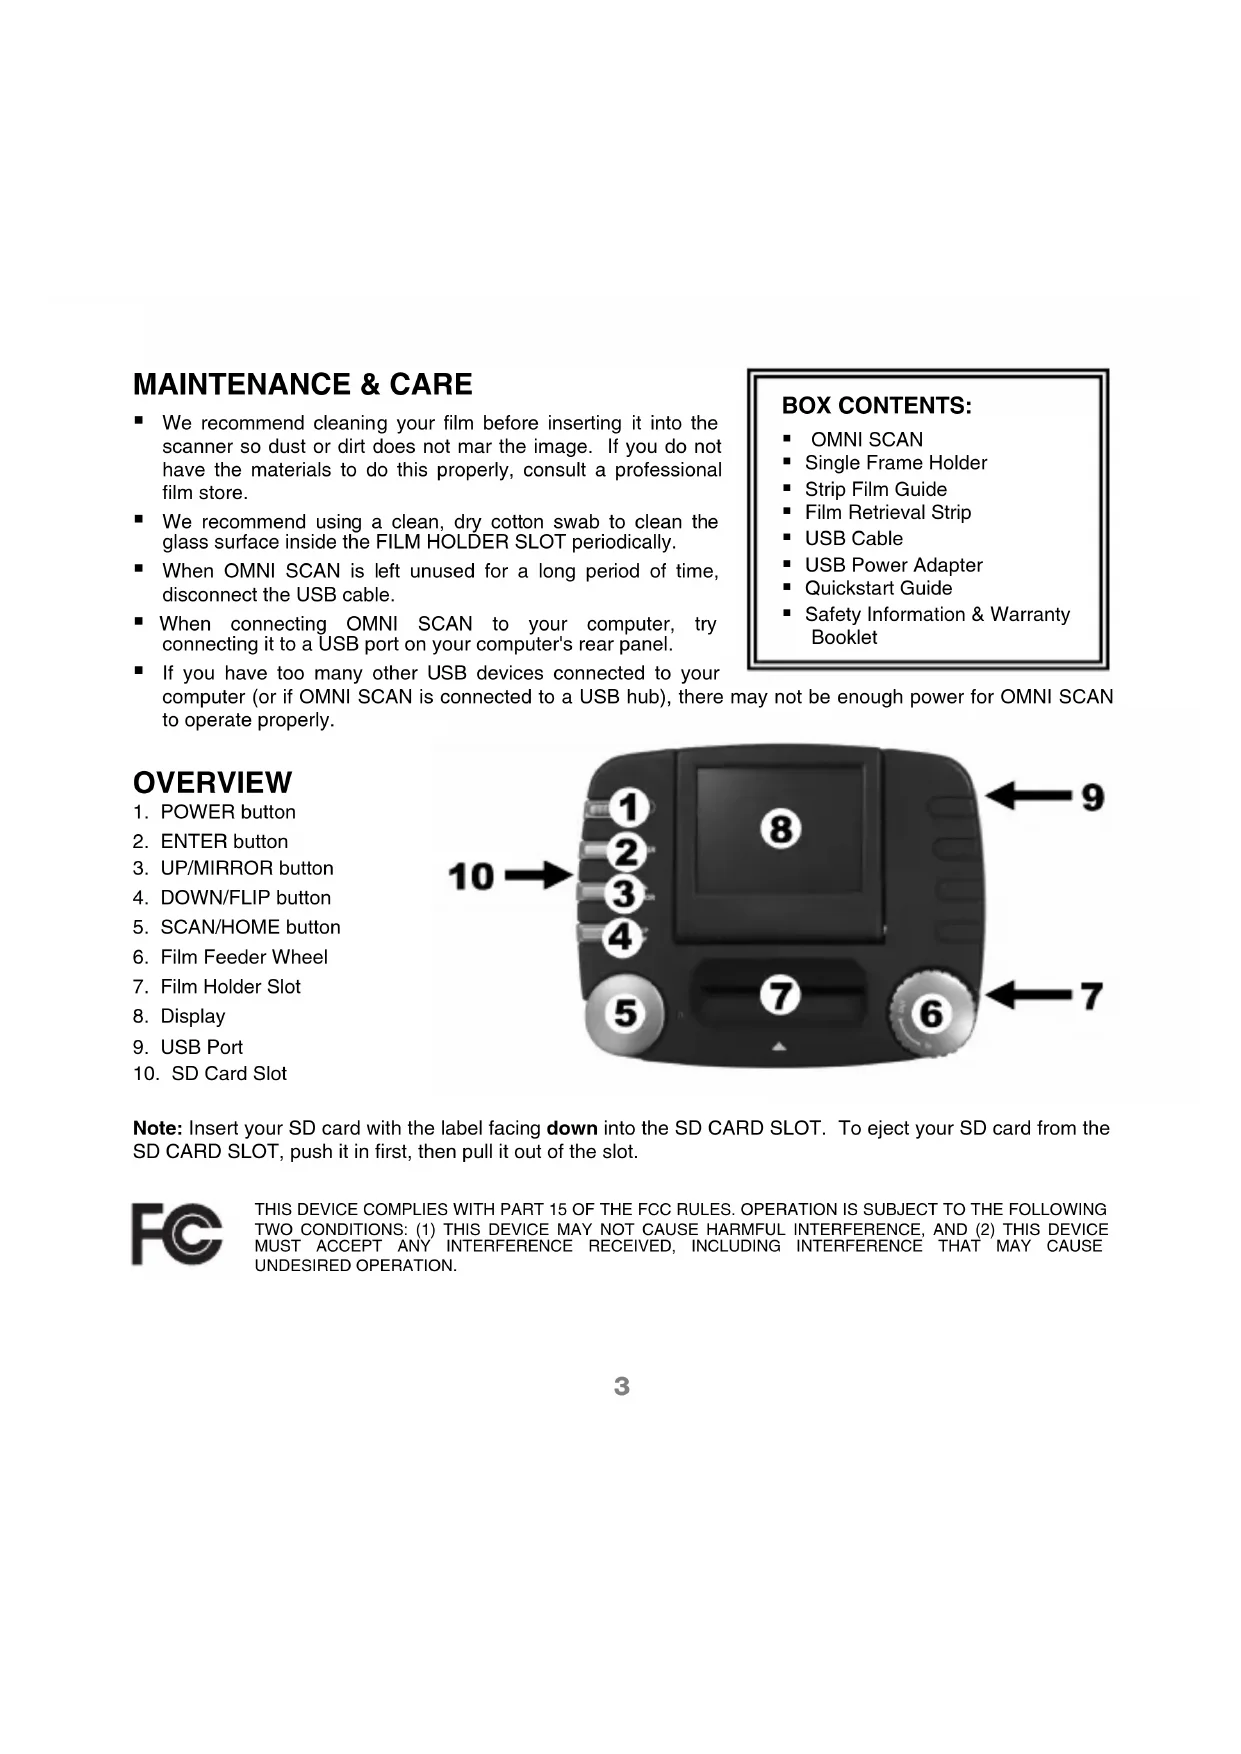
OVERVIEW
- POWER button
- ENTER button
- UP/MIRROR button
- DOWN/FLIP button
- SCAN/HOME button
- Film Feeder Wheel
- Film Holder Slot
- Display
- USB Port
- SD Card Slot

Note: Insert your SD card with the label facing down into the SD CARD SLOT. To eject your SD card from the SD CARD SLOT, push it in first, then pull it out of the slot.

THIS DEVICE COMPLIES WITH PART 15 OF THE FCC RULES. OPERATION IS SUBJECT TO THE FOLLOWING TWO CONDITIONS: (1) THIS DEVICE MAY NOT CAUSE HARMFUL INTERFERENCE, AND (2) THIS DEVICE MUST ACCEPT ANY INTERFERENCE RECEIVED, INCLUDING INTERFERENCE THAT MAY CAUSE UNDESIRED OPERATION.
QUICKSTART
- Connect OMNI SCAN to your computer's USB port or to a power outlet with the included power adapter.
- Turn on the OMNI SCAN with the POWER button.
- Press ENTER to select Capture Mode.
- Insert your SD card (not included) with the label facing down into the SD CARD SLOT. When you save your scanned images, they will be stored on the SD card. If you do not have an SD card, you can save scanned images to the device's internal memory (16 MB).
- Insert your appropriate holder and film.
a. If you are scanning a slide, insert it into the FILM HOLDER SLOT on the top of the device.
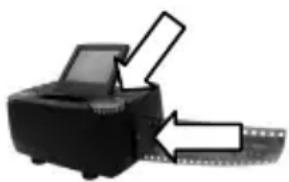
b. If you are scanning a strip of negatives, insert the included strip film guide into the FILM HOLDER SLOT on the top of the device. Then insert one end of the negative strip into the FILM HOLDER SLOT on the right side of the device. Turn the FILM FEEDER WHEEL counterclockwise while gently "feeding" the negative into the slot. (If you want to go back to a previous frame or if the negative strip is getting jammed, turn the FILM FEEDER WHEEL clockwise while gently pulling the negative from the slot.)
Note: The negative strip itself must be at least three frames long. Otherwise, it may get stuck in the device. If a negative strip becomes jammed in the device, you can loosen it by inserting the included film retrieval strip into the FILM HOLDER SLOT.
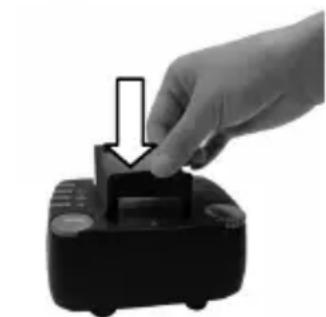
c. If you are scanning a single negative frame, insert it into the included single frame holder and insert it into the FILM HOLDER SLOT on the top of the device.
- The current image will be shown on the display. Before capturing your image, you can:
a. re-orient it by pressing the UP/MIRROR or DOWN/FLIP buttons
b. toggle through three different color settings (color, negative, and black/white) by pressing the ENTER button
- Capture your image by pressing the SCAN/HOME button. A "disk" icon will appear to confirm the image is being saved.
To transfer your images from the SD card to your computer:
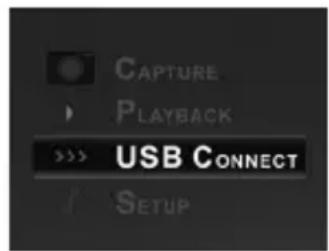
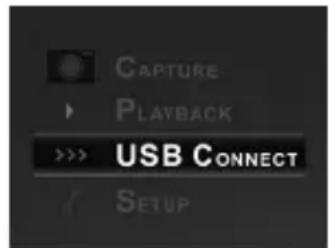
- On the Main Menu, use the UP/MIRROR and DOWN/FLIP buttons to select USB Connect Mode, then press the ENTER button.
Note: While OMNI SCAN is in USB Connect Mode, you will not be able to scan other pictures. To enable scanning again, press SCAN/HOME then enter Capture Mode. - OMNI SCAN will appear as a removable drive in My Computer (Windows) or on your Desktop (Mac). Open it, then click and drag the files of your pictures onto your computer's hard drive.
- When you are finished, press OMNI SCAN's power button to turn it off.

To remove the SD card to view your images elsewhere:
- Turn OMNI SCAN off by pressing the power button.
- Eject your SD card by pushing it in first, then pulling it out of the slot.
- To view your pictures, insert the SD card into an SD-compatible device, such as a digital picture frame, computer, or television.
When viewing any menus with multiple options, you can use the UP / MIRROR and DOWN / FLIP buttons to move through them and press the ENTER button to select one.
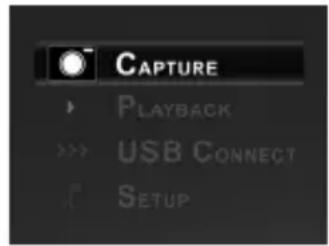
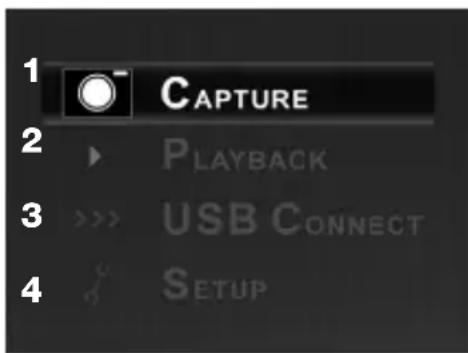
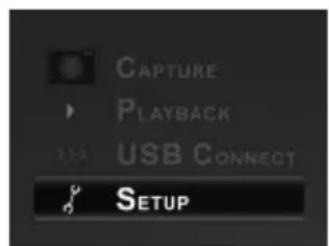
MAIN MENU
- Capture Mode: Allows you to capture images. OMNI SCAN will enter Capture Mode automatically if no buttons are pressed for five seconds.
- Playback Mode: Allows you to view your images.
- USB Connect Mode: Allows you to transfer your images to a connected computer via USB. Once your images are on your computer, you can view and edit them as you wish.
- Setup Mode: Allows you to select various settings for the device, such as image resolution, language, etc.
If there is no SD card in the SD Card Slot, "No Card" will appear on the screen and scanned images will be stored in the device's internal memory (16 MB).
Capture Mode
In Capture Mode, simply press the SCAN/HOME button to scan your image. You can change the orientation of your image by pressing the UP/MIRROR or DOWN/FLIP buttons before scanning it.
Before capturing your image, you can:

a. re-orient it by pressing the UP/MIRROR or DOWN/FLIP buttons
b. toggle through three different color settings (color, negative, and black/white) by pressing the ENTER button
c. change the exposure by holding the ENTER button for 2 seconds, using the UP/MIRROR or DOWN/FLIP buttons to select a new exposure setting


Capture your image by pressing the SCAN/HOME button. A "disk" icon will appear to confirm the image is being saved.
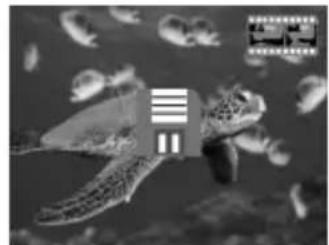
■Playback Mode
When you enter Playback Mode, your captured images will be displayed in a slideshow, allowing you to preview and/or edit them. To stop the slideshow, press the ENTER button.
With the slideshow stopped, you can use the UP / MIRROR and DOWN / FLIP buttons to move through your saved images one by one. Press the ENTER button to select one to edit.
In Playback Mode, you will see the following menu options.
- Rotate Left: Rotates the image counterclockwise by 90^ .
- Rotate Right: Rotates the image clockwise by 90^ .
- Delete: deletes the image from the SD card or from the device's internal memory.
Use the UP / MIRROR and DOWN / FLIP buttons to select one of the menu options. Press ENTER to confirm your choice or press SCAN/HOME to return to the slideshow.


USB Connect Mode
USB Connect Mode allows you to transfer images from your SD card directly to your computer. While in USB Connect Mode, OMNI SCAN becomes an SD card reader for your computer. To enter USB Connect Mode, connect OMNI SCAN to your computer's USB port with the included USB cable. Then, select the USB icon from OMNI SCAN's Main Menu. A USB symbol should appear on the DISPLAY, signifying that the connection has been established. OMNI SCAN will appear as a removable device in "My Computer" (Windows) or on your Desktop (Mac).
Note: While OMNI SCAN is in USB Connect Mode, you will not be able to scan other pictures. To enable scanning again, press SCAN/HOME then enter Capture Mode.

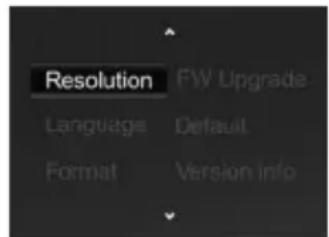
Setup Mode
In Setup Mode, you can adjust the following settings of OMNI SCAN. Use the UP/MIRROR and DOWN/FLIP buttons to select any options and press the ENTER button to confirm your choice:
- Resolution: Choose between 5-megapixel or 10-megapixel interpolation resolution.
Language: Choose between English, French, German, Italian, Spanish, Traditional Chinese, Simplified Chinese, and Japanese. - Format: This option will format an inserted SD card (or the internal memory, if no SD card is inserted), which will delete all its contents. Select "Yes" to confirm or "No" to cancel.
- FW Upgrade: If an inserted SD card contains an updated firmware file for OMNI SCAN, this option will allow OMNI SCAN to upload that firmware. Select "Yes" to confirm or No" to cancel.
- Default: This option will return OMNI SCAN to its original factory settings. Select "Yes" to confirm or "No" to cancel.
- Version Info: This option will display the model, version, and firmware of the unit. Press ENTER to return to the Setup Mode screen.
When you are finished, press SCAN/HOME to return to the Main Menu.
External memory: SD/MMC card
Exposure: Auto
Color balance: Auto
Scan high resolution: 10-megapixel interpolation resolution
Data conversion: 12 bits per color channel
Scan method: Single pass
Light source: Backlight (3 white LED)
Power: Powered from USB / 5V adapter
Interface: USB 2.0
Dimensions: 121 × 96 × 55 mm ( 4.76'' × 3.78'' × 2.17'' )
Weight: 214 g (0.47 lbs.)
Language:
English, French, German, Italian, Spanish, Traditional Chinese, Simplified Chinese, or Japanese.
www.ionaudio.com/omniscan
ION Audio, LLC
Tel: (U.S.) 401.658.3743
Web: www.ionaudio.com/supporthome
www.ionaudio.com
Made in China
MANUAL VERSION 1.3


Brand : ION
Model : Omni Scan
Category : To scan