
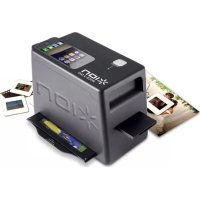
FILM 2 SD PRO - Scanner ION - Free user manual and instructions
Find the device manual for free FILM 2 SD PRO ION in PDF.
| Product Type | Film and Slide Scanner |
| Brand | ION |
| Model | FILM 2 SD PRO |
| Category | Scanner |
| Dimensions (approx.) | 15 x 10 x 5 cm |
| Weight (approx.) | 300 g |
| Power | USB (5V) or included AC power adapter |
| Compatible Film Type | Slides, color negatives, black and white negatives |
| Film Formats | 35 mm (with included film holders) |
| Storage Media | SD flash memory card (up to 32 GB) |
| Video Output | TV OUT (RCA cable included) |
| Connectivity | USB 2.0 for computer transfer |
| Main Functions | Capture, viewing, rotation, mirror, flip, delete, USB transfer |
| Built-in Screen | Yes, for viewing and menus |
| Included Accessories | Slide holder, negative holder, film negative holder, USB cable, TV cable, AC adapter, cleaning brush, 1 GB memory card, user guide |
| Maintenance and Cleaning | Clean the glass with a dry swab; use the brush for the backlight; clean films and trays before use |
| Safety | Turn off the device before removing the memory card; use the provided adapter; do not insert the film holder in the wrong direction |
| Spare Parts and Repairability | Not specified; contact the retailer for any service |
Frequently Asked Questions - FILM 2 SD PRO ION
User questions about FILM 2 SD PRO ION
0 question about this device. Answer the ones you know or ask your own.
Ask a new question about this device
Download the instructions for your Scanner in PDF format for free! Find your manual FILM 2 SD PRO - ION and take your electronic device back in hand. On this page are published all the documents necessary for the use of your device. FILM 2 SD PRO by ION.
USER MANUAL FILM 2 SD PRO ION
FILM2SD
Negative Film Holder
Slide Film Holder
Roll Film Holder
USB Cable
TV Output Cable
1GB SD Card
Power Adapter
- Cleaning Brush
- User Manual
- Safety Information & Warranty Booklet
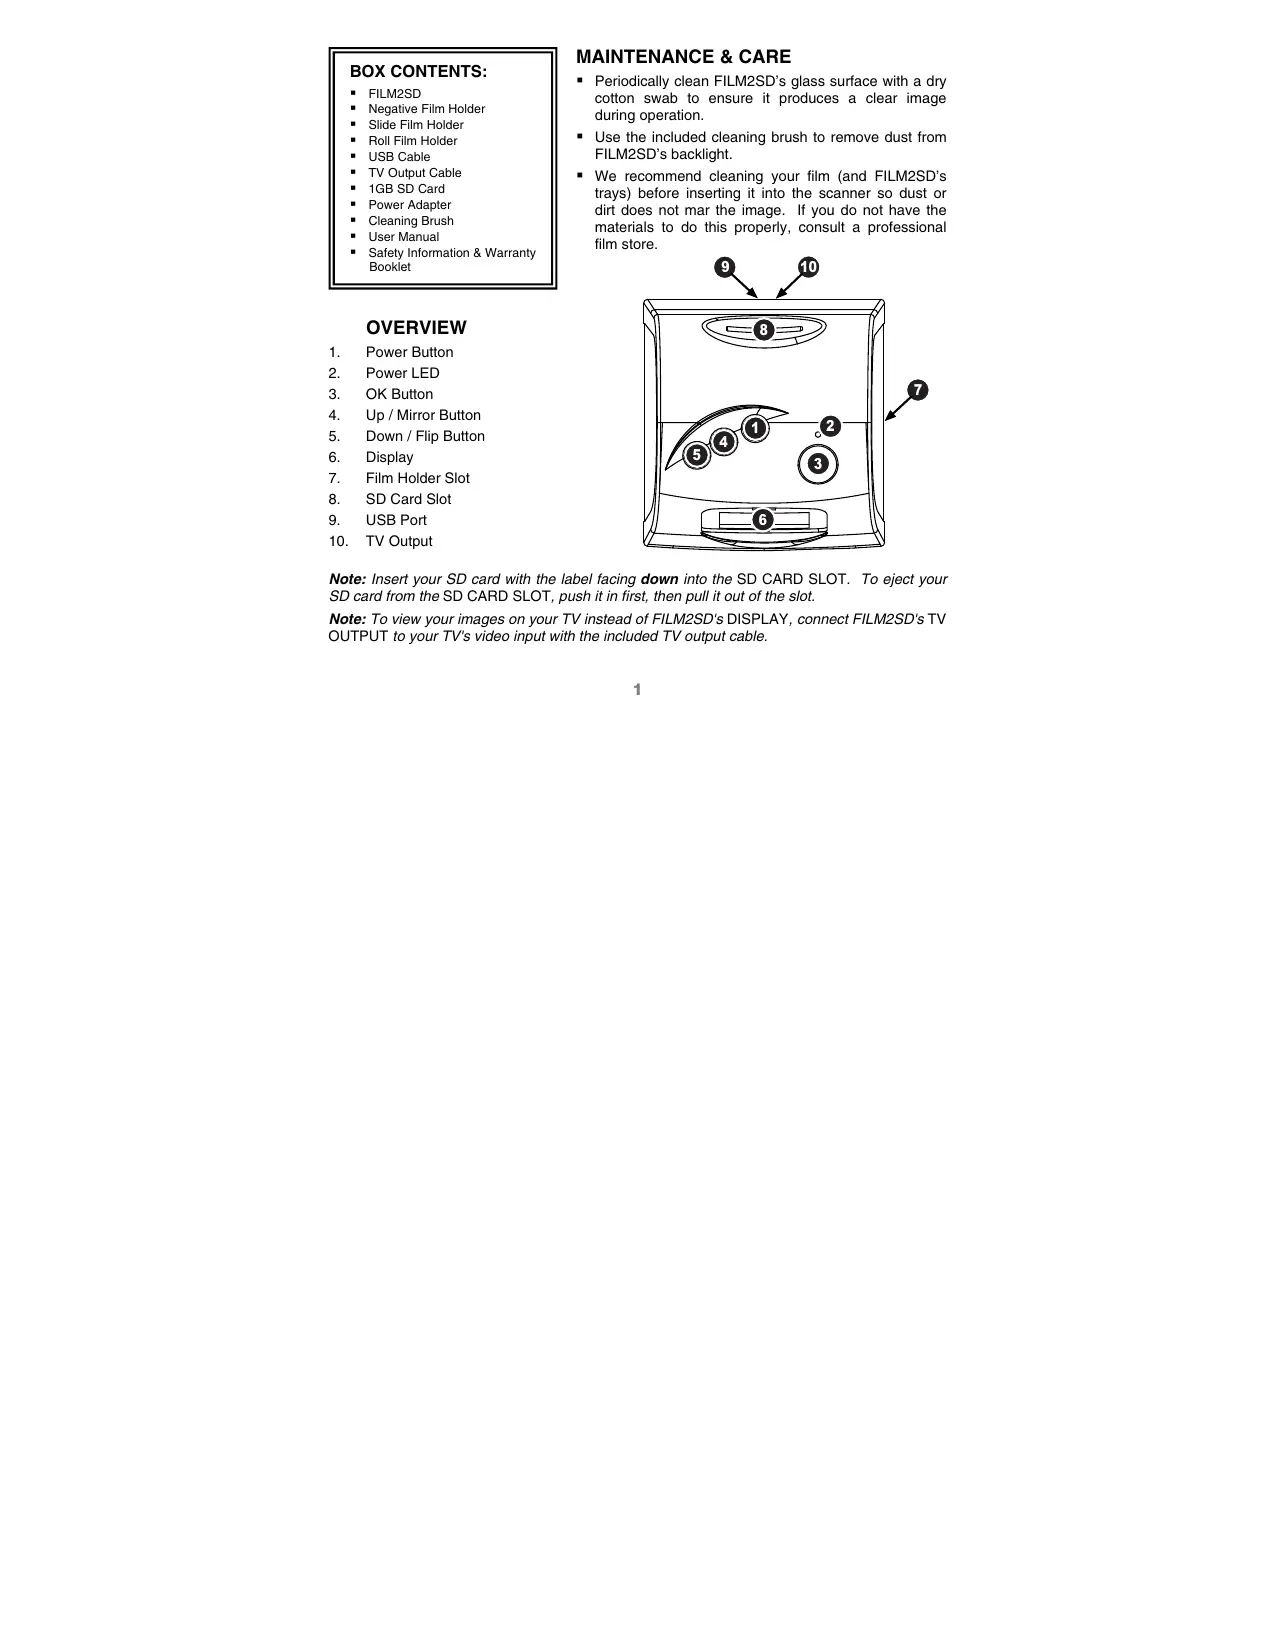
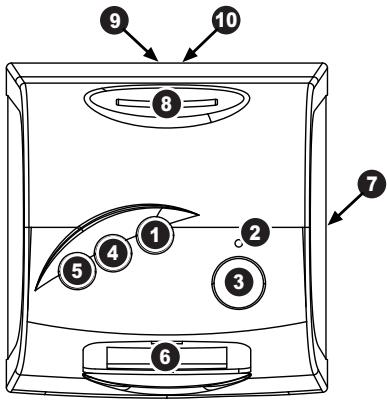
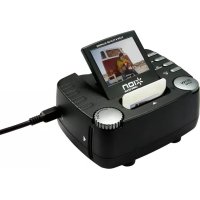
OVERVIEW
- Power Button
- Power LED
- OK Button
- Up / Mirror Button
- Down / Flip Button
- Display
- Film Holder Slot
- SD Card Slot
- USB Port
- TV Output
MAINTENANCE & CARE
Periodically clean FILM2SD's glass surface with a dry cotton swab to ensure it produces a clear image during operation.
- Use the included cleaning brush to remove dust from FILM2SD's backlight.
- We recommend cleaning your film (and FILM2SD's trays) before inserting it into the scanner so dust or dirt does not mar the image. If you do not have the materials to do this properly, consult a professional film store.
Note: Insert your SD card with the label facing down into the SD CARD SLOT. To eject your SD card from the SD CARD SLOT, push it in first, then pull it out of the slot.
Note: To view your images on your TV instead of FILM2SD's DISPLAY, connect FILM2SD's TV OUTPUT to your TV's video input with the included TV output cable.
PLACING SLIDES & NEGATIVES IN THE HOLDERS
| Slides | Negatives | Negatives (Roll) | |
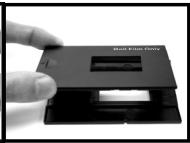
| 1. | Open the film holder by lifting the tab on the bottom. | ||
| 2. | Insert the slide(s) into the slide slot(s) or lay the negative over the negative slot. | ||
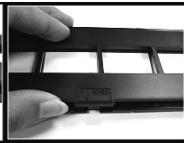
| 3. | Close the film holder. Be sure the latch and sides of the holder are securely in place. Only push the holder through the FILM HOLDER SLOT in the direction of the arrow (from right to left).* |
- To change move to the next picture when using the Roll Film Holder, slide the film itself through the holder (while the holder is inserted in FILM2SD's FILM HOLDER SLOT).
Note: If the image is scanned upside down or mirrored, you can also correct this by using the FLIP or MIRROR buttons later.
Tip: To avoid laying a negative in the wrong direction (which will produce a mirror image), be sure you can correctly read the serial numbers at the top of the negative when placing it in the holder.
QUICKSTART
- Connect FILM2SD to your computer's USB port or to a power outlet with the included power adapter.
- Turn on the FILM2SD with the POWER button.
- Place your slide(s) or negative into the appropriate holder. Be sure the latch and sides of the holder are securely in place.
- Insert the holder into the FILM HOLDER SLOT. Only push the holder through the FILM HOLDER SLOT in the direction of the arrow (from right to left).
- Insert your SD card with the label facing down into the SD CARD SLOT. When you save your scanned images, they will be stored on the SD card.
- Capture your image by pressing the OK button.
- Press the OK button again to save the image.
- Turn off FILM2SD before removing your SD card (otherwise its contents may be lost). To eject your SD card from the SD CARD SLOT, push it in first, then pull it out of the slot. Now you can insert it into an SD-compatible device, such as a digital picture frame, computer or television, to view your pictures.
If you want to transfer your image(s) directly to your computer from FILM2SD, connect FILM2SD to your computer with the included USB cable and select the USB icon (USB Mode) from the Main Menu to establish the connection. FILM2SD will appear as a removable device in "My Computer" (Windows) or on your Desktop (Mac). Once the connection has been established, you can copy the images to your computer by dragging the image files to your hard drive.
Note: While FILM2SD is in USB Mode, you will not be able to scan other pictures. To enable scanning again, turn off FILM2SD, then turn it on again and enter Capture Mode.
Note: To view your images on your TV instead of FILM2SD's DISPLAY, connect FILM2SD's TV OUTPUT to your TV's video input with the included TV output cable.
When viewing any menus with multiple options, you can use the UP / MIRROR and DOWN / FLIP buttons to move through them and press the OK button to select one.
MAIN MENU
- Capture Mode: Allows you to capture images. FILM2SD will enter Capture Mode automatically if no buttons are pressed for five seconds.
- Playback Mode: Allows you to view your images.
- Film Type: Select the kind of film you are using.
- USB Mode: Allows you to transfer your images to a connected computer via USB. Once your images are on your computer, you can view and edit them as you wish.
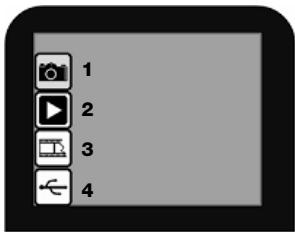
If there is no SD card in the SD Card Slot, a “?” icon will appear on the screen.
Capture Mode
When in Capture Mode, a red indicator in the upper left-hand corner will indicate FILM2SD is viewing the image in the film holder. Press OK to capture the image.
Once an image is captured, you will see the following menu options:
- Save: Saves the captured image.
- Rotate Right: Rotates the image clockwise by 90^ .
- Rotate Left: Rotates the image counterclockwise by 90^ .
- Cancel: Cancels editing without saving the image to the SD card.
- Home: Returns to the Main Menu.

After selecting Save or Cancel, you can move the film holder to the next image you want to capture. Once the SD card is full, a "FULL" icon will appear on the screen. Either transfer the contents of the SD card to your computer or insert an SD card with available memory.
When you enter Playback/Edit Mode, your captured images will be displayed in a slideshow, allowing you to preview and/or edit them. To stop the slideshow, press the OK button.
With the slideshow stopped, you can use the UP / MIRROR and DOWN / FLIP buttons to move through your saved images one by one. Press the OK button to select one to edit.
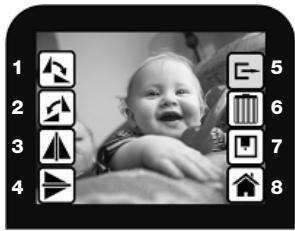
In Playback/Edit Mode, you will see the following menu options.
- Rotate Right: Rotates the image clockwise by 90^ .
- Rotate Left: Rotates the image counterclockwise by 90^ .
- Mirror: Flips the image left to right.
- Flip: Flips the image upside-down.
- Exit: Returns to the slideshow.
- Delete: deletes the image from the SD card.
- Save: Saves the captured image.
- Home: Returns to the Main Menu.
If there are no images saved to the SD card while in Playback Mode, a “?” icon will appear on the screen.
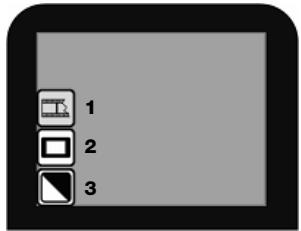
■ Film Type
Here, select the type of film you have placed in the film holder.
- Color Negative
- Slide
- Black & White Negative

USB Mode

USB Mode allows you to transfer images from your SD card directly to your computer. While in USB Mode, FILM2SD becomes an SD card reader for your computer. To enter mode, connect FILM2SD to your computer's USB port with the included USB cable. Then, select the USB icon from FILM2SD's Main Menu. A USB symbol should appear on the PLAY, signifying that the connection has been established. FILM2SD will appear as a movable device in "My Computer" (Windows) or on your Desktop (Mac).
Note: While FILM2SD is in USB Mode, you will not be able to scan other pictures. To enable scanning again, turn off FILM2SD, then turn it on again and enter Capture Mode.
CONTENIDO DE LA CAJA

Dias
Negatives
Negatives (Rolle)
- Color Negative
- Slide
- Black & White Negative
USB Mode

Image Sensor: 5-megapixel CMOS sensor
Lens: F no. = 2.0 ,4 glass elements
LCD: 2.4" color TFT LCD
Scan Quality: 1,800 dpi (3,600 interpolated)
Scan Method: Single pass
Light Source: Backlight (3 white LEDs)
Data Conversion: 10 bits per color channel
Exposure Control: Automatic
Color Balance: Automatic
Focus Range: Fixed focus
Internal Memory: 24 MB NAND Flash (for saving images)
External Memory: SD/MMC compatible
USB Configuration: Mass Storage Device Class / MSDC
Interface: USB2.0, TV-out (video 3.5mm jack)
Operating Systems: Windows XP / Vista
Power: 5 V adapter (included) or USB-powered
Dimensions: 82mm x 86mm x 152mm
Weight: .39 kg
ION Audio, LLC
Tel: (U.S.) 401.658.3743
E-mail: support@ion-audio.com
www.ionaudio.com

Brand : ION
Model : FILM 2 SD PRO
Category : Scanner