M6.1 - Counter VDO - Free user manual and instructions
Find the device manual for free M6.1 VDO in PDF.
User questions about M6.1 VDO
0 question about this device. Answer the ones you know or ask your own.
Ask a new question about this device
Download the instructions for your Counter in PDF format for free! Find your manual M6.1 - VDO and take your electronic device back in hand. On this page are published all the documents necessary for the use of your device. M6.1 by VDO.
USER MANUAL M6.1 VDO
Montage/Installation/Installation/Montaggio/Montaje/Installatie
Reifengrößen-Tabelle / Wheelsize Chart / Tableau des pneus / Tabella dimensioni ruote / Tabla de tamanos de neumáticos / Tabel met wielematen 172
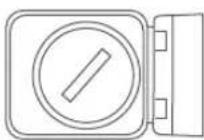
Montage der Halterung / Handlebar mount / Montage du support /Montaggio del supporto / Montaje del soporte /
Montage van de houder 174
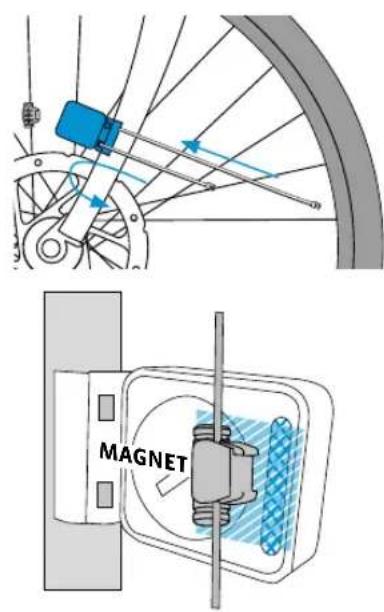
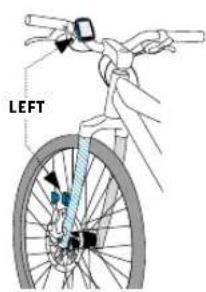
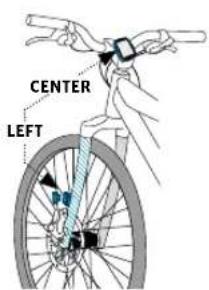
Montage des Magneten / Installation of the magnet / Montage de I'aimant / Montaggio del magnete / Montaje del iman / Montage van de magneeet 174
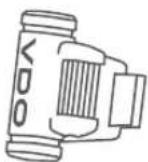
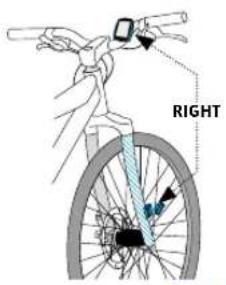
Montage des Geschw.-Senders / Installation wireless transmitter /Montage de I'émetteur de vitesse / Montaggio del sensore divelocità / Montaje del transmisor de velocidad /
Montage van de snelheidszender 175
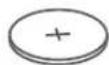
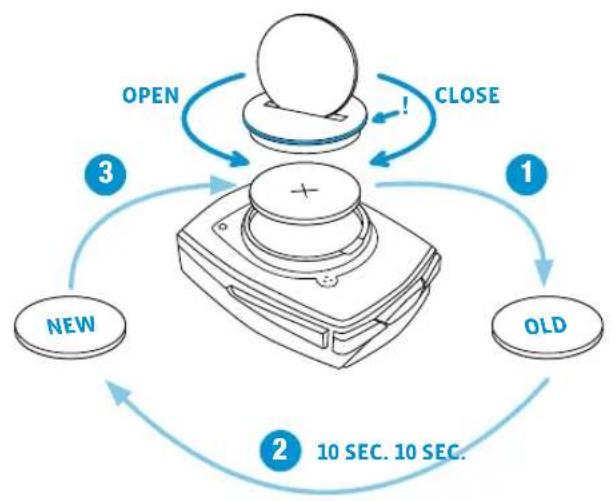
Batteriewechsel Computer / Battery change bike computer / Replacement de la pile du compteur / Sostituzione batteria computer / Cambio de bateria del ordinador /
De batterij van de computer verrangen 176
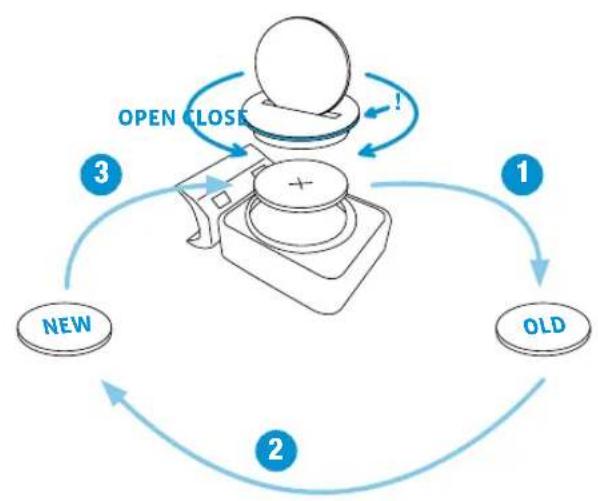
Batteriewechsel Geschw.-Senders / Battery change speed transmitter / Remplacement de la pile de l'émetteur de vitesse /
Sostituzione batteria sensore di velocità / Cambio de bateria del transmisor de velocidad / De batterij van de snelheidszender verrangen 176
Verpackungsinhalt
Batterie eingebaut

service@cycleparts.de
A full instruction manual can be found at: www.vdocyclecomputing.com
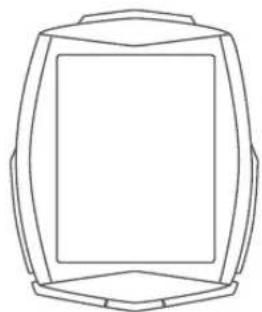
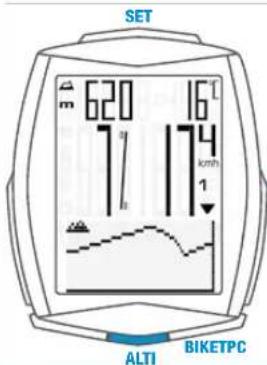
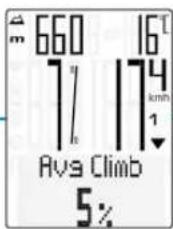
Display
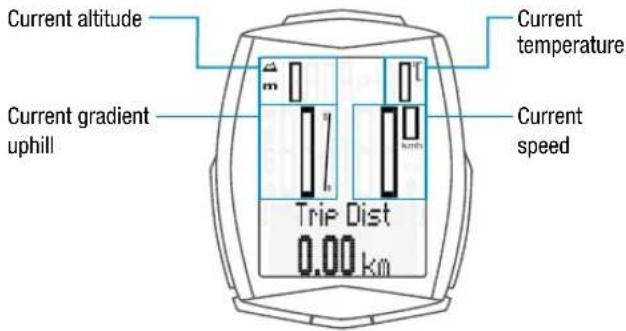
Standard display:

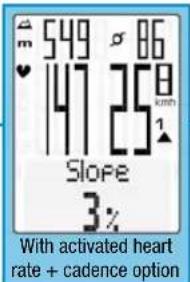
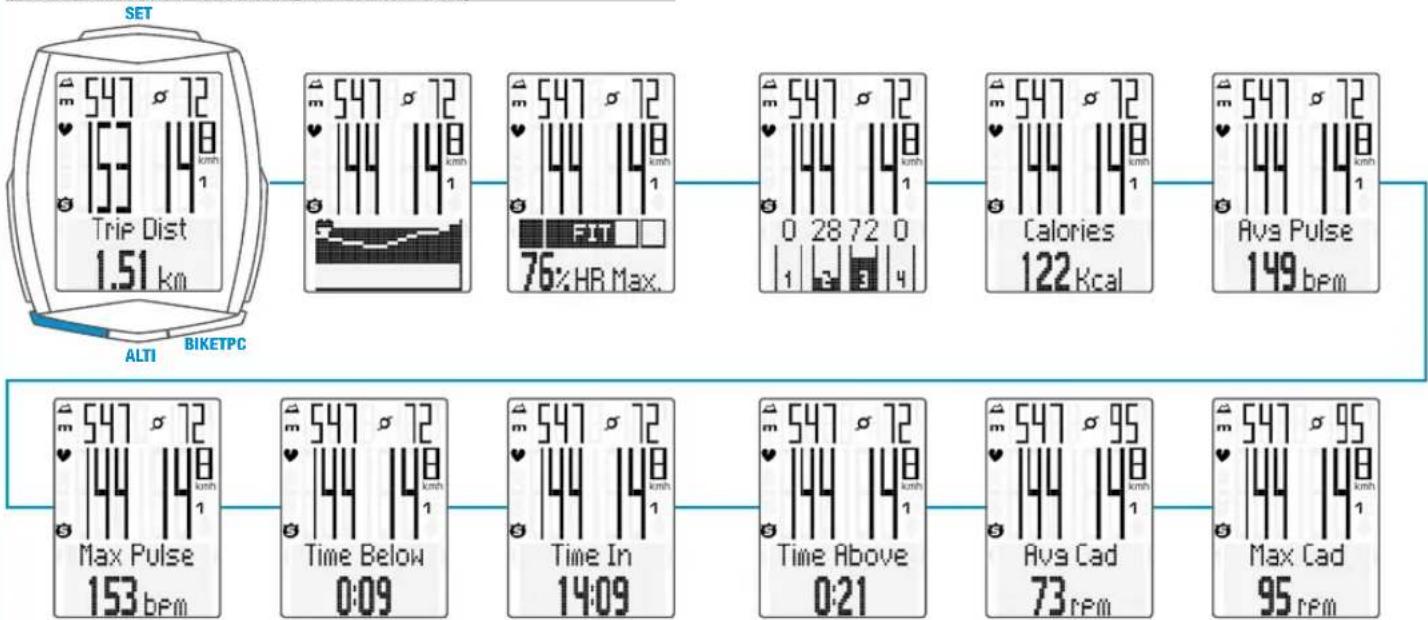
Display with activated heart rate + cadence option:
Icons
- 'KMH/MPH': shows the selected speed unit
or 2: shows the selected bike - bike 1 or bike 2 - : comparison of current speed with the average speed
- ' 5 icon: shows that the trip section counter is active
icon: shows that the light mode is active
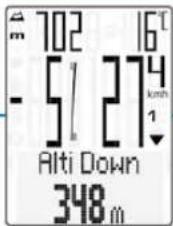
Heart rate arrow: shows whether the heart rate is above or below the selected training zone - 'm' or 'ft': indicates the altitude unit in metres or feet
- 'C' or 'F': indicates the temperature in Celsius or Fahrenheit

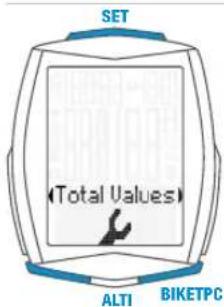
Buttons
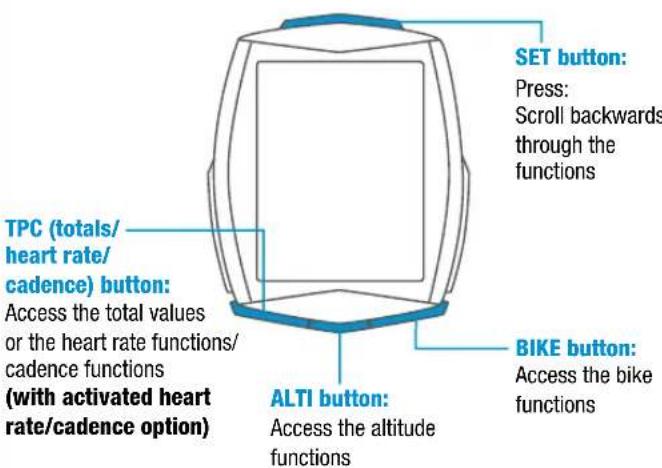
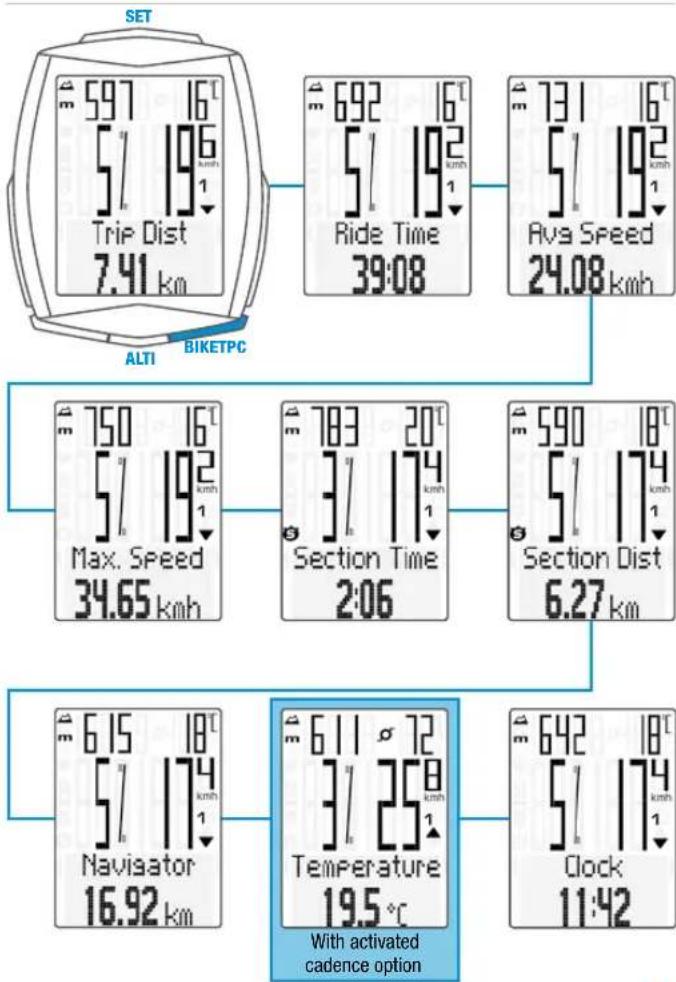
BIKE button functions
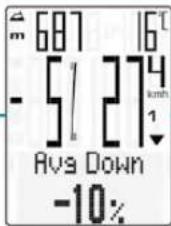
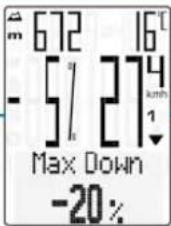
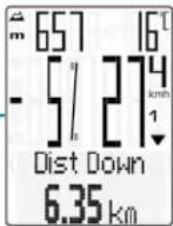
ALTI button functions
TPC button functions
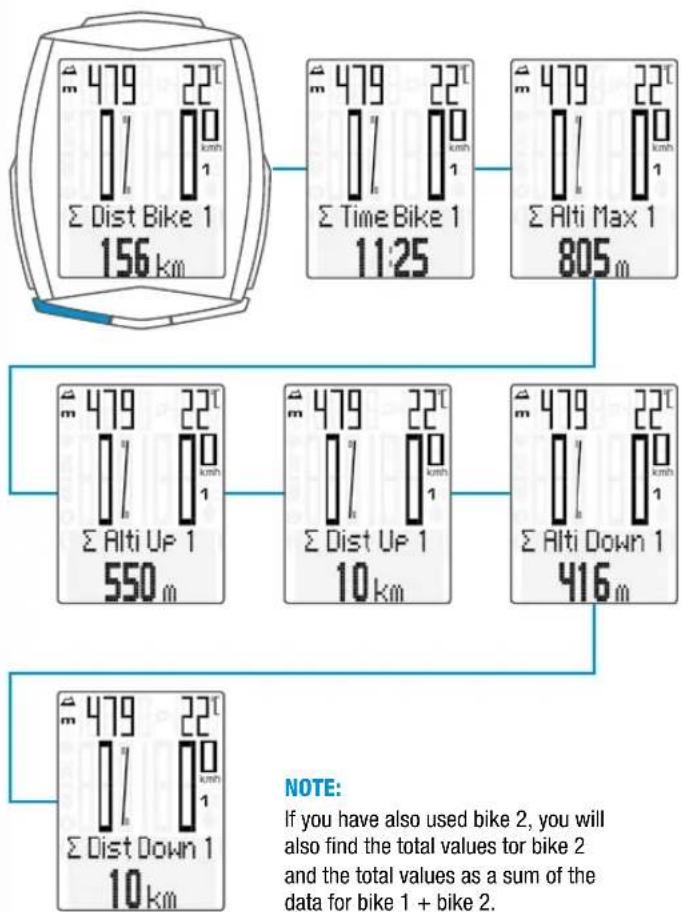
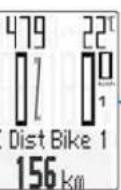
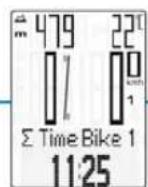
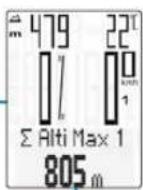
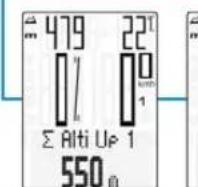
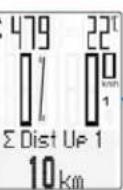
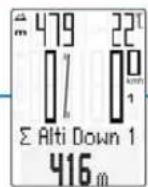
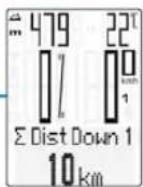
Total data for bike 1
TPC button functions
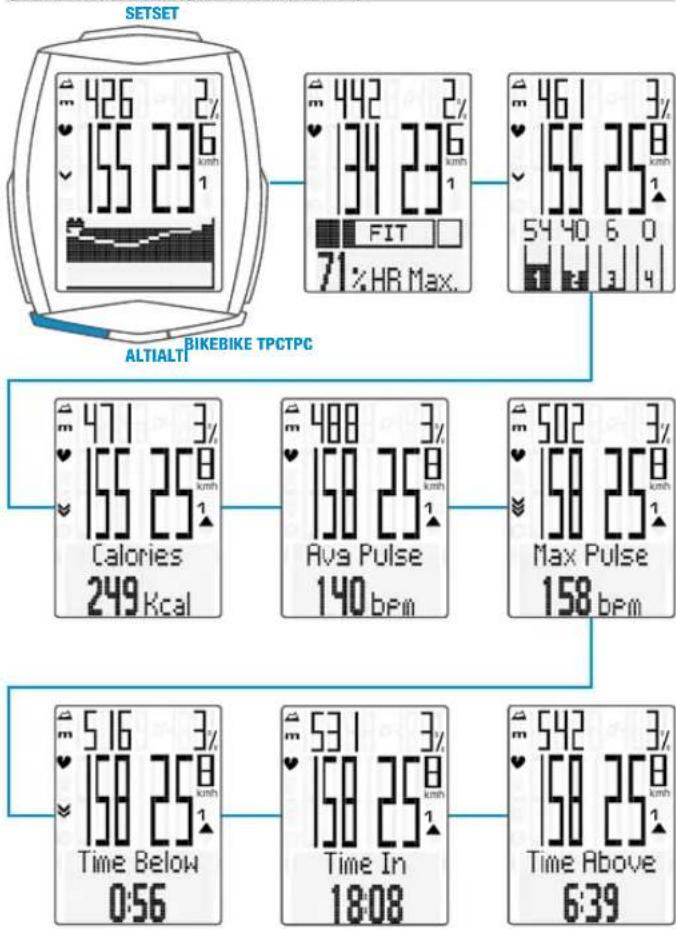
(If the heart rate option is activated)
TPC button functions
(If the heart rate + cadence option is activated)
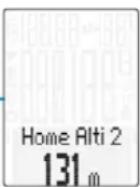
Select altitude/recalibrate
Two selectable start altitudes, current altitude can be set in metres/feet or by means of the sea level pressure.
Recalibration:
Recalibration must occur before every trip.
The M6.1 measures the current air pressure and converts it into an altitude measurement. However, the air pressure changes daily depending on the weather. This leads to a constantly changing current altitude measurement despite your start altitude not having changed.
During recalibration, the currently measured air pressure is calculated back to the set start altitude. Following recalibration, the current altitude once again matches the set start altitude.
If you are not setting off from start altitude 1 or 2, you can correct the current altitude here. This can be done by entering either the altitude in metres/feet or the sea level pressure.
Details of the sea level pressure can be found on weather websites.
- Press and hold the ALTI button
- Scroll by pressing the BIKE or TPC button
- Make a selection by pressing the SET button
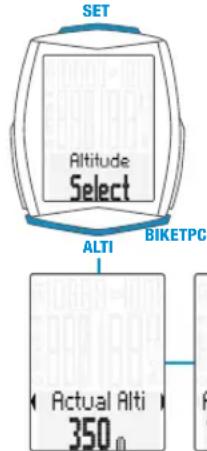
in Pressure 013.2 hPa
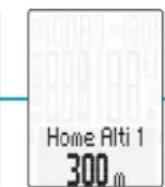
Home Alti 1 300m
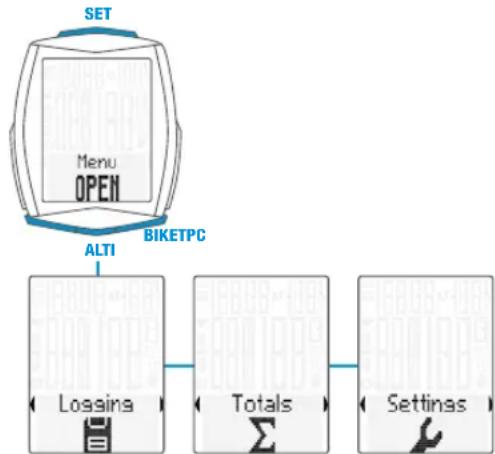
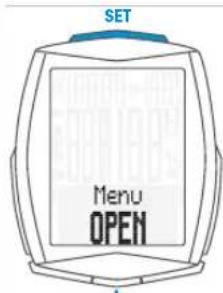
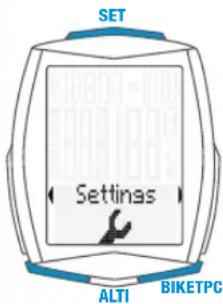
Settings using the SET button
- Open the settings menu:
Press and hold the SET button until the settings menu opens - Scroll from Logging to Settings:
Press the BIKE or TPC button - Open the settings menu: press the SET button
- Scroll to the desired setting in the settings menu: press the BIKE or TPC button
- Open the settings:
press the SET button
- Change the data:
press the BIKE or TPC button - Confirm the setting:
press the SET button - Close the settings menu/back to the function menu:
press and hold the SET button - Or close the settings menu/back one level:
press and hold the ALTI button
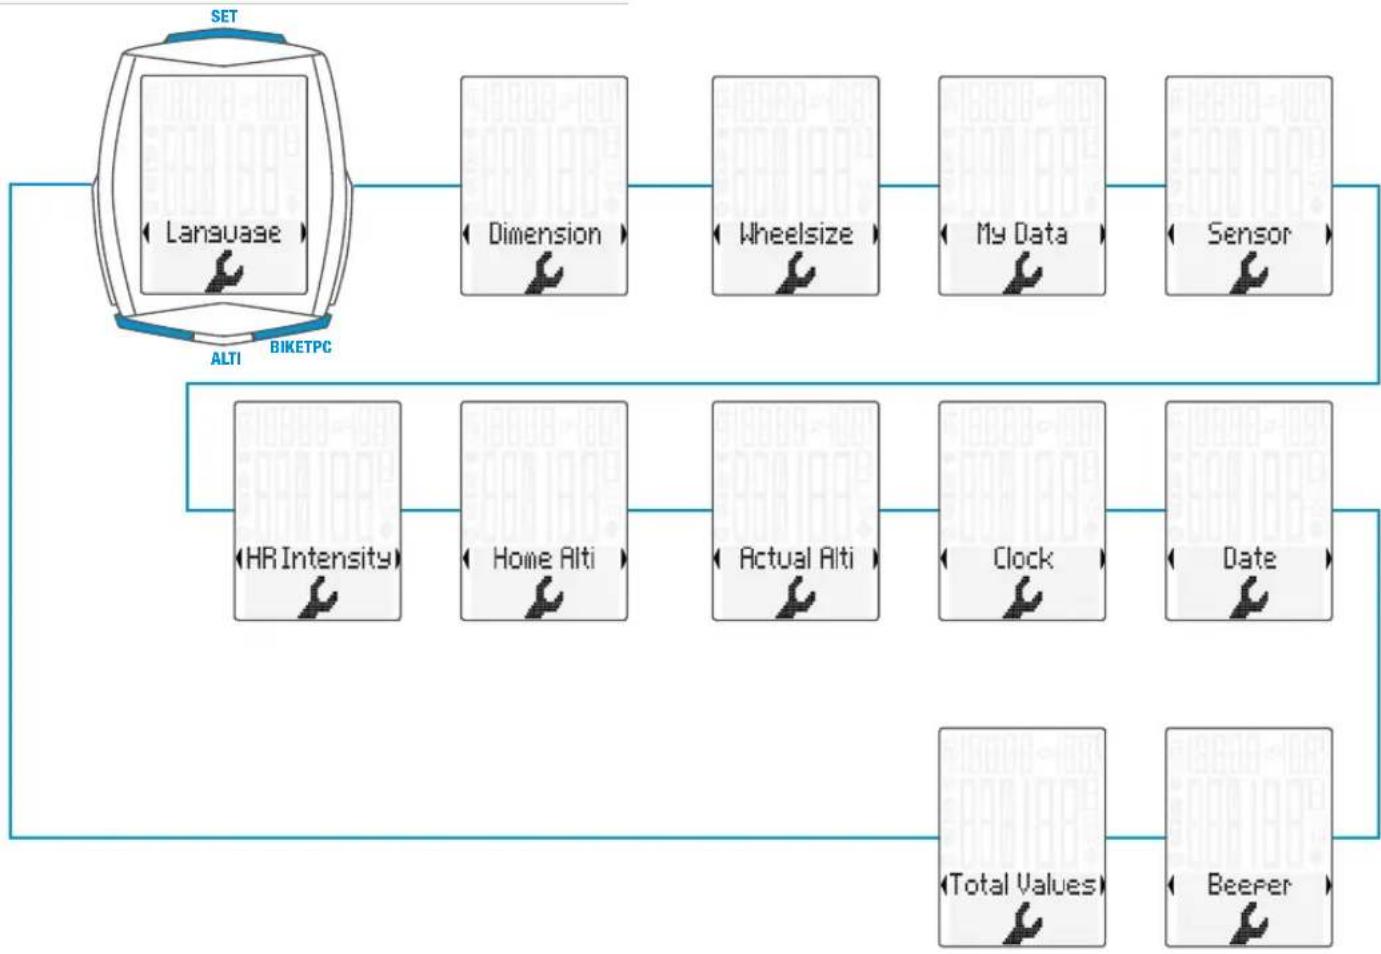
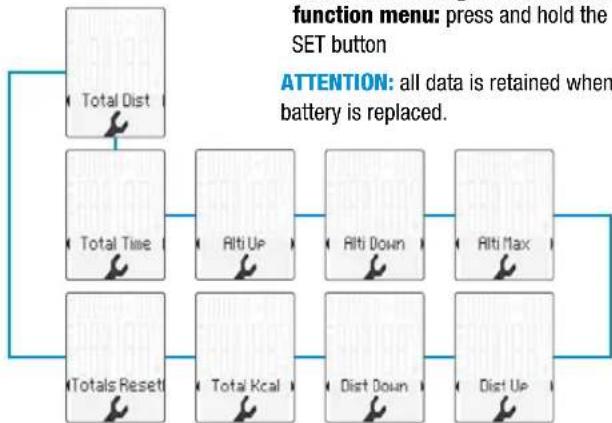
Setting menus
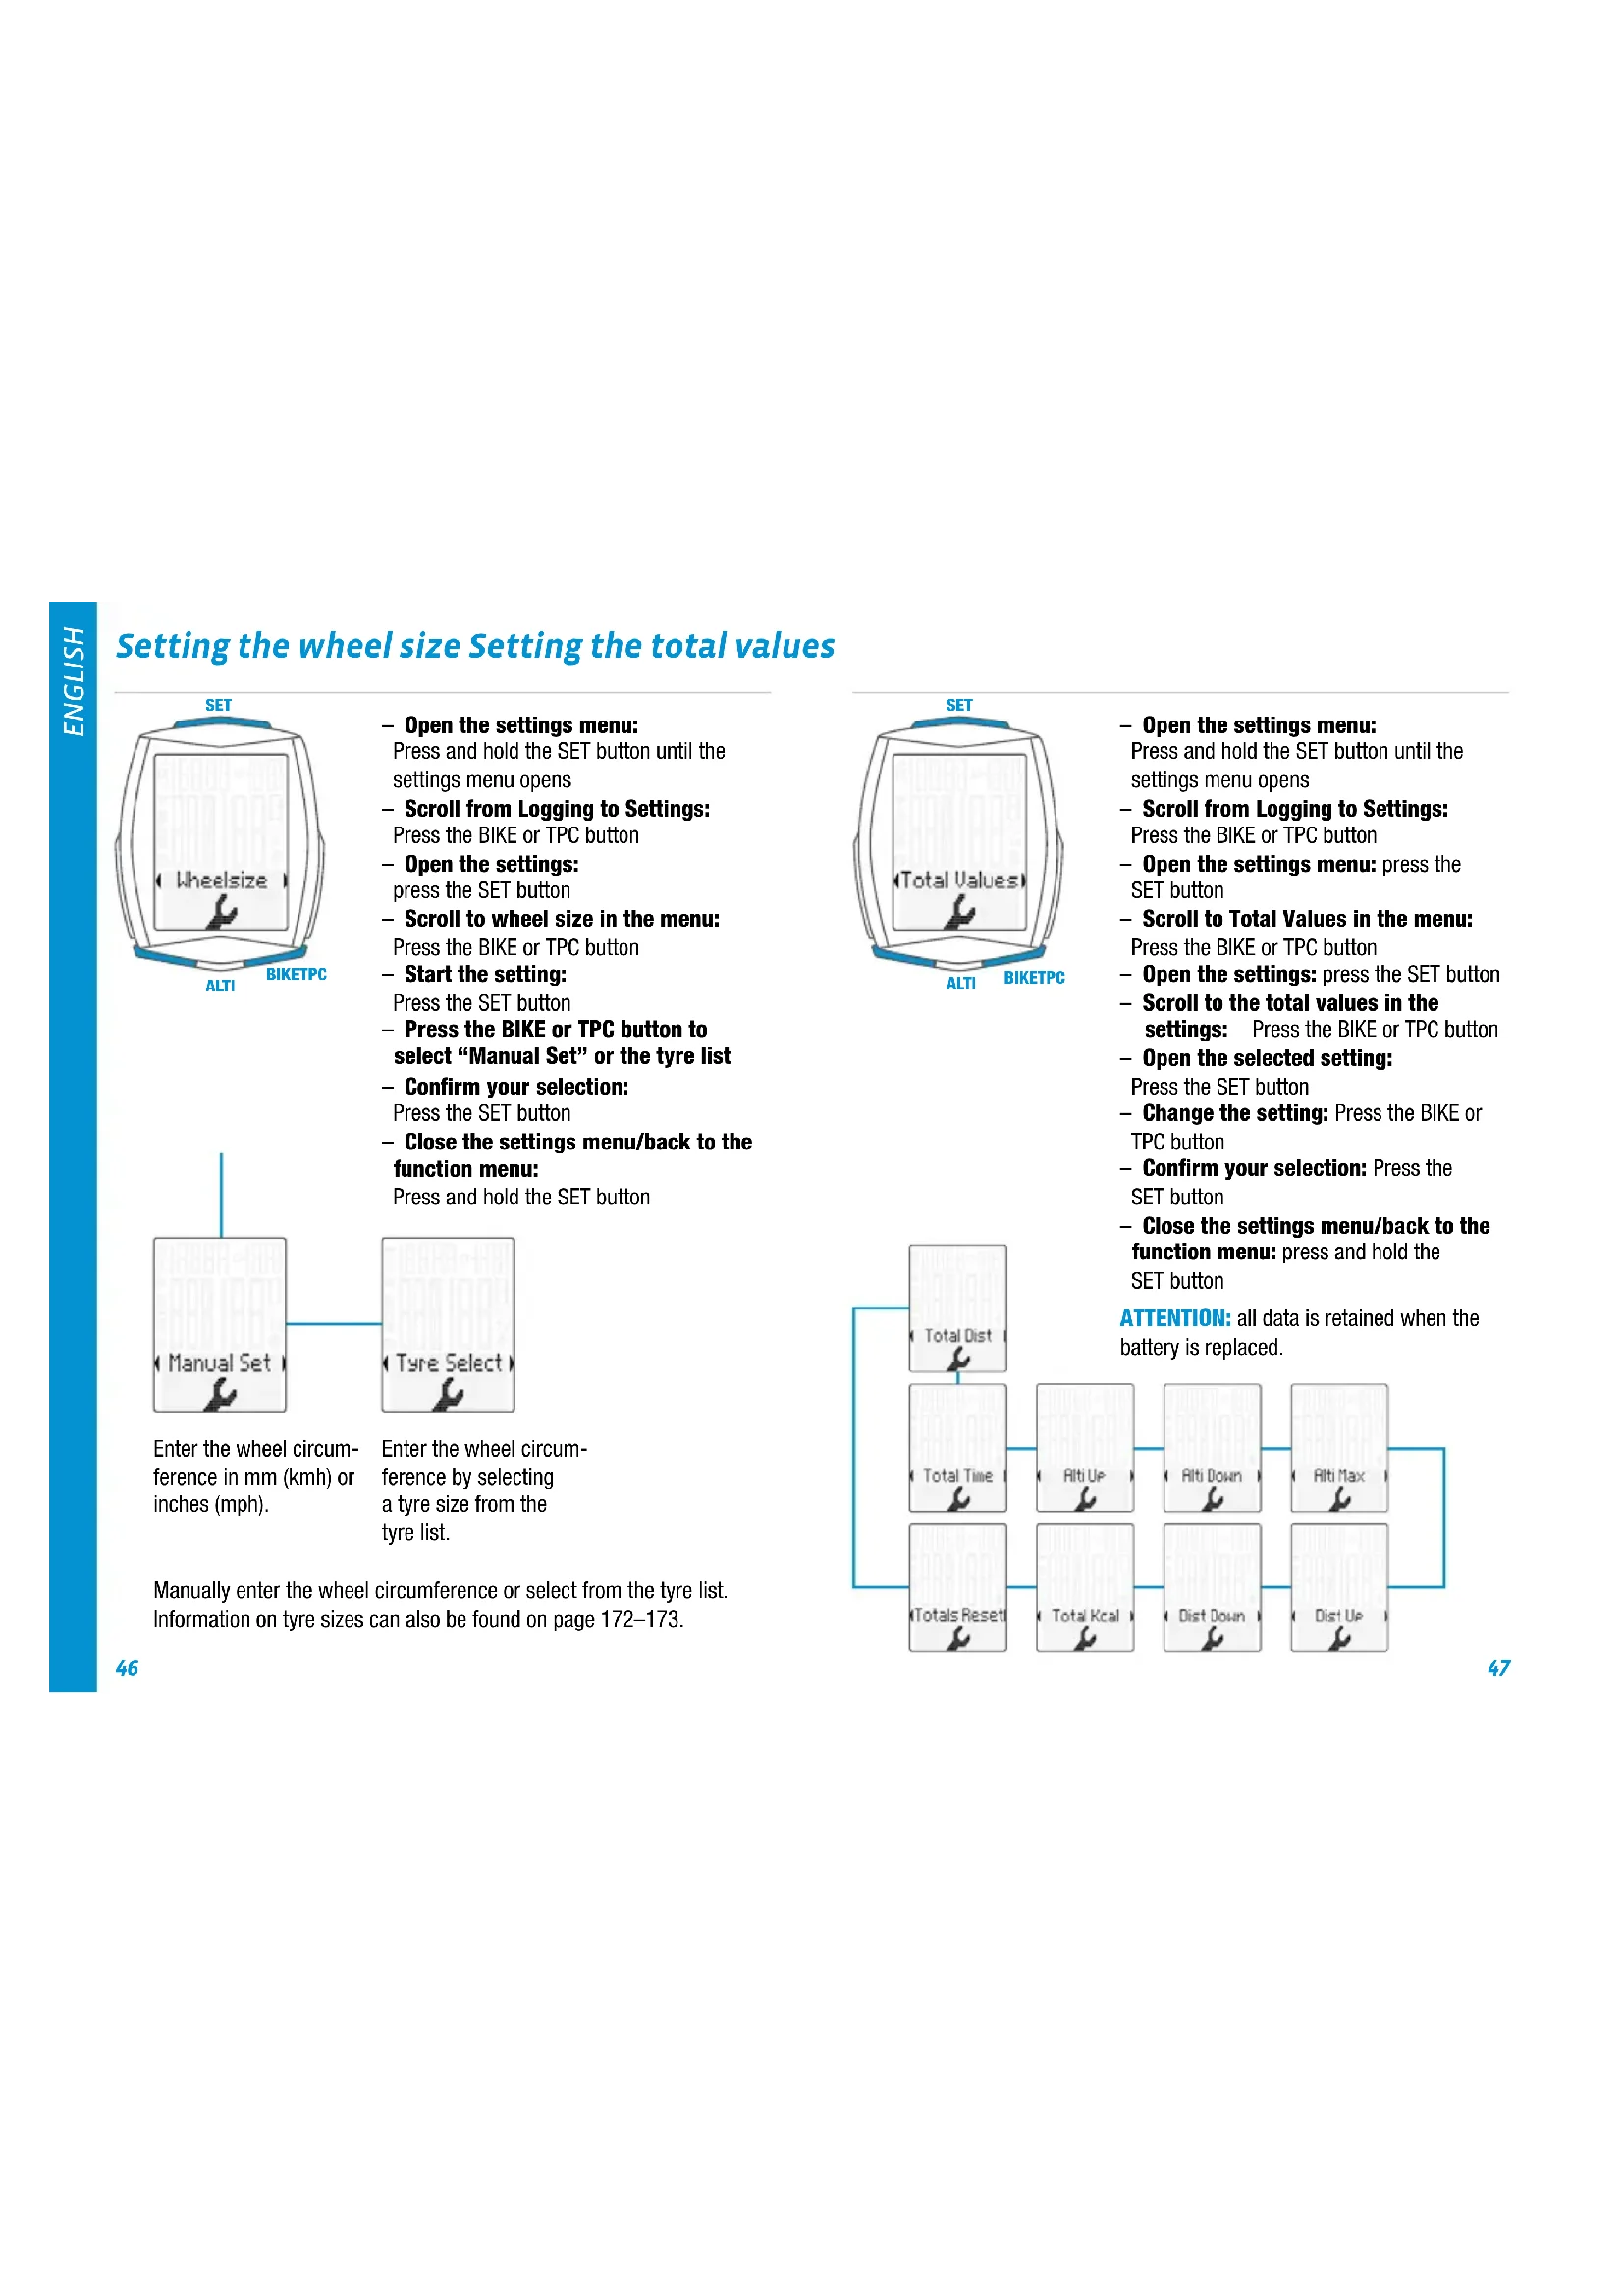
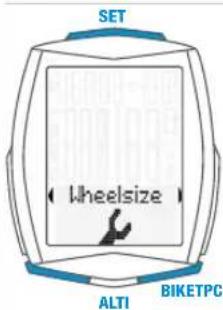
Setting the wheel size Setting the total values
- Open the settings menu:
Press and hold the SET button until the settings menu opens - Scroll from Logging to Settings: Press the BIKE or TPC button
- Open the settings: press the SET button
- Scroll to wheel size in the menu: Press the BIKE or TPC button
- Start the setting: Press the SET button
Press the BIKE or TPC button to select "Manual Set" or the tyre list - Confirm your selection: Press the SET button
- Close the settings menu/back to the function menu:
Press and hold the SET button
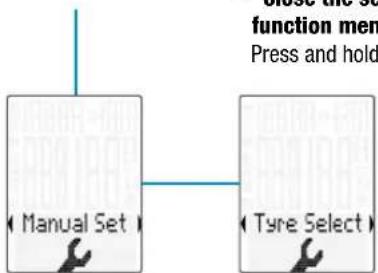
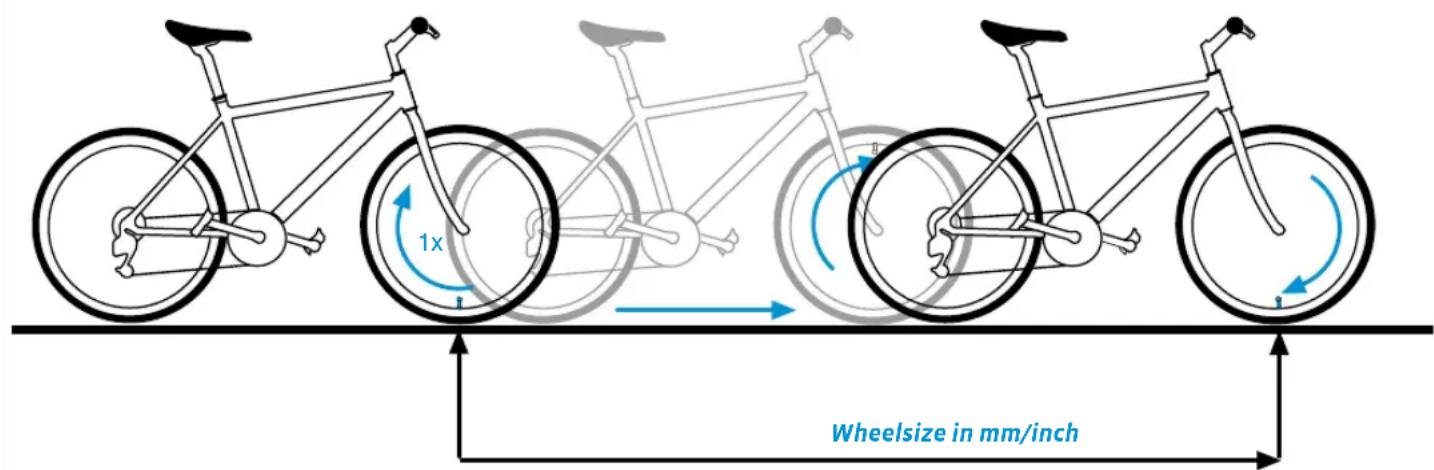
Enter the wheel circumference in mm (kmh) or inches (mph).
Enter the wheel circumference by selecting a tyre size from the tyre list.
Manually enter the wheel circumference or select from the tyre list. Information on tyre sizes can also be found on page 172-173.
- Open the settings menu:
Press and hold the SET button until the settings menu opens - Scroll from Logging to Settings:
Press the BIKE or TPC button - Open the settings menu: press the SET button
Scroll to Total Values in the menu: Press the BIKE or TPC button - Open the settings: press the SET button
Scroll to the total values in the settings: Press the BIKE or TPC button - Open the selected setting:
Press the SET button - Change the setting: Press the BIKE or TPC button
- Confirm your selection: Press the SET button
- Close the settings menu/back to the function menu: press and hold the SET button
ATTENTION: all data is retained when the battery is replaced.
Accessing the total values with the heart rate/cadence option activated
- Open the menu:
Press and hold the SET button until the menu opens
- Scroll from Logging to Totals:
Press the BIKE or TPC button
- Open the total values:
Press the SET button
- Scroll through the total values:
Press the BIKE or TPC button
- Close the total values/back to the function menu:
Press and hold the SET button

Resetting all total data
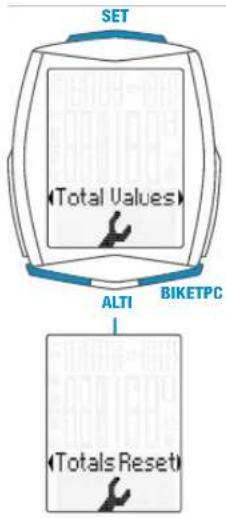
E.g. at the start of the next season.
- Open the menu:
Press and hold the SET button until
the menu opens
- Scroll from Logging to Settings:
Press the BIKE or TPC button
- Open the settings menu:
Press the SET button
- Scroll to the total values:
Press the BIKE or TPC button
- Open the settings:
Press the SET button
- Scroll to Totals Reset:
Press the BIKE or TPC button
- Open Totals Reset:
Press the SET button
Selection:
Press the BIKE or TPC button
- Confirm the selection:
Press the SET button
- Close the settings menu/back to the
function menu: press and hold the
SET button
ATTENTION: The reset procedure cannot be undone.
Resetting trip data to zero
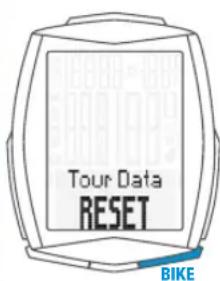
- Press and hold the BIKE button
- The following message appears on the display: Tour Data RESET
- Continue holding the BIKE button
Note: the distance, ride time, altitude data and calories (if heart rate option is activated) are all added to the total data.
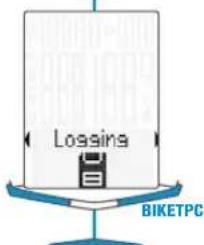
Any trip record is automatically saved at RESET and accessible under menu item "LOGGING".
Accessing the trip data from the memory
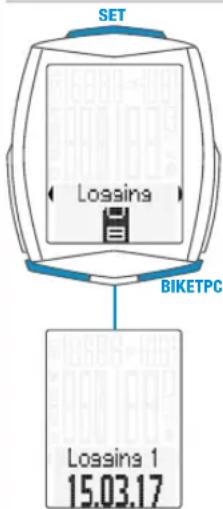
- Press and hold the SET button
- Open the Logging by pressing the SET button
- Scroll in the logs: Press the BIKE or TPC button
View the log: Press the SET button - Scroll through the detailed trip data:
Press the BIKE or TPC button - Exit the logs: Press and hold the SET button
Notice: With the optionally available VDO Docking-Station and the VDO Converter software you are able to retrieve and save all logs. (.fit-Format compatible with PC and Android devices)
Starting/stopping a TRIP SECTION
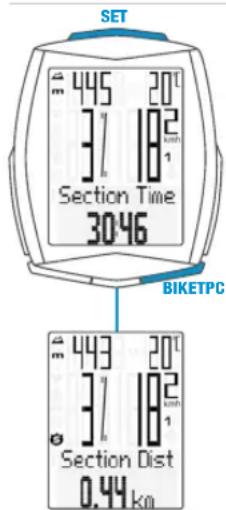
- START: press the BIKE + SET buttons simultaneously
- STOP: press the BIKE + SET buttons simultaneously
- Re-START: press the BIKE + SET buttons simultaneously again
- RESET: With "TRIP SECTION" selected and displayed, press and hold the BIKE-button
ATTENTION: if the speed is ZERO, the trip section counter stops automatically. If you continue the ride, the trip-section counter continues automatically.
Setting the NAVIGATOR

- Press the BIKE button to display the NAVIGATOR function
- Press and hold the SET button
- Change data: press the BIKE or TPC button
- Confirm the setting: press the SET button
Resetting the NAVIGATOR to ZERO
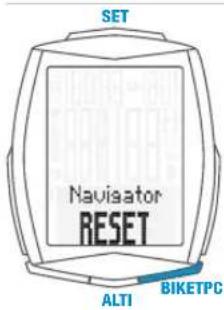
Show the navigator function on the display
- RESET: press and hold the BIKE button
Light mode ON/OFF
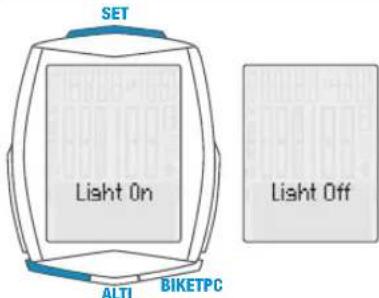
- ON: press the TPC + SET buttons simultaneously
- OFF: press the TPC + SET buttons simultaneously
ATTENTION: the light mode is automatically deactivated after a break to reduce the battery consumption.
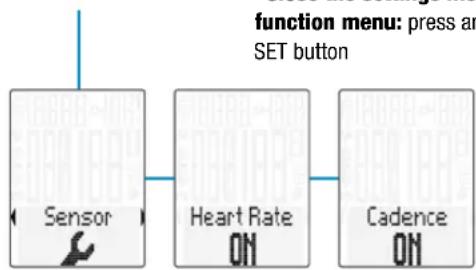
Activating the heart rate/cadence option
ATTENTION: heart rate transmitter item no. CP3013 and/or cadence transmitter item no. CP3012 are required for activation.
- Press and hold the SET button
- Scroll from Logging to Settings:
By pressing the BIKE or TPC button - Open by pressing the SET button
- Scroll to SENSOR by pressing the BIKE or TPC button
- Open the sensor selection by pressing the SET button
- Select the sensor by pressing the BIKE or TPC button
- Confirm by pressing the SET button
- Close the settings menu/back to the function menu: press and hold the SET button
Pairing the transmitter
- Insert the M6.1 computer into the handlebar bracket
- Speed indicator flashes
- If the heart rate option is activated: heart rate indicator flashes
- If the cadence option is activated: cadence indicator flashes
- Flashing display: searching for the transmitter
- Spin the front wheel: speed is found and displayed
- Spin the foot pedal: cadence is found and displayed
Put on the heart rate transmitter: heart rate is found and displayed
ATTENTION: When other radio signals interfere during the pairing function, the display shows the message "Too Many Signals".
Confirm this message by pressing any key. You will then need to leave this location and move to another location. Untwist the computer from the handlebar bracket. Then reinsert the computer into the handlebar bracket. The computer will now attempt another pairing.
Potential source of interference:
- LED lights
- Mobile telephone
-GPS receiver - WLAN
- Anti-theft security systems inside the store These sources can interfere with the pairing.

ATTENTION: when using the transmitter for the first time, the bike recognition switch must be set to either BIKE 1 or BIKE 2. Only then will the automatic bike recognition work.
Press and HOLD the button until the LED flashes.
Green flashes once = bike 1 is selected Red flashes twice = bike 2 is selected
Terms of guarantee
VDO Cycle Parts offers a two-year guarantee on your VDO computer, starting from date of purchase. This guarantee covers material and processing defects on the computer itself, the sensor/transmitter and the handlebar bracket. Cables, batteries and mounting materials are not covered by the guarantee.
The guarantee is only valid if the affected components have not been opened (exception: computer's battery compartment), no force has been used and there is no sign of wilful damage.
Please store the purchase receipt in a safe place as it must be submitted in the event of a complaint. If your complaint is legitimate, you will receive a comparable replacement device. You are not entitled to a replacement of the identical model if the model in question is no longer in production due to a model change.
Please contact the dealer from whom you purchased the device for all complaints and guarantee claims. Alternatively, send your complaint directly to:
Cycle Parts GmbH
Le Quartier Hornbach 13
If you have any technical questions, please do not hesitate to call our hotline on:
Our telephone hotline is available to assist you 9:00-12:00, Monday to Friday service@cycleparts.de
Additional technical information is available at: www.vdicyclecomputing.com
We reserve the right to make technical changes in the course of further development.
EU declaration of conformity
We, CYCLE PARTS GmbH, Le Quartier Hornbach 13, D-67433 Neustadt/Weinstraße, declare that when used as intended, the VDO cycle computer with wireless transmission VDO M6.1 and all transmitters D3-SPD, D3-CAD, D3-HR comply with the essential requirements established in Article 3 of the R&TTE Directive 1999/5/EC.
The declaration of conformity can be found at: www.vdcyclecomputing.com.
Correct disposal of this product (electrical waste)

(To be used in EU countries and other European countries with a separate collection system). The labelling on the product and the relevant literature indicates that it must not be disposed of with normal household waste at the end of its service life. Please
dispose of this device separately to other waste so as not to harm the environment or human health through uncontrolled waste disposal. Recycle the device to promote the sustainable reuse of material resources. Private users should contact the retailer from whom they purchased the product or the responsible authorities to find out how they can recycle the device in an environment-friendly manner. Commercial users should contact their suppliers and consult the conditions of the sales agreement. This product must not be disposed of with other commercial waste.
ATTENZIONE: Anything that is not yet accepted by the system.
Solo successivement sera in
service@cycleparts.de
service@cycleparts.de
Puede acceder a mayor informacion技术水平
www.vdocyclecomputing.com
9:00 - 12:00研究成果, including the results of the study, will be published in the journal.
This device complies with Industry Canada licence-exempt RSS standard(s). Operation is subject to the following two conditions:
(1) This device may not cause interference, and
(2) this device must accept any interference, including interference that may cause undesired operation of the device.
This Class digital apparatus complies with Canadian ICES-003.
FCC-Addendum
This device complies with part 15 of the FCC Rules. Operation is subject to the following two conditions:
(1) This device may not cause harmful interference, and
(2) this device must accept any interference received, including interference that may cause undesired operation.
NOTE: This equipment has been tested and found to comply with the limits for a Class B digital device, pursuant to part 15 of the FCC Rules. These limits are designed to provide reasonable protection against harmful interference in a residential installation. This equipment generates, uses and can radiate radio frequency energy and, if not installed and used in accordance with the instructions, may cause harmful interference to radio communications. However, there is no guarantee that interference will not occur in a particular installation. If this equipment does cause harmful interference to radio or television reception, which can be determined by turning the equipment off and on, the user is encouraged to try to correct the interference by one or more of the following measures:
- Reorient or relocate the receiving antenna.
- Increase the separation between the equipment and receiver.
- Connect the equipment into an outlet on a circuit different from that to which the receiver is connected.
- Consult the dealer or an experienced radio/TV technician for help.
Changes or modifications not expressly approved by the party responsible for compliance could void the user's authority to operate the equipment.
Wheelsize Chart Wheelsize Chart
| Tire size ETRO | KMH WS in mm | MPH WS in inch |
| 16 x 1,75 47-305 1272 50,1 | ||
| 20 x 1,75 47-406 1590 62,6 | ||
| 24 x 1,75 47-507 1907 75,1 | ||
| 26 x 1,5 40-559 2026 79,8 | ||
| 26 x 1,75 47-559 2070 81,5 | ||
| 26 x 1,9 2089 82,2 | ||
| 26 x 2,00 50-559 2114 83,2 | ||
| 26 x 2,10 54-559 2125 83,7 | ||
| 26 x 2,25 57-559 2145 84,4 | ||
| 26 x 2,35 60-559 2160 85,0 | ||
| 26 x 2,40 62-559 2170 85,4 | ||
| 28 x 1,5 40-622 | 2224 | 87,6 |
| 28 x 1,6 42-622 2235 88,0 |
| Tire size ETRO | KMH WS in mm | MPH WS in inch | |
| 28 x 1,75 | 47-622 | 2268 89,3 | |
| 29 x 2,10 | 54-622 | 2295 90,4 | |
| 29 x 2,25 | 57-622 | 2288 90,1 | |
| 29 x 2,40 | 62-622 | 2300 | 90,6 |
| 650 B | 2100 82,7 | ||
| 700 x 18C | 18-622 | 2102 | 82,8 |
| 700 x 20C | 20-622 | 2114 83,2 | |
| 700 x 23C | 23-622 | 2095 | 82,5 |
| 700 x 25C | 25-622 | 2146 | 84,5 |
| 700 x 30C | 30-622 | 2149 84,6 | |
| 700 x 32C | 32-622 | 2174 | 85,6 |
| 700 x 38C | 38-622 | 2224 | 87,6 |
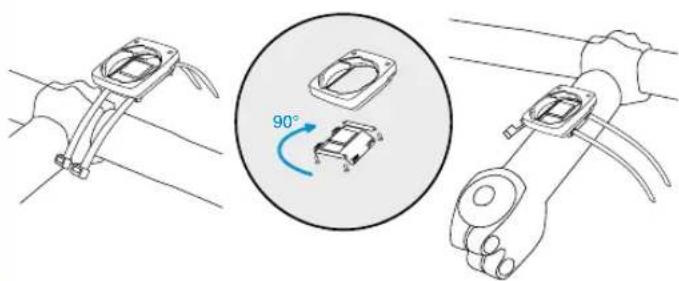
Handlebar mount
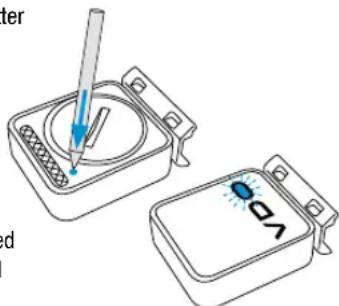
Installation of the magnet
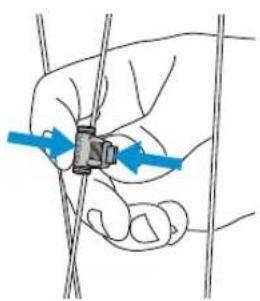
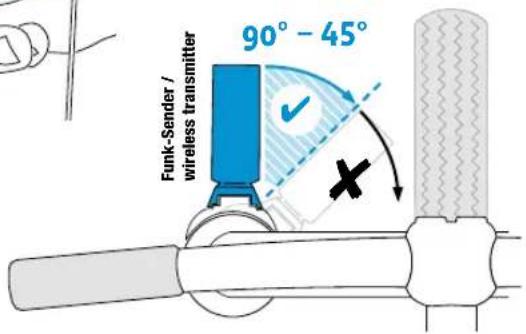
Installation wireless transmitter
175174
Battery change bike computer Battery change speed transmitter
When battery is replaced NO data is lost.
You need battery 3 V type 2450.
Attention: After taking out of empty battery, please wait for 10 seconds
before putting in new battery.
Siebenotigenene Batterie3V-Type2032.
You need battery 3 V type 2032.
Attention: After taking out of empty battery, please wait for 10 seconds
before putting in new battery.
Technical specifications
Computer:
Approx. 49H× 38W× 12Dmm
Display:
H approx. 39 mm, W approx. 29 mm
Computer weight:
Approx. 30g
Handlebar bracket weight:
Approx. 10 g
Speed transmitter weight:
Approx. 20 g
Cadence transmitter weight:
Approx. 20 g
Heart rate transmitter weight:
Approx. 50g
Computer battery:
3V, type 2450
Computer battery service life:
Approx. 2 years (approx. 400 ride hours, approx. 8,000 km (5,000 mi)
Speed transmitter battery:
3V, type 2032
Speed transmitter battery life:
Approx. 1.5 years (approx. 1,000 ride hours, approx. 20,000 km (12,000 mi)
Cadence transmitter battery:
3V, type 2032
Cadence transmitter battery life:
Approx. 1.5 years (approx. 1,000 ride hours, approx. 20,000 km (12,000 mi)
Heart rate transmitter battery:
3V, type 2032
Heart rate transmitter battery life:
Approx. 1.5 years (approx. 1,000 ride hours, approx. 20,000 km (12,000 mi)
Wireless transmission ranges:
Speed transmitter: 75~cm
Cadence transmitter: 90 cm
Heart rate transmitter: 75 cm
Temperature indicator range on the display:
-20°C to +70°C/ -4°F to +158°F
Speed range for wheel size 2,155 mm:
Min 2.0km / h Max 199 kmh
Ride time measurement range:
Up to 99:59:59 HH:MM:SS.
Trip distance odometer measurement range:
Up to value 9,999.99 km or mi
NAVIGATOR measurement range:
From -99.99 to +999.99km or mi
Total km measurement range:
Up to value 99,999 km or mi
Total ride time measurement range:
9999:59 HHHH:MM
Heart rate measurement range:
40 to 240 bpm
Cadence measurement range:
20 to 180 rpm
Wheel circumference setting range:
From 100mm to 3,999mm (3.9 to 157.4 inches)
Altitude measurement range:
-999 m to +4,999 m/-999 ft to 16,999 ft
Cycle Parts GmbH
Le Quartier Hornbach 13
67433 Neustadt/Weinstrasse (Germany)