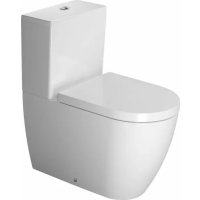
DNeo D4030500 - Toilet Duravit - Free user manual and instructions
Find the device manual for free DNeo D4030500 Duravit in PDF.
| Product Type | Flush Toilet |
| Brand | Duravit |
| Model | DNeo D4030500 |
| Floor drain distance | 305 mm (12 inches) |
| Flush type | Dual flush (5.0/3.5 L) or single flush (4.8 L) depending on configuration |
| Recommended operating pressure | 20–80 psi (140–550 kPa) |
| Water supply | Connection to water mains via shut-off valve |
| Material | Vitreous ceramic |
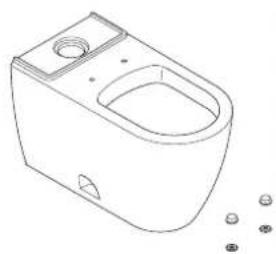
| Delivery contents | Tank, bowl, flush mechanism, seat, mounting kit (bolts, washers, gaskets) |
| Installation | By a qualified sanitary installer; two people recommended |
| Safety instructions | Do not lift or shake after installation; tighten moderately to avoid breakage |
| Water level adjustment | Via fill valve (configurations A, B, or C depending on reference) |
| Maintenance | Clean with mild non-abrasive products; regularly check seal tightness of connections |
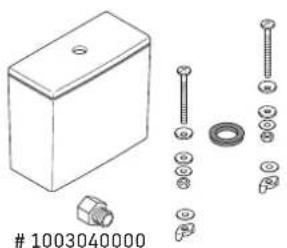
| Spare parts | Fill valves (ref. 092910..05, 093520..85, 092720..02, etc.), gaskets, seats |
| Applicable standards | Local installation regulations and national plumbing standards |
Frequently Asked Questions - DNeo D4030500 Duravit
User questions about DNeo D4030500 Duravit
0 question about this device. Answer the ones you know or ask your own.
Ask a new question about this device
Download the instructions for your Toilet in PDF format for free! Find your manual DNeo D4030500 - Duravit and take your electronic device back in hand. On this page are published all the documents necessary for the use of your device. DNeo D4030500 by Duravit.
USER MANUAL DNeo D4030500 Duravit
Installation instructions
Two-Piece toilet
Notice de montage
Cuvette Two Piece
1930 Series Happy D.2
# 213001..00 + # 087230..05 # 011201..62 + # 092910..05
# D1002200 # 217401..00 + # 093420..01
# D410200
Darling New
# 212601..00 + # 093120..05
ME by Starck
# D2101800 # 217101..00 + # 093820..01
# 217101..85 + # 093820..85
D-Code
# D4201600
# 011701..62 + # 092720..02 # D4201700
# D4005700
P3 Comforts
DuraStyle
# 216801..00 + # 093720..01
# 216001..00 + # 093520..05 # 216801..85 + # 093720..85
# 216001..00 + # 093520..83 # D4501200
# 216001..85 + # 093520..85
# D4051900
Starck 3
# D4052000 # 212501..00 + # 092040..04
# 212501..00 + # 092060..01
Duravit No. 1
# D1909700
# 218801..00 + # 094160..05/U2
# 218801..85 + # 094150..02/U3
D-Neo
# 218801..85 + # 094150..82/U4 # 200601..00 + #094420..U2
# 200601..85 + #094421..U3/U4

Important information 4

Installation 5

Settings 10

Remarques importantes 14

Montage 15

Réglages 20

About these instructions
The installation instructions come as part of the Duravit product and must be read carefully prior to installation.
Target readership and qualifications
This is a professional grade product. A working knowledge of construction techniques and code compliant plumbing installation are required for proper installation and user satisfaction. The product must be installed by a licensed plumber.
Explanation of the key words and symbols

WARNING
Indicates a hazardous
situation which, if not avoided, could result in death or serious injury.
NOTICE
Is used to address
practices not related to physical injury.

Link to other instructions

Inspection (e.g. for scratches)

Inspect for leaks and that all connections have a watertight seal
Action required
Safety instructions
Risk of personal injury or breakage through fragile product!
2 people are recommended of handling.
Handle with care.
Product and/or property damage
The breach of local and country-specific regulations and standards can cause damage to the product and/or property damage.
Observe the local installation regulations and any country-specific standards at all times.
Prior to the installation
Please read specification sheets prior to the installation. Specification sheets are available for download at pro.duravit.us.
Water installation
High efficiency
toilet
Operation pressure
Recommended:
Single flush 1.28 gpf / 4.8 lpf 25 - 80 psi /
172 - 550 kPA
Dual flush 1.32/0.92 gpf /
5.0/3.5 lpf
20 - 80 psi /
140 - 550 kPA
natural_image
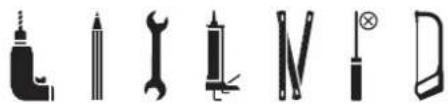
Collection of black silhouette icons representing different tools (no text or symbols)
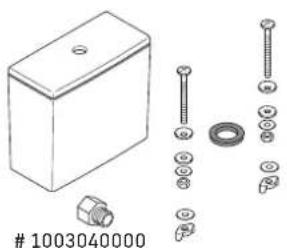
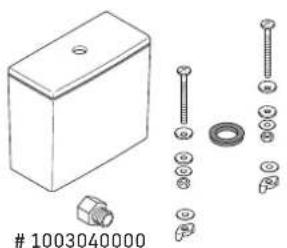
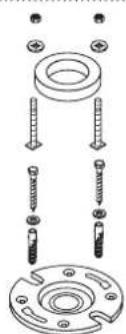
Delivery contents
011201..62,
011701..62, # 200601..00,
200601..85, #212501..00,
212601..00, #213001..00,
216001..00, #216001..85,
216801..00, #216801..85,
217101..00, #217101..85,
217401..00, #218109..00,
218801..00, #218801..85

natural_image
Line drawing of a toilet with a side sink and small buttons at the bottom (no text or symbols)087230..05, #092040..04, #092060..01,
092080..85, #092720..02, #092910..05,
093120..05, #093420..01, #093520..05,
093520..83, #093520..85, #093720..85,
093720..85, #093820..01, #093820..85,
094150..02, #094150..82, #094150..U3,
094150..U4, #094160..05, #094160..U2,
094420..U2, #094421..U3/U4
natural_image
Technical illustration of a mechanical assembly with bolts, nuts, and a housing (no text or symbols)
natural_image
Technical illustration of a rectangular housing with bolts, screw, and bearing components (no text or symbols)
natural_image
Line drawing of a toilet with a side vent and small accessories (no text or symbols)# D1002200, # D2101800
# D4005700, # D4051900
# D4052000, # D4102000
# D4201600, # D4201700
# D4501200, # D1909700

Accessories (not included)

001417..00
001431..00 (US)


natural_image
Exploded view diagram of a mechanical assembly showing bolt, screw, and housing components (no text or labels)001416..00,
001418..96 (ASIA)
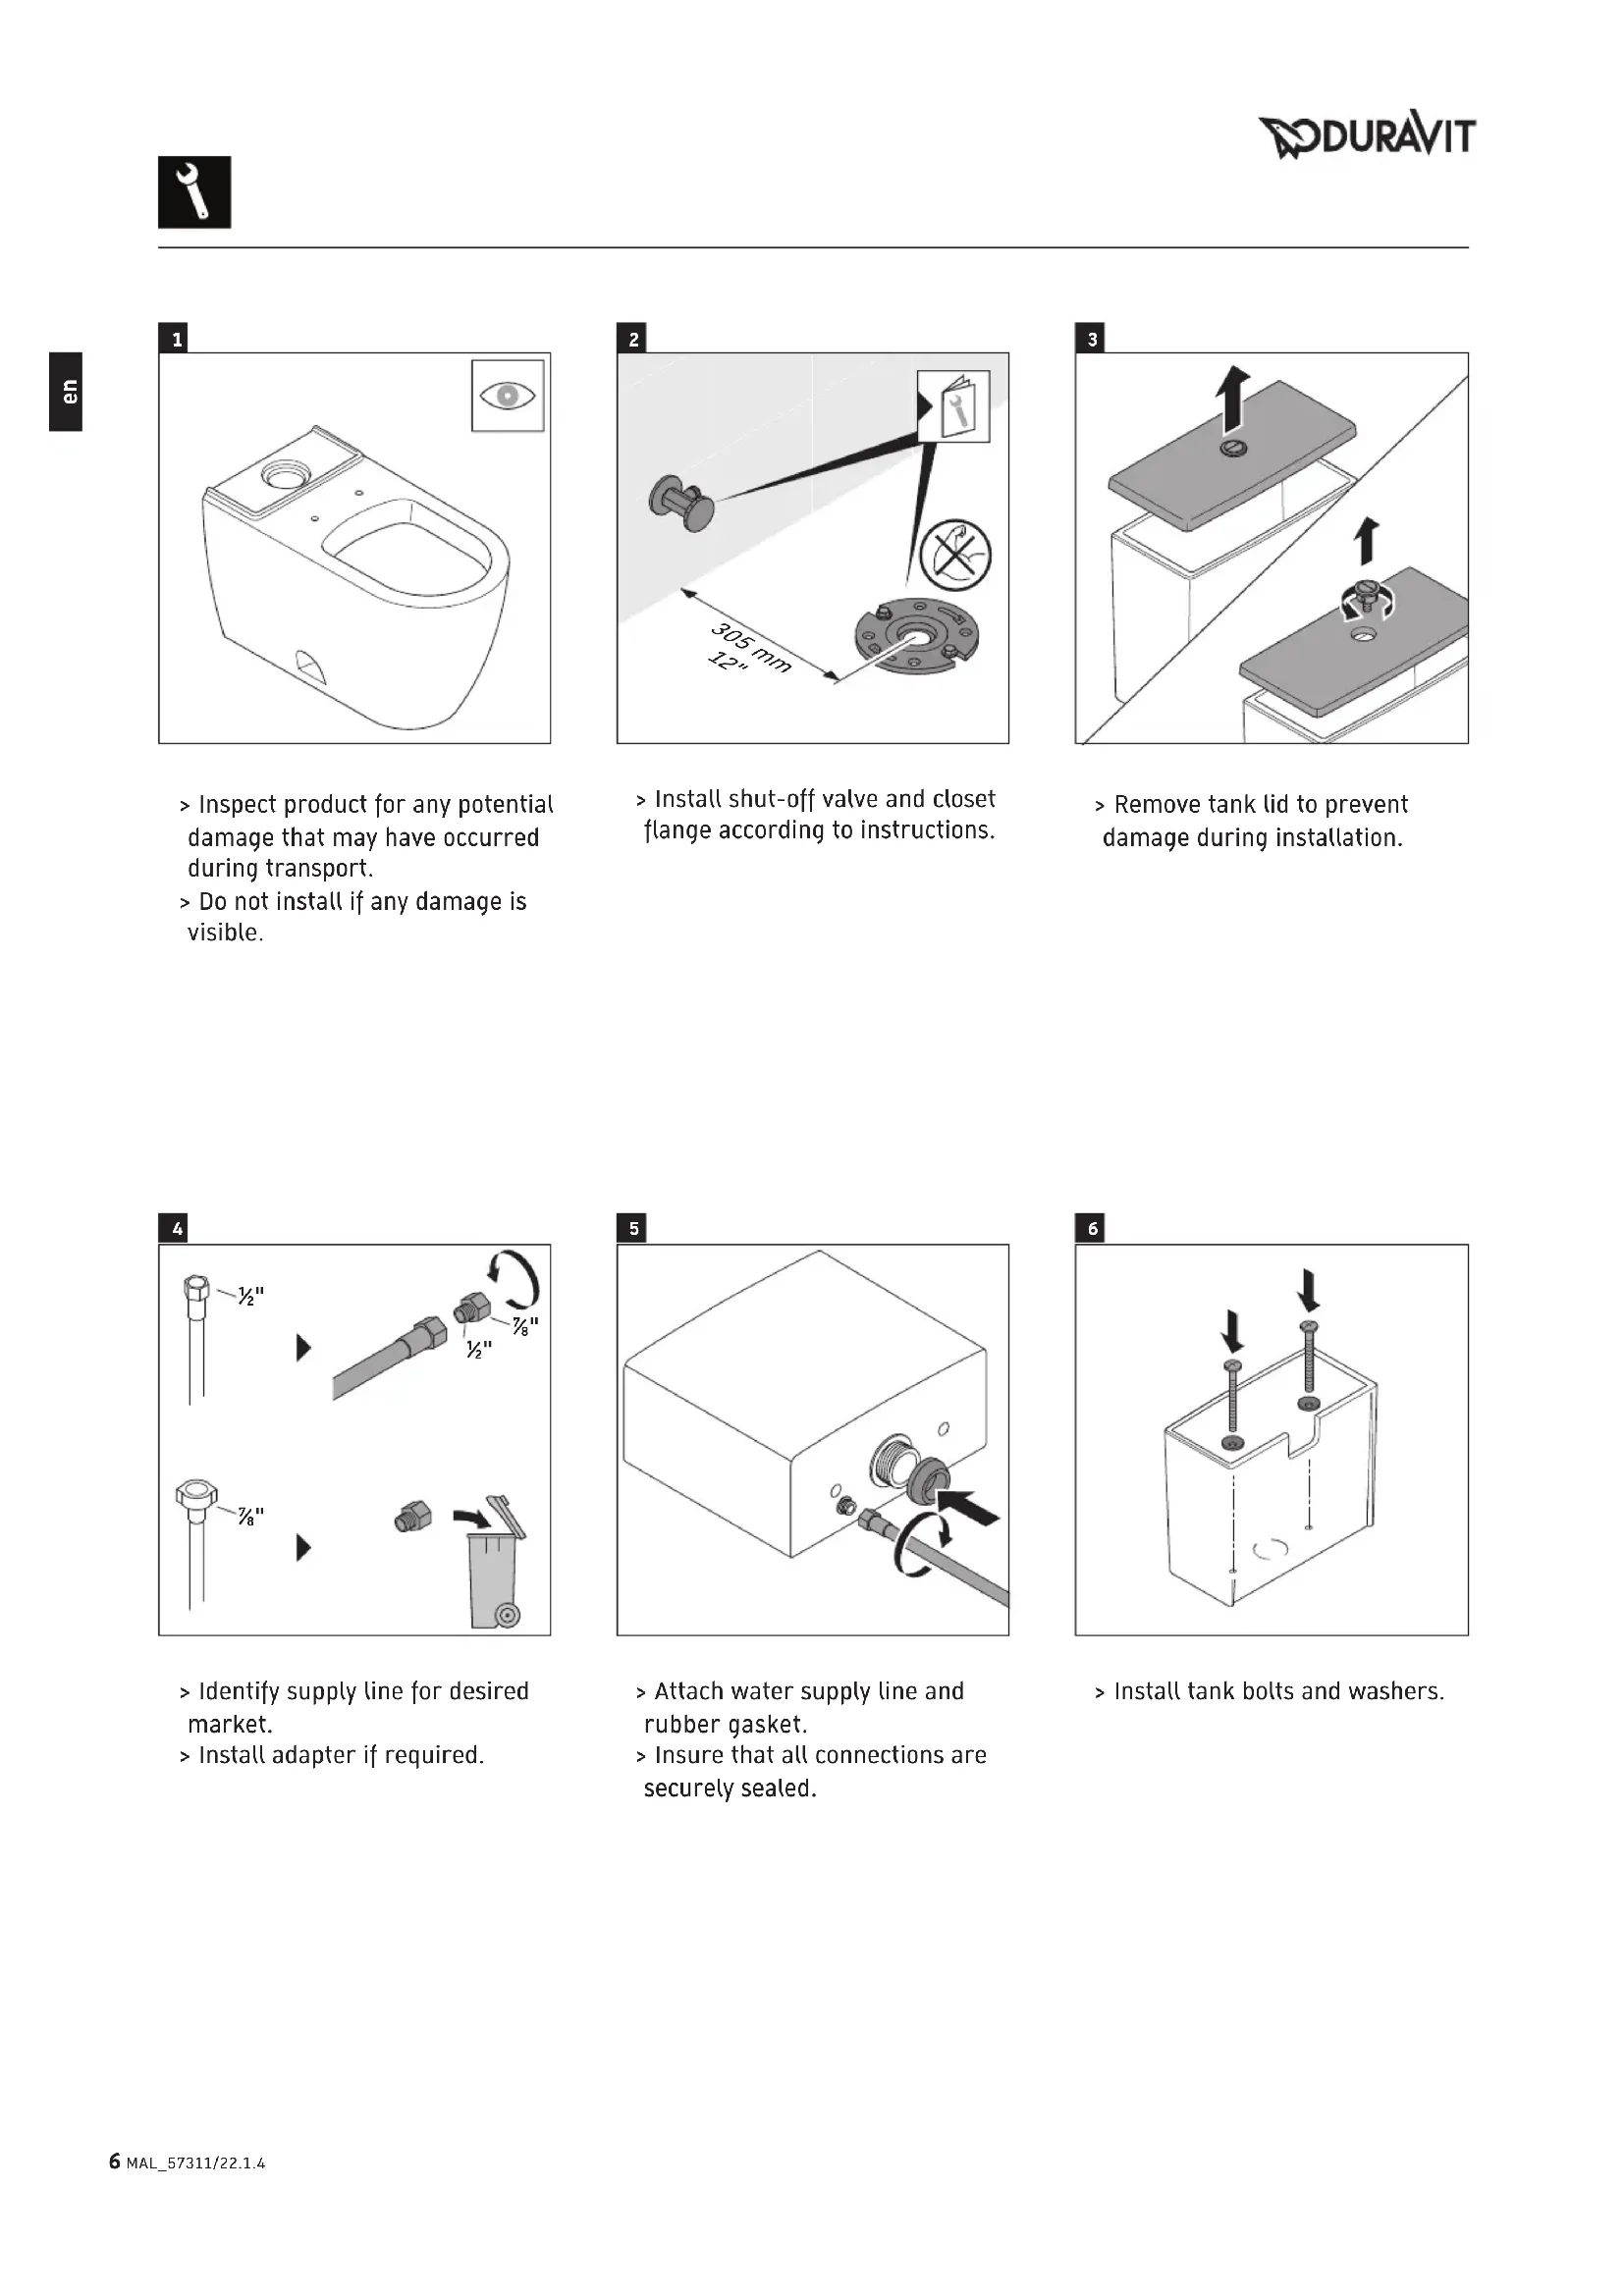
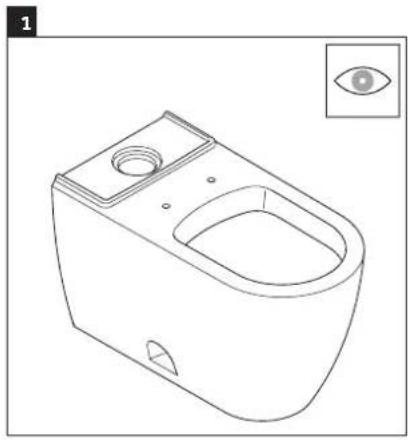
1
natural_image
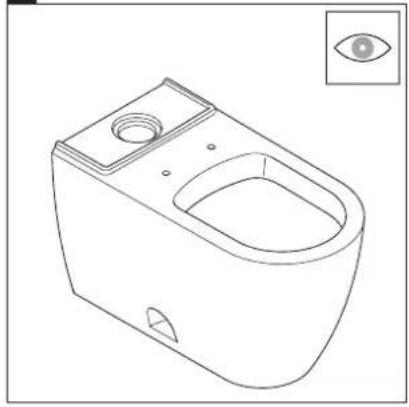
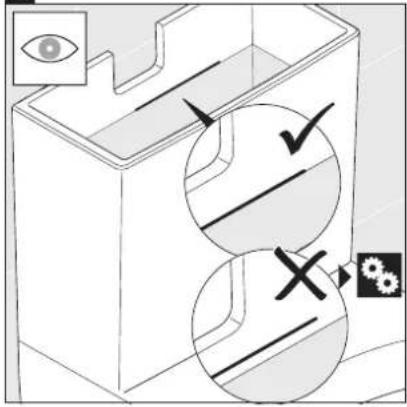
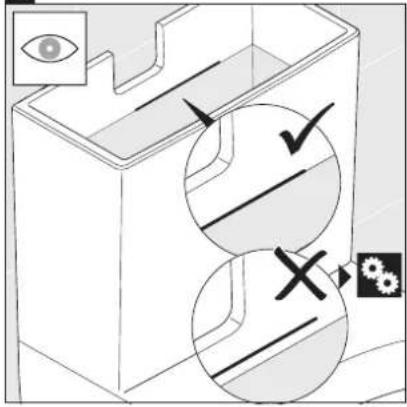
Line drawing of a toilet with an open lid and vent, accompanied by an eye symbol (no text or labels)Inspect product for any potential damage that may have occurred during transport.
Do not install if any damage is visible.
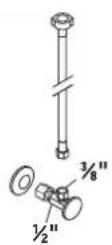
2

Install shut-off valve and closet flange according to instructions.
3
natural_image
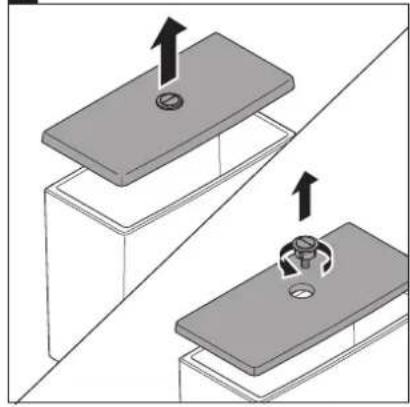
Diagram showing two mechanical components with arrows indicating assembly or movement (no text or symbols)Remove tank lid to prevent damage during installation.
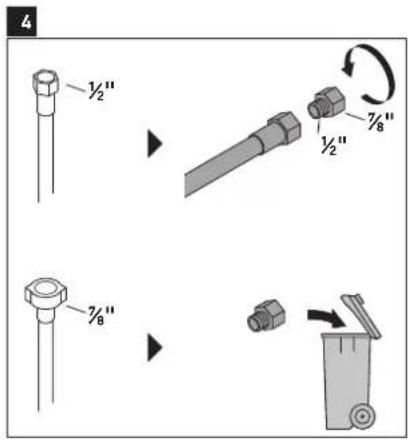
4
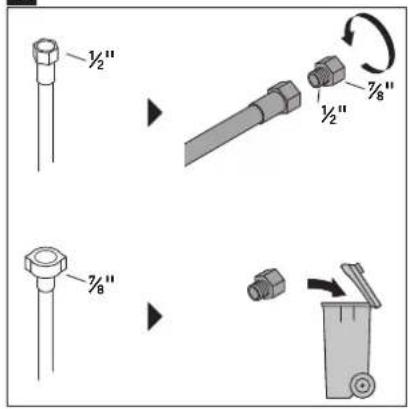
Identify supply line for desired market.
Install adapter if required.
5
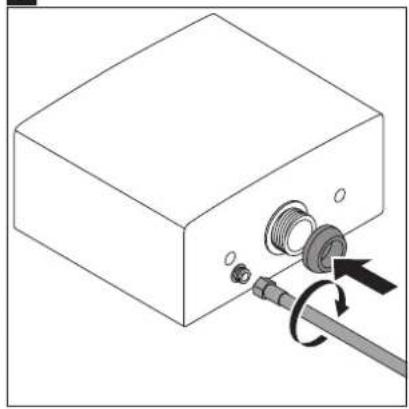
natural_image
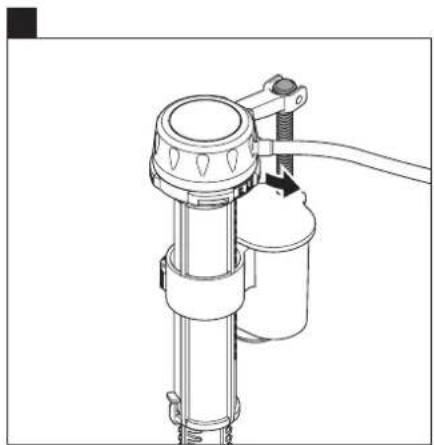
Diagram of a device with a coiled cable and connector, showing mechanical assembly (no text or symbols)Attach water supply line and rubber gasket.
Insure that all connections are securely sealed.
6

natural_image
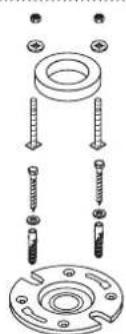
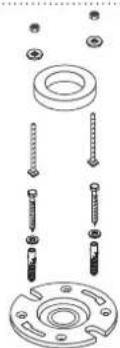
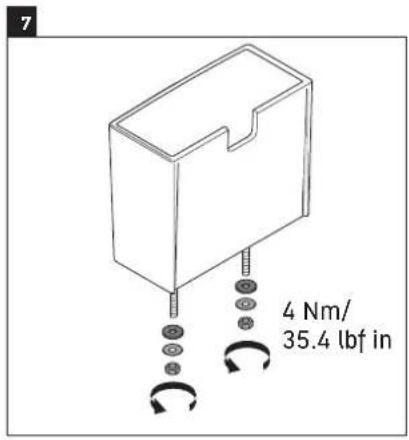
Technical line drawing of a mechanical component with two screws and a base, showing internal structure and alignment (no text or symbols)Install tank bolts and washers.

Attach and secure hardware to tank.

natural_image
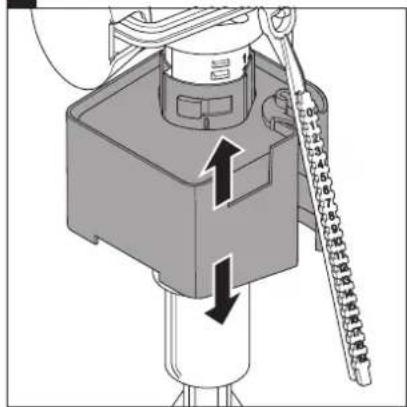
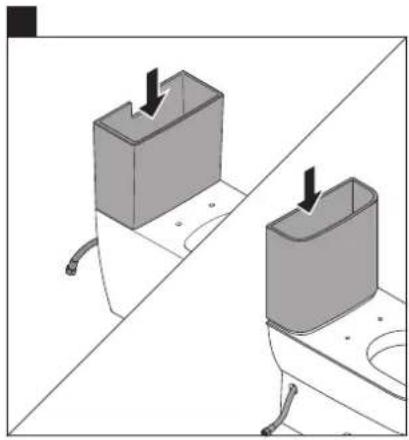
Diagram showing two 3D objects with arrows indicating movement or force, placed on a divided surface (no text or symbols)Lift tank onto toilet bowl.
Install water supply line either through the hole or behind the toilet pending model.
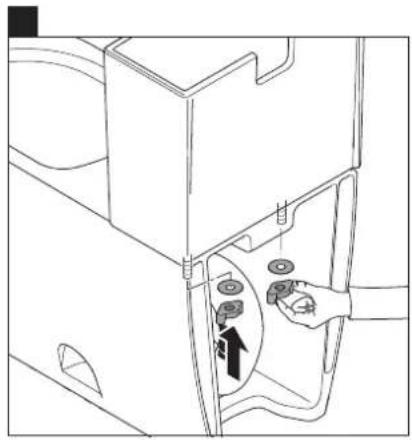
natural_image
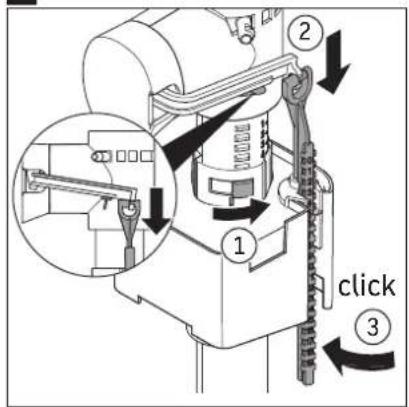
Line drawing of a mechanical device with a hand inserting a button into a housing (no text or symbols)Attach tank to toilet bowl using supplied hardware.
Install wax ring and T-bolts according to instructions.
natural_image
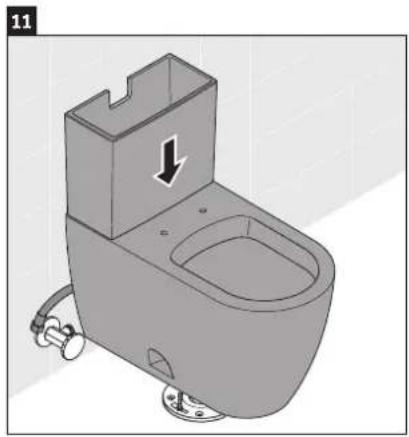
3D rendering of a toilet with a downward arrow indicating a component, shown in isometric view (no text or symbols)NOTICE
Risk of external leaks!
Do not lift or rock the toilet after placement.
If you break the watertight seal, you must install a new wax seal.
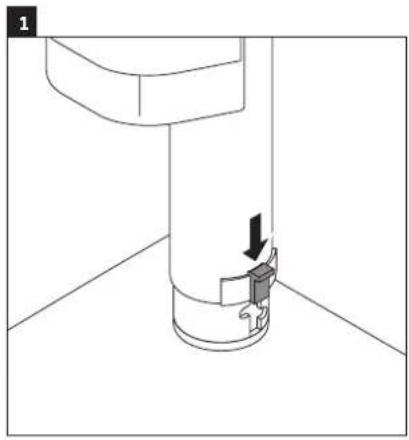
Install toilet to floor flange.
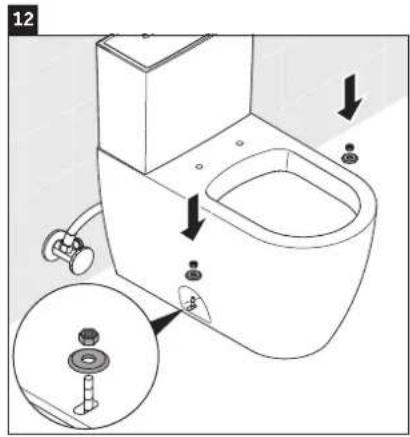
NOTICE
Risk of product damage!
Overtightening may cause breakage or chipping of vitreous china.
Handle with care.
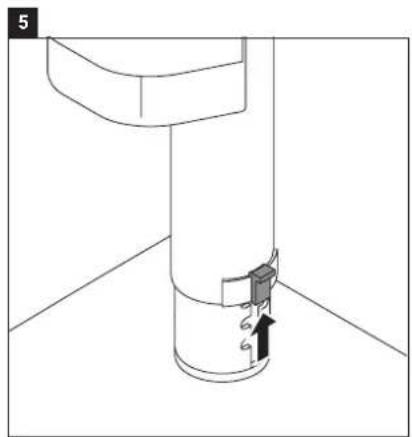
Install washer and nuts to secure toilet to floor.
13

natural_image
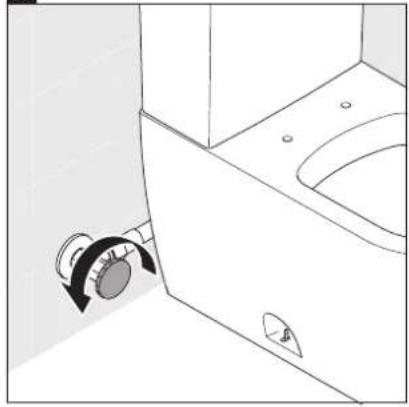
Diagram showing two mechanical components with rotational arrows, no text or symbols presentAttach water supply line to shut-off valve.
14

natural_image
Interior view of a bathroom sink with toilet and sink (no text or symbols visible)Turn on shut-off valve.
15
Check water level in tank.
Adjust water level up to proper setting if required (see section "Settings").
16
natural_image
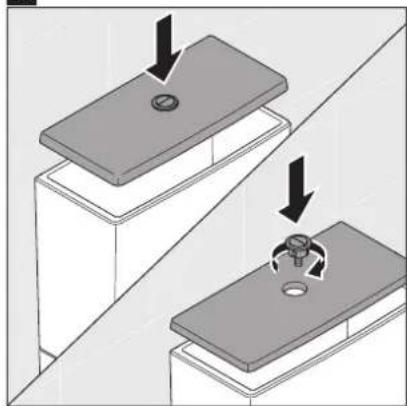
Diagram showing two mechanical components with downward arrows indicating motion or assembly (no text or symbols)Install and secure tank lid.
17
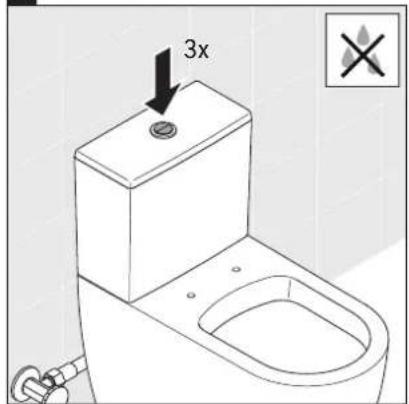
Flush toilet three times.
Inspect for leaks and that all connections have a water tight seal.
18
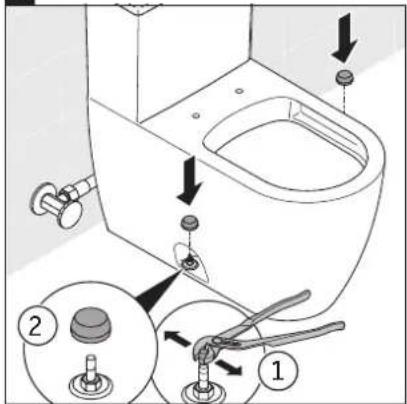
Cut/brake off bolts and install caps.
natural_image
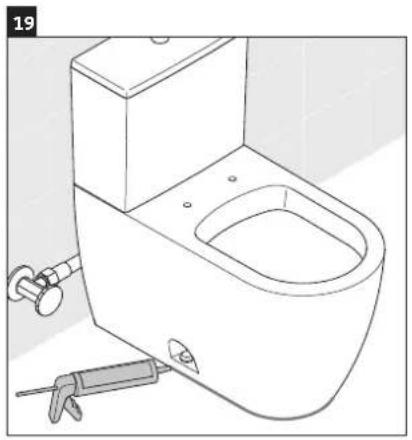
Line drawing of a standard toilet with faucet and sink (no text or symbols)Apply silicone around the base of the toilet.
natural_image
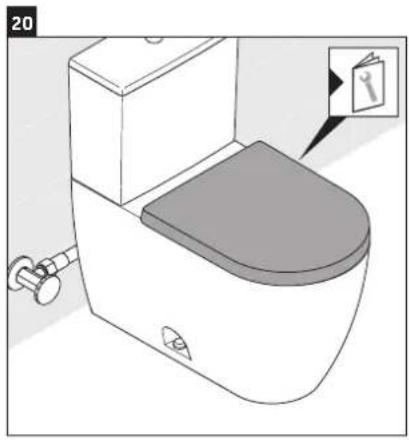
Illustration of a toilet with a lid and showerhead, showing internal components (no text or symbols)Install seat according to instructions.
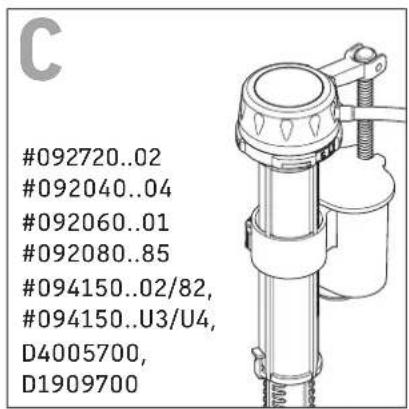
A
087230..05,
093120..05, #093120..05,
093520..05/83,
093720..01/85,
093820..85/01,
093420..01,
094160..05/U2,
D1002200, D2101800, D4052000,
D4501200, D4201600, D4201700

natural_image
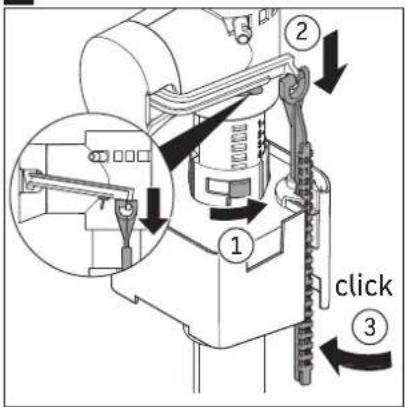
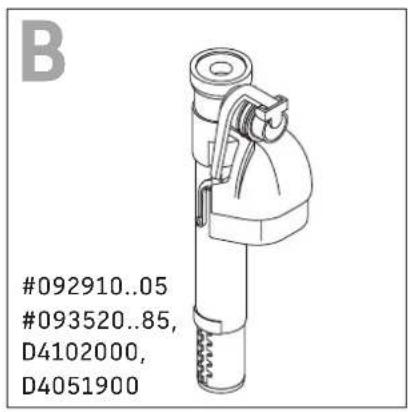
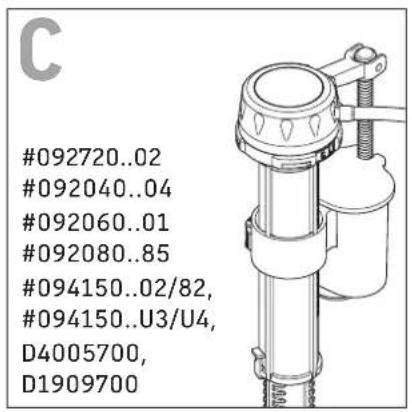
Technical line drawing of a mechanical device with no visible text or symbolsIdentify correct fill valve for appropriate toilet.
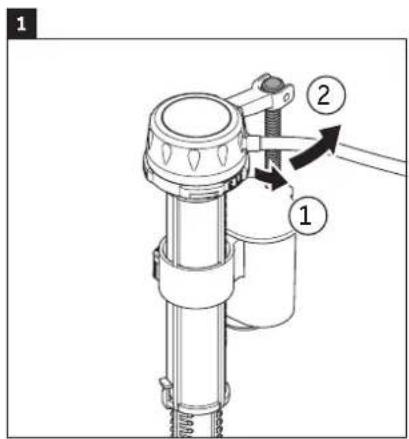
1
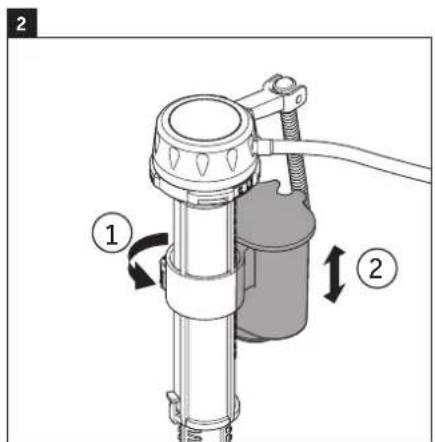
Remove adjustable screw.
Unlock float valve.
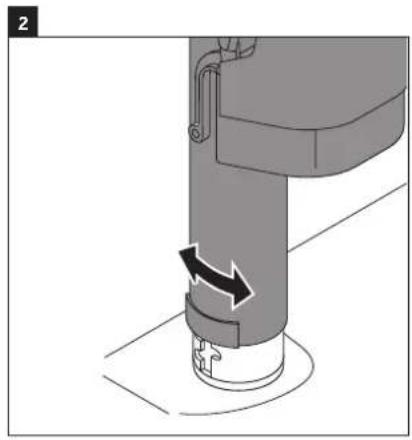
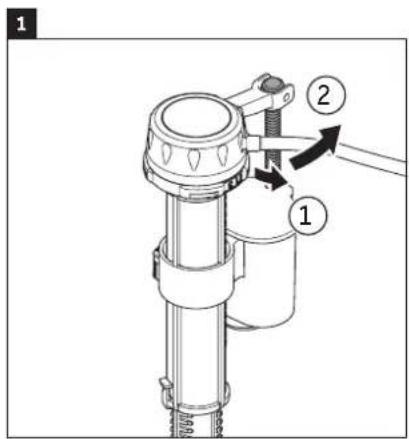
2
Set float valve to correct height.
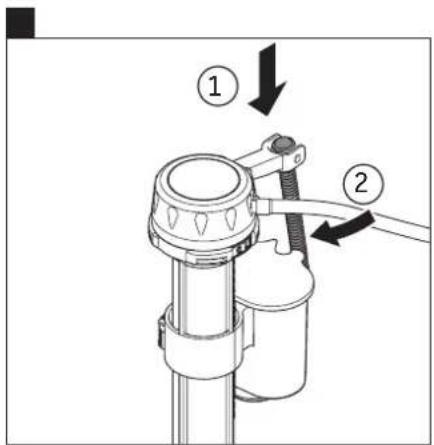
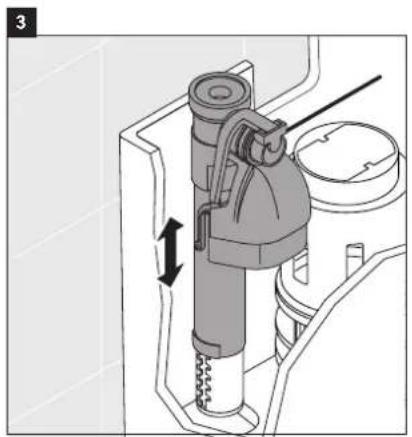
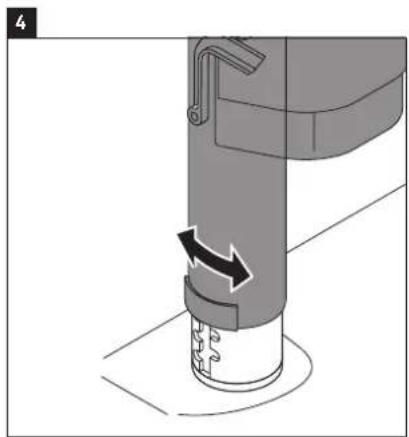
3
Lock float valve.
Reattach adjustable screw.

Identify correct fill valve for appropriate toilet.
natural_image
Diagram of a pipe fitting with a directional arrow indicating movement, no text or symbols presentUnlock float valve.

natural_image
Mechanical assembly diagram showing a cylindrical component with directional arrows indicating motion (no text or symbols)Rotate to release.

natural_image
Technical diagram of a mechanical device with internal components and directional arrow (no text or symbols)Set float valve at correct height.

natural_image
Mechanical component diagram showing a lever mechanism with directional arrows (no text or symbols)Rotate to secure.
natural_image
Technical line drawing of a pipe fitting with a valve inserted, showing no text or symbolsLock float valve.
Identify correct fill valve for appropriate toilet.
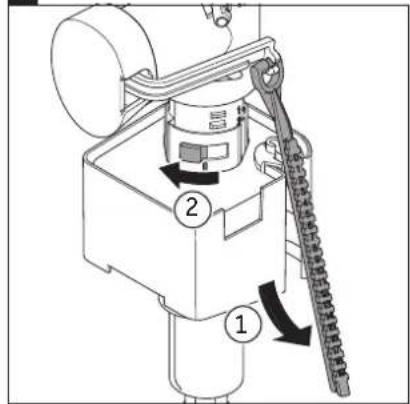
Rotate rod quarter turn and release.

Slide clip and adjust basket to correct height.

natural_image
Technical line drawing of a mechanical device with a rotating lever and attached tubing (no text or symbols)Secure clip,
reattach and

natural_image
Technical line drawing of a mechanical device with no visible text or symbolslock rod.
natural_image
Collection of black silhouette icons representing different tools (no text or symbols)200601..85, #212501..00,
212601..00, #213001..00,
216001..00, #216001..85,
216801..00, #216801..85,
217101..00, #217101..85,
217401..00, #218109..00,
218801..00, #218801..85

natural_image
Line drawing of a toilet with sink and side buttons (no text or symbols)087230..05, #092040..04, #092060..01,
092080..85, #092720..02, #092910..05,
093120..05, #093420..01, #093520..05,
093520..83, #093520..85, #093720..85,
093720..85, #093820..01, #093820..85,
094150..02, #094150..82, #094150..U3,
094150..U4, #094160..05, #094160..U2,
094420..U2, #094421..U3/U4
natural_image
Technical illustration of a mechanical assembly with bolts, nuts, and a base plate (no text or symbols)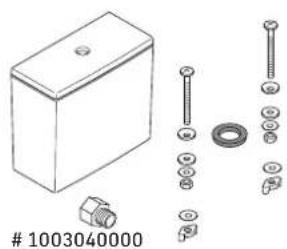
natural_image
Technical illustration of a box with bolts, screw, and nut assembly (no text or symbols)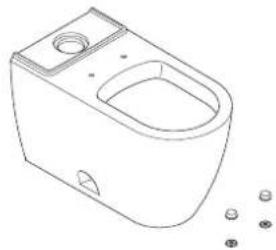
natural_image
Line drawing of a toilet with a side sink and small accessories (no text or symbols)# D1002200, # D2101800
# D4005700, # D4051900
# D4052000, # D4102000
# D4201600, # D4201700
# D4501200, # D1909700

Accessoires (non compris)
001417..00
001431..00 (US)
natural_image
Exploded view diagram of a mechanical assembly showing bolted components and fasteners (no text or labels)

natural_image
Exploded view diagram of a mechanical assembly showing bolted components and fasteners (no text or labels)001416..00,
001418..96 (ASIA)


natural_image
Line drawing of a toilet with an open mouth and side vent, accompanied by an eye symbol (no text or labels)natural_image
Diagram showing two mechanical components with arrows indicating movement or force, no text or symbols presentnatural_image
Diagram of a mechanical device with a screw and directional arrow indicating rotation (no text or symbols)natural_image
Isometric line drawing of a mechanical component with two screws and a central slot, showing alignment and rotation (no text or symbols)natural_image
Diagram showing two 3D objects with arrows indicating movement or force, placed on a divided surface (no text or symbols)natural_image
Line drawing of a mechanical device with a hand inserting a component into a housing (no text or symbols)natural_image
3D rendering of a toilet with a handle and outlet, showing internal components and a downward arrow indicating a component (no text or symbols present)ATTENTION
natural_image
Diagram showing two mechanical components with directional arrows, no text or symbols presentnatural_image
Diagram of a bathroom sink with a rotary knob and faucet mechanism (no text or symbols)natural_image
Diagram showing two mechanical components with downward arrows indicating assembly or alignment (no text or symbols)natural_image
Line drawing of a standard toilet with faucet and sink (no text or symbols)natural_image
Illustration of a toilet with a lid and showerhead, showing internal components (no text or symbols)093120..05, #093120..05,
093520..05/83,
093720..01/85,
093820..85/01,
093420..01,
094160..05/U2,
D1002200, D2101800, D4052000,
D4501200, D4201600, D4201700

natural_image
Technical line drawing of a mechanical device with no visible text or symbolsnatural_image
Diagram of a pipe fitting with a directional arrow indicating movement, no text or symbols presentnatural_image
Mechanical assembly diagram showing a cylindrical component with a curved arrow indicating motion or force (no text or symbols present)natural_image
Technical diagram of a mechanical device with internal components and directional arrow (no text or symbols)natural_image
Mechanical assembly diagram showing a lever mechanism with directional arrows (no text or symbols)natural_image
Technical line drawing of a pipe fitting with a valve inserted, showing no text or symbolsnatural_image
Technical line drawing of a mechanical device with a rotating lever and attached tubing (no text or symbols)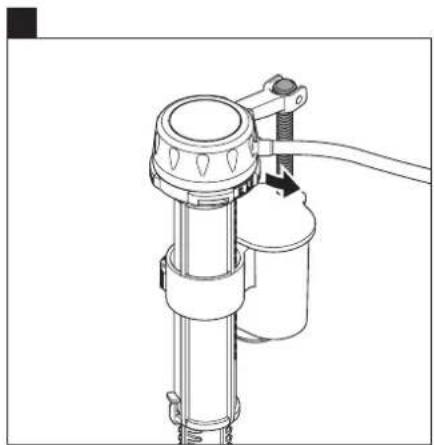
natural_image
Technical line drawing of a mechanical device with no visible text or symbolsnatural_image
Collection of black silhouette icons representing different tools (no text or symbols)200601..85, #212501..00,
212601..00, #213001..00,
216001..00, #216001..85,
216801..00, #216801..85,
217101..00, #217101..85,
217401..00, #218109..00,
218801..00, #218801..85
natural_image
Line drawing of a toilet with sink and side buttons (no text or symbols)087230..05, #092040..04, #092060..01,
092080..85, #092720..02, #092910..05,
093120..05, #093420..01, #093520..05,
093520..83, #093520..85, #093720..85,
093720..85, #093820..01, #093820..85,
094150..02, #094150..82, #094150..U3,
094150..U4, #094160..05, #094160..U2,
094420..U2, #094421..U3/U4
natural_image
Technical illustration of a mechanical assembly with bolts, nuts, and a housing (no text or symbols)
natural_image
Technical illustration of a mechanical assembly with bolts, nuts, and a housing (no text or symbols)
natural_image
Line drawing of a toilet with sink and vent, accompanied by small circular components (no text or symbols)# D1002200, # D2101800
# D4005700, # D4051900
# D4052000, # D4102000
# D4201600, # D4201700
# D4501200, # D1909700
natural_image
Exploded view diagram of a mechanical assembly showing bolted components and fasteners (no text or labels)
natural_image
Exploded view diagram of a mechanical assembly showing bolt, screw, and housing components (no text or labels)001416..00,
001418..96 (ASIA)
natural_image
Line drawing of a toilet with an open mouth and side vent, accompanied by an eye symbol (no text or labels)natural_image
Diagram showing two mechanical components with arrows indicating movement, no text or symbols presentnatural_image
Diagram of a mechanical assembly with a rotating shaft and threaded component (no text or symbols)natural_image
Isometric line drawing of a mechanical component with two screws and a base, showing internal structure and alignment (no text or symbols)natural_image
Diagram showing two 3D objects with arrows indicating movement or force, placed on a divided surface (no text or symbols)natural_image
Line drawing of a mechanical device with a hand inserting a component into a housing (no text or symbols)natural_image
3D rendering of a toilet with a handle and outlet, showing internal components and a downward arrow indicating a component (no text or symbols present)AVISO
natural_image
Diagram showing two mechanical components with directional arrows, no text or symbols presentnatural_image
Diagram of a bathroom sink with a rotary knob and handle, no text or symbols presentnatural_image
Diagram showing two mechanical components with downward arrows indicating assembly or alignment (no text or symbols)natural_image
Line drawing of a standard toilet with faucet and sink (no text or symbols)natural_image
Illustration of a toilet with a lid and showerhead, showing internal components (no text or symbols)093120..05, #093120..05,
093520..05/83,
093720..01/85,
093820..85/01,
093420..01,
094160..05/U2,
D1002200, D2101800, D4052000,
D4501200, D4201600, D4201700

natural_image
Technical line drawing of a mechanical device with no visible text or symbolsnatural_image
Diagram of a pipe fitting with a directional arrow indicating movement, no text or symbols presentnatural_image
Mechanical assembly diagram showing a cylindrical component with a curved arrow indicating motion or force (no text or symbols present)natural_image
Mechanical assembly diagram showing a piston and spring mechanism (no text or labels)natural_image
Mechanical component diagram showing a lever mechanism with directional arrows (no text or symbols)natural_image
Technical line drawing of a pipe fitting with a valve inserted, showing no text or symbolsnatural_image
Technical line drawing of a mechanical device with a rotating lever and attached tubing (no text or symbols)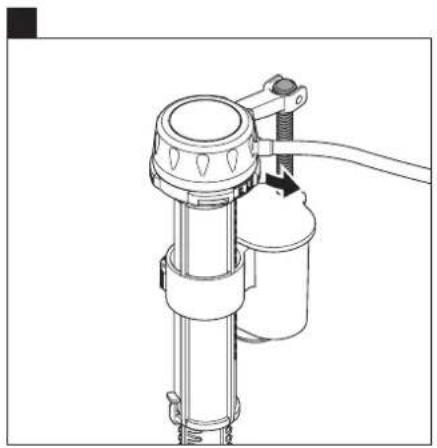
natural_image
Technical line drawing of a mechanical device with no visible text or symbols关于这些说明
natural_image
Collection of black silhouette icons representing different tools (no text or symbols)
交付内容
011201..62,
011701..62, # 200601..00,
200601..85, #212501..00,
212601..00, #213001..00,
216001..00, #216001..85,
216801..00, #216801..85,
217101..00, #217101..85,
217401..00, #218109..00,
218801..00, #218801..85

natural_image
Line drawing of a toilet with sink and side buttons (no text or symbols)087230..05, #092040..04, #092060..01,
092080..85, #092720..02, #092910..05,
093120..05, #093420..01, #093520..05,
093520..83, #093520..85, #093720..85,
093720..85, #093820..01, #093820..85,
094150..02, #094150..82, #094150..U3,
094150..U4, #094160..05, #094160..U2,
094420..U2, #094421..U3/U4

natural_image
Technical illustration of a mechanical assembly with bolts, nuts, and a housing (no text or symbols)
natural_image
Technical illustration of a mechanical assembly with bolts, nuts, and a housing (no text or symbols)
natural_image
Line drawing of a toilet with a side sink and small accessories (no text or symbols)D1002200, # D2101800
D4005700, # D4051900
D4052000, # D4102000
D4201600, # D4201700
D4501200, # D1909700

配件(不包含)

001417..00
001431..00 (US)

natural_image
Exploded view diagram of a mechanical assembly showing bolted components and fasteners (no text or labels)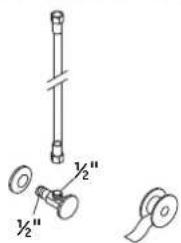

natural_image
Exploded view diagram of a mechanical assembly showing bolted components and fasteners (no text or labels)001416..00,
001418..96 (ASIA)

natural_image
Line drawing of a toilet with an open mouth and side vent, accompanied by an eye symbol (no text or labels)natural_image
Diagram showing two mechanical components with arrows indicating movement, no text or symbols present移除水箱蓋板,防止安裝時造成損壞。
natural_image
Diagram of a mechanical assembly with a rotating shaft and threaded component (no text or symbols)natural_image
Isometric line drawing of a mechanical component with two screws and a central slot, no text or symbols present安装水箱垫片和螺栓。
依照指示將配件依序安裝並擰緊。
natural_image
Diagram showing two 3D objects with arrows indicating movement or force, placed on a divided surface (no text or symbols)natural_image
Line drawing of a mechanical device with a hand inserting a component into a housing (no text or symbols)natural_image
3D rendering of a toilet with a handle and outlet, showing internal components and a downward arrow indicating a component (no text or symbols present)注意
外部洩漏風險!
natural_image
Diagram showing two mechanical components with rotational arrows, no text or symbols present將供水管連接至三角凡爾。
14
natural_image
Line drawing of a bathroom sink with a rotary knob and faucet mechanism (no text or symbols)打開三角凡爾。
15
natural_image
Diagram showing two mechanical components with downward arrows indicating assembly or alignment (no text or symbols present)安装水箱蓋板並將其固定。
17

擰緊螺栓,安裝保護帽。

natural_image
Line drawing of a standard toilet with faucet and sink (no text or symbols)在座便器底座周圍使用矽利康。

natural_image
Illustration of a toilet with a lid and handle, showing internal components and a magnified inset of a book (no text or symbols present)根據說明安裝座圈。
A
087230..05,
093120..05, #093120..05,
093520..05/83,
093720..01/85,
093820..85/01,
093420..01,
094160..05/U2,
D1002200, D2101800, D4052000,
D4501200, D4201600, D4201700
natural_image
Technical line drawing of a mechanical device with no visible text or symbols為相應的座便器選擇正確的供水閥。
1

移除可調螺絲。
開啟浮球閥。
2
將浮球閥設定至適當的高度。
3
鎖定浮球閥。
重新安裝可調螺絲。
為相應的座便器選擇正確的供水閥。

natural_image
Diagram of a pipe fitting with a directional arrow indicating movement, no text or symbols present開啟浮球閥。
natural_image
Mechanical assembly diagram showing a cylindrical component with a curved arrow indicating motion or force (no text or symbols present)旋轉,將其擰鬆。
natural_image
Technical diagram of a mechanical device with internal components and directional arrow (no text or symbols)將浮球閥設定為適當的高度。
natural_image
Mechanical component diagram showing a lever mechanism with directional arrows (no text or symbols)旋轉,將其擰緊。

natural_image
Technical line drawing of a pipe fitting with a valve inserted, showing no text or symbols鎖定浮球閥。
為相應的座便器選擇正確的供水閥。
旋轉導向桿四分之一圈,將其擰鬆。
緩慢轉動夾具,調整浮筒至適當高度。

natural_image
Mechanical device diagram showing a cylindrical assembly with a rotating arm and connecting rod (no text or symbols)擔緊夾具,
重新安装,
natural_image
Technical line drawing of a mechanical device with no visible text or symbols然後擰緊導向桿。
DURAVIT USA, INC.
2635 North Berkeley
Lake Rd., Ste. 100
Duluth, GA 30096
Toll Free 888-DURAVIT
Phone 770-931-3575
Fax 770-931-8454
info@us.duravit.com
www.duravit.us
DURAVIT