
Vero Air 23508000001 - Sink Duravit - Free user manual and instructions
Find the device manual for free Vero Air 23508000001 Duravit in PDF.


| Product Type | Washbasin (Sink) |
| Brand | Duravit |
| Model | Vero Air 23508000001 |
| Material | Vitreous China |
| Mounting Type | Wall-mounted or with pedestal |
| Overall Width | Approx. 24 inches (610 mm) |
| Overall Depth | Approx. 18 inches (457 mm) |
| Overall Height | Approx. 6-8 inches (152-203 mm) bowl depth |
| Weight | Approx. 30 lbs (13.6 kg) |
| Mounting Hardware Included | Yes, model # 695100 0000 (plastic anchors for concrete, lag bolts for wood studs) |
| Recommended Professional Installation | Yes, by licensed plumber |
| Compliance Codes | UPC, National Plumbing Code of Canada, ASME A112.19.2/CSA B45.1 |
| Cleaning Instructions | Use mild non-abrasive cleaners; avoid scouring pads |
| Maintenance | Regular cleaning; reapply silicone sealant if needed |
| Spare Parts Available | Mounting hardware kit (695100 0000), pedestal (if applicable) |
| Repairability | Ceramic is not repairable if chipped or cracked; replace entire unit |
| Warranty | Refer to Duravit warranty policy |
Frequently Asked Questions - Vero Air 23508000001 Duravit
User questions about Vero Air 23508000001 Duravit
0 question about this device. Answer the ones you know or ask your own.
Ask a new question about this device
Download the instructions for your Sink in PDF format for free! Find your manual Vero Air 23508000001 - Duravit and take your electronic device back in hand. On this page are published all the documents necessary for the use of your device. Vero Air 23508000001 by Duravit.
USER MANUAL Vero Air 23508000001 Duravit
Installation instructions
Washbasin


2 MAL_51193/21.03.3


Important information 4

Installation 10
MAL_51193/21.03.3 3

en
About these instructions
These mounting instructions come as part of the Duravit washbasin and are to be read carefully prior to the installation.
Target readership and qualifications
This is a professional grade product. A working knowledge of construction techniques and code compliant plumbing installation are required for proper installation and user satisfaction. The product must be installed by a licensed plumber.
Explanation of the signal words and symbols
NOTE! To avoid property damage

Link to the mounting instructions in this section

Inspection (e.g. for scratches)

Check for leaks and leak-tightness

Indication of the length of time (e.g. 10 minutes)

Safety instructions
Product and/or property damage
The breach of local and country-specific regulations and standards can cause damage to the product and/or property damage.
Observe the local installation regulations and any country-specific standards at all times.
Prior to installation
Please read the specifications sheets prior to installation. Specification sheets are available for download at www.pro.duravit.us.

Products are in compliance with the following codes:
• Uniform Plumbing Code (UPC®)
• National Plumbing Code of Canada
• Following standards: ASME A112.19.2/CSA B45.1
4 MAL_51193/21.03.3


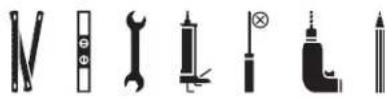

Delivery contents

The washbasin will include mounting hardware model # 695100 0000. The plastic anchors provided are for concrete wall applications. For wood stud walls, the lag bolts should be screwed into the wood backing.

N 1


When mounting the washbasin on a pre-wall carrier, install the mounting bolts to the element.

When mounting the washbasin into a wood stud wall, there must be adequate bracing. We recommend doubling up 2x6's or 2x8's between the studs to form a solid anchoring point. Reference the washbasin specification sheet to establish the height and the spacing of the mounting bolts.

Washbasins with siphon cover > Continue with mounting A
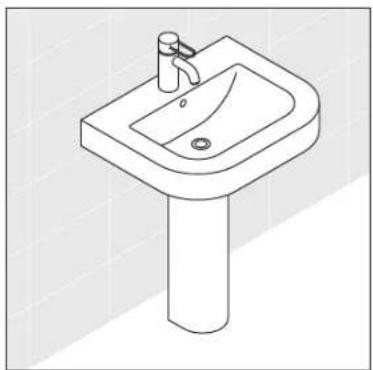
Washbasin with pedestal
Continue with mounting B


The washbasin specification sheet will provide the recommended mounting height and show the location of the mounting holes. (The height can be adjusted to your personal preference)
A1

Mark the location of the mounting holes.

Using the appropriate bit for the wall material, drill pilot holes.

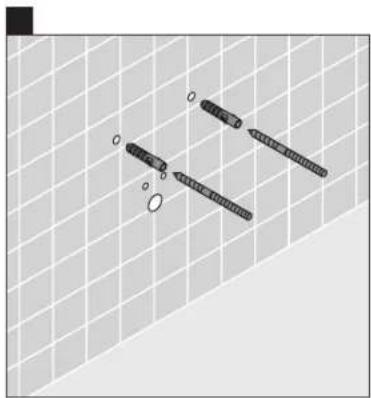
Please note if the washbasin will be mounted on a concrete wall application, anchors must be used.
Screw mounting bolts into the pre-drilled holes with an adjustable wrench.
Screw in the full length of the mounting bolt, so the lag thread is no longer visible.
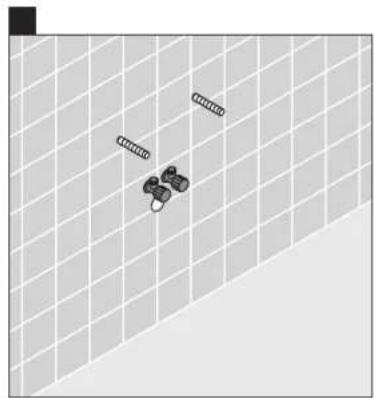
Install Shut off valves according to manufacturer's installation instructions.
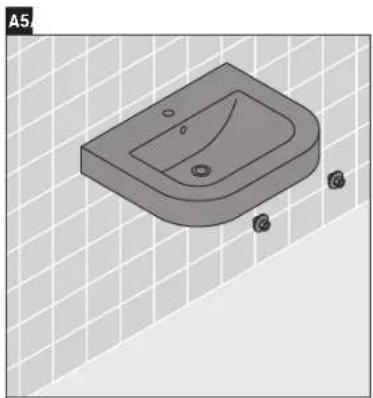
Carefully slide washbasin onto the mounting bolts.
Insert white plastic sleeve over the bolt and into the hole of the washbasin.
Install provided washer and nut.
Hand tighten the nut so the washbasin is secure.


Leveling the washbasin: the white plastic sleeves protect the china from the metal bolt and allow for slight adjustment in the height of the washbasin to level it.
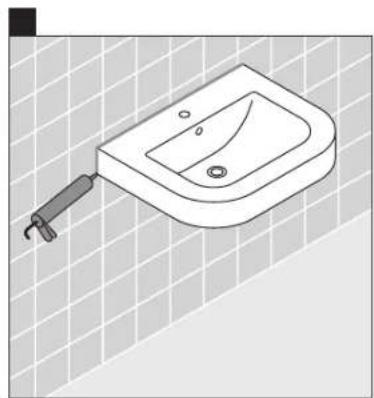
Apply silicone around washbasin edges.
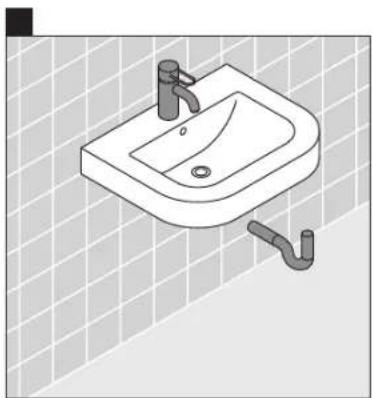
Install faucet and trap assembly according to manufacturer's installation instructions.
MAL_51193/21.03.37

V 10 10 10 10

085810..., #085824..., #085827..., #085829..., #085833..., #085836..., #085839..., #086327..., #086330..., #086341..., #086386..., #086398..., #086502..., #086516..., #262200..., #085770..., #086321..., #086320..., #086308..., #085791..., #085790..., #085842...
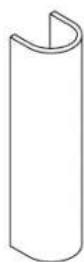
Pedestal
Note!
Pedestal may only be installed with corresponding listed washbasin.
Scan QR Code on packaging label or visit the webadress qr.duravit.com/"articlenumber" to get listed washbasin.
B1
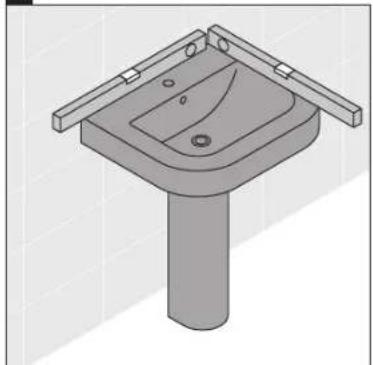
Set washbasin on pedestal leg carefully, then using a level, properly align the washbasin.

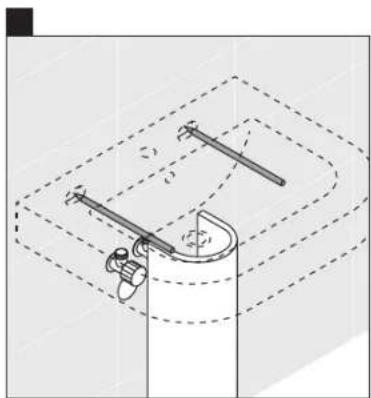
Mark the location of the mounting holes. Mark the location of the back edge where the washbasin meets the wall.
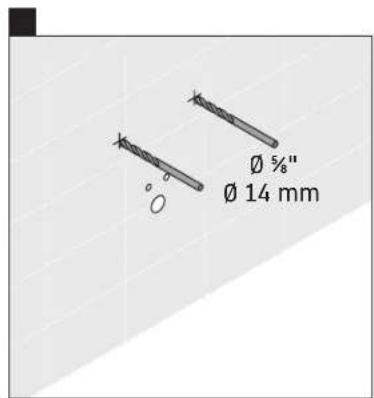
Using the appropriate bit for the wall material, drill pilot holes.
B4

Please note if the washbasin will be mounted on a concrete wall application, anchors must be used.
Screw mounting bolts into the pre-drilled holes with an adjustable wrench.
Screw in the full length of the mounting bolt, so the lag thread is no longer visible.
8 MAL_51193/21.03.3

B5
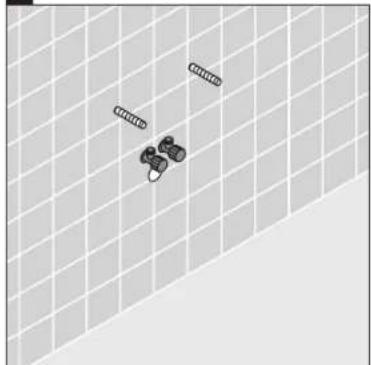
Install Shut off valves according to manufacturer's installation instructions.
∴ m = 3/11
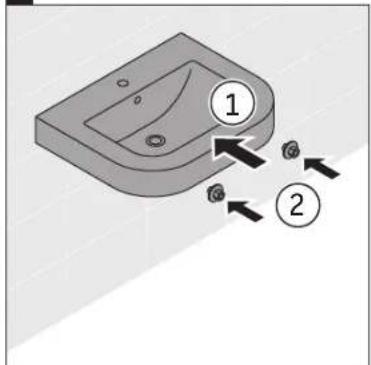
Carefully slide washbasin onto the mounting bolts.
Insert white plastic sleeve over the bolt and into the hole of the washbasin.
Install provided washer and nut.
Hand tighten the nut so the washbasin is secure.

Leveling the washbasin: the white plastic sleeves protect the china from the metal bolt and allow for slight adjustment in the height of the washbasin to level it.


B8
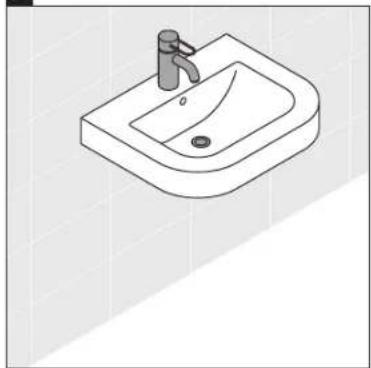
Install the faucet according to the corresponding installation instructions.
∴ m = 3/11
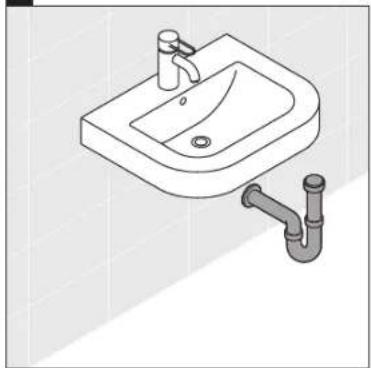
Install the siphon according to the corresponding installation instructions.
∴ m = 3/11
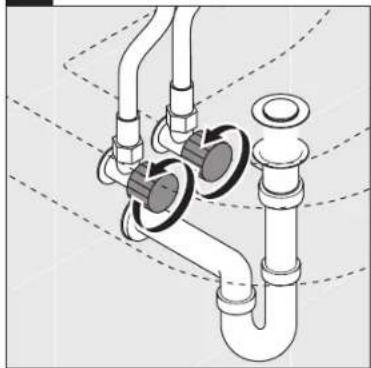
Turn on Shut off valves to test water flow to faucet and drain.

N I L
B11

Test faucet and drain to ensure there are no leaks.
B12
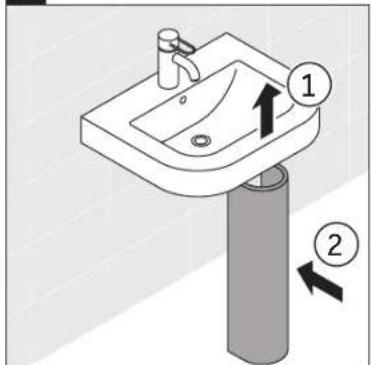
Gently lift the front of the washbasin to allow pedestal to slide underneath. Slightly loosen mounting if needed to allow for safe lift of basin lip.
B13
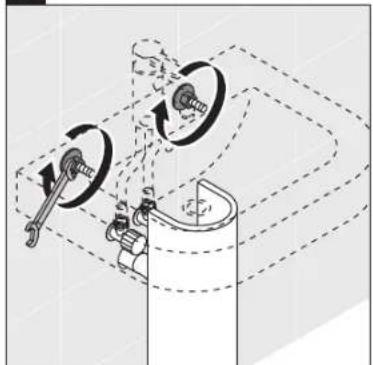
Tighten mounting bolts with wrench to secure. Inspect and adjust for proper level.
Washbasin should sit snug upon pedestal base.
B14
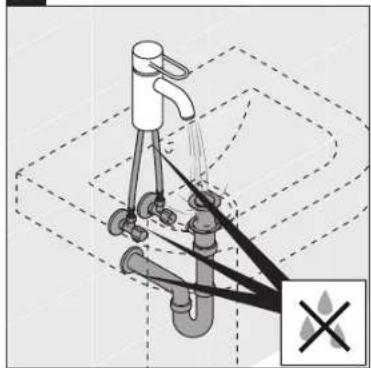
Test faucet and drain to ensure there are no leaks.
B15

Apply silicone around washbasin edges.
10 MAL_51193/21.03.3


DURAVIT USA, INC.
2635 North Berkeley Lake Rd., Ste. 100
Duluth, GA 30096
Toll Free 888-DURAVIT
Phone 770-931-3575
Fax 770-931-8454
info@us.duravit.com
www.duravit.us
DURAVIT


- EN
- ABOUT THESE INSTRUCTIONS
- TARGET READERSHIP AND QUALIFICATIONS
- EXPLANATION OF THE SIGNAL WORDS AND SYMBOLS
- SAFETY INSTRUCTIONS
- PRIOR TO INSTALLATION
- 085810..., #085824..., #085827..., #085829..., #085833..., #085836..., #085839..., #086327..., #086330..., #086341..., #086386..., #086398..., #086502..., #086516..., #262200..., #085770..., #086321..., #086320..., #086308..., #085791..., #085790..., #085842
- PEDESTAL
- NOTE
Brand : Duravit
Model : Vero Air 23508000001
Category : Sink