North - Air Conditioning DUUX - Free user manual and instructions
Find the device manual for free North DUUX in PDF.
User questions about North DUUX
0 question about this device. Answer the ones you know or ask your own.
Ask a new question about this device
Download the instructions for your Air Conditioning in PDF format for free! Find your manual North - DUUX and take your electronic device back in hand. On this page are published all the documents necessary for the use of your device. North by DUUX.
USER MANUAL North DUUX
text_image
WATCH THE INSTRUCTION MOVIES
natural_image
Abstract geometric logo with white triangular and dot elements on teal background (no text or symbols)North
Hot & cool smart mobile airconditioner
User manual | Gebruikershandleiding | Manuel d'utilisation
Manual de usuario | Bedienungsanleitung
duux®
Thank you for choosing Duux.
We're so glad you decided to read the instructions to your new Duux smart mobile airconditioning! Many users casually dismiss instructions and seek to figure it out on their own. But studies show that people who read instructions will get up to speed more quickly and efficiently than those who poke around with trial and error.
At Duux we believe in the importance of a comfortable and healthy living environment. Enhancing your well-being by designing appealing, functional and effective products is the passion that drives us every day. With our range of innovative air treatment products we aim to provide you the best possible indoor air quality.
Unproductive working days, sweaty dinners or sleepless nights. Summers are getting longer and hotter each year, meaning it's time for a new best friend that'll make those days a lot more enjoyable. Meet North: a mobile airco with front output for extra efficient cooling. Its unconventional design makes it a true eye catcher, and the wheels and handles on both sides allow you move it wherever you want. So you'll always stay cool.
Read this manual carefully to get the most out of your North mobile airconditioner.
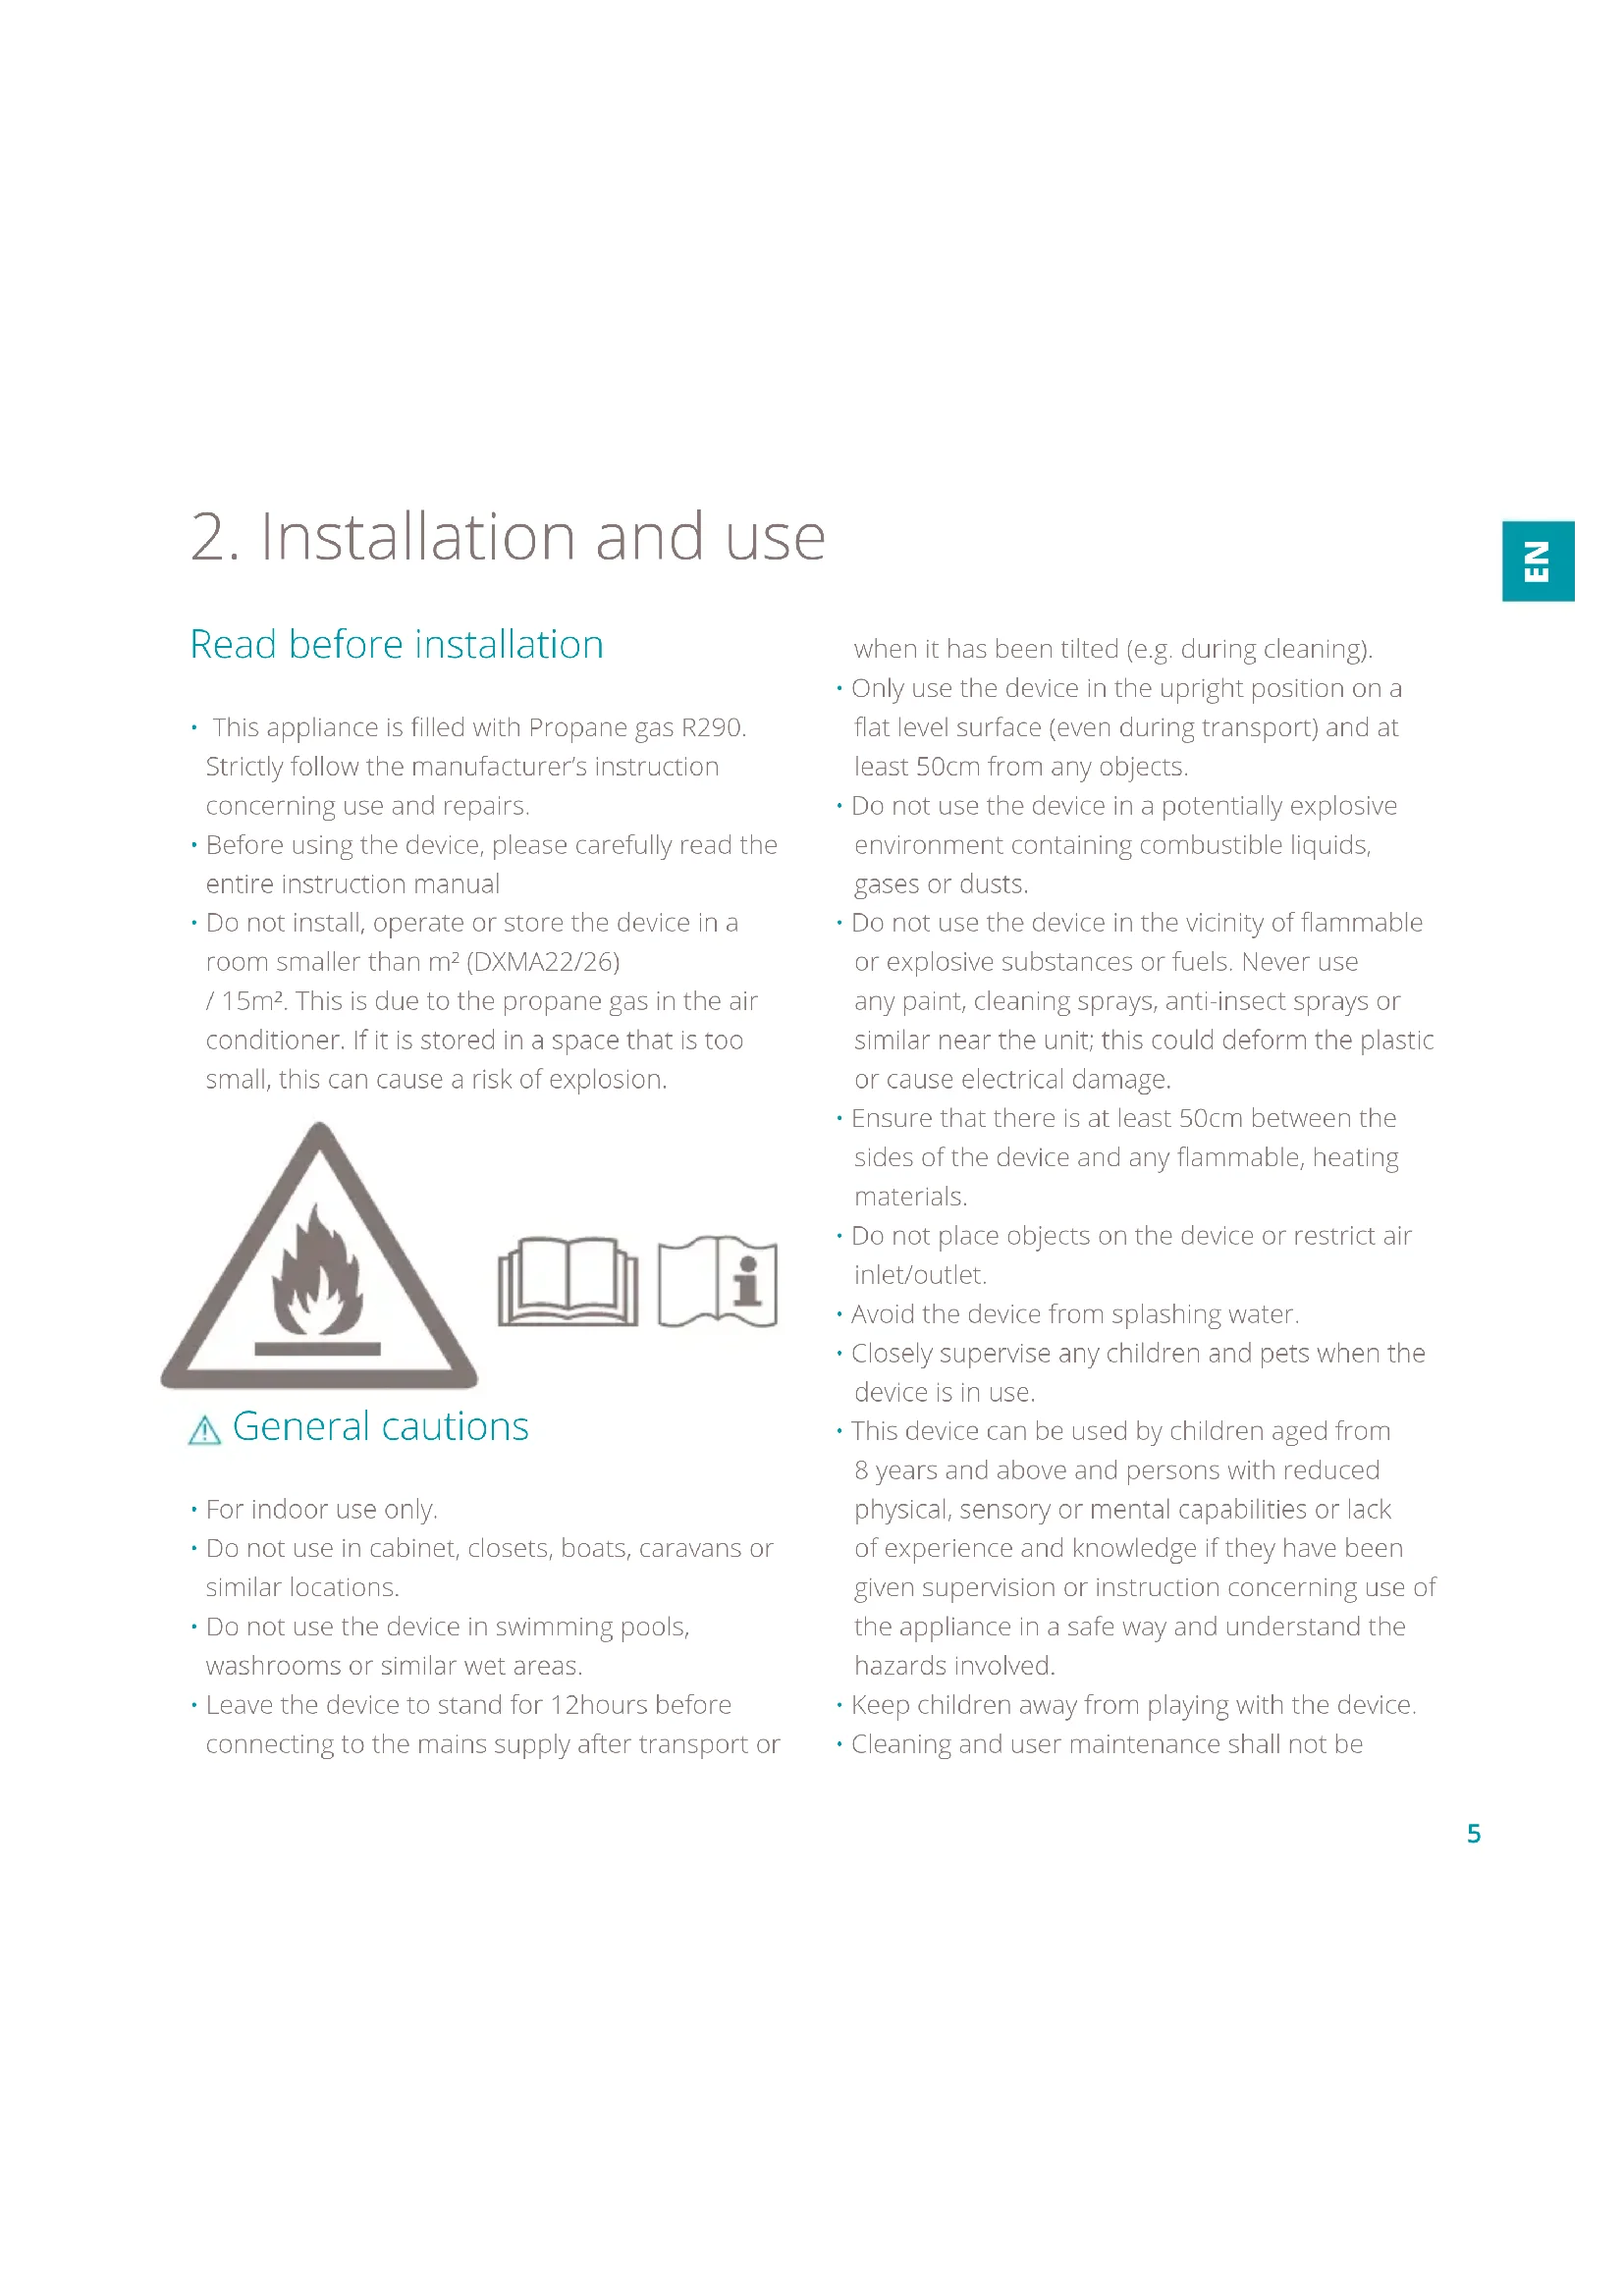
Box contents
natural_image
Line drawing of a portable air conditioner unit with wheels and lid (no text or symbols)
Remote controlNorth

Drainage hose

Battery
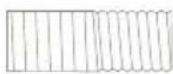
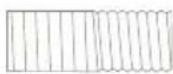
Exhaust hose
natural_image
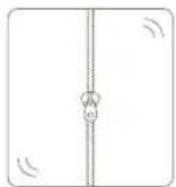
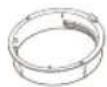
Simple line drawing of a vertical pipe or tube with a circular connector and directional arrows (no text or symbols)Window kit

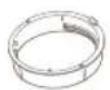
Housing adaptor
Window connector
User guide
Table of contents
- Product overview 4
- Installation and use 5
- Maintenance 10
- Functions 12
- Technical specifications 19
- FAQ 20
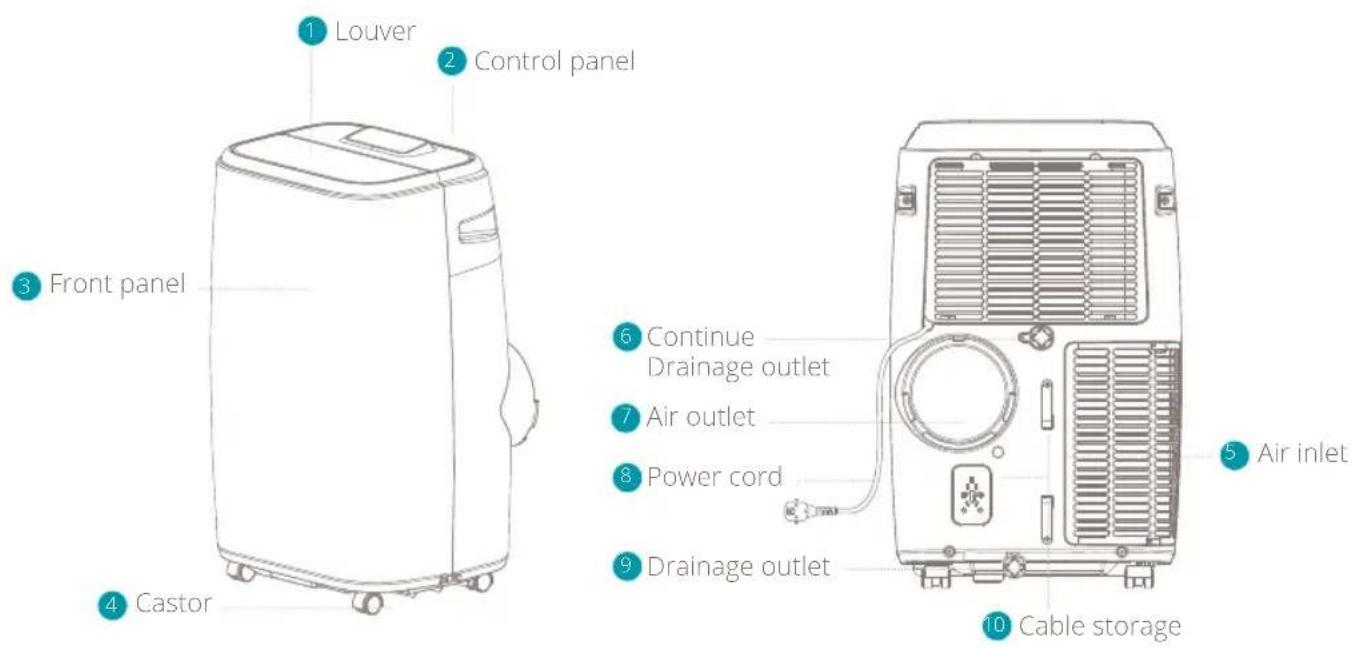
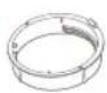
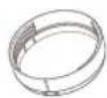
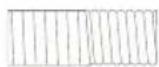
1. Product overview
Accessoires
11 Housing adaptor
12. Window connector
13 Drainage hose
14 Exhaust hose
15 Window kit
16 Remote controller
17 Battery
11
12
13

14
16
17

15
2. Installation and use
Read before installation
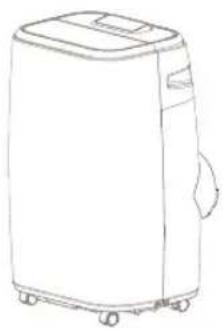
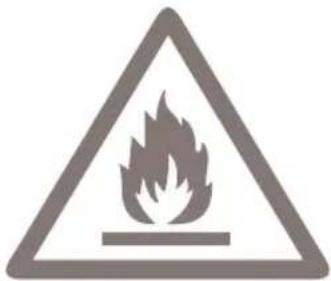
- This appliance is filled with Propane gas R290. Strictly follow the manufacturer's instruction concerning use and repairs.
- Before using the device, please carefully read the entire instruction manual
- Do not install, operate or store the device in a room smaller than m^2 (DXMA22/26)
/ 15m ^2 . This is due to the propane gas in the air conditioner. If it is stored in a space that is too small, this can cause a risk of explosion.
natural_image
Warning sign depicting a flame inside a triangle (no text or symbols)

△ General cautions
- For indoor use only.
- Do not use in cabinet, closets, boats, caravans or similar locations.
- Do not use the device in swimming pools, washrooms or similar wet areas.
- Leave the device to stand for 12 hours before connecting to the mains supply after transport or
when it has been tilted (e.g. during cleaning).
- Only use the device in the upright position on a flat level surface (even during transport) and at least 50cm from any objects.
- Do not use the device in a potentially explosive environment containing combustible liquids, gases or dusts.
- Do not use the device in the vicinity of flammable or explosive substances or fuels. Never use any paint, cleaning sprays, anti-insect sprays or similar near the unit; this could deform the plastic or cause electrical damage.
- Ensure that there is at least 50cm between the sides of the device and any flammable, heating materials.
- Do not place objects on the device or restrict air inlet/outlet.
- Avoid the device from splashing water.
- Closely supervise any children and pets when the device is in use.
- This device can be used by children aged from 8 years and above and persons with reduced physical, sensory or mental capabilities or lack of experience and knowledge if they have been given supervision or instruction concerning use of the appliance in a safe way and understand the hazards involved.
- Keep children away from playing with the device.
• Cleaning and user maintenance shall not be
made by children without supervision.
- Switch off and unplug the device when not in use.
- Never leave a functioning device unsupervised.
- Do not pull the unit along by the cord.
- Avoid over-twisting, -coiling, -pulling the power cord. Never use nylon or iron wire to tide the power cord.
- Make sure that the plug and socket remain visible and accessible at all the time.
- Do not use extension cords.
- Never reach to retrieve the unit if it has fallen in water. In such case, immediately pull the plug from the mains and have the unit checked before using it again.
- If the supplied power cord is damaged it must be replaced by an electrician or qualified person to avoid any hazard.
- The mains supply must confirm to the specification shown on the rating label on the back of the device.
- The appliance shall be installed in accordance with national wiring regulations.
- Do not exceed the recommended room size for max. efficiency.
- Close doors and windows for optimal efficiency.
- Keep curtains or blinds closed during the sunniest hours of the day.
- Keep filters clean.
- Once the room has reached the desired conditions, reduce the setting for temperature and ventilation.
- Do not turn on the device if you have discovered
damage to the appliance, cord or plug or if the device is malfunctioning or if there are signs of any other defect. Return the complete product to the point of purchase or to a certified electrician for inspection and/or repair. Always ask for original parts. The device (incl. cord and plug) may only be opened and/or repaired by properly authorized and qualified persons.
- Only a licensed professional is allowed to dismantle or modify the device.
- This device is to be used only for its prescribed purpose. Any other use is deemed to be a cause of misuse. The user/operator, not the manufacturer will be liable for any damage or injuries of any kind caused as a result of this.
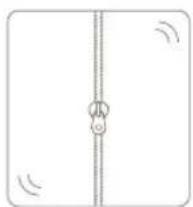
Installation of the window kit
North is a portable air conditioner that may be moved from room to room. Please refer to the separate instructions on how to install the included window sealing set.
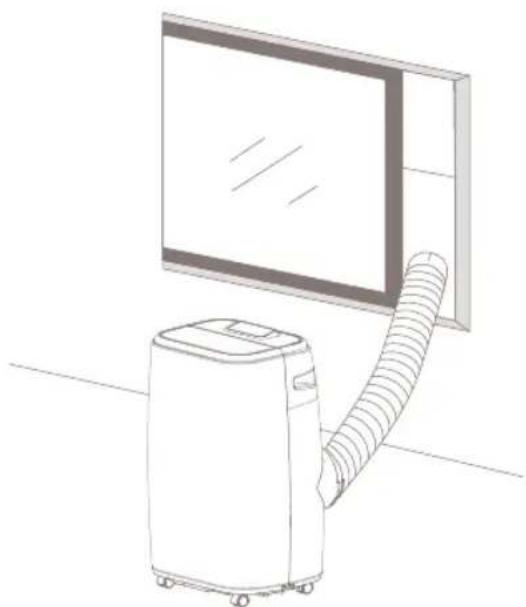
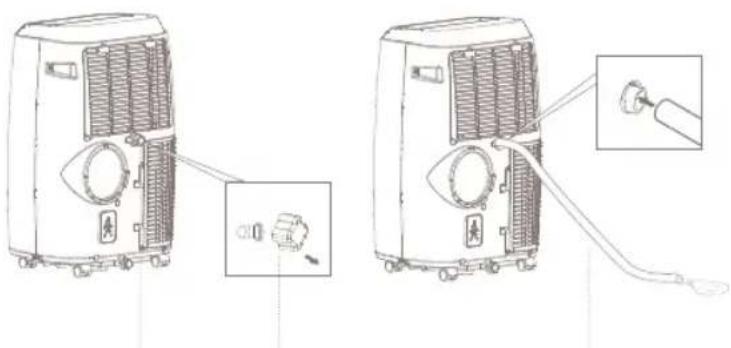
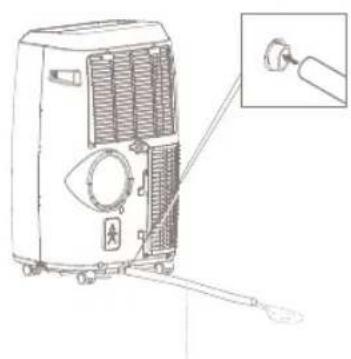
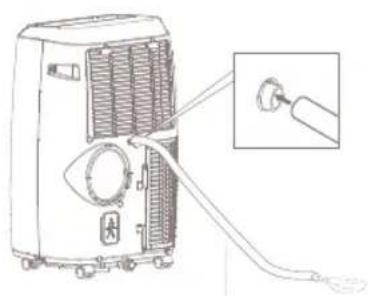
Mounting of the exhaust pipe
- Use only the hose provided and clip exhaust hose to the back of the air conditioner
- Avoid kinks and bends in the exhaust hose as this will cause expelled moist air to build up causing the unit to overheat and shut down. Figures below will show the correct position.
- The hose may be extended from 300mm to 1500mm but for maximum efficiency use the shortest length possible.
⚠ Warning! The length of the exhaust pipe is specially designed according to the specification of this product. Do not replace it with your own private hose as this could cause the unit to malfunction.
natural_image
Line drawing of a portable air conditioner next to a large screen (no text or symbols)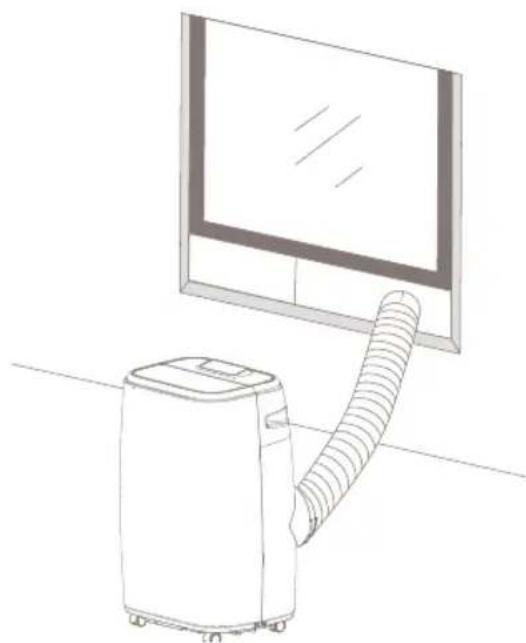
natural_image
Line drawing of a portable air conditioner next to a monitor (no text or symbols)Installation of the remote control
1 Remove the lid.
2 Place the battery according to the instructions on the lid with the correct polarity.
3 Close the lid.

Note
• Only use 1x CR2025 3V battery
• Non-rechargeable batteries are not to be recharged
- Exhausted batteries are to be removed from the remote control and safely disposed of
- If the remote control is to be stored unused for a long period, the battery should be removed
• The supply terminals are not to be short-circuited.
Tips and recommendations
To obtain the highest efficiency from the air conditioner, observe the following recommendations:
- Close windows and doors in the room to be air conditioned. The only exception is installation through a hole in the wall. In this case, it is recommended to leave a door or window ajar to ensure ventilation.
- Do not use the device in rooms with high humidity (e.g. laundry rooms).
- Protect the room from direct sunlight by closing the curtains and/or partially closing the blinds, thus ensuring highly economical operation
- Do not use the device outdoors.
• Make sure there are no heat sources in the room.
• Make sure that the air conditioner is placed on a flat floor. - Do not place items on top of the air conditioner.
- Do not obstruct the air inlets.
• Do not obstruct the air outlet
Attention! When the outside temperature is warm for a long period of time, this heat will also be noticeable in the house. Furniture, bedding, curtains, carpets and the like can retain a lot of heat. As a result, the air conditioner may need longer to cool the room.
3. Maintenance
Always unplug the air conditioner from the mains before cleaning. To maximize the efficiency of the air conditioner, clean regularly.
Cleaning the body
Use a soft, damp cloth to wipe the body clean. Never use aggressive chemicals, gasoline, detergents, chemically treated cloths, or other cleansing solutions. These all could possibly hurt the casing material.
Cleaning the filter
If the air filter becomes clogged with dust or dirt then the air filter should be cleaned once every two weeks. The filter can be cleaned by opening the air inlet grill and remove the filter. Clean the air filter with neutral detergent in lukewarm water (max. 40°C) and let it dry. Place the air filter back into the air inlet and place back the grill.

Note: Never operate the unit without the filter.

Tip: Clean the filter every 2 weeks. A clean filter proves the operation of the air conditioner! You can remove dust particles from the filter using a cloth or through careful use of a vacuum container.
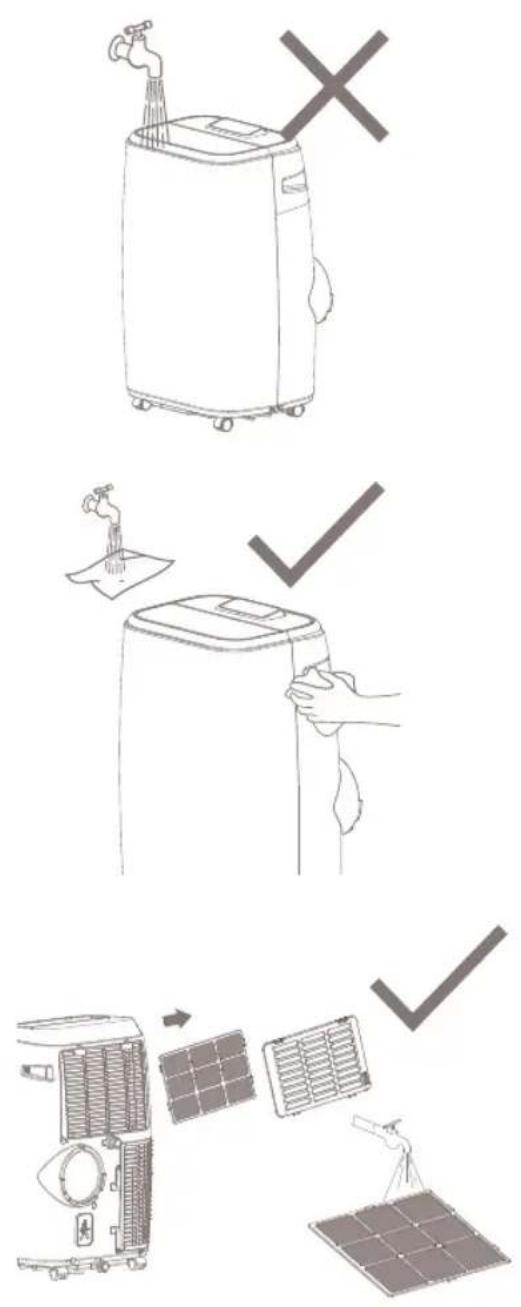
text_image
Illustration showing three steps of cleaning a solar air conditioner, including water tap, cleaning panel, and drying unit with solar panels.Attention: Never use the air conditioner without a filter. This will lead to dust particles on the ribs which you will not be able to remove later.
Long term storage
- Drain any remaining water in the unit
- Operate the unit in ventilation mode only for a few hours to thoroughly dry the inside.
- Unplug and store the power cord.
- Clean or change the filter.
- Cover the device in a close carton or bag (not hotter than 40^ ). Dry thoroughly before storing.
-
Do not store the device in a room smaller than 15m^2 (DXMA22/26). This is due to the propane gas in the air conditioner. If it is stored in a space that is too small, this can cause a risk of explosion.
-
Functions
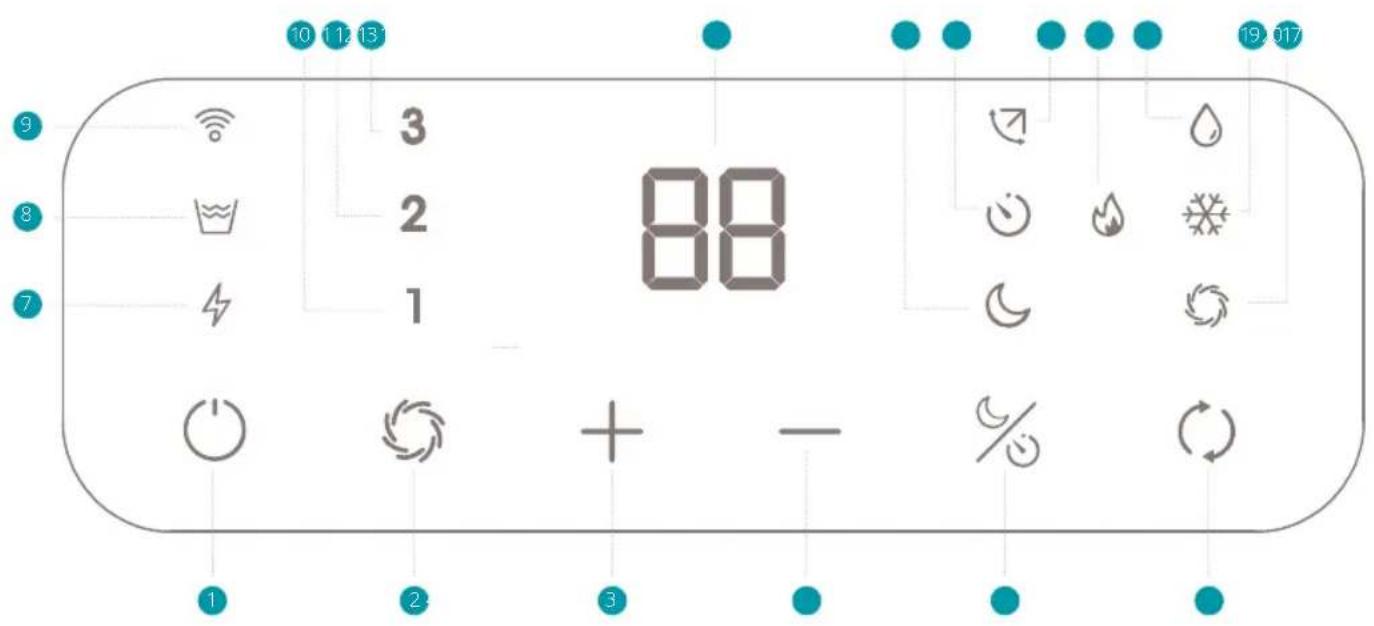
text_image
10 12 13 9 3 88 2 1 7 1 2 3 - % 19:0171 On/Off (power)
2 Fan Speed (ventilator)
3 Temperature or Timer Up
4 Temperature or Timer Down
5 Night/Timer mode
6 Mode selection
7 Power indicator
8 Full water tank indicator
9 WiFi indicator
10 Low ventilation speed indicator
11 Middle ventilation speed indicator
12 High ventilation speed indicator
13 Display
14 Night mode indicator
15 Timer mode indicator
16 Swing on indicator
17 Heating mode indicator (only available on 9K model - DXMA22)
18 Dehumidification mode indicator
19 Cooling mode indicator
20 Ventilation mode indicator
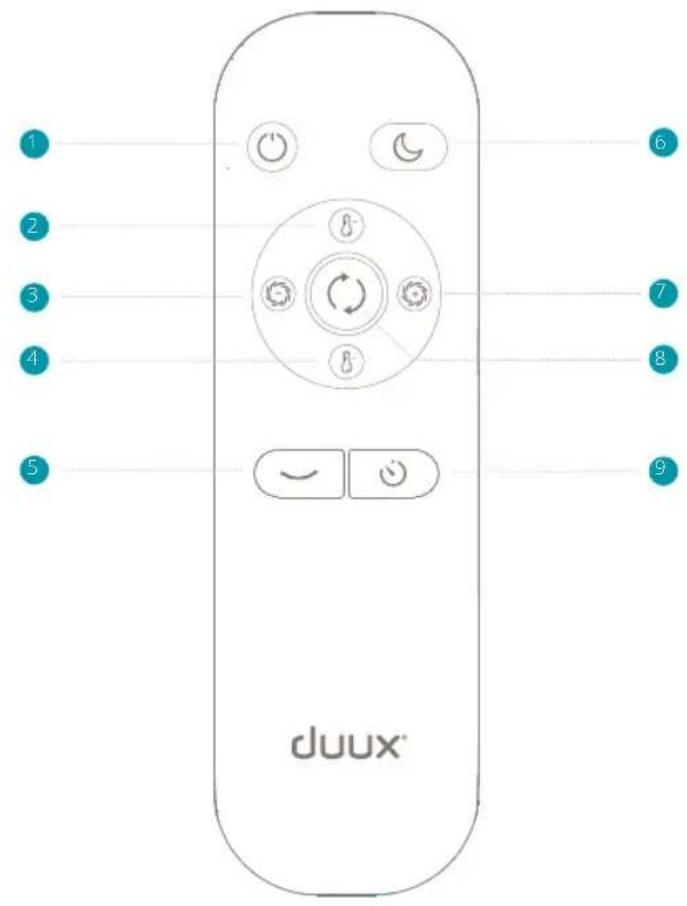
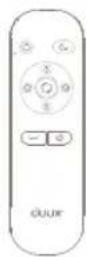
text_image
1 2 3 4 5 duux® 6 7 8 91 Power on/off
2 Temperature up
3 Fan speed down
4 Temperature down
5 Auto swing on/off
6 Night mode on/off
7 Fan speed up
8 Switch mode
9 Timer activated
Power switch
1 Press the ON/OFF button and the unit will start in cooling mode. The pre-set temperature is 25°C on medium fan speed. Only when unplugging the device will it go back to the pre-set settings.
2 To turn the unit off press the ON/OFF button again. When the device is turned ON/OFF using the power button, it will remember the last setting except timer. Timer is cancelled after power off and will not be remembered.
Note: The display window shows the ambient room temperature from 0°C to 50°C.
Select operation mode
Press the ⏻ button to select the preferred operation mode: cooling, heating (only available on 9K model - DXMA22), dehumidifying or fan.
Cooling mode
When the air conditioner is in cooling mode, it cools the room. The compressor is then switched on. When the air conditioner has reached the desired temperature, it will switch to ventilation mode. Press the 🎨 button till the ⚙️ icon lights up. Press the “-” or “+” buttons to select a desired room temperature. The temperature can be from 16°C to 31°C. Press the ⚙️ button to select wind speed.
Heating mode
When the air conditioner is in heating mode, it heats up the room. The compressor is then switched on. When the air conditioner has reached the desired temperature, it will switch to ventilation mode. Press the 🎨 button till the 🔊 icon lights up. Press the " - "or" + "buttons to select a desired room temperature. The temperature can be from 16°C to 31°C. Press the 🔊 button to select wind speed.
⚠️ Note: Heating mode is only available on the 9K model (DXMA22)
Dehumidifying operation
In dehumidifying mode the device will turn on the compressor and starting dehumidifying the room. Press the ⏻ button till the 🔊 icon lights up. The wind will stay in low speed in dehumidiying mode.
Ventilation mode
In ventilation mode, the air conditioner will only ventilate. It circulates the air in the room, which has a cooling effect. The compressor will not switch on in this mode. Press the 📊 button to select wind speed between 1, 2 or 3.
Setting the timer
1 The timer can be used to automatically activate the air conditioner between 1 and 24 hours.
This function can only be activated with the air conditioner is turned OFF. Press and hold the SLEEP/TIMER button, or press the timer button on the remote control to activate a delayed start of the device. You can set the hours by pressing the "+" or "-" buttons. When turning the timer off, press and hold the Sleep/Timer button again and turn the display to "0".
The timer can also be used to automatically shut the air conditioner OFF. This function can only be activated when the air condition is turned ON. Press and hold the SLEEP/TIMER button, or press the timer button on the remote control. You can set the hours by pressing the "+" or "-" buttons.
Swing function
After air conditioner turns on, press this key on the remote control to automatically swing the louver up and down. By pressing this button again the swing will stop and the louver will remain in that position. When the air conditioner is turned OFF, the louver will automatically close again. The swing function can only be used via the remote control, not on the touch panel.
Night mode
When pressing the Night mode button in cooling mode, the set temperature will increase with 1°C after an hour, another 1°C after two hours and then stays at that temperature. Press the Night mode button again to cancel the setting. When pressing the Night mode button in heating mode, the set temperature will decrease by 1^ C after an hour, another 1^ C after two hours and then stays at that temperature. Press the Night mode button again to cancel the setting. In Night mode, the ventilation will remain at low speed. By pressing the Night mode button again, the ventilation speed will return to the previous setting.
Note: The unit will shut down automatically when Night mode is running for more than 12 hours
Note: The night mode is not available while the machine is operating in Dehumidification or Ventilation mode.
⚠️ Note: In Night mode, the display will automatically dim after a few second. Press any key to reactivate the control panel.
Note: To prolong the lifespan of the compressor, please wait at least 3 minutes before re-switching on the device after switching it OFF.
Note: The cooling system will switch off if the ambient temperature is lower than the set one. However, the ventilation keeps operating on the set level. If the ambient temperature rises above the selected level, the cooling will return to work.
Note: The heating system will switch off if the ambient temperature is higher than the set one. However, the ventilation keeps operating on the set level. If the ambient temperature rises above the selected level, the heating will return to work (Heating mode is only available on 9K model - DXMA22)
Water drainage for cooling mode
This air conditioner is equipped with auto water evaporation so the water compartment would not typically fill in cooling mode unless there is high humidity. Water drainage will generally only be required at the end of the season for these modes.
Note: When the water level reaches a predetermined level, the "full tank" indicator light located on the control panel of the unit goes on. If error code "E2" appears on the control panel in COOL mode, the unit will have to be drained.
Intermittent draining
1 Unplug the unit from the power source. Carefully move the unit to a drain area over your basement floor or drip tray (not included) and remove the bottom drain cap.
2 Let the water drain away and close the drain cap. Restart the unit until the error codes "E2" or "E4" disappears on the control panel.
Note: Be sure to close the bottom drain plug before using the unit.
Continuous draining for cooling and heating mode
1 Unplug the unit from the power source. Remove the bottom drain cap. While doing this,
operation some residual water may spill so use a drip tray (not supplied) to collect the water.
2 Connect the drain hose as shown in the diagram. The water can be continuously drained through the hose into a floor drain or drip tray.
3 Turn on the unit.
Note: After the unit has stopped, it cannot be restarted for 3 minutes. Operation will automatically resume after 3 minutes.
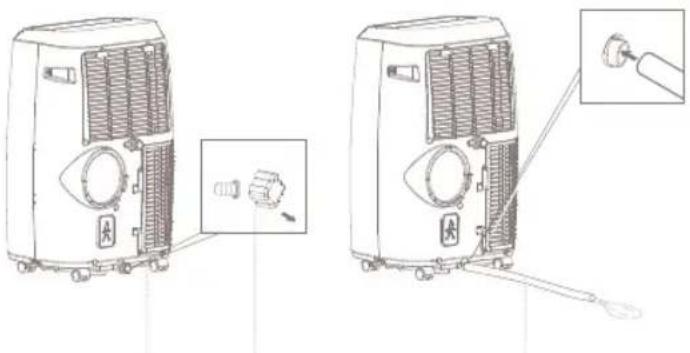
natural_image
Technical line drawing of two air purifiers with attached sensors and a close-up inset showing the internal components (no text or symbols)Drain outlet Drain cap Drain hose
Continuous draining for dehumidification mode
1 Unplug the unit from the power source. Remove the drain cap located in the back center of the unit. While doing this operation some residual water may spill so use a drip tray
(not supplied) to collect the water.
2 Connect the drain hose as shown in the diagram. The water can be continuously drained through the hose into a floor drain or bucket.
3 Turn on the unit.
Note: After the unit has stopped, it cannot be restarted for 3 minutes. Operation will automatically resume after 3 minutes.
natural_image
Line drawings of two air purifiers with attached connectors and a cable, showing internal structure and wiring details (no text or symbols)Drain outlet Drain cap Drain hose
WiFi mode
When plugging the device, the WiFi indicator will flash and start searching from devices to pair. Once connected, the WiFi indicator will turn solid.
If you want to change the WiFi setting, press and hold the 🔗 button to reset the WiFi setting till seeing the WiFi indicator flash again.
WiFi and APP operation
Scan below QR code to download the Duux APP or search DUUX APP in the App Store or Google Play Store. Once installed, enter your e-mail address and complete the registration.
Connect to WiFi
Once registered, click "add duux device" on the main screen or use the "+" button in the top right corner to add a new device.
2 Search for "North" and press to continue
3 Connect to your preferred WiFi network and enter the corresponding password
4 Follow the instructions in the app to complete the pairing process.
Note: if you experience any problems with connecting or using the app, please refer to the FAQ in the app menu.

text_image
QR code image containing encoded data, no visible human-readable textAPP STORE

text_image
QR code image containing encoded data, no visible human-readable textPLAY STORE
A cooling sensation like no other
5. Technical specifications
ZE

Cooling capacity:
9000/12000btu/h

Power consumption:
100-1000/1346 Watt

Noise level:
40-50/52-58dBa

Air volume:
340/380m3/hr

Effective area:
27/34m²

Operation modes:
3/4 (cooling, fan, heating ^* dehumidifying) * only available on 9K model (DXMA22)

Refrigirant:
R290

Display:
Digital LED

Control panel:
Capacitive touch

Timer:
0-24h
Model no.:
DXMA22/26
The appearance and specification of the device may be changed without notice.
6. FAQ
Q. The airconditioner does not turn on. What should I do?
A. - Please check if the air conditioner is plugged in
- Please check for a possible power failure
- Please check if the WATER FULL indicator is blinking. If so, empty the water tank.
- Please check if the room temperature is below/above the set temperature. In that case, the device will not cool/heat. (Heating mode is only available on 9K model - DXMA22)
Q. The device seems to have little effect. What is wrong or how can I improve this?
A. - Please check if direct sunlight is entering the room. Close all curtain to keep the warmth outside.
- Close doors and windows
- Many people in the room rises the room temperature which makes it harder to reach the desired temperature
- Please check if there is something is the room that could produce a lot of heat (e.g. microwave)
- Please check if the air intake or output are blocked
- Please check if the room temperature is below the set temperature. In that case, the device will not cool.
Q. The unit makes a lot of noise. What is wrong?
A. Please check if the device is on a stable surface and not positioned unevenly. This could cause the compressor to make loud noise.
Q. The compressor doesn't work. What is wrong?
A. It could be possible that the overheat protection of the compressor is on. Wait a few minutes for the temperature to drop.
Q. I see an error code. What does it mean?
A. See below table with error codes and their explanations. In all cases, please contact your point of sale of local service point for repair.
Q. How can I extend the lifespan of the compressor?
A. To extend the lifespan of the compressor, wait at least 3 minutes after switching off the device before switching it on again.
Q. Why doesn't the device switch off when the set temperature has been reached?
A. The cooling/heating system switches off when the ambient temperature is lower/higher than the set temperature. However, the ventilation continues to operate according to the set value. If the ambient temperature rises above/down to the selected value, cooling/heating becomes active again. (Heating mode is only available on 9K model - DXMA22)
| E0 Room temperature sensor failed.Contact your point of sales or local service point for repair. |
| E1 Condenser temperature sensor failed. Contact your point of sales or local service point for repair. |
| E2 The water tray is full when in cooling mode.Remove the rubber plug and empty the water tank. |
| E3 Evaporator temperature sensor failed.Contact your point of sales or local service point for repair. |
| E4 The water tray is full when in heating mode. Remove the rubber plug and empty the water tank |
Disposal
The European directive 2012 / 19 / CE on Waste Electrical and Electronic Equipment (WEEE), requires that old household electrical appliances must not be disposed in the normal unsorted municipal waste stream. Old appliances must be collected separately in order to optimize the recovery and recycling of the materials they contain and reduce the impact on human health and the environment. The crossed out "wheeled bin" symbol on the product reminds you of your obligation, that when you dispose of the appliance it must be separately collected. Consumers should contact their local authority or retailer for information concerning the correct disposal of their old appliance.
Simplified EU declaration of conformity
Hereby, Duux declares that this environmental control radio equipment is in compliance with Directive 2014/53/EU. The full text of the EU Declaration of Conformity is available at the following internet address: www.duux.com/doc
natural_image
Line drawing of a portable air conditioner unit with wheels and lid (no text or symbols)
AfstandsbedieningNorth

Waterafvoerslang

Batterij

Uitlaatslang

natural_image
Simple line drawing of a vertical pipe or tube with a circular connector and directional arrows (no text or symbols)Raamdoorvoerset
Adapter behuizing
natural_image
Warning sign depicting a flame inside a triangle (no text or symbols)
natural_image
Line drawing of a portable air conditioner next to a large screen (no text or symbols)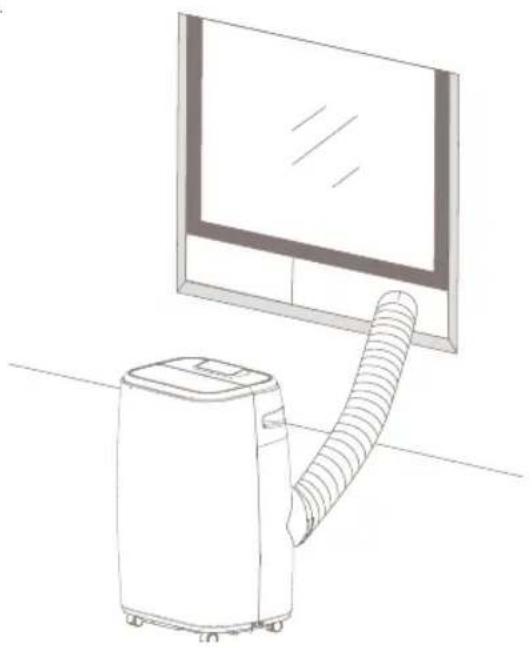
natural_image
Line drawing of a portable air conditioner next to a large screen (no text or symbols)text_image
Diagram illustrating the installation and maintenance of a portable air conditioner system, showing cleaning steps from washing to solar panel installation.natural_image
Technical line drawing of two air purifiers with internal cooling fans and labeled ports, showing exploded view and insertion detail (no text or symbols)natural_image
Diagram showing two identical air purifiers connected to a cable, with one device inserted and the other inserted into a plug (no text or symbols present)text_image
QR code image containing encoded data, no visible human-readable textAPP STORE

text_image
QR code image containing encoded data, no visible human-readable textPLAY STORE
natural_image
Line drawing of a portable air conditioner unit with wheels and lid (no text or symbols)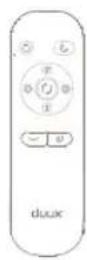
TélécommandeNorth

Tuyau de vidange

Batterie
Tuyau d'évacuation
natural_image
Simple line drawing of a vertical line with a circular mark and directional arrows, no text or symbols present.Kit fenêtres
natural_image
Warning symbol depicting a flame inside a triangle (no text or numbers)

natural_image
Line drawing of a portable air conditioner next to a large screen (no text or symbols)
natural_image
Line drawing of a portable air conditioner next to a large screen (no text or symbols)text_image
Diagram illustrating the installation and maintenance of a solar-powered air conditioner system, showing components before and after installation.natural_image
Line drawing of a portable air conditioner unit with ventilation grilles and control panel, shown with an inset close-up of the internal component (no text or symbols)Sortie de vidange Bouchon de vidange
natural_image
Line drawing of a portable air conditioner unit with a close-up inset showing the cable attachment (no text or symbols)natural_image
Line drawing of a portable air conditioner unit with ventilation grilles and a close-up inset showing internal components (no text or symbols)Sortie de vidange Bouchon de vidangeTuyau de vidange
natural_image
Line drawing of a portable air conditioner unit with attached cable and a close-up inset showing a plug inserted (no text or symbols)Tuyau de vidange
Mode Wi-Fi
text_image
QR code image containing encoded data, no visible human-readable textAPP STORE

text_image
QR code image containing encoded data, no visible human-readable textPLAY STORE
Notes/notities/les notes/notas/Notitzen

natural_image
Line drawing of a portable air conditioner unit with wheels and lid (no text or symbols)
FernbedienungNorth

Abflussschlauch

Akku
Abluftschlauch
natural_image
Simple line drawing of a vertical line with a circular mark and directional arrows, no text or symbols present.Fensterset
Gehäuseadapter

Fensteranschluss
Gebrauchsanweisung
natural_image
Warning symbol depicting a flame inside a triangle (no text or numbers)
natural_image
Line drawing of a portable air conditioner unit next to a large window (no text or symbols)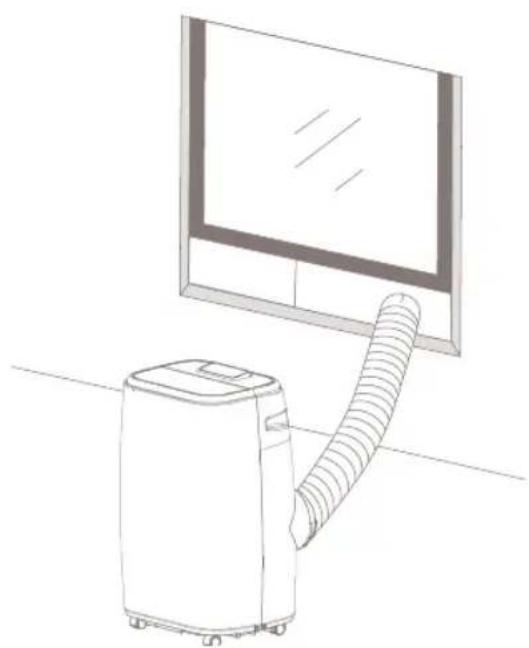
natural_image
Line drawing of a portable air conditioner next to a large screen (no text or symbols)text_image
Diagram illustrating the installation and maintenance of a solar-powered air purifier system, showing components before and after installation.natural_image
Line drawing of a portable air conditioner unit with a close-up inset showing a plug inserted into the air (no text or symbols)natural_image
Diagram of a portable air conditioner unit with ventilation grilles and a close-up inset showing a button (no text or symbols)natural_image
Line drawing of a portable air conditioner unit with attached cable and plug, showing internal airflow path (no text or symbols)Abflussschlauch
WLAN-Modus
text_image
QR code image containing encoded data, no visible human-readable textAPP STORE

text_image
QR code image containing encoded data, no visible human-readable textGOOGLE PLAY
Notes/notities/les notes/notas/Notitzen
natural_image
Line drawing of a portable air conditioner unit with wheels and lid (no text or symbols)
Mando a distanciaNorth

Manguera de drenaje

Pila
natural_image
Simple line drawing of a vertical line with a circular mark and directional arrows, no text or symbols present.Kit para ventanas
Guía del usuario
Índice
text_image
Diagram showing 17 labeled parts of a home appliance, including rings, a wall, remote control, and a plus button.natural_image
Warning symbol with flame, open book, and open book icon (no text or labels)natural_image
Line drawing of a portable air conditioner next to a large screen (no text or symbols)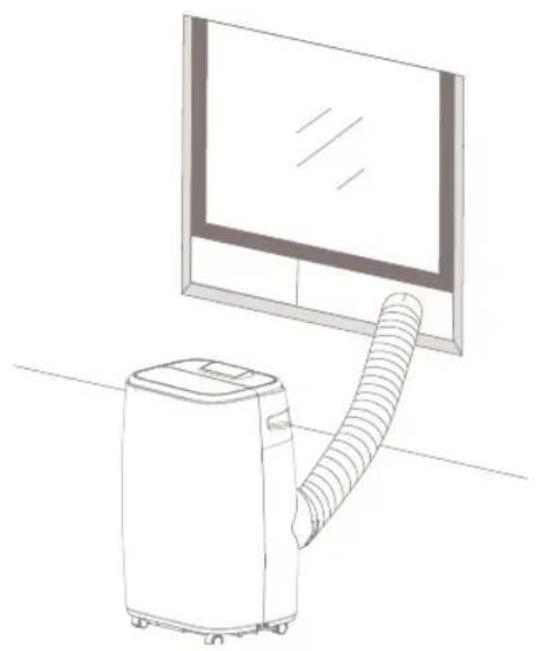
natural_image
Line drawing of a portable air conditioner next to a large screen (no text or symbols)text_image
Diagram illustrating the installation and maintenance of a solar-powered air conditioner system, showing components before and after cleaning.natural_image
Line drawing of a portable air conditioner unit with ventilation grilles and control panel (no text or symbols)natural_image
Line drawing of a portable air conditioner unit with a close-up inset showing the handle (no text or symbols)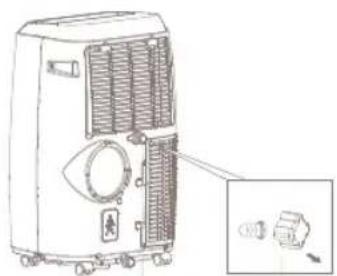
natural_image
Diagram of a portable air conditioner unit with ventilation grilles and a close-up inset showing internal components (no text or labels)natural_image
Line drawing of a portable air conditioner unit with a cable inserted, showing internal airflow and a close-up detail (no text or symbols)Manguera de drenaje
Modo wifi
text_image
QR code image containing encoded data, no visible human-readable textAPP STORE

text_image
QR code image containing encoded data, no visible human-readable textPLAY STORE
Notes/notities/les notes/notas/Notitzen
ES
Designed in The Netherlands by Duux BV. Made in P.R.C. Duux BV, P.O. Box 145, 5400 AC Uden Netherlands, www.duux.com
© 2022 Duux. All rights reserved.
DUUX® is a trademark of Duux BV, registered in the EU and other countries.
The brand cited belongs exclusively to the respective owners.
Specifications are subject to modification without notice.
duux®
Version: IMDXMA2226_V1