
Stream DXHCF01 - Heating DUUX - Free user manual and instructions
Find the device manual for free Stream DXHCF01 DUUX in PDF.


| Product type | Heating and cooling fan |
| Brand | Duux |
| Model | Stream DXHCF01 |
| Weight | 3.6 kg |
| Power consumption (cooling) | 45 W |
| Power consumption (heating) | 1500 W |
| Noise level | 30 - 55 dBA |
| Maximum air flow | 1200 m³/h |
| Wind reach | 7 m |
| Power cord length | 1.8 m |
| Main materials | ABS, PP |
| Number of speeds (cooling) | 4 (Low, Medium, High, Turbo) |
| Number of speeds (heating) | 2 (Medium, High) |
| Oscillation | Horizontal, up to 80° |
| Timer | 1 / 2 / 4 / 8 hours |
| Operating modes | Cooling, heating, natural wind, night |
| Vertical tilt | 4 positions, max 30° upward |
| Remote control | Yes, with CR2032 battery, store it at the back |
| Activated carbon filter | Yes, cleanable with vacuum cleaner, lifespan 3000 h |
| Maintenance and cleaning | Unplug before cleaning; wipe exterior with a soft damp cloth (neutral detergent); do not immerse |
| Safety | Safety switch on the base; overheat protection; do not cover; use on a flat surface |
| Spare parts and repairability | Replacement charcoal filter (ref. DXHCFFC); do not disassemble yourself, contact customer service |
Frequently Asked Questions - Stream DXHCF01 DUUX
User questions about Stream DXHCF01 DUUX
0 question about this device. Answer the ones you know or ask your own.
Ask a new question about this device
Download the instructions for your Heating in PDF format for free! Find your manual Stream DXHCF01 - DUUX and take your electronic device back in hand. On this page are published all the documents necessary for the use of your device. Stream DXHCF01 by DUUX.
USER MANUAL Stream DXHCF01 DUUX
natural_image
Abstract geometric logo with white triangular shapes on teal background (no text or symbols)Stream
Thank you for choosing Duux.
We're so glad you decided to read the instructions to your new Linux heating + cooling fan. Many users, casually difficult instructions and seek up figure it out on their own. But studies show that, people who read instructions will get up to speed more quickly and efficiently than those who poke around with trial and error.
As, Dux we believe in the importance of a comfortable and healthy living environment. Enhancing your well-being by designing appealing, functional and effective products is the passion that drives us every day. With our range of innovative air treatment products we aim to provide you the best possible in poor air quality.
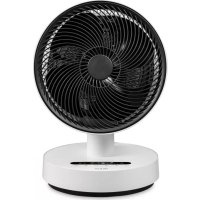
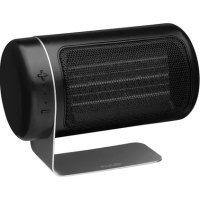
Perfect comfort throughout every season. Stream can be seen all year round with it's 4 cooling speeds and 2 heating settings. The activated carbon filter removes odors and smoke to ensure clean air output. The slack LED touch bar offers convenient operation while the compact remote control can be stored in the back of the device. With 7 meters wind reach and 1200m^3/hr air flow, Stream provides a very powerful performance with extremely silent operation down to 30D&A. The natural wind and night modes adds extra convenience for ultimate comfort during the day and night.
Read this manual carefully to get the most out of your Stream heating + cooling fan.
Table of contents
- Product overview 4
- Installation & use 5
- Functions 7
- Maintenance 11
- Technical specifications 13
- FAQ 14
1. Product overview 2. Installation and use

Note: Please take notice of below instructions and the separately included morning sheet before using the product.
Installation
- Before use, please check whether the voltage used matches the indicated voltage on the racing label.
- This device can be used by children aged from 8 years and above and persons with reduced physical, sensory or mental capabilities or lack of experience and knowledge if they have been given supervision or instruction concerning use of the device in a safe way and understand the hazards involved: children shall not play with the device, cleaning and user maintenance should not be performed by children without supervision.
• Children younger than 3 years should be kept away from the device unless continuously supervised.
Children older than 3 years and younger than 8 years shall only switch or off the device provided that it has been placed or installed in its intended normal operating position and they have been given subscription or instruction concerning use of the device in a safe way and understand the hazards involved. Children aged from 3 years and less than 8 years shall not plug in regular and
clean the device or perform user maintenance
Caution: Some parts of this device can become very hot and coarse barns. Particular attention must be given where children and vulnerable people are present.
- If the power cord is damaged, it must be replaced by the manufacturer, its service agent or similarly qualified persons in order to avoid a hazard.
This marking indicates that the product cannot be covered with anything.
Warning: In order to avoid overheating, do not cover the device
• The device must not be located immediately below a wall outlet.
- Do not use this device in the immediate surroundings of a bath, a shower or a swimming pool.
Warning: This device is not equipped with a sensor to control the room temperature. Do not use this device in small rooms when they are occupied by persons not capable of leaving the room on their own, unless constant supervision is provided.
This product is only suitable for well insulated spaces or occasional use.
Warning: Batteries contain materials that are harmful to the environment and must be removed from the device before disposal and disposed properly.
- When the device is not in use, please turn off the device by pushing the stand-by switch on the base of the device or remove power plug. Do not leave the device in stand-by mode for a long period of time.
- Do not place the power cord under the item or cover the power cord. Place the power cord properly to prevent tripping over it.
- Place the device on a flat and secure surface before using the product.
- Remove the power plug when the device is not in use. Never pull the power cord to remove the plug.
- Please ensure that this product does not run into any obstructions.
• Do not put your fingers or other objects into the air inlet and outlet when the fan is running. - When the product is operating, do not put any soft items such as hairs, window/door curtains on the device that might get caught between the fan blades.
- Stop using the device when the power cord or plug is damaged, or the device is damaged after being dropped.
- Do not use this device outdoors. The device is only for household and indoor use. Do not use this device near a window or expose.
to direct sunlight.
- This device cannot be used without a base and should always be placed horizontally
- Do not use this device in a place where gasoline, paint or other flammable materials are stored
- Remove the power plug before cleaning, repairing or moving the device.
- Remove the power plug when the device is not in use.
• Please use this device according to the instructions provided in this manual.
• Do not disassemble the device yourself. If the repair is retained, please return. I to your point of purchase or service center. - Products should be kept clean and regularly maintained.
- Do not use extension cords.
Installing the device
1 Unpack the device and remove the packing materials from the device. Store the packing materials for possible future transportation.
3 Insert the power plug into a wall outlet and press the safety switch to | posit on. You will hear a double confirmation beep.
Press the power button to switch on the device and the LED touch bar will illuminate and operate in cooling mode at low speed.
3. Functions

LED touch bar
1 Power
2 Change speed
Timet
4 Oscillation
5 Heating made
Natural wind & night mode
A Note: if the display has been inactive for 1 minute, the lights will be dimmed by 80%.
Remote control
● Flower
Change speed
Tract
+ Oscillation
Healing mouse
Natural wind & night mode

Power
To touch the ⏻ key to switch on the device. The display will illuminate and operate in cooling mode at low wind speed by default. Press again to switch off in stands-by mode.
Note: Make sure the stand-by switch is in position in order to switch on the device. If the stand-by switch is in 0 position, all buttons are disordered.

Change speed
Press the O key to increase or decrease the wind speed in the following sequence: Low (1) > Medium (2) > High (3) > Strong (4). Default setting is Low (1) speed. The icons of the LLD display will change accordingly.

Timer
Timer is deactivated when using the device for the first time. Press the Ⓧ key to activate the timer mode. You can switch the timer in the following order: 3h > 2h > 4h > 8h. The corresponding indicators will illuminate on the display. You can also read the timer count down on the display (e.g. if 4th timer is activated, the display will change to 2h after 2h and so on). After the timer is completed, the device will switch to stand-by mode.

Oscillation
Oscillation is deactivated when using the device for the first time. By pressing the ⬆ key, the device will automatically oscillate horizontally up to 80 degrees. The indicator on the display will illuminate accordingly. The vertical angle can be adjusted manually in 4 positions, up to 90°

Heating mode
Heating mode is deactivated when using the device for the first time. Press the *key to turn on the heating mode. Once pressed, the heating mode will start in Medium (2) speed mode and the corresponding indicator on the display will illuminate. Pressing again will increase the heating power to High (3) speed mode.
Note: It's not possible to manually adjust the speed of the heating mode. When pressing the key, the device will return in cooling mode
Pressing this key again will activate ECO mode. When the room temperature is below 18°C, the High (5) speed heating mode will turn on automatically. When the room temperature is between 18°C and 22°C, the Low (2) speed heating mode will be accumulated. When the room temperature is above 22°C, the heating mode will have a slow and then will stop working. To
continue in cooling mode, switch on the fan by pressing the ○ button. Pressing this key for a 4th time will return to cooling mode.

Natural wind & night mode
Night mode is deactivated when using the device for the first time. Press the G key to activate natural wind & night mode. The corresponding indicator will illuminate on the display. Press again to deactivate this mode.
Note: The natural wind & night mode cannot be used in combination with the heating mode. Once natural wind & night mode is activated, pressing the heating mode key will automatically deactivate the natural wind & night mode.
The natural wind & night mode works according to the below programming:
Natural wind & night mode in HI speed

line
| Time (sec) | Value | | ---------- | ----- | | 0 | 6 | | 1 | 6 | | 2 | 6 | | 3 | 1 | | 4 | 6 | | 5 | 12 | | 6 | 6 | | 7 | 6 | | 8 | 1 | | 9 | 6 | | 10 | 1 | | 11 | 17 | | 12 | 5 |Natural wind & night mode in MID speed

Natural wind & night mode in LOW speed

Installing the battery
Remove the battery cover of the remote control, place the 3V CR282 in the battery compartment for use.
During use, point the remote control towards infrared receiver. Obstructions along the path will hinder the performance of the remote control. When not used, the remote control can be placed in the holder for easier accessibility.
For battery replacement please refer to the figure below. Press the button on the side and pull out the battery tray. Please take notice of the negative and positive symbols on the cover.

Bacter es contain materials that are harmful to the environment and must be removed from the equipment before disposal and disposed properly.
Vertical angle adjustment
The head of the device can be tilted in 4 different positions to adjust the wind angle, in which the last one is 90° facing upwards.
4. Maintenance
A. Important: Be sure to remove the power plug from the outlet before carrying out maintenance.
▲ Important: Do not soak or immerse the power plug or the device in water.
Cleaning
- Please use a soft cloth to wipe the dust on the body; if the surface is too dirty, it is better to wipe it clean with a clamped cloth mixed with neutral detergent
- Don't use gasoline, thinner and any others chemical substances as it will easy damage the surface
Carbon filter
If there is too much dust on the carbon filter it may influence the devices' efficiency. We recommend cleaning the filter every month
Unscrew the 3 screws from the rear cover and remove it from the device.
Use a vacuum cleaner with soft brush extension to clean the carbon filter. Never use a liquid cleaner or water to clean!
Insert the carbon filter or back in the rear cover and re-attach the rear cover to the rear shell on the device.
The carbon filter lifespan 3500 hours (approx. 1 year). Please check duox.com for replacement carbon filters (arL no. DXHCTF01).
Spare parts
Spare parts and accessories can be requested at the part of purchase or total distributor.
Comfortable air throughout every season
5. Technical specifications

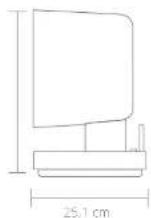
Weight 3,6 kg
Power consumption (cooling): 45W
Power consumption (heating)
1500W
Noise level 30-55dBA
Air flow: 1200m³/hr
≈ wind reach
7m
Powercord length 1,8m
Main materials: ABS, PP
Model no.: DXHCF01/02
The appearance and specification of the device may be changed without notice.
6. FAQ
Q. How often should I replace the carbon filter?
A. You don't have to replace any of the filters. See chapter 4 for maintenance instructions for cleaning the carbon filter
Q. Why can't I manually adjust the wind speed in heating mode?
A. The wind speeds in heating mode are fixed to 2 speeds: Medium (2) and High (3). This is to assure safe usage of the heating element.
Q. I smell a strange odor. Is this normal?
A. This small is generated by the heating element when first time use. This is normal and will be reduced gradually during use. It can also occur when dust accumulates on the heating element.
ERP table
Model identifier(s):
| Item Item | Systolic Value (Pa) | ||||
| Heat output | Type of heat input, for electric storage local space heaters only (select one) | ||||
| Natural heat output | P. Box | 1000 | kW | Normal heat charge control with integrated heat monitor. | No |
| Minimum heat output (indicated) | P. Box | 0.829 | kW | Normal heat charge control with room interior temperature socket. | No |
| Minimum temperature control and output | P. Box | 5.31 | kW | Electronic heat charge control with room interior temperature socket back. | No |
| Cooling device | unassessed heat output. | No | |||
| A nominal heat output | P. Box | 100 | kW | Type of heat output/room temperature control (select one) | |
| A maximum heat output | P. Box | 0.638 | Single-stage heat output and no room temperature control | No | |
| A stationary mode | P. Box | 0.638 | kW | Two-stage maximum stage to room temperature control | No |
| With current thermocouple temperature control | No | ||||
| With the track above temperature control | Yes | ||||
| Electronic room temperature control but also timer | No | ||||
| Different room temperature control with work timer | No | ||||
| Other control options (multiple selections possible) | |||||
| Room temperature control with frozen water level. | No | ||||
| Room temperature control with water reservoir depletion | No | ||||
| With distance measurement control | No | ||||
| With adaptive heat control | No | ||||
| With cooling line limitation | Yes | ||||
| With black tool center | No | ||||
| Item Item | Systolic Value (Pa) | ||||
| Heat output | Type of heat input, for electric storage local space heaters only (select one) | ||||
| Natural heat output | P. Box | 1000 | kW | Normal heat charge control with integrated heat monitor. | No |
| Minimum heat output (indicated) | P. Box | 0.829 | kW | Normal heat charge control with room interior temperature socket. | No |
| Minimum temperature control and output | P. Box | 5.31 | kW | Electronic heat charge control with room interior temperature socket back. | No |
| Cooling device | unassessed heat output. | No | |||
| A nominal heat output | P. Box | 100 | kW | Type of heat output/room temperature control (select one) | |
| A maximum heat output | P. Box | 0.638 | Single-stage heat output and no room temperature control | No | |
| A stationary mode | P. Box | 0.638 | kW | Two-stage thermal stage to room temperature control | No |
| With microwave thermocouple temperature control | No | ||||
| With single-stage thermal stage control | Yes | ||||
| Electronic low-temperature control bus dec meter | No | ||||
| Differential low-temperature control bus dec meter | No | ||||
| Other control options (multiple selections possible) | |||||
| Room temperature control with frozen bed door. | No | ||||
| Room temperature control with dual-mode device. | No | ||||
| With distance measurement control. | No | ||||
| With adaptive wall control. | No | ||||
| With cooling line limitation. | Yes | ||||
| With black bulb sensor. | No | ||||
Model identifier(s):
| Item Item | Symbol Value/Unit | ||||
| Heat output | Type of heat input, for electric storage local space heaters only (select one) | ||||
| Natural heat output | P.200 | 1.500 | kW | Normal heat charge control with integrated thermocenter. | No |
| Minimum heat output (select one) | P.45 | 0.920 | kW | Normal heat charge control with room condition outside temperature. Socked. | No |
| Minimum temperature control | P.325 | 5.31 | kW | Electronic heat charge controls with room conditions outside temperature control. | No |
| Cooling device | unassessed heat output. | No | |||
| A nominal heat output | P.60 | NA | kW | Type of heat output/room temperature control (select one) | |
| A maximum heat output | P.80 | 0.600 | Large heat-charge output and minimum temperature control | No | |
| A stationary mode | P.48 | 0.600 | kW | Yes to non-thermal stages, to minimum temperature control | No |
| With current thermal control, temperature control | No | ||||
| With the matrix, the temperature control | Yes | ||||
| Electronic room remote state control area delay time | No | ||||
| Electronic room remote state control area week time | No | ||||
| Other control options (multiple selections possible) | |||||
| Room temperature control with power in field to: | No | ||||
| Some temperature control with power remote detection | No | ||||
| With distance control after: | No | ||||
| With equipment control | No | ||||
| With working site limitation | Yes | ||||
| With black tool center | No | ||||
| Item Item | Spec. No. | Label, Unit | No. | ||
| Heat output | Type of heat input, for electric storage local space heaters only (select one) | ||||
| Natural heat output | P. Box | 1000 | kW | Normal heat charge control with integrated heat monitor | No |
| Temperature heat output indicated | Pain | 0.928 | kW | Normal heat charge control with room interior outside temperature socket | No |
| Temperature range and heat output | P. Box | 5.41 | kW | Electronic heat charge control with room interior outside temperature socket back | No |
| Condition data only | Unassessed heat output | No | |||
| An inverted heat output | D. box | NA | kW | Type of heat output/room temperature control (select one) | |
| An inverse heat output | P. box | 3.625 | kW | Single-digit-12 heat input and 12 micro-temperature control | No |
| Potentially hot pipe | P. Box | 3.625 | kW | Two micro thermal sensors to room temperature control | No |
| Very potentially thermocouple temperature control | No | ||||
| With the track above the temperature control | Yes | ||||
| Electronic low temperature control plus speed timer | No | ||||
| Electronic low temperature control plus speed timer | No | ||||
| Other control options (multiple selections possible) | |||||
| Room temperature control with frozen up/dry line | No | ||||
| Room temperature control with low temperature detector | No | ||||
| With distance measurement | No | ||||
| With distance measurement | No | ||||
| With distance measurement | No | ||||
| With cooking time limitation | Yes | ||||
| With black fruit container | No | ||||
| Item Item | Size (oz) | Value (oz) | Unit | Type of heat input, for electric storage local space heater only (select one) | |
| Heat output | |||||
| Natural heat output | Large | 500 | kW | Normal heat charge control with integrated temperature control | No |
| Minimum heat output (select one) | Small | 0.28 | kW | Water heat charge control with room temperature control temperature temperature control | No |
| Maximum temperature control | Large | 5.31 | kW | Junction heat charge control with room temperature control temperature control | No |
| Radiation device | unassessed heat output | ||||
| A nominal heat output | large | 5.5 | kW | Type of heat output/room temperature control (select one) | |
| A maximum heat output | small | 0.43 | kW | Single-leg heat output and in constant temperature control | No |
| In a stationary mode | 0.48 | 0.63 | kW | Two-leg heat output and in constant temperature control | No |
| With current thermodynamic temperature control | No | ||||
| With single-leg heat output and in constant temperature control | Yes | ||||
| Junction heat capacity control with two days then | No | ||||
| Junction heat capacity control with two days then | No | ||||
| Other control options (multiple selections possible) | |||||
| Room temperature control with frozen water level | No | ||||
| Room temperature control with pure reservoir depletion | No | ||||
| With discharge temperature control | No | ||||
| With adaptive thermal control | No | ||||
| With cooling line limitation | Yes | ||||
| With black tool center | No | ||||
Notes/notities/les notes/notas/Notitzen Notes/notities/les notes/notas/Notitzen
Designed in The Netherlands bij Duux BV. Made in P.R.C. Duux BV, P.O. Box 145, 5400 AC Uden Netherlands, www.duux.com
© 2019 Duux. All rights reserved.
DUUX® is a trademark of Duux BV, registered in the EU and other countries.
The brand cited belongs exclusively to the respective owners.
Specifications are subject to modification without notice.
duux®
- Stream
- Thank you for choosing Duux.
- Table of contents
- Product overview 2. Installation and use
- Installation
- to direct sunlight.
- Installing the device
- Functions
- LED touch bar
- Remote control
- Power
- Change speed
- Timer
- Oscillation
- Heating mode
- Natural wind & night mode
- Installing the battery
- Vertical angle adjustment
- Maintenance
- Cleaning
- Carbon filter
- Spare parts
- Comfortable air throughout every season
- Technical specifications
- FAQ
- ERP table
Brand : DUUX
Model : Stream DXHCF01
Category : Heating