IAN 278519 - Bike accessory CRIVIT - Free user manual and instructions
Find the device manual for free IAN 278519 CRIVIT in PDF.
| Product type | Mini bike air pump |
| Brand | Crivit |
| Model | IAN 278519 |
| Dimensions | Length approx. 190 mm |
| Weight | Approx. 100 g |
| Maximum pressure | 120 PSI / 8.3 bar |
| Power supply | Manual (no batteries or mains) |
| Compatible valve types | Schrader, Dunlop, Sclaverand |
| Package contents | 1 pump, 2 caps, 2 rubber rings, 1 bike mount, 2 screws, 1 hose, 2 valve adapters, instructions |
| Mounting | On bike frame via bottle cage mount (provided or existing screws) |
| Intended use | Inflating bike tires only (not for cars) |
| Maintenance | Clean with a damp cloth, do not immerse in water |
| Safety instructions | Risk of burns from friction; do not exceed maximum pressure; check condition before use |
| Warranty | 3 years (against material and manufacturing defects) |
| Customer service | Switzerland hotline: 0842 665566; spare parts at www.delta-sport.com |
| Repairability | Spare parts available during warranty period; item not repairable in case of defect |
Frequently Asked Questions - IAN 278519 CRIVIT
User questions about IAN 278519 CRIVIT
0 question about this device. Answer the ones you know or ask your own.
Ask a new question about this device
Download the instructions for your Bike accessory in PDF format for free! Find your manual IAN 278519 - CRIVIT and take your electronic device back in hand. On this page are published all the documents necessary for the use of your device. IAN 278519 by CRIVIT.
USER MANUAL IAN 278519 CRIVIT
natural_image
Two black air compactioners with attached hoses, one labeled 'AIR COMPACT' (no additional text or symbols visible)MINI-LUFTPUMPE
DE AT CH
MINI-LUFTPUMPE
Gebrauchsanweisung
FR CH
MINI-POMPE À AIR
Instructions for use
IAN 278519
DE AT CH
FR IT GB
text_image
A 1 2 6 3 4 5 7 8 9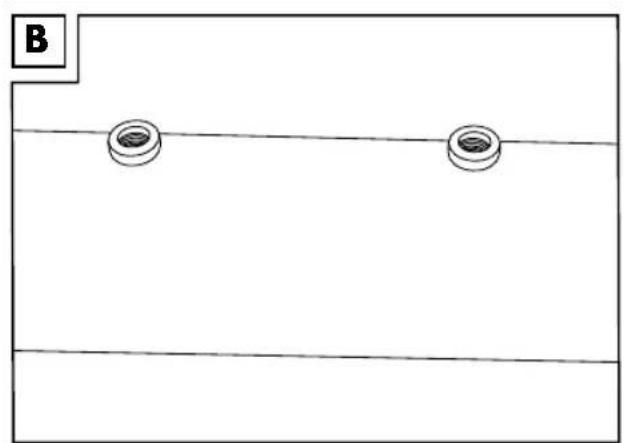
natural_image
Simple line drawing of a rectangular container with two circular objects on horizontal lines, labeled 'B' in top-left corner (no text or symbols on objects)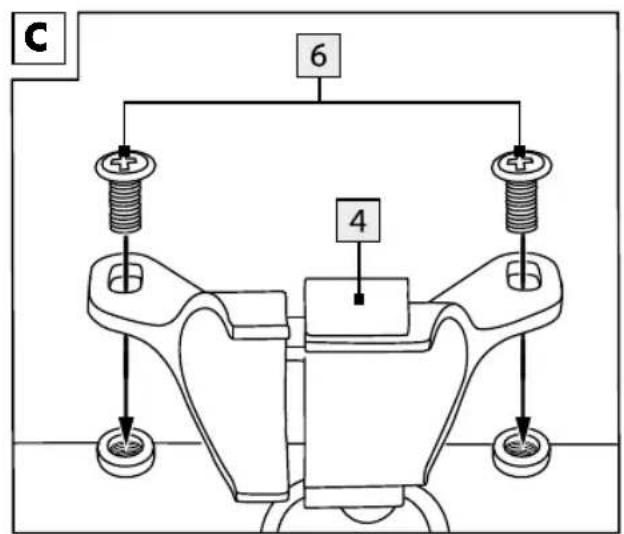
text_image
C 6 4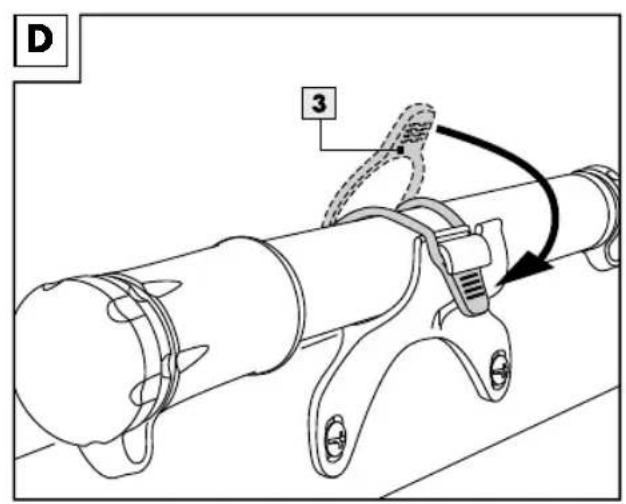
text_image
D 3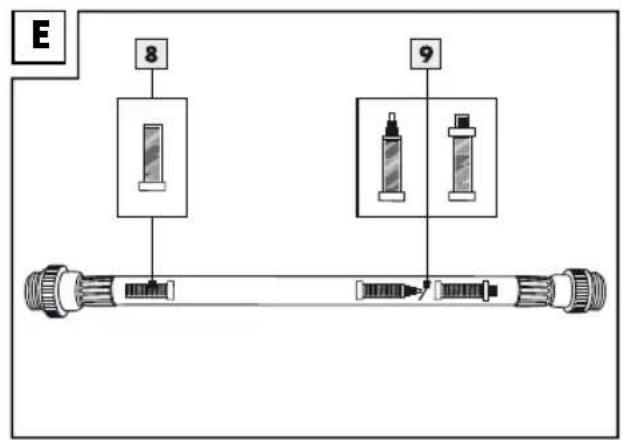
text_image
E 8 9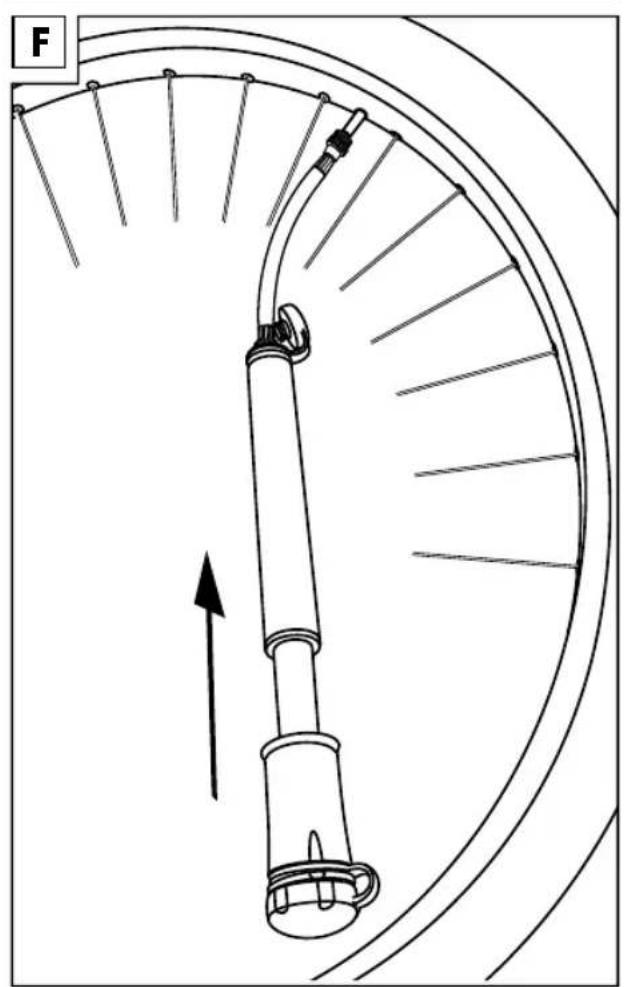
natural_image
Diagram of a mechanical device with a curved arrow indicating motion or force direction (no text or symbols)DE AT CH
Scope of delivery / Part names 18
Technical data 18
Correct use 18
Safety notes 18-19
Mounting to the bike frame 19
Use 19
Maintenance and storage 19
Disposal 20
3 Years Warranty 20

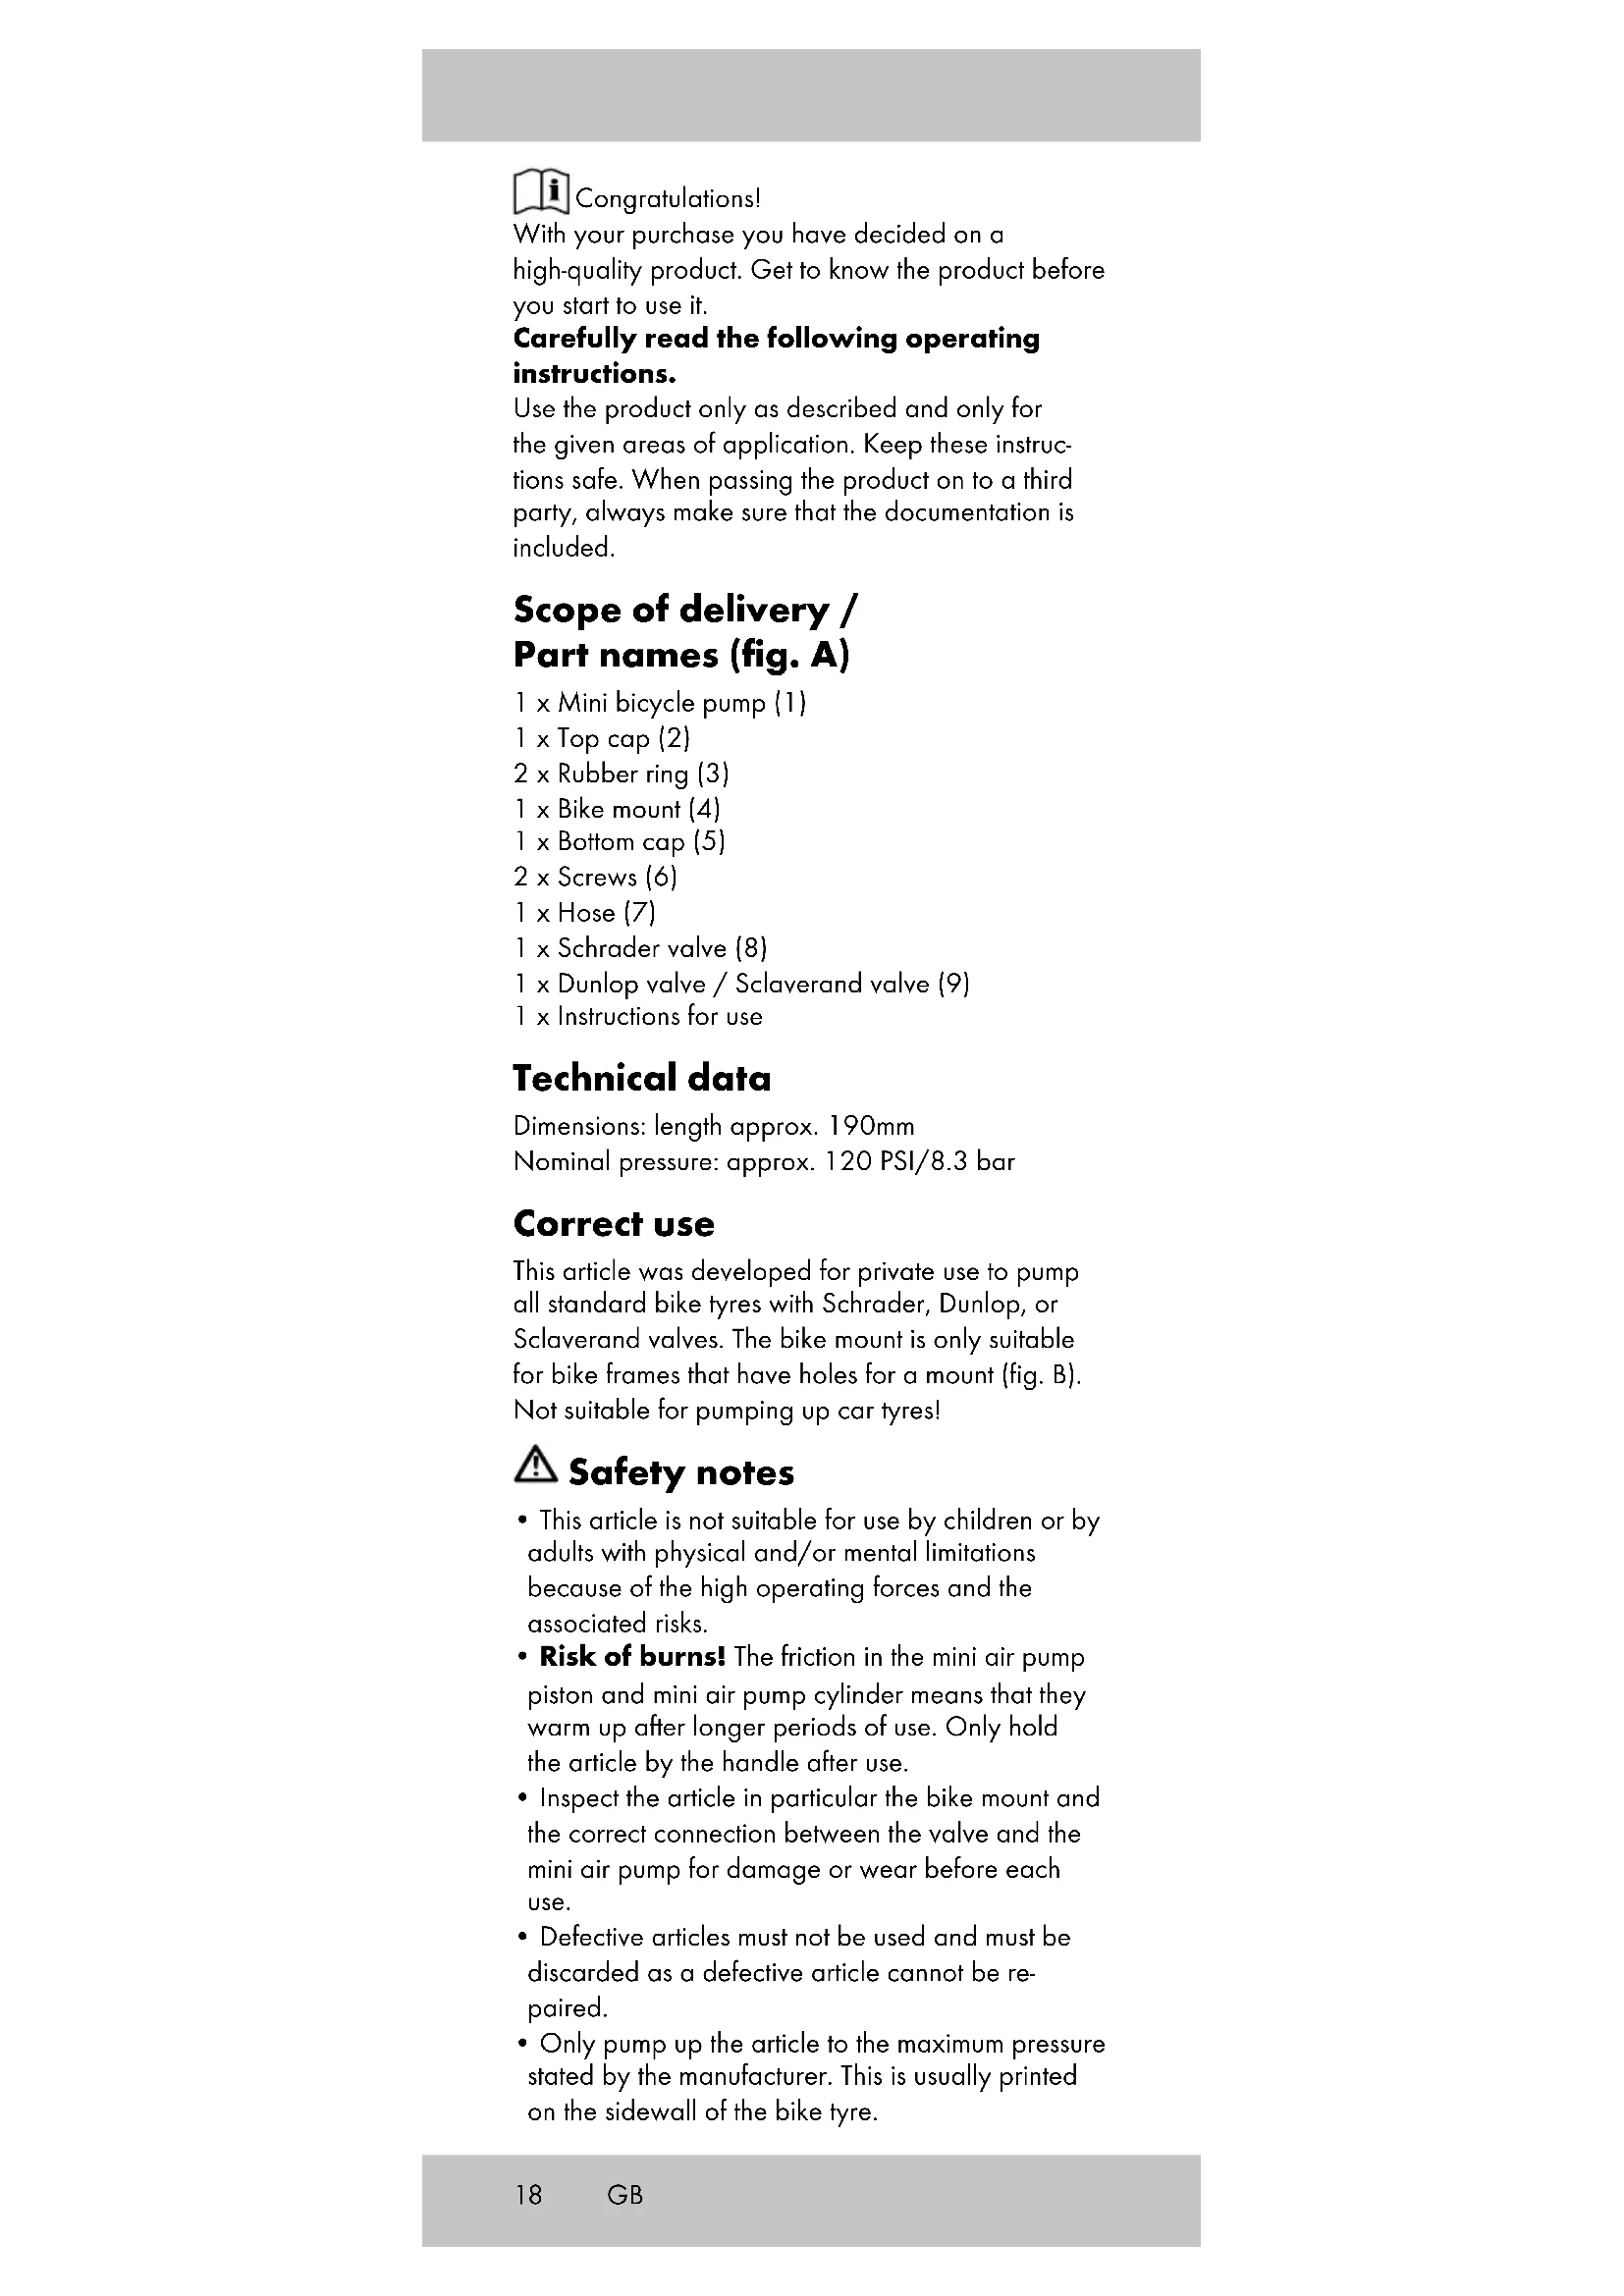
With your purchase you have decided on a high-quality product. Get to know the product before you start to use it.
Carefully read the following operating instructions.
Use the product only as described and only for the given areas of application. Keep these instructions safe. When passing the product on to a third party, always make sure that the documentation is included.
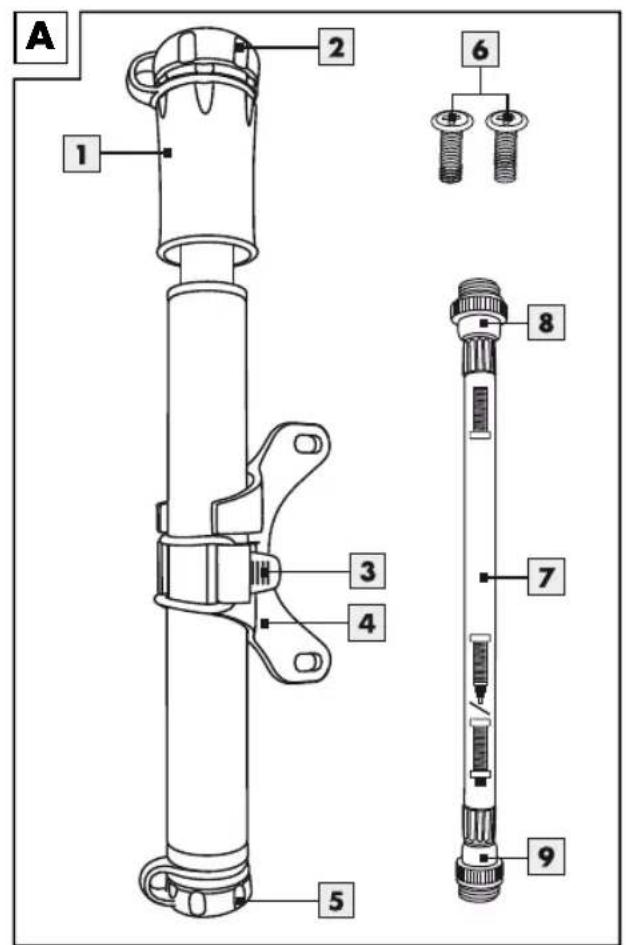
Scope of delivery / Part names (fig. A)
1 x Mini bicycle pump (1)
1 x Top cap (2)
2 x Rubber ring (3)
1 x Bike mount (4)
1 x Bottom cap (5)
2 x Screws (6)
1 x Hose (7)
1 x Schrader valve (8)
1 x Dunlop valve / Sclaverand valve (9)
1 x Instructions for use
Technical data
Dimensions: length approx. 190mm
Nominal pressure: approx. 120 PSI/8.3 bar
Correct use
This article was developed for private use to pump all standard bike tyres with Schrader, Dunlop, or Sclaverand valves. The bike mount is only suitable for bike frames that have holes for a mount (fig. B). Not suitable for pumping up car tyres!

Safety notes
- This article is not suitable for use by children or by adults with physical and/or mental limitations because of the high operating forces and the associated risks.
- Risk of burns! The friction in the mini air pump piston and mini air pump cylinder means that they warm up after longer periods of use. Only hold the article by the handle after use.
- Inspect the article in particular the bike mount and the correct connection between the valve and the mini air pump for damage or wear before each use.
• Defective articles must not be used and must be discarded as a defective article cannot be repaired. -
Only pump up the article to the maximum pressure stated by the manufacturer. This is usually printed on the sidewall of the bike tyre.
-
There is a risk of explosion with over-inflated tyres!
- The pressure must be controlled using a calibrated measurement device.
Mounting to the bike frame
- Remove the screws from the frame designed for attaching a drinking bottle (fig. B).
- Attach the bike mount (4) to the frame with the included screws (6) or the screws from the drinking bottle mount (fig. C).
- Secure the pump by placing the rubber ring (3) around the pump (fig. D).
- If the included screws are too large or too small, please purchase the correct screws from a specialist retailer.
Always ensure the article is attached securely and tightly! The bike mount must stay secure even on unpaved surfaces and it must not wobble.
Otherwise there is a risk of losing the bike mount with the mini air pump.
Use
- Open the top cap (2) and remove the hose (7).
- Open the bottom cap (5). Depending on whether you have a Schrader valve (8), Dunlop valve (9), or Sclaverand valve (9), screw the correct end of the hose to the other end of the mini air pump (see label on the hose: Schrader/Dunlop, Sclaverand) (fig. E).
- Open the cap on the tyre valve.
- Screw the correct end of the hose to the OPEN valve and then pump (fig. F).
Special note when pumping bike tyres using the Sclaverand valve (9):
- Remove the knurled nut (on the bike valve casing) of the bike valve.
- Place the Sclaverand valve vertically on the bike valve, then pump.
- Now tighten the knurled nut on the bike valve again after pumping.
- Caution! The hose on the mini air pump must not be bent!
- Pump the mini air pump in a regular motion and do not pump too fast.
When the article is not in use, please always store the hose inside the mini air pump.
Close the caps securely, and always put the mini air pump in the mount with the handle of the air pump pointing upward.
Maintenance and storage
Never submerge the pump in water as this will damage the article. Always store the article in a clean, dry, temperature-controlled room. Important! Only clean with a damp cloth and then wipe dry.
Disposal
Dispose of the article and the packaging materials in accordance with current local regulations. Packaging materials such as foil bags are not suitable to be given to children. Keep the packaging materials out of the reach of children.
3 Years Warranty
The product was produced with great care and under constant supervision. You receive a three-year warranty for this product from the date of purchase. Please retain your receipt.
The warranty applies only to material and workmanship and does not apply to misuse or improper handling. Your statutory rights, especially the warranty rights, are not affected by this warranty. With regard to complaints, please contact the following service hotline or contact us by e-mail. Our service employees will advise as to the subsequent procedure as quickly as possible. We will be personally available to discuss the situation with you.
Any repairs under the warranty, statutory guarantees or through goodwill do not extend the warranty period. This also applies to replaced and repaired parts. Repairs after the warranty are subject to a charge.
IAN: 278519
GB Service Great Britain
Tel.: 0871 5000 720 (£ 0.10/Min.)
E-Mail: deltasport@lidl.co.uk
You can also find spare parts for your product at: www.delta-sport.com, category Service - Lidl Spare Parts Service
DELTA-SPORT HANDELSKONTOR GMBH
Wragekamp 6 • D-22397 Hamburg
Version: 02/2017