
Telios Plus TE29PAR 011 - Vacuum Cleaner HOOVER - Free user manual and instructions
Find the device manual for free Telios Plus TE29PAR 011 HOOVER in PDF.
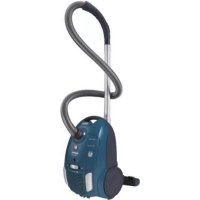


| Product Type | Canister Vacuum Cleaner |
| Brand | Hoover |
| Model | Telios Plus TE29PAR 011 |
| Variable Power | Yes, with power control on body and handle |
| Bag Type | Disposable dust bag (or permanent depending on model) |
| Bag Capacity | Approximately 3 to 4 liters (estimate) |
| Pre-motor Filter | Washable, clean every 5 bag changes |
| Exhaust Filter | Washable, clean regularly |
| Cord Length | Automatic rewind, estimated length 8 m |
| Telescopic Tube | Yes, with adjustment button |
| Main Brush | 2-in-1 brush for carpet and hard floors (GP) with floor selector |
| Included Accessories | Crevice tool, small nozzle, furniture brush, mini pet turbo brush, mini allergen turbo brush, large turbo brush, Caresse brush (depending on model) |
| Bag Full Indicator | Yes, indicator light |
| Overheat Protection | Electronic circuit breaker |
| Weight | Approximately 5 to 6 kg (estimate) |
| Dimensions (L x W x H) | Approximately 40 x 30 x 50 cm (estimate) |
| Power Supply | Mains, 220-240 V, 50/60 Hz |
| Power Consumption | Approximately 2000 W (estimate) |
| Noise Level | Approximately 75 dB (estimate) |
| Maintenance and Cleaning | Replace bag, washable filters with warm water, check for blockages |
| Safety | Do not use without bag or filter, auto shut-off in case of overheating |
| Spare Parts and Repairability | Hoover parts available from retailers, repair by authorized service |
| General Information | Complies with European directives 2014/35/EU, 2014/30/EU, 2011/65/EU |
Frequently Asked Questions - Telios Plus TE29PAR 011 HOOVER
User questions about Telios Plus TE29PAR 011 HOOVER
0 question about this device. Answer the ones you know or ask your own.
Ask a new question about this device
Download the instructions for your Vacuum Cleaner in PDF format for free! Find your manual Telios Plus TE29PAR 011 - HOOVER and take your electronic device back in hand. On this page are published all the documents necessary for the use of your device. Telios Plus TE29PAR 011 by HOOVER.
USER MANUAL Telios Plus TE29PAR 011 HOOVER
INSTRUCTIONS FOR SAFE USE
This appliance should only be used for domestic cleaning, as described in this user guide. Please ensure that this guide is fully understood before operating the appliance.
Do not leave the appliance plugged in. Always switch off and remove the plug from the socket after use, or before cleaning the appliance or any maintenance task.
This appliance can be used by children aged from 8 years and above and persons with reduced physical, sensory or mental capabilities or lack of experience and knowledge if they have been given supervision or instruction concerning use of the appliance in a safe way and understand the hazards involved. Children shall not play with the appliance. Cleaning and user maintenance shall not be made by children without supervision.
If the power cord is damaged stop using the appliance immediately. To avoid a safety hazard, an authorised HOOVER service engineer must replace the power cord.
Keep hands, feet, loose clothing and hair away from rotating brushes.
Use only attachments, consumables or spares recommended or supplied by HOOVER.
Static electricity: some carpets can cause a small build up of static electricity. Any static discharge is not hazardous to health.
Do not use your appliance out of doors or on any wet surface or for wet pick up.
Do not pick up hard or sharp objects, matches, hot ashes, cigarette ends or other similar items.
GB
Do not spray with or pick up flammable liquids, cleaning fluids, aerosols or their vapours.
Do not run over the power cord when using your appliance or remove the plug by pulling on the power cord.
Do not continue to use your appliance if it appears faulty.
HOOVER service: To ensure the continued safe and efficient operation of this appliance we recommend that any servicing or repairs are only carried out by an authorised HOOVER service engineer.
Do not stand on or wrap the cord around arms or legs when using your appliance.
Do not use the appliance to clean animals or people.
Do not position the appliance above you when cleaning the stairs.
The Environment
The symbol on this appliance indicates that this appliance may not be treated as household waste. Instead it must be handed over to the applicable collection point for the recycling of electrical and electronic equipment. Disposal must be carried out in accordance with local environmental regulations for waste disposal. For more detailed information about treatment, recovery and recycling of this appliance, please contact your local city office, your household and waste disposal service or the shop where you purchased the appliance.


This appliance complies with the European Directives 2014/35/EU, 2014/30/EU and 2011/65/EU.
CANDY HOOVER GROUP S.r.l. Via Privata Eden Fumagalli, 20861 Brugherio (MB) Italy
GETTING TO KNOW YOUR CLEANER
A. Cleaner main body
B. On/Off Button
C. Cord Rewind Button
D. Variable Power Control*
E. Bag Check Indicator
F. Bag Door Release Latch
G. Bag Door
H. Pre-motor Filter
I. Exhaust Filter
J. Exhaust Filter Cover
K. Accessories door
L. Hose Handle
M. Suction Regulator*
N. Hose
O. Telescopic Tube*
P. Telescopic Tube Adjuster*
Q. Carpet and Floor nozzle (GP)**
Q1. Carpet Nozzle (CA)**
Q2. Hard Floor Nozzle (HF)**
Q3. Carpet and Floor nozzle (GP)**
R. Floor type selector
S. Accessory set
S1. Crevice Tool
- Furniture Nozzle
S3. Dusting Brush
T. Pet Hair Remover Mini Turbo Nozzle
U. Allergy Remover Mini Turbo Nozzle*
V. Grand Turbo Nozzle*
W. Hard Floor Caresse Nozzle*
ASSEMBLING YOUR CLEANER
Remove all components from the packaging.
- Connect the hose to the cleaner main body, ensuring it clips and locks into position. To release the hose: simply press the two latches on the hose end and pull. [2]
- Connect the handle to the upper tube end. [3]
- Connect the tube lower end to the carpet and floor nozzle**.[4]
USING YOUR CLEANER
- Extract Power Cord and plug it into the power supply. Do not pull the cord beyond the red marker, [5]
- Adjust the Telescopic Tube to the desired height by moving the Telescopic Tube Adjusters up and raise or lower the handle to the most comfortable cleaning position. [6]
- Carpet and Floor Nozzle**: Press the floor type selector to choose the ideal cleaning mode for the floor type.
Hard Floor - Brushes are lowered to protect the floor.
Carpet - Brushes are raised for the deepest clean.
4. Carpet & Floor Nozzle**: [8]
- Hard Floor Cleaning: Press the pedal on the nozzle to select Hard Floor mode and adjust the slider on the nozzle to ALL FLOORS. In this position, brushes, wheels, and wiper blade are lowered to protect hard floors. [8a]
Certain Models Only: Certain models only; nozzles may vary according to model.
- Standard Carpet & Rugs Cleaning: Press the pedal on the nozzle to select Carpet mode and adjust the slider on the nozzle to ALL FLOORS. In this position, brushes and wiper blade are raised while wheels are lowered to allow perfect ease of movement on such surfaces. [8b]
- Deep Carpet Cleaning: Press the pedal on the nozzle to select Carpet mode and adjust the slider on the nozzle to DEEP CARPET CLEANING. In this position, brushes, wheels, and wiper blade are raised for a deeper cleaning of your carpet. [8c]
- Switch the cleaner on by pressing the On/Off button on the cleaner main body. [9]
- Slide the Variable Power Control* to increase or decrease the suction. [10]
- Adjust the suction regulator* to the desired level. [11]
- Switch off at the end of use by pressing the On/Off button. Unplug and press the Cord Rewind Button to wind the power cord back into the cleaner. [12]
- Parking and Storage - The tube can be parked for temporary storage [13] while in use, or in the storage position when not in use. [14]
CLEANER MAINTENANCE
Replacing the Dust Bag
If the Bag Check Indicator is illuminated, please check and, if necessary, replace the dust bag. 1. Lift the bag door release latch [15] to open the bag door. To avoid dust escaping, pull the tongue and remove the bag [16]. Dispose of the full dust bag correctly and carefully. 2. Fold a new bag as shown on the bag, and fit it by inserting the collar into the bag holder [17]. 3. Close the bag door.
Remember: The bag check indicator may be red if an obstruction has occurred. In this case, refer to 'Removing a Blockage From the System'.
Cleaning the Filter
To maintain optimum performance of your cleaner, please wash the pre-motor filter and exhaust filter after each 5 bag changes.
Cleaning the pre-motor filter:
- Lift the Bag Door Release latch [15] to open the bag door and remove the bag [16].
- To remove the pre-motor filter, slide the pre-motor filter frame from the cleaner [18].
- Remove the filter from the holder [19].
- Wash it in hand warm water [20] and allow it to dry thoroughly before replacing it in the cleaner.
Cleaning the exhaust filter:
- To remove the exhaust filter, unclip the exhaust filter cover [21] and remove the exhaust filter pack [22].
- Wash the filter in hand warm water [20] and allow it to dry thoroughly before replacing it in the cleaner.
Remember: Do not use hot water or detergents. In the unlikely event of the filters
becoming damaged, fit a genuine Hoover replacement. Do not try to use the product without a dust bag or filter fitted.
Cleaning the permanent cloth dust bag*:
To maintain optimum performance we recommend that you wash the permanent cloth dust bag under hand warm water after every 5 full bags. Remove excess water and leave to dry fully before replacing.
Removing a Blockage From The System
If the Bag Check Indicator is red:
- Check if the bag is full. If so refer to 'Replacing The Dust Bag'.
- If it is not full, then: A. Do the filters need cleaning? If so refer to 'Cleaning the Filter'. B. Check if there is any other blockage in the system - Use a rod or a pole to remove any blockage from Telescopic Tube or flexible hose.
Warning*: The bag check indicator will remain illuminated if the cleaner is used when the bag is full, if there is a blockage or if the filters are dirty. If used for a period over ten minutes with the bag check indicator illuminated, an electronic cut out will switch the cleaner off to prevent any risk of overheating. If this should happen, switch the cleaner off, unplug and correct the fault (see 'Removing a blockage'). The cut out will automatically reset upon switching the cleaner back on.
ACCESSORIES AND NOZZLES
To obtain the best performance and efficiency it is recommended that the correct nozzles are used for the main cleaning operations. These nozzles are indicated in the diagrams by the letters GP, HF or CA.
A nozzle type GP can be used to clean both carpet and hard floor.
A nozzle type HF is suitable for use only on hard floor.
A nozzle of type CA is suitable for use only on carpet.
The other nozzles are accessories for specialist cleaning tasks and are recommended for occasional use only.
The Crevice tool, Furniture nozzle and Dusting brush are stored on board under the accessories door.
All accessories can be fitted to the end of the handle or the end of the Telescopic* Tube.
Crevice Tool - For corners and hard to reach areas. [S1] Furniture Nozzle - For soft furniture and fabrics. [S2] Dusting Brush - For bookshelves, frames, keyboards, etc. [S3]
Pet Hair Remover Turbo Nozzle - Use the mini turbo nozzle on stairs or for deep cleaning on textile surfaces and other hard to clean areas. Particularly suitable for pet hair removal. [T] Allergen Remover Mini Turbo Nozzle - Use the mini turbo nozzle on stairs or for deep cleaning on textile surfaces and other hard to clean areas. Particularly suitable for allergen removal. [U]
*Certain Models Only ** Certain models only, nozzles may vary according to model
Grand Turbo Nozzle* - Use the Grand Turbo Nozzle for deep cleaning on carpets. [W] Hard Floor Caresse Nozzle* - For parquet floors and other delicate floors. [W]
IMPORTANT: Do not use the Grand Turbo Nozzle on rugs with long fringes, animal hides and carpet pile deeper than 15mm. Do not keep the nozzle stationary while the brush is rotating.
USER CHECKLIST
Should you have a problem with the product, complete this simple user checklist before calling your local Hoover service.
- Is there a working electricity supply to the cleaner? Please check with another electrical appliance.
- Is the dust bag over-filled? Please refer to 'Cleaner Maintenance'.
- Is the filter blocked? Please refer to 'Cleaner Maintenance'.
- Is the hose or nozzle blocked? Please refer to 'Removing a blockage from the system'.
- Has the cleaner overheated? If so, it will take approximately 45 minutes for the cut out to automatically reset.
IMPORTANT INFORMATION
Hoover spares and Consumables
Always replace parts with genuine Hoover spares. These are available from your local Hoover dealer or direct from Hoover. When ordering parts always quote your model number.
Quality
Hoover's factories have been independently assessed for quality. Our products are made using a quality system which meets the requirements of ISO 9001.
Your Guarantee
The guarantee conditions for this appliance are as defined by our representative in the country in which it is sold. Details regarding these conditions can be obtained from the dealer from whom the appliance was purchased. The bill of sale or receipt must be produced when making any claim under the terms of this guarantee.
Subject to change without notice.
SAFETY INSTRUCTIONS FOR USE
DK
Do not vacuum up hair, sharp objects, matches, hot ashes, cigarette butts, or other similar objects.
MAINTENANCE OF THE VACUUM CLEANER
Replacing the dust bag
Use only the nozzles, consumables, and spare parts that are recommended and supplied by HOOVER.
Static electricity: Some types of carpet coverings can generate a small amount of static electricity. The discharge of static electricity is not dangerous to health.
Do not use the appliance outdoors, on wet
surfaces or for collecting liquids.
Do not use the appliance to collect sharp objects, matches, burning ash, cigarette butts, or similar items.
Do not vacuum or collect flammable liquids, corrosive substances, aerosols, or their vapors.
Do not carry the appliance by the power cord and do not pull the cord to unplug it from the socket.
In case of malfunction, do not continue to use the appliance.
HOOVER Service: For the guarantee of safe and reliable operation of this appliance, we recommend that you have authorized HOOVER service engineers carry out any technical servicing or repairs.
Do not step on the cord and do not wrap it around your hand or foot while using the appliance.
Do not use the appliance to clean animals or people.
Do not place the appliance on stoves or heaters during cleaning.
Environment:
The symbol on the appliance indicates that it must not be disposed of with household waste. It must be taken to a suitable collection point for the recycling of electrical and electronic components. Disposal must be carried out in accordance with local environmental regulations for waste disposal. For more detailed information on the handling, disposal, and recycling of this appliance, please contact your local authorities, the waste disposal service, or the store where you purchased the appliance.
This appliance complies with European Directives 2014/35/EU, 2014/30/EU, and 2011/65/EU.
CANDY HOOVER GROUP S.r.l. Via Privata Eden Fumagalli, 20861 Brugherio (MB) Italy
GET TO KNOW YOUR VACUUM CLEANER
A. Body B. "Net" button C. Cord rewind button D. Power regulator* E. Dust bag full indicator F. Door latch of dust bag compartment G. Dust bag compartment cover H. Adjustable suction tube I. Suction tube release button J. Exhaust filter cover K. Accessories cover L. Handle M. Suction regulator N. Hose O. Telescopic tube
P. Telescopic tube regulator
Q. Nozzle for floors and carpets (GP)**
Q1. Nozzle for carpets (CA)**
Q2. Nozzle for hard floors (HF)**
Q3. Nozzle for floors and carpets (GP)
R. Floor nozzle switch
S. Accessory set
- S1. Upholstery nozzle
S2. Furniture nozzle
S3. Brush for polishing
T. Mini turbo nozzle for removing pet hair
U. Mini turbo nozzle for
removing allergens
V. Turbo nozzle Grand*
W. Nozzle for cleaning
hard surfaces*
CEBOPKA NBJIECOCA
N3BnKeNTe CoCTaBbIe HacT NblneocOa N ynaKOVKn.
- PnpcoeHnHHe IINAHKOPNcYbIneocOca, cneHa3a TEM, T06bOH BOWENB RTHENO BCTAN B npabInbHM NonoKHeHHM. DnTO, T06bOTcOeHnHHTb IINAH, DOCTATOnHO HAKATb DE 3aueHNK HA KOHNEI ANHAR aNOTHByE hO CE6h. [2] 2.ПпсоюнгтеpykoarTkyКерхнemY KOHcy Tpybbl.[3] 3.Ппсоeннгнгнгнгнгнгнгнгнгнгнгнгнгнгнгнгнгнгнгнгнгнгнгнгнгнгнгнгнгнгнгнгнгнгнгнгнгнg..[4]
3KCNJYATAUINbIIECOCA
- 1aBekTeI shUP npTAnA INoKnIOuTH BnNKU shNpy K pOeTke NekTpONHtAN. 2NEpSeaTeC BTBTRHbATb HYND apJe KpChOn OTMeKn! [5]
- YctahonBITE TeneckOnuueckCyu Ty6y"Ha HuyxHOB BbCote, nepeBnHrA perytnOp TeneckOnuueckOu Ty6bX BBepx, INoHNHMnTE uIN OnyCTHe pyKoAry B yD06HoE noJoxKeHne.[6] 3.HacKaHdIaNTHKOBPOBINoA*HaXMMATEHaNEaIb,neDyMCOTpeHHyHOHa HacAdKe [7],YTObBbOpaTbONTMaIbMbHpeXIMuNTCKB3ABHCMOCTnOTnHAnHOHBTO NOKpBTM. Tepoe HANbHOe NOpBTNe -Jra 3aHTbHANbHOBOrNO pOKTBn OTkNOnUeHbKOBoPBOE NOpBTNe -Jra 60Bee Iy60K OQCTNqETKnNoDTBt. 4.HacnKaIyHCTKIOBPOB nnona*: [8]
- y60pa TbepybH HAnonbHbN NOKpbTn: NpepeDnte nepaJIb HA HacJaB e peKHM y60pn TbeBbH HAnonbHbN NOKpbTn NcTaHOBte NcTaHOK Ha HacJaB e NcIOJKeHne BCE TINbI pNOJB, B 3Otn ONoJIeHN NcTeKN, KONEcHK cKpEoK ONyCKAOTCH dIraaHTb TbePDRTO HAnoiHBOrno NOKpbTn.[8a] TOnbKOy KOHHpeTHbIX MoDEnE
Tolbko dna HeKOTOpBx MoDeneu. DOpMa HacaKn MOKeT MeHrTaC B 3aBMcMoCTN OT MOneN.
- CTAHAPTHA y60kpa KOBPOB IN KOPB8Nb NKOPBtIy IpepeBnTe nepaHa HACNAE BxPEXM Y6O4Ko KOBPOB IN YCTAHOBITNE PONJOH NO HACNAE B NIOJOKHE NCE THTIbI NIOJB. BAKOMI NOPEKOKHEN MZETK IN CK60KgNOHNbI, aKOIECNrOUYeHbI, 7TO6bI OeHJIYbI DNNKHeN NOPOBEXHOCT DAHORHO TIN.[8b]
- Tny6OKaH NCTKA KObOB: IpeBeeNTte neIaIb Ha HacAke B peKIM Y60PKN KOBPO IN yctAHOBite nonayHok Ha HacAke B NOJENOH MTY6OKAR NCTKA NIOB. B 3TOM nONKeHM uETKN, KONEcIKN INCPEKOB NOIHTbl 7n6oe Iy76OKOHNCTKOBPA.[8c]
- Bknoite nbcoc, haaB KHonky Bk/NbIKHa KOpnyce nbinecoca.[9]
- YnpabnnepepyrnoTPOOMMOHOTN"yIaCYNNEHINOCsABNEHBAcBBAHNN. [10] 7. Opyernypnye pRn nooMOniye pyrrnoTOpA"MOHOTBCBaCBBAHNN. [11]
- No OKOHyAHn pa60Tb BHKNIOHTe PbNEcO, HAKAB KONKY BKN/BkN. Iocne OTKINQEHmIOTcETH NtAHHbHypMOXHO bHYtpb NtIEcOCa HAKATMEM KONK CMtBBAHn HUHPa.[12]
- BpEmeHOe H NJIETBHeOx PAxHEHcI PbNecOca-E CEnb Iy He NoPb3yeTeCb PbNecOCom, Tpy6y MOKHO OCTABnI B NOJIOXeHNi BpEMeHROHcI [13] NIOCTOBaRHOxPAHEHcI.[14]
TEXHMUECKOE OBCJLYXMBAHNE NBJIECOCA
Replacing the dust collection bag
If the dust collection bag is full, check the condition of the bag and replace it if necessary.
- Lower the bag door latch [15] to open the bag compartment. Close the bag to prevent dust from escaping, then pull the latch and remove the bag. [16] When removing the bag, do so carefully and correctly.
- Insert the new bag as indicated on it, and secure it by placing the collar in the bag holder [17].
- Close the dust collection compartment door. The bag full indicator should be red when the bag is full. See section on clearing blockages in the system.
Filter cleaning
To maintain optimal suction parameters, regularly check the dust bags and filters for blockages.
Cleaning the motor filter:
- Lower the latch on the dust collection compartment [15] to open the compartment door and remove the bag. [16] 2. Remove the motor filter from its holder. [18]
- Pull the filter out of the holder. [19] 4. Rinse it under warm water [20] and let it dry completely before reinstalling it.
Cleaning the exhaust filter:
1. To remove the exhaust filter, detach the exhaust grille [21] and pull out the exhaust filter. [22] 2. Rinse the filter under warm water [20] and let it dry completely before reinstalling it. Note: Do not wash the filter with cleaning agents. If the filter is damaged, replace it with a new one. Do not use the vacuum cleaner without the filter installed.
Cleaning the permanent dust bag*:
To maintain optimal performance of the vacuum cleaner, regularly check the bag and empty it after each use. Remove the bag and empty it, then let it dry completely before reinstalling it.
Clearing blockages from the system
Filling the tank with red:
Furniture nozzle - designed for cleaning upholstered furniture and fabrics. [S2]
Fabric crevice tool - for bookshelves, picture frames, keyboards, etc. [S3]
Turbo brush for pet hair* - a small turbo brush designed for cleaning pet hair from upholstered surfaces and other hard-to-reach places. Especially effective for removing pet hair. [T]
Mini turbo brush for allergens* - a mini turbo brush designed for deep cleaning of upholstered surfaces and other hard-to-reach places. Especially effective for removing allergens. [U]
Grand turbo brush* - the Grand turbo brush is designed for deep cleaning of carpets. [V]
Only for specific models
*Only for some models. The shape of the nozzle may vary depending on the model.
Hard floor nozzle - for parquet, laminate, and other hard floor coverings that require careful handling. [W]
WARNING! Do not use the mini turbo brush on carpets with long pile, on animal skins, or on carpets with pile longer than 15 mm. It is forbidden to use the nozzle in an upright position, while it is allowed to be tilted.
USER MANUAL
If you have difficulties during the operation of the vacuum cleaner, try the following tips before contacting the local Hoover service center.
Does the vacuum cleaner not turn on? Check the presence of electricity with any electrical appliance. - Is the dust bag full? See the section «Maintenance of the vacuum cleaner» - Is the filter or nozzle clogged? See the section «Cleaning blockages in the system». - Does the vacuum cleaner not pick up? If so, approximately after 45 minutes the automatic reset will return to the operating position.
IMPORTANT INFORMATION
Spare parts and accessories are available from Hoover.
When ordering spare parts, please specify the model number. Hoover company reserves the right to make changes to the product range. For information about the nearest Hoover service center, contact Hoover company directly. When placing an order for spare parts, you must specify the model number.
Quality requirements
Hoover company conducts thorough testing of products to ensure they meet quality requirements. Products are manufactured using a quality system that meets the requirements of ISO 9001.
Your guarantee
The guarantee conditions for this household electrical appliance are determined by our representative in the country where this electrical appliance was purchased. You can obtain more information about these conditions from the nearest Hoover service center. The guarantee obligations do not affect your statutory rights as a consumer.
Changes may be made without prior notice.
SAFETY INSTRUCTIONS FOR USE
SAFETY INSTRUCTIONS FOR USE
Do not use the appliance if it is damaged.
HOOVER SERVICE: To ensure that this appliance operates reliably, safely, and efficiently, we recommend that servicing and repairs be carried out only by an authorized Hoover service engineer.
Do not pull the cord to unplug the appliance. Do not pull the cord over sharp edges or corners.
Do not use the appliance to vacuum animals or people. Do not place the appliance on yourself or others when vacuuming stairs.
Environmental protection
The symbol on this appliance indicates that it must not be treated as household waste. Instead, it should be handed over to an appropriate collection point for recycling of electrical and electronic equipment. By ensuring this product is disposed of correctly, you will help prevent potential negative consequences for the environment and human health. For more detailed information about recycling of this product, please contact your local city office, your household waste disposal service, or the shop where you purchased the product.

This appliance complies with European Directives 2014/35/EU, 2014/30/EU, and 2011/65/EU.
CANDY HOOVER GROUP S.r.l. Via Privata Eden Fumagalli, 20861 Brugherio (MB) Italy
ASSEMBLY OF THE VACUUM CLEANER
A. Main body of the vacuum cleaner B. On/Off button C. Cable winding button D. Power control E. Indicator for checking the filter F. Handle for carrying the vacuum cleaner G. Vacuum cleaner door H. Motor filter I. Inlet filter J. Exhaust filter K. Accessories door L. Hose connection M. Suction regulator* N. Hose O. Telescopic tube
P. Telescopic tube regulator+ Q. Floor nozzle (GP)++ Q1. Carpet nozzle (CA)** Q2. Hard floor nozzle (HF)* R. Speed selector S. Crevice tool T. Upholstery nozzle U. Dust brush V. Mini turbo nozzle for pet hair W. Mini turbo nozzle against allergens" X. Turbo floor nozzle Y. Parquet nozzle*
ASSEMBLY OF THE VACUUM CLEANER
Remove all components from the packaging.
- Connect the hose to the main body of the vacuum cleaner, making sure it clicks into place. To release the hose: simply press the buttons on the hose and pull it out. [2]
- Attach the tube to the upper end of the hose. [3]
- Attach the floor nozzle and the tube to the nozzle for carpets and hard floors**. [4]
USE OF THE VACUUM CLEANER
1. Pull out the telescopic tube to the desired length, adjusting the telescopic tube regulator. [5] 2. Adjust the "telescopic tube" to the desired height, using the telescopic tube regulator" upwards, and pull the hose to the desired length. [6] 3. Floor nozzle**: Press the pedal to select the type of floor surface [7]. To select the appropriate cleaning mode for the floor type. Hard floor - the brush retracts for cleaning. Carpet - the brush extends for maximum cleaning. 4. Turn on the vacuum cleaner by pressing the On/Off button on the body. [8] 5. Use the power regulator* to increase or decrease the suction power. [9] 6. Adjust the suction regulator* to the desired level. [10] Turn off the vacuum cleaner by pressing the On/Off button. Unplug the power cord by pressing
*Only for some models, **Only for some models, the nozzles may vary depending on the model
BG
Press the cable winding button to wind up the power cord. [11]
- Parking and storage - The tube can be parked for temporary storage
[12] Store the appliance in a dry place when not in use. [13]
CLEANING AND MAINTENANCE
Replacing the dust bag
Check the dust bag indicator light; replace the dust bag if necessary.
- Press the latch on the lid [14] to open the lid of the dust bag compartment, then close the dust bag to prevent dust from spilling, by pulling the latch outward from the dust bag. [15]. The dust bag should be inserted correctly and carefully. Insert the new dust bag as shown, pushing it into the guides in the dust bag compartment [16].
- Close the lid of the dust bag compartment.
Note: The dust bag indicator light is red when the dust bag is full. See "Replacing the dust bag" section.
Cleaning the filter
To maintain the optimal performance of your vacuum cleaner, clean the filters regularly. Clean the filters after every 5 dust bags.
Cleaning the motor filter:
- Press the latch on the lid of the dust bag compartment [14] to open it and remove the dust bag. [15]
- To remove the motor filter, pull it out of the vacuum cleaner by the tab. [17] 3. Remove the filter from the holder. [18]
- Rinse it with cold water [19] and let it dry completely before placing it back into the vacuum cleaner.
Cleaning the exhaust filter:
- To remove the exhaust filter, turn the filter cover [20] and remove the exhaust filter. [21]
- Fill the water tank [19] until the water level is visible, then replace the cap and the dust filter.
Note: Do not use hot water or detergents. In the unlikely event of damage, only use original Hoover spare parts. Do not attempt to use the appliance without the cap and filter for dust or liquids.
Replacing the permanent filter for dust:
To maintain optimal performance, the permanent dust filter should be cleaned with cold water after each use. The water must be
left to dry completely before replacing it.
Clearing blockages from the system
If the filter check indicator is red:
1. Check if the filter is full. If yes, empty the dust container.
2. If it is not full:
A. Is there a blockage in the hose or the tube? If so, remove it.
B. Check if there is another blockage in the system - inspect the inlet, the dust container, and the exhaust filter for any obstructions.
Warning: The filter check indicator remains on if the dust container is full, if there is a blockage, or if the filters are clogged. If the indicator activates within a few minutes after emptying, the dust container may not be properly inserted. If this happens, empty the dust container, check the contacts, and correct the fault (see "Clearing blockages"). The indicator will reset after the dust container is reinserted.
ACCESSORIES AND FILTERS
For the best performance and efficiency, it is recommended to use only genuine Hoover accessories. These accessories are marked with the letters GP, HF, or CA.
The GP filter can be used for both dry and wet vacuuming.
The nozzle is not suitable for use only on hard floor surfaces.
The nozzle is suitable for use only on carpets.
Other nozzles are accessories specially designed for specific tasks and should be used only when necessary.
The tools for tight spaces, the nozzle for furniture and the dust brush are stored in the housing under the handle for accessories. [22]
Always place the accessory at the end of the handle or at the end of the telescopic tube.
The tools for tight spaces are for cleaning difficult-to-reach areas. [23]
Furniture nozzle - for soft furniture and fabrics. [24]
Dust brush - for skirting boards, frames, keyboards, etc. [25]
Turbo nozzle for removing pet hair from upholstery* - Use the mini turbo nozzle on the vacuum cleaner or for deep cleaning of textile surfaces and other difficult-to-clean areas. Especially suitable for removing pet hair from upholstery. [TV]
Mini turbo nozzle for removing allergens* - Use the mini turbo
*Nozzle for upholstery **Nozzle for upholstery, the nozzles may vary depending on the model
The nozzle for upholstery is for deep cleaning of textile surfaces and other difficult-to-clean areas. Especially suitable for removing allergens. [1w]
Large turbo nozzle* - Use the large turbo nozzle for deep cleaning of carpets. [1X]
Parquet nozzle* - for parquet and other delicate floor coverings. [1y]
IMPORTANT: Do not use the large turbo nozzle on carpets with long pile, on animal skins or on carpets with a pile height of more than 15mm. Do not leave the nozzle in one place while the vacuum cleaner is running.
NOTPEBUTEJCKM CINCSK 3A IPOBEPKA
In case of a problem with the appliance, the troubleshooting table below will help you. If you cannot solve the problem, contact the Hoover service.
- For your safety, the appliance is equipped with a safety switch; if the appliance is not working properly, check the following. If the appliance does not start, check the plug and the socket. If the appliance still does not work, check the fuse. If the appliance is still not working, contact the Hoover service. If the appliance is not working properly, check the following. If the appliance does not start, check the plug and the socket. If the appliance still does not work, check the fuse. If the appliance is still not working, contact the Hoover service.
IMPORTANT INFORMATION
Spare parts for Hoover appliances
Original Hoover spare parts. These are available from your local Hoover dealer or directly from Hoover. When ordering parts, always quote the model and serial number.
Dust bag for microfibre H60 35600392
- INSTRUCTIONS FOR SAFE USE
- THE ENVIRONMENT
- GETTING TO KNOW YOUR CLEANER
- ASSEMBLING YOUR CLEANER
- USING YOUR CLEANER
- CARPET & FLOOR NOZZLE**: [8]
- CLEANER MAINTENANCE
- REPLACING THE DUST BAG
- CLEANING THE FILTER
- CLEANING THE PRE-MOTOR FILTER
- CLEANING THE EXHAUST FILTER
- CLEANING THE PERMANENT CLOTH DUST BAG
- REMOVING A BLOCKAGE FROM THE SYSTEM
- ACCESSORIES AND NOZZLES
- GRAND TURBO NOZZLE* - USE THE GRAND TURBO NOZZLE FOR DEEP CLEANING ON CARPETS. [W] HARD FLOOR CARESSE NOZZLE* - FOR PARQUET FLOORS AND OTHER DELICATE FLOORS. [W]
- USER CHECKLIST
- IMPORTANT INFORMATION
- HOOVER SPARES AND CONSUMABLES
- QUALITY
- YOUR GUARANTEE
- SAFETY INSTRUCTIONS FOR USE
- MAINTENANCE OF THE VACUUM CLEANER
- ENVIRONMENT
- GET TO KNOW YOUR VACUUM CLEANER
- CEBOPKA NBJIECOCA
- KCNJYATAUINBIIECOCA
- TEXHMUECKOE OBCJLYXMBAHNE NBJIECOCA
- REPLACING THE DUST COLLECTION BAG
- FILTER CLEANING
- CLEANING THE MOTOR FILTER
- CLEANING THE PERMANENT DUST BAG
- CLEARING BLOCKAGES FROM THE SYSTEM
- USER MANUAL
- SPARE PARTS AND ACCESSORIES ARE AVAILABLE FROM HOOVER
- QUALITY REQUIREMENTS
- ENVIRONMENTAL PROTECTION
- ASSEMBLY OF THE VACUUM CLEANER
- USE OF THE VACUUM CLEANER
- CLEANING AND MAINTENANCE
- REPLACING THE PERMANENT FILTER FOR DUST
- ACCESSORIES AND FILTERS
- NOTPEBUTEJCKM CINCSK 3A IPOBEPKA
- SPARE PARTS FOR HOOVER APPLIANCES
Brand : HOOVER
Model : Telios Plus TE29PAR 011
Category : Vacuum Cleaner