PKLL 7 B2 - Laser pointer PARKSIDE - Free user manual and instructions
Find the device manual for free PKLL 7 B2 PARKSIDE in PDF.
| Product type | Cross-line laser |
| Brand | Parkside |
| Model | PKLL 7 B2 |
| Laser class | 2 (635 nm) |
| Working range | 7 m |
| Weight | 204 g |
| Power supply | 2 AAA 1.5 V batteries |
| Levelling time | approx. 6 seconds |
| Automatic levelling | Yes, with LED indicator |
| Usage | Indoor, DIY |
| Included accessories | Clamping tripod, batteries, manual |
| Tripod thread | Yes (5) |
| Low battery indicator | Flashing red LED |
| Pendulum lock | Yes, for transport |
| Warranty | 3 years |
| Cleaning | Soft cloth, puff of air |
| Storage | Dry and dust-protected place |
| Operating temperature | Not specified |
Frequently Asked Questions - PKLL 7 B2 PARKSIDE
User questions about PKLL 7 B2 PARKSIDE
0 question about this device. Answer the ones you know or ask your own.
Ask a new question about this device
Download the instructions for your Laser pointer in PDF format for free! Find your manual PKLL 7 B2 - PARKSIDE and take your electronic device back in hand. On this page are published all the documents necessary for the use of your device. PKLL 7 B2 by PARKSIDE.
USER MANUAL PKLL 7 B2 PARKSIDE
CROSS LINE LASER PKLL 7 B2
GB IE NI
CROSS LINE LASER
Translation of the original instructions
FR BE
NIVEAU LASER EN CROIX
Before reading, unfold the page containing the illustrations and familiarise yourself with all functions of the device.
DK
GB/IE/NI Translation of the original instructions Page 4
Intended purpose .........4
General description .... 5
Extent of the delivery ....5
Functional description ....5
Overview 5
Technical specifications ...5
Safety information .......5
Symbols and icons .5
General notes on safety .6
Safety Instructions
for Handling the Laser ....6
Safety Instructions
for Handling Batteries ....6
Initial Operation .7
Inserting/replacing
batteries 7
Operation 7
Working with
the automatic leveller . . . .7
Working without the
automatic leveller 8
Working
with the clamp tripod .8
Working with the tripod ....8
Cleaning 8
Storage 9
Maintenance 9
Transport 9
Waste disposal and environmental protection ...... 9
Spare parts/Accessories . 10
Troubleshooting 10
Guarantee 10
Repair Service 12
Service-Center 12
Importer 12
Translation of the original EC declaration of conformity 53
Introduction
Congratulations on the purchase of your new device. With it, you have chosen a high quality product. During production, this equipment has been checked for quality and subjected to a final inspection. The functionality of your equipment is therefore guaranteed.

The operating instructions constitute part of this product. They contain important information on safety, use and disposal.
Before using the product, familiarise yourself with all of the operating and safety instructions. Use the product only as described and for the applications specified. Keep this manual safely and in the event that the product is passed on, hand over all documents to the third party.
Intended purpose
The cross-line laser is suitable for projecting vertical and horizontal lines.
The device is only intended for indoor use.
The device is intended to be used by do-it-yourselfers. It was not designed for heavy commercial use.
The device is to be used by adults. Children under the age of 16 may not use the device except under supervision.
The manufacturer is not liable for damage caused by improper use or incorrect operation.
General description
See the front fold-out page for illustrations.
Extent of the delivery
Carefully unpack the appliance and check that it is complete. Dispose of the packaging material correctly.
Cross Line Laser
- Clamp tripod with clamping jaws
- 2 × 1.5 ~V batteries, AAA size
- Instruction Manual
Functional description
Refer to the following descriptions for a functional description of the controls.

Overview
1 On/off switch
2 LED ring
3 Battery compartment
4 Levelling stop / transport securing device
5 Thread for tripod fastening
6 Laser
7 Tripod screw
8 Retaining screw
9 Clamping nut
10 Clamping jaw
Technical specifications
Working range. 7 m*
Weight approx. 204 g
Power supply. 3 V (2 x AAA 1.5 V cells)
Laser
Wavelength 635 nm
Laser class 2
Levelling time ..approx. 6 sec
- The working range may be restricted by environmental conditions (e.g. bright light).
Safety information
Symbols and icons
Symbols on the device:
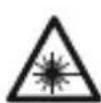
Attention! - Laser radiation Do not stare into beam!
class 2 laser product laser specification according to EN 60825-1:2014
λ=635nm P0<1mW
Caution! - Laser beam
Do not look into the beam! Laser class 2
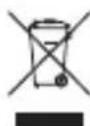
Electrical machines do not belong with domestic waste.

Direct voltage
Symbols used in the instructions:

Hazard symbols with information on prevention of personal injury and property damage.

Precaution symbol with information on prevention of harm / damage

Notice symbol with information on how to handle the device properly.
General notes on safety
- Observe the information on operation, cleaning, storage and disposal in the operating instructions.
- Keep children away from the device.
- Check the device each time before using. If damaged, have the device repaired. Do not use the device if damaged.
- Turn off the device when not in use. Do not leave the device unsupervised.
- Keep the device away from medical devices, magnetic data storage media and magnetically sensitive devices.
Safety Instructions for Handling the Laser
-
Caution: Leaser beam - Do not look into the beam!
Laser class 2 -
Do not aim the laser beam at people.
Safety Instructions for Handling Batteries
- Ensure at all times that the batteries are inserted with the correct polarity (+ and -), as shown on the battery itself.
- Do not short-circuit the batteries.
- Do not charge non-rechargeable batteries.
- Do not overcharge batteries!
- Do not mix old and new batteries or batteries of a different type or from different manufacturers! Replace all batteries of a set at the same time.
- Remove used batteries immediately from the device and dispose of them correctly!
- Do not heat the batteries!
- Do not carry out any welding or soldering work directly on the batteries!
- Do not take the batteries apart!
- Do not deform the batteries!
- Do not throw the batteries into fire!
- Store the batteries out of the reach of children.
- Do not allow children to replace the batteries without supervision!
-
Do not store the batteries close to a fire, cookers or other sources of heat. Do not place the battery in direct sunlight and do not use or store it in motor vehicles in hot weather.
-
Store used batteries in the original packaging and keep them away from metal objects. Do not mix (up) unpacked batteries! Otherwise this may cause the battery to short-circuit, resulting in damage, burns or even the danger of fire.
- Remove batteries from the device if this is not going to be used for a prolonged period, unless it is to be used in emergencies!
- NEVER touch batteries which have leaked without appropriate protection. If the leaked liquid comes into contact with the skin, you should rinse off this area of the skin immediately under running water. Make sure at all events that your eyes and mouth do not come into contact with the liquid. If they do, seek medical advice immediately.
- Clean the battery contacts and the equivalent contacts in the device before inserting the batteries.
Initial Operation
Inserting/replacing batteries
- Open the battery compartment (3).
- Insert two AAA batteries. Ensure you place the batteries into the compartment in accordance with the illustration.
- Close the battery compartment (3).

The LED ring (2) will flash red when the battery charge is low.
Operation
Caution! - Laser beam. Do not look into the beam. Turn your head away or close your eyes to prevent looking into the laser beam.
Danger of eye injury!
Working with the automatic leveller
- Place the device on a horizontal solid surface. The on/off switch (1) must be pointing upwards. Or fasten the device to a tripod (see "Working with the clamp tripod" / "Working with the tripod").
- Align the device so it is parallel with the floor
- Switch the device on by releasing the levelling stop: position 6 The LED ring (2) will illuminate:
Green: if automatic levelling is possible.
Levelling is complete once the laser lines no longer move.
Red: if automatic levelling is not possible. The laser lines will flash and longer be at exact right-angles to one another.
- Switch the device off by locking the levelling stop: position
In the event of vibrations, the laser will level itself automatically; wait until the laser lines no longer move.
Working without the automatic leveller

Caution! - Laser beam. Do not look into the beam. Turn your head away or close your eyes to prevent looking into the laser beam.
Danger of eye injury!

The LED ring (2) will illuminate permanently in red when working without the automatic leveller. The laser lines depicted are not levelled.
Switching on:
Turn the device on using the on/off switch (1). The levelling stop (4) must be in position
Switching off:
Turn the device off using the on/off switch (1).
Working with the clamp tripod
The clamp tripod provided can be used to attach the device to various objects.
- Release the clamping nut (9).
- Position the clamping jaws (10) to the desired location.
- Turn the clamping nut (9) until fastened.
- Place the device with thread (5) onto the tripod screw (7) and tighten by hand.
Do not use excessive force as this may damage the device. - Align the device. To do so, release the retaining screw (8) and move the device into the desired position.
- Fix the position by fastening the retaining screw (8).
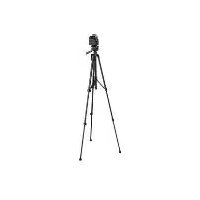
Working with the tripod
You can place the device in a stable position and adjust the height using a tripod (not provided in scope of delivery).
Place the device with thread (5) onto the tripod screw and tighten by hand.
Do not use excessive force as this may damage the device.
Cleaning

Have any work on the device that is not described in this instruction guide performed by a professional. Only use original parts.

Do not use any cleaning agents or solvents. Chemical substances may attack the plastic parts of the device. Never clean the device under running water.
Thoroughly clean the device after every use.
Clean the disc protecting the laser (6) with a soft jet of air, or soft cloth. Do not use heavy pressure as this may damage the surface!
Clean the surface of the device with a soft brush or cloth.
Storage
- Remove the batteries from the device prior to leaving it in prolonged storage.
- Store the device in a dry and dustproof location and out of reach of children.
Maintenance
The device is maintenance free.
Transport
Turn off the laser and lock the levelling stop (4) when transporting position in order to protect the levelling pendulum from impact damage.
Waste disposal and environmental protection
Take the batteries out of the device and recycle the device, batteries, accessories and packaging in an environmentally friendly manner.
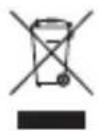
Electrical machines do not belong with domestic waste.
- Hand the device to a recycling plant. The plastic and metal parts used on your appliance can be properly sorted according to materials and grades and efficiently recycled. Please contact our service centre for more information.
- Dispose of the batteries according to local regulations. Hand in the batteries at a used battery collection point where they are recycled in an environmentally friendly manner. Dispose of the batteries in a discharged state. For more information, please contact your local waste management provider or our service centre.
We will dispose of any defective devices that you send to us free of charge.
Spare parts/Accessories
Spare parts and accessories can be obtained at www.grizzly-service.eu
If you do not have internet access, please contact the Service Centre via telephone (see "Service-Center" page 12). Please have the order number mentioned below ready.
Position instruction manual Description Order No.
A 7-10 Clamp tripod (complete) 91102998
Troubleshooting

Caution! - Laser beam. Do not look into the beam.
| Troubleshooting | Possible cause Corrective action | |
| Device does not start | Batteries empty Replace batteries | |
| Batteries incorrectly inserted | Insert the batteries correctly while observing polarity | |
| Automatic leveller does not work | The automatic leveller cannot oscillate freely, the device is not aligned sufficiently parallel with the floor | Align the device so it is parallel with the floor |
Guarantee
Dear Customer,
This equipment is provided with a 3-year guarantee from the date of purchase.
In case of defects, you have statutory rights against the seller of the product. These statutory rights are not restricted by our guarantee presented below.
Terms of Guarantee
The term of the guarantee begins on the date of purchase. Please retain the original receipt. This document is required as proof of purchase.
If a material or manufacturing defect occurs within three years of the date of purchase of this prod
uct, we will repair or replace - at our choice - the product for you free of charge. This guarantee requires the defective equipment and proof of purchase to be presented within the three-year period with a brief written description of what constitutes the defect and when it occurred. If the defect is covered by our guarantee, you will receive either the repaired product or a new product. No new guarantee period begins on repair or replacement of the product.
Guarantee Period and Statutory Claims for Defects
The guarantee period is not extended by the guarantee service. This also applies for replaced or repaired parts. Any damages and defects already present at the time of purchase must be reported immediately after unpacking. Repairs arising after expiry of the guarantee period are chargeable.
Guarantee Cover
The equipment has been carefully produced in accordance with strict quality guidelines and conscientiously checked prior to delivery.
The guarantee applies for all material and manufacturing defects. This guarantee does not extend to cover product parts that are subject to normal wear and may therefore be considered as wearing parts (e.g. batteries) or
to cover damage to breakable parts (e.g. switch).
This guarantee shall be invalid if the product has been damaged, used incorrectly or not maintained. Precise adherence to all of the instructions specified in the operating manual is required for proper use of the product. Intended uses and actions against which the operating manual advises or warns must be categorically avoided.
The product is designed only for private and not commercial use. The guarantee will be invalidated in case of misuse or improper handling, use of force, or interventions not undertaken by our authorised service branch.
Processing in Case of Guarantee
To ensure quick handling of you issue, please follow the following directions:
-
Please have the receipt and identification number (IAN 289285) ready as proof of purchase for all enquiries.
-
Please find the item number on the rating plate.
-
Should functional errors or other defects occur, please initially contact the service department specified below by telephone or by e-mail. You will then receive further information on the processing of your complaint.
After consultation with our customer service, a product recorded as defective can be
sent postage paid to the service address communicated to you, with the proof of purchase (receipt) and specification of what constitutes the defect and when it occurred. In order to avoid acceptance problems and additional costs, please be sure to use only the address communicated to you. Ensure that the consignment is not sent carriage forward or by bulky goods, express or other special freight. Please send the equipment inc. all accessories supplied at the time of purchase and ensure adequate, safe transport packaging.
Repair Service
For a charge, repairs not covered by the guarantee can be carried out by our service branch, which will be happy to issue a cost estimate for you. We can handle only equipment that has been sent with adequate packaging and postage.
Attention: Please send your equipment to our service branch in clean condition and with an indication of the defect. Equipment sent carriage forward or by bulky goods, express or other special freight will not be accepted.
We will dispose of your defective devices free of charge when you send them to us.
Service-Center
GB Service Great Britain
Tel.: 0871 5000 720
(£ 0.10/Min.)
E-Mail: grizzly@lidl.co.uk
IAN 289285
IE Service Ireland Service Northern Ireland
Tel.: 1890 930 034
(0,08 EUR/Min., (peak))
(0,06 EUR/Min., (off peak))
E-Mail: grizzly@lidl.ie
IAN 289285
Importer
Please note that the following address is not a service address. Please initially contact the service centre specified above.
Attention! - Laser radiation Do not stare into beam!
class 2 laser product
laser specification according to
EN60825-1:2014
= 635 ~nm P_0 < 1 ~mW
OBS! - Laserstråling
Se/DDi ind i strålen!
Laser klasse 2

Attention! - Laser radiation
Do not stare into beam!
class 2 laser product
laser specification according to
EN 60825-1:2014
= 635 ~nm P_0 < 1 ~mW
Attention! - Rayon laser
Chere cliente, cher client,
| Translation of the original EC declaration of conformity | |
| We hereby confirm that the Cross Line Laser, model PKLL 7 B2 Serial number: 201801000001 - 201801131312 conforms with the following applicable relevant version of the EU guidelines: | |
| 2014/30/EU • 2011/65/EU* | |
| In order to guarantee consistency, the following harmonised standards as well as national standards and stipulations have been applied: | |
| EN 61326-1:2013 • EN 61326-2-2:2013 EN 60825-1:2014 • EN 62321:2009 | |
| This declaration of conformity is issued under the sole responsibility of the manufacturer: | |
| Grizzly Tools GmbH & Co. KG Stockstädter Straße 20 63762 Großbostheim, GERMANY 30.01.2018 | Christian Frank, Documentation Representative |
- The object of the declaration described above satisfies the provisions of Directive 2011/65/EU of the European Parliament and the Council of 8 June 2011 on limiting the use of certain harmful substances in electrical and electronic appliances.