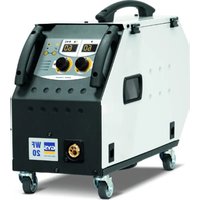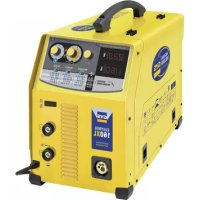
Easymig 160 XL - Welding machine GYS - Free user manual and instructions
Find the device manual for free Easymig 160 XL GYS in PDF.



User questions about Easymig 160 XL GYS
0 question about this device. Answer the ones you know or ask your own.
Ask a new question about this device
Download the instructions for your Welding machine in PDF format for free! Find your manual Easymig 160 XL - GYS and take your electronic device back in hand. On this page are published all the documents necessary for the use of your device. Easymig 160 XL by GYS.
USER MANUAL Easymig 160 XL GYS
INSTALLATION - FONCTIONNEMENT PRODUIT
DESCRIPTION
ANOMALIES, CAUSES, REMEDES
Read and understand the following safety recommendations before using or servicing the unit.
Any change or servicing that is not specified in the instruction manual must not be undertaken.
The manufacturer is not liable for any injury or damage caused due to non-compliance with the instructions featured in this manual.
In the event of problems or uncertainties, please consult a qualified person to handle the installation properly.
ENVIRONMENT
This equipment must only be used for welding operations in accordance with the limits indicated on the descriptive panel and/or in the user manual. The operator must respect the safety precautions that apply to this type of welding. In case of inadequate or unsafe use, the manufacturer cannot be held liable for damage or injury.
This equipment must be used and stored in a place protected from dust, acid or any other corrosive agent.
Operate the machine in an open, or well-ventilated area.
Operating temperature:
Use between -10 and +40^ (+14 and +104^)
Store between -20 and +55^ (-4 and 131^
Air humidity:
Lower or equal to 50% at 40^ (104^)
Lower or equal to 90% at 20^ (68^)
Altitude: Up to 1000 meters above sea level (3280 feet).
INDIVIDUAL PROTECTIONS AND OTHERS
Arc welding can be dangerous and can cause serious and even fatal injuries.
Welding exposes the user to dangerous heat, arc rays, electromagnetic fields, noise, gas fumes, and electrical shocks. People wearing pacemakers are advised to consult with their doctor before using this device.
To protect oneself as well as the other, ensure the following safety precautions are taken:

In order to protect you from burns and radiations, wear clothing without cuffs. These clothes must be insulated, dry, fireproof and in good condition, and cover the whole body.

Wear protective gloves which guarantee electrical and thermal insulation.

Use sufficient welding protective gear for the whole body: hood, gloves, jacket, trousers... (varies depending on the application/operation). Protect the eyes during cleaning operations. Do not operate whilst wearing contact lenses.
It may be necessary to install fireproof welding curtains to protect the area against arc rays, weld spatters and sparks.
Inform the people around the working area to never look at the arc nor the molten metal, and to wear protective clothes.

Ensure ear protection is worn by the operator if the work exceeds the authorised noise limit (the same applies to any person in the welding area).
Stay away from moving parts (e.g. engine, fan...) with hands, hair, clothes etc...
Never remove the safety covers from the cooling unit when the machine is plugged in - The manufacturer is not responsible for any accident or injury that happens as a result of not following these safety precautions.
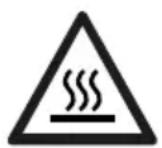
The pieces that have just been welded are hot and may cause burns when manipulated. During maintenance work on the torch or the electrode holder, you should make sure it's cold enough and wait at least 10 minutes before any intervention. The cooling unit must be on when using a water cooled torch in order to ensure that the liquid does not cause any burns. ALWAYS ensure the working area is left as safe and secure as possible to prevent damage or accidents.
WELDING FUMES AND GAS
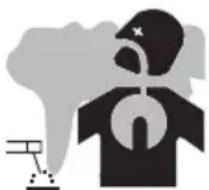
The fumes, gases and dust produced during welding are hazardous. It is mandatory to ensure adequate ventilation and/or extraction to keep fumes and gases away from the work area. An air fed helmet is recommended in cases of insufficient air supply in the workplace. Check that the air intake is in compliance with safety standards.
Care must be taken when welding in small areas, and the operator will need supervision from a safe distance. Welding certain pieces of metal containing lead, cadmium, zinc, mercury or beryllium can be extremely toxic. The user will also need to degrease the workpiece before welding.
Gas cylinders must be stored in an open or ventilated area. The cylinders must be in a vertical position secured to a support or trolley.
Do not weld in areas where grease or paint are stored.
FIRE AND EXPLOSIONS RISKS
Protect the entire welding area. Compressed gas containers and other inflammable material must be moved to a minimum safe distance of 11 meters.
A fire extinguisher must be readily available.
Be careful of spatter and sparks, even through cracks. It can be the source of a fire or an explosion.
Keep people, flammable objects and containers under pressure at a safe distance.
Welding of sealed containers or closed pipes should not be undertaken, and if opened, the operator must remove any inflammable or explosive materials (oil, petrol, gas...).
Grinding operations should not be directed towards the device itself, the power supply or any flammable materials.
GAS BOTTLE

Gas leaking from the cylinder can lead to suffocation if present in high concentrations around the work area.
Transport must be done safely: Cylinders closed and product off. Always keep cylinders in an upright position securely chained to a fixed support or trolley.
Close the bottle after any welding operation. Be wary of temperature changes or exposure to sunlight.
Cylinders should be located away from areas where they may be struck or subjected to physical damage.
Always keep gas bottles at a safe distance from arc welding or cutting operations, and any source of heat, sparks or flames.
Be careful when opening the valve on the gas bottle, it is necessary to remove the tip of the valve and make sure the gas meets your welding requirements.
ELECTRIC SAFETY
The machine must be connected to an earthed electrical supply. Use the recommended fuse size.
An electrical discharge can directly or indirectly cause serious or deadly accidents.
Do not touch any live part of the machine (inside or outside) when it is plugged in (Torches, earth cable, cables, electrodes) because they are connected to the welding circuit.
Before opening the device, it is imperative to disconnect it from the mains and wait 2 minutes, so that all the capacitors are discharged.
Do not touch the torch or electrode holder and earth clamp at the same time.
Damaged cables and torches must be changed by a qualified and skilled professional. Make sure that the cable cross section is adequate with the usage (extensions and welding cables). Always wear dry clothes in good condition, in order to be insulated from the electrical circuit. Wear insulating shoes, regardless of the environment in which you work in.
CEM CLASSIFIED MATERIAL

These Class A devices are not intended to be used on a residential site where the electric current is supplied by the public network, with a low voltage power supply. There may be potential difficulties in ensuring electromagnetic compatibility on these sites, because of the interferences, as well as radio frequencies.
This equipment does not comply with IEC 61000-3-12 and is intended to be connected to private low-voltage systems interfacing with the public supply only at the medium- or high-voltage level. On a public low-voltage power grid, it is the responsibility of the installer or user of the device to ensure, by checking with the operator of the distribution network, which device can be connected.
Provided that the impedance of the low-voltage public electrical network at the common coupling point is less than Z = 0.41 Ohms, this equipment complies with IEC 61000-3-11 and can be connected to public low-voltage electrical mains. It is the responsibility of the installer or user of the equipment to ensure, in consultation with the distribution network operator if necessary, that the network impedance complies with the impedance restrictions.
ELECTROMAGNETIC INTERFERENCES
The electric currents flowing through a conductor cause electrical and magnetic fields (EMF). The welding current generates an EMF field around the welding circuit and the welding equipment.
The EMF fields may disrupt some medical implants, such as pacemakers. Protection measures should be taken for people wearing medical implants. For example, access restrictions for passers-by or an individual risk evaluation for the welders.
All welders should take the following precautions in order to minimise exposure to the electromagnetic fields (EMF) generated by the welding circuit::
- position the welding cables together - if possible, attach them;
- keep your head and torso as far as possible from the welding circuit;
- never enroll the cables around your body;
-
never position your body between the welding cables. Hold both welding cables on the same side of your body;
-
connect the earth clamp as close as possible to the area being welded;
- do not work too close to, do not lean and do not sit on the welding machine
- do not weld when you're carrying the welding machine or its wire feeder.

People wearing pacemakers are advised to consult their doctor before using this device. Exposure to electromagnetic fields while welding may have other health effects which are not yet known.
RECOMMENDATIONS TO ASSESS THE WELDING AREA AND WELDING INSTALLATION
Overview
The user is responsible for installing and using the arc welding equipment in accordance with the manufacturer's instructions. If electromagnetic disturbances are detected, it is the responsibility of the user of the arc welding equipment to resolve the situation with the manufacturer's technical assistance. In some cases, this remedial action may be as simple as earthing the welding circuit. In other cases, it may be necessary to construct an electromagnetic shield around the welding power source and around the entire piece by fitting input filters. In all cases, electromagnetic interferences must be reduced until they are no longer bothersome.
Welding area assessment
Before installing the machine, the user must evaluate the possible electromagnetic problems that may arise in the area where the installation is planned.
In particular, it should consider the following:
a) the presence of other power cables (power supply cables, telephone cables, command cable, etc...) above below and on the sides of the arc welding machine.
b) television transmitters and receivers;
c) computers and other hardware;
d) critical safety equipment such as industrial machine protections;
e) the health and safety of the people in the area such as people with pacemakers or hearing aids;
f) calibration and measuring equipment
g)The isolation of the equipment from other machinery.
The user will have to make sure that the devices and equipments that are in the same room are compatible with each other. This may require extra precautions;
h) make sure of the exact hour when the welding and/or other operations will take place.
The surface of the area to be considered around the device depends on the building's structure and other activities that take place there. The area taken in consideration can be larger than the limits determined by the companies.
Welding area assessment
Besides the welding area, the assessment of the arc welding systems installation itself can be used to identify and resolve cases of disturbances. The assessment of emissions must include in situ measurements as specified in Article 10 of CISPR 11. In situ measurements can also be used to confirm the effectiveness of mitigation measures.
RECOMMENDATION ON METHODS OF ELECTROMAGNETIC EMISSIONS REDUCTION
a. National power grid: The arc welding machine must be connected to the national power grid in accordance with the manufacturer's recommendation. If interferences occur, it may be necessary to take additional preventive measures such as the filtering of the power supply network. Consideration should be given to shielding the power supply cable in a metal conduit. It is necessary to ensure the shielding's electrical continuity along the cable's entire length. The shielding should be connected to the welding current's source to ensure good electrical contact between the conduct and the casing of the welding current source.
b. Maintenance of the arc welding equipment: The arc welding machine should be be submitted to a routine maintenance check according to the manufacturer's recommendations. All accesses, service doors and covers should be closed and properly locked when the arc welding equipment is on.. The arc welding equipment must not be modified in any way, except for the changes and settings outlined in the manufacturer's instructions. The spark gap of the arc start and arc stabilization devices must be adjusted and maintained according to the manufacturer's recommendations.
c. Welding cables: Cables must be as short as possible, close to each other and close to the ground, if not on the ground.
d. Electrical bonding : consideration should be given to bonding all metal objects in the surrounding area. However, metal objects connected to the workpiece increase the risk of electric shock if the operator touches both these metal elements and the electrode. It is necessary to insulate the operator from such metal objects.
e. Earthing of the welded part : When the part is not earthed - due to electrical safety reasons or because of its size and its location (which is the case with ship hulls or metallic building structures), the earthing of the part can, in some cases but not systematically, reduce emissions It is preferable to avoid the earthing of parts that could increase the risk of injury to the users or damage other electrical equipment. If necessary, it is appropriate that the earthing of the part is done directly, but in some countries that do not allow such a direct connection, it is appropriate that the connection is made with a capacitor selected according to national regulations.
f. Protection and plating : The selective protection and plating of other cables and devices in the area can reduce perturbation issues. The protection of the entire welding area can be considered for specific situations.
TRANSPORT AND TRANSIT OF THE WELDING MACHINE

The machine is fitted with handle(s) to facilitate transportation. Be careful not to underestimate the machine's weight. The handle(s) cannot be used for slinging.
Do not use the cables or torch to move the machine. The welding equipment must be moved in an upright position.
Do not place/carry the unit over people or objects.
Never lift the machine while there is a gas cylinder on the support shelf. A clear path is available when moving the item. The removal of the wire reel from the machine is recommended before undertaking any lifting operation.

Stray welding currents/voltages may destroy earth conductors, damage electrical equipment or cause components to warm up which may cause a fire.
- All welding connections must be firmly secured, check regularly!
- Check that the metal piece fixation is strong and without any electrical problems!
- Attach or hang all the electrically conductive elements, such as the trolley and slinging equipment, in order to insulate them
- Do not place any electrical equipment, such as drills or grinders, on top of the welding machine without insulating them!
- Always place welding torches or electrodes holders on an insulated surface when they're not in use!
EQUIPMENT INSTALLATION
- Put the machine on the floor (maximum incline of 10^ ).
- Ensure the work area has sufficient ventilation for welding, and that there is easy access to the control panel.
- The machine must not be used in an area with conductive metal dusts.
- The machine must be placed in a sheltered area away from rain or direct sunlight.
- The machine protection level is IP21, which means :
- Protection against access to dangerous parts from solid bodies of a ≥ 12.5mm diameter and,
- Protection against vertically falling drops.
The power cables, extensions and welding cables must be fully uncoiled to prevent overheating.

The manufacturer does not incur any responsibility regarding damages to both objects and persons that result from an incorrect and/or dangerous use of the machine.
MAINTENANCE / RECOMMENDATIONS
- Maintenance should only be carried out by a qualified person. Annual maintenance is recommended.
- Ensure the machine is unplugged from the mains, and wait for two minutes before carrying out maintenance work. DANGER High Voltage and Currents inside the machine.
- Remove the casing 2 or 3 times a year to remove any excess dust. Take this opportunity to have the electrical connections checked by a qualified person, with an insulated tool.
- Regularly check the condition of the power supply cable. If the power cable is damaged, it must be replaced by the manufacturer, its after sales service or an equally qualified person.
- Ensure the ventilation holes of the device are not blocked to allow adequate air circulation.
- Do not use this equipment to thaw pipes, to charge batteries, or to start any engine.
INSTALLATION - PRODUCT OPERATION
DESCRIPTION
Thank you for choosing this machine. To get the best use from your machine, please read the following carefully : The Easymig range are semi-automatic MIG/MAG, MMA and flux cored wire welding stations. They are manual settings machine, with the help of the table printed on the product. They are recommended for welding steel, stainless steel and aluminium.
ELECTRICITY SUPPLY
This machine is fitted with a 16A socket type CEE7/7 which must be connected to a single-phase 230V (50 - 60 Hz) power supply fitted with three wires and one earthed neutral. The absorbed effective current (I1eff) is displayed on the machine, for optimal use. Check that the power supply and its protection (fuse and/or circuit breaker) are compatible with the current needed by the machine. In some countries, it may be necessary to change the plug to allow the use at maximum settings. The device must be installed so that the mains socket is accessible.
Do not use an extension cable with a diameter of less than 1.5mm^2 . Easymig is delivered with a 16amp plug (TYPE CEE7-7).
This machine must be connected to an EARTHED power supply 230V, 50/60 Hz, and protected by a 16A circuit breaker.
MACHINE DESCRIPTION (FIG I / P.76)
1: Adjustment of welding settings (wire speed, welding voltage and inductance).
2:SwitchMIG/MMA
3: European standard torch connection.
4: Connectors
5 : Polarity reversal cable
6:Power Cable (2 m)
7:Power switch
8:Reel adaptor 100/200mm (EASYMIG 160)
Reel adaptor 200/300mm (EASYMIG 160 XL)
9:Digital displays
SEMI-AUTOMATIC WELDING FOR STEEL / STAINLESS STEEL (MAG MODE)
Set the voltage output and the wire speed according to the thickness of the weld piece, following the instructions/ recommendations printed on the side of the machine.
The Easymig can weld Steel wire 0.6 / 0.8mm and Stainless Steel of 0.8mm .
The machine is fitted with 0.8mm Steel or Stainless Steel rollers. The contact tube, the groove of the roller and the sleeve of the torch are all compatible with 0.8mm wire. Should you wish to weld 0,6 wire, use a torch
of maximum 3m long. The contact tip must be changed (fig II A / p.76) as well as the wire feeder's roller that must be replaced by an optional reference (042339) with a 0.6 diameter groove. In this case, the position in such a way to observe 0.6. For use with Steel, the gas requirement is argon + CO2. (Ar+CO2). The proportion of CO2 required will vary depending on the use. For Stainless Steel, use the combination of 2% CO2 For specific gas requirements, please contact your gas distributor. The gas flow in steel is between 8 and 12 Litres/minute depending on the environment.
SEMI-AUTOMATIC WELDING FOR ALUMINIUM (MIG MODE)
Set the voltage output and the wire speed according to the thickness of the weld piece, following the instructions/ recommendations printed on the side of the machine.
The Easymig can be equipped to weld with aluminium wire 0,8 or 1,0 (fig II-B / p.76).
For use with aluminium, the gas requirement is pure argon (Ar). For the specific gas requirements please contact your distributor. The gas flow in Aluminium is between 20 and 30 Litres/minute depending on the environment, and the experience of the welder.
Below are the differences between welding with Steel and Aluminium :
- Specific rollers are needed for welding with Aluminium.
- Adjust the pressure of the drive rolls to prevent the wire being crushed.
- Only use a capillary tube for welding with Steel or Stainless Steel.
- Use a special Aluminium Torch with a teflon sheath to reduce friction.
DO NOT cut the sheath close to the joint, it is used to guide the wire from the the rollers.
- Contact Tube : Use a special aluminium contact tube specific to the diameter of wire being used.
GASLESS WIRE WELDING
Set the voltage output and the wire speed according to the thickness of the weld piece, following the instructions/ recommendations printed on the side of the machine.
The Easymig can weld gasless wire up to 0.9mm , if the polarity is reversed (fig III / p.77) respecting a maximum pressure of 5Nm. For parameters of use, please refer to the instructions indicated on page 76. Welding gasless wire with a standard nozzle can lead to overheating and deterioration of the torch. It is recommended to use a "No Gas" nozzle (ref. 041868), or remove the genuine nozzle (Fig. III / p.77).
ELECTRODE WELDING
- The reverse polarity cable must be disconnected in MMA (stick welding) mode in order to connect the electrode holder and earth clamp. Connect the electrode holder and earth clamp as indicated on the electrode packaging.
- Respect the basic rules of welding.
- This device has 1 feature specific to Inverter machines :
- Anti-Sticking: Enables easy removal of the electrode from the metal. The anti-sticking feature, after its start, requires approximately a 3 seconds delay before resuming normal welding operations.
The proportion of CO2 can vary according to the type of metal being welded.
SETTINGS PANEL (FIG V/P.77)
| 1 | ·Green light «ON»: when the machine is switched on the light turns on. ·In case of power failure, the green light goes off but the device remains powered while the power cable is unplugged. | ON |
| 2 | ·Orange light : ·Over-temperature: in such a case you shall wait a few minutes, the light will turn off and the machine will start again. ·Over-current on primary circuit: in such a case you shall switch off the machine (with the main switch) and switch on. | |
| 3 | - MIG / MAG Welding : Adjust the wire feeder speed up to maximum speed. Wire speed selection from 3 to 10 m/min. - MMA welding : Adjust the welding current. | 6 7 8 9 10 cp |
| 4 | •Adjust the voltage reference up to the maximum value. | A B C D E A A B B C C D D E E F F U U |
| 5 | Welding arc dynamic potentiometer : Can manually adjust the arc dynamic. MINI to MAX settings : Hard arc to soft arc. | 2 3 4 5 6 7 8 9 10 11 |
| MIG/MAG recommendations The wire speed adjustment is often determined « with the assistance of sound «: the arc must be stable and have a low crackling. If the speed is too low, the arc is not continuous. If the speed is too high, the arc crackles and the wire pushes back the torch. The inductance adjustment is done according to the welder's preferences : The lower the inductance, the more the arc will be hard and guiding. The higher the inductance and the softer the arc with little splatter. | ||
PROCESS OF REELS AND TORCHES ASSEMBLY (FIG IV / P.77):
- Remove the contact tube and its support (fig D), and the nozzle (fig E) from the torch.
Fig A : • Position the wire reel on the reel support : - Adjust the reel brake (1) to avoid reel movement tangling the wire when welding stops. Be careful not to tighten too much.
- For a 200mm wire reel tighten the reel to the maximum. The adaptor (4) is only to be used for a 200mm reel.
Fig B : The drive rollers included have 2 grooves (0,8 and 0,9). For 0.8mm steel wire, use the V shaped groove. For flux cored wire, remove and reverse the roller to use the 0.9mm groove.
For 0.8mm aluminium wire, remove and replace the roll with a model specifically designed for aluminium with a U shaped groove (not included).
Fig C : To select the adjustment of the drive rollers.
- Loosen the drive roller knob (3) as far as possible and insert the wire, tighten the knob again slightly.
- Start the motor by pressing the trigger of the torch.
- Tighten the knob whilst pressing the trigger until the wire starts to move.
Nb : When welding with Aluminium, use the minimum possible pressure to avoid crushing the wire
- Leave about 5cm of wire out of the torch, then put the contact tube (fig. D), and the nozzle (fig. E) adapted to the wire to be used at the extremity.
GAS COUPLING
- Connect a pressure regulator to the gas bottle. Connect the welding machine using the pipes supplied, and place the two clamps to avoid leakages.
- Set the gas flow by adjusting the dial located on the pressure regulator.
NB : to help facilitate the adjustment of the gas flow, operate the drive rollers by pressing the trigger of the torch (ensure that the drive roller is completely loose so the wire is not fed through).
Maximum gas pressure 0.5MPA (5 bars).
This procedure does not apply to «Gasless» welding mode.
RISK OF INJURY DUE TO MOVING PARTS
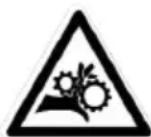
The wire feeders contain moving parts that may catch hand, hair, clothes or tools which can lead to injuries! Take extra care.
- Do not lay a hand to swivel or moving components or parts to the drive!
- Ensure that the housing covers or protective covers remain closed during operation!
ADVICE & THERMAL PROTECTION
This device is equipped with a ventilator regulated by the inside temperature. When the machine's thermal protection is activated, it will not deliver any current. Orange light (Fig-V-2 / p.77) will turn on until the temperature of the machine has returned to normal.
- Do not block/cover the ventilation holes, ensure free flow of air.
- Whilst in thermal protection mode leave the machine plugged into the mains after welding to allow it to cool. General observations :
- Always respect the basic rules of welding.
- Always work in an adequately ventilated area.
- Do not work on a damp surface.
TROUBLESHOOTING
| SYMPTOMS POSSIBLE CAUSES REMEDIES | ||
| The welding wire speed is not constant. | Debris is blocking up the opening. Clean | out the contact batch or change it and replace the anti-adherence product. Ref.041806. |
| The wire skids in the rollers. • Control the roller pressure or replace it. • Wire diameter non-compatible with roller • Covering wire guide in the torch non-compatible." | ||
| The wire-feeder motor doesn't operate. | Reel or roller brake too tight. Release the brake and rollers. | |
| Electrical supply problem. Check that the power switch is in the "On" position. | ||
| Bad wire feeding. Covering | wire guide dirty or damaged. Clean or replace | |
| The drive roller is too loose Tighten the drive roller knob | ||
| Reel brake too tight Release the brake | ||
| No welding current Bad correction to the main supply. Check the mains connection and look if the plug is fed by 230 V (1PH) power socket. | ||
| Bad earth connection. Check the earth cable (connection and clamp condition). | ||
| Torch trigger inoperative. | Check the torch trigger / replace torch | |
| The wire jams (after the rollers) | Guide wire sheath crushed. Check the sheath and torch body. | |
| Wire jammed in the torch Clean or replace. | ||
| No capillary tube. | Check the presence of capillary tube. | |
| Wire speed too fast | Reduce the wire speed | |
| The welding bead is porous | The gas flow rate is not sufficient. Adjust flow range 15 to 20 L / min. | |
| Clean the working metal. | ||
| Gas bottle empty. Replace it. | ||
| Gas quality unsatisfactory. Replace it. | ||
| Air flow or wind influence. Prevent drafts, protect welding area. | ||
| Gas nozzle dirty. Clean or replace the gas nozzle. | ||
| Poor quality wire. Use suitable WIRE for MIG-MAG welding. | ||
| Surface to weld in bad condition. (rust, etc...) | Clean the metal before welding. | |
| Very important flashing particules. | Arc voltage too low or too high. See welding settings. | |
| Bad earth connection. Adjust the earth cable for a better connection. | ||
| Insufficient gas flow. Adjust the gas flow. | ||
| No gas flow at the end of the torch. | Bad gas connection. Check the gas connection at the welding machine. Check the gas regulator and the solenoid valves. | |
Bo3dEICTBnE 3NekTpomarHHTHO NOI B IpoceCE CBapKn MoKet NMeTb N DpyrVe, eue He N3BeCTHbIe HayKe, NocJeCTBnA DJIa 3OpOBbY.
PEKOMEHDAUIN DIA OLEHKI 3OHbICBAPOHOU YCTAHOBKN
06üne noJoxKeHHa
POnb3OBaTeB oTBeuAeT 3a yCTaHOBky uNcNoIb3OBAHne yCTaHOBKn pyHOn dyROBo CBAPKn, cJeDyra Yka3aHnAm npOn3BOAnTeJ. PIn OsbHApXeHN 3NeKTPOMarHHTbIX n3nyeHn NpIb3OBaTeB aannapaTa pyHOn dyROBo CBAPKn d0JIkeH pa3peWntb np6IeMy C NOMoUbIO TexHnueckO NOdEepKKn pON3BOAnTeJ. B HeKOTOpbIX clyuaRx 3TO KOPpeKTpyIoUe ee DeIcTBn MOKeT 6bIT bOCTaTOUHO pOcTbIM, HApPImep 3a3EmLnHe CBAPouHOr zuEN. B Dpyrnx clyuaRx BO3MOxHO nOTpe6yETcR CO3DaHne 3NeKTPOMarHHTHO 3KpaHa BOKpyr nCTOUnHkca CBAPouHOro ToKa I Bce CBapNBaEMo Detanu NyTem MOHTnpoBaHn BxOdBx xfNbTpoB. B JIObom clyuae 3NeKTPOMarHHTbIe n3nyeHn DOJIxKhbl 6bITb UMeHBWeHbI TaK, UTo6bl OH 6OJIbSe He Co3DaBaNl NOMex.
OueHka 30HbI CBapKn
Ipeed yctaHOBko O6OpyOBAHnry DyrBOB CBapKn Nolb3OBaTeNb DOJKeH OueHHTb BO3MOXHbIe 3JIeKtpOMaHHTbIe np6JIembl, KOTOpBIE MOrY BO3HNKHyTb B OKpyKaIOUe CpeJe. CneDyIOUne MOMHTbI DOJXHbI 6bITb pINHrTbI BO BHMaHHe:
a) NaHnue HAD, NOI INIIN PRAOM C OOBDAHHe M IJyROB CBAPK, DpyrNX Ka6eNe NITAHN, ynpabHeH, cnHaHn3aun n TelefoHa;
b) npneMHnKn n nepeaTcuKn paDIO N TeLeBnDEHn;
c) KOMNbIOTepOB IN dpyrnx yCTPOINCTB ynpabJIeHnra;
d) obopydoBaHne 6e3oNaChOCTn, HapnpMeP, 3aunTa npomblIeHHoro o6opydoBaHna;
e) 3dopOBBe HaxoJxNcXg No-6n3OCTn IIOe, HApPIMep, nCNoJIb3yIOUxKapDIOCTMMyTOpBn yCTpoiCTBa OT fIyXOTbl;
f) INHCTpymEnT, nCNoJIb3yEmbl IJRA KaJIb6PoBKn IIN NIm N3MepeHnra;
g) nomexoctouhBOCTbpyrO o6OpydoBaHn, HaxoJzeroCn06n30ctn.
IoiB3OBaTeJIb DoJIkeH y6eITbC B TOM, YTO BCE aIIapatbl B NOMEeHN COBMeCTnMbI dpYr C dpYrom. 3To MOKET NOTpe6oBaTb Co6JIIODeHIN DOIOJIHHTeJIbHbIX MEP 3aUNTbl:
h) onpeJeHHeBpeMa nH, KOrda CBapKa nn Dpyrne pa60Tb MoKHO 6yTe TBInOHHTb.
Pa3mepbl Okpykaioe cpebl, KOtOpbIe Hado yuHTbIBaTb, 3aBnCrt OT KOHCTpyKun 3daHnra n Dpyrnx pa60T, KOtOpbIe B Hem npoBODaTc. PaccMaTpnaBaemar 3OHa MOKeT npoctnpaTbcra 3a npedeJIb pa3MeueHnra yctahOBKn.
OueHka CBapoHou yCTaHOBKn
IOMMIO OueHKN 30HbI, OueHKa aannapaTOB pyuHOn dyROBO CBAPKMOXET NOMOy ONpeDeINrB IN peWNTb CnyaH NJIeKTPomarHnTHbIX NOMex. OueHKa n3JyuHn DOJxHa yuHTbIBaTb N3MepeHn B YcNOBnX 3KcNpyaTaun, KaK 3TO yKa3aHO B CtaTbe 10 CISPR 11. N3MepeHn B YcNOBnX 3KcNpyaTaun MOrY TAKKe I03BOJNTb NOITBepdntb 3ΦΦeKTnBHOCTb MEP IO CMrUeHn BO3DeECTBnR.
PEKOMEHДAUINI NO METOДIKE CHNXEHNIA 3JIEKTPOMAHHTHOI N3JUYEHNIA
a.ObseCTBeHHa CnCTema NITAHN: annapat pyHOn DyROB CBAPKN HxKHO NOKIOUHTb K O6eCTBeHHo cETNIITAHN, CLEyra peKOMeHdaunm npON3BOIDTeJI.B Clyuae BO3HNKHOBEHNA NOMEX BO3MOXHO 6ydet Heo6xoJIMO pInHb DOONHtBbHbIe PpeDynpEnTbHbIe Mepbl, TaKne KaKpNbTPaCINr OBSeCTBeHHo CNCTembl NITAHN. Bo3MOxHO 3aUnNTb shHypr nITAHN aNnapaTa C NOMOsbIO 3kpaHn3npyUoJeonlETKN, IIN6 IOXJIM npncnOC6JIeHMeB (B Clyuae eCN AnnapaT pyHOn DyROB CBAPKn NOcTOrHNO HaxODHTcna Ha ONpeDeJIeHHom pa6oYem MeTe). Heo6xoJIMO o6ecNeHTb 3LeKtpnueckyIO HeNPepbIBHOCTb 3kpaHn3npyUoJeonlETKN PO BcENHe. Heo6xoJIMO NOCoEINHtB 3kpaHn3npyUOOnlETKY K INcTOHNy CBAPOHORo TOKa dIra ObecneueHry XopoWero 3LeKtpnueckoro KOHTaKTA MeJdy ShHypom N KOpnycom NcToHnka CBapOHORo TOKa.
b. Texo6cnykubahne annapata pyuho dyrobo CBapkn: annapaT pyuho dyrobo CBapkn HxHNO Heo6xOIMO nepnoDnueckn 06cIyKnbATb corlaCHO pekomehdaqummpon3BODntela. Heo6xOIMO, yTO6bl BCE doCTynbl, IIOKN i OTKnDbIBaIOUncEcaTNI KOpNyaC 6blIN 3akpybITBI INpabINbHO 3akpenJIeHbl, KOrda annapat pyuho dyrobo CBapkn rOTOB K pa6ote nIN haoOnTCB p6oohem coctOHN. Heo6xOIMO, yTO6bl annapat pyuho dyrobo CBapkn He 6blIN nepeJedan KaKIM 6bl TO HN 6blIO 06pa3OM, 3a NCKIQUEHem NaCTpoek, yka3aHHbIX B pykoBOdCTBe npOn3BOIDTeJI. B uactHOCTNI, cJeDuET OTpeRyInpOBaTB n O6cIyKnbATb NCKPOBO npomjkyToK dYrN UcTPOBJCB NOXIRa N CTA6NJIN3aUIN DyrN B COOTBE TCTBNI C peKOMeHdaUZMAHn PON3BOIDTeJI.
c. CBapoHbIe Ka6eN: Ka6eN DoJxHbI 6bITb KaK MoXHo KopoYe I NOMEuEhbl Dpyr praOM C dpYrom B6n3N OT nOla nn Ha noLy.
d. 3KBNOTeHcuaHbHbe CoeHNHeHn: Heo6xOIMO o6ecneHTb CoeHNHeHne BCex MeTaNueCKnx npedMeTOB OkpykaIOSeI 30hJI. TeM He MeHHe, MeTaNueCKNe PpeDMtBI, CoeHNHeHHbIe CO CBAPNBAeMOI DeTALIO, YBeJIuHbAIOT pNCK IIN NOlb3OBaTeJIa Ydapa 3LekTPnueCKm TOKOM, eCNI OH OJHOBpeMeHHO KOCHeTCr 3TNX MeTaNueCKNX npedMeTOB n 3LekTPOda. OepaTop DoJXeH 6bITb N3OLIpOBaH OH TaKHX MeTaNueCKNX npedMeTOB.
e.3a3emlenne CBapnBaem DeTaln: B cnyae, ecn CBapnBaem deTalb He 3a3emIeHa no coo6paXeHnA m 3JIeKtpnuecko 6e30nacnoctn nll B cnly cBOny pa3mepob u CBOero paCNOLOXeHnA, KaK, HApPImep, B cnyae KOpNyCa cyDHa nll MeTALIOKHOCTpykun npOMblIeHHoro obEkeTa, TO CoeINHeHne DeTAln C 3EmJe, MoKeT B HeKOToPbIX cLuyax, Ho He CNCTeMaTHueckn, COkPaTntb BbIbPoCsb. Heo6xOIMo I36eRaTb 3a3emLeHne DeTanei, KOToPbIe MOrn 6bl yBeJInuHT bIra Nolb3OBaTeJe PnCKn paHenn IINI Je NOBpeINTb dpyrne 3JIeKtpoyctahOBKn. Ppr HAno6HocTN, cIeDyET HAnpMyIO NODcoEINHT bDeTaN K 3EmNe, HO B HeKOTopbIX CTpaHax, KOToPbIE He pa3peShaOT pPMAoe NODcoEINHHe, ERO HJXHO CdelaTb C NOMOsbIO NODXODaIeRO KOHDeHCatota, BbIbpaHHoro B 3aBNCIMOCtN OT HaUNOHJIbHORO 3aKOHODaTeJIbCTBa.
f. 3aunTa n 3kpaHn3npyouaonlTeKa: BbIbOpOuHa 3aunTa n 3kpaHn3npyouaonlTeKa dpyrnx Ka6eJe n obOpydoBaHna, HaxoJaUnxC B 6bn3neJkaUem pa6oHem yUacTke, NOMoXe TOrpaHnUHTb npo6IeMb, CBra3aHHbIe C NOMexAmN. 3aunTa Bce CBapOuHO 30Hb MOxET paccMaTpNBaTcB HekOTopbIX OOCbIX clyaAx.
TPAHCNOPTNPOBKA IN TPAH3NT ANIAPATA

IcToUHnKa CBapOuHOro ToKa OChaSeH pyUkAm IJRA TpaHCnOpTnpOBKn, IO3BOJIIOUIMNIpeHocntb annapaT. BydTe BHMateIbHbI: He HeDOOeHNBaIte Bec annapaTa. PyKoRTka(-) He MoKeT(-rYT) 6bITb NcNoJIb3OBAHa(-bl) dJIra CTPONOBKn.
He noIb3yIeTcB ka6eIaMn IIN rOpEIKo IJI na nepeHocA nCTOuHnKa CBapOuHOro Toka. ETo moXHo npeHocHTb ToIbKO B BepTKaJIbHOM nIoXeHmN.
He nepeHocntb nCTOuHNK TOKa HAd IIOdbMn NIN PpeMeTaMn.
HnKorda He noDnHaIe ra3OBb 6aJIIOH n IcTOUHK Toka OndHOBpeMeHHo. Ix TpaHCnOpTHbIe HopMbI pa3JIuHaTcR.
KeIaTeIbHO ChraTb 6o6Hny npOBoNOKn npeed Tem, KaK NOdHMaTb NII nepeHocNTb NCTOuHk CBapOCHoro TOka.

HHTEPΦEIC YNPABJIENHA (PNC V P.77)
WAARSCHUWING - VEILIGHEIDSINSTRUCTIES
ALGEMENE INSTRUCTIES

INSTALLATIE VAN HET APPARAAT
PROBLEM, PRICINY, RESENI
CONDITIONS DE GARANTIE
The warranty covers faulty workmanship for 2 years from the date of purchase (parts and labour).
The warranty does not cover:
- Transit damage.
- Normal wear of parts (eg.: cables, clamps, etc..).
- Damages due to misuse (power supply error, dropping of equipment, disassembling).
- Environment related failures (pollution, rust, dust).
In case of failure, return the unit to your distributor together with:
- The proof of purchase (receipt etc ...)
- A description of the fault reported
GARANTIE
*The duty cycles are measured according to standard EN60974-1 à 40°C and on a 10 min cycle.
While under intense use (> to duty cycle) the thermal protection can turn on, which switches the arc off and the indicator switches on. Keep the machine's supply on, to enable cooling until protection cancellation.
The machine has a specification with a "dropping current output" in MMA and with a "constant current output" in MIG/MAG.