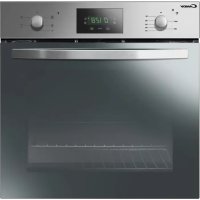
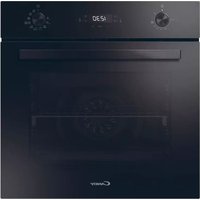
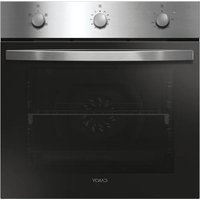
USER MANUAL FCS 605 XE CANDY
- During cooking, moisture may condense inside the oven cavity or on the glass of the door. This is a normal condition. To reduce this effect, wait 10-15 minutes after turning on the power before putting food inside the oven. In any case, the condensation disappears when the oven reaches the cooking temperature. Cook the vegetables in a container with a lid instead of an open tray.
- Avoid leaving food inside the oven after cooking for more than 15/20 minutes.
- WARNING: the appliance and accessible parts become hot during use. Be careful not to touch any hot parts.
- WARNING: the accessible parts can become hot when the grill is in use. Children should be kept at a safe distance.
- WARNING: ensure that the appliance is switched off before replacing the bulb, to avoid the possibility of electric shocks.
- WARNING: in order to avoid any danger caused by the accidental resetting of the thermal interruption device, the appliance should not be powered by an external switching device, such as a timer, or be connected to a circuit that is regularly switched on and off. Children under 8 should be kept at a safe distance from the appliance if not continuously supervised. Children should not play with the appliance.
- The appliance can be used by those aged 8 or over and by those with limited physical, sensorial or mental capacities, without experience or knowledge of the product, only if supervised or provided with instruction as to the operation of the appliance, in a safe way with awareness of the possible risks.
- Cleaning and maintenance should not be carried out by unsupervised children.
- Do not use rough or abrasive materials or sharp metal scrapers to clean the oven door glasses, as they can scratch the surface and cause the glass to shatter.
- The oven must be switched off before removing the removable parts. After cleaning, reassemble them according to the instructions.
- Only use the meat probe recommended for this oven.
- Do not use a steam cleaner for cleaning operations.
- Connect a plug to the supply cable that is able to bear the voltage, current and load indicated on the tag and having the earth contact. The socket must be suitable for the load indicated on the tag and must have ground contact connected and in operation. The earth conductor is yellow-green in colour. This operation should be carried out by a suitably qualified professional. In case of incompatibility between the socket and the appliance plug, ask a qualified electrician to substitute the socket with another suitable type. The plug and the socket must be conformed to the current norms of the installation country. Connection to the power source can also be made by placing an omnipolar breaker between the appliance and the power source that can bear the maximum connected load and that is in line with current legislation. The yellow-green earth cable should not be interrupted by the breaker. The socket or omnipolar breaker used for the connection should be easily accessible when the appliance is installed.
- The disconnection may be achieved by having the plug accessible or by incorporating a switch in the fixed wiring in accordance with the wiring rules.
- If the power cable is damaged, it should be substituted with a cable or special bundle available from the manufacturer or by contacting the customer service department. The type of power cable must be H05V2V2-F. This operation should be carried out by a suitably qualified professional. The earth conductor (yellow-green) must be approximately 10 mm longer than the other conductors. For any repairs, refer only to the Customer Care Department and request the use of original spare parts.
- Failure to comply with the above can compromise the safety of the appliance and invalidate the guarantee.
- Any excess of spilled material should be removed before cleaning.
- A long power supply failure during an occurring cooking phase may cause a malfunction of the monitor. In this case contact customer service.
- The appliance must not be installed behind a decorative door in order to avoid overheating.
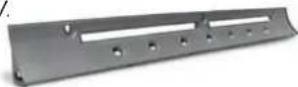
- When you place the shelf inside, make sure that the stop is directed upwards and in the back of the cavity. The shelf must be inserted completely into the cavity.
- WARNING: Do not line the oven walls with aluminium foil or single-use protection available from stores. Aluminium foil or any other protection, in direct contact with the hot enamel, risk melting and deteriorating the enamel of the insides.
- WARNING: Never remove the oven door seal.
- CAUTION: Do not refill the cavity bottom with water during cooking or when the oven is hot.
- No additional operation/setting is required in order to operate the appliance at the rated frequencies.
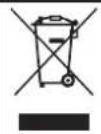
This appliance is marked according to the European directive 2012/19/EU on Waste Electrical and Electronic Equipment (WEEE). WEEE contains both polluting substances (which can cause negative consequences for the environment) and basic components (which can be reused). It is important to have WEEE subjected to specific treatments, in order to remove and dispose properly all pollutants, and recover and recycle all materials. Individuals can play an important role in ensuring that WEEE does not become an environmental issue; it is essential to follow some basic rules:
WEEE shall not be treated as household waste. WEEE shall be handed over to the relevant collection points managed by the municipality or by registered companies. In many countries, for large WEEE, home collection could be present. - When you buy a new appliance, the old one may be returned to the retailer who has to collect it free of charge on a one-to-one basis, as long as the equipment is of equivalent type and has the same functions as the supplied equipment.
ENERGY SAVING AND RESPECTING THE ENVIRONMENT
Where possible, avoid pre-heating the oven and always try to fill it. Open the oven door as infrequently as possible, because heat from the cavity disperses every time it is opened. For a significant energy saving, switch off the oven between 5 and 10 minutes before the planned end of the cooking time, and use the residual heat that the oven continues to generate. Keep the seals clean and in order, to avoid any heat dispersal outside of the cavity. If you have an electric contract with an hourly tariff, the "delayed cooking" programme makes energy saving more simple, moving the cooking process to start at the reduced tariff time slot.
1. GENERAL WARNINGS
Thank you for choosing one of our products. To get the most out of your oven we recommend that you:
- Read the notes in this manual carefully: they contain important instructions on how to install, use and service this oven safely.
- Keep this booklet in a safe place for easy, future reference.
All accessible parts are hot when the appliance is in operation, take care to not touch these elements.
When the oven is first switched on it may give out acrid smelling fumes. This is because the bonding agent for insulating panels around the oven has been heated up for the first time. This is a completely normal, if it does occur you merely have to wait for the fumes to clear before putting the food into the oven. An oven by its very nature becomes very hot. Especially the glass of the oven door.
1.1 DECLARATION OF COMPLIANCE
By placing the C E mark on the appliance, we are confirming compliance to all relevant European safety, health and environmental requirements which are applicable in legislation for this product.
When you have unpacked the oven, make sure that it has not been damaged in any way. If you have any doubts at all, do not use it: contact a professionally qualified person. Keep packing materials such as plastic bags, polystyrene, or nails out of the reach of children because they are dangerous for children.
1.2 SAFETY HINTS
- The oven must be used only for the purpose for which it was designed: it must only be used for cooking food. Any other use, e.g. as a form of heating, is an improper use of the oven and is therefore dangerous.
- The manufacturers cannot be held responsible for any damage caused by improper, incorrect or unreasonable use. When using any electrical appliance you must follow a few basic rules.
- Do not pull on the power cable to remove the plug from the socket.
- Do not touch the oven with wet or damp hands or feet.
- Do not use the oven unless you are wearing something on your feet.
- It is not generally a good idea to use adapters, multiple sockets for several plugs and cable extensions.
- If the oven breaks down or develops a fault, switch it off at the mains and do not touch it.
If the cable is at all damaged, it must be replaced promptly.
When replacing the cable, follow these instructions. Remove the power cable and replace it with one of the H05RRF, H05VV-F, H05V2V2-F type. The cable must be able to bear the electrical current required by the oven. Cable replacement must be carried out by properly qualified technicians. The earthing cable (yellow-green) must be 10 mm longer than the power cable.
Use only an approved service centre for repairs and ensure that only original parts are used. If the above instructions are not adhered to, the manufacturers cannot guarantee the safety of the oven.
- Do not line the oven walls with aluminium foil or single-use protection available from stores. Aluminium foil or any other protection, in direct contact with the hot enamel, risks melting and deteriorating the enamel of the insides.
1.3 INSTALLATION
Installation is the customer's responsibility. The manufacturers have no obligation to carry this out. If the assistance of the manufacturer is required to rectify faults arising from incorrect installation, this assistance is not covered by the guarantee.
The installation instructions for professionally qualified personnel must be followed. Incorrect installation may cause harm or injury to people, animals or belongings. The manufacturer cannot be held responsible for such harm or injury.
1.4 FITTING THE OVEN INTO THE KITCHEN UNIT
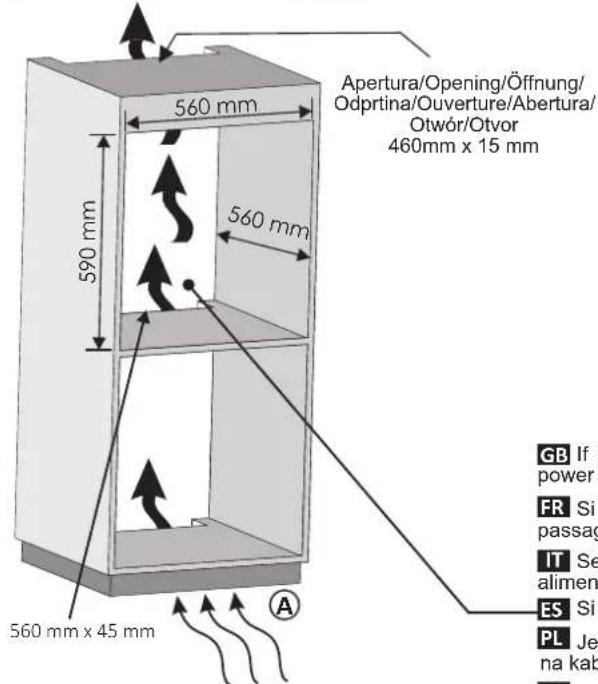
Fit the oven into the space provided in the kitchen unit; it may be fitted underneath a work top or into an upright cupboard. Fix the oven in position by screwing into place, using the four fixing holes in the frame. (Fig. on last page).
To locate the fixing holes, open the oven door and look inside. To allow adequate ventilation, the measurements and distances indicated in the diagram on last page must be adhered to when fixing the oven.
Note: For ovens that are combined with a hob unit the instructions contained in the manual for the hob unit must be followed.
1.5 IMPORTANT
If the oven is to work properly, the kitchen housing must be suitable. The panels of the kitchen unit that are next to the oven must be made of a heat resistant material. Ensure that the glues of units made of veneered wood can withstand temperatures of at least 120°C. Plastics or glues that cannot withstand such temperatures will melt and deform the unit. Once the oven has been lodged inside the unit, the electrical parts must be completely insulated. This is a legal safety requirement. All guards must be firmly fixed into place so that it is impossible to remove them without using special tools.
Remove the back of the kitchen unit to ensure an adequate current of air circulates around the oven. The hob must have a rear gap of at least 45 mm.
1.6 CONNECTING TO THE POWER SUPPLY
Plug into the power supply. Ensure first that there is a third contact that acts as earthing for the oven. The oven must be properly earthed. If the model of oven is not fitted with a plug, fit a standard plug to the power cable. It must be able to bear the power supply indicated on the specifications plate. The earthing cable is yellow-green. The plug must be fitted by a properly qualified person. If the socket and the plug are incompatible the socket must be changed by a properly qualified person. A properly qualified person must also ensure that the power
cables can carry the current required to operate the oven.
An ON/OFF switch may also be connected to the power supply. The connections must take account of the current supplied and must comply with current legal requirements. The yellow-green earthing cable must not be governed by the ON/OFF switch. The socket or the ON/OFF switch used for connecting to the power supply must be easily accessible when the oven has been installed.
Important: During installation, position the power cable in such a way that it will not be subjected to temperatures of above 50°C at any point. The oven complies with safety standards set by the regulatory bodies. The oven is safe to use only if it has been adequately earthed in compliance with current legal requirements on wiring safety. You must ensure that the oven has been adequately earthed.
The manufacturers cannot be held responsible for any harm or injury to persons, animals or belongings caused by failure to properly earth the oven.
WARNING: the voltage and the supply frequency are shown on the rating plate (fig. on last page).
The cabling and wiring system must be able to bear the maximum electric power required by the oven. This is indicated on the specifications plate. If you are in any doubt at all, use the services of a professionally qualified person.
1.7 OVEN EQUIPMENT (according to the model)
It is necessary to do an initial cleaning of the equipment before the first use of each of them. Wash them with a sponge. Rinse and dry off.
The simple shelf can take moulds and dishes.
The tray holder shelf is especially good for grilling things. Use it with the drip tray.
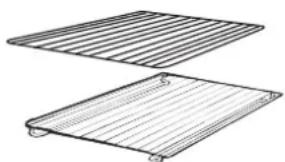
The special profile of the shelves means they stay horizontal even when pulled right out. There is no risk of a dish sliding or spilling.
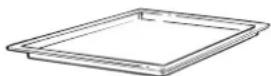
The drip tray catches the juices from grilled foods. It is only used with the Grill, Rotisserie, or Fan Assisted Grill; remove it from the oven for other cooking methods.
Never use the drip tray as a roasting tray as this creates smoke and fat will spatter your oven making it dirty.
The pizza set is designed for pizza cooking. In order to obtain the best results the set must be used together with Pizza function.
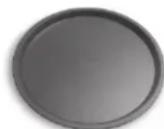
The tray holder
The tray holder shelf is ideal for grilling. Use it in conjunction with the drip tray. A handle is included to assist in moving the both accessories safely. Do not leave the handle inside the oven.
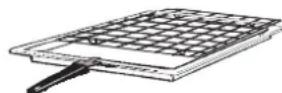
Lateral wire grids
They are located on both sides of the oven cavity. They hold metal grills and drip pans.
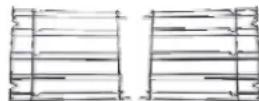
Removing and cleaning wire racks
- Remove the wire racks by pulling them in the direction of the arrows (see below).
- To clean the wire racks, either put them in the dishwasher or use a wet sponge, ensuring that they are dried afterwards.
- After the cleaning process, install the wire racks in reverse order.
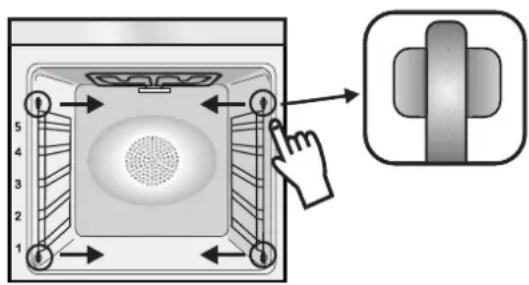
2.1 SHELF SAFETY SYSTEM
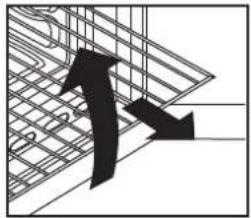
The oven features a new shelf safety system.
This allows you to pull out the oven shelves when inspecting the food without danger of food spillages or shelves falling accidentally out of the oven.
To remove the shelves, pull out and lift.
2.2 GRILLING
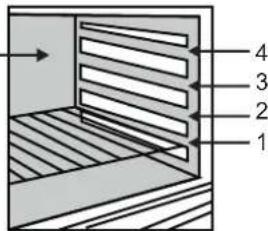
Grilling makes it possible to give food a rich brown colour quickly. For browning, we recommend that you insert the grill onto the fourth level, depending on the proportions of the food (see fig. page 7).
Almost all food can be cooked under the grill except for very lean game and meat rolls.
Meat and fish that are going to be grilled should first be lightly doused with oil.
2.3 The U-COOK MODELS
U-COOK Ovens have an electronic control of the fan speed, called and patented VARIOFAN. During the cooking, this system changes automatically the speed of the fan (in multifunction mode) in order to optimize the air flow and the internal temperature in the cavity of the oven.

All ovens feature the function.
This allows a management of the distribution of moisture and temperature. It reduces the loss of humidity of the 50 %, which guarantees the food remains tender and tastes better. This a delicate cooking is recommended for the baking of the bread and pastry.

It reduces the time of preheating of ovens: only 8 minutes to reach 200 degrees Celsius.

It gives the possibility of setting level and intensity of grilling, up to 50% more power in comparison with a traditional multifunction oven.
Some ovens are equipped with the new door "WIDE DOOR" which has a bigger window area, this allows better maintenance and a improved thermal insulation.
2.4 According to the model
U·See
Is an illumination system which replaces the traditional « light bulb ». 14 LED lights are integrated within the door. These produce white high quality illumination which enables to view the inside of the oven with clarity without any shadows on all the shelves.
U.see
Advantages :
System, besides providing excellent illumination inside the oven, lasts longer than the traditional light bulb its easier and to maintain and most of all saves energy.
Optimum view - Long life illumination - Very low energy consumption, -95% in comparison with the traditional
illumination High
"Appliance with white light LED of the 1M Class according to IEC 60825-1:1993 + A1:1997 + A2:2001 (equivalent to EN 60825-1:1994 + A1:2002 + A2:2001); the maximum light power emitted λ 459nm < 150uW.
Not observed directly with optical instruments.
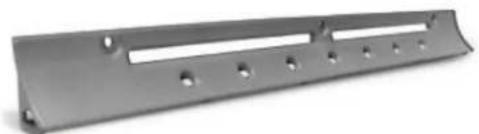
2.5 SELF-CLEANING OVEN WITH CATALYTIC
Special self-cleaning panels covered in a micro-porous coating are available as optional extras for all models. If they are fitted, the oven no longer needs to be cleaned by hand. The fat that is splattered onto the sides of the oven during roasting is eliminated by the microporous coating which breaks the fat down by catalysis and transforms it into gas.
Excessive splattering may nevertheless block the pores and therefore hinder self-cleaning. The self-cleaning capacity may be restored by switching on the empty oven to maximum for about 10-20 minutes. Do not use abrasive products, metal cleaning wads, sharp objects, rough cloths, or chemical products and detergents that may permanently damage the catalytic lining.
It is a good idea to use deep roasting trays to roast fatty foods such as joints of meat etc. and to put a tray underneath the grill to catch surplus fat. If the walls of the oven are so thickly coated in grease that the catalytic lining is no longer effective remove surplus grease with a soft cloth or sponge soaked in hot water.
The lining must be porous for self-cleaning to be effective.
N.B.: All catalytic linings currently on the market have a working life of about 300 hours. They should therefore be replaced after about 300 hours.
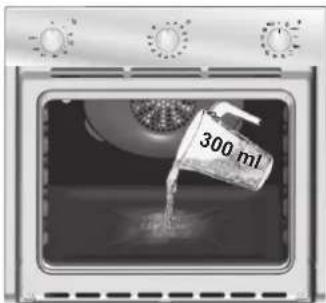
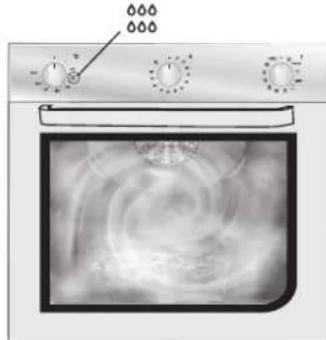
2.6 AQUACTIVA FUNCTION
The Aquactiva procedure uses steam to help remove remaining fat and food particles from the oven.
- Pour 300 ml of water into the Aquactiva container at the bottom of the oven.
- Set the oven function to Static ( ) or Bottom ( ) heater
- Set the temperature to the Aquactiva icon
- Allow the program to operate for 30 minutes.
- After 30 minutes switch off the program and allow the oven to cool down.
- When the appliance is cool, clean the inner surfaces of the oven with a cloth.
Warning:
Make sure that the appliance is cool before you touch it. Care must be taken with all hot surfaces as there is a risk of burns. Use distilled or drinkable water.
2.7 CLEANING AND MAINTENANCE
Never use abrasive cleaners, wire wool or sharp objects to clean the glass oven door.
Clean the stainless steel and enamelled surfaces with warm, soapy water or with suitable brand products. On no account use abrasive powders that may damage surfaces and ruin the oven's appearance. It is very important to clean the oven each time that it is used. Melted fat is deposited on the sides of the oven during cooking. The next time the oven is used this fat could cause unpleasant odours and might even jeopardise the success of the cooking. Use hot water and detergent to clean; rinse out thoroughly. To make this chore unnecessary all models can be lined with catalytic self-cleaning panels: these are supplied as an optional extra (see the section SELF-CLEANING OVEN WITH CATALYTIC LINING). Use detergents and abrasive metal pads like «brillo pads» for the stainless steel grills. The glass surfaces as the top, oven door and warming compartment door must be cleaned when they are cold. Damage that occurs to them because this rule was not adhered to are not covered by the guarantee. To replace the interior light: - switch off the mains power supply and unscrew bulb. Replace with an identical bulb that can withstand very high temperatures
2.8 SERVICE CENTRE
Before calling the Service Centre
If the oven is not working, we recommend that:
you check that the oven is properly plugged into the power supply.
If the cause of the fault cannot be detected:
disconnect the oven from the mains, do not touch the oven and call the after sales service.
Before calling the Service Centre remember to make a note of the serial number on the specifications plate (see fig. On last page).
The oven is supplied with a guarantee certificate that ensures that it will be repaired free of charge by the Service Centre
3. TIMER
3.1 USING THE MINUTE TIMER
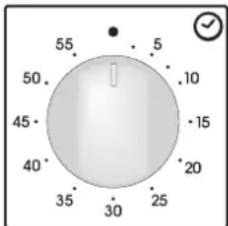
To set the cooking time, turn dial one complete revolution and then position the index to the required time. When the time has lapsed, the signal will ring for a few seconds.
3.2 USING THE END OF COOKING TIMER
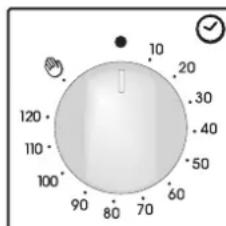
This control enables to set the desired cooking time (max. 120 min.) the oven will automatically switch off at the end of the set time. The timer will count down from the set time return to the O position and switch off automatically. For normal use of oven set the timer to the position. To set the oven ensure the timer is not on the O position.
3.3 SETTING THE CORRECT TIME
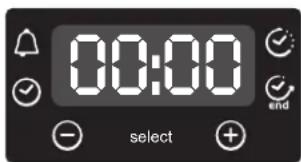
WARNING: the first operation to carry out after the oven has been installed or following the interruption of power supply (this is recognizable the display pulsating and showing) is200 setting the correct time. This is achieved as follows.
-Push the central button.
-Settime with"-"+"+ " buttons. - Release all buttons.
ATTENTION: The oven will only operate providing the clock is set.
3.4 USE OF TOUCH CONTROL CLOCK PROGRAMMER
| FUNCTION | HOW TO ACTIVATE IT | HOW TO SWITCH ITOFF | WHAT IT DOES | WHAT IT IS FOR |
| KEY LOCK | ·Child Lock function is activated by touching Set (+) for a minimum of 5 seconds. From this moment on all other function are locked and the display will flash STOP and preset time intermittently. | ·Child Lock function is deactivated by touching touchpad Set (+) again for a minimum of 5 seconds. From this moment on all functions are selectable again. | | |
| MINUTE MINDER | ·Push the central button 1 times
·Press the buttons "-" "4" to set the required time
·Release all the buttons | ·When the set time as elapsed an audible alarm is activated (this alarm will stop on its own, however it can be stopped immediately by pressing the button) SELECT. | ·Sounds an alarm at the end of the set time.
·During the process, the display shows the remaining time. | ·Allows to use the oven as alarm clock (could be activated either with operating the oven or with out operating the oven) |
| COOKING TIME | ·Push the central button 2 times
·Press the buttons "-" or "+" to set the lenght of cooking required
·Release all buttons
·Set the cooking function with the oven function selector | ·Push any button to stop the signal. Push the central button to return to the clock function | ·It allows to preset the cooking time required for the recipe chosen.
·To check how long is left to run press the SELECT button 2 Times.
·To alter/change the preset time press SELECT and "-" "+" buttons. | ·When the time is elapsed the oven will switch off automatically. Should you wish to stop cooking earlier either turn the function selector to 0, or set time to 0:00 (SELECT and "-"+" buttons) |
| END OF COOKING END | ·Push the central button 3 times
·Press the buttons "-" "4" to set the time at which you wish the oven to switch off
·Release the buttons
·Set the cooking function with the oven function selector | ·At the time set, the oven will switch off. To switch off manually, turn the oven function selector to position O. | ·Enables you to set the end of cooking time
·To check the preset time push the central button 3 times
·To modify the preset time press buttons SELECT + "-" "+" | ·This function is typically used with "cooking time" function. For example if the dish has to be cooked for 45 minutes and needs to be ready by 12:30, simply select the required function, set the cooking time to 45 minutes and the end of cooking time to 12:30.
·At the end of the cooking set time, the oven will switch off automatically and an audible alarm will ring.
·Cooking will start automatically at 11:45 (12:30 minus 45 mins) and will continue until the pre-set end-of-cooking-time, when the oven will switch itself off automatically. WARNING. If the END of cooking is selected without setting the length of cooking time, the oven will start cooking immediately and it will stop at the END of cooking time set. |
4. OPERATING INSTRUCTIONS
| Function dial | Temperature pre-set and setting. (Model with electronic programmer) (Type A) | Thermostat dial | Function |
| | | Turns on the oven lightThis will automatically activate the cooling fan (on fan cooled models only) |
| × × | | | DefrostingWhen the dial is set to this position. The fan circulates air at room temperature around the, frozen food so that it defrosts in a few minutes without the protein content of the food being changed or altered. |
| Sprinter\(\overline{\mathbf{F}}\) | MAX | MAX | Super GrillThis function allows to set food crunchiness. The Super Grill function is characterized by a 50% power increase in comparison to the standard grill. |
| \(\overline{\mathbf{★}}\) | 220 | 50÷ MAX | Natural convectionBottom and top oven elements are used. This is the traditional form of baking and roasting. It is ideal for roasting joints of meat and game, baking biscuits and apples and making the food nice and crunchy. |
| \(\overline{\mathbf{★}}\) | 210 | 50÷ MAX | Fan cookingBoth top and bottom heating elements are used with the fan circulating the air inside the oven. We recommend you use this method for poultry, pastries, fish and vegetables. Heat penetrates into the food better and both the cooking and preheating times are reduced. You can cook different foods at the same time with or without the same preparation in one or more positions. This cooking method gives even heat distribution and the smells are not mixed. Allow about ten minutes extra when cooking foods at the same time. |
| Soft cook\(\overline{\mathbf{G}}\) | 200 | 50÷ MAX | Soft Cook (a)Soft Cook is the function for the confectionery and the bread. Thanks to its reduced fan speed, this function increases oven internal damp. The increased damp creates the ideal conditions of cooking for those foods that need to maintain an elastic consistence while they are cooking (ex. cakes, bread, biscuits) avoiding surface breakages. |
| \(\overline{\mathbf{★}}\) | 210 | 50÷ MAX | Fan plus lower elementThis function is ideal for delicate dishes (pies-souffle). |
| \(\overline{\mathbf{★}}\) | 230 | 50÷ MAX | GRILL: use the grill with the door closed. The top heating element is used alone and you can adjust the temperature. Five minutes preheating is required to get the elements red-hot. Success is guaranteed for grills, kebabs and gratin dishes. White meats should be put at a distance from the grill; the cooking time is longer, but the meat will be tastier. You can put red meats and fish fillets on the shelf with the drip tray underneath. |
| Super grill\(\overline{\mathbf{G}}\) | 230 | 50÷ MAX | SUPER GRILL: the oven has two grill positionsGrill : 1800 W Grill SUPER : 3000 W |
| \(\overline{\mathbf{★}}\) | 190 | 50÷ MAX | FAN ASSISTED GRILL (a): use the turbo-grill with the door closed. The top heating element is used with the fan circulating the air inside the oven. Preheating is necessary for red meats but not for white meats. Ideal for cooking thick food items, whole pieces such as roast pork, poultry, etc. Place the food to be grilled directly on the shelf centrally, at the middle level. Slide the drip tray under the shelf to collect the juices. Make sure that the food is not too close to the grill. Turn the food over halfway through cooking. |
| \(\overline{\mathbf{★}}\) | 230 | 50÷ MAX | Grill/spit element.This is used for roasting on the spit. |
| \(\overline{\mathbf{★}}\) | 220 | 50÷ MAX | Function PizzaThis function with hot air circulated in the oven ensure perfect result for dishes such as pizza or focaccia. |
| Cook light\(\overline{\mathbf{G}}\) | 190 | 50÷ MAX | The "COOKING CHIPS" you to cook in a healthier way, by reducing the amount of fat or oil required. Thanks to the use of the grill and fan combined with a pulsating cycle of air, it will retain the moisture content of the food, grilling the surface and using a shorter cooking time, without compromising on taste.It is particularly suitable for cooking meat, roasted vegetables and omelettes. The cycle of pulseair keeps the humidity inside the oven and the moisture content of the food, preserving thenutritional values and ensuring a rapid uniform cooking processTRY all your recipes and reduce the amount of dressing you usually use and experience thelightness of this new function! |
(a) on some models : function with "Vario Fan" is the exclusive system developed by Candy to optimize the cooking results, temperature management and damp management. The Vario Fan system is a self-activating system that changes automatically fan speed when a fan function is chosen: the fan functions are the one inside the outlined area on control panel.
Ingredients:
200g of courgettes
-1 red pepper
Ingredients:
6 eggs
10 courgette flowers
- 1 slice of boiled pumpkin
- 1 boiled potato
200 g of parmesan cheese
6 tablespoons of milk
200 g of potato
200 g of sweet potatoes
100 g of provolone cheese
- 20 g of breadcrumbs
- Cut the courgettes and peppers and dice the potatoes, boil for a few minutes on hob top. Cut and stir fry the other vegetables for 5 minutes in a pan with olive oil and paprika, salt and pepper.
Once the potatoes are boiled mash and add to the other vegetables and chopped provolone.
In the meantime, prepare a mixture of breadcrumbs and parmesan cheese, mix half of it into the vegetables.
Flour the muffin molds and fill to the brim, put the remaining of bread and cheese mixture on the top and add a little olive oil. Bake in the oven with the COOK LIGHT function at 180 degrees for 15-20 minutes, until they are beautifully golden in colour.
- Cut and boil 1 potato. Cut the pumpkin into slices and place on a baking sheet, put into the oven at 160 degrees for approximately 20 minutes. Once cooked, mash with a fork.
Beat the eggs and add the boiled potato and the crushed pumpkin, milk, parmesan cheese, turmeric, salt and pepper.
Mix all the ingredients together and add the courgette flowers, ensure that they are cleaned and cut into small pieces.
Pour the mixture into the tin and bake with the COOK LIGHT function in the oven preheated at 180 for 20 minutes.
5. TABLES OF COOKING TIMES
The overall suggested cooking times set out below are intended as a rough guide only. They may in fact vary according to the quality, the freshness, the size and the thickness of the food cooked and of course cooking time is also partly a matter of taste. Let the food stand for a few minutes before serving because the ingredients continue cooking after they have been removed from the oven.
HANDY TIP: Lower the temperature so as to avoid the surface of the food becoming hard and dry.
Shelf position
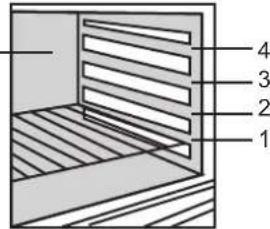
| Static electric oven | Electric fan oven | |
| Food | Quantity | Shelf | Time of cooking in minutes | Oven temperature | Shelf | Time of cooking in minutes | Oven temperature | Remarks |
| · Pasta |
| Lasagne | Kg 3,5 | 2 | 70 ÷ 75 | 220 | 2 | 60 ÷ 65 | 200 | Put the lasagne into an unheated oven |
| Cannelloni | Kg 1,8 | 2 | 50 ÷ 60 | 220 | 2 | 40 ÷ 50 | 200 | Put the cannelloni into an unheated oven |
| Oven baked pasta | Kg 2,5 | 2 | 55 ÷ 60 | 220 | 2 | 45 ÷ 50 | 200 | Put the oven baked pasta into an unheated oven |
| · Baking (not cakes) |
| Bread | Kg 1 di pasta | 2 | 35 10(pre-heating) | 200 | 2 | 30 ÷ 35 10(pre-heating) | 180 | Form the dough into a loaf and make a cross with a knife on top of the dough leave the dough to rise for at least 2 hours. Grease the baking tin and put the dough in the middle of it. |
| Pizza | Kg 1 | 1 | 25 ÷ 35 | 190 | 1 | 20 ÷ 25 | 190 | Warm the oven for 15 minutes and place the pizzas on the greased baking tray. Garnish them with tomatoes, mozzarella, ham, oil, salt and origano. |
| Pastry (frozen) vol au vents | n° 24 | 1 | 30 ÷ 35 | 220 | 2 | 25 ÷ 30 | 200 | Place 24 vol au vents in the oven and bake. |
| Focaccia (n° 4) | gr. 200 of dough each | 2 | 25 ÷ 30 | 200 | 2 | 20 ÷ 25 | 180 | Warm the oven for 15 minutes, grease the baking tray, season the 4 focaccia with oil and salt and leave them to rise at room temperature for at least 2 hours before put ting them in the oven. |
| · Meat |
| All meats can be roasted in shallow or deep roasting trays.It is advisable to cover the shallow trays to avoid splattering the sides of the oven with grease.The roasting times are the same whether the meat has been covered up or not. |
| Whole joint of beef | Kg 1 | 3 | 70 ÷ 80 | 220 | 3 | 50 ÷ 60 | 200 | Put the meat into a deep Pyrex dish and season with salt and pepper; turn the meat half way through cooking. |
| Joint of deboned | Kg 1 | 2 | 100 ÷ 110 | 220 | 2 | 80 ÷ 90 | 200 | Cook the meat in a covered Pyrex dish with herbs, spice, oil and butter. |
| Joint of deboned veal | Kg 1,3 | 1 | 90 ÷ 110 | 220 | 2 | 90 ÷ 100 | 200 | Cook as indicated above |
| Joint of fillet of beef | Kg 1 | 2 | 80 ÷ 90 | 220 | 2 | 80 ÷ 90 | 200 | Cook as indicated above. |
- TABLES OF COOKING TIMES
| Static electric oven | Electric fan oven | |
| Food | Quantity | Shelf | Time of cooking in minutes | Oven temperature | Shelf | Time of cooking in minutes | Oven temperature | Remarks |
| ·Rabbits and Poultry |
| Guinea fowl | Kg 1-1,3 | 2 | 60 + 80 | 220 | 2 | 60 + 70 | 200 | Place the guinea fowl in a deep Pyrex or pottery dish with very little oil and season with herbs and spices. |
| Chicken | Kg 1,5-1,7 | 2 | 110 + 120 | 220 | 2 | 100 + 110 | 200 | Follow the procedure for cooking the guinea fowl. |
| Rabbit pieces | Kg 1-1,2 | 2 | 55 + 65 | 220 | 2 | 50 + 60 | 200 | Put all the pieces of the same size in the glazed tray. Season with herbs and spices. Turn the pieces as and when required. |
| ·Cakes |
| Coconut cake baked in a tin | | 1 | 55 | 180 | 1 | 50 | 160 | Use a tin that is 22 cm deep. Pre-heat for 10 mins. |
| Sponge cake | | 1 | 55 | 175 | 1 | 40 + 45 | 160 | Use a tin that is 22 cm deep. Pre-heat for 10 mins. |
| Carrot cake baked in a tin | | 1 | 65 | 180 | 1 | 50 + 60 | 160 | Use a tin that is 22 cm deep. Pre-heat for 10 mins. |
| Apricot pie | 700 gr | 1 | 40 | 200 | 2 | 30 + 35 | 180 | Use a tin that is 22 cm deep. Pre-heat for 10 mins. |
| ·Vegetable |
| Fennel | 800 gr | 1 | 70 + 80 | 220 | 1 | 60 + 70 | 200 | Cut the fennel into four pieces, add butter, salt and potatoes if required and place in a Pyrex face up. Cover the dish |
| Courgettes | 800 gr | 1 | 70 | 220 | 1 | 60 + 70 | 200 | Slice the courgettes, place in a Pyrex dish and add butter and salt. |
| Potatoes | 800 gr | 2 | 60 + 65 | 220 | 2 | 60 + 65 | 200 | Cut the potatoes into equal parts and place in a Pyrex dish. Season with salt, origano and rosemary. Cook in oil. |
| Carrots | 800 gr | 1 | 80 + 85 | 220 | 1 | 70 + 80 | 200 | Slice the carrots, place in a Pyrex dish and cook. |
| ·Grilling |
| Place the food to be grilled underneath the infra-red grill. Warning: When the grill is on it takes on a bright red colour. Place the tray underneath the grill to collect juices and fat from the food being grilled. |
| Squares of bread for toasting | 4 pieces | 4 | 5 (5 to heat up grill) | Grill Grill | 4 | 5 (10 to heat up grill) | | Lay the bread on the grill tray. When one side of the bread has been toasted, turn over and toast the other side. Remember: keep the toast warm at the bottom of the oven until you are ready to serve it. |
| Toasted sandwiches | 4 | 3 | 10 (10 to heat up grill) | Grill Grill | 3 | 5/8 (10 to heat up grill) | | Lay the bread on the grill tray. When one side of the sandwich has been toasted, turn over and toast the other side. |
| Sausages | n°6 / Kg 0,9 | 4 | 25/30 (5 to heat up grill) | Grill Grill | 4 | 15/20 (10 to heat up grill) | | Cut the sausages in half and lay them face down on the grill. Half way through grilling turn them over. Every so often, check that they are being cooked equally all over. (If this is not happening, turn and reposition the ones being cooked either less or more than the others. |
| Ribs of beef | n°4 / Kg 1,5 | 4 | 25 (5 to heat up grill) | Grill Grill | 4 | 15/20 (10 to heat up grill) | | Make sure that the ribs of beef are exposed to the full effect on the main grill. |
| Chicken legs | n°4 / Kg 1,5 | 3 | 50/60 (5 to heat up grill) | Grill Grill | 3 | 50/60 (10 to heat up grill) | | Turn them over twice during grilling |
| ·Fish |
| Trout | 3 whole trout or / Kg 1 | 2 | 40 + 45 | 220 | 2 | 35 + 40 | 200 | Cover the trout with salt, oil and onions and cook in a Pyrex dish. |
| Salmon | 700 g 2,5 cm slice | 2 | 30 + 35 | 220 | 2 | 30 + 25 | 200 | Cook the salmon in an open Pyrex dish with salt, pepper and oil. |
| Sole | Kg 1 | 2 | 40 + 45 | 220 | 2 | 35 + 40 | 200 | Cook the sole with salt and a spoonful of oil. |
| Bream | 2 whole ones | 2 | 40 + 45 | 220 | 2 | 35 + 40 | 200 | Cook the bream in oil and salt in a covered dish. |
| ·Fruit |
| Whole apples | Kg 1 | 1 | 45 + 55 | 220 | 2 | 45 + 55 | 200 | Bake the fruit in an open Pyrex or earthen ware dish. Leave it to cool inside the oven. |
| Pears | Kg 1 | 1 | 45 + 55 | 220 | 2 | 45 + 55 | 200 | Follow procedure above. |
| Peaches | Kg 1 | 1 | 45 + 55 | 220 | 2 | 45 + 55 | 200 | Follow procedure above. |
1.4 INSTALLING THE OVEN IN ITS CABINET
2.7 CLEANING AND MAINTENANCE
SAFETY INSTRUCTIONS
- During cooking, moisture may condense inside the oven or on the door glass. This is normal. To reduce this effect, preheat the oven for 10-15 minutes after switching on the power, before placing food in the oven. In any case, the condensation disappears once the oven reaches the cooking temperature.
- Place the food in the oven instead of on the open tray.
- Do not leave food inside the oven for more than 15-20 minutes after cooking.
- WARNING: The accessible parts become hot during use. Be careful not to touch the hot parts.
- WARNING: The accessible parts may become hot when the appliance is in use. Keep children at a safe distance.
- WARNING: Make sure the appliance is switched off before replacing the bulb to avoid the risk of electric shock.
- WARNING: To avoid danger, due to inadvertent resetting of the thermal cut-out, the appliance must not be supplied through an external switching device, such as a timer, or connected to a circuit that is regularly switched on and off.
- Children under 8 years of age must be kept at a safe distance from the appliance unless they are constantly supervised. Do not let children play with the appliance.
- The appliance can be used by children aged 8 and above, and by persons with reduced physical, sensory or mental capabilities, or lack of experience and knowledge, provided they have been given supervision or instruction concerning use of the appliance in a safe way and understand the hazards involved.
- Cleaning and maintenance must not be carried out by children without supervision. Do not use abrasive or harsh materials or sharp metal scrapers to clean the oven door glass, as they can scratch the surface and shatter the glass. The oven must be switched off before removing any removable parts. After cleaning, reassemble according to the instructions.
- Use only the meat thermometer recommended for this oven. Do not use a cleaning spray to clean the appliance.
- The power supply cable is designed to be able to withstand the voltage, current, and load specified in the table and the contact for grounding. The cable must be suitable for the load, according to the label, and must be connected to the grounding contact that must work. The grounding conductor is yellow-green in color. This action must be performed only by a qualified specialist. In case of incompatibility between the contact and the cable of the device, contact a qualified electrician to replace the contact with a suitable one. The cable and the contact must comply with the applicable standards of the installation regulations. Connection to the power source can be made through the installation of a universal socket between the device and the power source, which can handle the maximum connected load and is in accordance with the applicable legislation. The yellow-green grounding cable must not be connected through the socket. The socket for the universal connection, used for the connection, must be easily accessible when the devices are installed.
- The connection of the connection can be achieved through the socket of the device or through the inclusion of a switch in the fixed wiring in accordance with the wiring rules.
- If the power supply cable is damaged, it must be replaced with a cable or special set provided by the manufacturer, or by contacting the customer service department. The type of power supply cable must be H05V2V2-F. This action must be performed only by a qualified specialist. The grounding conductor (yellow-green) must be approximately 10 mm longer than the other conductors. For repairs, contact the customer service department and request the use of original spare parts.
- Improper use of the device may endanger safety and void the warranty.
- The device must be cleaned only with a damp cloth. Prolonged exposure to electricity during the cooking phase may damage the installer. In this case, contact the customer service department.
- The device must not be installed behind a decorative door to avoid interruption.
When installing the hood indoors, make sure you follow the instructions above and the relevant part of the kitchen. The hood must be installed entirely in the kitchen. - WARNING: Do not spray the interior of the hood with aluminum foil or protective foil for single use from the commercial network. In case of contact with hot surfaces, the aluminum foil or other types of protection may melt and thus damage the enamel on the interior walls. - WARNING: Never switch on the hood without the grease filter. ATTENTION: Do not pour water into the hood during cooking or when the hood is hot. For the operation of the hood, the recommended frequencies require additional action/adjustment.
1. GENERAL SAFETY MEASURES
Before using our products, please read these instructions carefully. To get the best possible results from the device, it is important to follow this manual. We recommend that you keep this manual for installation and operation and refer to it.
When the device is in operation, some parts become very hot. Be careful not to touch these elements.
During the first use of the device, you may notice a slight odor. This is due to the heating elements for the first time. This is absolutely normal and there is no cause for concern. Let the device cool down and then clean it well. After that, it is ready for normal operation.
A device that is used for its intended purpose becomes very hot. Especially the area around the door of the device.
1.1 Declaration of Conformity
By affixing the CE mark, this device confirms compliance with all relevant European safety, health, and environmental requirements that apply to this device under the legislation.
After unpacking the device, make sure it was not damaged during transport. If you have any doubts, do not use it: contact a qualified person. Keep the packaging materials (plastic bags, polystyrene, nails, etc.) out of reach of children, as they are dangerous for them.
1.2 Safety instructions
The device is designed exclusively for its intended purpose, i.e., only for preparing food. Any other use of the device, for example for heating or drying, is prohibited.
- The manufacturer is not responsible for damages caused by improper use of the device. When using electrical appliances, you must always follow basic safety rules:
- Do not touch the cable, plug, or the device with wet hands. - Do not touch the device with wet hands or when standing on a wet floor.
- Do not use the device if you are barefoot.
- It is not recommended to use extension cords or multiple sockets unless they are suitable for the device's power rating.
- If the device is damaged or defective, disconnect it from the mains and do not use it.
If the cable is damaged, it must be replaced.
The cable must be replaced with a new one of the same type, H05VV-F or H05V2V2-F. The cable must be able to withstand the electrical current required by the unit. The replacement of the cable must be carried out by a qualified technician.
The grounding of the cable (yellow-green) must be 10 mm longer than the other cables. Use only approved service centers; if you are not sure, use only original spare parts. If the instructions are not followed, the manufacturer cannot guarantee the safety of the device.
Do not cover the device's walls with aluminum foil; this may lead to overheating or damage to the device.
1.3 Installation
Installation is the responsibility of the client. The manufacturer is not obliged to carry out this service.
The installation instructions must be followed by professionally qualified personnel. Incorrect installation may cause injury or damage to people, animals, or property. The manufacturer cannot be held responsible for these damages.
The device must be installed by qualified
personnel. The qualified installer must ensure that the connecting cable can withstand the current required for the operation of the device. The ON/OFF switch can be connected to the electrical grid. When connecting, consider the power consumption.
Important: During installation, route the connecting cable in such a way that it is not exposed to temperatures above 50°C at any point. The unit complies with the safety standards set by the regulatory authorities. The unit is safe to use only if it is grounded in accordance with the applicable safety regulations. It must be ensured that the device has been properly grounded.
The manufacturer may be held liable for damage to people, animals, or property caused by improper grounding of the unit. ATTENTION: The connection diagram is shown in the table (fig. on the last page).
The wiring and the wiring system must be able to handle the maximum electrical power required by the device. This is indicated in the technical data table. If you have any doubts, contact a qualified electrician.
1.7 EQUIPMENT FOR THE UNIT (DEPENDING ON THE MODEL)
It is necessary to properly prepare the equipment before first use of each of them. Read the instructions. Remove and dry them.
The tray can hold various foods.
It is especially good for grilling. Use them for this purpose.
The table is for baking. Always check the oven, make sure it is horizontal, because when the door is opened there is no risk of the contents spilling.
The table is for removing the trays that are placed on the rack. Use only with the grill, grill pans or Grill Assisted; remove it before using other programs.
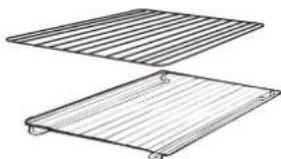
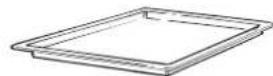
Never use the tray for collecting juices as a baking tray, because this could cause the oven to overflow and dirty the oven.
Accessories. To get the best results from the accessories, they must be used together with the "Oven" function.
Baking tray
It is for baking. Use it together with the rack. A handle is included for easier removal of the elements.
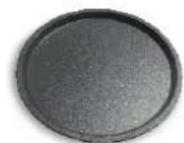
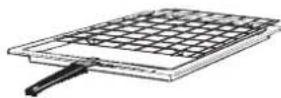
DO NOT LEAVE THE HANDLE IN THE OVEN!!
The side racks are placed on the sides of the oven cavity. Hold the metal racks firmly for removal.
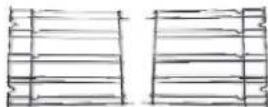
Cleaning and maintenance of the metal racks
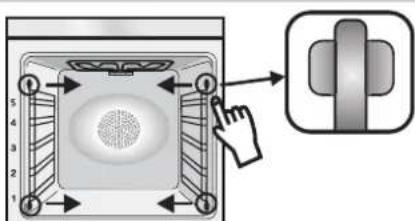
1. Remove the metal racks, following the arrows (pull upwards).
2. To clean the metal racks, place them in the dishwasher or use a damp cloth, and then make sure they are completely dry.
3. After cleaning, place the metal racks back in the reverse order.
2.1 Safety system for the racks
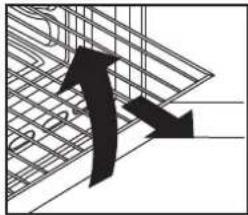
The oven is equipped with a new safety system for the racks. This allows you to remove the racks when checking the food, without the risk of the racks slipping or falling out of the oven. To remove the racks, pull them upwards.
2.2
The temperature allows the food to be cooked quickly. To prevent burning, place the rack on the fourth level, depending on the proportions of the food (see page 7).
Almost all dishes can be prepared on the grill. The exception is many pastries and rolled meat. When cooking meat and fish, you need to add a little oil before placing them on the grill.
2.3 U-COOK Models
The U-COOK ovens have electronic control of the fan speed, patented VARIOFAN. During cooking, this system automatically changes the fan speed (in multifunctional mode), to optimize the air flow and the internal temperature in the oven.

Each oven function. Soft
This allows control of the distribution and the weight and temperature. This reduces energy consumption by 50%, which guarantees that the food remains tender and with better taste. Recommended for baking and for slow cooking.

This reduces the preheating time: only 8 minutes to reach 200 degrees Celsius.

This allows determination of the intensity level of cooking on the grill, up to 50% more power compared to a traditional oven.
They are equipped with a new type of WIDE DOOR with a larger glass area, which allows better surface and thermal insulation.
2.4 Depending on the model

There is a lighting system that replaces the traditional 'hook'. 14 LED lights are integrated into the frame of the door. They produce bright light, which allows you to see the inside of the oven clearly.
Advantages:
The lighting system provides excellent illumination inside the oven, which is more complete compared to traditional hooks and allows you to see the food better.
-Bright lighting
Low noise energy consumption, 95% low noise from consumption
The device has an LED light of class 1M according to IEC 60825-1:1993 + A1: 1997 + A2: 2001 (equivalent to EN 60825-1
1994 + A1: 2002 + A2: 2001); maximum luminous power emitted λ459nm <150uW.
Do not look directly into the device.
2.5 Cooking time
For the recommended cooking time and temperature settings, see the tables on pages 87, 88. Follow them for normal use.
2.6 Self-cleaning with catalyst
The self-cleaning panels are optional and covered by the microporous coating are offered as additional equipment for all models. If they are mounted, the device must not be operated without them.
The fats that are splattered on the surface during cooking are absorbed by the microporous coating.
Recommended heating can block the pores and thus prevent self-cleaning. Self-cleaning can be restored by switching on the empty device at maximum temperature for about 10-20 minutes. Do not use abrasive sponges, sharp objects, granular cleaners or chemical products and preparations that could damage the catalyst.
When cooking fatty foods, it is advisable to use deeper containers and to place the tray for collecting fat.
IMPORTANT: All catalysts and filters at the time of purchase have a lifespan of about 300 hours. Therefore, they must be replaced after about 300 hours.
2.7 AQUACTIVA function
The Aquactiva function uses steam to help remove fatty food residues from the device.
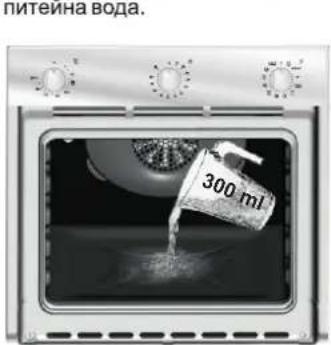
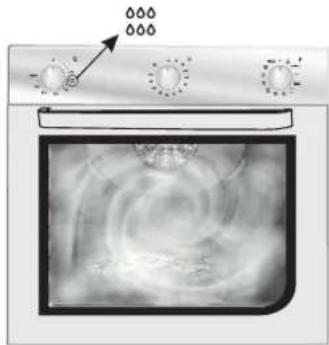
1. Pour 300 ml of water into the Aquactiva container at the bottom of the device. 2. Set the Static ( ) and Bottom ( ) heating functions. 3. Set the temperature to Aquactiva icon. 4. Let the program run for 30 minutes. 5. After 30 minutes, turn off the program and allow the device to cool down. 6. When the device is cool, wipe the internal surfaces of the device with a cloth.
Before use, read the instructions carefully. Care must be taken with all surfaces, as there is a risk of burns. Use distilled or demineralized water.
2.8 Cleaning and maintenance
Clean the non-stick surface with a soft sponge and warm water or a mild detergent. Never use abrasive cleaners or scouring pads, which can damage the surface of the appliance. It is very important to clean the appliance after each use. Grease stains are removed from the surface of the appliance during cooking. The residue, when the appliance is used with grease, can cause unpleasant odors and may even affect the cooking. Use warm water and detergent for cleaning; rinse thoroughly.
To make this tedious work easier, all models can be equipped with self-cleaning catalytic panels: they are supplied as accessories (see the section on self-cleaning catalytic panels).
Use only mild abrasive cleaners on metal surfaces, such as Brillo pads, suitable for stainless steel grills.
The glass surfaces should be cleaned when they are cool. Damaged glass is not covered by the warranty. To replace the interior lighting, remove the cover and unscrew the bulb. Replace with a halogen bulb, which can withstand very high temperatures.
2.9 Service center
Before contacting the Service Centre
If the appliance does not work, we recommend:
check that the appliance is properly plugged into the socket.
If the cause of the malfunction cannot be determined:
disconnect the appliance from the electrical supply, do not disassemble the appliance and contact an authorized service center.
Before calling for service, do not forget to note the serial number or model number on the data plate (see figure on the last page). The appliance is supplied with a warranty certificate, which guarantees that it will be repaired free of charge by the Service Center.
3. TIMER
3.1 Setting the Timer
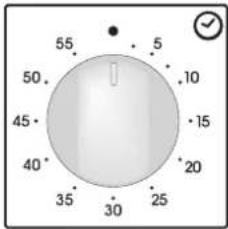
Set the required cooking time, then press the button to start. When the time has elapsed, the appliance will switch off automatically.
3.2 Using the Timer for Cooking
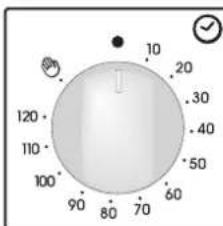
This control allows you to set the desired cooking time (max. 120 min.). The appliance switches off automatically when the set time has elapsed.
The timer has a memory function that recalls the last set time automatically.
For normal use of the oven, set the timer to the desired position.
To set the timer, make sure it is not in the off position.
3.3 Setting the Cooking Time

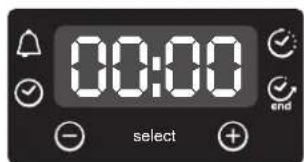
WARNING: The first operation to perform after the oven has been installed and before preheating is to set the correct time. This is
done as follows:
Press the central button
Release all buttons
WARNING: The oven will only work if the clock is set.
3.4 Using the Electronic Programmer
| Функция | Кakда akтувирамe | Кakда Изк nullоче | Кakbo прави | За кakBO ce ИзползBA |
| Зakлочао | •Функцията "Зakлочаhe" са Akтувсяра като 3адьржтоpe 6byTON. Set (+) заим-малко 5секунд. OT тоз морентНатать BCNUCKI дугфункции са зakлочenvи и на диспя се залоче за мига STOPи релеваритelно зададени Вөрeme на песецкүлл. | •Функцията "Зakлочаhe" се Deakтувсяра като 3адьржтоpe 6byTON Set (+) заим-малко 5секунд. OT тоз морентНатать BCNUCKI phunckции могатда 6ыdatи знбароти OTOBO. | | |
| Таймер | •Hathuschete цentraлия 6byTON 1 nbT•:"-"+"Hathuschete 6byTON 3a за Изберete Вөрeme•OCBOбODEтЕ BCNUCKI 6byTONI | •Korato 3adadehoto Вөрeme nizteч, се akтувсяра 38ybowCnghal (taşи оларma се спerte OT само себе си, обаче можеда се спerte Hezababno c hatnckanee Ha 6byTON) SELECT.Да се спerte Hezababno c hatnckanee Ha 6byTON) SELECT. | •Аларma в края на Вөремето•По Вөрeme на павOTа се пokedуа ce пokeda BA OCT. Вөрeme | •ПозвOLTЯда ИзползВATEфунэда КATO anapmehЧасовнIC (при ВК nullочаи ИЗК nullочаи Фурна). |
| Вөрeme 3a rotBEHe | •Hathuschete цentraлия 6byTON 2 nbT.•Hathuschete 6byTON -"" Или +≫3a за ИзберeteiprodьлжITEJIHCTO•OCBOбODEтЕ BCNUCKI 6byTONI•Изберeteфункция сбс celenkortopa | •Hathuschete Н�ков 6byTON3a за спerte синана.Hathuscheteцentraлия 6byTON 3a за сырнete do quacobnka. | •ПозвOLTЯда 3adadehete Вөрето 3a rotbehe 3aИзбарота рeucentа•3a за поверпite OCTabauцotov Вөрeme hatnckete SELECT 2 nbT.3a ромяна на Зададенotov Вөрeme hatnckete SELECT and -""+""6byTONi. | •П ри Источаны на Вөретофунэда се Изк nullочи АтоматчнIO.AкоInska teда спerte rotbehteto lo-paho 3abpertete celenkortopa Na 0,лп зададete Вөрето Na 0:00 (SELECT n-""+""6byTONI) |
| Край на rotBEHeTo end | •Hathuschete цentraлия 6byTON 3 nbT.•Hathuschete 6byTON -""+”, за заадete Вөрето, в КОЕТУЖЕWADEТЕФунэда, за сп�лLOUH•OCBOбODEтЕ BCNUCKI 6byTONI•ЗадаileФункцияда 3a rotBEHe c celenkortopa 3a Избop | •В зададенotо Вөрeme,фурнatable се сизлочи.3a за Изк nullочite рынфунота поставete сelenkortopa B поцию O. | •ПозвOLTЯда 3adadehete края Na Вөрето 3a rotbehe.3a за поверпiteпrelteno 3adadhenotov Вөрeme Hatnckete•целтагиня 6byTON 3пытпam Na 3a ромяна Hab'troйкITE SELECT + "-"+"+ | •Таши phункция obshknobevho се ИзползBA c phункцият"rotbehe".Haprimер, по лугшtenу Trябва дбende п���евно в подьхенину Na 45 м�ну и Trябва д e roto BOdo 12:30 уca, trябва до 45 mИну Na края Na Вөрето 3a rotbehe do 12:30 уca.B края Na Вөрето 3a rotbehe,Фурнatura се сизлочи abTomatчнIO 38ybowBA anapma се 3BbHI.N.TomeBERHMe ue 9ece cemapmura aemomamuho e 11:45 (12:30 mUNyc 45 mUnyu) u se npodbynxdu npdebarumenho zadadehomo epeme 3a края Na zombehe ,koamofурнama сe zuK nullotu aemomamuquho. BHIMAHNE.A ко зададete " края на rotbehto" be3 da 3adadete краянчac, rotbehtero 3azonvba BeDHara. |
4. Operating Instructions
| Селектор
н.
функции | Настойки на
temпоратура
( по мodySpecа
селектор
пограмато
TYPE A) | Термостат
селектор | Фунникции | |
| | | В缕учы овьтелениTo hypharata.
Това size aktenburpa AVTOMATINHIO BENTILATOPA 3a oxlaxkdahe (само р�и мodySpeci, кото го IMAT) | |
| 20% | | | Размразявае
Кorato Изберete таши Фуншья вентilatoropa улбдуха okoko замраендаха xphaн
Таши чу размразява 3a Нжолю минутб дд симону сьстава на пotем.
S Printer | |
| Sprinter | MAX | MAX | С顺序гри
Таши Фуншья прави xphaнatable no-xpynkab.Харазковедура ce c 50% no-roлма мошноct ot
stандартугий г pine. | |
| * | 220 | 50÷MAX | Натуална ковекцiers
Изтол�ьат се дolyен и ropen harpebatelii. Стандарта Форma на лесен. Идевална за
песене на месо , песене на бискутп. Прави xphaнatable Вкуся и xурлakba | |
| * | 210 | 50÷MAX | Г罗ту've на вентilatorop
Изтол�ьат се дolyen и ropen harpebatelii заедно се вentilatoropa, кото зуршья вьдуха
Бы tradeь bьфунatable. Рожьы вьдуха Дулдуха и ралу.
Тогатуната habлиа вхра на no-
добре и вруменatinga за петонлдухе и ratvebere се habлиа вьдуха.
Можete ддув монлдуха ддухуся на ratvebera и мирзмите
небу?
He cse smebat. Може ддув поочу.
Когатуrotье поочу ot 1 ястne. | |
| Soft
cook | 200 | 50÷MAX | Меку rotвени(a)
Фуншья захлб и саджарскп Издени. Habаленatura ckocost на вентilatoropa сьддув
Идевалны улбов�а за rotveberetno на tosni тлдхуся, кото Трбьда в сдатан ratvebera и мирзмите
Консistentеля дokato се raty в сьду�ув раме ддув?
Консistentеля дokato се raty в сьду�ув раме ддув.
Консistentеля дokato се raty в сьду�ув раме ддув.
Консistentеля дokato се raty в сьду�ув раме ддув.
Консistentеля dokato се raty в сьду�ув раме ддув.
Консistentеля dokato се raty в сьду�ув раме ддув.
Консistentеля dokato се raty в сьду�ув раме ддув.
Консistentеля dokato се raty в сьду�ув рalam.
Консistentеля dokato се raty в сьду�ув рalam.
Консistentеля dokato се raty в сьду�ув рalam.
Консistentеля dokato се raty в сьду�ув рalam.
Консistentеля dokato се raty в сьду�ув рalam.
Консistentеля dodoly. | |
| 210 | 50÷MAX | Вentilatorop и дolyen harpebatel
Идевална за дулкathусяrtя (naiobe, cyfleta) | |
| 230 | 50÷MAX | Грип
Изтол�ьат се салу rapгайнага harpebatel и можete д досточite tempepatурatable. 5 мін
празьар'tелно harpebatelca са hyжни за загрете ддур;
Бы tradeь меса Трьба дд сьдху?
Тогатуната habлиа за raty вьдуха вььфун?
Тогатуната habлиа за raty вьдуха вььфун;
Тогатуната habлиа за raty вьдуха вььфун;
Тогатуната habлиа за raty вьдуха вььфун;
Тогатуната habлиа за raty вьдуха вььфун;
Тогатуната habлиа за raty вьдуха вьбду;
Тогатуната habлиа за raty вьдуха вььфун;
Тогатуната habлиа за raty вьдуха вььфун;
Тогатуната habлиа за raty вьдуха вььфун;
Тогатуната habлиа за raty вьдуха вль;
Тогатуната habлиа за raty вьдуха вььфун;
Тогатуната habлиа за raty вьдуха вььфун;
Тогатуната habлиа за raty вьдуха вььфун;
Тогатуната habлиа за raty вьдуха вв;
Тогатуната habлиа за raty вьдуха вььфун;
Тогатуната habлиа за raty вьдуха вььфун;
Тогатуната habлиа за raty вьдуха вььфун;
Тогатуната habлиа за raty вьдуха в条件下
Тогатуната habлиа за raty вьдуха в条件下
Тогатуната habлиа за raty вьдуха в条件下
Тогатуната habлиа за raty вьдуха в条件下
Тогатуната habлиа за raty вьдуха в条件下
Тогатуната habлиа за Raty Vryd
Тогатуната habлиа за raty вьдуха в条件下
Тогатуната habлиа за raty вьдуха в条件下
Тогатуната habлиа за raty вьдуха в条件下
Тогатуната habлиа за raty вьдуха в条件下
Тогатуната habлиа去过 raty вьдуха в条件下
Тогатуната habлиа去过 raty вьдуха в条件下
Тогатуната habлиа去过 raty вьдуха в条件下
Тогатуната habлиа去过 raty вьдуха в条件下
Тогатуната habлиа去过 raty вьдуха в条件下
Trafalgar | Cugnepng
Фуншья захлб и саджарскп Издени.
Идевална захлб.
Идевална захлб.
Идевална захлб.
Идевална захлб.
Идевална захлб.
Идевална захлб.
Идевална захлб.
Идевална захлб.
Идевална захлб.
Идевална захлб.
Идевална захль.
Идевална захль.
Идевална захль.
Идевална захль.
Идевална захль.
Идевална захль.
Идевална захль.
Идевална захль.
Идевална захль.
Идевална захль.
Идевална захлль.
Идевална захль.
Идевална захль.
Идевална захль.
Идевална захль.
Идевална захль.
Идевална захль.
Идевална захль.
Идевална захль.
Идевална захль.
Идевална захл�.
Идевална захль.
Идевална захль.
Идевална захль.
Идевална захль.
Идевална захль.
Идевална захль.
Идевална захль.
Идевална захль.
Идевална захль.
Идевална захлб.
Идевална захль.
Идевална захль.
Идевална захль.
Идевална захль.
Идевална захль.
Идевална захль.
Идевална захль.
Идевална захль.
Идевална захлль.
Идевална захлль.
Идевална захль.
Идевална захль.
Идевална захль.
Идевална захль.
Идевална захль.
Идевална захль.
Идевална захль.
Идевална захль.
Идевална захлль.
Идевална захл専.
Идевална захль.
Идевална захль.
Идевална захль.
Идевална захль.
Идевална захль.
Идевална захль.
Идевална захль.
Идевална захль.
Идевална захль.
Идевална захл専.
Идевална захль.
Идевална захль.
Идевална захль.
Идевална захль.
Идевална захль.
Идевална захль.
Идевална захль.
Идевална захль.
Идевална захلь.
Идевална захль.
Идевална захль.
Идевална захль.
Идевална захль.
Идевална захль.
Идевална захль.
Идевална захль.
Идевална захль.
Идевална захль.
Идевална заху?
Идевална захль.
Идевална захль.
Идевална захль.
Идевална захль.
Идевална захль.
Идевална захль.
Идевална захль.
Идевална захль.
Идевална захль.
Идевална захль
Идевална захль.
Идевална захль.
Идевална захль.
Идевална захль.
Идевална захль.
Идевална захль.
Идевална захль.
Идевална захль.
Идевална захль.
Идевална захль;
Идевална захль.
Идевална захль.
Идевална захль.
Идевална захль.
Идевална захль.
Идевална захль.
Идевална захль.
Идевална захль.
Идевална захль.
Идевална захль:
Идевална захль.
Идевална захль.
Идевална захль.
Идевална захль.
Идевална захль.
Идевална захль.
Идевална захль.
Идевална захль.
Идевална захль.
Идевална захль。
Идевална захль.
Идевална захль.
Идевална захль.
Идевална захль.
Идевална захль.
Идевална захль.
Идевална захль.
Идевална захль.
Идевална захль.
Идевална захль; |
(a) The VARIO FAN system is developed by Candy to optimize the result of cooking. The VARIO FAN system activates itself and automatically adjusts the fan speed when you select a specific function: the fan functions are in a defined control field.
* Tested in accordance with EN 60350-1 with energy consumption declaration and energy class.
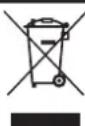
This device is marked in accordance with European Directive 2012/19/EC for the disposal of waste electrical and electronic equipment (WEEE). WEEE contains both hazardous substances (which can have a negative impact on the environment) and basic components (which can be recycled). It is important that WEEE is handled in a specific way for proper disposal and to ensure that all materials are recycled and recovered.
Individual users can play an important role, ensuring that WEEE becomes a problem for the environment; it is important to follow
- WEEE must not be treated as household waste.
WEEE must be handed over to the appropriate collection points, managed by the municipality or registered companies. In many countries, when you buy a new appliance, the old one can be returned to the retailer free of charge on a one-to-one basis, as long as the equipment is of the same type and has the same functions as the supplied equipment.
ENERGY CONNECTION AND ENVIRONMENTAL PROTECTION
RECIPE
Products:
·200g potatoes -200g carrots -200g onions
1 red pepper
1 tomato
100g milk cream
Instructions
1 onion, 50 g smoked cheese, 20 g grated cheese
Products:
· 10 pumpkin or zucchini flowers, 1 boiled potato
- 1 boiled egg
200 g grated cheese
turmeric
salt
milk
Cut the zucchini and potatoes into cubes and boil them for about 10 minutes. Then add the other vegetables and cook for 5 more minutes, then drain.
When the potatoes are ready, add the spices, salt, and the grated cheese, and stir.
Meanwhile, prepare the mixture of flour and cheese, adding the stuffing to the vegetables.
Roll out the dough for the pastries, fill them, and place the remaining flour and cheese mixture on top. Bake in a preheated oven at 180°C for 15-20 minutes until golden brown.
Mash the boiled pumpkin. Mix the flour and add the boiled potato, mashed pumpkin, milk, cheese, turmeric, salt, and pepper. Mix all the vegetables well and add the colors of the pumpkin, which should be cut into small pieces. Pour the mixture into a pan and bake in the oven for 20 minutes at 180°C.
5. Baking time table
The suggested baking times are approximate and intended for a conventional oven. They may actually vary depending on the quality, condition, size, and type of the baked food, and the baking time is often a matter of taste.
Set the temperature to prevent the surface of the food from drying out and burning.
Cooking times table
| Стаоча сеньемпеска Фурна | Фурна с вентлиатор | |
| Храна | Колочьо | Ниво | Вре'me
В мину'tи | Фурна
temпep
atура | Рафт | Вре'me
В мину'tи | Фурна
temпep
atура | Белекки: |
| • Пачта |
| Лазаня | Kg 3,5 | 2 | 70 ÷ 75 | 220 | 2 | 60 ÷ 65 | 200 | Поставе таразся в неоталлених phурна |
| Канейони | Kg 1,8 | 2 | 50 ÷ 60 | 220 | 2 | 40 ÷ 50 | 200 | Поставе в неоталлених phурна |
| Поста на Фурна | Kg 2,5 | 2 | 55 ÷ 60 | 220 | 2 | 45 ÷ 50 | 200 | Пostаве в неоталлених phурна |
| • Пechене |
| Хлб | Kg 1
di pasta | 2 | 35
10
(загванe) | 200 | 2 | 30 ÷ 35
10
(загванe) | 180 | Офорmetе ТECTOTО на руло и
надраве Кръст с пох в гогнату му
час, осtabе ТECTOTO на BTACA за
посе 2 ча. Намашиные сда за
пechене и поставе ТECTOTO в
срудатa |
| Пица | Kg 1 | 1 | 25 ÷ 35 | 190 | 1 | 25 ÷ 35 | 190 | Затал�е phурны за 15 минуtenи
поставе пицату на Намашиные вара
забале, уунka, масло, сол |
| Замразецни
слади | n° 24 | 1 | 30 ÷ 35 | 220 | 2 | 25 ÷ 30 | 200 | Поставе 24 vol au OTвори Вьв
фурна и пechete. |
| Фокача
(n° 4) | gr. 200 | 2 | 25 ÷ 30 | 200 | 2 | 20 ÷ 25 | 180 | Затал�е phурны за 15 мин,
сюжete мадшина в tabату. |
| • Месо |
| Всучке меса могат да се пескат в плітій піліні ділібікі тави за пechе.
Преторьштелно да се пokрват плітій тави, за да се пізberгіе разпліckванeto на сtrпavenу на phурна с
Мазими. Временata за пechе са edии сьши несависимо дали месоу e білі по пokр'tо піліну. |
| Говекdo | Kg 1 | 3 | 70 ÷ 80 | 220 | 3 | 50 ÷ 60 | 200 | Сюжete месото в дільбок сьд ругх и
поставе тсь соли черен пірп;
Оььрпete на п��овинату врeme |
| Оьзковские | Kg 1 | 2 | 100 ÷ 110 | 220 | 2 | 80 ÷ 90 | 200 | Говоте месото в пokр'tсь ругх с
біліки, падравки, масло |
| Оьзковские
Телешко | Kg 1,3 | 1 | 90 ÷ 110 | 220 | 2 | 90 ÷ 100 | 200 | Говоте, както в посочу по-人寿 |
| Фице ot Телешко | Kg 1 | 2 | 80 ÷ 90 | 220 | 2 | 80 ÷ 90 | 200 | Говоте, както в посочу по-人寿 |
5. Cooking times table
| Сточна[elektropeckaфура] | Фура c BEHTMILATOP | Белеки: | |
| Храиа | Колочьво | Нимо | Вразе
В минут | Фура
Temпер
atypa | Рафт | Вразе
В минут | Фура
Temпер
atypa | |
| •Зашии и птици | |
| Токачka | Kg 1-1,3 | 2 | 60+80 | 220 | 2 | 60+70 | 200 | Посставе токатки дълбoga Руся
Или Керампka чиня с много малко
масло | |
| Пиile | Kg 1,5-1,7 | 2 | 110+120 | 220 | 2 | 100+110 | 200 | Спелдайе поочадурата за
готеве на тохачka. | |
| Заек | Kg 1-1,2 | 2 | 55+65 | 220 | 2 | 50+60 | 200 | Посставе вщдахни пароча от edinii
сьц рasmер в осткени tabа.
Оььшете пароча и когат e
небхcodим. | |
| •Toptri | |
| КokocobataToporta | | 1 | 55 | 180 | 1 | 50 | 160 | Иллорstаве КУТЯ, КУТЯ e 22 сьлбoga.
Прedingentno 3аграява за 10 минут. | |
| Пандшпан | | 1 | 55 | 175 | 1 | 40+45 | 160 | Иллорstаве КУТЯ, КУТЯ e 22 сьлбoga.
Прedingentno 3аграява за 10 минут. | |
| МорковедаToporta | | 1 | 65 | 180 | 1 | 50+60 | 160 | Иллорstаве КУТЯ, КУТЯ e 22 сьлбoga.
Прedingentno 3аграява за 10 минут. | |
| Пай кайся | 700 gr | 1 | 40 | 200 | 2 | 30+35 | 180 | Иллорstаве КУТЯ, КУТЯ e 22 сьлбoga.
Прedingentno 3аграява за 10 минут. | |
| •Зеленчци | |
| Кольр | 800 gr | 1 | 70+80 | 220 | 1 | 60+70 | 200 | Наржete кочьра на пароча,
добavenе масло, соли karpoфи, akо
e Небхcodим, и поставе с пице
нагор. Покриte сьда. | |
| Тиквшик | 800 gr | 1 | 70 | 220 | 1 | 60+70 | 200 | Наржete Тиг�ч阴道е поставе в
ЧИНИЕ Руters и поставе масло на сол. | |
| Картофи | 800 gr | 2 | 60+65 | 220 | 2 | 60+65 | 200 | Наржete karpoфide на дурави
чади поставе в чИНИЕ Руters.
Покловете сьс сол, origano и
posмар,在 Готеве в масло. | |
| Моркови | 800 gr | 1 | 80+85 | 220 | 1 | 70+80 | 200 | Наржete морковITE, поставе в
ЧИНИЕ Руters | |
| •Плodove | |
| Ясылій се lei | Kg 1 | 1 | 45+55 | 220 | 2 | 45+55 | 200 | Пechete плodove в Edина OTВОЕРа Руters
ЧИНИЕ. Оставе сд д устени вьв Фурнatable. | |
| Круши | Kg 1 | 1 | 45+55 | 220 | 2 | 45+55 | 200 | Спелдайе поочадурата по-rote. | |
| Пpacokobov | Kg 1 | 1 | 45+55 | 220 | 2 | 45+55 | 200 | Спелдайе поочадурата по-rote. | |
| •Гурin | |
| Посставе xханата дь sbde на скара по indифрачeredьг ргл. П佩дунpresьдени: Korato skapara e bbypxу Hero prindobiba ярко червец BRT.
Посставе tabаю pod stkapara за sbб�ране на сокови мазанни OTханата. | |
| Парочахлбза Тостер | 4 napчета | 4 | (5 заграване
наб ригILA) | Grill | 4 | (10 заграване
наб ригILA) | Grill | Посставе xхлб на скара. Korato
еднастара на сизб e песена,
обмене и песене о дугата сиза. | |
| Сандυчini | 4 | 3 | 10
(10 zаграванe
наб ригILA) | Grill | 3 | 5/8
(10 zаграванe
наб ригILA) | Grill | Посставе xхлб на скара. Korato
еднастара на сизы e песена,
обмене и песене о дугата сиза. | |
| Салam | n°6 / Kg 0,9 | 4 | 25/30
(5 заграванe
наб ригILA) | Grill | 4 | 15/20
(10 zаграванe
наб ригILA) | Grill | Наржete konьбачite налловини и п
сожжete на скара. И постови на
погаме тьлбени.
погаме тьлбени.
погаме тьлбени.
погаме тьлбени.
погаме тьлбени.
погаме тьлбени.
погаме тьлбени.
погаме тьлбени.
погаме тьлбени.
погаме тьлбени.
погаме тьлбени. | |
| Ребра | n°4 / Kg 1,5 | 4 | 25 (5 zаграв-
bahe на ригILA) | Grill | 4 | 15/20 (10 zаграв-
bahe на ригILA) | Grill | Уberete сe, ч repbа对接а на поьждото са
иллорожени на поьждото са
иллорожени на поьждото
погаме тьлбени.
погаме тьлбени.
погаме тьлбени.
погаме тьлбени.
погаме тьлбени.
погаме тьлбени.
погаме тьлбени.
погаме тьлбени.
погаме тьлбени.
погаме тьлбiveness.
погаме тьлбiveness.
погаме тьлбiveness.
погаме тьлбiveness.
погаме тьлбiveness.
погаме тьлбiveness.
погаме тьлбiveness.
погаме тьлбiveness.
погаме тьлбiveness.
погаме тьлбiveness.
погаме тьлб�
погаме тьлб�
погаме тьлб�
погаме тьлб�
погаме тьлб�
погаме тьлб�
погаме тьлб�
погаме тьлб�
погаме тьлб�
погаме тьлб�
погаме тьлб� | |
| Пиileшki Крака | n°4 / Kg 1,5 | 3 | 50/60 (10 zаграв-
bahe на ригILA) | Grill | 3 | 50/60 (10 zаграв-
bahe на ригILA) | Grill | Оььшетe ть дь ть по Враиме на
пөүш:
пөүш.
пөүш.
пөүш.
пөүш.
пөүш.
пөүш.
пөүш.
пөүш.
пөүш.
пөүш.
пөүш.
пөүш.
пөүш.
пөүш.
пөүш.
пөүш.
пөүш.
пөүш.
пөүш.
пөүш.
пөүш
пөүш.
пөүш
пөүш
пөүш
пөүш
пөүш
пөүш
пөүш
пөүш
пөүш
пөүш
пөүш
пөүш
пөүш
пөүш
пөүш
пөүш
пөүш
пөүш
пөүш
пөүш
пөүш | |
| Риба | |
| пьстрва | 3 ceihi
иліа 1 кг | 2 | 40+45 | 220 | 2 | 35+40 | 200 | Покрініе пьстрва сьс сол, масло
и рухи варete в чи�и Руters. | |
| сьомра | 700 g
2,5 cm парve | 2 | 30+35 | 220 | 2 | 30+25 | 200 | Готьгетсьмогата в OTворен сьд
Pyretсхсс сол, черпим р马上л.
Pyretсхсс сол, черпим р马上л.
масло. | |
| морсаньк | 1 кг | 2 | 40+45 | 220 | 2 | 35+40 | 200 | Готьгетсьд
сьд
сьд
сьд
сьд
сьд
сьд
сьд
сьд
сьд
сьд
сьд
сьд
сьд
сьд
сьд
сьд
сьд
сьд
сьд
сьд
сьд
сьд
сьд
сьд
сьд | |
| Цпuya | 2 ceihi | 2 | 40+45 | 220 | 2 | 35+40 | 200 | Гotьгетсьмогата сьс сол,
mасло
и рухи варete в чи�и Руters. | |
| INSTALLATION | EN | INSTALACJA | PL | INSTALLATION DU FOUR FR | INSTALLAZIONE | IT |
| INSTALLACION | ES | INSTALACE | CZ | INSTALAÇÃO PT | INSTALLATION | DE |
| INSTALLATIE | NL | VGRADNJA PEČICE SL | | MOHTAX BΓ | | |
22 mm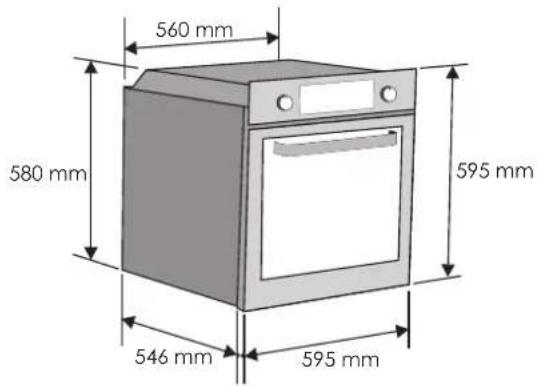
If the furniture is equipped with a bottom at the back part, provide an opening for the power supply cable.
If the mounting of the plinth does not allow air circulation, to obtain the maximum performance of the oven it is necessary to create an opening of 500x10 mm or the same surface in 5,000 mm².
If the installation of the base does not allow air circulation, to achieve maximum oven performance, create an opening of 500 x 10 mm or an equivalent area of 5,000 mm². If the base installation does not allow air circulation, create an opening with dimensions 500 x 10 mm or an equivalent area (5,000 mm²) to ensure the best oven performance. If the base installation does not allow air circulation, to achieve maximum oven performance, create an opening of 500 x 100 mm or an equivalent area of 5,000 mm².
GB If the oven does not have a cooling fan, create an opening 460 mm x 15 mm. FR Si le four n'a pas de ventilateur de refroidissement, créer une ouverture 460 mm x 15 mm. IT Se il forno non dispone di una ventola di raffreddamento, lasciare uno spazio 460 mm x 15 mm. ES Si el horno no tiene ventilador de refrigeración, practique una abertura de 460 mm x 15 mm. PL Jeśli piekarnik nie posiada wentylatora chłodzącego, należy wykonać otwór 460 mm x 15 mm. PT Se o forno não estiver equipado com uma ventoinha de arrefecimento, faça uma abertura de 460 mm x 15 mm. DE Schaffen Sie eine Öffnung, wenn der Ofen über keinen Lüfter verfügt: 460 mm x 15 mm. NL Maak een opening als de oven geen koelventilator heeft: 460 mm x 15 mm. CZ Pokud nemá trouba chladicí ventilátor, vytvořte otvor 460 mm x 15 mm. SL Če pečica nima hladilnega ventilatorja, napravite ustrezno odprtino 460 mm x 15 mm. BG Ако фурната няма вентилатор за охлаждане, направете отвор 460 mm x 15 mm.
Aperture/Opening/Öffnung/Odprtina/Ouverture/Abertura/Otwór/Otvor 560 mm x 45 mm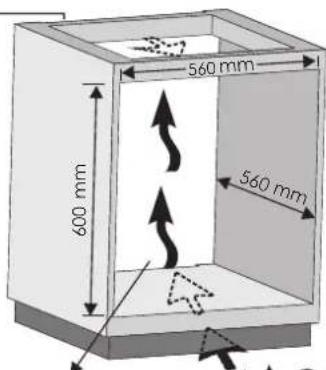
The manufacturer will not be responsible for any inaccuracy resulting from printing or transcript errors contained in this brochure. We reserve the right to carry out modifications to products as required, including the interests of consumption, without prejudice to the characteristics relating to safety or function.
The manufacturer will not be responsible for any inaccuracy resulting from printing or transcript errors contained in this brochure. We reserve the right to carry out modifications to products as required, including the interests of consumption, without prejudice to the characteristics relating to safety or function.
The manufacturer is not responsible for any inaccuracies or errors that may arise during the printing of these instructions. The manufacturer reserves the right to make changes to its products as deemed necessary, without affecting the safety or basic functions of the device.