
ME686827 - Meat Grinder MOULINEX - Free user manual and instructions
Find the device manual for free ME686827 MOULINEX in PDF.
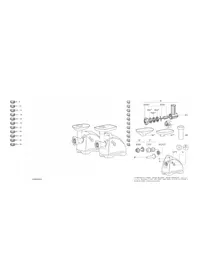



| Brand | Moulinex |
| Model | ME686827 |
| Product Type | Electric Meat Grinder |
| Included Accessories | Grinding plates (small, medium, large holes), knife, tray, pusher, sausage, biscuit, kebbe attachments, vegetable cutter (drums and cones), coulis attachment |
| Main Functions | Grinding, making sausages, biscuits, kebbe, vegetable cutting, coulis and juice |
| Power | 500 W (estimated) |
| Housing Material | Plastic and aluminium (depending on parts) |
| Reverse Button | Yes, to clear jams |
| On/Off Button | Yes, positions 0 and I |
| Head Unlocking | Release button |
| Storage Cover | Yes, for accessories |
| Cleaning | Wash accessories in soapy water, dry immediately; oil grinding plate and knife |
| Safety | Safety instructions booklet included (LS-123456) |
| Weight | 4 kg (estimated) |
| Dimensions (L x W x H) | 30 x 20 x 30 cm (estimated) |
| Power Supply | 220-240 V, 50/60 Hz (estimated) |
Frequently Asked Questions - ME686827 MOULINEX
User questions about ME686827 MOULINEX
0 question about this device. Answer the ones you know or ask your own.
Ask a new question about this device
Download the instructions for your Meat Grinder in PDF format for free! Find your manual ME686827 - MOULINEX and take your electronic device back in hand. On this page are published all the documents necessary for the use of your device. ME686827 by MOULINEX.
USER MANUAL ME686827 MOULINEX
RUS 6-8 UK 9-11 KK 12-14 AR 17-15 FAP 20-18 EN 21-23 Fig. 24-26 E5 27-29 PS 30-32 13-35 EL 36-38
RU UK KK AR FA EN FR ES PT IT FL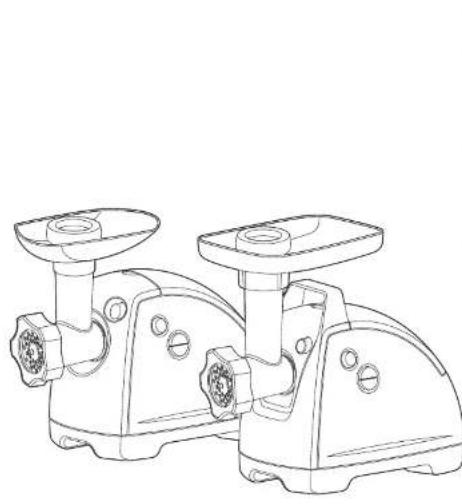
A4 Grid (depending on model)
A4a Grid with small holes (for very fine grinding) A4b Grid with medium holes (for fine grinding) A4c Grid with large holes (for coarse grinding)
A5 Additional attachment A6 Mixing attachment A7 Whisk attachment A8 Pusher
B Accessories for sausage (depending on model)
B1 Centering ring
C Attachment for baking (depending on model)
C1 Support C2 Shape C3 Centering ring
D Accessories for kebbe (depending on model)
D1 Sector tip D2 Blade
E Feed block F Reverse button (for instant reverse) G On/Off button H Unlocking button for the upper part of the meat grinder Accessory storage compartment
J Handle (depending on model)
K Cutting attachment (depending on model)
K1 Disc for cookies / pastries K2 Pusher K3 Attachments (depending on model)
K3a Nozzle for cutting into slices K3b Nozzle for large pressure K3c Nozzle for fine pressure K3d Nozzle for pressure spray K3e Nozzle for changing diameter
L Cutting (depending on model)
L1 Cone-shaped nozzles / horn L2 Pusher L3 Cone-shaped nozzles (depending on model)
L3a Cone-grater L3b Cone for scraping L3c Cone for cutting with thin slices L3d Cone for scraping L3e Nozzle for cutting into cubes
M Nozzle for making fruit puree (depending on model)
M1 Sealing gasket M2 Blade M3 Nozzle with holes of different sizes for making sauce M4 Nozzle with small holes for making juices M5 Strainer M6 Brush for cleaning
Warning! Safety instructions LS-123456 are supplied with the appliance.
Read the instructions carefully before first use of the appliance and keep them for future use.
RECOMMENDATIONS FOR USE
Before first use, wash the nozzles in soapy water. Then rinse and dry them.
The grater is dishwasher safe. Grease it with vegetable oil.
USING THE TOP PART OF THE MEAT GRINDER (SEE FIG. 1.1-1.6)
Prepare all ingredients for cutting, remove bones, cartilage and veins. Cut the meat into pieces (approximately 2 cm x 2 cm).
Tip: At the end of the operation, you can pass a few pieces of bread through to push out all the meat from the grinder.
Use until you get the desired amount of minced meat.
USING THE MEAT GRINDER (SEE FIG. 5.1-5.10)
Tips for achieving the best cutting results:
To get the best result and avoid product buildup in the chute, the ingredients used should be firm.
Do not use the appliance for chopping or cutting overly hard products, such as sugar or large pieces of meat.
USING THE ATTACHMENT FOR MAKING FRUIT OR VEGETABLE PUREE (SEE FIG. 6)
Application: Place the container for collecting juice under the spout K5 and another container under the spout for collecting waste. For making puree, use only fresh fruits. Depending on the time of year and the quality of the fruit, carefully pass the pulp through the grinder again to obtain the maximum amount of puree or juice.
Juice: Use filter L4
Puree attachment: Use filter L3
CLEANING (SEE FIG. 7.1-7.4)
STORAGE OF ACCESSORIES (SEE FIG. 8.1-8.2)
DESCRIPTION
A Upper part of the meat grinder
A1 Aluminum housing
A2 Auger
A3 Self-sharpening knife made of stainless steel
A4 Grid (depending on model)
A4a Grid with fine holes (finer grinding)
A4b Grid with medium holes (medium grinding)
A4c Grid with coarse holes (coarse grinding)
A5 Aluminum washer
A6 Winter plastic plate
A7 Winter aluminum plate
A8 Rubber gasket
B Attachment for sausages (depending on model)
B1 Centering ring
C Attachment for liver (depending on model)
C1 Support
C2 Form
C3 Centering ring
D Attachment for kibbeh (depending on model)
D1 Sector switch
D2 Wedge
E Electric motor block
F "Reverse" button (reverse rotation)
G On/off button
H Button for unlocking the upper part of the trimmer
Removing and storing accessories
J Handle (depending on model)
K Guard (depending on model)
K1 Nozzle/head attachment
K2 Spool
K3 Drum (depending on model)
K3a Drum with pre-wound line
K3b Drum for round line
K3c Drum for square line
K3d drum for chopping
K3e drum for fine chopping
L O-ring (depending on model)
L3d cone for chopping with cubes
L3e nozzle for chopping with cubes
MДоаТКОВаНаСаДКаДЯПIOре (depending on model)
M1 sealing ring
M2 blade
M3 filter with holes of different sizes for making sauce
M4 filter with small holes for making juices
M5 spout for juice
M6 pusher

Warning! The device is supplied with instructions on safety rules LS-123456.
Before first use of the device, carefully read the operating instructions and keep them.
OPERATING INSTRUCTIONS
Designed for use with minced meat in milk water. The blade is thoroughly rinsed and dried.
The grate and its parts should be protected with oil. Lubricate them.
USING THE MEAT GRINDER ATTACHMENT (SEE FIG. 1.1-1.6)
Prepare all ingredients for grinding, remove bones, tendons, and films. Cut the meat into pieces (approx. 2x2 cm).
Useful tip: To make grinding easier, you can pass pieces of bread through the meat grinder to clean it.
USING THE VEGETABLE CUTTER (FIG. 5.1-5.10)
Tips for getting the best results:
It is recommended to use chilled ingredients to get the expected result and to avoid ingredients sticking to the drum body.
Do not use this device for pressing or grinding hard products, especially the skin of boiled meat pieces.
USING THE JUICER ATTACHMENT (SEE FIG. 6)
Usage: Separate one unit for collecting juice with a fine strainer for juice K5 and another - under the filter for collecting pulp. When preparing juice, use only fresh fruits. Depending on the season and quality of the fruits, it is advisable to pass the pulp through the meat grinder again to get the maximum amount of juice or pulp.
Juice: Use filter L4
Sauce: Use filter L3
A4 Top (increased capacity)
A4b YcaKaTaNbIn Tpyyfa apHaJIFaH opta Sha caHbInaynap6ap Top
A4c Ipinen Tpyayra apHaIraH ipi caHbIaynapb6ap Top
A5 ANOMHNI COMBIH
A6 AnbH6aJIbI pJaCTnK Haya
A7 AJIbIH6aJIbI aJIIOMHn Haya
A8 IVtepriu
B Wxkbka apHaJraH KepeK-kaPak (yIricHe 6aJNaHbICTbl)
B1 Optara keiTipy kypaIbI
C Neuehbe re apHaJraH canTaMa (yIrciHe 6aINaHbICTbl)
C1 Typkbl
C2ΦopMaCbI
C3 Optara KeIpy KypaIbI
D Ke66ere apHaIraH KepeK-kaPak (yJriciHe 6aINaHbICTbl)
D1 CeKTop yWtblfbl
D2 CaKunHa
E Ko3raJTKbIw 6norbl
F «Reverse» (brake control) assembly
G Kosu/senipu assembly
H ETTERTKY BASPLETIN BUGATAN 1Y RAPU BASPLETIN
Kepek-kaapakdaicaTau belgisi
J Tutka (yInire baIInaHbICTbl)
K Kekenis truaytby (yNIsne baIanaBICtbl)
K1 SanTamalarga arnaLIFan UHeK/ MObIHWBk
K2 NTepriu
K3 SanTama (yIrIsne baIIaHbICTbl)
K3a Tinimden Tyrauga arnaIgan sanTama
K3b Ipinen ytyre arnaIgan sanTama
K3c YsaKatan ytyre arnaIgan sanTama
K3d Ipimwik ytyre arnaIgan sanTama
K3e Myz ytyre arnaIgan sanTama
L Kekechtyapty (Yrrisihe 6aINaHbICTbl)
L1 Konus Terizdes santamalarga arnalgan unek / Movyn
L2 Nteriu
L3 Konus Terizdes santamalar (Yrrisihe 6aɪnlaHbICTbl)
L3a Maɪdəlan yretɪn Konus
L3b Yry Konusy
L3c Tijimdepre kesu Konusy
L3d Kokatarga kesure arnalgan Konus
L3e Warynyan Turura arnalgan santama
M Kemis pirosin zirtneure arnalgan santama (Yrrisihe 6aJNaHbICTbl)
M1 Tylyzdafyll Tesem
M2 Buraznda
M3 Tuzdyk zirtneure arnalgan Turli Kelemderi sanyauyptary bar santama
M4 Bypnarp azyrneure arnalgan wabyn sanyauypty santama
M5 Afyzu Murynyasy
M6 Ta3aIayra apHaIraH 1eTka
Ha3ap aydapbIbI3! LS-123456 kayinci3dkxohiHderi HycKaynbIbI KypaJI xINHaBbIHa KipeDI.
KypaIbI anFaW KOJaHap anDbIHda HyckayNbIKTbIMyKnT OKbIN WbIFbIN, OHbl KeNeci KOJaHy ywiH caKtan KoBih3.
KoJIaHv JxEHIHdI YcblbICTAP

Anfaw KondaHap aIbIHda 6apbIK KepeK-JapaKaTapbIH ca6bIHdbI cyMeH Jybl3. Onapblu, KAKcbIan KypraTbIHbI3.
Topdbi XeHe nbIwaKbI ePkaWah MaJbn Tpy Kepek. OnapdbI ecIMdk MaBImeH MaJnHa3.
KoJIdAHy ETTAPTKbIb BACTEIT (1.1 JXHE 1.6 CYP.)
BapnbK Kypam-6eikTeepi DaibHdaHb3, cyneKtepi, WemipweKTePiH XaHe JyIbHapbH aIbIn TactaHb3. ETTi KeceKTeN TypaHb3 (WamameH 2 cm x 2 cm).
Kehec: Oepauncohnda et tapkbiTah iwiHdericihi6apnbfbn wbyrapy ywiH haHHbIH 6ipHewe tiimih otki3in xi6epyre 6oanabl.
Bitejin Kaifan XaFdaHa He icTey Kepek?
Kocy/cenipy 6aTbIPMaCbIH (G) «0» JkaFdaNbHa KOnbIn, et TapTKbl W KymbICbIH TOKTaTbIHbI3. - TaFamdapdbI sbHfapy ywiH «PeBepc» (F) 6aTbIPMaCbH 6acbIn, 6ipHeWe cekyHd yCTan TypbHbI3. - Yrydi xanfactbipy ysiH Kocy/cenHipy 6aTbIPmacbIH (G) «I» XaFdaBbHa KObIn, bipHeWe ceKHyD YCTan TypbHb3.
KÖNJDAHUY WYJKBIKA APHAJIFAH KEPEK-JXAPAKTAP (2.1 JXÖHE 2.6 CYP.)
MaHbI3db! Byn KepeK-JkapaTap Tek 6apNbIK dAmdeyiUTepi KocblrHaT TapTbInFaH etneH KOJaHy ywiH apHaJraH.
Kocna eTe JkaKcbI apanackaH 6onybI KaXeT. NInriwiK KaNbHa KeNTipy yWih KblbI cyFa MaNbIHFaH WxykbIK Ka6bIFbIH y3bIHDbIFbI 5 CM 6OJaTBiH yWbIH KaNdbipBn (TyinHdE n 6aunay yWih KaXeT), OHbl CanTamaF aKnir3iH3. KypaIbI icKe KocbIbI3 da, et TapTKbIwKa TaPTbINFaH eTTi caIbI, WxykbIK Ka6bIFbIHbIH TOnybiH 6aKbIaHbI3.
KeHec. ByJ KymbictbI ekeylen aTkapraH oHa: 6ipeyi TapTBinFaH eTTiH 6epinyiH KaMTaMacbl3 eTce, ekHwici eT Ka6bIFbIHbIH TOnybiH KaDaFAn OTbipaBl.
Carefully pull the cable out of the connector. Do not pull the cable by the cable itself; instead, hold the connector and pull it out gently, keeping the cable straight within 10-15 cm.
FOR CONNECTION TO THE DEVICE (SEE SECTIONS 3.1 AND 3.3)

For daily use:
For a stronger hold, apply the adhesive connector 2-3 times, pressing firmly.
FOR CONNECTION TO THE POWER SUPPLY (SEE SECTIONS 4.1 AND 4.3)
Close the lid. If the lid is not closed properly, you may not get the desired result.
Select the desired ornament and apply it to the surface.
Apply the necessary amount of glue to the surface.
FOR CONNECTION TO THE POWER SOURCE (SEE SECTIONS 5.1 AND 5.10)
Instructions for use:
For proper use and to avoid damage, follow the safety instructions provided.
Do not use the device for purposes other than those intended, or for any other use.
FOR CONNECTION TO THE DEVICE OR POWER SOURCE (SEE SECTION 6)
Usage: For cleaning, use a soft, dry cloth. For stubborn stains, use a mild detergent. Do not use abrasive cleaners or solvents.
Cleaning: Use a soft, dry cloth.
Table of contents: List of contents
Section 7.1 and 7.4
Maintenance of spare parts (sections 8.1 and 8.2)
(Sections 4.3 and 4.1)
(Sections 5.10 and 5.1)
(Section 6J)
a
L4 jdljos:
L3 jalal Josw:Jg5
(7.4 7.1)
(8.2 8.1)
Jx

(1.6 1 1.1)
. 11 11 11 11 11 11 11 11 11 11 11 11 11
. (ρ ω 2 xρω 2 l _ ij ^
aal lai jn no nlo aolwgljgssy J aorabl g jzg 0g 0g 0g 0g 0g 0g 0g 0g 0g 0g
.4o j6b1 J61u 4a aullb
5 1
(G) «f/0» j z 0> gbl l bz bdoa a
.
.(G)《/》jIgI
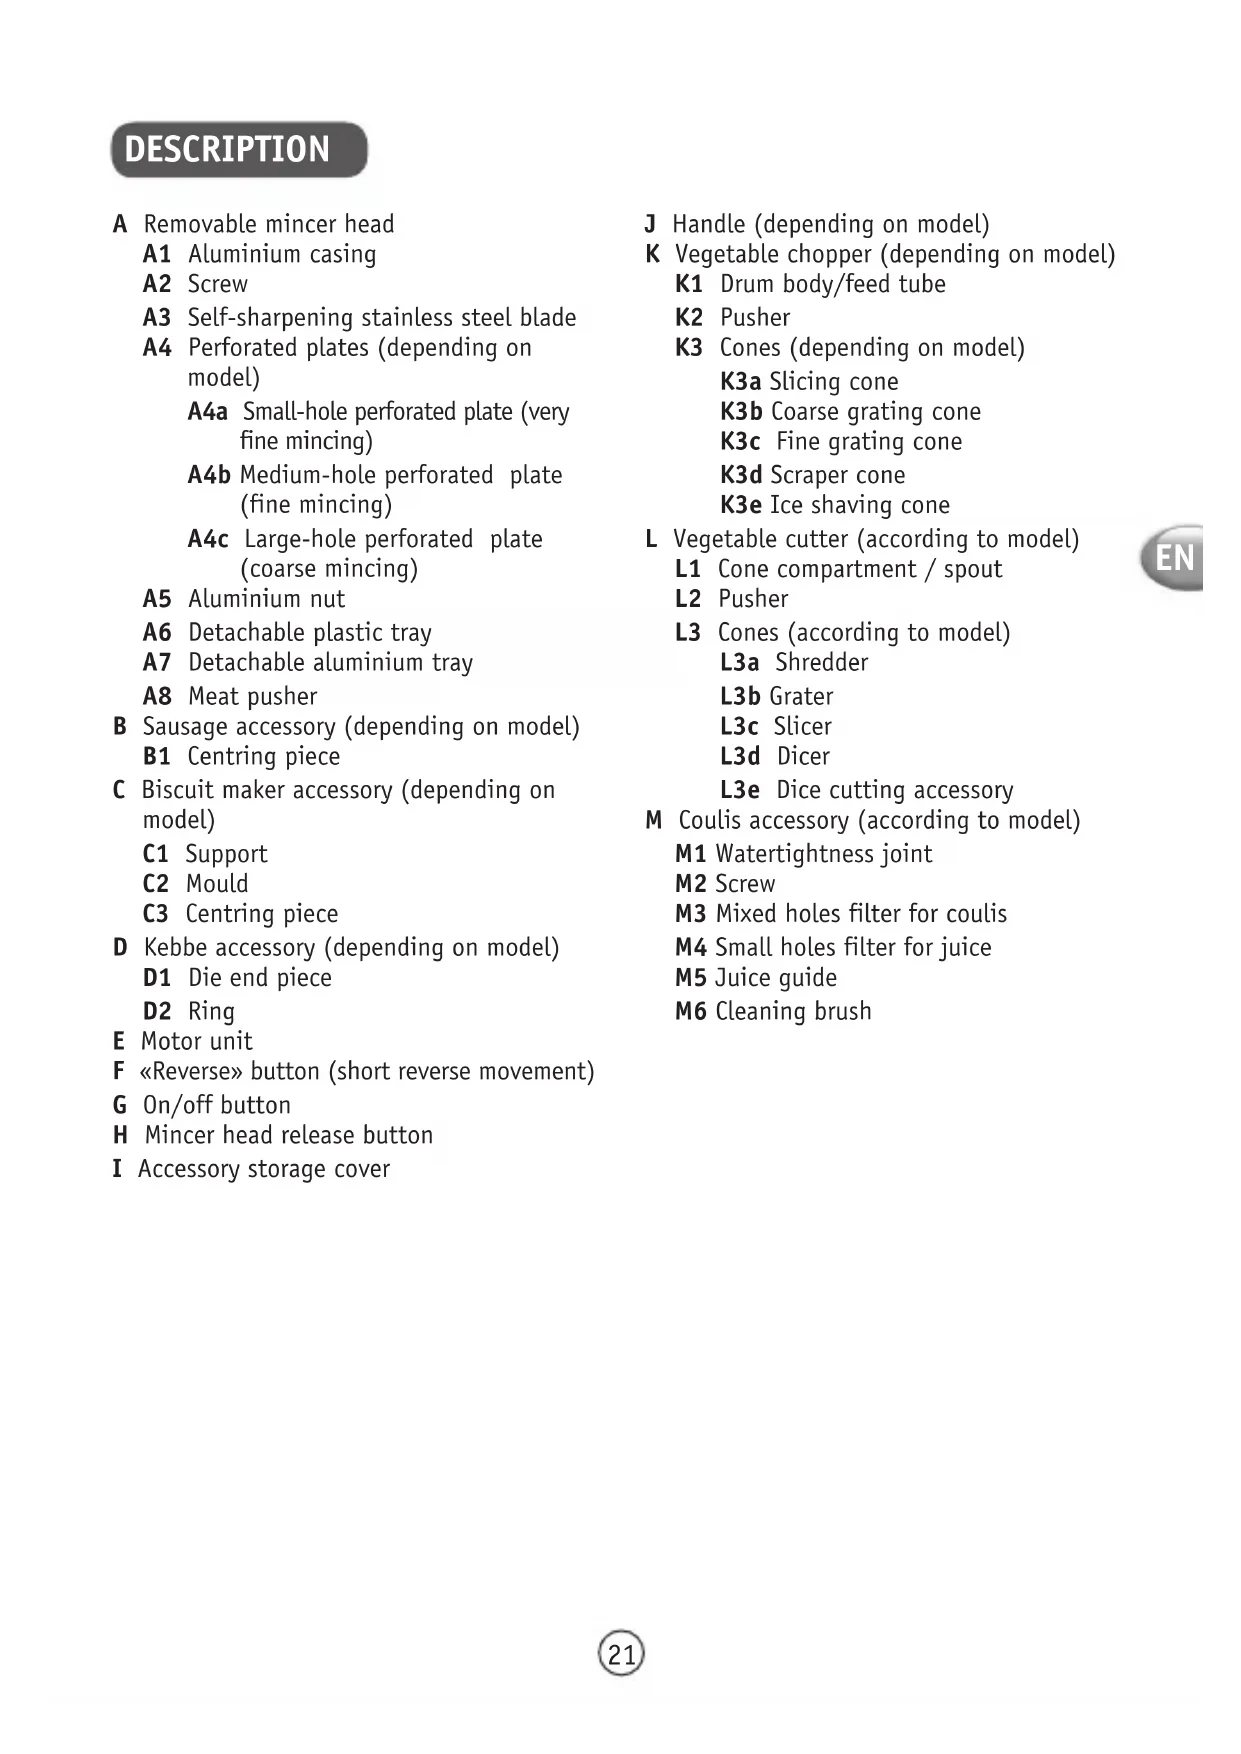
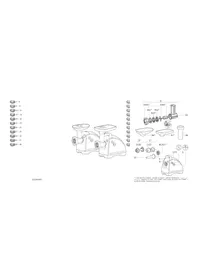
A Removable mincer head
A1 Aluminium casing A2 Screw A3 Self-sharpening stainless steel blade A4 Perforated plates (depending on model)
A4a Small-hole perforated plate (very fine mincing) A4b Medium-hole perforated plate (fine mincing) A4c Large-hole perforated plate (coarse mincing)
A5 Aluminium nut A6 Detachable plastic tray A7 Detachable aluminium tray A8 Meat pusher
B Sausage accessory (depending on model)
B1 Centring piece
C Biscuit maker accessory (depending on model)
C1 Support C2 Mould C3 Centring piece
D Kebbe accessory (depending on model)
D1 Die end piece D2 Ring
E Motor unit F «Reverse» button (short reverse movement) G On/off button H Mincer head release button I Accessory storage cover
J Handle (depending on model) K Vegetable chopper (depending on model)
K1 Drum body/feed tube K2Pusher K3 Cones (depending on model)
K3a Slicing cone, K3b Coarse grating cone, K3c Fine grating cone, K3d Scraper cone, K3e Ice shaving cone
L Vegetable cutter (according to model)
L1 Cone compartment / spout, L2 Pusher, L3 Cones (according to model)
L3a Shredder, L3b Grater, L3c Slicer, L3d Dicer, L3e Dice cutting accessory
M Coulis accessory (according to model)
M1 Watertightness joint, M2 Screw, M3 Mixed holes filter for coulis, M4 Small holes filter for juice, M5 Juice guide, M6 Cleaning brush
Note: Safety instruction booklet LS-123456 is supplied with the appliance.
Before using your appliance for the first time, read the booklet carefully and keep it in a safe place.
BEFORE FIRST USE
- Wash all accessories in warm water and washing up liquid. Rinse, and carefully dry them straight away.
- The perforated plate and the cutter must remain greased. Coat them with cooking oil.
- Do not switch on the appliance when it is empty or if the mincer plates are not greased.
ATTENTION: The blades of the cones are extremely sharp; handle the cones with great care, always holding them by the plastic parts.
USE: MEAT GRINDER HEAD (FIG. 1.1 TO 1.6)
Prepare the entire quantity of food to be minced, remove any bones, gristle and tendons. Cut the meat into pieces (approx. 2 cm x 2 cm).
Tip: At the end of operation, you can pass a few pieces of bread through the grinder in order to extract all the ground meat.
Notes:
- Only use your appliance for mincing raw meat. Do not mince cooked meat.
- Do not use your appliance for more than 14 minutes.
What should you do if the machine is clogged?
- Stop the mincer by pressing position "0" of the On/Off button (G).
- Then press the "Reverse" button (F) for a few seconds to release the jam.
- Press position "I" of the On/Off button (G) to continue mincing.
USE: SAUSAGE ACCESSORY (FIG. 2.1 TO 2.6)
Important: this accessory can only be used after the meat has been minced, seasoned and the preparation has been well mixed.
After leaving the skin to soak in warm water to regain its elasticity, slide it onto the funnel and let it overhang by around 5 cm (which you will seal by tying a knot with a link). Start the appliance, feed the mince through the mincer, following the skin as it fills.
Note: this work will be done more easily with two people, one to feed the mince through and the other to take care of filling the skin.
Give the sausages the required length by clamping and twisting the skin. For a quality sausage, take care to avoid trapping air during filling and make sausages that are 10 to 15 cm long (separate the sausages by making a link and tying a knot with the link).
USE: KEBBE ACCESSORY (FIG. 3.1 TO 3.3)
Practical tip:
To make a fine Kebbe or Kefta paste, run the meat through the mincer two or three times until you obtain the desired smoothness.
USE: BISCUIT ACCESSORY (FIG. 4.1 TO 4.3)
Prepare the dough. For best results, use a soft dough.
Choose the design by aligning it with the arrow.
Repeat the process until you have obtained the desired amount of biscuits.
USE: VEGETABLE CHOPPER (FIG. 5.1 TO 5.10)
Useful tips for best results:
The ingredients that you use must be firm to obtain satisfactory results and to avoid the accumulation of food in the compartment.
Do not use the appliance to grate or cut food products that are too hard such as sugar cubes or pieces of meat.
USE: COULIS ACCESSORY (FIG. 6)
Use: Place a container under the juice groove (K5) to collect the juice and another one at the end of the filter to collect any residues. If you wish to make coulis or juice, using fresh fruits only is an imperative. According to the season and to the quality of your fruits, we recommended that you run the pulp through a second time to extract the maximum possible amount of coulis or juice.
Juice: Use filter L4
Coulis: Use filter L3
CLEANING (FIG. 7.1 TO 7.4)
STORAGE OF ACCESSORIES (FIG. 8.1 TO 8.2)
DESCRIPTION
A Removable meat grinder head
A1 Aluminum body A2 Screw A3 Self-sharpening stainless steel blade A4 Grates (depending on model)
USE: COULIS ACCESSORY (FIG. 6)
USE: BISCUIT ACCESSORY (IMAGES 4.1 TO 4.3)
CLEANING (IMAGE 7.1 TO 7.4)
STORAGE OF ACCESSORIES (IMAGES 8.1 TO 8.2)
DESCRIPTION
A Removable meat grinder accessory
ACCESSORY HOLDER (FIG. 8.1 - 8.2)
A Removable meat grinder head A1 Aluminum body A2 Screw A3 Self-sharpening stainless steel blade A4 Grates (depending on model) A4a Fine grate (fine grind) A4b Medium grate (medium grind) A4c Coarse grate (coarse grind) A5 Aluminum pusher A6 Removable plastic disc (depending on model) A7 Removable aluminum disc (depending on model) A8 Meat grinder attachment B Sausage attachment (depending on model) B1 Centering ring C Biscuit attachment (depending on model) C1 Support C2 Nozzle C3 Centering ring D Kibbeh/kofta attachment D1 Tip D2 Shaping ring E Motor unit F Reverse button (instant reverse) G On/off button
H Release button for the meat grinder head
I Accessory storage compartment
Manufactured in France for GROUPE SEB
Complies with the requirements:
- TR CU 004/2011 "On safety of low-voltage equipment", approved by the Decision of the Customs Union Commission dated 16.08.2011 No. 768. TR CU 020/2011 "Electromagnetic compatibility of technical equipment", approved by the Decision of the Customs Union Commission dated 09.12.2011 No. 879.
Service life of the product is 2 years from the date of sale.




- RECOMMENDATIONS FOR USE
- USING THE TOP PART OF THE MEAT GRINDER (SEE FIG. 1.1-1.6)
- USING THE MEAT GRINDER (SEE FIG. 5.1-5.10)
- TIPS FOR ACHIEVING THE BEST CUTTING RESULTS
- USING THE ATTACHMENT FOR MAKING FRUIT OR VEGETABLE PUREE (SEE FIG. 6)
- CLEANING (SEE FIG. 7.1-7.4)
- STORAGE OF ACCESSORIES (SEE FIG. 8.1-8.2)
- DESCRIPTION
- OPERATING INSTRUCTIONS
- USING THE MEAT GRINDER ATTACHMENT (SEE FIG. 1.1-1.6)
- USING THE VEGETABLE CUTTER (FIG. 5.1-5.10)
- TIPS FOR GETTING THE BEST RESULTS
- USING THE JUICER ATTACHMENT (SEE FIG. 6)
- KOJIAHV JXEHIHDI YCBLBICTAP
- KOJIDAHY ETTAPTKBIB BACTEIT (1.1 JXHE 1.6 CYP.)
- BITEJIN KAIFAN XAFDAHA HE ICTEY KEPEK
- KÖNJDAHUY WYJKBIKA APHAJIFAH KEPEK-JXAPAKTAP (2.1 JXÖHE 2.6 CYP.)
- FOR CONNECTION TO THE DEVICE (SEE SECTIONS 3.1 AND 3.3)
- FOR DAILY USE
- FOR CONNECTION TO THE POWER SUPPLY (SEE SECTIONS 4.1 AND 4.3)
- FOR CONNECTION TO THE POWER SOURCE (SEE SECTIONS 5.1 AND 5.10)
- INSTRUCTIONS FOR USE
- FOR CONNECTION TO THE DEVICE OR POWER SOURCE (SEE SECTION 6)
- SECTION 7.1 AND
- MAINTENANCE OF SPARE PARTS (SECTIONS 8.1 AND 8.2)
- (SECTIONS 4.3 AND 4.1)
- (SECTIONS 5.10 AND 5.1)
- (SECTION 6J)
- (7.4 7.1)
- (1.6 1 1.1)
- BEFORE FIRST USE
- USE: MEAT GRINDER HEAD (FIG. 1.1 TO 1.6)
- NOTES
- WHAT SHOULD YOU DO IF THE MACHINE IS CLOGGED
- USE: SAUSAGE ACCESSORY (FIG. 2.1 TO 2.6)
- USE: KEBBE ACCESSORY (FIG. 3.1 TO 3.3)
- PRACTICAL TIP
- USE: BISCUIT ACCESSORY (FIG. 4.1 TO 4.3)
- USE: VEGETABLE CHOPPER (FIG. 5.1 TO 5.10)
- USEFUL TIPS FOR BEST RESULTS
- USE: COULIS ACCESSORY (FIG. 6)
- CLEANING (FIG. 7.1 TO 7.4)
- STORAGE OF ACCESSORIES (FIG. 8.1 TO 8.2)
- USE: BISCUIT ACCESSORY (IMAGES 4.1 TO 4.3)
- CLEANING (IMAGE 7.1 TO 7.4)
- STORAGE OF ACCESSORIES (IMAGES 8.1 TO 8.2)
- ACCESSORY HOLDER (FIG. 8.1 - 8.2)
Brand : MOULINEX
Model : ME686827
Category : Meat Grinder