
I 2160 WH - Cooker NODOR - Free user manual and instructions
Find the device manual for free I 2160 WH NODOR in PDF.
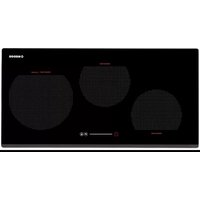
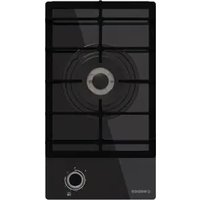
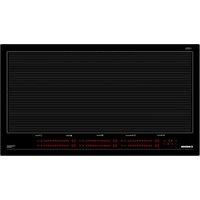
| Product type | Induction hob |
| Brand | Nodor |
| Model | I 2160 WH |
| Power supply | 220-240 V ~ 50/60 Hz |
| Maximum power | 7200 W (adjustable to 6000 W, 3500 W or 2800 W) |
| Number of cooking zones | 4 |
| Power levels | 9 (1 to 9) + Booster function (P) |
| Booster duration | 10 minutes maximum per zone |
| Timer function | Yes, from 1 to 99 minutes, independently programmable on each zone |
| Key lock (child safety) | Yes |
| Residual heat indicator | Yes (display 'H') |
| Automatic shut-off | Yes, per zone after prolonged inactivity |
| Inadvertent start protection | Yes |
| Control type | Touch control |
| Surface material | Ceramic glass |
| Compatible cookware | Ferromagnetic base (enameled steel, cast iron, ferritic stainless steel) |
| Maintenance | Clean with scraper and suitable product, no abrasives |
| Installation | Built-in, requires ventilation |
| Certifications | Directives 2014/35/EU (Low Voltage) and 2014/30/EU (EMC) |
Frequently Asked Questions - I 2160 WH NODOR
User questions about I 2160 WH NODOR
0 question about this device. Answer the ones you know or ask your own.
Ask a new question about this device
Download the instructions for your Cooker in PDF format for free! Find your manual I 2160 WH - NODOR and take your electronic device back in hand. On this page are published all the documents necessary for the use of your device. I 2160 WH by NODOR.
USER MANUAL I 2160 WH NODOR
Operating and maintenance instructions for hobs
FR
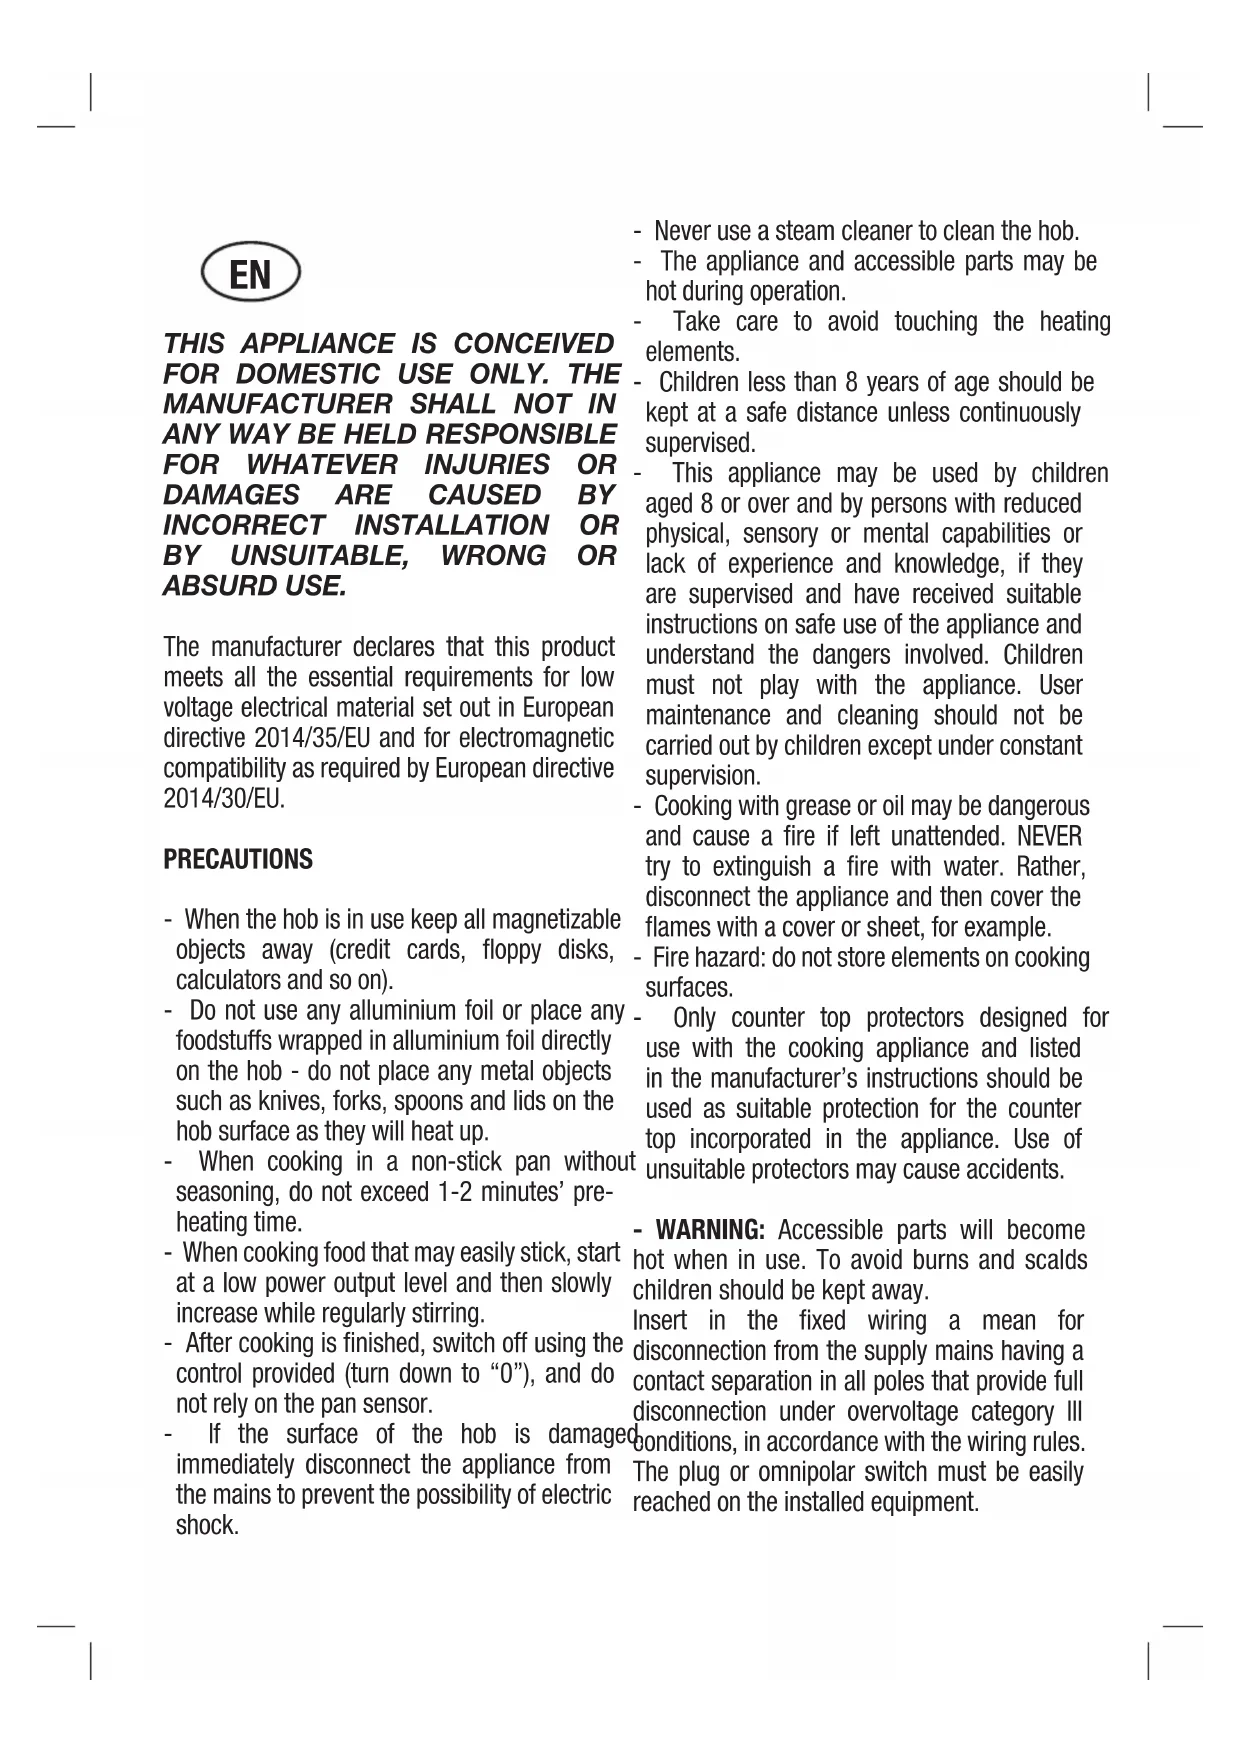
THIS APPLIANCE IS CONCEIVED FOR DOMESTIC USE ONLY. THE MANUFACTURER SHALL NOT IN ANY WAY BE HELD RESPONSIBLE FOR WHATEVER INJURIES OR DAMAGES ARE CAUSED BY INCORRECT INSTALLATION OR BY UNSUITABLE, WRONG OR ABSURD USE.
The manufacturer declares that this product meets all the essential requirements for low voltage electrical material set out in European directive 2014/35/EU and for electromagnetic compatibility as required by European directive 2014/30/EU.
PRECAUTIONS
- When the hob is in use keep all magnetizable objects away (credit cards, floppy disks, calculators and so on).
- Do not use any aluminium foil or place any foodstuffs wrapped in aluminium foil directly on the hob - do not place any metal objects such as knives, forks, spoons and lids on the hob surface as they will heat up.
- When cooking in a non-stick pan without seasoning, do not exceed 1-2 minutes' preheating time.
- When cooking food that may easily stick, start at a low power output level and then slowly increase while regularly stirring.
-
After cooking is finished, switch off using the control provided (turn down to "0"), and do not rely on the pan sensor.
If the surface of the hob is damaged immediately disconnect the appliance from the mains to prevent the possibility of electric shock. -
Never use a steam cleaner to clean the hob.
- The appliance and accessible parts may be hot during operation.
Take care to avoid touching the heating elements. - Children less than 8 years of age should be kept at a safe distance unless continuously supervised.
- This appliance may be used by children aged 8 or over and by persons with reduced physical, sensory or mental capabilities or lack of experience and knowledge, if they are supervised and have received suitable instructions on safe use of the appliance and understand the dangers involved. Children must not play with the appliance. User maintenance and cleaning should not be carried out by children except under constant supervision.
- Cooking with grease or oil may be dangerous and cause a fire if left unattended. NEVER try to extinguish a fire with water. Rather, disconnect the appliance and then cover the flames with a cover or sheet, for example.
-
Fire hazard: do not store elements on cooking surfaces.
Only counter top protectors designed for use with the cooking appliance and listed in the manufacturer's instructions should be used as suitable protection for the counter top incorporated in the appliance. Use of unsuitable protectors may cause accidents. -
WARNING: Accessible parts will become hot when in use. To avoid burns and scalds children should be kept away.
Insert in the fixed wiring a mean for disconnection from the supply mains having a contact separation in all poles that provide full disconnection under overvoltage category III conditions, in accordance with the wiring rules. The plug or omnipolar switch must be easily reached on the installed equipment.
This appliance is not intended to be used via an external timer or a remote control system. The manufacturers decline any responsibility in the event of non-compliance with what is described above and the accident prevention norms not being respected and followed.
To avoid all risk, if the power cable becomes damaged, it must only be replaced by the manufacturer, by an authorised service centre, or by a qualified electrician.
OPERATING PRINCIPLE (Fig. 1)
It exploits the electromagnetic properties of most cooking vessels.
The coil (inductor) which produces the electromagnetic field is operated and controlled by the electronic circuit.
The heat is transmitted to food by the cooking vessel itself.
The cooking process takes place as described below.
- loss of heat is minimum (high efficiency)
- the system stops automatically when the vessel is removed or even just lifted from the hob
- the electronic circuit guarantees maximum flexibility and fine adjustments.
(Fig. 1)
1 Vessel
2 Induced current
3 Magnetic field
4 Inductor
5 Electronic circuit
6 Power supply
User's Instructions (Fig. 2)
1 ON/OFF
2 Down -
3Up+
4 Cooking area indicator LED
5 Power level display
6 Timed zone indicator LED
7. Timer display
8. Down - timer.
9. Up + timer
10. Safety lock
11. Safety lock indicator LED
Installation
All operations relative to installation (electric connection) should be carried out by skilled personnel in conformity with the rules in force.
As for the specific instructions see part pertaining to installer.
Switching the Touch Control ON/OFF "Z"
After mains voltage is applied the control initializes for approx. 1 second before it is ready for operation.
After a reset all displays and LEDs glow for approx. 1 second. When this time is over all displays and LEDs extinguish and the control is in the stand-by mode. Safety lock is activated and the safety lock indicator LED is illuminated (11).
Before turning on the hob and operating the controls, press the safety lock button (10) for two seconds to unlock the keypad for normal operation.
Press the ON/OFF (1) button to switch the touch control on. The cooking zone displays show a static "0".
If a cooking zone is in the "hot" status, the display shows a static "H" instead of "0".
After switching-ON the electronic control remains activated for 10 seconds. If no cooking zone or timer selection follows within this period of time, the electronic control automatically switches back into the stand-by-mode. The control can only be switched-ON if it identifies the ON/OFF (1) key alone being operated. Should it recognize ON/OFF (1) key activation other than that, the control remains in the standby-mode.
If the child safety feature is active when switching on, the Safety lock indicator (11) lights up. When the Touch Control is ON it can be switched- OFF at any time by operating the ON/OFF (1) key. This is also valid if the control has been locked (activated child safety feature).
The ON/OFF (1) key has always priority in the switch-OFF function.
Automatic switch-OFF
When the control is ON it automatically switches-OFF after 10 seconds if no cooking zone or select key has been operated within this period of time. If no pan is placed on a cooking zone after selecting a power level for that area on the hob, it will automatically turn off after 1 minute.
Switching a cooking zone ON and OFF
First place the pan in the chosen cooking zone. If the pan is not present the system cannot be switched on the correspondent zone.

When the touch control is on, a cooking zone may be selected by pressing the UP + (3) or DOWN - (2) buttons on the corresponding area.
The display (5) for the chosen cooking zone will show the selected power level.
If the cooking zone is "hot", "H" and "0" are alternately displayed. Press the PLUS (3) or MINUS (2) button to select a setting and the zone will begin to heat up.
Once the cooking zone has been selected, the setting can be selected by keeping the PLUS (3) button pressed down. The setting begins at level 1 and increases by 1 level every 0.4 seconds. When setting "9" is reached, the setting will not be changed further.
If the setting level has been selected using the MINUS (2) button, the start level is "9" (maximum level). Keep the button pressed down to lower the active level by 1 every 0.4 seconds. When setting "0" is reached, there will be no further setting changed. The setting can only be changed by pressing the MINUS (2) or PLUS (3) button again.
Switching a cooking zone off
Pressing the UP (3) and DOWN (2) buttons at the same time will reset
the power level to 0. Alternatively, the MINUS button (2) can be used to reduce the setting level to 0.
If a cooking zone is "hot", "H" and "0" will be alternately displayed.
Switching-OFF all cooking zones
Pressing the ON/OFF (1) button at any time will cause all cooking zones to switch off immediately. In the standby- mode an "H" appears on all cooking zones which are "hot". All other cooking zone displays are not illuminated.
Wattage settings
The output of the cooking zones can be set in 9 steps which are indicated by the figures "1" thru "9" by means of LED displays.
Boost function
The booster function can be activated for the required cooking zone by selecting power level 9 and then pressing the UP (3) button. By means of this function certain cooking zones are enabled to receive power over the nominal (the number of boostable cooking zone depends on the power available on a partial modules which is to be lees than total hob power). If the desired cooking zone has the capacity to activate the booster, the display shows a "P" symbol. If there is insufficient available power, the power level indicator for the cooking zone that needs to automatically reduce power will display "r" for 3 seconds, following which the power level will decrease to the previous setting.
The boosting time is limited to 10 min to protect cooking utensils. After the booster is switched off automatically, the cooking zone continues operation on power level "9". The booster can be reactivated after some minutes.
In case that the pan is removed from the cooking zone during boosting, the boosting function remains active and boosting time continues.
Residual heat indicator
It is meant to indicate to the user that the glass ceramic has a dangerous touch temperature in the circumference of a cooking zone. The temperature will be determined following a mathematical model and the remaining residual heat will be indicated by means of "H" on the corresponding display.
Heating-up and cooling down will be calculated dependent on:
the selected setting (0^ to 9^ )
- the ON/OFF time.
After switching-0FF the cooking zone the respective display shows "H" until the assigned cooking zone temperature is mathematically in a uncritical level. (≤ 60^)
Automatic power OFF function (operating time limitation)
Dependent on the selected setting, every cooking zone will be switched-Off after a defined maximum operation time if no operation of the assigned cooking zone follows within this time period. Every change of the cooking zone condition (by means of the PLUS-, MINUS- key) puts back the maximum operation time of this cooking zone to the initial value of the operating time limitation.
Protection against unintended switching-ON
- If the electronic control realizes a continuous operation of keys for approx. 10 seconds, it switches OFF automatically.
- If no cooking zone is activated within 10 seconds of switching on the touch control, this will revert to stand-by status.
- When the control is switched- ON the ON/OFF-key has priority over all other keys, so that the control can be switched-OFF anytime, even in case of multiple or continuous operation of keys.
- In the stand-by mode a continuous operation will not be signalized
However, before the electronic control can be switched-ON again, it has to recognize that all keys are not operated.
Key lock (child safety feature)
Child safety feature:
Key lock:
To activate the child safety lock after switching on the touch control, press the safety lock button (10) for 1 second and the safety lock indicator LED will illuminate (11).
The safety lock function may be activated either when cooking zones are active or when the appliance is fully switched off.
The electronic control remains in a locked condition until it gets unlocked, even if the control has been switched-0FF and -ON in the meantime. Also a reset of the control (after a voltage drop) does not cancel the key lock.
Unlocking for cooking purposes:
To unlock the touch control, press the safety lock button (10) for 1 second and the safety lock indicator LED will be extinguished (11).
Audible signal (buzzer)
While the control is in operation the following activities will be signaled by means of a buzzer:
normal key activation with a short sound signal.
- 3 short acoustic signals (beeps) for turning off the touch control.
Timer function (optional)
The timer function works as follows:
Timer function for a selected cooking zone, from 1 to 99min at the end of the set time, an acoustic signal will be emitted and the timed zone will be turned off. All three cooking zones may be programmed independently to different timer settings. During the last minute of the set time, the timer display (7) will show the time remaining in seconds.
Timer programming on cooking zones
Activate the timer by pressing UP TIMER (9) or DOWN TIMER (8). The timer display will show "00" (7) and the symbol "t" will appear on the power level displays for each cooking zone for which the timer is being set.
Press the power level UP (3) or DOWN (2) button on the cooking zone to be timed; the desired zone is selected and the timer indicator LED illuminates (6) for the selected zone.
Having selected the zone to be timed, press UP TIMER (8) or DOWN TIMER (9) to select a time between 1 and 99 minutes. Holding the time selection buttons pressed will cause the time to increase or decrease more quickly.
If no cooking zone is selected for the timer function within 5 seconds, the timer function will be automatically deactivated.
After selecting the cooking zone to be timed, the time must be selected within 5 seconds; otherwise, the timer function will be automatically deactivated.
The selected time will start 5 seconds after setting the timer. The timer setting can be modified during timer cycle by pressing the buttons UP TIMER (9) or DOWN TIMER (8). The new timer setting will start 5 seconds after programming the new timer setting.
To deactivate the timer function at any time press simultaneously
the UP TIMER (9) and DOWN TIMER (8). Pressing the DOWN TIMER (8) button until the timer display (7) shows "00" also deactivates the timer function.
When the set time has elapsed, the selected cooking zone will switch off and the timed zone indicator (6) and time indicator (7) LEDs will illuminate intermittently while a warning beep will sound for 1 minute. To cancel this acoustic warning before the set time has elapsed, press any button on the touch control.
Cooking vessels (Fig. 3)
- a magnet-attracting vessel may be a suitable vessel for induction cooking
- prefer vessels which are especially declared to be suitable for induction cooking
- flat- and thickbottomed vessels
- a vessel with the same diameter as zones ensures the maximum exploitation of power
- a smaller vessel reduces power exploitation, but does not cause any energy loss. We would anyhow not recommend the use of vessels with diameters smaller than 10cm .
- stainless-steel vessels with multi-layer or ferritic stainless-steel bottoms when specifically suited for induction cooking
- cast-iron preferably enamel-bottomed vessels to avoid scratching the pyroceram surface
- we do not recommend the use of any glass, ceramic, earthenware, alluminium, copper or non-magnetic (austenitic) stainlesssteel vessels.
Maintenance (Fig. 4)
Any remains of aluminium foil, food, fat, sugar or food with high sugar content must be immediately removed from the hob surface with a scraper to prevent potential damage to the hob surface.
Subsequently clean the surface with some towel and appropriate product, rinse with water and dry by means of a clean cloth. Under no circumstance should sponges or abrasive cloths be used; also avoid using aggressive chemical detergents such as oven sprays and spot removers.
Installer's Instructions
Installation
These Instructions are for the qualified technician, as a guide to installation, adjustment and maintenance, according to the laws and standards in force. These operations must always be carried out when the appliance has been disconnected from the electric system.
Positioning (Fig. 5)
The fixture is especially designed for fitting into a work-top as shown in the corresponding figure.
Place the supplied sealing agent along the hob perimeter.
Do not install the hob over an oven; in case you do, make sure of the following:
- the oven is equipped with an appropriate cooling system
- there is no warm-air leakage from the oven towards the hob
- suitable air-inlets are provided as shown in the figure.
Electrical connection (Fig. 6)
Prior to carrying out the electrical connection, please ensure that:
- the plant characteristics are such as to follow what is indicated on the matrix plate placed at the bottom of the working area;
- that the plant is fitted with an efficient earth connection, following the standards and law provisions in force.
The earth connection is compulsory in terms of the law.
Should there be no cable and/or plug on the equipment, use suitable absorption material for the working temperature as well, as indicated on the matrix plate. Under no circumstance must the cable reach a temperature above 50^ of the ambient temperature.
Power limitation function (only on certain models)
The appliance features a function that allows the maximum power level to be limited internally. This maximum power level limit can be selected from the following power values: 7,200 W, 6,000 W, 3,500 W and 2,800 W. The appliance is configured by default to the maximum power level limit.
To modify this factory setting, after connecting the appliance to the power supply, with the touch control unlocked and all cooking zones inactive, press simultaneously the UP (3) and DOWN (2) buttons at the two ends of the touch control within 30 seconds of connecting the power supply. The display will show the power level selected. Use the UP (3) or DOWN (2) buttons on any cooking zone to select one of the available values. Once the desired value is selected, press simultaneously the UP (3) and DOWN (2) buttons at the two ends of the touch control to memorise the power level limit and turn off the touch control.
If when using the appliance a power level is selected that exceeds the limit, the affected cooking zone display will show the symbol "r" for 3 seconds and return to the previous power level.
To increase the power level on a given cooking zone, it may be necessary to reduce the level on another cooking zone in order to
remain within the overall power limit.
FR
CE PRODUIT EST CONCUXCLUSIVEMENT POUR USAGEDOMESTIQUE.LECONSTRUCTEURDECLINE TOUTERESPONSABILITEPOURDOMMAGESETBLESSURESCAUSEESPAR UNE INSTALLATIONINCORRECTE OU PAR UN USAGIMPROPRE,ERRONÉOU ABSURDE.
KoHCTpykTOpCHMaetCce68BcIOOTBeTCTBeHHOCTbB TOM Cnyae,ecn BCE BblweyKa3aHHble Tpe60BaHn I obuHbe HopMbI npEOctopoxHOCTn He 6ydyT co6HodeHbl.
B clyuae noepekdehna unhya numaHua,
obpamumecbKfapabpukaHmydne2o3ameHbI,
UuObpaumecb BynonHomoueHHbI ueHmp
mexHuueckou nomouu, UuJe obpamumecb
K mexHuueckomy cneuaunucmy IIO6020
ueHmpa c nodo6hbIMu noHMOuymu, dnn
npedombaueHua BO3HukHObeHua IIO6020
buda puckoB.
PnHnunbI paobTb (Pnc.1)
PnHnbl paobtbi ochoBaHbHa nEKeTpoMaTHnBix CboiCTBax KaCtpioNb, CKOBOPoK HHOH NocdyI IpnroToBleHnPiu.
HnykuonHHa KaTyka ynpabJIaeTc3 3NEKtpHOH CxEMO DnC03dHnM CmBHO MArTHHTOro nIJa.
TennnopepeaetcnpoayktaamnTaHNAOTcAmOnnocybl.
Bapka npodyktoB n npiroTOBneHme nMnO ocuiectBJIeTcN neDyUoIIM 06pa30m:
-MNHIMMaBbHaa DnCnpepcu(BbIOxN BbXoD)
-CHTHeKaCTPHOMC30HbBapKu(UIMPPOCTOeNOJHATNEBBepx)ABTOMaTHUeCKN 6IOKUPyETCNCTeMy.
-3NeKtpoHnHa CnCTema OBycnaBnBaet MaKcMaIbHyO r6KOCTb mTOHKoCTb perynuropKn.
(PNC.1)
1 KaTpOJIa
2 INduyuPObaHHbI TOK
3 MarTHHThoe noJe
4MHdYkTOp
5JnKtpoHna cxema
6 3neKtpuueckoe noDKnIpyeHne
He peKoMeHnyem yCTaHaBnBaTb PnHTy Ha DxyXOBKe, mN, B Cnyae TaKOro poDa yCTaHOBKn, y6eDntecb B TOM, 4TO:
-dyxOBka 06OpyObaHa 3oKtmbHcNTeMOn OXJaJckHeHnA,
-TopaBn BO3DyN 13 DxyOBKn He MoKET NO NaCTb NO KAHany B O6NaCTb HNDyKUHOHHoNAHEnI,
- npeyCMptBbO3dyuHbIe KaHaJIbI B COOTBeTCTBmI cYka3aHHbIM Ha PmCyHke.
3neKtpuueckne noqkIouenna (Pnc.6)
Pepd noKJIyHEnm K cTe nTahn, y6eNTcB b TOM, yTO:
-XapaKTePcTnKN yCTaHOBKn COBnaJaoT C xapaKTePcTnKaMM, PnPbEeHHbIMN HaYCTaHOBOuHNOIpaCTHHe,HaxOJaIeIcSA HNe NaHEIN DnBapK;
-ДяуctahOBKN npedyCMtpeHO DoCTaTOH OMOUHoe 3a3eMnHeNBEOTBCTBUN C HopMaTHBaMn N Tpe6oBAHmN DeHCTByHOJIero3aKHOHaTeNbCTBa.3a3eMnHeN npedyCMtpeHO B yCTAHOBHeHHbX HopMaTHBaX. B Tom cIyae,ecnI dny annapata He npedyCMtpeH Whyp n -JIN PO3eTKA BKIOUeHN, Heo6xOIMNO IcNoIb3ObAtb MaTepHaI, pInPOdHBI dny 3NaueHn 3JeKTPuYeCKOrTo ToKa, pInBeDeHHbIX Ha yCTAHOBQUHn PnaCTHcXapakTePNCtKaMn, IN daHHO pa6ooy TempepaTybl. 3aPeuaTcNcNoIb3ObAtb Whyp B cIyae erOppeBaHHn npinpeBbIweHH m50CTEMnepatpyokpykaouse Cpebl.
Функцяоурари ueHnMoUHcTи(TOlbkoB HKeKToPbIX MoeJax)
PnH6Op OchaIeH FyHKUeI OrpaHueHMaKcIMaJIbHOro yOBoHr MoUHOCtM, Notpe6JIeMoI CaMM np6OpOM. MaKcIMaJIbHbI ppeJIoMuHOCtM MoKHO Bbl6pAb N3 CNeIyUOxN 3HaueHm MoUHOCtM: 7200 Bt, 6000 Bt, 3500 Bt M 2800 Bt. IIO yMOJauHmHO Ha 3aBoJe ppeJIoMuHOCtM np6Opa YCTAHOBIn H MaKcIMaJIbHoE 3HaueHme.
TObbI 3MeHHT bTBy BmUHy, cpa3y NocLe NODKIOUeHnnp6oBa KIOCTOHNky 3NeKTPOINATHn, KOrDa pa36NknpOBa HcTeMa ynpabInHeu IN BCE BapOHBte 30hBt OKIOUeHb, Heo6xOJIMo OJHOBPEmHo HaxKaTb KNOKN B0JIbWE + (3) IN MEHbWE - (2) Ha DByX KpAix NaHEnn CEHCOPHO ynpabInHeu B TeueHne 30 CekyND C MOMeHa NDOaun NITAHn. Ha 3KpAne 6yDet oTO6pKaTaC Bb6pAHn IyPoBeH MoOCHTo pN6oBa, a Pn NOMOnu KNOHOK B0JIbWE + (3) IN MEHbWE - (2) IIO6oB BApOHH 3OHi MoKHO 6yDet Bb6paTb ONo H IMeOuXcx 3NaueHn. PocLe Bb6oPa XeJaEMTO 3NaueHn Heo6xOJIMo OJHOBPEmHo HaxKaTb Ha KNOKn B0JIbWE + (3) IN MEHbWE - (2) Ha DByx KpAax NaHeHn CEHCOPHO ynpABInHeu, 3To npBBeDET K ZAnOMnHaMIO IppeJeNa MoUHOCTm np6oBa nOTKIOUeHMoCtBeMby ynpabInHeu.
KordaIraHopMaNbHOpa6oTbINotpe6yetc6oBlePa3peuHHoMOUHOCTn np60pa,HaDCNlEe BapouHoi 3ObI, KOTopo Tpe6yetc6oBlaa MoUHOCTb, BTeueHne 3cekyH6byet OTo6paKaTaC8r),noCte yero npOn3oJET Bo3BpaK 3HaueHIO ppebluyero ypOBH MaUHOCTn.
B HeKoToBbIX CnyaXn IINHrTmMyOPOBHe MOUHcTm OJHO H BApOuHbIX 30H, HeOe6xOIMMO CHN3NTb yPOBeHb MOUHcTm DpyTOB H BApOuH0 30HbI, UTO6bI He npEboHaTa bOoi npeJe MoUHcTm pnp6opa.
PL
PRODUKTENZAPROJEK TOWANY
ZOSTAL DO UZYTKU W
GOSPODARSTwie DOMOWYM.
PRODUCENT NIE PONOSI
ZADNEJ ODPOWIEDZIALNOŚCI
ZA EWENTUALNE SZKODY
RZECZOWE I OSOBOWE
POWSTALE WSKUTEK
JEGO NIEPRAWIDŁOWEJ
INSTALACJI ORAZ
NIEWLAŚCIWEGO, BłEDNEGOLUB NIEUZASADNIONEGO
UZYTKOWANIA.
J 11 J 11 J 11 J 11 J 11 J 11 J 11 J 11 J 11 J 11 J 11 J 11 J 11 J 11 J 11 J 11 J 11 J 11 J 11 J 11 J 11 J 11 J 11 J 11 J 11 J 11
"z" is a zuii i.i.
J 1 J 1 J 1 J 1 J 1 J 1 J 1 J 1 J 1 J 1 J 1 J 1 J 1 J 1 J 1 J 1 J 1 J 1 J 1 J 1 J 1 J 1
iJg aalj 11b0c0b0
()
125 1000
11111111111111111111111111
1
山2
3
4
4.11525j
6
(/12J).
ON/OFF 1
-2
[ + 2 \downarrow \downarrow 3]
4
albal s jina ojc 5
cillia 6
Czalwicr7.
8.
+3j9.
10.
j11
中
()yjy jaiy jaiy jaiy jaiy jaiy jaiy jaiy jaiy jaiy jaiy jaiy jaiy jaiy jaiy jaiy jaiy jaiy jaiy jaiy jaiy jaiy jaiy jaiy jaiy jaiy jaiy jaiy jaiy jaiy jaiy jaiy jaiy jaiy jai
Ljio jia oiai jdo sui iiaoi ci jinai.
1
iia glss i jy. 120 "jlll"uulJubI Ioo
1 1 1 1 1 1 1 1 1 1 1 1 1 1 1 1 1 1 1 1 1 1 1 1 1 1 1 1 1 1 1 1 1 1 1 1 1 1 1 1 1 1
(11.
设 s ,则
Lg j 11j g j j 1
8g j 10s u
2u 11u 11u 11u 11u 11u 11u 11u 11u 11u 11u 11u 11u 11u 11u 11u 11u 11u 11u 11u 11u 11u 11u 11u 11u 11u 1
11s
(1)
AR


- FR
- PRECAUTIONS
- OPERATING PRINCIPLE (Fig. 1)
- (Fig. 1)
- User's Instructions (Fig. 2)
- Installation
- Switching the Touch Control ON/OFF "Z"
- Automatic switch-OFF
- Switching a cooking zone ON and OFF
- Switching a cooking zone off
- Switching-OFF all cooking zones
- Wattage settings
- Boost function
- Residual heat indicator
- Automatic power OFF function (operating time limitation)
- Protection against unintended switching-ON
- Key lock (child safety feature)
- Child safety feature:
- Key lock:
- Unlocking for cooking purposes:
- Audible signal (buzzer)
- Timer function (optional)
- Timer programming on cooking zones
- Cooking vessels (Fig. 3)
- Maintenance (Fig. 4)
- Installer's Instructions
- Positioning (Fig. 5)
- Electrical connection (Fig. 6)
- Power limitation function (only on certain models)
- PnHnunbI paobTb (Pnc.1)
- 3neKtpuueckne noqkIouenna (Pnc.6)
- Функцяоурари ueHnMoUHcTи(TOlbkoB HKeKToPbIX MoeJax)
- PL
- AR
Brand : NODOR
Model : I 2160 WH
Category : Cooker