
MWG 6016 CB - Microwave Oven BOMANN - Free user manual and instructions
Find the device manual for free MWG 6016 CB BOMANN in PDF.
| Brand | Bomann |
| Model | MWG 6016 CB |
| Product type | Microwave oven |
| Power supply | 230 V~, 50 Hz |
| Microwave power | 700 W / 2450 MHz |
| Microwave consumption | 1150 W |
| Grill power | 800 W |
| Oven volume | 20 liters |
| Net weight | 11.65 kg |
| Protection class | I |
| Functions | Microwave (10 power levels), grill, combo, automatic defrost, auto cook (8 programs), quick start, timer, clock, multi-stage cooking |
| Included accessories | Glass turntable, grill rack, guide ring |
| Display | LED screen with time, power, duration display |
| Control | Touch panel with rotary knob |
| Child safety | Control panel lock (long press STOP/CANCEL) |
| Cleaning | Interior: damp cloth; turntable: soapy water or dishwasher; grill rack: dish soap or dishwasher |
| Maintenance | Do not use abrasive cleaners or metal scrapers; do not clean with steam cleaner |
| Repairability | Oven light replaceable only by a specialist; do not disassemble yourself |
| Delayed start | Yes, programmable up to 23 h 59 min |
| Auto shut-off | Beep at end of cooking, auto shut-off |
Frequently Asked Questions - MWG 6016 CB BOMANN
User questions about MWG 6016 CB BOMANN
0 question about this device. Answer the ones you know or ask your own.
Ask a new question about this device
Download the instructions for your Microwave Oven in PDF format for free! Find your manual MWG 6016 CB - BOMANN and take your electronic device back in hand. On this page are published all the documents necessary for the use of your device. MWG 6016 CB by BOMANN.
USER MANUAL MWG 6016 CB BOMANN
- Do not remove any installed parts from inside the oven or anything from the inside of the door!
- The foils on the inside of the door must not be removed!
- The mica sheet (11) is also part of the appliance and must not be removed. It protects the electronic component located behind it from dirt.
UWAGA:
WAARSCHUWING: Kookvertraging!
| Code | Magnetron | Grill |
| C.1 | 30% | 70% |
| C.2 | 55% | 45% |
WAARSCHUING: Brandgevaar!
Instructions d-installation
| Code | Micro-ondes | Grill |
| C.1 | 30% | 70% |
| C.2 | 55% | 45% |
Microwave energy: Do not remove this cover!
Thank you for choosing our product. We hope you will enjoy using the appliance.
Symbols in these Instructions for Use
Important information for your safety is specially marked. It is essential to comply with these instructions in order to avoid accidents and prevent damage to the machine:

WARNING:
This warns you of dangers to your health and indicates possible injury risks.

CAUTION:
This refers to possible hazards to the machine or other objects.

NOTE: This highlights tips and information.
Contents
Overview of the Components. 3
General Notes 56
Important Safety Information! 56
Signs and Symbols on the Appliance 58
Overview of the Components. 58
Buttons and Controls on the Control Panel. 58
Information on Grilling and Combined Operation 58
Suitable Microwave Tableware 58
Notes on Operating and Using the Appliance. 59
What you Should Know about Microwave Operation. 59
Notes on Operating the Appliance 59
Initial Operation. 59
Installation Instructions. 59
Preparation. 59
Setting the Clock. 59
Operating the Microwave 59
Pause or Cancel Cooking 59
Quick Start. 60
Heating 60
Heating Table 60
Cooking. 60
Hands-on Cooking Tips 60
Cooking Table 61
Grilling 61
Microwave and Grill Combination Modes.. 61
Tips for Combi Operation. 62
Auto Functions 62
Automatic Program Table. 62
Defrosting 62
Multi-Stage Cooking 63
Special Functions 63
Auto Start (Timer-Function) 63
Locking (Child-proof Lock) 63
Display Function 63
Cleaning 63
Interior 63
External Walls 63
Accessories 63
Odours 63
Oven Light 63
Troubleshooting 64
Technical Data 64
Disposal .64
Meaning of the "Dustbin" Symbol 64
General Notes
Read the operating instructions carefully before putting the appliance into operation and keep the instructions including the warranty, the receipt and, if possible, the box with the internal packing. If you give this device to other people, please also pass on the operating instructions.
- The appliance is designed exclusively for private use and for the envisaged purpose. This appliance is not fit for commercial use.
- Do not use it outdoors. Keep it away from sources of heat, direct sunlight, humidity (never dip it into any liquid) and sharp edges. Do not use the appliance with wet hands. If the appliance is humid or wet, unplug it immediately.
- When cleaning or putting it away, switch off the appliance and always pull out the plug from the socket (pull the plug itself, not the lead) if the appliance is not being used and remove the attached accessories.
- Do not operate the machine without supervision. If you leave the room you should always turn the device off. Remove the plug from the socket.
- The device and the mains lead have to be checked regularly for signs of damage. If damage is found the device must not be used.
- Use only original spare parts.
- In order to ensure your children's safety, please keep all packaging (plastic bags, boxes, polystyrene etc.) out of their reach.
WARNING:
Do not allow small children to play with the foil. There is a danger of suffocation!
Important Safety Information!
Please read carefully and keep for future use.
WARNING:
- The microwave oven is intended for heating foods and drinks. Drying foods or clothes or heating electric pads, slippers, sponges, wet cleaning rags, or similar can cause injuries, combustion, or fire.
- The microwave oven is not suitable for warming/heating up living animals.
- When the door or the door seals are damaged, the microwave oven must not be used until it has been repaired by a qualified specialist.
- Please do not repair the device yourself, but have it repaired by an authorised specialist. Carrying out maintenance or repair work which involves removal of the cover that protects the surroundings from microwave radiation is dangerous unless carried out by an expert.
- If the supply cord is damaged, it must be replaced by the manufacturer, its service agent or similarly qualified persons in order to avoid a hazard.
- Do not heat liquids in closed containers. DANGER OF EXPLOSION!
WARNING:
- Do not place your microwave in a cupboard.
- The appliance requires sufficient space for air circulation in order to function properly. Leave a distance of 30cm above, of 10cm on the back, and of 10cm on both sides of the appliance. Do not cover the appliance. Never block the openings of the appliance. Do not remove the feet.
- Place the appliance with the back facing a wall.
- The appliance and its accessible parts become hot during use. Care should be taken to avoid touching heating elements. Children less than 8 years of age shall be kept away unless they are continuously supervised.
- Only suitable tableware should be used such as: glass, porcelain, ceramics, heat-resistant plastic or special microwave tableware.
Metallic containers are not permitted for heating food and beverages in the microwave oven. Observe the notes in the chapter "Suitable Microwave Tableware". - If food is being heated or cooked in combustible materials, such as plastic or paper containers, the microwave oven should be checked frequently due to the risk of fire.
- If smoke is produced, turn the device off and remove the plug. Keep the door closed in order to suffocate any flames.
- The contents of babies' bottles and jars of baby food must be stirred or shaken and the temperature checked before use. There is a danger of burns.
- Use oven cloths or kitchen gloves when removing the containers. DANGER OF BURNS!
- Food with a shell or skin, such as eggs, sausages, sealed jars etc. must not be heated up in the microwave as they may explode even when heating by the microwaves is finished.
WARNING: Delay in Boiling!
During boiling, particularly during the reheating of liquids (water), it may happen that the boiling temperature has been reached but the typical bubbles have not yet started to rise. The liquid does not boil evenly. When the vessel is removed this so-called delay in boiling may result in the sudden formation of bubbles when the vessel is knocked, causing the water to boil over. There is a serious danger of burns! In order to achieve even boiling, please place a glass rod or similar item, but nothing metallic, in the vessel.
- This appliance can be used by children aged from 8 years and above and persons with reduced physical, sensory or mental capabilities or lack of experience and knowledge if they have been given supervision or instruction concerning use of the appliance in a safe way and understand the hazards involved.
Children shall not play with the appliance. - Cleaning and user maintenance shall not be made by children unless they are older 8 years and supervised.
- Keep the appliance and its cord out of reach of children less than 8 years.
- Any dirt on the door frame/door seal and neighbouring parts must be carefully cleaned with a damp cloth.
- Clean the microwave oven regularly and remove any food residues from the interior.
- If the machine is not clean the surface may be damaged, affecting its serviceable life and possibly resulting in hazardous situations.
- Do not use any aggressive abrasive cleaners or sharp metal scrapers to clean the glass door. You could scratch the surface. This can destroy the glass.
- Steam cleaner is not to be used.
- Also follow the instructions which are given in the "Cleaning" chapter.
-
Do not operate the appliance with an external timer or separate remote control system.
This device is used -
for heating up and cooking solid or liquid foods
- for browning and grilling solid foods.
It is intended for the use in households and for similar applications, such as:
- in staff kitchens of stores, offices, and other industrial areas;
- by guests in hotels, motels, and other housing facilities;
- in agricultural estates;
- in bed and breakfasts.
Signs and Symbols on the Appliance
There is a warning symbol attached to the top surface of the microwave oven:
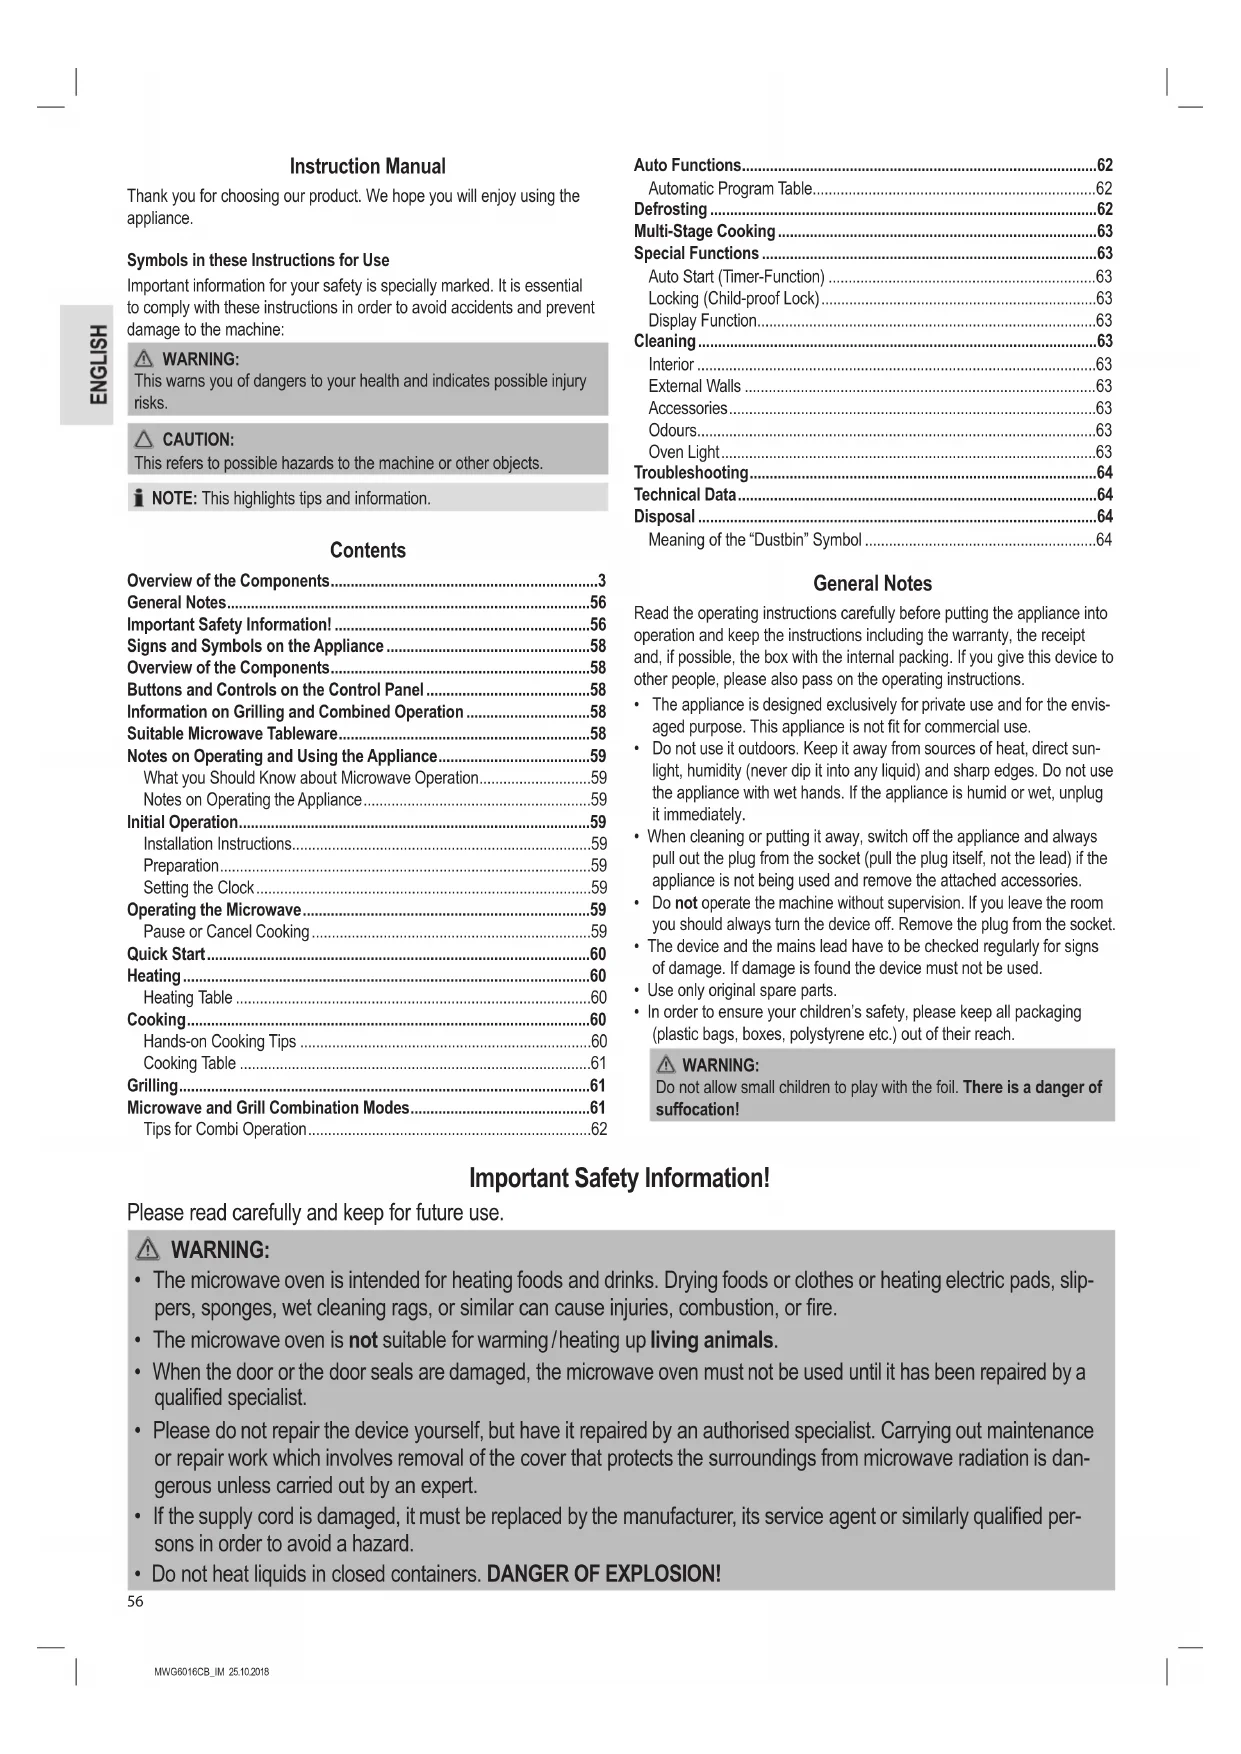
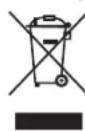
WARNING: Hot Surface!
Risk of Burning!
The temperature of accessible surfaces can get very hot during and after operation.
Also note the information signs on the microwave:
WARNING
1: MICROWAVE AND HIGH VOLTAGE INSIDE. BE SURE NOT TO REMOVE THE ENCLOSURE.
2: THIS APPLIANCE IS EQUIPPED WITH A GROUNDED PLUG FOR YOUR PROTECTION AGAINST POSSIBLE SHOCK HAZARDS AND SHOULD BE CONNECTED TO A PROPERLY GROUNDED OUTLET.
3: THIS DEVICE IS TO BE SERVICED ONLY BY PROPERLY QUALIFIED SERVICE PERSONNEL.
4: DISCONNECT POWER PLUG BEFORE SERVICING. REMOVAL OF THE ENCLOSURE WITH PRODUCT ENERGIZED COULD EXPOSE SERVICEMEN TO HAZARDOUS HIGH VOLTAGE POTENTIAL.
Microwave energy: Do not remove this cover!
Overview of the Components
1 Display
2 Control panel
3 Rotary knob
4 Door opener
5 Drive shaft
6 Guide ring
7 Glass rotating plate
8 Griller
9 Door latch
10 Viewing window
11 Mica sheet
Buttons and Controls on the Control Panel
MICRO Select microwave power setting
GRILL/COMBI
Grill: For grilling and scalloping
Combinations: Microwave and grill work alternately
DEFROST Defrost according to weight
TIMER/CLOCK
Clock: In conjunction with the rotary knob for setting the clock
Timer: Presets for TIMER function
STOP/CANCEL
Reset: Press 1 x to cancel programming
Stop: Press 1 x to temporarily pause cooking
Cancel: Press 2 x to stop an activated program early
Child safety lock: Press and hold for 3 seconds to lock or unlock the control panel respectively
START
Start the program
- Quick start of microwave operation (always + 60 seconds at 100% power)
- Extend cooking time by 10, 30 or 60 seconds during operation, according to the adjusted cooking time (except for the defrost programs and the automatic programs)
- Confirm a selection
Rotary Knob
To set time, cooking time, temperature or by combinations
Information on Grilling and Combined Operation
- As heat radiation is used during grilling and combined operation, please use only heat-resistant tableware. Plastic containers are not suitable.
- When food is only being grilled, metal or aluminium tableware may also be used -but not during combined or microwave operation.
- Do not place anything on top of the housing as this becomes hot. Always leave the ventilation slits uncovered.
- Please use the grilling grid to move the food to be cooked nearer to the heating element.
Suitable Microwave Tableware
- The ideal material for use in a microwave is transparent and allows the microwave radiation to heat the food evenly.
- Round/oval dishes and plates are more suitable than rectangular ones as the food in the corners may overcook.

CAUTION:
Risk of explosion by sealed tableware.
- Open closed containers before cooking or heating.
- Pierce protective plastic foil several times using a fork.

CAUTION: Sparking and Fire Hazard!
- Microwaves cannot penetrate metal. Accordingly, no metal containers or plates may be used in microwave operation.
- Do not use any paper dishes made of recycled material as these may contain small amounts of metal, which may result in sparks or fires.
The list below is intended to help you select suitable microwave tableware:
| Material | Suitable for | ||
| Microwave | Grill | Combination* | |
| Heat-resistant glass vessel | yes | yes | yes |
| Non-heat-resistant glass vessel | no | no | no |
| Heat-resistant ceramic vessel / plate | yes | yes | yes |
| Plastic vessels suitable for microwave use | yes | no | no |
| Kitchen roll | yes | no | no |
| Metal or aluminium ovenware | no | yes | no |
| Grilling grid | no | yes | no |
| Aluminium foil and foil containers | no | yes | no |
*) Combination of microwave with grill
Notes on Operating and Using the Appliance
What you Should Know about Microwave Operation
- Your device works with microwave radiation, which heats up water particles in food in a very short time. There is no heat radiation and therefore hardly any browning.
- Only food should be heated up with this device.
- The device is not suitable for baking in floating fat.
- Only 1 - 2 portions should be heated up at the same time. Otherwise the microwave will become less efficient.
- Microwaves provide their full energy levels immediately. Pre-heating is therefore not necessary.
- Never operate the microwave function when the oven is empty.
- The microwave oven does not replace your traditional cooker. It is used mainly for:
defrosting deep-frozen food
- rapid warming / heating of food or drinks
- cooking meals.
Notes on Operating the Appliance
- Your selection by pressing buttons is confirmed by a signal tone. If this does not occur, then you have not pressed the button properly or you have made an incorrect selection.
- If a program is selected and the START button is not pressed within 2 minutes, then the setting is cancelled. The display will then show the current time again.
After a program has started, the display will show a countdown timer indicating the remaining operating time. - 3 signal tones will indicate the end of the program. "E nd" will appear in the display. After that the appliance turns off automatically.
- The illumination inside the microwave oven is on permanently. Close the door of the microwave oven to turn off the illumination.
Initial Operation
Installation Instructions
- Install the appliance with the back of the appliance facing the wall.
-
Maintain the following safety clearances:
-
10 cm to the back
- 10cm to both sides
-
30~cm to the top of the microwave.
-
In order to avoid interference with the operation of other devices, do not place your device near other electronic devices.
Preparation
- Press the door opener to open the door of the microwave. The door swings open.
- Remove any accessories from the cooking chamber and unpack.
- If not yet done: Place the drive shaft on the centre of the bottom inside the oven.
- Install the guide ring in the centre.
- Position the glass rotating plate in such a way that its lower recesses lock onto the centre of the drive shaft.
- Check the device for any visible damage, particularly in the area of the door. If any damage is found, the machine must not be used.
- Make sure the mains voltage to be used corresponds to the voltage of the appliance. Check the rating label for specifications.
- Insert the mains plug into a properly installed power socket.
CAUTION:
- Do not remove any installed parts from inside the oven or from inside the door!
- The mica sheet (11) is also part of the appliance and must not be removed. It protects the electronic component located behind it from dirt.
i NOTE:
If there are manufacturing or oil remains on the enclosure or heating element, smoke or odour might occur during the beginning operation. This is normal and will cease after repeated use.
We strongly recommend proceeding as follows:
- Turn on the grill mode and let the device operate several times without food to be cooked.
- Ensure sufficient ventilation.
Setting the Clock
i NOTE:
As soon as the appliance has been connected to the power supply, all segments light up 3 times. Then a signal will sound and in the display will flash " : .
- Press the TIMER / CLOCK button once.
- Use the rotary knob to set the desired hour.
- Press the TIMER / CLOCK button to confirm your settings.
- Use the rotary knob to set the desired minutes.
- Press the TIMER / CLOCK button again to activate the new time. The delimiter symbol " : " of the digital time will be flashing on the display.
Operating the Microwave
- Place the food to be heated in a suitable piece of tableware.
- Open the door and place the vessel in the middle of the glass plate. Then close the door. (For safety reasons the oven only operates when the door is tightly closed.)
- Press the MICRO button once/repeatedly to select the desired microwave power.
| Power Setting on the Display as Selected in % | Power in Watt (approx.) | Application |
| 10 OP | 700 Quick heating | |
| 8 OP | 560 Cooking | |
| 6 OP | 420 Simmering | |
| 4 OP | 280 Defrosting frozen goods | |
| 2 OP | 140 Melting butter etc. |
- Use the dial control to select a cooking time between 10 seconds and 60 minutes.
- Press the START button. The cooking time depends on the quantity and constituency of the contents of the oven. With a little practice you will soon learn to estimate the cooking time.
NOTE:
Each time you press the START button, the operating period is extended.
- Up to 5 minutes by 10 seconds.
-
From 5 minutes to 10 minutes by 30 seconds.
Over 10 minutes by 60 seconds. -
Preparation of food in a microwave oven is very much faster than in a conventional cooker. Set the cooking time to a low level if you are not sure and continue cooking again if necessary.
- Please note: A cover should be placed over the food when operating the microwave.
Pause or Cancel Cooking
- To pause cooking, press STOP / CANCEL button once or open the door.
- To continue cooking, close the door and press the START button again.
- In order to fully stop the cooking process, press the STOP / CANCEL button twice, thereby resetting all program settings.
Quick Start
You wish to heat food or drinks shortly at the highest power setting?
Quick-start the microwave by directly pressing the START button. The cooking process will start immediately, whereby each time you press the button, cooking time will be extended by 10, 30 or 60 seconds (see "Operating the Microwave").
The power setting of the microwave is thereby 100% .
Heating
Warming and heating are special characteristics of microwaves. Refrigerated liquids and foods can be easily warmed up to room or eating temperature without having to use a lot of pots.
The heating times in the following table are for reference only, as the time depends very much on the original temperature and the texture of the food. It is therefore recommended to check once in a while whether the food is hot enough.
Heating Table
| Edibles / Food Quantity | Microwave Power in % | Time approx. Min. | Cover | |
| Liquids | ||||
| 1 cup 150g | 10 DP | 0.5-1 no | ||
| 0,5 l 500g | 10 DP | 3.5-5 no | ||
| 0,75 l 750g | 10 DP | 5-7 no | ||
| Tip: Put a glass stick into the container to avoid superheating; stir well before drinking. | ||||
| Plated Meals | ||||
| Cutlet + potatoes and vegetables | 450 g | 10 DP | 2.5-3.5 yes | |
| Goulash with noodles 450 g | 10 DP | 2-2.5 yes | ||
| Meat + lump + sauce 450 g | 10 DP | 2.5-3.5 yes | ||
| Tip: Slightly moisten before cooking; stir occasionally. | ||||
| Meat | ||||
| Cutlet, breaded | 200 g | 10 DP | 1-2 no | |
| Meatballs, 4 pieces | 500 g | 10 DP | 3-4 no | |
| Joint | 250 g | 10 DP | 2-3 no | |
| Tip: Coat with oil for the breading or crust not to soften. | ||||
| Poultry | ||||
| 1/2 chicken | 450 g | 10 DP | 3.5-5 no | |
| Chicken fricassee | 400 g | 10 DP | 3-4.5 yes | |
| Tip: Coat with oil; stir occasionally. | ||||
| Side Dish | ||||
| Noodles, rice, 1 serving2 servings | 150 g | 10 DP | 1-2 | yes |
| 300 g | 10 DP | 2.5-3.5 yes | ||
| Potatoes | 500 g | 10 DP | 3-4 | yes |
| Tip: Slightly moisten prior to cooking. | ||||
| Soups/Sauce | ||||
| Broth, 1 plate | 250 g | 10 DP | 1-1,5 yes | |
| Soup with solids | 250 g | 10 DP | 1.5-2 yes | |
| Sauce | 250 g | 10 DP | 1-2 | yes |
| Edibles / Food Quantity | Microwave Power in % | Time approx. Min. | Cover | |
| Infant Food | ||||
| Milk | 100 ml | 5 0P | 0.5-1 no | |
| Mash 200g | 5 0P | 1-1.5 no | ||
| Tip: Thoroughly shake or stir. Check temperature! | ||||
Cooking
Hands-on Cooking Tips
Follow the guidelines given in the cooking table and recipe. Monitor the cooking process if you do not yet have as much experience.
You may open the door of the device at any time. The device will turn off automatically.
It will only continue operation when the door is closed and the START button pressed again.
Refrigerated food needs a longer cooking time than that with room temperature.
The chunkier the food, the longer the cooking time. Meat cut in bigger pieces, for example, requires longer cooking than meat of the same quantity cut into strips. It is recommended cooking larger amounts of food at maximum power and having it simmer at medium power for a more evenly cooking.
Lower foodstuffs cook faster than higher ones; therefore distribute the food as low as possible. Place thinner parts such as chicken legs or fish files in the centre or leave them overlapping.
Smaller amounts cook faster than bigger ones. The following rule of thumb applies:
Double amount = almost double time Half amount = half time
If you cannot find the exact cooking time for a dish, you may apply the following rule:
Per 100g approx. 1 minute cooking
All foods that you cover on a common stove should be covered in the microwave as well.
A cover will prevent the food from running dry. An upside-down plate, greaseproof paper or microwave cooking foil are all suitable as covers. Cook food that should be getting a crust without cover.
Cooking Table
| Edibles / Food Quantity | Microwave Power in % | Time approx. Min. | Cover | |
| Vegetables | ||||
| Eggplant 500g | B OP | 7-10yes | ||
| Cauliflower 500g | B OP | 13-15yes | ||
| Broccoli 500g | B OP | 6-9yes | ||
| Chicory 500g | B OP | 6-7 yes | ||
| Peas 500g | B OP | 6-7 yes | ||
| Fennel 500g | B OP | 8-11yes | ||
| Green beans 300g | B OP | 13-15yes | ||
| Potatoes 500g | B OP | 9-12yes | ||
| Stem turnip | 500g | B OP | 8-10yes | |
| Leek | 500g | B OP | 7-9yes | |
| Corn on the cob | 250g | B OP | 7-9yes | |
| Carrot | 500g | B OP | 8-10yes | |
| Pepper | 500g | B OP | 6-9yes | |
| Brussels sprouts 300g | B OP | 7-10yes | ||
| Asparagus | 300g | B OP | 6-9yes | |
| Tomatoes | 500g | B OP | 6-7 yes | |
| Zucchini | 500g | B OP | 9-10yes | |
| Tip: Cut vegetables into small pieces and cook with 2-3 spoons of liquid; stir occasionally. Simmer 3-5 minutes; add seasoning just before eating. | ||||
| Fruits | ||||
| Stewed apple or pear | 500g | B OP | 5-8yes | |
| Stewed rhubarb | 250g | B OP | 4-6 | no |
| Roast apple, 4 pieces | 500g | B OP | 7-9yes | |
| Tip: Add 125 ml of water; lemon juice will prevent the fruits from discolourating; simmer 3-5 minutes. | ||||
| Meat*) | ||||
| Meat with sauce | 400g | B OP | 10-12yes | |
| Goulash, veal strips | 500g | B OP | 10-15yes | |
| Beef roulades | 250g | B OP | 7-8yes | |
| Tip: Stir occasionally; rest for 3-5 minutes. | ||||
| Poultry*) | ||||
| Chicken fricassee | 250g | B OP | 6-7 yes | |
| Chicken soup | 200g | B OP | 5-6 yes | |
| Tip: Stir occasionally; rest 3-5 minutes. | ||||
| Fish | ||||
| Fish filet | 300g | B OP | 7-8yes | |
| 400g | B OP | 8-9yes | ||
| Tip: Turn over after half the time has elapsed; simmer 3-5 minutes. | ||||
| Edibles / Food Quantity | Microwave Power in % | Time approx. Min. | Cover | |
| Defrosting and Cooking Vegetables | ||||
| Red cabbage with apple | 450g | B OP | 14-16yes | |
| Spinach leaves | 300g | B OP | 11-13 | yes |
| Cauliflower 200g | B OP | 7-9yes | ||
| String beans | 200g | B OP | 8-10yes | |
| Broccoli 300g | B OP | 8-9yes | ||
| Peas 300g | B OP | 7-8yes | ||
| Stem turnip | 300g | B OP | 13-15yes | |
| Leek | 200g | B OP | 10-11 | yes |
| Corn | 200g | B OP | 4-6yes | |
| Carrots | 200g | B OP | 5-6yes | |
| Brussels spout | 300g | B OP | 7-8yes | |
| Spinach | 450g | B OP | 12-13yes | |
| 600g | B OP | 15-17yes | ||
| Tip: Cook with 1-2 spoons of liquid; stir occasionally or carefully cut.Simmer 2-3 minutes; add seasoning just before eating. | ||||
| Soups/(Stew*) | ||||
| Stew | 500g | B OP | 13-15yes | |
| Soup with solids | 300g | B OP | 7-8yes | |
| Crème soup | 500g | B OP | 13-15yes | |
| Tip: Stir occasionally; simmer 3-5 minutes. | ||||
*) Ready-made food
Grilling
Place the grill rack onto the supplied glass plate. Use suitable heat-resistant tableware or directly put the food onto the grill.
It is not necessary to preheat the grill rack since the grill generates radiant heat immediately.
Proceed as follows for roasting and scalloping:
- Press the GRILL/COMBI button until "E" appears on the display.
- Use the rotary knob to set the desired roasting time between 10 seconds and 60 minutes.
- Press the START button to start.
i NOTE:
We recommend turning the food (e.g. meat, sausage) after approx. half of the cooking time has elapsed. The fan continues running when the cooking process is paused.
| Edibles / Food | Quantity | Time approx. Min. | Cover |
| Scalloping toast with cheese | 2-3 slices | 3-4 | no |
| Scalloping soups, e.g. onion soup | 2-3 cups | 10-15 | no |
Microwave and Grill Combination Modes
During those modes the microwave and grill work alternately within a set time.
- Press the GRILL/COMBI button repeatedly to select the desired combination mode.
| Code | Microwave | Grill |
| C.1 | 30% | 70% |
| C.2 | 55% | 45% |
- Use the dial control to select a cooking time between 10 seconds and 60 minutes.
- Press the START button.
Tips for Combi Operation
When cooking food with the combined setting of microwave-grill, you should adhere to the following:
The cooking time for big and thick food items, such as roast pork, is respectively longer than for small, lower food. Nevertheless, when roasting, the opposite rule applies. The closer the food is to the grill, the faster it will become brown. i.e., when preparing big joints during combi operation, the roasting time is possibly shorter than for smaller joints.
Auto Functions
Use the auto functions to cook certain amounts of foods automatically. Proceed as follows:
- Turn the rotary knob clockwise and select the desired auto function. Choose one of the settings given in the table below.
- After selecting the automatic program, press the START button. Now use the rotary knob to set the weight.
- Press the START button to start operation.
NOTE:
For the programs R.1, R.3 and Radd approximately 2-3 tablespoons of water.
- Cut the potatoes for the programs R-B and Rinto small pieces beforehand.
Automatic Program Table
| Code Function Quantity | ||
| R.1 | Rice | 0.1 kg |
| 0.2 kg | ||
| 0.3 kg | ||
| R.2 | Meat | 0.15 kg |
| 0.3 kg | ||
| 0.45 kg | ||
| 0.6 kg | ||
| R.3 | Vegetables | 0.2 kg |
| 0.3 kg | ||
| 0.4 kg | ||
| 0.5 kg | ||
| 0.6 kg | ||
| 0.7 kg | ||
| 0.8 kg | ||
| R.4 | Popcorn 0.1 kg | |
| R.5 | Beverages | 1 cup |
| 2 cups | ||
| R.6 | Potatoes | 0.45 kg |
| 0.65 kg | ||
| R.7 | Pizza(Warming up) | 0.2 kg |
| 0.3 kg | ||
| 0.4 kg | ||
| Code Function Quantity | ||
| R-8 | Fish | 0.2 kg |
| 0.3 kg | ||
| 0.4 kg | ||
| 0.5 kg | ||
| 0.6 kg | ||
| 0.7 kg | ||
Defrosting
i NOTE:
- Microwave power when defrosting is 40% (280 W).
- Since the microwaves always penetrate the food from the outside in, larger pieces may not be fully defrosted in their centre. The outer layers may already have started to cook.
- Turn foodstuff such as meat, sausages or bread once after approx. half of the defrost time has elapsed. Close the door and press the START button to continue.
- Factor in a compensation time after the defrost program. This is a standing period during which a temperature compensation takes place through conduction of heat from the outside (defrosted) to the inside (frozen). You can leave the food in the switched off appliance or outside the appliance during the compensation time. The compensation time should be at least as many minutes as the defrost time in the microwave. It depends on the condition of the food.
- If the weight of the food is less than 200g , do not place it in the middle but at the edge of the glass plate.
- You can shorten the compensation times by e.g. separating small pieces of meat or crumbling the remaining frozen chunks of mince after the defrosting time. For sliced bread or sausage, separate the slices during the compensation time.
- Allow fruit to defrost in a bowl with a lid. After around half the defrost time, gently stir the fruit once.
- Cakes or tarts with chocolate icing should not be defrosted in the microwave.
There are two methods by which you may thaw frozen items:
- Use the MICRO button to select 4^ P . Use the rotary knob to set the desired defrost time.
To use the defrost program, proceed as follows: - Determine the weight of the food.
- Remove the food from its packaging. If it cannot be removed from the packaging, defrost for 30 seconds on maximum microwave power (see "Quick start").
- Place the food to be defrosted onto the plate (fruit into a bowl). Also place meat onto a upturned saucer so that the meat juices can drain. This saucer should never be used for other foods or come into contact with them.
- Repeatedly press the DEFROST button to select one of the defrost functions:
| Edibles | Defrost Program | Weight | Defrost Time |
| Meat | d·1 | 0.1 - 2.0 kg | 1:19 - 52:52 |
| Poultry | d·2 | 0.2 - 3.0 kg | 2:38 - 66:25 |
| Fish | d·3 | 0.1 - 0.9 kg | 1:32 - 13:50 |
- Use the rotary knob to set the desired weight.
- Press the START button to start.
Multi-Stage Cooking
You can set the programs in such a way that up to 4 different functions can be carried out in succession.
Assume you select the following programs:
Microwave

Grill
- Select 1. Functions: Press the MICRO button repeatedly to select the desired microwave power.
- Use the dial control to select a cooking time between 10 seconds and 60 minutes.
- Select the 2nd function: Press the GRILL / COMBI button until " appears on the display.
- Use the rotary knob to set the desired roasting time between 10 seconds and 60 minutes.
- Press the START button to start operation.
i NOTE:
- The change of program is indicated by an acoustic signal.
- This function is not possible with the automatic and defrost programs.
Special Functions
Auto Start (Timer-Function)
The maximum time-delay is 23 hours and 59 minutes.
i NOTE:
- First set the clock! Otherwise you may not use this function.
- When using auto start, the defrost function is not available. This program setting does not support quick start cooking.
Example: It is 10:45 h. You want to program the microwave so that it operates at maximum power for 712 minutes at 14:20. Proceed as follows for automatically starting the microwave:
| Step Button Display | |||
| 1 MICRO | 10.0P | (Power) | |
| 2 | 7:30 | (Cooking time) | |
| 3 | Hold down the TIMER / CLOCK button for 3 seconds | 10:45 | (Current time) |
| 4 | 14:45 | (Setting the hours) | |
| 5 TIMER / CLOCK | 14:45 | (Confirmation of hour) | |
| 6 | 14:20 | (Setting the minutes) | |
| 7 TIMER / CLOCK | 10:45 | (Current time) | |
i NOTE:
- The Timer function is activated when the "O" symbol flashes in the display.
- During this programmed setting the functions of the controls are blocked (except: TIMER / CLOCK, STOP / CANCEL and START).
- If you wish to display the start time again, press the TIMER / CLOCK button.
- In order to deactivate the automatic start time, press the STOP/CANCEL button.
- When the pre-set time has been reached, the microwave will start operation. A beep indicates the start.
- If you wish to start the program earlier, then press the START button. The program begins based on the previously selected settings.
WARNING: Risk of Fire!
- Always supervise the device during operation.
- When using the time-delay function, set the time in such a way that the device will be operating under proper supervision.
- Do not operate the microwave empty. If you want to take out the food before the program has finished, you have to cancel the program by pressing the STOP / CANCEL button.
Locking (Child-proof Lock)
- Press and hold the STOP / CANCEL button for 3 seconds to lock the appliance. You will hear a signal tone. The locked condition is shown in the display by "0 FF". The control panel function is blocked.
- Press and hold the STOP / CANCEL button again for 3 seconds to unlock. You will hear a signal tone.
Display Function
If you press the MICRO button during operation, the operating mode will be displayed for 1 - 2 seconds.
Cleaning
WARNING:
Turn the microwave off and remove the mains plug.
#
- Do not use any wire brush or other abrasive objects.
- Do not use any acidic or abrasive detergents.
- Do not use a metal scraper to clean the viewing window. The surface could be scratched and the glass could possibly break.
Interior
- Keep the interior of the oven clean. Splashes and overflowing liquids on the walls of the oven can be removed with a damp cloth. If the oven is very dirty a mild detergent can also be used.
- Wipe off the viewing window on the inside and outside with a damp cloth and remove splashes and stains from overflowing liquids regularly.
External Walls
- The external walls of the microwave should only be cleaned with a damp cloth. Please ensure that no water enters the openings in the housing and therefore inside the device.
- Open the microwave door before cleaning the control panel in order to avoid accidentally switching on the appliance.
Accessories
- Clean the glass plate in warm soapy water or in the dishwasher. Dry it before reinstalling it in the microwave.
- Regularly clean the guide ring and the inside of the bottom. You may remove the guide ring and manually clean it. Use a mild detergent or glass cleaner. Dry thoroughly. Make sure to position the ring properly afterwards.
- Clean the grill after each use with a dishwashing detergent or place it in a dishwasher for cleaning.
Odours
In order to remove any unpleasant odours that may emanate from the microwave, place a dish filled with water and lemon juice that is suitable for microwave use in the oven and heat it for approximately 5 minutes. Then wipe out the oven with a soft cloth.
Oven Light
If you need to replace the lighting in the oven, please contact a specialist workshop near you.
Troubleshooting
Malfunctions are often just caused due to minor problems. Before contacting our customer service, please check the table below:
| Problem Possible Cause Notes / Solution | ||
| Radio or TV reception is interrupted during microwave operation. | The electromagnetic fields of this device might interfere with the pictures and sound of special frequencies. | This is normal and not a malfunction. Position the devices further away from each other. |
| The device is not supplied with electricity; the display is black. | Defect wall socket. Try another wall socket. | |
| Check the main fuse in your household. | ||
| " : " will flash in the display. There was a power failure. Set the clock again. | ||
| The device does not start operation. The display shows a readout other than the current time. | The door is not properly closed. Check if there are objects or food remains jammed in the door. | |
| The START button was not pressed after selecting the function. | Press the START button to start or continue operation. Press the STOP / CANCEL button to cancel the program. | |
| All controls are locked The child-proof lock is activated. The display shows “0 F F”. | Press and hold the STOP / CANCEL button for 3 seconds to unlock the appliance. You will hear a signal tone. | |
| The display shows the current time. The “0” symbol will flash. | An automatic start mode is programmed. You can see the start time by pressing the TIMER / CLOCK button. Press the STOP / CANCEL- button to cancel the program. | |
| The turntable causes a scratching or aberrant noise. | There are dirt or foreign objects in the area of the turntable shaft. | Remove possible objects and food remains as described under “Cleaning”. |
| The operation is terminated without any obvious reason. | The device is defect. | Please contact our customer service. |
Technical Data
Model: MWG 6016 CB
Power supply: 230V\~,50Hz
Power consumption: Microwave: 1150 W Grill: 800 W
Rated microwave power output: 700W/2450MHz
Cavity volume: approx. 20 litres
Protection class:
Net weight: approx. 11.65kg
The right to make technical and design modifications in the course of continuous product development remains reserved.
This device has been tested according to all relevant current CE guidelines, such as electromagnetic compatibility and low voltage directives, and has been constructed in accordance with the latest safety regulations.
Disposal
Meaning of the "Dustbin" Symbol
- Protect our environment: do not dispose of electrical equipment in the domestic waste.
Please return any electrical equipment that you will no longer use to the collection points provided for their disposal.
This helps avoid the potential effects of incorrect disposal on the environment and human health.
This will contribute to the recycling and other forms of re-utilisation of electrical and electronic equipment.
Information concerning where the equipment can be disposed of can be obtained from your local authority.
Instrukcja obstugi
Polecamy nastepujace procedure:
CIMBOBII pIIMHeMbIe B DAHOM pyKOBoDCTBe NIOb3OBaTeJIa
Baxhble pekomehdaunn o6ceuehenraaew 6e3oanchoctn
060haehbnooc6ehHomy.ObraTeNbHO cneyuTte 3TNM pekomehda
qum, y06bI npedotbpaTntb HeccuactHbI cnuyaINI NIOOMky n3dienr
PNEyPENKDEHNE:
PpeDynpexJaetobOpachOCTnIa3dopOBbNBO3MOxHOM pncKe noLyueHn TpaBmbl.
BHIMAHHE:
Yka3bIbaeT Ha BO3MOxHyIO ONaCHOCtB DnA N3DeJIIN N DpyrNX OkpyKaIO-ux npEIMetOB.
I I P N M E U A H N A: Daet COBETbI INHOpMaUHIO.
CoepekhaHne
O63op deTanei np6opa. 3
O6uaHnΦopMaun8
Baxhhe yka3aHn no texnke 6e3onachoctn! 85
3HaKn HCMBOJbHa ycTpoNCTBe 87
063op deTanei npnbopa. 88
KhoNKn npraHbI ynpaBneHa naHeiynpaaBneHn 88
PpmeaHnK pexmmy rnilb n KOM6n. 88
Iocya dna MmKpOBoHOBo neu 88
PpmeaHnno 3Kcnpyataunn HcnoNb3oBaHnO np6opa...88
I03HaBaTeIbHoe K TeMe MmKpOBoHOBa ney. 88
PpimmeaHnno 3KcPiyaTaunn npnbopa. .89
IoproToBka K pa6ote 89
Hnctpykun no yctaHOBKe. 89
IodroTobka 89
YcTaHOBka Yacob 89
3KcnnyataaMnKpOBoHOBoNeu.. 89
PpnoocTaHOBHeHne HnOToMeHa pnproTOBHeHn89
BbIcTpbi nyck. 90
Pa3orpeB 90
Tablua pa3orpeBa. 90
TOTOBka. 90
CobetbI npn roTOBKe. 90
Tabnla roTobkn 91
Icnonb3OBAHne rPnra 91
KombHHpoBaHHbIepeXIMblPnHROTOBHeHnB
MnKpOBoJHax Ha rPHe 92
CobetipnpncnoB30BaHmKoM6o-peKMa..92
ABTomatueckne yHKunn 92
Tabnca aBtOMaTnuecknx nporpaMm 92
Pa3MopaxuBaHne 92
MhorocTyenHauToe npuroToBneHne. 93
Cneuaabhbie yHKun.. 93
ABTOCTAP(TaMep-ФyHkU) 93
3aIpaHne (6nokpOBka ot deTei) 93
Функлг OTo6paKeHn.. 93
Ynctka 93
BHyTpeHHra emKocTb neu. 93
HapyKhble CTeHN. 94
PruHaJnEeXHoCTu 94
3anaxn 94
BHytpenHne ocbeueHne 94
PeueHne npo6IeM 94
TexHHueckne daHHbIe 94
ytnnnaa. 94
3HaueHne CnmbOna «Kop3nHa» 94
06uaHnΦopMaun
Ipeep Hauanom 3Kcnnnyataaun npmbopa BnHMaTeJbHo npOHTaTe npnIraeMyIO INCTpyKUHO NO 3Kcnnyataaun n COxpaHNTe ee H naExKHOM MecTe, BmecTe C rapaTnHbIM TaIOHOM, KACCOBbM YekOM N, NO BO3MOXHOCTN, KAPTOHHo KOpO6KO C yNAKOBOuHbIM MaTePnaONOM. EcIn daete KOMy-1n60 nonlb3ObaTbca np6bOpom, O6BaTeJbHO daITe B npndaY daHHyo INCTpyKUIO NO 3Kcnnyataaun.
Пльзупесь пиборм толькоauthыmобраимиnoHAЗHAЧЕНИ. Пибор He npedHa3HauhenяКOMMpeCKeKOrO INcNoIb3OBAHIN.
He noIb3yntecb np60pom nO1 OTKpbTbIM He6oM. PpeoxpaHnTe np6opOT Xapbl, pRbIX COINHEhBIX Nyuei, BnaxHOCTN (HN B KOem Cnyae He norpykaIte erO B Body) u yapOB 06ocptble yIbl. He npkacaiTecb K np60by BnaXhblm pykam. Ecnnp6op yBaXHnncn nnHAMOK, TY TKe BbHbTe BNIKY n3 PO3eKn.
- Iocne 3KcnpnyatauH, MoHTaxe npHaadnHexHOCTe, YNCTKe HIN NOIOMKe np6bopa Bcerda BbyHMaTe BnIKy n3 po3ETKn (TJHNTe 3a BNJKy, a He 3a Ka6eB).
He octabnIte BkIIOueHHbIe 3JIeKTpnpN6OpbI 6e3 npncMOTpa. BblXoJa n3 NOMeueHnB CBeTa BBKIOUaTe np6op. BbHbTe uTeKepe n3po3eTKn.
-ПиббпИ Кабь сеТБО rntaHЯ Heo6xOДМо peryIryPHO 6CNEIOBAt bHa HANUe CTeIOB NOpeXdEHn.Пи ObHApYKeHIN NOpeXdEHn NOb3OBAbTa cpiN6pOM 3anPeuaTcra.
IcnoJb3yIteToJIbKOOpnHaHaNbHbIe3aIHaCTN.
- Ⅲ coobpaKeHn 6eONaChOCT nIg DeTe HcTbNJIte Jekatb ynakOBky (PiactNKOBblc MeuK, KapTOH, NeHONNaCT N T. d.) 6e3 npCmOTpa.
PNEyPENKDEHNE:
He no3BOJnAte TETM INpTaB C nonIn3TNHeHOB O nIeHKO. Onac
Hoctb ydyb!
Baxhble yka3aHnno TeXnke 6e3onacHOCTn!
Ioxanynta, tataeBno npouHTaTe n coxpaHnTe dna daJIbHeuero noIb3ObaHn.
PENEYUNPEXDEHNE:
MnKpOBoJHOBa neb npEHa3HaueHa nIpa 0a3OrpeBa eIb I HaNTKOB. CyuKa npOdyKTob IIN OeXdbI, HarpeBaHHe 3JIeKtpUeCKnx NOpUeK, TaOnueK, r6ok, MOKpoB BeToIIN IIOo6hIx npEmdetOB MoKET npNBecTN K TpaMe, B3pbBy nI IN Noxapy.
3anpeaetcrauyntb/corpbaB B MIKPOBOHOBONeyn XNBbIX XNBOTbIX, OHa dIy 3TOHO He npedycmOTpeha.
- Ecπn DBepua nIy npTHeHn yDBePbI NobpeXeHbI, 3aIpeuaetc DaIbHeuAa EKcnnyataun neu, noka OHa He 6ydet OTpemOnHTnpoBaHa oByeHHbIM dIra 3TOrO cneuaJIInCTOM.
PENEyPEXDEHNE:
- HN B KOEM CNYaH e peMOHTnpyTe neb camoCTOaTbHO, a 6paNTeCb KaBTOpeTHOMy CneuaNCTy. Bcem DpymK, KpOME CNEuAIncTy, OAnCHO PPOBOITb KaKe-Neo peMOHTbIe NIN pePNaMeHTbIe pa60tbl, TAK KAK3TO Tpe6byET ydaJIeHnRA ObuBKn, KOTOPAR 3aUIIaET OT o6nyehnM MKNPOBOHOBBIM N3nyeHnEM.
- Ecnn uHyp nHTaHnna NOBpeXdeH, BO n36exhane ONaCHcTn 3aMeHy DoJIKeH pOn3BOoNTb n3rOToBnteIb, cepBnC-HbI npedCTaBnteJI bnn dpyroKBAInΦuNpOBaHHb CneuaNCT.
- He pa3orpeBaIte JxNdkocTn B 3aKpbItbIX 6aHkax IJI N cocyJax. ONACHOCTb B3PbIBA!
- Hn B KOem Cnyae He CTaBbTe MmKpOBoHOByIO Neyb B UkkaΦ.
Bokpyr npnbopa Heo6xOIMO oecneuHb DoctatoHoe npoctpaHCTBO dnyu, T06bl npnbop pa6otan hadejHo. Hnd npnbopom doJHKHO 6b1t b 30cm, 10cm c3aun n 10cm c kdoon ctopohb ot npnbopa. 3a- npeuaetcnaKpbBaT npnbop. 3appeaetc6bnknpobatb OTBepnBn B npnbope. He chImaTe ochOBaHne. - UctanabnBaIte np6op 3aHne CTOpOH K CTeHe.
- Cam npibop n doctynbIe deTaN HarpeBaOTcB O Bpempa6oTbI np6opa. BybTe BHIMaTeNbHbI, He npika-cainTecb K HArpeBaTeNbHbIM 3JIeMeHTam. DeTn MJaIe 8 Iet DoJXHbI HaxOOnTbc BAan OT np6opa NIN NOCTOHHbIM Ha6NIODeHNEM B3Pocblix.
- Пользунтесь только посудов ИЗ похордхи Матерпалов Тадк:сткл, сарфop, керамка, јаразмда симпллгшдьног Дя PMKрOBЛНБыx Neч.
3anpeaetcnaonb30BaTb MetanHueckyIOncuIy InIpoIorpeBa ebl nHaNTKOB B MmKpOBOHOBoNeu. O3nakombtecB c HOpMaueB bpa3deJe «IocyaIgMmKpOBOHOBo Neu» - Pa3orpeBaI IIN Bapr NnUy B ynaKOBKe n3 ropOuNX MaTePnaIOB, HAprrMeR n3 PIIaCTMaCCbI IIN 6ymarH, Heo6XODIMO NOCToAHNO HaJIIODaTb 3a IpoueccOM, No pNUnHe BO3MOxHO RBO3ropaHnIX.
- Ecni n3 dYXOBKn Haunet BbICTynatb DbIM, To BbIKNIOHTe neyb N BbIHbTe BNIKy n3 pO3eTKn. IBepua DOnJxHa octaBaTbc 3akpbIToi, YTO6bl yDyUInTB Oyar BO3rOpAHn.
CopeKIMoe 6yTbIOueK 6aHOeK cTeCKM NtAHm o83aTeJIbHO nepemeuTaB INN B36oNTaTb, a TAKKe npOBepntb nx Temnepatypy. OnachOCT b noJyuEHH OXOROB! - Yo6bI BbITauntb KOHTeHep n3 neu, nCNoJIb3yIte npxBaTKn nn pyKaBnIb. ONACHOCTb NOLYEHNr OXoROB!
- IpoodykTBI NITaHnco CCKOpLyNoi HNI B WkypKe, KaK YMa iN N KOJIbAcbl, KOHcEpBbI B 3aKpbITbIX CTeKJHbIX 6aHKax NT. D. 3aIpeuaetcpa3OrpeBaTb B MmKpOBoHOBo Neu, TAK KAK OHN MOrYB 3OpBaTbcR, daXe nocne OKOHuaHn pa3OrpeBaHHe MmKpOBoHOBo 3Heprmei.
PENEYNPEXKDEHNE:3aTJXHoe 3aknnaHne!
Bo BpemBaKn, 0oc6eHNO Bo Bpempa3oRpeBaHnJxNkoCTeB (BObI) MoKET cnyuHTbcr, YTO TempeaTpa KIneHn8 bDcTIOCTHyTa, Ondako TINmHbIe dIra 3TO rO pOcecca np3bIPbKn Iapa He NOBnHTc. KNIOKCTb KnINT He paBHOMepHO. 3To, TaK Ha3bIbaEMoe 3aTjXHoe 3aknnaHne, MoKET pPnBEcTn K TOMy, YTO NOcNE CHRTNPOcyDbIC XNIOCTbO OT JERKOrO BCTprXnBaHnHEoXnDaHNo HauHyT o6pa3OBbIbATbcr napOBbIe Ny3bIpN n OHa BCKnIT. OnacHOCTb NOnyehnO xkORo! IJI daOCTnxKeHn paBHomepHoro KIneHn BCTaBbTe B COCyd CTeknHHyU nAnOuyKu nn en PNO6hbl He MetaJInuYeckn PpeMet.
3TO yCTPOIcTB MOXET NCIIOJIb3OBAITBCaTeBMM C 8 JET NJIIOJBMM C ORpaHnueHHbIMN OIN3NUeCKMIM,OC3aTEJIbHbIMN IYMCTBEHHbIMN CNOCOBHOCTAM, a TAKKE NIOJBMM 6e3 ONbTA N3HaHNI, ECIN OHN HAXODTcN IOI INCMOTPOM INIbIIIN pONHCTpyKTIPOBaHbI O6 NCIIOJIb3OBAHN YCTPOIcTBa 6e30NaChbIM O6pa3OM I NOHMaiOT BO3MOHbIe yrpo3bl.
- DeTAM He pa3peWaeTcR NpTaB c yCTpoiCTBOM.
- YnCTka n o6cnykuaHne He DoJxHO BbIOnHraTbcr DeTbMn, 3a NckIyueHnem dTee Ctapwe 8 neT n noD h6nOHeHNEM B3pocJIbIX.
PacnonaraiTe neb n cetBoi shyp BHe doCraemocTn deTeMnaIue 8 nT.
- Ecni paMka DBePcbl/ynNoTHHeHna DBepcbl n COceHne K Hm Yactn 3aPr3Hnncb, INx Heo6XoJMo TuaTeJIbHO npOuNCTIb BnaxHoT TpAknO.
- UnCTNTe MmKpOBoNHO neHpeyIaRHO u yaIaJIte OcTaTK NIIuN 3e BpyTppeHHocTn.
3anyeHHie 3aep3HeHn MIKPOBOJHOBOI neu MoYr npNBecTn K pa3pyeHIO ee NOBepxHOte, YTO Bnraet Ha cpoK cnjXkbI neu, a npn CTyeHn O6ctoTeNbCTB CO3daTb ONaCHyO CNTyaCIO.
-ДячNTkn CTeKna DBepuI He NcNoIb3yIte arpeccNBHbIe a6pa3NHBIe YnCTaIcne CpeIcTBa IIN ocTpIe MeTaJIIN-ueckne ckpe6Kn. Bbl MoKeTe nOuaapanatb NOBepxHOctb. 3TO MOKeT IOBpeIITb CTeKIO.
He nCnoJIb3yIte OUcTky napOM.
Takkeco6JIIOdaIteHnCTpyKun,DaHHbIeBΓnaBe《UcTka》.
He ynpabnTe yCTpoiCTBOM C NOMOu BHEHrTo TaMepa nn OTdJIbHOJ CNTeMbI DnCTaHIOHHORynpabneHn.
3TOT npn6op npedHa3NaueH:
Microwave energy: Do not remove this cover!
MnKpOBoJHOBa 3Heprna: 3anpeaaetc ChmMaTb 3Tu KpbIuKy!
063op DeTanei npn6opa
1DinCnnei
2 Panaheb ynpabneHnA
3Bpaaiooynpeytnatop
4OTKpbBaHneDbepb
5 PnBODHO BAN
6 HanpaBnaOooee KoIbO
7CTeKJIaHHaBpaaUoJaaCraTapeIka
8PnNb
93aueIkaHaDBepue
10 CMOTpOBoE OKHO
11JIHCTOBOMMUKaHHT
KhONkN OprAhbl ynpabHeHn Ha naHeJn ynpaBHeHn
MICRO Bb6epnte HactpoKy MOHcHcTNI MKNPOBOJIH
GRILL/COMBI
CTON:HaKMnTe 1pa3,yTO6bI BpeMeHNo npnoctaHOBNTb npiroTOBneHHe
OTMeHa: HaxMITE 2 pa3a, yTO6bIOCTAOHOBITb AKTNBINOBaHHyIO pIOrpamMy paNbIe BpeMeHN
3amok 3auiTbI
OT DeTe: HaxMnte n ydepxnBaIte B TeueHne 3 cekyH, YTO6bI 3a6IOKpOBaT b mI pa36IOKpOBaTb naHeIb ynpabHeHn, COOTBeTCTBeHHO
START
3anyck nporpammbi
- 5bIcIpbI 3aIyck pa6Otbl MmKpOBONH (Bcerda +60 cekyHn npn 100% MOUHOCTN)
- YdInHReT Bpem npiroTOBHeHn Ha 10,30 nIN 60 cekyHn BO Bpem pa6ota, cornacho HacptoeHHOMy BpemHn npiroTOBHeHn (Kpome nporpaMM pa3MopaxNBAHn n ABTomATnuecknx)
Подтверждени Вьбoga
BpaauouipeyraTOp
ДяуctановкиВрemeи,Врemeи npriroTOBNeHry,TempepatypblIIMKOMbHHropoBaHO
PpmeaHnK pexmmy rnpnb n KOM6n
Tak KaK B pexmMax rpnB N KOM6n IcNoIb3yETc TennOBoe n3nyeHne,TO nO1b3yIteCb NoXaNyIcTa XapocToIKoNocyoI. PnactkoBbIE KOHTeHepbl He npiroDhl.
- YnctO B pexnme rpnIb IOnyckaetc npimHeHneAInHomnHBeOB nI INpyrO METaJIIMNECKO NocyIb - OJnako HN B KOEM Cnyae B KOMBnHnpoBaHHOM INI MIKPOBOHOBOM peXnme.
He cTaBbTe HnUero Ha MMKPOBOHOByIO neyb.OHa HArpeBaetc. BEnTINRAOHHbIe OTBepCTNDAONKHbI 6bITb BCERda CBOOHNBMN.
- PnIb3yIteCb paIePToM, YTO6bl NIOOdBHyTb IpOdyKtbl IIN 6JIIOa no6JIneke K HArpeBaTeMbHOmy 3IeMeHtY.
Nocya dna MmKpOBoJHOBoN neu
IeaeIbHoi nocdyo dny MmKpOBoNHOBO neu rBnTcna nocya n3 np03paHoro MaTePnana, KOtopbKO BCemy eue Nno3BOJrE MtKpOBoNHAM paBHomeHo pOrpeBaTb NiUy.
KpyrIbIe/OabIbHbe 6JIOda NOxOJaT 60JIbe dIa 3ToI cEN, YEM yRIOBaTBe, TAK KAK B yrrax Nua MoKeT NoIropetb.
BHIMAHHE:
Onachoctb Bo3HKnHOBeHn B3pbIbA,ecNI NOcydNIOITHO 3aKpbItA.
- Паран саалом пи��овлени Или Нагевом OTкрьИавп Te KoHTe-Nepы.
- PpOtKHTHe BnIKoB H NcCKoJIbKIMx MeCTaX NIIuCEyIO.
BHIMAHHE:OnacchoBt NckpeHnN BO3ropaHnI
Bolnbl CBH He cncoc6hbl npohkhyb B metanll. I03tomy BMKPOBOJHOBOI neu H doJIHKbl NCpObl3OBaTbcra Metanllmeckne KOHTeHepblnn TapeNkn.
He npimehnre TaKke pa3oByIO KaptonHyIO nocdy, cdeNaHHyIO n3 MaKyIaTypbI, OHa MoKet CoepKaTb MeTaJIINueCKne BkpanHeHHa, YTO MOKe TnpBecTN K NCKpOo6pa30BaHNIO BO3ropaHNIO.
Hnke npBedeHbI cncOK nOmoKet Bam noo6paTb noxOrauO nocdy dna MmKPOBOHOBIO neH:
PpnoctaHOBJIeHne Hn OTMeHa pnproTOBHeHn
YTO6bI npnoCTaHOBHT npnroTOBNEHHe, OINH pa3 hXKMITE Ha KhoNky STOP/CANCEL ININ OTKPOTe Dbepu.
- YTo6bI npOIoNkNTb npnroTOBHeHne, 3aKpoTe DBepu N CHOba HaKMMTe Ha KhoNkiy START.
- YTo6bI nonHocBtIO octaHOBNbI npOeCC npiroTOBnEHHa Dba pa3a HaxMMte Ha KhoNkY STOP/CANCEL, Yo npBEdT K cbpocy Bcex npOrpaMmHbIX Hactpoek.
Bbictpbinyck
BbXOTNE pa3ORpeT b eY n HAnNTKn 6bICTpO npn cAmo BbICOKO MOUHOCTN?
Быстpo ВКПОЧITE МИКРОВOLHOBYЮ的新ь, Нжав Н КНONKY START.
Ipocecc npirotoBnHnnaHayHeTc H3aMeDnTeBHo,KaJdoe nocne- yOooee hakatne KHOKNPiOaNT Bpemr npiroTOBnHnHa 10,30nn 60 cekynd (cm. «Kcnnyataunm MkPBOBnHOBn neu").
B 3TO BpEMr MOUHOCb MMKPOBOH yCTaHOBnHa Ha 100 %.
PazorpeB
HarpeBaHHe n pa3orpey BnIyIOCTc CneUmaIbHbIMN xapaKTePncTKaMm MInKpOBoNH. 3AmOpoxeHHBe XnDkoCTn N eDa JERKO MOrYT 6bITb pa3o- rpeTbI DO KOMHaTHOH INN CepBnPoBOCHHO TEMpePaTybI 6e3 IcNoJIb30BAHn MHoXeCTBa EMKoCTeI.
BpempaorpeBa Ta5nue Hnke npnbEeHNO mMbIgcnpaBKn, OHO B3NaHTenbHO CTeneHN 3aBNCNT OT HauanbHO TEmnpaTpybN CtpykTpybI npOyKTA. I03ToMy peKoMeHdyETcBpEMr OT BpemH npOBepaTb DOCTaTOUHOCTb pa3OrpeBa.
Ta6nua pa3orpeBa
Pa3mOp03ka n IrotOBKa OBOUeI
KOMHnHPOBaHHbIepeXnMbI npnroTOBJeHnB MKNpOBoJHax HnHa rpnJIe
BoBpem3TnXpeJIMMOB MIKPOBOHbI INrPnIb pa6oTAOT nonepeMeHHO B TeueHHe 3aDaHHOro BpemHn.
- Haxmite Ha KhoNky GRILL / COMBI HeckoIbko pa3, YTO6bl BbI6paTb Tpe6yembl KOMbHnHpoBaHHb peXIM.
ABTOCTAPT (TaIMep-ФyHKUJIA
Makcimalbna 3aepkka BpeMeH coCTaIeT 23 yaca n 59 MmHT.

ПРИМЕЧАнЯ:
- Chayana hactpoite yacb! B npotnbom cnyae BbI He CMOkeTe BOCIOJIb3OBAtbcra fynkuien.
- PnNcNoIb3OBAHm nABTOCTaPfYHKUpa3MOpAxBAHnHEIOCTyHn. DaHHa HAcTPOKa IporpAMMbHe NoIDepXnBaETnpiroTOBHeHne B pexHMe 6bICTPO 3anycka.
Ппмер:Сeчac 10:45.БыхOTte 3anporpammpoBaTb neydsнькючEHNA NOHNYMOUHOCThBa7 12 MHyT B14:20.ДeиCTByIte CneDyUOUMOBpa3OMdЯ ABTomaTHeCKOrO 3anycka neu:
oljg jglal jao gao jdy aodll ddoa oaiy Jia yd jy Lda Jia jia jia jia jia jia jia jia jia jia
a60jg10 laabll 8y paoi 2
GRILL/COMBI 1
4ab = y_0
aill 10 jay jaoa a cagb daab Jaaas
,TIMER/CLOCK:12e) Sall lglb g!y
.(START9STOP/CANCEL
.TIMER/CLOCK jjIe IaBbIg,gsjJyUJIeJIJI JooJooJooJooJooJoo
STOP/CANCEL JJde bdo jdlldjao sly
aill j 3al aagg jaae i aall g
SNTARTjge bol,
Laaa aee 8eae 1sly
| العربية الحرفية الحرفية الحرفية | ||
| \( p_{0}50.2 \) | \( U_{0} \) | R-3 |
| \( p_{0}50.3 \) | ||
| \( p_{0}50.4 \) | ||
| \( p_{0}50.5 \) | ||
| \( p_{0}50.6 \) | ||
| \( p_{0}50.7 \) | ||
| \( p_{0}50.8 \) | ||
| \( p_{0}50.1 \quad l_{0} \) | R-4 | |
| \( p_{0}51 \) | \( U_{0} \) | R-5 |
| \( a_{0}50.2 \) | ||
| \( p_{0}50.45 \) | \( U_{0} \) | R-6 |
| \( p_{0}50.65 \) | ||
| \( p_{0}50.2 \) | \( U_{0} \) | R-7 |
| \( p_{0}50.3 \) | ||
| \( p_{0}50.4 \) | ||
| \( p_{0}50.2 \) | \( U_{0} \) | R-8 |
| \( p_{0}50.3 \) | ||
| \( p_{0}50.4 \) | ||
| \( p_{0}50.5 \) | ||
| \( p_{0}50.6 \) | ||
| \( p_{0}50.7 \) |
J 1
4ab = y_0
(1b280)%40a#ll a#i##uaggSuB aBgl
100 100
aaii iiaaiy jie bui jui kaii aii iiaai yai
J 1
aas aai 15i 10000000000000000000000000000000000000
aLSTARTjJgdo
S OBC = S COD + S BOC - S BOC
.()j()()()()()()
0j 16 jglg jgl g aalz gdl gdl gdl gdl gdl gdl gdl
a aaii j 10g aiiaao gao 100 100 100 100 100
aalal 5 GRILL/COMBI 1
a 60 jg 10 jy jy g y g y g y g y g y g y g y g y
STARTJb
2ab = 3a
jaii jy jiall Cg cai jyao (gailg pgyal Jto) plalll yogj 100 gol 100
a a a a a a a a a a a a a a a a a a a a a a a a a a a
1. 100
a 1
gglal gall gglal glal glal glal glal glal glal glal glal glal glal glal glal glal glal glal glal glal glal glal glal glal glal glal glal glal glal glal glal glal glal glal glal glal glal glal glal glal glal glal glal glal glal glal glal glal glal glal glal glal glal
aBc gogg 103 1000000000000000000000000000000000000000
faiall 1a! d a o a a 0 0 0 0 0 0 0 0 0 0 0 0
aI 1I. STARTJg Jg hao jn Jn Jn Jn Jn Jn Jn Jn Jn Jn Jn Jn Jn Jn Jn Jn Jn Jn Jn Jn Jn Jn Jn Jn Jn Jn Jn Jn Jn Jn Jn Jn Jn Jn Jn Jn Jn Jn Jn Jn Jn Jn Jn Jn
( ^ a1b2^3 + a2b1^3) = ( a1b2) ^3
.100 11111111111111111
#
aessb 1g lglss aee s. ggee eae ae eae aee aee aee aee
0gag aag cag gblb 10000000000000000000000000000000000000000000000000000000000000000000000
jsswulg
Microwave energy: Do not remove this cover!
2g
Cegao 2yjg jg jydlal yglal l 2g g 2g 2
gjgl jglg jloglo
a 10g3 g3g3b1 aagll oagll aalgl ealplak
aal aale 2e aee aee aee 1jgill baa jall zogla
gglgljgljglgglgglgglgglg
auiuul ouiuul cglol jucl 3 duuulab aauuua aull uall
| الجī لَهُّةِلْدْ | الجُلِي | الشُبُ | |
| *الجُلِي عَسَنَرْ | العَسَنَرْ | العَسَنَرْ | |
| الجī | الجī | الجī | الجُلِلَمَلَعَلَةِلَهُّةِلَهُّةِ |
| y | y | y | الجُلِلَمَلَعَلَةِلَهُّةِلَهُّةِ |
| الجī | الجī | الجī | الجُلِلَمَلَعَلَةِلَهُّةِلَهُّةِ |
| y | y | الجī | الجُلِلَمَلَعَلَةِلَهُّةِلَهُّةِ |
| y | y | الجī | الجُلِلَمَلَعَلَةِلَهُّةِ |
UgSbJe oolj
L 1
( 0,12,0)
yj 3
wll 4
a0 < a1 < a_3 5
JUULI 6
a0j12g0j7
8
yabla 9
a23j1 10
11
pSoll a g1 gde o3ggb1 pSoll nolig jjjj
2995 241 8b 241
MICRO
GRILL/COMBI
wlaWg
:
JdIyJyJyJyJyJyJy
:
glljjgl aai
DEFROST
TIMER/CLOCK
aalwlaagwaae
:dlwJ
TIMER ababababoo
:
STOP/CANCEL
a00011 00000000
:baal
103 104
a 1
有 Sn = na1 + ( n - 1) a_2 + ·s + n^2
glulde gaoa gl aolg baiall aaiig bai
Jubu Jua
START
(100 Jd aIbI Lai Ioc 60+5) gssuall Jgssuall .
(aaii
j 1
jaiolol aaiil jai blo jajoll jci ulgi 8
A 1
"2g3ySall aullb10wllc1g3l 1a5 3o2yglll lalab161 gyl. 3g3lgl 3cglab1g 2g3lgl 2g3lgl
jbi jSio gai ge i9gssu aae aagaae gai Jia. Jauu uolgo 1
a 1
a 1
a aae aee aee aee abae e ae baae / aee / 100
alol jao pabb luyi jg plzul yggk61j
do elie goljll jbjg olo aiaa bokg agaiaia clabio g pao jll
jlll alia plalol
"abill Jaa 30gSul buaa eul
aee e aiee aeae
:du lau jlaqal lia pua
aalwgl aalw alaa bsl gbs jzss
aall aabbyolggy
1ylosalibololowiyjooegjiblplzjglll
aial glblj no loxg kglg jolal
jlll lioaoggagglgolld jdo
a1 = 2,an + 1 = n1 + n2 - 2a_n
jIggy
j( g + y) = j_0 + g loys
:gggSj jz gabw dgl galo ydo jy do
jolw joi
i. | x,y| = 1,| x + y| = 1
-
-
-
-
-
-
-
-
-
-
-
-
-
-
-
-
-
-
- 20.
-
-
-
-
-
-
-
-
-
-
-
-
-
-
-
-
-
98.
98
97
97
97 206
97 (Timer-aa)
- (Jabu Jai)
96
96
96
96
96
96
96 1
96.
95.
95.
95
dole 1
Jlgl Jllll l 15g jlgll g 15g jlgll l 15g jlgll 15g jlgll 15g jlgll 15g jlgll 15g jlgll 15g jlgll 15g jlgll 15g jlgll 15g jlgll 15g jlgll 15g jlgll 15g jlgll 15g jlgll 15g jlgll 15g jlgll 2
jglal y. 0sllh jg (dLw ola g t albo caaa) ) a, jlg jg aLl
UjIg placawll jglgll 13! (Lgll lll g, aaiy yall cwl)

- UWAGA:
- WAARSCHUWING: Kookvertraging!
- WAARSCHUING: Brandgevaar!
- Instructions d-installation
- Symbols in these Instructions for Use
- WARNING:
- CAUTION:
- Contents
- General Notes
- Important Safety Information!
- WARNING: Delay in Boiling!
- Signs and Symbols on the Appliance
- WARNING: Hot Surface!
- Risk of Burning!
- WARNING
- Overview of the Components
- Buttons and Controls on the Control Panel
- GRILL/COMBI
- TIMER/CLOCK
- STOP/CANCEL
- START
- Rotary Knob
- Information on Grilling and Combined Operation
- Suitable Microwave Tableware
- CAUTION: Sparking and Fire Hazard!
- Notes on Operating and Using the Appliance
- What you Should Know about Microwave Operation
- Notes on Operating the Appliance
- Initial Operation
- Installation Instructions
- Preparation
- i NOTE:
- Setting the Clock
- Operating the Microwave
- NOTE:
- Pause or Cancel Cooking
- Quick Start
- Heating
- Cooking
- Hands-on Cooking Tips
- Double amount = almost double time Half amount = half time
- Per 100g approx. 1 minute cooking
- Grilling
- Microwave and Grill Combination Modes
- Tips for Combi Operation
- Auto Functions
- Defrosting
- Multi-Stage Cooking
- Microwave
- Grill
- Special Functions
- Auto Start (Timer-Function)
- WARNING: Risk of Fire!
- Locking (Child-proof Lock)
- Display Function
- Cleaning
- #
- Interior
- External Walls
- Accessories
- Odours
- Oven Light
- Troubleshooting
- Technical Data
- Disposal
- Meaning of the "Dustbin" Symbol
- Instrukcja obstugi
- CIMBOBII pIIMHeMbIe B DAHOM pyKOBoDCTBe NIOb3OBaTeJIa
- PNEyPENKDEHNE:
- BHIMAHHE:
- CoepekhaHne
- 06uaHnΦopMaun
- Baxhble yka3aHnno TeXnke 6e3onacHOCTn!
- PENEYUNPEXDEHNE:
- PENEyPEXDEHNE:
- PENEYNPEXKDEHNE:3aTJXHoe 3aknnaHne!
- 063op DeTanei npn6opa
- KhONkN OprAhbl ynpabHeHn Ha naHeJn ynpaBHeHn
- BpaauouipeyraTOp
- PpmeaHnK pexmmy rnpnb n KOM6n
- Nocya dna MmKpOBoJHOBoN neu
- BHIMAHHE:OnacchoBt NckpeHnN BO3ropaHnI
- PpnoctaHOBJIeHne Hn OTMeHa pnproTOBHeHn
- Bbictpbinyck
- PazorpeB
- KOMHnHPOBaHHbIepeXnMbI npnroTOBJeHnB MKNpOBoJHax HnHa rpnJIe
- ABTOCTAPT (TaIMep-ФyHKUJIA
- ПРИМЕЧАнЯ:
- J 1
- 2ab = 3a
- 100
- 2g
- gjgl jglg jloglo
- UgSbJe oolj
- pSoll a g1 gde o3ggb1 pSoll nolig jjjj
- dole 1
Brand : BOMANN
Model : MWG 6016 CB
Category : Microwave Oven