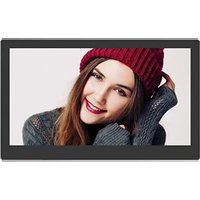
DigiFrame 1060 - Digital photo frame BRAUN - Free user manual and instructions
Find the device manual for free DigiFrame 1060 BRAUN in PDF.

| Product type | Digital photo frame |
| Brand | Braun |
| Model | DigiFrame 1060 |
| Screen size | 25.7 cm (10.1 inches) |
| Resolution | 1024 x 600 pixels |
| Aspect ratio | 16:9 |
| Internal memory | 4 GB |
| Supported image formats | JPG, JPEG, BMP |
| Supported audio formats | MP3, WMA |
| Supported video formats | MPEG1, MPEG2, MPEG4, M-JPEG, AVI |
| Supported memory cards | SD, SDHC, MMC |
| Connectivity | USB 2.0, Mini USB |
| Power supply | AC adapter 100-240 V, output 5 V DC |
| Main functions | Slideshow, music, video, calendar, clock, file copy |
| Built-in speakers | Stereo 2 x 1 W |
| Headphone jack | Yes |
| Remote control | Yes (CR2025 battery included) |
| Wall and table mount | Yes |
| OSD languages | English, German and others |
| Care and cleaning | Soft non-abrasive cloth; LCD screen cleaning products |
| Safety | For indoor use only; do not expose to moisture or condensation |
| Package contents | Photo frame, adapter, remote control, manual, fixing ring, USB cable |
Frequently Asked Questions - DigiFrame 1060 BRAUN
User questions about DigiFrame 1060 BRAUN
0 question about this device. Answer the ones you know or ask your own.
Ask a new question about this device
Download the instructions for your Digital photo frame in PDF format for free! Find your manual DigiFrame 1060 - BRAUN and take your electronic device back in hand. On this page are published all the documents necessary for the use of your device. DigiFrame 1060 by BRAUN.
USER MANUAL DigiFrame 1060 BRAUN
This symbol on the product or in the instructions means that your electrical and electronic equipment should be disposed at the end of its life separately from your household waste. There are separate collection systems for recycling in the EU. For more information, please contact the local authority or your retailer where you purchased the product.
Design and specifications are subject to change without notice.
natural_image
Line drawing of a door handle with a lever and control panel (no text or symbols)
natural_image
Line drawing of a door handle assembly with no text or symbols
natural_image
Line drawing of a mechanical support structure with no text or symbols2. Aufbau
2.1 Fernbedienung
text_image
① ② ③ ④ ⑤2.2 Tastenbelegung
natural_image
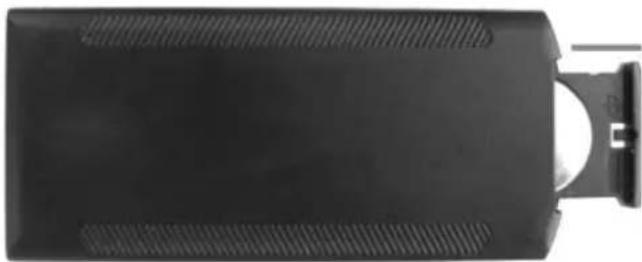
Top-down view of a black rectangular electronic device with ventilation grilles and a small circular component attached (no visible text or symbols)text_image
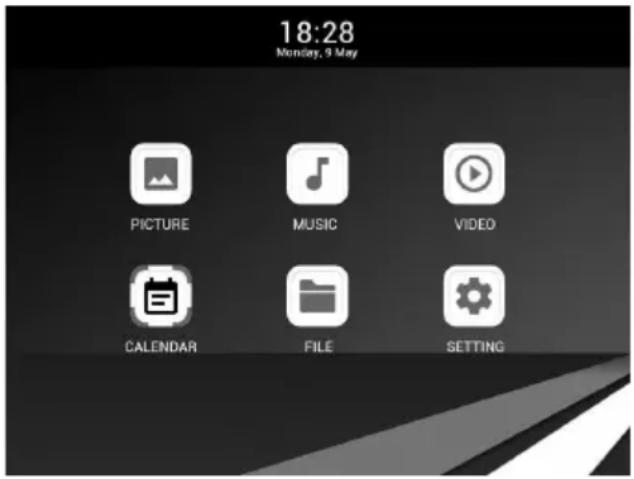
18:28 Monday, 9 May PICTURE MUSIC VIDEO CALENDAR FILE SETTINGtext_image
1.mp3 2.mp3 3.mp3 4.mp3 Music 1.mp3 3.68MBtext_image
January 2016 Sun Mon Tue Wed Thu Fri Sat 3 4 5 6 7 8 9 10 11 12 13 14 15 16 17 18 19 20 21 22 23 24 25 26 27 28 29 30 31 20:00:00text_image
Computer USB DPF MINI USB OTGThank you for purchasing the Digital Photo Frame. The product is designed to allow quick and easy viewing of photos taken from your digital camera, mobile phone, or from a memory storage card. Please read this User Manual carefully to learn the correct way to use the Digital Photo Frame.
Contents:
- Stand Instructions 9
- Product Diagram ...... 10
2.1 Remote Control.... 10
2.2 Buttons....10
2.3 Ports 10 - Installing & Replacing the Battery ..... 10
- Getting Started.... 11
- Operating Instruction...... 11
5.1 Card and USB.... 11
5.2 Photo Mode 11
5.3 Music Mode.... 12
5.4 Video Mode.... 12 - Calendar 12
- File 13
- Setup 13
- PC Connection (Optional).... 13
- Technical Specifications .... 14
- Troubleshooting Guide ...... 14
Packaging List:
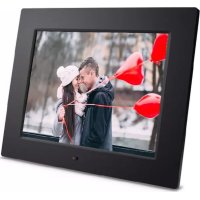
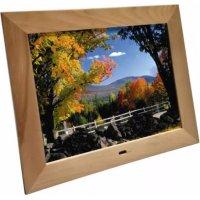
- 25.7cm (10.1 inch) digital photo frame
- AC/DC adapter
- Remote control
- User's manual
- Bracket
- USB Cable
Note: If the unit has built-in memory, item 6 (USB Cable) will available in accessories which goes with machine.
Cautions:
Precautions and maintenance
- For indoor use only
- To avoid risk of fire or electric shock, do not expose the unit to moisture or condensation.
- To avoid overheating, do not block the ventilation holes on the back of the Digital Photo Frame.
- Keep the Digital Photo Frame out of direct sunlight.
- Do not dismantle the Digital Photo Frame. Dismantling the Digital Photo Frame will void your warranty.
Cleaning the LCD Screen
- Treat the screen with care. The screen of the Digital Photo Frame is made of glass so it is easily broken or scratched.
- If fingerprints or dust accumulate on the LCD screen, we recommend using a soft, non-abrasive cloth such as a camera lens cloth to clean the LCD screen.
- Moisten the cleaning cloth with the cleaning solution and apply the cloth to the screen.
WARNING:
Please power off the unit before inserting or removing a card or USB device.
Failure to do so may cause damage to the card/USB and the unit.
To reduce the risk of fire or electric shock, do not expose this device to rain or moisture
Note:
This device is for private use only and not designed for commercial use
Features:
- Supported picture formats: JPG, JPEG, BMP
- Supported audio formats: MP3 & WMA
- Supported video formats: MPEG1, MPEG2, MPEG4, M-JPEG and AVI
- Supported memory cards: SD/SDHC/MMC.
- USB connection: Mini USB & USB 2.0
- Built-in 4GB memory, supports PC connection and file storage
- Auto slideshow when memory card is inserted
- Picture & Music: Slideshow with background music
- Supports viewing pictures in thumbnail mode
-
Built-in clock and calendar with the slideshow window, schedule auto on/off
-
Image display modes: slideshow, preview, zoom, rotate function
- Adjustable slideshow speed and more than 10 kinds of slideshow transitions
- Adjustable brightness, contrast, saturation
- Copy files to memory and delete files in the Card, Memory and USB Flash Drive
- Built-in stereo speaker (2x1W) and earphone jack
- Adjustable stand (vertical and horizontal); the DPF can be hung on a wall
- OSD languages: English, German and other languages.
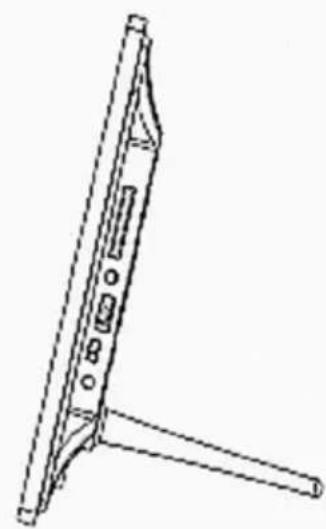
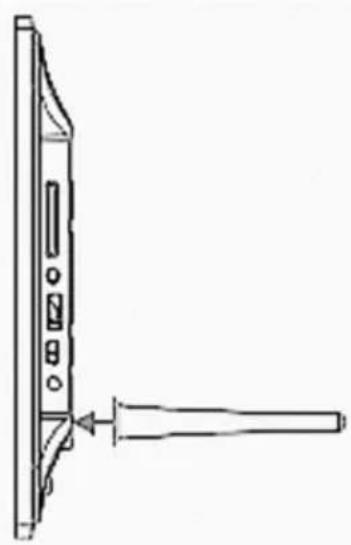
12. Stand Instructions
Insert the bracket into the slot of the digital photo frame and rotate the bracket
anticlockwise to set it tight. Please make sure the stand is locked, then put it on a table steadily. Please refer to the illustration below.
natural_image
Technical line drawing of a mechanical component with a lever and adjustment knob (no text or symbols)
natural_image
Line drawing of a door handle assembly with no text or symbols
natural_image
Line drawing of a mechanical support structure with mounting brackets and mounting holes (no text or symbols)13. Product Diagram
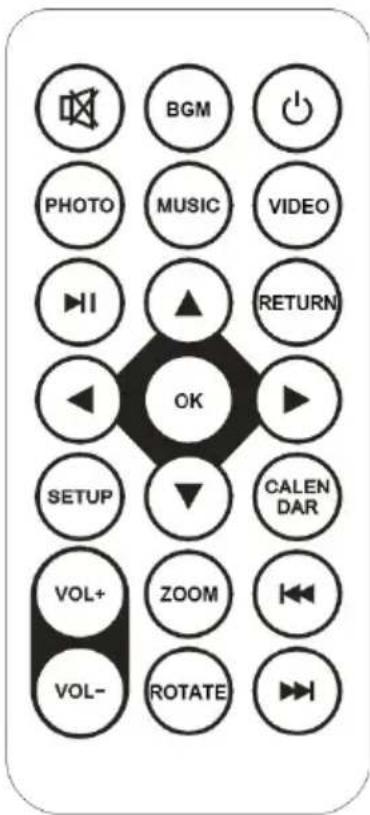
13.1 Remote Control
MUTE: Silence the sound temporarily.
BGM: Play photo slideshow with background music.
POWER: Power on/off switch.
PHOTO: Play photo slideshow.
MUSIC: Play music.
VIDEO: Play video.
▶II: Pause or play the media again.
RETURN: Return to previous page.
▼▲◀▶: Move up/down/left/right cursor keys.
OK: Confirm or switch between pause/play function in media play mode.
SETUP: Go to setup menu.
CALENDAR: See date and time.
VOL +/-: Turn up/down the volume.
ZOOM: Enlarge the photo in photo play mode
ROTATE: Rotate images 90° clockwise in the photo play mode
: Move back to previous file in media play mode.
▶▶: Move forward to next file in media play mode.
text_image
BGM PHOTO MUSIC VIDEO RETURN OK SETUP CALENDAR VOL+ ZOOM VOL- ROTATE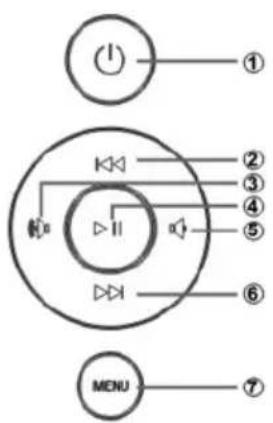
text_image
① ② ③ ④ ⑤ ⑥ MENU ⑦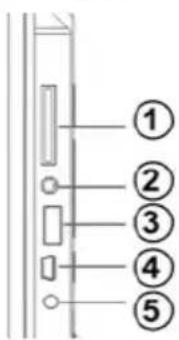
text_image
① ② ③ ④ ⑤13.2 Buttons
- Power
- UP
- VOL +/Right
- Play/Pause/O K
- VOL-/Left
- DOWN
- MENU
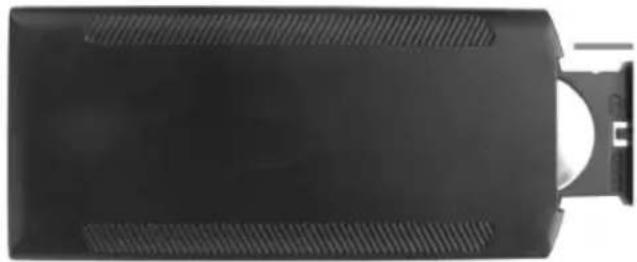
13.3 Ports
- SD/MMC/MS Slot
- Earphone Jack
- USB port
- MINI USB
- DC IN
natural_image
Top-down view of a black rectangular electronic device with ventilation slots and a small circular component attached (no visible text or symbols)14. Installing & Replacing the Battery
Place the remote control upside down, press down on the ridged area of the battery cover and pull towards you to remove the tray.
Place one CR2025 lithium button-cell battery on the tray with the positive "+" side facing you. Reinsert the tray.
15. Getting Started
4.5. Place the digital photo frame with the installed bracket in a steady flat position, then plug one end of the AC adapter into a standard 110-240V AC electrical outlet and the other end into the DC IN slot on the left side of the frame.
4.6. Slowly remove the protective film covering the LCD.
4.7. Remove the plastic battery insulator from the battery compartment and make sure the remote control has a battery inside. Please refer to "Installing & Replacing Battery" if you need a new battery.
4.8. It will start up automatically when the power is on. Press the power button on the backboard or press the Power Button on the Remote Control to Switch On/Off.
16. Operating Instruction
After turning on the unit, a startup picture will show. The slideshow with background music will play automatically if there is built-In memory, a memory card or a USB device.
NOTE: Make sure there are supported picture and music files in the card or USB device.
text_image
18:28 Monday, 9 May PICTURE MUSIC VIDEO CALENDAR FILE SETTING10.1 Card and USB
SD/SDHC/MMC and USB 2.0 are supported. After inserting a card or USB device, the slideshow will play automatically, press RETURN to access Photo, Music, Video, File, Calendar and Setup. Press "OK" to confirm.
text_image
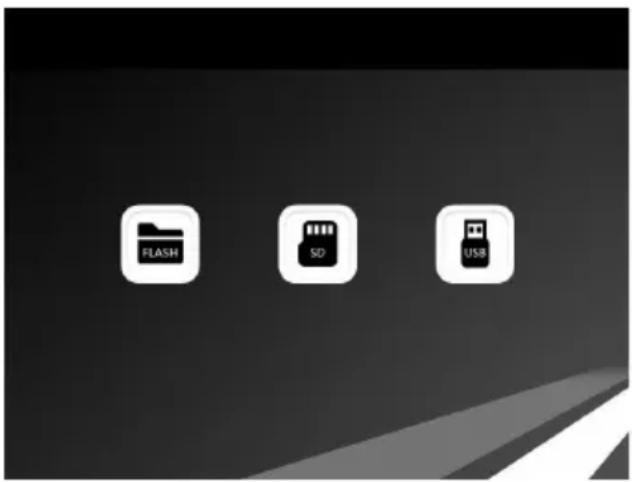
FLASH SD USBNote:
3) Make sure there are supported Picture, Music and Video files in the Card or USB device.
4) If there are supported picture and music files in the memory card or USB Device, the slideshow will play automatically with background music
10.2 Photo Mode
Press “RETURN” to choose Storage Device. Press “OK” to enter into the main menu, choose Photo and press OK to start the slideshow, press “Return” to enter into the 9-Pictures Mode, use
▼▲◀▶ to choose the picture and press "OK" to play. If Music is activated in the Photo setup, the slideshow will play with background Music. The music must be stored in the same memory device! You can use VOL+/VOL- to turn the volume up or down.

text_image
Photo 1 jpg 168KBYou can configure different settings in the setup menu, press "OK" to enter the sub-menu items.
Press ◀ to set the Value and press to ▼ select the previous or next item.
Note: For random picture slideshow mode, you can go to Setting/Photo Setup/Slideshow Repeat, and select the Random option.
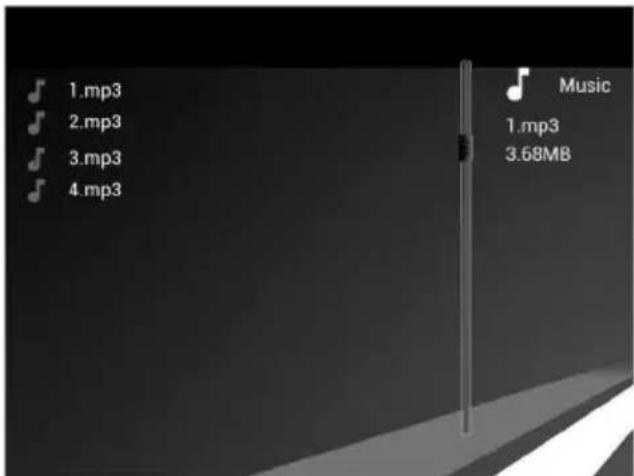
10.3 Music Mode
Press "RETURN" to choose "MEMORY CARD" in the main menu. Choose the Music icon and press "OK" to enter, press ▲to select the music in the playlist, then press ▶to Play/Pause. Press VOL+/- to turn up/down the volume.
text_image
1.mp3 2.mp3 3.mp3 4.mp3 Music 1.mp3 3.68MBIn music playing mode, press to fast forward or rewind, press "OK" to Pause or Play again. With you can play the previous or next track.
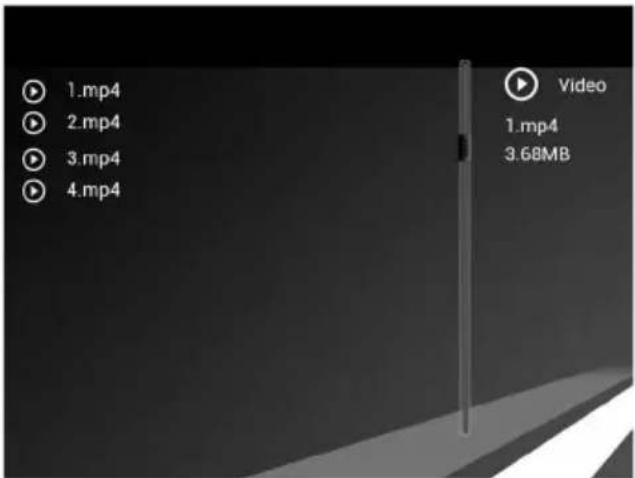
10.4 Video Mode
Press "RETURN" to choose Storage Device. Press "OK" to enter into the main menu, choose the Movie icon and press "OK". Press ▲▼ to select the video from the playlist, then press "OK" to play. Press VOL+/- to turn up/down the volume.
text_image
1.mp4 2.mp4 3.mp4 4.mp4 Video 1.mp4 3.68MBIn the video playing mode, press ◀to fast forward or rewind. Press ▶to pause, press again to continue playback.
Press to play the previous or next video.
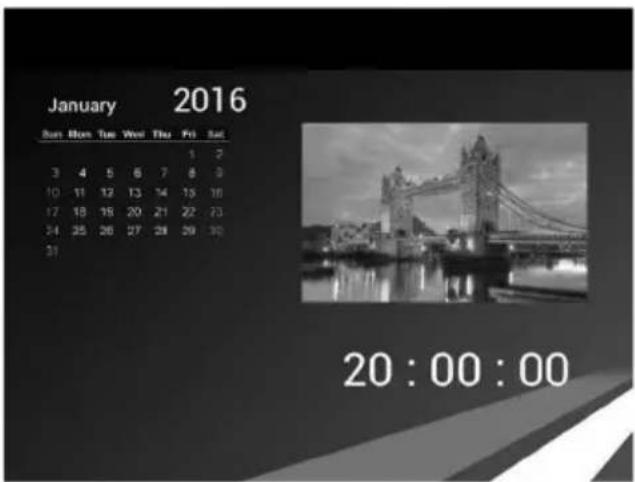
17. Calendar
Select Calendar in the Main Menu, then press "OK" to enter. A calendar with a window on the right will be shown with the slideshow. Supported files must be stored in the selected storage device.
Press to adjust the year, and press to adjust Month.
text_image
January 2016 Sun Mon Tue Wed Thu Fri Sat 3 4 5 6 7 8 9 10 11 12 13 14 15 16 17 18 19 20 21 22 23 24 25 26 27 28 29 30 31 20:00:00If you want to set the date/time, press Setup, you can enter into the Calendar Setup menu, press "OK" to enter the sub-menu items. Press ◀▶ to set the Value and press ▲to confirm. The set time will be shown in the Calendar Interface.
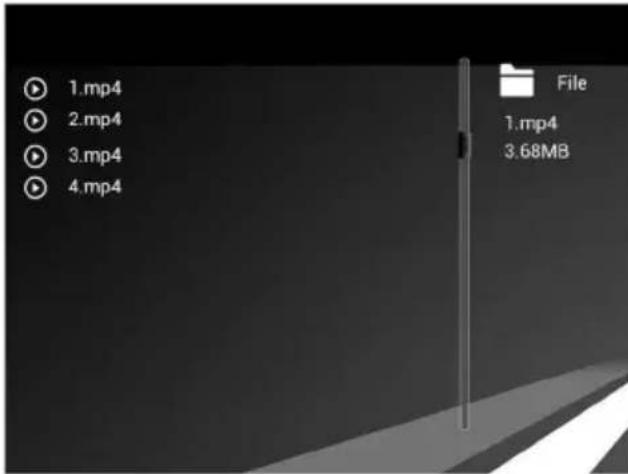
18. File
Choose "File" in the main menu and press "OK" to enter, you can browse all files in your selected storage device. You can press ▲to choose the file then press "OK" to confirm.
text_image
1.mp4 2.mp4 3.mp4 4.mp4 File 1.mp4 3.68MBDelete file
Use ▲ to highlight the file then press , it will show a Sub-Menu for Delete Operation
Copy file
Select Setting in the main menu. Press OK to enter the Setup interface, press ▲to highlight System Setup and press OK to enter, then press ▲to move to Auto Copy, press to set the Value to On, all of the files in USB Flash Drive will be automatically copied to Memory.
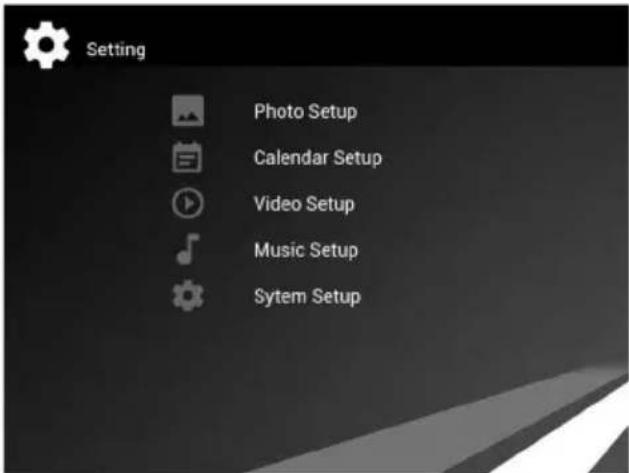
19. Setup
Select "Setup" from the main menu. Press "OK" to enter the setup interface and press ▲▼ to highlight the main item and press "OK" to enter the sub-menu items. Press ◀to set the Value and press ▲to confirm and move.
Note: After you make a setting for an item and enter into the next item, the mode/data will be saved automatically.
text_image
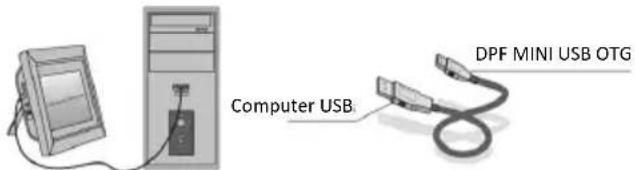
Setting Photo Setup Calendar Setup Video Setup Music Setup Sytem Setup20. PC Connection (Optional)
You can connect the unit to external equipment using USB Cable for file copying, deleting and editing operations.
C. Turn on the digital photo frame, connect it with your Windows2000/XP/Vista/WIN7 PC using a USB cable
D. The unit will be detected automatically and a "Connecting" icon will be displayed. You can then copy, delete, or edit files in the built-in memory or other storage devices. You need to restart the digital photo frame after you finished copying, deleting, editing or inserting a memory card.
text_image
Computer USB DPF MINI USB OTG21. Technical Specifications
- Adapter: Input AC 100-240V 50/60HZ, Output DC: 5V
• Picture Formats: JPG, JPEG, BMP
• Audio Format: MP3 & WMA
• Video formats: MPEG1, MPEG2, MPEG4, M-JPEG and AVI
• Memory Cards: SD/SDHC/MMC
• Built-in memory: 4GB
• USB: USB Host; MINI USB (USB Cable) - Screen Parameter: Screen Size: 25.7cm (10.1 inch) TFT LED Resolution: 1024x600 Pixel Aspect Ratio: 16:9 Working temperature: 0°\~40°, Humidity: 10-85%
22. Troubleshooting Guide
If you are having problems with your player, please consult the following. If you need further assistance, please contact our technical support team.
No power:
- Please check whether the plug is inserted correctly.
Remote control not functioning:
- Please check whether the battery has power (the battery can be used for half a year under normal conditions). Replace with new battery if necessary.
Cannot read the CARD or USB:
- Please confirm whether there is storage in the card or USB device.
• Empty devices cannot be read.
Cannot play the file:
- Please confirm if the file format is compatible with the player.
Display is too bright or too dark:
- Please adjust the brightness or contrast in the setup menu.
The color is too sharp or there is no color:
- Please adjust the color and contrast setup.
No sound:
- Please check whether the volume is correct and that the player is not in Mute mode.
Introducción:
natural_image
Technical line drawing of a mechanical component with a handle and lever (no text or symbols)
natural_image
Line drawing of a door handle assembly with no text or symbols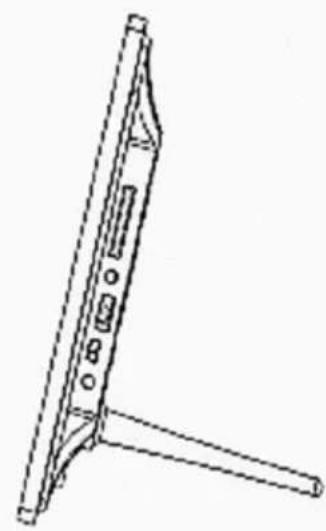
natural_image
Line drawing of a mechanical support structure with no text or symbolstext_image
Diagram showing labeled components of a device with numbered parts and connections, including a circular dial and a separate panel layout.24.2 Botones
natural_image
Top-down view of a black rectangular electronic device with ventilation slots and a small white component attached (no visible text or symbols)text_image
18:28 Monday, 9 May PICTURE MUSIC VIDEO CALENDAR FILE SETTING15.1 Tarjeta y USB
text_image
1.mp3 2.mp3 3.mp3 4.mp3 Music 1.mp3 3.68MBtext_image
January 2016 Sun Mon Tue Wed Thur Fri Sat 3 4 5 6 7 8 9 10 11 12 13 14 15 16 17 18 19 20 21 22 23 24 25 26 27 28 29 30 31 20:00:0034. Instructions concernant le support
natural_image
Line drawing of a mechanical component with a lever and handle (no text or symbols)
natural_image
Line drawing of a door handle assembly with a scroll wheel and control panel (no text or symbols)
natural_image
Line drawing of a mechanical support structure with mounting brackets and mounting holes (no text or symbols)natural_image
Top-down view of a black rectangular electronic device with ventilation grilles and a small circular component attached (no visible text or symbols)text_image
18:28 Monday, 9 May PICTURE MUSIC VIDEO CALENDAR FILE SETTING20.1 Carte et USB
text_image
1.mp3 2.mp3 3.mp3 4.mp3 Music 1.mp3 3.68MBtext_image
January 2016 Sun Mon Tue Wed Thu Fri Sat 3 4 5 6 7 8 9 10 11 12 13 14 15 16 17 18 19 20 21 22 23 24 25 26 27 28 29 30 31 20:00:00natural_image
Line drawing of a door handle with a lever and control panel (no text or symbols)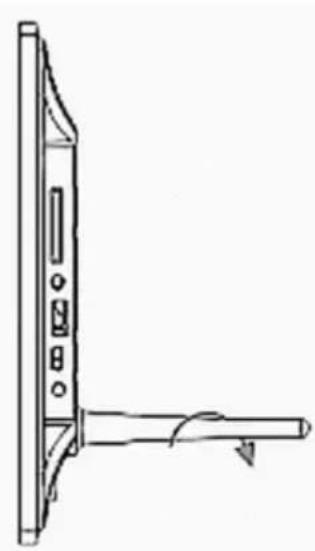
natural_image
Technical line drawing of a vertical mechanical component with a handle and mounting bracket (no text or symbols)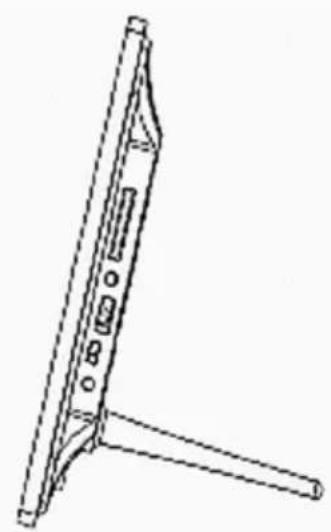
natural_image
Line drawing of a mechanical support structure with mounting brackets and mounting holes (no text or symbols)46. Schema prodotto
46.1 Telecomando
text_image
① ② ③ ④ ⑤46.2 Tasti
natural_image
Top-down view of a black rectangular electronic device with ventilation grilles and a small circular component attached (no visible text or symbols)text_image
18:28 Monday, 9 May PICTURE MUSIC VIDEO CALENDAR FILE SETTING25.1 Scheda e USB
text_image
1.mp3 2.mp3 3.mp3 4.mp3 Music 1.mp3 3.68MBtext_image
January 2016 Sun Mon Tue Wed Thu Fri Sat 3 4 5 6 7 8 9 10 11 12 13 14 15 16 17 18 19 20 21 22 23 24 25 26 27 28 29 30 31 20:00:00text_image
Computer USB DPF MINI USB OTGnatural_image
Line drawing of a mechanical component with a lever and handle (no text or symbols)
natural_image
Line drawing of a door handle assembly with no text or symbols
natural_image
Line drawing of a mechanical support structure with no text or symbols57. Productdiagram
57.1 Afstandsbediening
text_image
① ② ③ ④ ⑤57.2 Toetsen
-
Aan/uit
-
OMH00G
-
VOL +/Rechts
-
Start/Pauze/O K
-
VOL-/Links
-
OMLAAG
-
MENU
57.3 Poorten
natural_image
Black rectangular electronic device with ventilation slots and a small circular component attached (no visible text or symbols)58. De batterij installeren & vervangen
text_image
18:28 Monday, 9 May PICTURE MUSIC VIDEO CALENDAR FILE SETTING30.1 Kaart en USB
text_image
1.mp3 2.mp3 3.mp3 4.mp3 Music 1.mp3 3.68MBtext_image
January 2016 Sun Mon Tue Wed Thu Fri Sat 3 4 5 6 7 8 9 10 11 12 13 14 15 16 17 18 19 20 21 22 23 24 25 26 27 28 29 30 31 20:00:00text_image
Computer USB DPF MINI USB OTG65. Technische specificaties
- Adapter: Ingang AC 100-240V 50/60HZ, uitgang DC: 5V
- Fotoformaten: JPG, JPEG, BMP
• Audioformaat: MP3 & WMA - Videoformaten: MPEG1, MPEG2, MPEG4, M-JPEG en AVI
• Geheugenkaarten: SD/SDHC/MMC - Ingebouwd geheugen: 4GB
• USB: USB-host; MINI-USB (USB-kabel) - Schermparameters: Schermafmeting: 25,7 cm (10,1 inch) TFT LED
Resolutie: 1024x600 Pixel
natural_image
Line drawing of a door handle with a lever and adjustment knob (no text or symbols)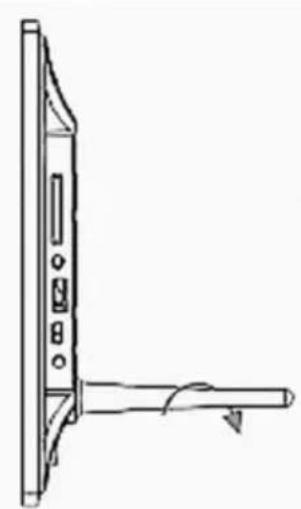
natural_image
Line drawing of a door handle assembly with a lever and bracket (no text or symbols)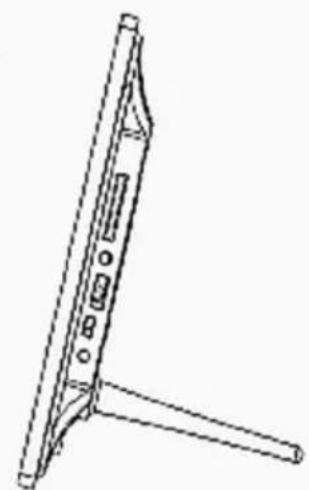
natural_image
Line drawing of a mechanical support structure with no text or symbolsDiagrama do produto
67.1 Controlo Remoto
SEM SOM: Retira temporariamente o som.
text_image
① ② ③ ④ ⑤67.2 Botões
natural_image
Top-down view of a black rectangular electronic device with ventilation grilles and a small circular component attached (no visible text or symbols)text_image
18:28 Monday, 9 May PICTURE MUSIC VIDEO CALENDAR FILE SETTING35.1 Cartão e USB
text_image
1.mp3 2.mp3 3.mp3 4.mp3 Music 1.mp3 3.68MBtext_image
January 2016 Sun Mon Tue Wed Thu Fri Sat 3 4 5 6 7 8 9 10 11 12 13 14 15 16 17 18 19 20 21 22 23 24 25 26 27 28 29 30 31 20:00:00Se pretender definir a data/hora, premir Setup, pode entrar no menu Calendar Setup, premir "OK" para entrar nos itens do submenu. Premir
text_image
① ② ③ ④ ⑤78.2 Butoane
- Alimentare
- SUS
- VOL+/Dreapta
- Redare/Pauză/OK
- VOL-/Stânga
- JOS
- MENU
78.3 Porturi
- SD/MMC/MS
- Mufă căşti
- Port USB
- MINI USB
- DC IN (Intrare alimentare CC)
natural_image
Top-down view of a black rectangular electronic device with ventilation slots and a small white connector (no visible text or symbols)text_image
18:28 Monday, 9 May PICTURE MUSIC VIDEO CALENDAR FILE SETTING40.1 Card și USB
text_image
1.mp3 2.mp3 3.mp3 4.mp3 Music 1.mp3 3.68MBtext_image
January 2016 Sun Mon Tue Wed Thu Fri Sat 3 4 5 6 7 8 9 10 11 12 13 14 15 16 17 18 19 20 21 22 23 24 25 26 27 28 29 30 31 20:00:00text_image
USB computer DPF MINI USB OTGnatural_image
Line drawing of a mechanical component with a lever and handle (no text or symbols)
natural_image
Line drawing of a door handle assembly with a scroll wheel and control panel (no text or symbols)