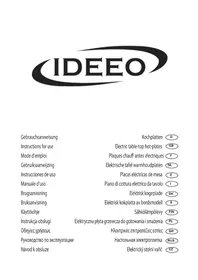
BA 0951 - Steam iron Ideeo - Free user manual and instructions
Find the device manual for free BA 0951 Ideeo in PDF.
| Product type | Steam iron |
| Brand | Ideeo |
| Model | BA 0951 |
| Power supply | Mains plug with earth, voltage according to rating plate |
| Soleplate | Soleplate for steam ironing |
| Water tank | With level indicator, max capacity (not specified) |
| Functions | Steam ironing, steam shot, spray, dry ironing |
| Temperature adjustment | Rotary knob with symbols (synthetic, silk/wool, cotton/linen) |
| Steam adjustment | Steam flow adjustment knob (closed to maximum) |
| Indicator light | Indicates heating: on during heating, off when temperature reached |
| Included accessories | Measuring cup for filling |
| Care and cleaning | Clean the soleplate with a wool cloth soaked in water and vinegar; do not immerse; do not use abrasive products; descale by periodic self-cleaning |
| Safety | Do not leave unattended; risk of burns; do not direct steam at people; unplug after use; do not use if cord damaged |
| Repairability | Repairs by qualified personnel; send to authorized after-sales service |
| Warranty | 2 years against material and manufacturing defects |
Frequently Asked Questions - BA 0951 Ideeo
User questions about BA 0951 Ideeo
0 question about this device. Answer the ones you know or ask your own.
Ask a new question about this device
Download the instructions for your Steam iron in PDF format for free! Find your manual BA 0951 - Ideeo and take your electronic device back in hand. On this page are published all the documents necessary for the use of your device. BA 0951 by Ideeo.
USER MANUAL BA 0951 Ideeo
Connection to the mains supply
The appliance should only be connected to an earthed socket installed in accordance with the regulations. Make sure that the supply voltage corresponds with the voltage marked on the rating label. This product complies with all binding CE labelling directives.
Familiarisation
- Spray nozzle
- Water fill hole
- Steam control button
- Spray button
- Steam jet button
- Indicator lamp
- Handle
- Cable sleeve support
- Power cord
- Base stand
- Rating label
- Temperature control knob
- Soleplate
- Water level indication
Important safety instructions
Before using the appliance, the user must read the following instructions carefully.
Before the appliance is used, the main body including the power cord as well as any attachment fitted should be checked thoroughly for any defects or leakage. Should the appliance, for instance, have been dropped onto a hard surface, it must no longer be used: even invisible damage may have adverse effects on the operational safety of the appliance.
Great care is necessary in using any appliance, especially near children. Do not leave the steam iron unattended while connected or on an ironing board. Always remove the plug from the wall socket and place the steam iron on its base stand.
The appliance operates at very high temperatures. Do not touch any part of the appliance except the handle. Burns can occur from touching the hot parts of the housing or the soleplate and from hot water or steam.
When operating the steam iron, hold only by the handle. Do not allow steam to escape in the direction of anyone nearby.
Do not allow the power cord to touch hot surfaces. Do not coil the power cord round the appliance.
Always place the appliance on a flat, level and heat-resistant surface during operation. Do not position the appliance on or near hot surfaces or open flames such as hot-plates or gas fl ames.
Always remove the plug from the wall socket
after use,
in case of any malfunction,
before cleaning the appliance.
When removing the plug from the wall socket, never pull on the power cord; always grip the plug itself.
This appliance is not intended for use by any person (including children) with reduced physical, sensory or mental capabilities, or lacking experience and knowledge, unless they have been given supervision or instruction concerning the use of the appliance by a person responsible for their safety.
Children should be supervised to ensure that they do not play with the appliance.
Caution: Keep any packaging materials well away from children, as they are a potential source of danger e.g. from suffocation.
Do not operate the appliance if excessive force has been used to pull the power cord. Damage cannot always be detected from the outside; the entire unit should therefore be checked by a qualified technician before it is used again.
Before refilling or emptying the water reservoir, remove the plug from the wall socket.
No responsibility is accepted if damage results from improper use, or if these instructions are not complied with.
This appliance is intended for domestic use only and not for commercial applications.
In order to comply with safety regulations and to avoid hazards, repairs of electrical appliances must be carried out by qualified personnel, including the replacement of the power cord. If repairs are needed, please send the appliance to one of our customer service departments.
The addresses can be found in the appendix to this manual.
Filling with water
Fill the water reservoir before using the steam function or the spray nozzle. Remove the plug from the wall socket before flling the reservoir.
This steam iron is to a large extent resistant to hard water (up to 15^ ). Although normal tap water may be used, it is advisable to use distilled, demineralised or decalcified water. Should you be unsure about the hardness of the water in your area, please enquire of the relevant local authority department.
To prevent water from dripping from the sole plate, ensure that the steam control button is closed. It should be opened only once the temperature level required for steam ironing [as indicated on the temperature control knob] has been reached.
Fill the empty water reservoir using the measuring cup provided. Fill the reservoir to the indicated "Max" level only.
General information about ironing
Always check first whether a label with ironing instructions is attached to the article to be ironed.
The meaning of the ironing symbols is as follows:
synthetics (low temperature)
- silk and wool (medium temperature)
... cotton and linen (high temperature)
These markings can also be found on the temperature control knob of the steam iron in form of dot symbols.
Laundry to be ironed should be sorted according to the fabric ironing temperature. Follow the ironing symbols and start with the lowest temperature.
When ironing highly sensitive fabrics, or if you are not sure about the fabrics, you may carefully test-iron at a non-visible point, e.g. inside of seam. Start with the lowest temperature.
If the laundry is being dried in a dryer before ironing, the temperature should be adjusted to "iron dry". Very dry fabrics are difficult to iron.
Start up
Clean the steam iron before using for the first time, according to the instructions given in the paragraph "General Care and Cleaning". This will result in the removal of possible dust particles from the soleplate and subsequently lessen the smell typically encountered when first switching on.
Please ensure sufficient ventilation.
Ironing
Steam ironing requires high temperatures. The temperature level for steam ironing is indicated on the temperature control knob.
After filling the reservoir with water, place the steam iron upright on its base stand and insert the plug into the wall socket.
Set the temperature control knob to the required ironing temperature as indicated by the ironing symbols.
During the heating-up process the indicator lamp will be on. The lamp will go out once the required ironing temperature is reached.
Before ironing any fabrics, the soleplate should be cleaned by passing it over an old, clean cotton cloth, while using the steam jet function; this helps to flush out any dirt residues or lint particles trapped inside the openings in the soleplate.
The steam output can be adjusted with the steam control button or completely switched off for dry ironing.
For dry ironing, the water reservoir may be empty. Should there be water left in the reservoir, the steam jet function may also be used when dry-ironing at higher temperature settings.
Place the steam iron upright on its base stand after use and remove the plug from the wall socket.
Steam Jet
When the steam jet button is depressed, an additional hot steam jet is emitted from the soleplate. This function can be very useful when the regular amount of steam emitted is not sufficiently to remove stubborn creases or when ironing diffi cult or thick fabrics.
The steam jet function may also be used with the iron held vertically, to remove creases or wrinkles from fabrics.
Using the Spray Nozzle
The laundry can be dampened by pressing the spray button. This will help to smooth out difficult areas. The spray nozzle may be used at any temperature level during dry or steam ironing.
General Care and Cleaning
Before cleaning the appliance, ensure it is disconnected from the power supply and has cooled down completely.
To avoid the risk of electric shock, do not clean the appliance with water and do not immerse it in water.
If necessary, the unit may be wiped with a dry fuzz-free cloth.
Starch, fat and other deposits on the soleplate may be removed with a
woollen cloth soaked in a vinegar-water solution.
In order to protect the clean soleplate, you may occasionally apply a small amount of paraffin to the warm plate, wiping it off with a woollen cloth.
Do not use abrasives or harsh cleaning solutions.
Do not put vinegar or other descalers into the water reservoir.
Before the appliance is used for the first time (or when it has not been used for a long period), and thereafter every 10 to 15 days, the soleplate should be cleaned in the following way:
Fill half the water reservoir with water and place it on its base stand.
Leave the iron to heat on the highest temperature setting until the indicator lamp goes out.
Unplug the unit, open the steam control button to its full and swing the iron horizontally over a sink. During this procedure, the steam jet button should be repeatedly depressed.
Hot water and steam will be emitted by the holes in the soleplate. This will result in the removal of dust particles from the soleplate.
Pour out any remaining water, let the iron heat up again and pass the soleplate over an old, clean cotton cloth. The remaining water trapped in the soleplate will evaporate, helping the cleaning process.
Storage
Turn off the steam iron, remove the plug from the wall socket and let the unit cool down completely.
Pour any remaining water out of the reservoir through the water fill hole.
To avoid damage to the soleplate, store the steam iron in upright position on its base stand.
Disposal
Do not dispose of old or defective appliances in domestic garbage; this should only be done through public collection points.
Guarantee
This product is guaranteed against defects in materials and workmanship for a period of two years from the date of purchase. Under this guarantee the manufacturer undertakes to repair or replace any parts found to be defective, providing the product is returned to one of our authorised service centres. This guarantee is only valid if the appliance has been used in accordance with the instructions, and provided that it has not been modified, repaired or interfered with by any unauthorised person, or damaged through misuse.
This guarantee naturally does not cover wear and tear, nor breakables such as glass and ceramic items, bulbs etc. This guarantee does not affect your statutory rights, nor any legal rights you may have as a consumer under applicable national legislation governing the purchase of goods. If the product fails to operate and needs to be returned, pack it carefully, enclosing your name and address and the reason for return. If within the guarantee period, please also provide the guarantee card and proof of purchase.
CJIeIHTe 3a TeM, YTO6bI IHHyp IITaHnHe COIIpHKacJcC rOpAUMN IOBepXHOCTaMH. He HamaTbIBaIte IHHyp Ha rOpAun yTHOr.
He octablan Te deTei 6e3 npncmOTpa, yTO6bI OHN He hauaJIH nIgpaTb C nn6opom.
Bo Bpemn HarpBa yTOra nHdNkAToP 6yTeT rpeTb. Ppr DoCTnJKeHNn 3aDaHHoN TeMnpaTypbI nHdNkAToP noracHeT.
Ipejde yem npntyntb K rnaxehbu IIO6o TkaHn, Heo6xOIMo IOuNCTtB NOoSWBy yTIOra, npoBeJr IM HeCKoJIbKO pa3 PO YnCToJ XIoNuaTo6ymaxHO TKAHN. PnpMeHHe ΦyHKcIN Bbl6poca cTpyn npa CnOCo6CTByeT OUNCtKe OTBepCTn B NooWBe yTIOra OT Ha6NBuxxCa B HNX BOLOKOH, a TaKxE HaKNII.
Ipa npa moKHO peYnpoBaTb C NOMOu KHONKn, a nay cyxoro Iae Hb e MOKHO NOHOCtBu OTKIOHTb.
Ipeed Tem KaK npntyntb K uNCTke np6opa, OTKnIOHTe erO OT cTeN i DaITe emY NOHOCtBIO OCTblTb.
Bo n36eJahne nopajKeHnna 3JIeKTPnueCKnM TOKOM He MOIte yCTPOIcTBO BOOJ n He norpyKaIte erO B BODY.
Ecn Heo6xOIMo,ero MoXHO npotepb 6e3BOPCOBOI TkaHbIO.
Kpaxmam, Jnnp n dpyrne BnDbl 3aqr3HeHnnooBbI yTOra MOXHO ydaNTb C NOMOosbIO wepcTahOn TKaHN, cMOueHHOn B paCTBOpe yKCyca.
Дя 3aитbl NOOWBbl yTOra MOxHo HaHeCTn He6OJIbwoe KOINueCTBO npaΦiHa Ha TeNlIyIO NOOswBy, nocne Yero BbITEpeTb erO uepCTraHOI TkaHbIO.
He nCnoIb3yIte a6pa3nBOB nII nCnJIbHbIX paCTBOpITeIe.
He 3aIINBaIte yKcyc nII npyrne aHTnHaKnHbI B pe3epByap Ira BObl.
IpeedBkIIOueHHeMyTOra BnepBbIpa3(IIINKoIaOHHeNcNoIb3OBaIcB TeueHne IInTeIbHO BpemeH), a 3aTeM uepe3 KaJdIe 10-15 dHei OunuaiTe NODOWBy yTOra, KaYka3aHO HIXKe:
3aNoHnTe pe3epByap HanoNoBHy BDoi N NoCTaBbTe yTIOr Ha onOpy;
pa30rpeTe yTOr Ha MaKcImMaIbHOi TemnepaTyphOi yCTaBKe Do Tex NOp, Noka He NoracHeT INHdNkAToPHaJ lamNoUka;
BbHbTe BnKy n3 p03eTKn, NOIHOCTbIO OTKpoIte peryIaTOp npa I NOKaayTe yTHOr B rOpN3OHTaJIbHOM NOLoXeHNn HAd paKOBuHOi, PpN 3tOM Heo6xOIMO nepNoIDnueCKn HaKIMaTb KHOIpKy Bbl6poca napoBOv CTpyn.
Ropayra Boda n nap 6ydyT npn 3Tom BbIXoNDt bN3 OTBepCTn B NOOwBe yTO, yTO npNBedeT K ydaJIeHNo qACTnC pbln N HaKUNN N3 PNOOWBbl;
CneITe OCTaBswOcB OBody, CHOBa DaITe yTIOry HArpeTbcN IN PPOBeIITe Nm HeCKoJIbKO pa3 IIOCTOn XIoONuato6yMaXHNo TkaHn. Boda, OCTaBwaJcB N IOoWBe, 6yJeT nCnpaRtbcR, DOnOJIHnTeNbHO OUnIaJ npN EToM OTBepCTnB NIOoWBe yTIOra.
XpahHeHne
BbIKIIOUHTe yTOr, BbIHbTe BNkky n3 pO3eTKn I NOHOCbIO OCTyInte erO.
BbIeIe BCIO OCTaBswyOcR BODy n3 pe3epByapa uepe3 OTBepCTne.
Kuressaare: Toomas Teder FIE, Pikk 1B,
tel:4555978
Kaina: Ilmar Pauk Elektroonika FIE, Mae2S,
tel: 4636379, 5187444
Espana
Severin Electrodom. España S.L.
Plaza de la Almazara Portal 4, 1^ E.
45200 ILLESCAS(Toledo)
Tel: 925 51 34 05
Fax: 925 54 19 40
eMail: severin@severin.es
http://www.severin.es
France
SEVERIN France Sarl
4,rue de Thal
B.P.38
67211 Obermai Cedex
Tel. 03 88 47 62 08
Fax 0388476209
Greece
BERSON
C. Sarafi dis Bros. S.A.
Agamemnonos 47
176 75 Kallithea, Athens
Tel.: 0030-210 9478700
Philippines Business Center
Agias Anastasias & Laertou, Pilea
Service Post of Thermi
570 01 Thessaloniki, Greece
Tel.: 0030-2310954020
Iran
IRAN-SEVERIN KISH CO. LTD.
No.668,7th.Floor
Bahar Tower
Ave. South Bahar
TEHRAN - IRAN
Tel.:009821-77616767
Fax:009821-77616534
Info@iranseverin.com
www.iranseverin.com
Israel
Eatay Agencies
109 Herzel St.
Haifa
Phone: 050-5358648
Email: service@severin.co.il
Italia
via Dino Col 52r-54r-56r,
I-16149 Genova
Green Number: 800240279
Tel.: 010/6451102-010418609
Fax: 010/6425009
e-mail: videoelettronica@panet.it
Jordan
F.A. Kettaneh
P.O.Box 485
Amman, 11118, Jordan
Tel: 00962-6-4398642
e-mail: app@kettaneh.com.jo
Korea
Jung Shin Electronics co., Ltd.
501, Megaventuretower 77-9
Moonrae-Dong 3ga,
Yongdeungpo-Gu
Seoul, Korea
Tel: +82-22-637 3245~7
Fax: +82-22-637 3244
Service Hotline: 080-001-0190
Latvia
SERVO Ltd.
Mr. Janis Pivovarenoks
Tel: +371 7279892
servo@apollolv.
Lebanon
Khoury Home
7th Floor, Cité Dora 3 Building, Dora
P.O.Box 70611
Antelias, Lebanon
Telephone 01 244200, Fax 01 253535
eMail: info@khouryhome.com
Internet: www.khouryhome.com
Luxembourg
Ser-Tec
Serbia and Montenegro
tel: +381-21-524-638
tel: +381-21-553-594
fax: +381-21-522-096
Slowak Republic
PREMT,s.r.o.
Skladova 1
917 01 Trnava
Tel: 033/544 7177
Finland
Oy Harry Marcell Ab
Rälssitie 6, PL 63
01511 Vantaa
Puh 0207 599 860
Fax 0207 599 803
Svenska
Rakspecialisten HS
Mollevangsgatan 34
214 20 Malmö
Fax: 040/6110335
Slovenia
SEVTIS d.o.o.
Smartinska 130
1000 Ljubljana
Tel: 00386 1542 1927
Fax: 00386 1542 1926
Stand: 07.2009