
TO 9677 - Mini oven SEVERIN - Free user manual and instructions
Find the device manual for free TO 9677 SEVERIN in PDF.
| Product type | Mini oven |
| Brand | Severin |
| Model | TO 9677 |
| Power supply | 220-240 V, 50/60 Hz |
| Power | Approximately 1500 W |
| Control type | Rotary (temperature selector, 6-position switch, timer) |
| Functions | Grill, convection cooking, rotisserie, pizza |
| Temperature range | From 150°C to 220°C (approximately) |
| Timer | Up to 60 minutes with audible signal, continuous operation |
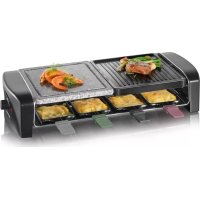
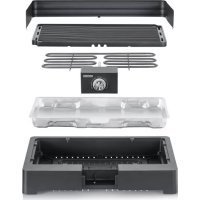
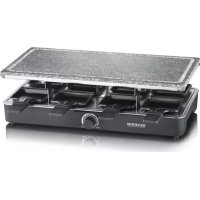
| Included accessories | Rack, baking tray, rotisserie with skewers, pizza stone, crumb tray, handles |
| Safety distances | Minimum 12 cm on the sides, rear, and above |
| Exterior cleaning | Damp lint-free cloth |
| Cleaning accessories | Rack, tray and rotisserie are dishwasher safe; pizza stone cleaned with wooden spatula (do not immerse) |
| Crumb tray | Removable, washable with warm water and mild detergent |
| Safety | Automatic shut-off by timer, protected heating elements, hot glass door - caution for burns |
| Repairability | Repair by an authorized technician - see list of service centers in the appendix |
| Warranty | 2 years against material defects and manufacturing faults |
Frequently Asked Questions - TO 9677 SEVERIN
User questions about TO 9677 SEVERIN
0 question about this device. Answer the ones you know or ask your own.
Ask a new question about this device
Download the instructions for your Mini oven in PDF format for free! Find your manual TO 9677 - SEVERIN and take your electronic device back in hand. On this page are published all the documents necessary for the use of your device. TO 9677 by SEVERIN.
USER MANUAL TO 9677 SEVERIN
Before using the appliance, the user must read the following instructions carefully.
Connection to the mains supply
Th e appliance should only be connected to an earthed socket installed in accordance with the regulations. Make sure that the supply voltage corresponds with the voltage marked on the rating label of the appliance. Th is product complies with all binding CE labelling directives.
Familiarisation
- Temperature control
- 6-position switch
- Timer
- Power cord with plug
- Indicator lamp
- Door handle
- Baking tray with handle
- Spit handle
- Spit end-piece (drive unit connection)
- Recesses for spit handle
- Spit end-piece (idle)
- Pizza stone
- Grill rack handle
- Crumb tray
- Heating element
- Grill rack
- Rotating spit
- Food clamps
Important safety instructions
Before the appliance is used, the main body as well as any attachments fitted should be checked thoroughly for any defects. If the appliance, for instance, has been dropped onto a hard surface, it must no longer be used: even invisible damage may have adverse effects on its operational safety.
- The power cord should be regularly examined for any signs of damage. In the
event of such damage being found, the appliance must no longer be used.
- Do not operate the appliance if excessive force has been used to pull the power cord. Damage cannot always be detected from the outside; the entire unit should therefore be checked by a qualified technician before it is used again.
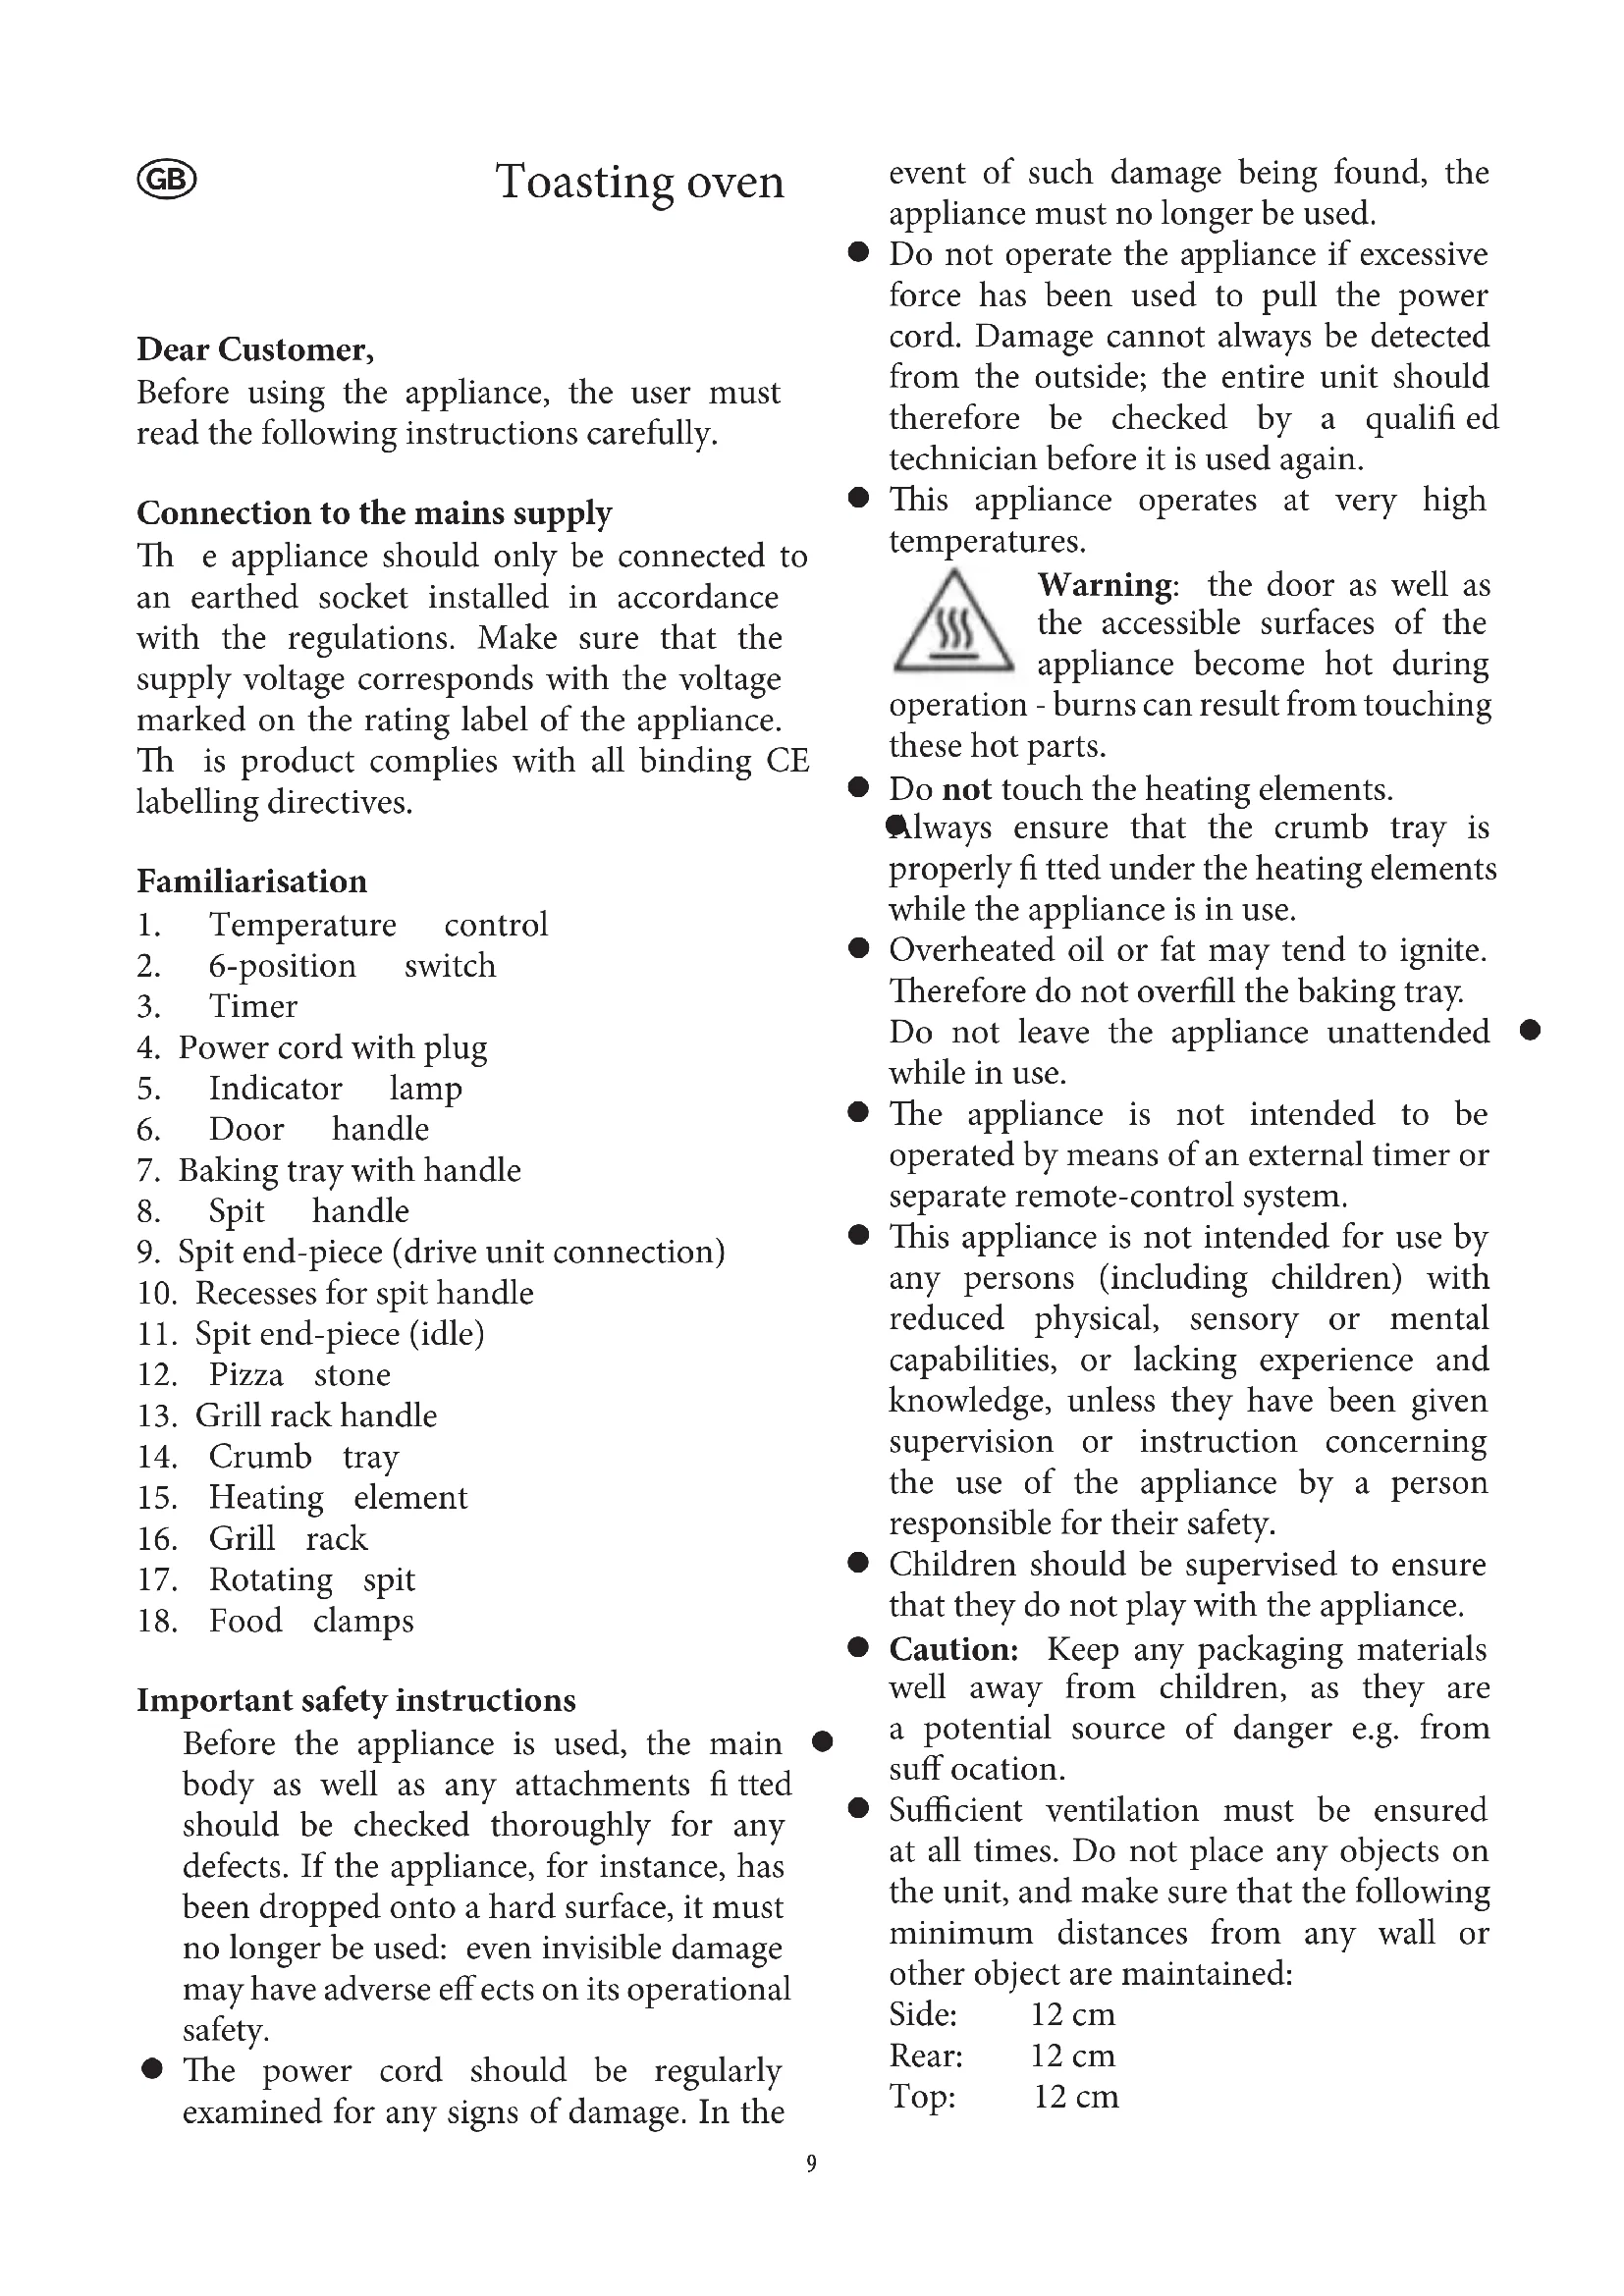
- This appliance operates at very high temperatures.
Warning: the door as well as the accessible surfaces of the appliance become hot during - burns can result from touching parts.
- Do not touch the heating elements.
Always ensure that the crumb tray is properly fitted under the heating elements while the appliance is in use.
Overheated oil or fat may tend to ignite. Therefore do not overfill the baking tray. Do not leave the appliance unattended while in use.
The appliance is not intended to be operated by means of an external timer or separate remote-control system. - This appliance is not intended for use by any persons (including children) with reduced physical, sensory or mental capabilities, or lacking experience and knowledge, unless they have been given supervision or instruction concerning the use of the appliance by a person responsible for their safety.
Children should be supervised to ensure that they do not play with the appliance. - Caution: Keep any packaging materials well away from children, as they are a potential source of danger e.g. from suffocation.
- Sufficient ventilation must be ensured at all times. Do not place any objects on the unit, and make sure that the following minimum distances from any wall or other object are maintained:
Side: 12 cm
Rear: 12 cm
Top: 12 cm
Do not position or operate the appliance close to or underneath any wall-cupboards or hanging objects such as curtains or any infl ammable materials.
During operation, the appliance must be placed on a heat-resistant surface, impervious to splashes and stains. Do not position the appliance on or near hot surfaces, open flames or infl ammable vapours.
- Caution: the pizza stone becomes very hot during use, and will only cool down very slowly after the appliance has been switched off and disconnected from mains power. There is a severe danger of burns in any case of contact.
Always let the pizza stone cool down completely before it is removed from the appliance.
- Caution: do not place aluminium foil or anything similar between the grill rack and the pizza stone. Place the stone directly onto the rack.
Do not allow the power cord to touch hot surfaces.
Do not let the power cord hang free.
Always switch off and remove the plug from the wall socket
- after use, as well as in cases of malfunction, and during cleaning.
When removing the plug from the wall socket, never pull on the power cord; always grip the plug itself.
-
No responsibility will be accepted if damage results from improper use, or if these instructions are not complied with.
-
This appliance is intended for domestic use only and not for commercial applications. In order to comply with safety regulations and to avoid hazards, repairs of electrical appliances must be carried out by qualified personnel, including the replacement of the power cord. If repairs are needed, please send the appliance to one of our customer service departments. The address can be found in the appendix to this manual.
-
Temperature control
With the temperature control knob, the temperature can be set to the desired level.
-6-position switch settings

Upper heat
Upper and lower heat

Upper heat with hot-air convection function

Upper and lower heat with hot-air convection function

Upper heat with rotating spit

Upper heat with hot-air convection function and rotating spit
- The heating elements will only be switched on once the timer is activated.
Timer
The timer can be used for either selecting a certain cooking time (up to 60 minutes), or for continuous operation.
- To select continuous operation, turn the timer switch anti-clockwise to its position. To turn the unit off, turn the switch to position .
To pre-programme the cooking time, turn the switch clockwise to the desired time.
To set a time of less than 10 minutes, turn the timer to a somewhat higher setting first and then slowly turn it back to the desired time setting. After the pre-programmed time has elapsed, an acoustic signal indicates that the heating elements are switched off.
Indicator lamp
The indicator lamp lights up when the appliance is switched on. It goes out once the
- pre-programmed time has elapsed, or if the switch is turned back to position .
Rotating spit
The rotating spit is used with the upper heat function; in addition, the hot-air convection function can be selected.
Before the spit is used, always ensure that the baking tray is properly inserted into
the guide rails.
When food is put on the spit, make sure that it cannot come into contact with either the upper heating elements or the baking tray; ensure sufficient distance.
Make sure that the spit pierces through the middle of the food. This is to ensure that there is sufficient distance between the baking tray, the oven interior and the heating elements. Use the holding clamps to secure it in the centre of the spit.
Any protruding parts (e.g. wings of a chicken) should be held in with a toothpick, a suitable piece of string or other suitable means. This ensures that no part of the food can stick out or come off during the cooking process.
Inserting and removing the rotating spit: -
Once the food has been securely attached, - place the spit onto the handle. Ensure that the indentations in the handle fit into the corresponding recesses in the spit.
Slide the spit end-piece with the drive unit connection into the drive unit (see picture II).
Place the idle end of the spit into its holding bracket on the opposite side (see picture I).
To remove the spit, follow these steps in reverse order.
Pizza stone
- Always place the pizza stone on the middle of the grill rack before inserting the rack into the appliance.
-Preheat the appliance to the required temperature as described in the section
Operation.
-With certain pre-baked pizzas made from especially light dough, the preheating phase should be shortened; this is to prevent the bottom layer of the pizza dough from browning too fast.
- After pre-heating, open the door and use a spatula to place the pizza on the centre of the stone. The pizza should be slightly smaller than the stone so that there is a clear space all round it.
- The pizza is ready once the cheese topping has melted and the bottom of the dough is slightly brown. Use a spatula for removing the pizza and serving it.
Start up
- Clean the appliance (see General care and cleaning) and remove any packing materials completely.
Before using the appliance for the first time, let it heat up for 15 minutes with both heating elements on. When the appliance is first switched on, a slight smell may be emitted. This is normal and will only last for a very short time. Ensure suffi cient ventilation.
Operation
Before using the appliance, make sure that the crumb tray is fitted in its proper position underneath the lower heating element.
-Pre-heat the oven compartment for several minutes with the door closed, using both heating elements. Set the temperature control knob to the required level and use the timer control to select the desired preheating time.
-Place the food to be cooked on the grill rack, the baking tray or the rotating spit. When cooking food containing fat or moisture, use the baking tray to stop any drips into the interior of the appliance.
If the pizza stone is used, it should be placed straight onto the grill rack.
- Close the door, set the temperature control to the required level and use the timer knob to select the desired cooking time, or continuous operation.
-For baking or grilling from above, either the upper or the upper and lower elements may be selected.
The switch settings may be changed during the cooking process.
After the pre-programmed cooking time has elapsed, the timer will automatically switch off the heating elements.
To interrupt the cooking process, or to
switch off the oven during continuous operation, set the timer switch to
Always use the door handle to open the glass door after use, when it is hot. When removing the baking tray or grill rack, use the baking tray handle provided. Likewise, when removing the spit, the spit handle must be used. Always place the baking tray and the grill rack on a heat-resistant surface.
After cooking, always turn the temperature control to its position.
Remove the plug from the wall socket. -
Cooking times
The grilling/cooking times listed are approximate only, as each type of food is of a different nature and consistency; please also refer to the information contained on the food packaging.
| Food | Temperature / switch setting | Grilling / cooking time |
| Chicken (rotating spit) | 180°C | 60 - 70 mins. |
| Pizza (deep-frozen) | 200°C | 10-12 mins. |
| Pizza (deep-frozen) | 220°C | 13-15 mins. |
| ‘Hawaii’ Toast | 220°C | 10-14 mins. |
| Baguette (deep-frozen) | 200°C | 14-15 mins. |
| Baguette (deep-frozen) | 220°C | 15-16 mins. |
| Cookies, biscuits | 175°C | 15-17 mins. |
| Cakes, pastry | 150°C | 50-60 mins. |
General care and cleaning
Before cleaning the appliance, ensure it is disconnected from the power supply and has completely cooled down.
To avoid the risk of electric shock, do not clean the appliance with water and do not immerse it in water.
Do not use abrasives, harsh cleaning solutions or spray-type oven cleaners.
The exterior of the housing may be cleaned with a damp, lint-free cloth.
The baking tray, grill rack, rotating spit and holding clamps may be cleaned using hot water and a mild detergent, or in a dishwasher.
-Allow the pizza stone to cool down completely before cleaning. Any remaining food can be scraped off with a wooden spatula. Because the surface is porous, discoloration as a result of contact with food is normal.
If the stone has been rinsed in water during the cleaning process, ensure that it has dried of completely before it is used again. Only a completely dry stone ensures best baking results.
-If necessary, the crumb tray may be removed and cleaned using hot water and a mild detergent. Be sure to replace it in the proper position underneath the heating element after cleaning.
Disposal
Do not dispose of old or defective appliances in domestic garbage; this should only be done through public collection points.
Guarantee
Th is product is guaranteed against defects in materials and workmanship for a period of two years from the date of purchase. Under this guarantee the manufacturer undertakes to repair or replace any parts found to be defective, providing the product is returned to one of our authorised service centres. Th is guarantee is only valid if the appliance has been used in accordance with
the instructions, and provided that it has not been modified, repaired or interfered with by any unauthorised person, or damaged through misuse.
Th is guarantee naturally does not cover wear and tear, nor breakables such as glass and ceramic items, bulbs etc. Th is guarantee does not affect your statutory rights, nor any legal rights you may have as a consumer under applicable national legislation governing the purchase of goods. If the product fails to operate and needs to be returned, pack it carefully, enclosing your name and address and the reason for return. If within the guarantee period, please also provide the guarantee card and proof of purchase.
Chere cliente, Cher client,
Regulator temperature
Ipeperpetoe MacIO nn Jnep Meet TeHdEHHIO K BOCIIaMeHeHIO. IOnToMy He IepeIOJIHrTe IpOTuBeHb.
He octabTae BkIIOueHHbI np6op 6e3 IIpcmOTpa.
KcIIyatau np6opa c NIOJIb3OBaHnEM BHeIINHeTO TaIMepa IIT OTeJIbHOrOYcTPOiCTBaIINCTaHIOHHO yIpaBHeHn He DoIpyCKaeTc.
3TOT np6op He IpeHa3HaueH IJIa NcIOJIb3OBaHHa 6e3 IIpNCMOtpa IINaMn (BKJIIOUaI Tei) C OrpaHnueHHbIMN
Φn3nuecknMn, ceHCOPHBIMN nIN yMCTBeHHbIMN cIOco6HOCTaMn, a TaKKe IuIaMn, He o6laIaIOUIMN IOCTaTOHbIM OIIbITOM N yMeHNEM, IOKa
JIuIO,OTBeuaIOUe 3a INX 6e3OIIaCHOCTb, He OByuNT INX O6paIeHnIO C DaHHbIM Ipi6Opom.
He octablan Te JeTei 6e3 npncmOTpa, YTO6bI OHn He HauaII INrpaTb C IIpN6Opom.
IpeyipexKJeHne . IepKnte
YIIaKOBOUHbIe MaTePnAJIbI B HeIOCTYINOM IIIA TeT MeTc. Pe6eHOK MoKet HaIeTb IIaKeT Ha TOrIOBy N 3aIOXHyTbCra!
Heo6xoJIMo BcerIa o6ecIeHuBaTb IOCTaTOUHyIO BeHTnJIaIIO.He KlaIITe Ha aIIIapaT HnKaKnx IpeIMeTOB; CIEIITe 3a TEM, YTO6bI aIIIapAT HaxOINCSHa CIEyIOIeM MHNImaJIbHOM ydaJIeHNI OT CTehBI INIOT IIO6OTo IpyTOI OpeIMeta:
c6OKy: Ha 12 cm;
c3aIi:Ha12cm;
Cbepxy:Ha12cm.
He yctHaBnBaIte ycTpoNCTBO n He NCIOJIb3yIte eRO OKOIO HaCTeHHbIX IkaΦOB NII IN IOI HUMN, NII IN IOI TaKIMN IIpeIMeTaMn, KaK 3aHaBeCn I pyTne BOCIIaMeHReMbIe MaTePnaJIbI
Bo BpeMa pa6OtBi ycTpoiCTBO IOJXHO CToA Hn JxapoIPOuHOn IOBepxHOCTn, yCToUHBOK 6pbl3rAm N IyTHaM. He ycTaHaBJIbAitc Ye CToIcTB OHa TropaHne IOBepxHOCTN nIN OKOIO Hnx nIN y OTKpbITOrO IIaMeHN nIN BOCIIaMeHraIOUHXsCnApOB.
BybTe octopokhbl! IIHTa IIuIbI Ipr pa6ote Ipr6opa cnIbHO HaIpeBaETcI NIOcIe BbIKIOUeHnI Ipr6opa n OTCoeINHeHn erO OT cETN OCTbIBaET OueHb MeIIeHHo. Ipr IIO6OM IIpIKOCHOBeHN K HeM MoKHO IOJYHTb CNIbHbI OXkOr.
IpeKJe Yem cHrTb IIHTy IJIa IIuIcBi C IIpIbopa, JaIte eIIOCTaTOUHO OCTbITb.
BHMaHHe! HeIOMeIaITeaIIOMHHeByIO oIbry IIN IIO6oI pyTOI IOIO6HbIMaTePnAImexKdy peTkoI-tpNIeM INIInTOIJIaII NIIuIb. KlaIInTe IIInTy IprMoHapeTky.
CleIte 3a Tem, YTO6bI IHHyp HHTaHnHe cOIIPKacJc CHarpeBaIOUeienC
IOBepxHOCTbIO IIpI6opa.
He IOnyckaIte CBO6OJHOrO IpOBuCAHnI Hhypa IIITAHnI.
O6aTeIbHo BbIKIOuaTe Ipru6Op N BbIHMaTe BnIKy N3 p03eTKN: IocIe MCIOJIb3OBaHJ3
- IIpnIIO6oHneIOJaKe; - IpeepNtKoI pnp6opa.
Ipn N3BJIeHHN BUNIKN N3 CTeHHOHO3eTKNHKOrIa He TAHNTe 3a IIPOBOJ, aTOJIbKO 3a BNJKY.
13ROTOBNTeHb He Hecet HNKaKOI OTBeTCTBeHHOCTn 3a IOBpeXJdeHne, BbI3BaHHoe HeIIpaBnIbHOI 3KcIIyatauNei NIIHapUHeHEm HACTOaNX yKa3aHn.
OTI pI6Op IpeHa3HaueH NCKJIIOUHTeJIbHO JIIA JOMaIIHeRO IIpIMHeHn I He IOJKeH NCIOJIb3OBAtbcB KOMMepuecknx IeJAX.
COOTBeTCTBUN C Tpe6OBaHnA MNI IpaBnI TexHnKn 6e3OIIacHOCTN N IJI NCKJIIOUeHn BO3MOXHO TpaBMATn3Ma peMOHT 3JIeKTPoIIpN6OpOB, BKJIIOuaN 3aMeHy IIHypa IIITaNHn, IOJIKeH
IPOUN3BOJNTbC KBAJIHΦNIIpOBaHHbIM IepcoHaIOM.EcIN Heo6XOJIM pEmOH, HaIIpaBbTe,IOXaIyIcTa,JIeKTpOIIpU6Op B OJHy N3 HaIIIX CepBnCHbIX CnyK6. AIIpeca yKa3aHbI B IIpNIIOJKeHN K JaHHOMY PYKOBOIDCTBY.
ДлЯPerулровka TeMператypы
HyxHna TeMnepaTypa 3aJaetc npn HOMOUI peYJITOPa TeMnepaTypbI.
IIOJKeHn IeCTNIO3NIOHOHOro IpeKIOuAteIa
BepxHnHaRpeB
BepxHn HNXHn HaPeB
BepxHn HaPpeB C yHKnnei KOHNBeKUN TOpAyeRO BO3Dyxa
BepxHn HnKnHaRpeB c yHKnnei KOHBeKmTogpaTeRO Bo3dyxa
BepxHn HaPpeB C BpaIaIOIIMcB 被TeIOM
BepxHn HaPpeB C yHKnneM
KOHBeKUIN TROPaYeRO BO3IyXa N BpaIaIOIIMcR BePTeIOM
HarpeBaTeIbHbIe 3JIeMeHTbI HaHyT HarpeBaTbcr TOIbKO IOCIE YCTaHOBKn TaMepa.
Taimep
TaImeP MoKeT HcIOJIb3OBA TbC8 KaK IIa BB6opa OIIpeJeHHO BpEmHn IpiROTOBHeHn (Io 60 MmHT), TaK IIJr HeIIpepbIBhIX peKIMOB IIpiROTOBHeHn.
IIa BBi6opa HeIpepbIBHOro peKIMa, IOBepHnTe IpeekNIOUaTeJIb TaMepa IIPOTNVB YacOBOc TpeIKN B IOIOKeHne .IIa BbIKIOUeHnYcTpoIcTBa IOBepHnTe IpeekNIOUaTeJIb B IOIOKeHne O.
ДяпрдварNTeHOrOпрогмMuPoBaHnB BpeMeHи ПИROTOВIeHnA, IOBepHnTe IpeKIOUaTeIb TaMepa IO YacOBoI CTpeJIke Ha OTMeTKy KeJIaEMOTo BpeMeHи IIpIROTOBJIeHnA.
YTO6bI 3aTb BpeMa MeHee 10 MNHyT, CHaHaJa yCTaHOBnTe TaIMep Ha 6OJIee IIPOIOJIKNTeJIbHoe BpeMa, a 3aTeM MeJIeHHo IOBopauHBaIe eTo Ha3aI Do yCTaHOBKn Ha HJxHoe BpeMa. IocLe nCTeueHna YCTaHOBJIeHHOTo BpeMeHN pa3IacTc8 3BYKOBoi CnTHaI, O3HaYaIOIIIN, YTO 3JIeMeHTb OTKIOUHInCb.
HnukaTopha IamnouKa
HIIKATOPHaIaMIOUka 3aropaetcI npBkIOueHHI Ip6op.a. To IPOINCXOINT, KaT OJIbKO HCTeKaET IIpeIBaPHTeHBHOyCTaHOBJIeHHoe BpeM, NIII ecJIN BbIKIOuAteJIb BO3BpaIaETCa B INCXOIDHOIIOXKeHne O.
BpaaioiinC BepTe
BpaiaoHn BepTeI nCIOb3yeTcI npi BepxHem HaRpeBe; KpOME TORO, MOXHO TaKKe BB6paTb yHKUIO KOHBekuN IROPaero BO3dyxa.
Ipei nCIOJIb3OBAHnEM BpaIaIOUeOcB BepTeIa 06a3aTeIbHO IPOBepbTe, YTO6BI IIpOTnBEH 6bl IpaBnIbHO BCTaBIIeH BOHy N3 HaIIpaBIAIOxN.
IIpn HacaKbHaHn IIpyrOtaBnBaemoi nHn Ha BepTeI cIeIITe 3a TeM, YTO6bIOHaHeKaacJaCb BepXHnxHaTpeBaTeJIbHbIX ⅡIeMeHTOB IIN IIpOTuBHn, TO eCTb 06ecIeYte MeKJy HmN IOCTaTOUHbI 3a3Op.
HacaIte PnIy TaKIM o6pa3OM, YTO6bI BepTe IpOxOuII IO ee cepeINHe. 3TO HJXHO IJIa TORO, YTO6bI PnIua HaxoIINacb Ha IOCTaTOUHOM ydaJIeHNOT IIpoTINBHa, BHyTpEHHeNIOBepXHOCTN Neu N HaRpeBaTeIbHbIX 3JIeMeHTOB. IocNe 3tOrO 3akPeIInTe PnIy PO IeHTpy BepTeIa IIpN IOMOII INepKaTeJIeN.
CkpeHnTe BbICTyIaIOUne I3 IIpoTnBnHaCTN IIuII (HaIppmep, KpbIbIKNUbIIeHka) 3y6OuHcTKoH, HNTKOHNiueM-TO IOIO6HbIM. TeIepb OHn He 6yuyT BbICTyIaTb NIN CBeIINBaTbcra Ype3 Kpa IIpoTnBnBnBnBnBnBnBnBnBnBnBnBnBnBnBnBnBnBnBnBnBnBnBnBnBnBnBnBnBnBnBnBnBnBnBnBnBnBnBnBnBnBnBnBnBnBnBnBnBnBn
YcmaHObKa u u3BneueHue bpauaoue2ocBepmena:
Iocne HaJeKHO 3aKeIIeHn HnH, IIpncOeHnHTe BepTeB pyKe. Y6eNTecb, TTO BBICTyHbHa pyKe BOIII IN B COOTBeTCTBYIOHne BblEMKn Ha BepTeIe.
BcTaBBte KOHueByo YacTb BepTea III npcoeINHeHn K IpNBOy B OTBepCTne (cm. nII. II).
BcTaBBTe CBO6OHNbI KOHeI BepTeIa BV KpeIeKHyIO cKO6y Ha IpyToI CTOpOHe (CM. HJI. I).
YTO6bI H3BJIeYb BpaIIaIOIIINcBepTeI, BBIOJIHNTE 3TN DeIcTBnB O6paTHOM IOPJKe.
IIHTaIJIa IIINZbI
BcerIa cTaBBTe IINTy IJIa IIINIbI Ha cepeHHy peHETKN IpeI yCTaHOBKOI peHETKN B Iprn6Op.
Pa3orpeIe Ipr6op IO Tpe6yemOITeMIIepaTpybI, KaK OINcAHO B pa3JeIe 3Kcnnyamaua.
IIpn BbIeUKe HeKOTOpbIX BnIOB IIOyΦa6pNKaTHoH IINuB, IIpiTOToBJIeHHoN 3 OueHb IerKOrO TecTa, BpeMa pa30rpeBa MoKet 6bITb
COKpaIeHo; 3TO IeIaETcI JIIr TOrO, YTO6bI He IOnyCTITb CInIJKOM 6bICTPOrO IIOpymHnBaHn HnKHeRo CIOr TecTa IIuIcbl.
Iocpepa3oRpeBa oTKpoIte IBepuI neuN IOMeCTnte IIuIy B ueHTp IInTbI IprN IOMOUIIOnaTOUKN.IuIuaIOJXHa 6bITb HEmHO Ro MeHbIe IIINrbl, YTO6bl BOKpyr Hee OCTaBAIOcB CBO6OJHoe IPOCTpaHCTBO.
IIuua 6yTe T OTOBa, KaK TOIbKO paacIIaBntcye cbIPbHbIB Bepx I IOdpyMaHNTc HIXHHa Yactb. YTO6bICHTb IIOdaTb IIuU K CTOly, IIOJIb3yITecb IOnaTOUkOJ.
BkIIOueHne
YdaJIInTe BeCb yIIaKOBOuHbIM MaTePnaI IN OUnCTHTe yCTpOINCTBO (cm. pa3JeI
O6iueo6cIyKuBaHne uNCTka).
Ipei HCIOJIb3OBAHNem yCTPOINCTBa IepBbI pa3 IIporpeIte ero B TeueHne 15 MNHT, BKIOUcNIB Oba HArpeBaTeJbHbIX 3JIeMeNTa. IIpn IIepBOM BKIOUeHnIy CHTPOINCTBa MoKET IOABHTbcra Cla6bI 3aIIax. 3TO HopMaJIbHoe ABLeHne, KOToPoe IIpoIOJIkaeTcR KOpOTKoe BpeM. O6ecIeYbTe IOCTaTOUYIO BEHTNIJIuHO.
3KcIpyaTua
IpeKJe Yem IpiCTyINITb K
HCIOJIb3OBAHnIO Ipi6opa, y6eINTeCb,
YTO IOIDIOH IIIA KPOIeK yCTaHOBIIeH
B HUJKOM IIOJOKeHnI IOI HIXKHIM
HaIpeBaTeJIbHbIM ⅢIeMeHTOM.
IporpeTe yctpoiCTBO B TeueHne HeCKoJIbKnx MmHT C 3aKpbITOn IBePciE, NcIOJIb3yra Oba 3JIeMeHTa. YcTaHOBtPepeYJrTOp TEmIIepaTpy Ha Tpe6yeMyTO TemIIepaTpy HArpeBa, a TaIMep - Ha HyJHoe BpeMia.
Ioomectnte npOdykTBI IJIra TOTOBKn HapeiHTKY-rgnIb,Ha IIpoTnBeHb NIIJxKeHa BpaiaOuIscBepTeI. IIpi rOtOBKe IIpOdyKTOB C 6oJIbIIM coJePkaHneM KInpa NII BlaIg, MCIOJIb3yIte IIpoTnBeHb, YTO6bl IIpeIoTbPaTNTb IOnJaHne KInpa NII BlaIg BHYTpB
yctpoCTBa.
EcnBbI nCIOJIb3YeTe IINTy IJIa IIuIcIbI, -CTaBbTe ee IprMo Ha peIeTKy-rgnIb.
3aKpoTe IBepu, yCTaHOBtpepyIaTOp - TemIIepaTypbHa Heo6XoIMbI yPoBeHb, HcIOJIb3yIte pyUky TaIMepa, YTO6bI BbI6paTb Heo6XoIMbI IIepNoB VpeMeHn IIpIroTOBJIeHn, IIN HeIIpepbIBhI peKm IIpIroTOBJIeHn.
Дя 3aIeKaHnI IIN JkapKn B BepxHei -YacTn IIp6opa, nCIOJIb3yIte BepxHnI IIN BepXHnI N HIXHnHaIpeBaTeIbHbIe 3JIeMeHTbl.
Bo BpeMa rOTOBKn IIOJIOKeHHe IpeKJIIOuHaTeIaMOXHO N3MeHrTb.
Iocne nCTeueHn yCTaHOBHeHHoro BpeMeHn TaMep aBTOMaTHueCKN BbIKIOUHT HaTpeBaTeJIbHbIe 3JIeMeHTbI.
YTO6bI IpiHOCTaHOBTb Ipouecc
IIpIROTOBJIeHnA, INI YTO6bI 3aKOHHTb
HeIIpepbIBHbI peXIM, yCTaHOBTe
IpeKJIIOUHaTeJIb TaMepa B IOIOJKeHne
O.
Iocne nCIOJb3OBAHnI np6opa BcerJa OTKpbBaIte TOpayU OCTeKJIHHyU IOBepuTOJIbKO3a pyuKy.IpNn3BLeueHn IpoTnBnI INPeIeTKI IOJIb3yITecb pykOINPOTNBnI N3 KOMIIKeTA IocTaBKn. IIra ChrTnBpaIaIOIeOcR BepTeHa TaKKe IIOJIb3yITecb erO pyuKoN.
-BceIa cTaBbTe npOTnBeHb n peIeTKy- rPnIb Ha TeIIIOCTOIKYIO IOBepXHOCTb.
Iocne 3aBepHHeHHn IpiHrOToBJIeHHn, Bcerda IOBOpaUNBaHTe peryJrTOp TeMIIepaTpybIBIOJIOKeHHe
-BbHbTe IITeIcJIbHyU BUNKy 13 po3ETKn.
BpMa IIpyrTOBJIeHnIa
IpiBHeHHOe B Ta6JIuCe BpeMjaKapKn /rotOBKn YBJIaETcra Ipi6JIu3HTeJIbHbIM, TaKa KIIuHa, KOtOpYIO HxKHO IOJXapNTb IIIN IpiTROBHTb, IMeet pa3HyIO IpiPOny N KOHCnCTeHnIO. PyKOBoDCTByITecb, IIOJaIyIcTa, peKOMeHdaIzIyMa, daHHbIMN Ha yIpaKOBKe IpoOyKTOB.
O6a3aTeIbHO BbIHbTe BNIKy N3 p03eTKN IaTe IIpN6OpY OCTbITb.
Bo n36eKaHne IopaKeHnna 3JIeKTPnueCKnM TOKOM He MOITe yCTPOIcTBO H He IIOpykaIte erO B BOy. He IIpIMeHnTe IJIa YNCTKN IIeenn a6pa3NBhIE MaTePnAIIbI, CNIIbHOJeIcTBYIOIIne MOIOIIne cpeIcTBA IIIN cIIPen.
Chapykno Kopnyc Moxho IpotepeTb BnaXHO 6e3BOPCOBOI TkaHbIO.
IpoTHBcHb,peiEeKy-tpnIb,BepTeIN IepKaTeIN IPOJyKTa MOXHO MbITbB rOpaye BOe C IIpIMHeHNEMMRAKOro MOIOIeTo cpeIcTba NIN BIOCYDOMOeHOn MaIIINHe.
IpeTem KaK IIpNCTyINITb K YnCTKe IINITbI DIAI INIICbI, DaIte eI NOIHOCTBIO OCTbITb. OCTaBIYIOcA INIUY MOJHO COCKPecTN DepeBraHHo JONaTOUKOH.
Tak KaK IIInTa IopnCTa, To ee oBeCuBcYbAHne Ipr KOnTaKTe C IIuIe JABJIeTCa HOpMaJIbHbIM JVBIIeHNEM.
EcIN BbI OIOJaCKNBAJI INIHTy BOIOB BO BpeMg YnCTK, y6eINTecb, YTO OHa IIOHOCTbIO BBICOXIIa, IIpeJKe Yem IIOJIb3OBA Tb ee cHObA. CaMyIO JIyUHIO BblNeKY MOJHO IOJIyHTb TOJIbKO Ha COBepHHeHCOxOI NTe.
EcHn Heo6xOIMo, IOnIOH IJIa KPOIeK MOJHO CHrTb N BBIMbITb B TROPyei BOJe C MRAKIM MOIOHM CpeICTBOM. IocHe YnCTKn He 3a6yNbTe yCTaHOBTb IOnIOH IJIa KPOIeK O6paTHO IOn HArpeBaTeJIbHbI ΘJIeMeHT.
YTNn3aun

He BbI6paCbIBaIe CTapBie NnH HeNCIIpaBHBie 3JIeKTPoIIpN6OpbB MecTe C 6bITOBbIM MycOpOM. OTHOCHTe IX Ha IIyHKtBi c6opa cIIeIuaJIbHOrO Mycopa.
TapaHTna
TapaHTHbI cPOK Ha IIp6OpbI 0nPmbl "Severin" - 2 rOa co INx IpoJauKu. B TeueHne 3TOrO BpeMeHN MBI 6ecIIaTHo UcTpaHMM BCE 1eΦeKTbI, BO3HNUIIe B pe3yIbTaTe IPOUN3BOIDCTBeHHORO 6paka NIN IIPIMHeHNA HeKAueCTBeHHbIX MaTePnaIOB. TapaHTN He pacIproCTpaHaeTcra Ha IeΦeKTbI, BO3HNUIIe IN3-3a HecO6JIIODeHNA pyKOBoIDCTBa IIO 3KcIIYaTaUIN, rpy6Oro O6paIeHNA C IIp6OpOM, a TaKKe HA 6bIOIIeCRA (CTekJIaHHbIE IN KepaMUnYeCKNE) YactN. DaHHa raPAHTN He HapuyHaet BaIHX 3aKOHHbIX IpaB, a TaKKe IIO6bIX IpyTnx IpaB IOTpe6ITeIN, yCTaHOBJeHHbIX HAIOHAJIbHbIM 3aKOHOJaTeJIbCTBOM, perTyIpyIOHM OTHOIIeHNA, BO3HNUAIouHme MeKdY IOTpe6ITeJIaMn IN IpoDAuAMN IprN IpoJaKe TOBapOB. TapaHTN aHHyIInpyETcA, ecIN IIp6Op peMOHTIpOBaICr HE BVka3aHHbIX HAMN INYHKTax cepBnCHoro O6cIyKIBAHNA. Bbi MoXeTe IIOIOYte OTIIpaBNTb IIp6Op C IIpeyuHem HencIIpaBHOCTeIN IIpNIIOJKeHHbIM KaccOBbIM YeKOM Ha HAII 6JIxKaIHIIN
IyHKT cepBnCHoro 6cnyKuBaHn. KaKeIIN6O IOIOJIHnTeIbHbIe rapaHTn IpoaBua3aBOJOM-N3rOTOBITeIeM He IIpIHMaIOTcY.
Kuressaare: Toomas Teder FIE, Pikk 1B,
tel:4555978
Kaina: Ilmar Pauk Elektroonika FIE, Mae2S,
tel:4636379,5187444
Espana
Severin Electrodom. España S.L.
Plaza de la Almazara Portal 4, 1^ E.
45200 ILLESCAS(Toledo)
Tel: 925 51 34 05
Fax: 925 54 19 40
eMail: severin@severin.es
http://www.severin.es
France
SEVERIN France Sarl
4, rue de Thal
B.P.38
67211 OBERNAI CEDEX
Tel.: 0388476208
Fax: 0388476209
Greece
BERSON
C. Sarafi dis Bros. S.A.
Agamemnonos 47
176 75 Kallithea, Athens
Tel.: 0030-210 9478700
Philippines Business Center
Agias Anastasias & Laertou, Pilea
Service Post of Thermi
570 01 Thessaloniki, Greece
Tel.: 0030-2310954020
Iran
IRAN-SEVERIN KISH CO. LTD.
No.668,7th.Floor
Bahar Tower
Ave. South Bahar
TEHRAN - IRAN
Tel.:009821-77616767
Fax:009821-77616534
Info@iranseverin.com
www.iranseverin.com
Israel
Eatay Agencies
109 Herzel St.
Haifa
Phone: 050-5358648
Email: service@severin.co.il
Italia
via Dino Col 52r-54r-56r,
I-16149 Genova
Green Number: 800240279
Tel.: 010/6451102-010418609
Fax: 010/6425009
e-mail: videoelettronica@panet.it
Jordan
F.A. Kettaneh
P.O.Box 485
Amman, 11118, Jordan
Tel: 00962-6-4398642
e-mail: app@kettaneh.com.jo
Korea
Jung Shin Electronics co., Ltd.
501, Megaventuretower 77-9,
Moonrae-Dong 3ga, Yongdeungpo-Gu
Seoul, Korea
Tel: +82-22-637 3245~7
Fax: +82-22-637 3244
Service Hotline: 080-001-0190
Latvia
SERVO Ltd.
Mr. Janis Pivovarenoks
Tel: +371 7279892
servo@apollo.lv
Lebanon
Khoury Home
7th Floor, Cité Dora 3 Building, Dora
P.O.Box 70611
Antelias, Lebanon
Telephone 01 244200, Fax 01 253535
eMail: info@khouryhome.com
Internet: www.khouryhome.com
Luxembourg
Ser-Tec
Sc. 2 Et.1, Ap. 27, Sector 1
Bucuresti
Tel: +40 21 233 41 12
+40212334113
+40216886613
Fax: +40 21 233 41 03
+40216886613
E-mail: offi ce@forbrands.ro
Web site: www.forbrands.ro
Schweiz
Serbia and Montenegro
tel: +381-21-524-638
tel: +381-21-553-594
fax: +381-21-522-096
Slowak Republic
PREMT,s.r.o.
Skladova 1
917 01 Trava
Tel: 033/544 7177
Finland
Oy Harry Marcell Ab
Rälssitie 6, PL 63
01511 Vantaa
Tel.: 00358 / 207599860
Fax: 00358 / 207599803
Svenska
Rakspecialisten HS
Mollevangsgatan 34
214 20 Malmö
Tel.: 040/12 07 70
Fax: 040/6110335
Slovenia
SEVTIS d.o.o.
Smartinska 130
1000 Ljubljana
Tel: 00386 1542 1927
Fax: 00386 1542 1926
Stand:03.2010

- Connection to the mains supply
- Familiarisation
- Important safety instructions
- Timer
- Indicator lamp
- Rotating spit
- Pizza stone
- Operation.
- Start up
- Operation
- Cooking times
- General care and cleaning
- Disposal
- Guarantee
- Chere cliente, Cher client,
- Regulator temperature
- IpeyipexKJeHne . IepKnte
- O6aTeIbHo BbIKIOuaTe Ipru6Op N BbIHMaTe BnIKy N3 p03eTKN: IocIe MCIOJIb3OBaHJ3
- ДлЯPerулровka TeMператypы
- IIOJKeHn IeCTNIO3NIOHOHOro IpeKIOuAteIa
- Taimep
- HnukaTopha IamnouKa
- BpaaioiinC BepTe
- IIHTaIJIa IIINZbI
- BkIIOueHne
- O6iueo6cIyKuBaHne uNCTka).
- 3KcIpyaTua
- BpMa IIpyrTOBJIeHnIa
- YTNn3aun
- TapaHTna
- Espana
- France
- Greece
- Iran
- Israel
- Italia
- Jordan
- Korea
- Latvia
- Lebanon
- Luxembourg
- Schweiz
- Slowak Republic
- Finland
- Svenska
- Slovenia
Brand : SEVERIN
Model : TO 9677
Category : Mini oven