
SS8775 - Docking station Sogo - Free user manual and instructions
Find the device manual for free SS8775 Sogo in PDF.
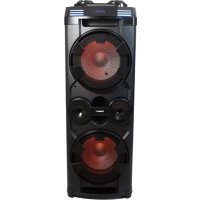
| Product type | Portable audio docking station with Bluetooth speakers, FM radio, karaoke and LED light |
| Brand | Sogo |
| Model | SS8775 |
| Dimensions (W x D x H) | 40 x 35.4 x 116 cm |
| Weight (with packaging) | 26.5 kg |
| Power supply | 100-240 V, 50-60 Hz, 250 W |
| Output power | 150 W RMS (1800 W PMPO) |
| Speakers | 2 x 12" (woofers) + 1 tweeter |
| Wireless connectivity | Bluetooth 5.0 (range 10 m), TWS (stereo connection with two speakers) |
| Audio functions | FM radio, USB player (up to 32 GB), AUX 3.5 mm input, LINE input (RCA), karaoke (2 microphone jacks 6.3 mm), equalizer (FLAT, POP, CLASSIC, JAZZ, ROCK), Super Bass, microphone echo |
| Display | LCD screen |
| LED lighting | 5 LED lighting modes (including 2 music-follow modes), light rings around the buttons |
| USB charging ports | 1 USB input (5 V, 200 mA) for playback, 1 charging port (5 V, 1000 mA) for smartphone |
| Included accessories | 2 wired microphones, FM antenna, power cable |
| Operating temperature | +5 °C to +35 °C |
| Maintenance and cleaning | Soft dry cloth; do not use abrasive cleaners |
| Safety | Do not immerse; do not repair yourself; unplug during storms |
| Spare parts and repairability | No user-serviceable parts; contact authorized after-sales service |
| General information | Compliant with European directives RED, low voltage, EMC, RoHS; made in China; imported by Sanysan Appliances S.L. |
| After-sales service | sogosat@sogosat.com / 0034 902 222 161 |
Frequently Asked Questions - SS8775 Sogo
User questions about SS8775 Sogo
0 question about this device. Answer the ones you know or ask your own.
Ask a new question about this device
Download the instructions for your Docking station in PDF format for free! Find your manual SS8775 - Sogo and take your electronic device back in hand. On this page are published all the documents necessary for the use of your device. SS8775 by Sogo.
USER MANUAL SS8775 Sogo
- Important Note P. 15
- Symbol definitions P. 15-16
-
Safety instructions for the user P.16 I. General precautions during the use of electrical equipment P.16-17
II. Restrictions on use to avoid personal injury P.17-18
III. Product use restrictions due to poor condition or breakdown P. 18-19
IV. Restrictions on use when used with children and elders P.19
V. IMPORTANT WARNING P.19
VI. Instructions to follow when using the device P.19-21 -
Features and technical specifications P. 21
- Information about products and accessories
6.Product and Panel Overview P.22 - Bluetooth Speaker functions P. 22-25
- Cleaning and maintenance P. 25
- Disposal of electronic goods P. 25
- Declaration of conformity P. 74
- Responsibility for disposal, details of the manufacturer and after-sales service P. 75
INDICE
REPETIR REPRODUCTION
- Always read the instruction book carefully before using.
This manual can be downloaded from our web page www.sogo.es - Keep these instructions for future reference.
2. Symbol definitions

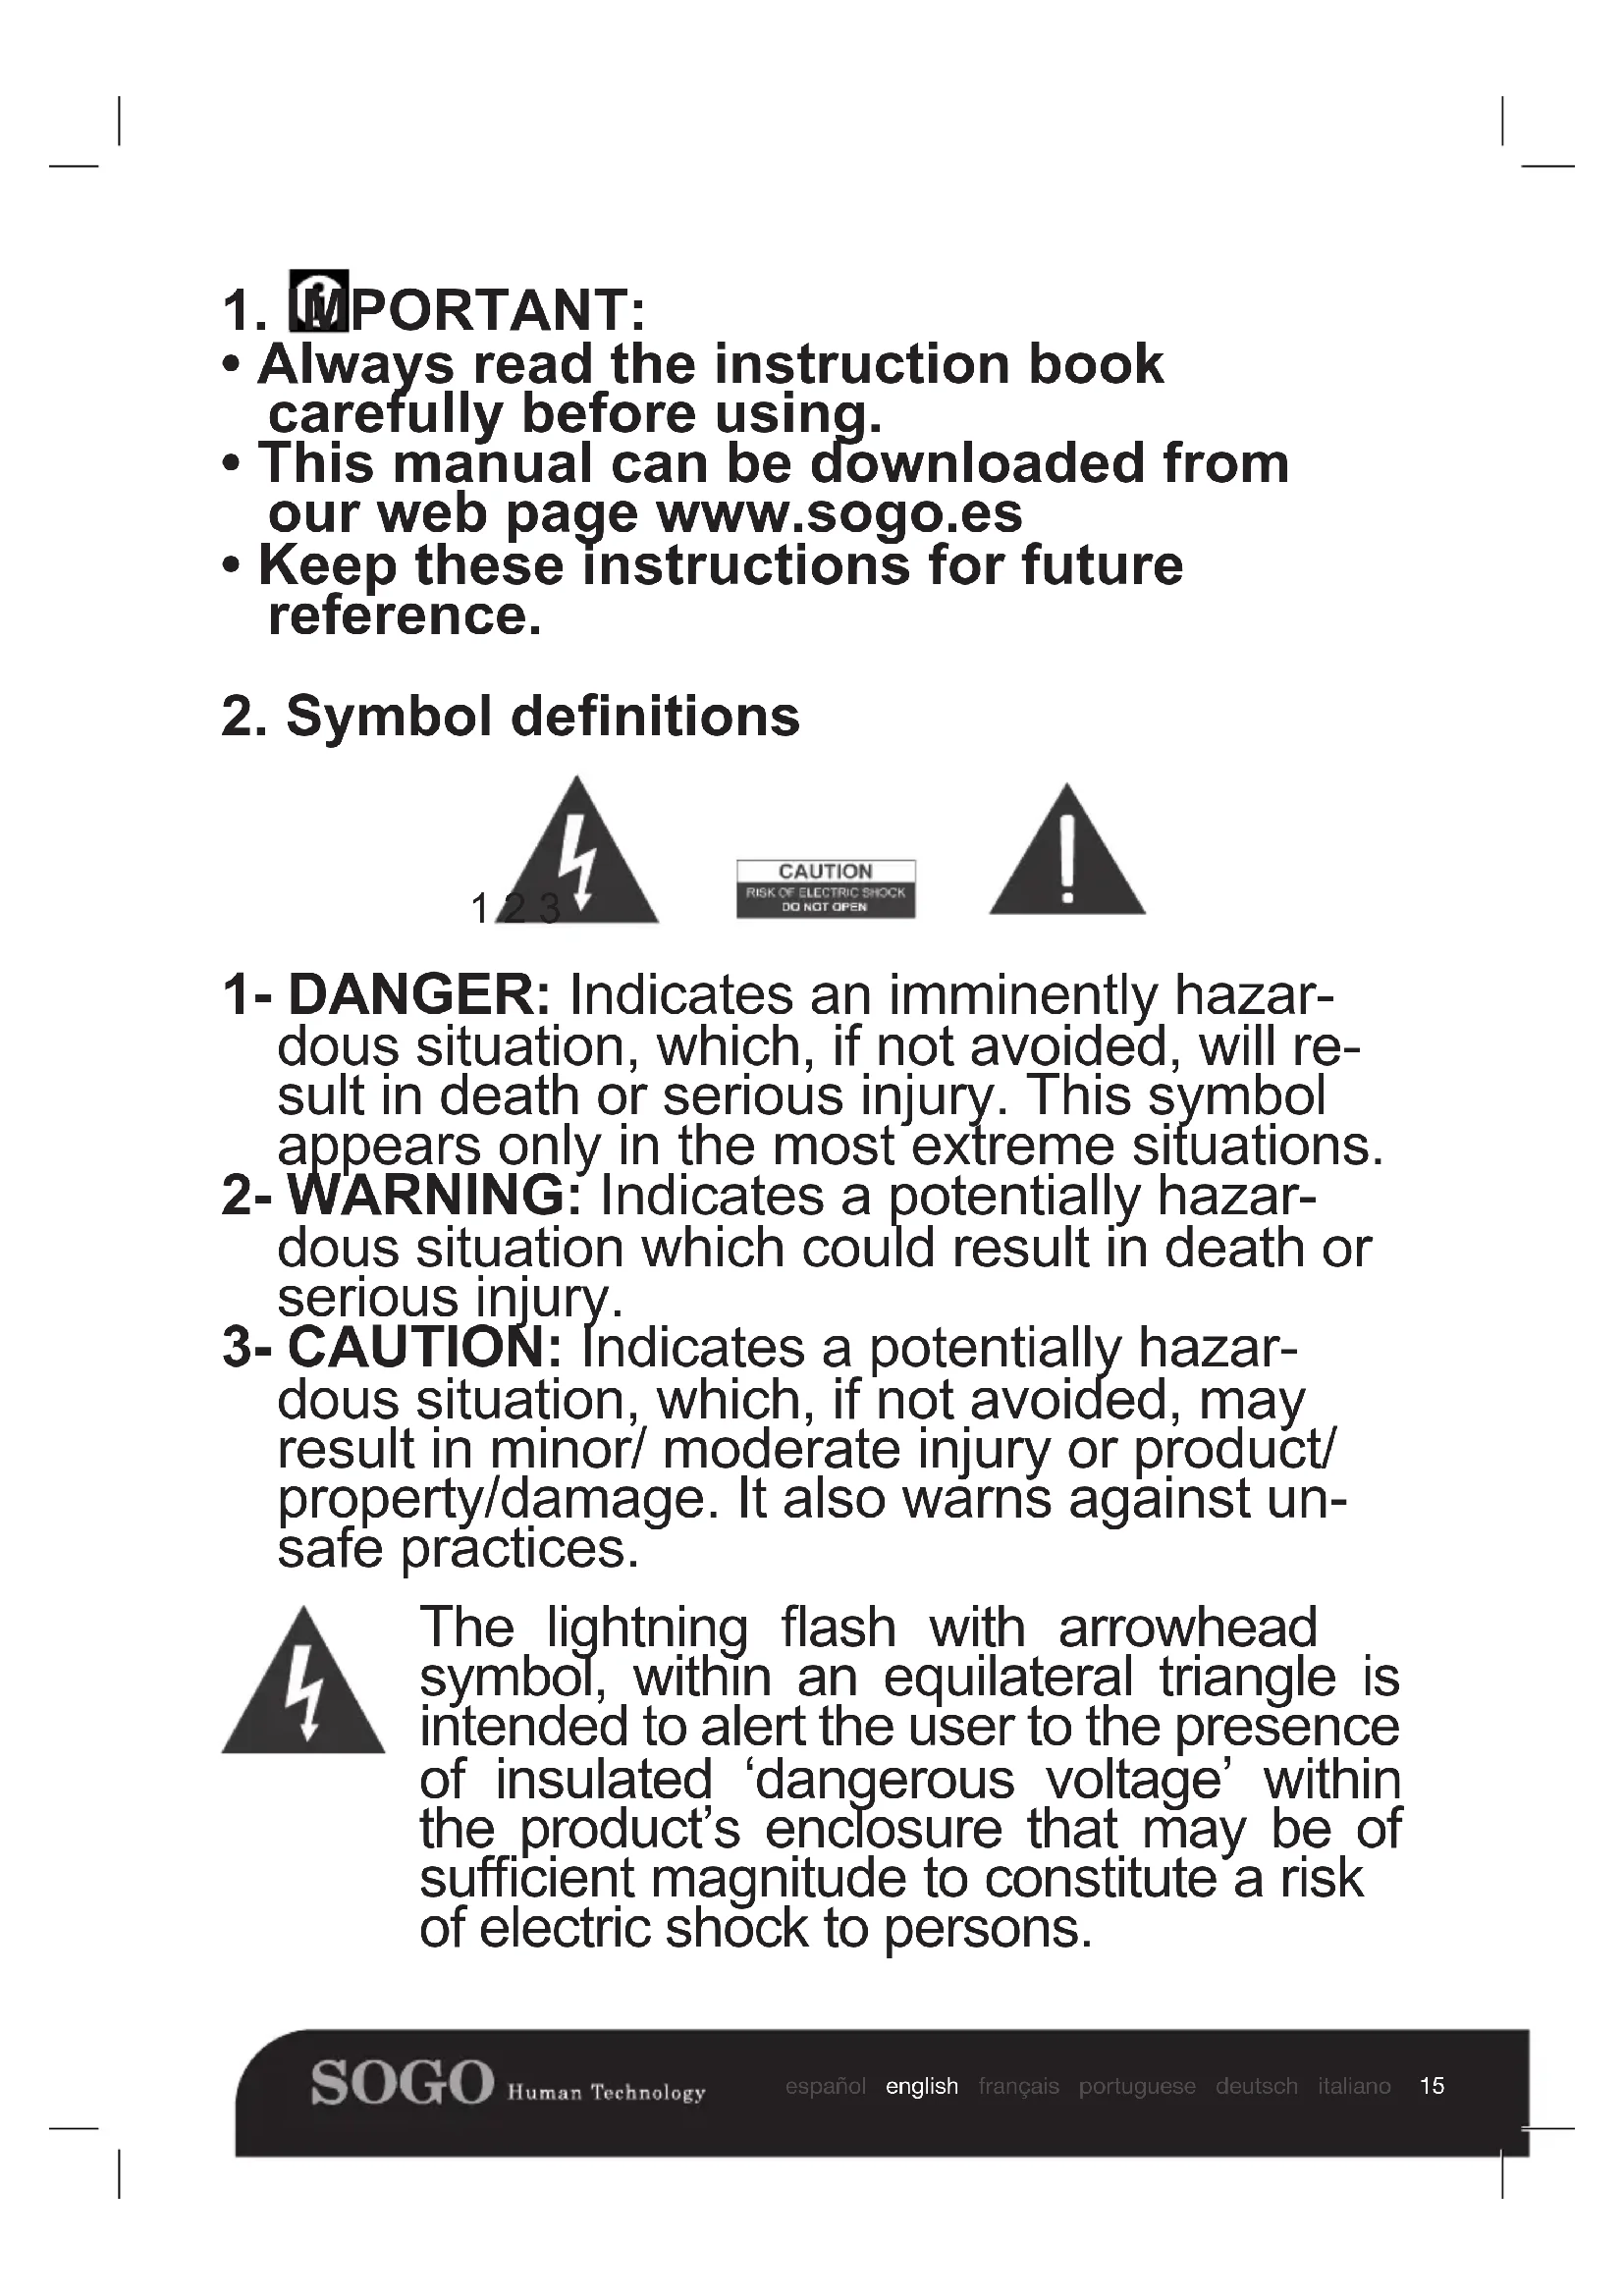
1- DANGER: Indicates an imminently hazardous situation, which, if not avoided, will result in death or serious injury. This symbol appears only in the most extreme situations.
2-WARNING: Indicates a potentially hazardous situation which could result in death or serious injury.
3- CAUTION: Indicates a potentially hazardous situation, which, if not avoided, may result in minor/ moderate injury or product/ property/damage. It also warns against unsafe practices.
The lightning flash with arrowhead symbol, within an equilateral triangle is intended to alert the user to the presence of insulated 'dangerous voltage' within the product's enclosure that may be of sufficient magnitude to constitute a risk of electric shock to persons.
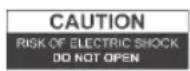
WARNING: TO REDUCE THE RISK OF ELECTRIC SHOCK DO NOT REMOVE COVER (OR BACK), NO USER SERVICEABLE PARTS INSIDE, REFER SERVICING TO QUALIFIED SERVICE PERSONNEL.

The exclamation point within an equilateral triangle is intended to alert the user to the presence of important operating and maintenance (servicing) instructions in the manual book accompanying the appliance.
GENERAL PRECAUTIONS
GENERAL PRECAUTIONS
Cautions while using electrical and electronic equipment.
3. Safety instructions for the user

General precautions during the use of electrical equipment
- Do not use the appliance for any other purpose than described in this manual.
- Do not use or store the appliance outdoors.
- Always place the appliance on to the flat and even surface.
- This product is intended for indoor, non-industrial, non-commercial and only for household use. Do not use the item outdoors or for any other purpose. Misuse or improper handling may cause problems in the appliance and cause injury to the user.
- The unit must be used only for the intended purposes. No liability is accepted for damages
arising from improper use or wrong handling.
- Ensure that the voltage indicated on the nameplate matches the mains voltage before plugging in the appliance.
Always remove the plug from the power socket when the appliance is not in use. Do not leave the appliance unattended when switched on. - Close supervision is necessary when any appliance is being used by or near children.
- The device is not completely disconnected from the power source, even after it has been turned off. To disconnect it completely, disconnect it from the mains plug.
II. Restrictions on use to avoid personal injury
- Do not let the appliance operate unattended.
- Do not place or operate this appliance near water sources.
- Do not place or operate the appliance and its power cord on or near hot surfaces (e.g., stove plates) or open flames.
- Do not leave the power cord hanging from sharp edges and keep away from hot objects and flames. Do not wind the cord around the appliance and do not bend it.
- Never use accessories that are not recommended by the manufacturer.
- The use of accessories not recommended or sold by the appliance manufacturer may result in fire, electric shock or injury to persons.
- When you want to remove the plug from the wall contact, please do this at the plug itself and not
by pulling on the cable or the appliance itself.
- To avoid electric shock, make sure your hands are dry before plugging or unplugging.
- Do not use the device with wet hands, on damp floors or when the atmosphere is humid, there is a risk of electric shock.
- While using the appliance, make sure that the power cord must not be caught or crushed.
- Do not let the motor unit, cord or plug get wet to protect against risk of electric shock.
III. Product use restrictions due to poor condition or breakdown
- Never immerse the appliance or the plug-in water or any other liquid. In the event of the appliance falling in water, disconnect immediately from the mains supply and take it to an authorized service agent for repair before reusing.
- Do not use the appliance if it has fallen on the floor, if there are visible signs of damage or if it has a leak.
- Do not use the appliance if the cable or plug is damaged. In case of the cord be damaged, it must be replaced only by the manufacturer, its service agent or similarly qualified persons in order to avoid Hazard.
- In case of appliance malfunction, or if it has been damaged in any manner, return the appliance to the nearest authorized service facility for examination, repair or adjustment.
- In case of hardware problems, do not attempt to repair the product yourself. Repairs should only
be carried out by qualified technicians.
IV. Restrictions on use when used with children and elders
- Children should be supervised to ensure that they do not play with the appliance.
- Cleaning and user maintenance shall not be made by children without supervision.
- Keep the appliance and its cord out of the reach of the children.
V. 1 IMPORTANT WARNING
- To avoid a circuit overload when using this product, do not operate another high-wattage product on the same electrical circuit.
- A short power supply cord is provided with this product. An extension cord is not recommended for use with this product, but if one must be used:
- The marked electrical rating of the cord must be at least as great as that of the product.
- Arrange the extension cord so that it does not hang where it can be tripped over or pulled unintentionally.
VI. Instructions to follow when using the device
- Do not use the speaker for any other purpose than described in this manual.
- Do not leave the speaker charging longer than recommended by the manufacturer, as this may
damage the speaker itself.
- Do not use the speaker while in charge, otherwise it may also damage the speaker.
- This product has no user-serviceable parts. Do not attempt to repair this product yourself. Only qualified service personnel should perform servicing. Take the product to the electronics repair shop of your choice for inspection and repair.
- NEVER let anyone, especially children, push anything into holes, slots or any other openings in the unit's casing as this could result in a fatal electric shock.
- Don't mount this product on a wall or ceiling.
- Do not place the unit near TVs, speakers and other objects that generate strong magnetic fields.
- NOTE: To disconnect the system completely if it not to be used for a long time, remove the AC power plug from the wall outlet.
- Do not drop, disassemble, deform, modify or insert any objects into holes of the speaker as it may result in product damage.
- Do not clean the product with alcohol, ammonia-based cleaners and abrasive cleaners.
- Do not place this product in to contact with any sharp objects as this may cause scratches and operating damage.
- Keep the speaker away from direct sunlight, fire, or other high voltage equipment.
WARNING: the device might get warm during charging. Always ensure the speaker is
turned off when you plug and unplug the device. If the device is not turned off you might damage the speaker or injure yourself.
- Place the unit where there is good ventilation. Place the system on a flat, hard and stable surface. Do not expose to temperatures above 40^ . Allow at least 30 cm clearance from the rear and the top of the unit and 5 cm from each side.
- Press the buttons of the unit gently. Pressing them too hard can damage the unit.
- Unplug the product during lightning, storms or when it will not be used for long periods of time.
- Observe all signs and displays that require an electrical device or RF radio product to be switch off in designated areas.
- Dispose of the product and the product's battery in accordance with local laws and regulations.
4. Features and technical specifications
Speakers: 2 × 12 with 1 tweeter
Connection: Wireless
TWS function: TWS music system in capable of working as stereo pair with another
speaker (same model)
Karaoke: Yes
Functions: FM radio
Led light: Musical beats with RGB colours lighting effects
Input: USB up to 32GB (5V 200mA), auxiliary jack, USB charging port (5V 1000mA),
2 Microphone jacks
Screen: LCD display
RMS power: 150W RMS (1800W PMPO)
Sensitivity: ≤90dB
Bluetooth range: ≤ 10m
Bluetooth connection: SS-8775
Accessories: 2 wired microphone, antenna for FM function
Easy transportation: With trolley wheels
Input power: 100-240V; 50-60Hz
Energy consumption: 250W
Frequency: 87.5 - 108MHz
AUX IN jack: 3.5mm
Microphone jack: 6.3mm
Work temperature: +5^ + 35^
Sound settings: Equalizer, Echo, Super Bass
Unit measure: 40 × 35.4 × 116 cm
Box size: 47 × 46 × 123 cm
Box weight: 26.5kg
5. Information about products and accessories
This product contains 1 Bluetooth speaker, Instruction manual, electric cable, 2 wired Mics and antenna cable for FM function
6. Product and Panel Overview
Top View
- USB PORT (5V = 200mA)
2.3.5 mm AUX IN JACK
3.6.3 mm MIC JACK 1
4.6.3 mm MIC JACK 2
- USB CHARGING PORT
(5V=000mA)
-
LIGHT RINGS
-
VOLUME CONTROL
-
FUNC.BUTION
-
BUTTON
-
MUTE BUTTON
-
ECHO BUTTON
-
10/ FOLD/M.+ BUTTON
-
TUNE+ BUTTON
-
CAN BUTTON
-
PAIR/TWS BUTTON
16.TUNE-BUTTON
-
10/FOLD/M. - BUTTON
-
P-MODE/MEM.BUTION
-
LIGHT BUTTON
-
SUPER BASS BUTTON
21.EQ BUTTON
- MIC VOL. KNOB
Front and Back view
-
LCD DISPLAY
-
STANDBY INDICATOR
-
PAIR INDICATOR
-
LED FLASHING LIGHT
-
SPEAKERS
-
SPEAKER GRILLES
-
TWEEETER
-
DISCO LED LIGHT
-
LINE IN (AUDIO IN)
L/R RCA JACK
- FM SOCKET AND FM
WIRED ANTENNA
- AC SOCKET
34.WHEELS
- HANDLE
7. Bluetooth Speaker functions
POWER SOURCE
This unit is AC operation.
After connecting the power, the standby indicator will turn to red, press the button to switch the unit on/off.
NOTE: When the unit is not providing the main function for 15 minutes, the unit will automatically
switch into standby mode. To turn on the unit again, press button.
ESD hints - The product maybe reset or not reset to operation of control due to electrostatic discharge, just switch off and reconnect again.
SETTING THE FUNCTION MODE
To change the function modes, press the FUNC. button repeatedly to choose RADIO/USB/ BLUETOOTH/AUX/LINE IN function.
ADJUSTING THE VOLUME
- Rotate the VOLUME knob on the unit to increase or decrease the music volume.
- Rotate the MIC VOLUME knob on the unit to increase or decrease the microphone volume.
BASS ADJUSTMENT
Press the SUPER BASS button on unit to increase the bass effect.
This unit has a built-in equalizer system, press the EQ button on unit to select a setting that best matches the music style:FLAT, POP, CLASSIC, JAZZ and ROCK preset.
USB CHARGING
This unit provides a 5V 1A USB charging port for charging your smart phone. Connect the USB cable of your smart phone to the USB CHARGE port for charging.
MICROPHONE ECHO ADJUSTMENT
Press the ECHO button on unit turn on or off the microphone echo effect.
FLASHING LIGHT
There are 5 modes for the DISCO LED lighting around the speakers. Press the LIGHT button to choose the light modes.
Mode 1 - Blue light stays on
Mode 2 - Red light stays on
Mode 3 - Green light stays on
Mode 4 - 7 color light flashing follow the music
Mode 5 - 7 color light flashing smoothly preset
L OFF - all the speaker lights off.
There are some blue LED light bars on the two sides of the LCD display, the blue light will flash to the music beat in all disco LED light modes. And around the volume knobs on the top panel, there're two LED light rings. Press and hold the LIGHT button to turn these lights on or off.
RADIO OPERATION
Listen to FM radio broadcasts. Press the FUNC. button on the unit, the display reads the radio frequency.
Note: The wired antenna is packed with the user manual as a separated accessory, insert the wired antenna into the FM socket on the rear cabinet when listening to the radio, and extend the wired antenna to its full length in order to get the best reception.
TUNING TO A RADIO STATION
If you know the station frequency that you want to tune to directly:
- Tune to a station by pressing the /TUNE+ or /TUNE- button repeatedly. The station frequency is shown on the display.
To tune to a preset station:
To tune to the next preset station, press the 10/FOLD/M. + button.
To tune to the previous preset, press the 10/FOLD/M. - button.
AUTO PRESET MEMORY / SCAN
To scan for stations within reception range and save them to preset memory automatically, press and hold the /SCAN button. After the unit is finished scanning, the unit will automatically tune to preset number 1 (P01).
Choose which stations to save in preset memory instead of scanning automatically.
- Use the /TUNE+ or /TUNE- button to tune to the station that you want to save as a preset (e.g., 93.1).
- Press the P-MODE/MEM. Button, "P01" will flash on the display to indicate that you are saving the station as Preset Memory 01. (To change the preset memory number, press the 10/FOLD/M.+ or 10/
FOLD/M.- buttons.)
- Press the P-MODE/MEM. button to finish saving the station (e.g., P01 is now set to 93.1).
- To save another station, repeat steps 1 to 3. You may save up to 30 FM stations.
USB OPERATION
This unit provides one USB port for music playback.
-
Press the FUNC. button on unit to select USB mode.
-
Plug the USB memory stick to the USB port on top of the unit. Playback will start automatically from Track 1.
- To pause playback, press the /SCAN button on unit. The playing time will flash on the display.
- To resume playback, press the HSCAN button again.
- To select a desired track, press the /TUNE+ or /TUNE- button respectively during playing until the desired track appears on the display. The unit will start play automatically.
- To search for a particular passage during playback, press and hold the /TUNE+ or /TUNE- button to scan the current playing track at high speed until desired point (passage) appears, then release the button for normal playback mode.
- To select a song which track number exceeds 10, press the 10/FOLD/M.+ or 10/FOLD/M.- button each time to skip forward/backward 10 tracks, then press the TUNE+ or TUNE- button to select desired track.
- To select a desired folder (if the USB contains more than one folder), press and hold the 10/FOLD/M.+ or 10/FOLD/M. - button each time to skip forward/backward a folder, then press the TUNE+ or TUNE- button to select desired track.
playing track at high speed until desired point (passage) appears, then release the button for normal playback mode.
Important: The USB port is intended for data transfer only, other devices cannot be used with this USB connection. The use of USB extension cords is not recommended. Don't plug the USB from the unit when playing or reading the USB device.
REPEAT PLAY
You can play one track or all tracks on the USB repeatedly.
To Repeat a Single Track
- Press P-MODE/MEM. button on unit during play, the display will show “ ” and the current track will be played over and over again.
- To cancel repeat play, press P-MODE/MEM. button on unit until " " disappears from the display.
To repeat all the Tracks
- Press P-MODE/MEM. button on unit until the " ALL" shows on the display, all tracks on the USB will be played over and over again.
- To cancel repeat play, press the P-MODE/MEM. button on unit until "ALL" disappears from the display.
To repeat the folder (only for USB which contains more than one folder)
- Press the P-MODE/MEM. button on unit until "DIR" shows on the display, the current folder will be repeated over and over again.
- To cancel repeat play, press the P-MODE/MEM. button on unit until "DIR" disappears from the display.
RANDOM PLAY
Press the P-MODE/MEM. button on unit in play mode till the "RAN" shows on the display, the random play will start from next track automatically. Press the P-MODE/MEM. button on unit again until the "RAN" disappears from the display to cancel.
BLUETOOTH OPERATION
- Press the FUNC. button on unit to switch to BLUETOOTH function, the LCD will display "BT" and the pair indicator will flash at high speed.
- Turn on the Bluetooth function on the device, scan the unit "SS-8775" and connect, then input the password 0000 if required, the pair indicator keep light up to indicate connection done, and the display will show "BT". Press Play to start playback.
- Rotate the VOLUME knob on the unit or adjust the volume on the external device to increase or decrease the music volume to your desired level.
- Press the PAIR/TWS button to disconnect Bluetooth.
Note: The Bluetooth works best within 10 meters in open air.
TWS OPERATION
If you have two units of this model, you can connect the two units by TWS function to become stereo output.
- Connect the device to one of the units by Bluetooth function, this unit will become the master unit.
- Turn on the second unit and switch to Bluetooth mode, press and hold the PAIR/TWS button on the second unit, then these two units will connect automatically with a sound indicated that the connection is done. The master unit will show "TWS R" and the second unit will show "TWS L", then these two units will become stereo output.
- Control of play, pause, next track and previous track can be done by both units. Rotate the volume knob on each unit to adjust the volume individually.
- To quit the TWS, press and hold the PAIR/TWS button on the second unit to disconnect.
AUX-IN OPERATION
-
Press the FUNC. button on unit to select the "AUX" mode.
-
Connect your audio device to the AUX IN jack on the top panel of the unit with an AUX IN cable. (audio cable is not included)
- Rotate the VOLUME knob on the unit or adjust the volume on the external device to increase or decrease the music volume to your desired level.
- Control the playback with your audio device.
- Press the FUNC. button on unit to select the "LINE" mode.
- Connect your audio device to the RCA jack L/R on the back panel of the unit with RCA cable (cable is not included).
- Rotate the VOLUME knob on the unit or adjust the volume on the external device to increase or decrease the music volume to your desired level.
- Control the playback with your audio device.
8. Cleaning and maintenance
While cleaning the product, just use soft or dry cloth and in case of severe stains use the damp cloth.
Do not use abrasive cleaners, as it can damage the paint, plastic or even the speaker itself.
Keep it away from sun light and do not keep it in hot and humid atmosphere.
Make sure to remove the power adaptor cable and keep it in cool and dry place.
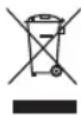
9. Disposal of electronic goods
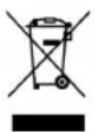
DISPOSAL OF BATTERY OPERATED UNITS
Do not dispose the battery operated units as normal rubbish, always these should be recycle in proper manner and according to the local municipal laws. You can recycle them by taking them to government authorized disposal centres or specialized bins which you can find in any nearby big super markets, electronics or electro domestics products stores or malls who have these types of facilities available.
1. IMPORT:
Gamme bluetooth: ≤10m
Connexion Bluetooth: SS-8775
FONCTIONNEMENT AUX-IN
Alcance bluetooth: ≤10 m
Conexão Bluetooth: SS-8775
There are some blue LED light bars on the two sides of the LCD display, the blue light will flash to the music beat in all disco LED light modes. And around the volume knobs on the top panel, there're two LED light rings. Press and hold the LIGHT button to turn these lights on or off.
RADIOBETRIEB
DECLARATION OF CONFORMITY
This device complies with EU RED Directive 2014/53/EU related to Health and Safety from usage of Radio spectrum in household electronic equipment.
Low Voltage Directive 2014/35/EC. Electromagnetic Compatibility Directive 2014/30/EU. Directive 2015/863/EU on the restriction of the use of certain hazardous substances in electrical. Directive 2009/125/EC on the eco-design requirements applicable to energy-related products.

DECLARATION DE CONFORMIDADE
This symbol on the product or on the packaging indicates that this product can't be disposed as normal rubbish or household waste. All the electrical, electronic equipment's and battery-operated units must recycle in proper manner and according to the local municipal laws. You can recycle them by taking them to government authorized disposal centres or specialized bins which you can find in any nearby big super markets, electronics or electro domestics products stores or malls who have these types of facilities available.
Designed by: SOGO based on European quality standards
Imported by: Sanysan Appliances S.L, NIF: B98753056, C/ Barcas 2, 2, 46002 Valencia, Spain
Product manufactured in P.R.C. After-sales service: www.sogosat.com sogosat@sogosat.com / 0034 902 222 161

- INDICE
- REPETIR REPRODUCTION
- Symbol definitions
- GENERAL PRECAUTIONS
- Safety instructions for the user
- General precautions during the use of electrical equipment
- Restrictions on use to avoid personal injury
- Product use restrictions due to poor condition or breakdown
- Restrictions on use when used with children and elders
- 1 IMPORTANT WARNING
- Instructions to follow when using the device
- Features and technical specifications
- Information about products and accessories
- Product and Panel Overview
- Top View
- Front and Back view
- Bluetooth Speaker functions
- POWER SOURCE
- SETTING THE FUNCTION MODE
- ADJUSTING THE VOLUME
- BASS ADJUSTMENT
- USB CHARGING
- MICROPHONE ECHO ADJUSTMENT
- FLASHING LIGHT
- RADIO OPERATION
- TUNING TO A RADIO STATION
- AUTO PRESET MEMORY / SCAN
- FOLD/M.- buttons.)
- USB OPERATION
- REPEAT PLAY
- To Repeat a Single Track
- To repeat all the Tracks
- To repeat the folder (only for USB which contains more than one folder)
- RANDOM PLAY
- BLUETOOTH OPERATION
- TWS OPERATION
- AUX-IN OPERATION
- Cleaning and maintenance
- Disposal of electronic goods
- DISPOSAL OF BATTERY OPERATED UNITS
- IMPORT:
- FONCTIONNEMENT AUX-IN
- RADIOBETRIEB
- DECLARATION OF CONFORMITY
- DECLARATION DE CONFORMIDADE
Brand : Sogo
Model : SS8775
Category : Docking station