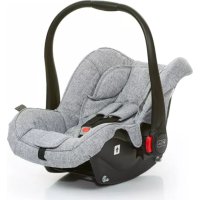
Hazel Isofix Base - Car seat ABC DESIGN - Free user manual and instructions
Find the device manual for free Hazel Isofix Base ABC DESIGN in PDF.
| Product type | Isofix base for child car seat |
| Brand | ABC Design |
| Model | Hazel Isofix Base |
| Compatibility | ABC Design Hazel child seat (Group 0+) |
| Standard | ECE R44/04 |
| Weight | 6.8 kg |
| Materials | Plastic, steel |
| Main functions | Isofix attachment, adjustable damping bar, support leg, lock color indicators |
| Care and cleaning | Clean plastic parts with a cloth, warm water and soap. Do not use harsh or abrasive products. |
| Safety | Mandatory use in rear-facing direction, deactivate airbag, do not use for more than 5 years, replace after an accident |
| Spare parts | Protective sleeves, child seat adapters, protective caps |
| Repairability | Send the damaged product to the manufacturer for inspection |
| General information | Compliant with European legislation. Exclusive use with Hazel car seat. |
Frequently Asked Questions - Hazel Isofix Base ABC DESIGN
User questions about Hazel Isofix Base ABC DESIGN
0 question about this device. Answer the ones you know or ask your own.
Ask a new question about this device
Download the instructions for your Car seat in PDF format for free! Find your manual Hazel Isofix Base - ABC DESIGN and take your electronic device back in hand. On this page are published all the documents necessary for the use of your device. Hazel Isofix Base by ABC DESIGN.
USER MANUAL Hazel Isofix Base ABC DESIGN
Instructions for use - EN (04-06)
NB: Keep these instructions for future reference!
natural_image
Illustration of a hand holding a small object with a red arrow pointing to it, no text or symbols present
natural_image
Mechanical assembly diagram showing a lever mechanism with red components and directional arrows (no text or labels)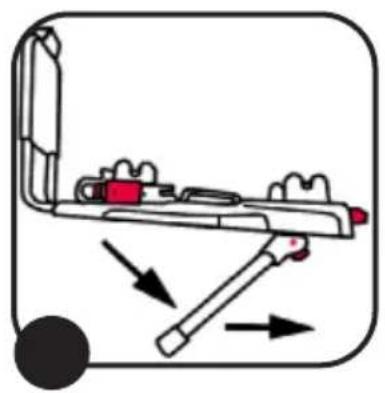
natural_image
Diagram of a mechanical device with arrows indicating motion or force direction (no text or symbols)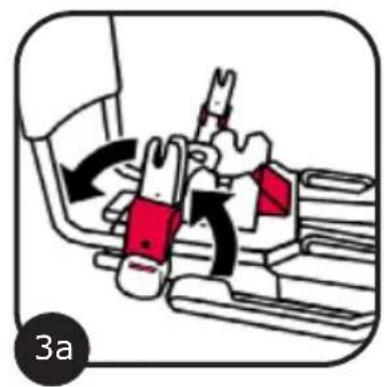
natural_image
Diagram of a vehicle seatbelt mechanism with arrows indicating motion (no text or symbols)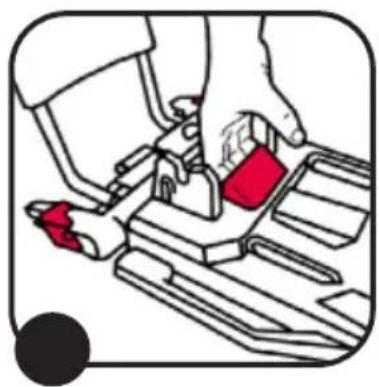
natural_image
Illustration of a hand using a tool to adjust or install a mechanical component, with no visible text or symbols.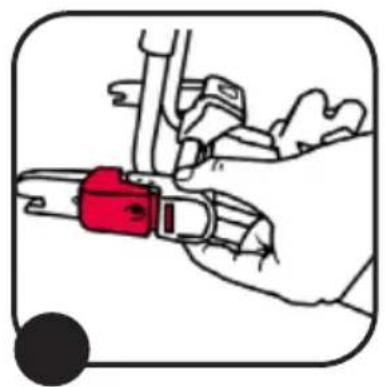
natural_image
Illustration of a hand holding a red safety clip attached to a mechanical component (no text or symbols)
natural_image
Illustration of a red, irregularly shaped object resembling a mask or mask with teeth, enclosed in a rounded square frame (no text or symbols)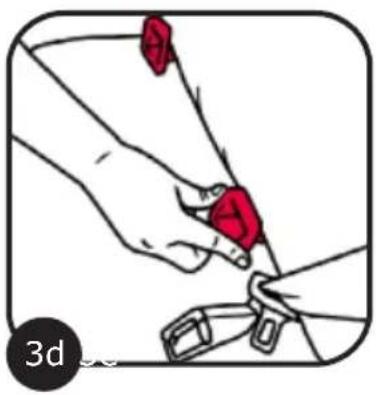
natural_image
Illustration of a hand holding a red object attached to a belt, with no visible text or symbols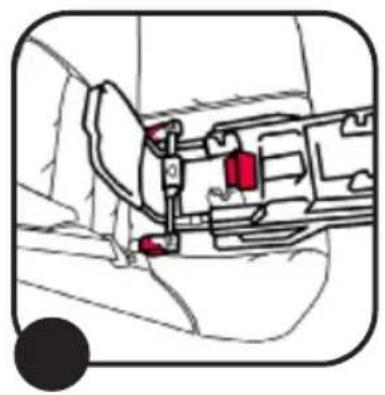
natural_image
Mechanical assembly diagram showing a valve mechanism inside a car seat (no text or labels)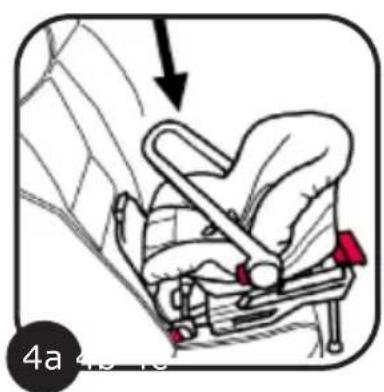
natural_image
Illustration of a car seatbelt with a hand operating the seatbelt (no text or symbols)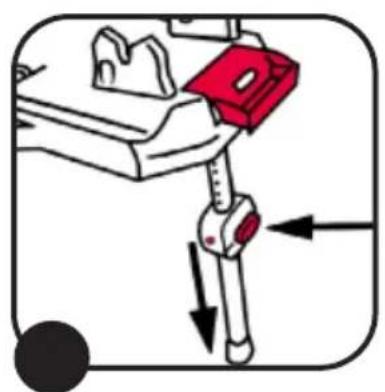
natural_image
Illustration of a robotic arm with red grip and black directional arrows indicating movement (no text or symbols)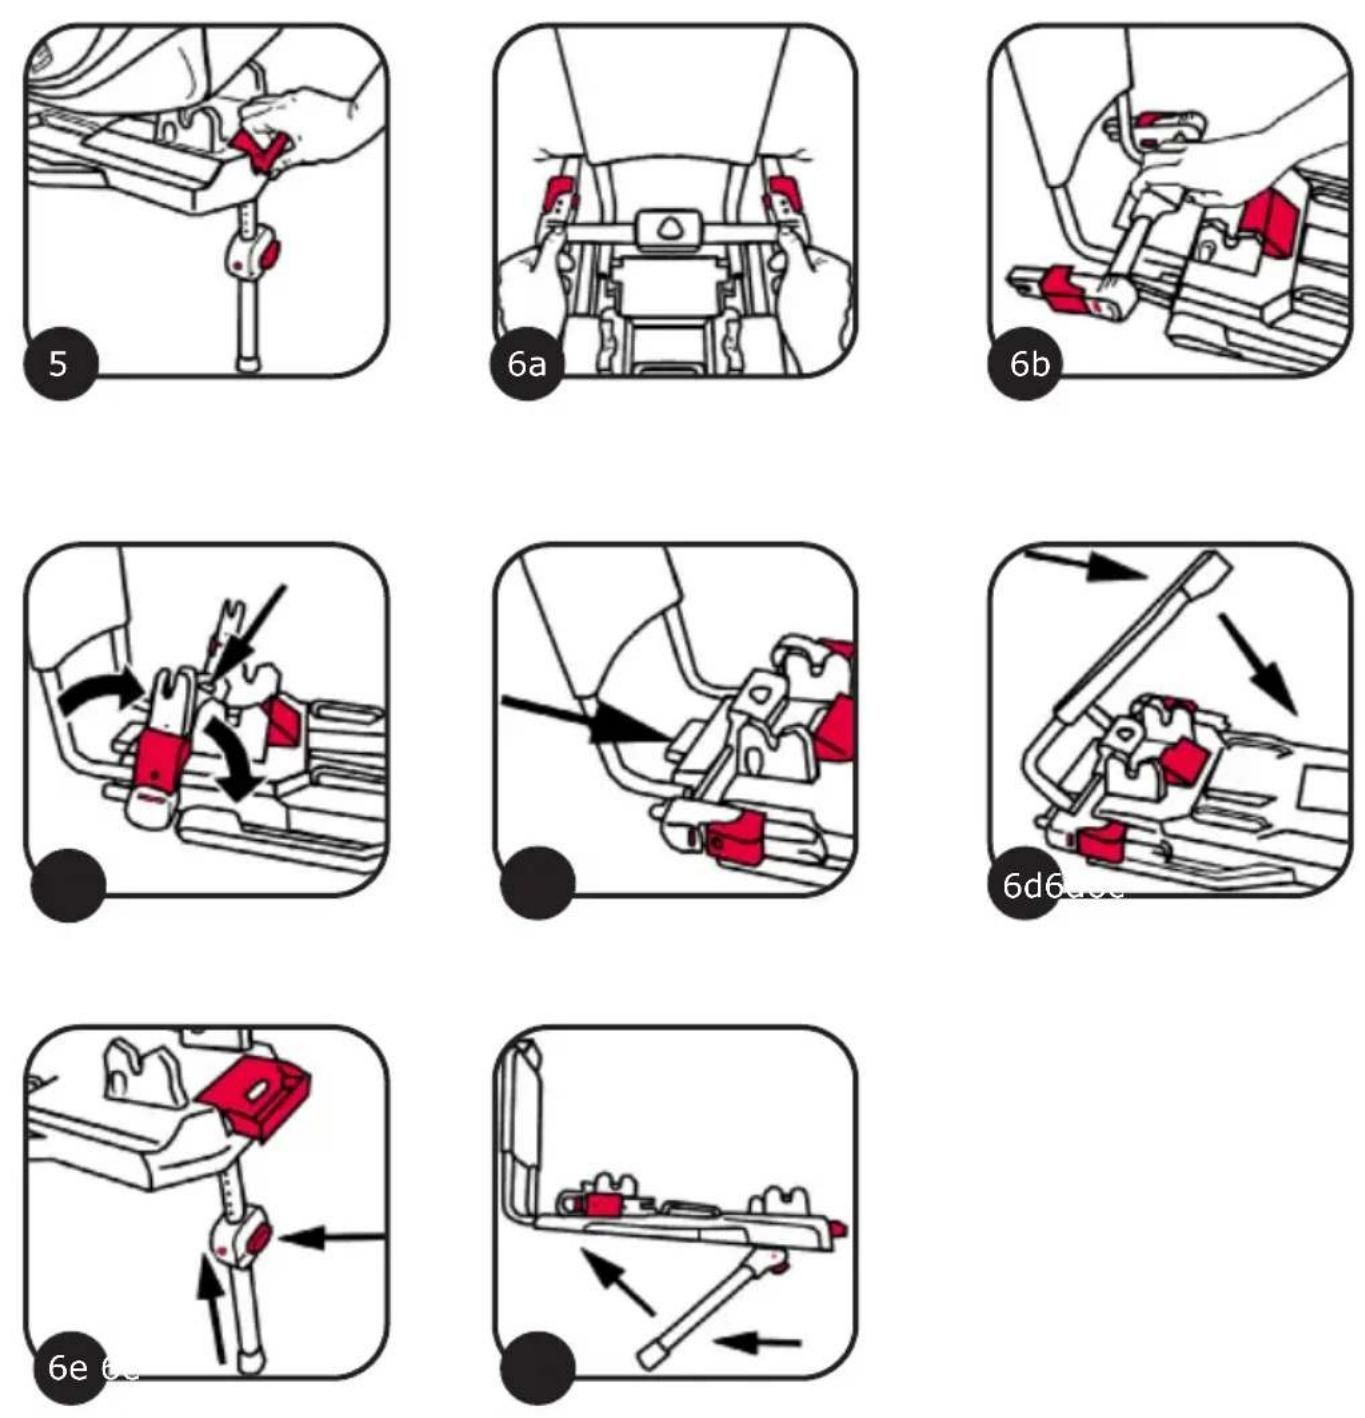
- Isofix Base
- compatible with ABC Design "Hazel" child seat (Group 0+)
- Weight: 6,8 kg
- Tested for conformity with ECE R44/04
Care instructions
- CAUTION: Take the base out of the car for cleaning.
- Wipe the plastic parts down with a cloth soaked in warm soapy water.
- Do not use abrasive cleaning agents.
- CAUTION: Never use scouring agents - not even on movable parts of the Base.
Safety instructions
Read these instructions carefully before use and keep them for future reference. Failure to read these instructions may compromise the safety of your child.
NB:
- The safety of the child seat is only guaranteed by the manufacturer when it is used by the initial purchaser. It is therefore not advisable to buy a second-hand seat.
- The child seat is no longer fit for use five years after purchase. It is possible, under certain circumstances, for the quality of the seat to be imperceptibly affected if subject to very frequent usage.
CAUTION:
- Never leave your child alone in the child seat / in the vehicle.
- The child seat may not be used on car seats with airbags. Disable the airbag if necessary (consult your car dealer).
- The child seat is only for use in car seats which face the direction of travel.
- The child seat must always face against the direction of travel - not in the direction of travel.
- The child seat may only be used on car seats with Isofix anchor points (between seat and backrest). Please comply with the regulations in force in your country.
- Do not place any objects in the footwell in front of the Isofix adapter in the interests of your baby's safety.
- An unsecured child 'seat may injure the passengers in the event of an emergency stop or an accident.
- Ensure that all items of luggage and objects which could injure passengers in the event of an accident or a sudden application of the brakes are adequately secured.
- Do not make any modifications to the child seat. This could adversely affect the safety of the seat.
- Please read these instructions for use carefully and follow the installation instructions meticulously in the interests of your child's safety.
- When not in use, the child seat should not be left in the blazing sun, the residual heat from which might later cause unnecessary discomfort to your baby.
- In an accident (even at low speed above 10 km/h) the child safety seat could suffer damage which is not necessarily obvious. In this case you must replace the child seat. Please dispose of it properly.
- Check all the main parts regularly for signs of damage. Make sure that the mechanical parts are in perfect working order.
- Make sure that the child seat does not get caught in the door of the vehicle or damaged by rotating car seats or by objects placed on the child seat (e.g. luggage), etc.
- Always arrange for us to inspect your child seat if it gets damaged (e.g. after being dropped).
1. Parts and fittings
- Cushioning plate
- Isofix attachment fitting
- Catch
- Cushioning plate release mechanism
- Attachment arms release mechanism
- Attachment fitting release mechanism
- Child seat adapter fitting
- Child seat attachment colour indicator
- Child seat release mechanism
- Support leg
- Adjustment button
- Protective caps
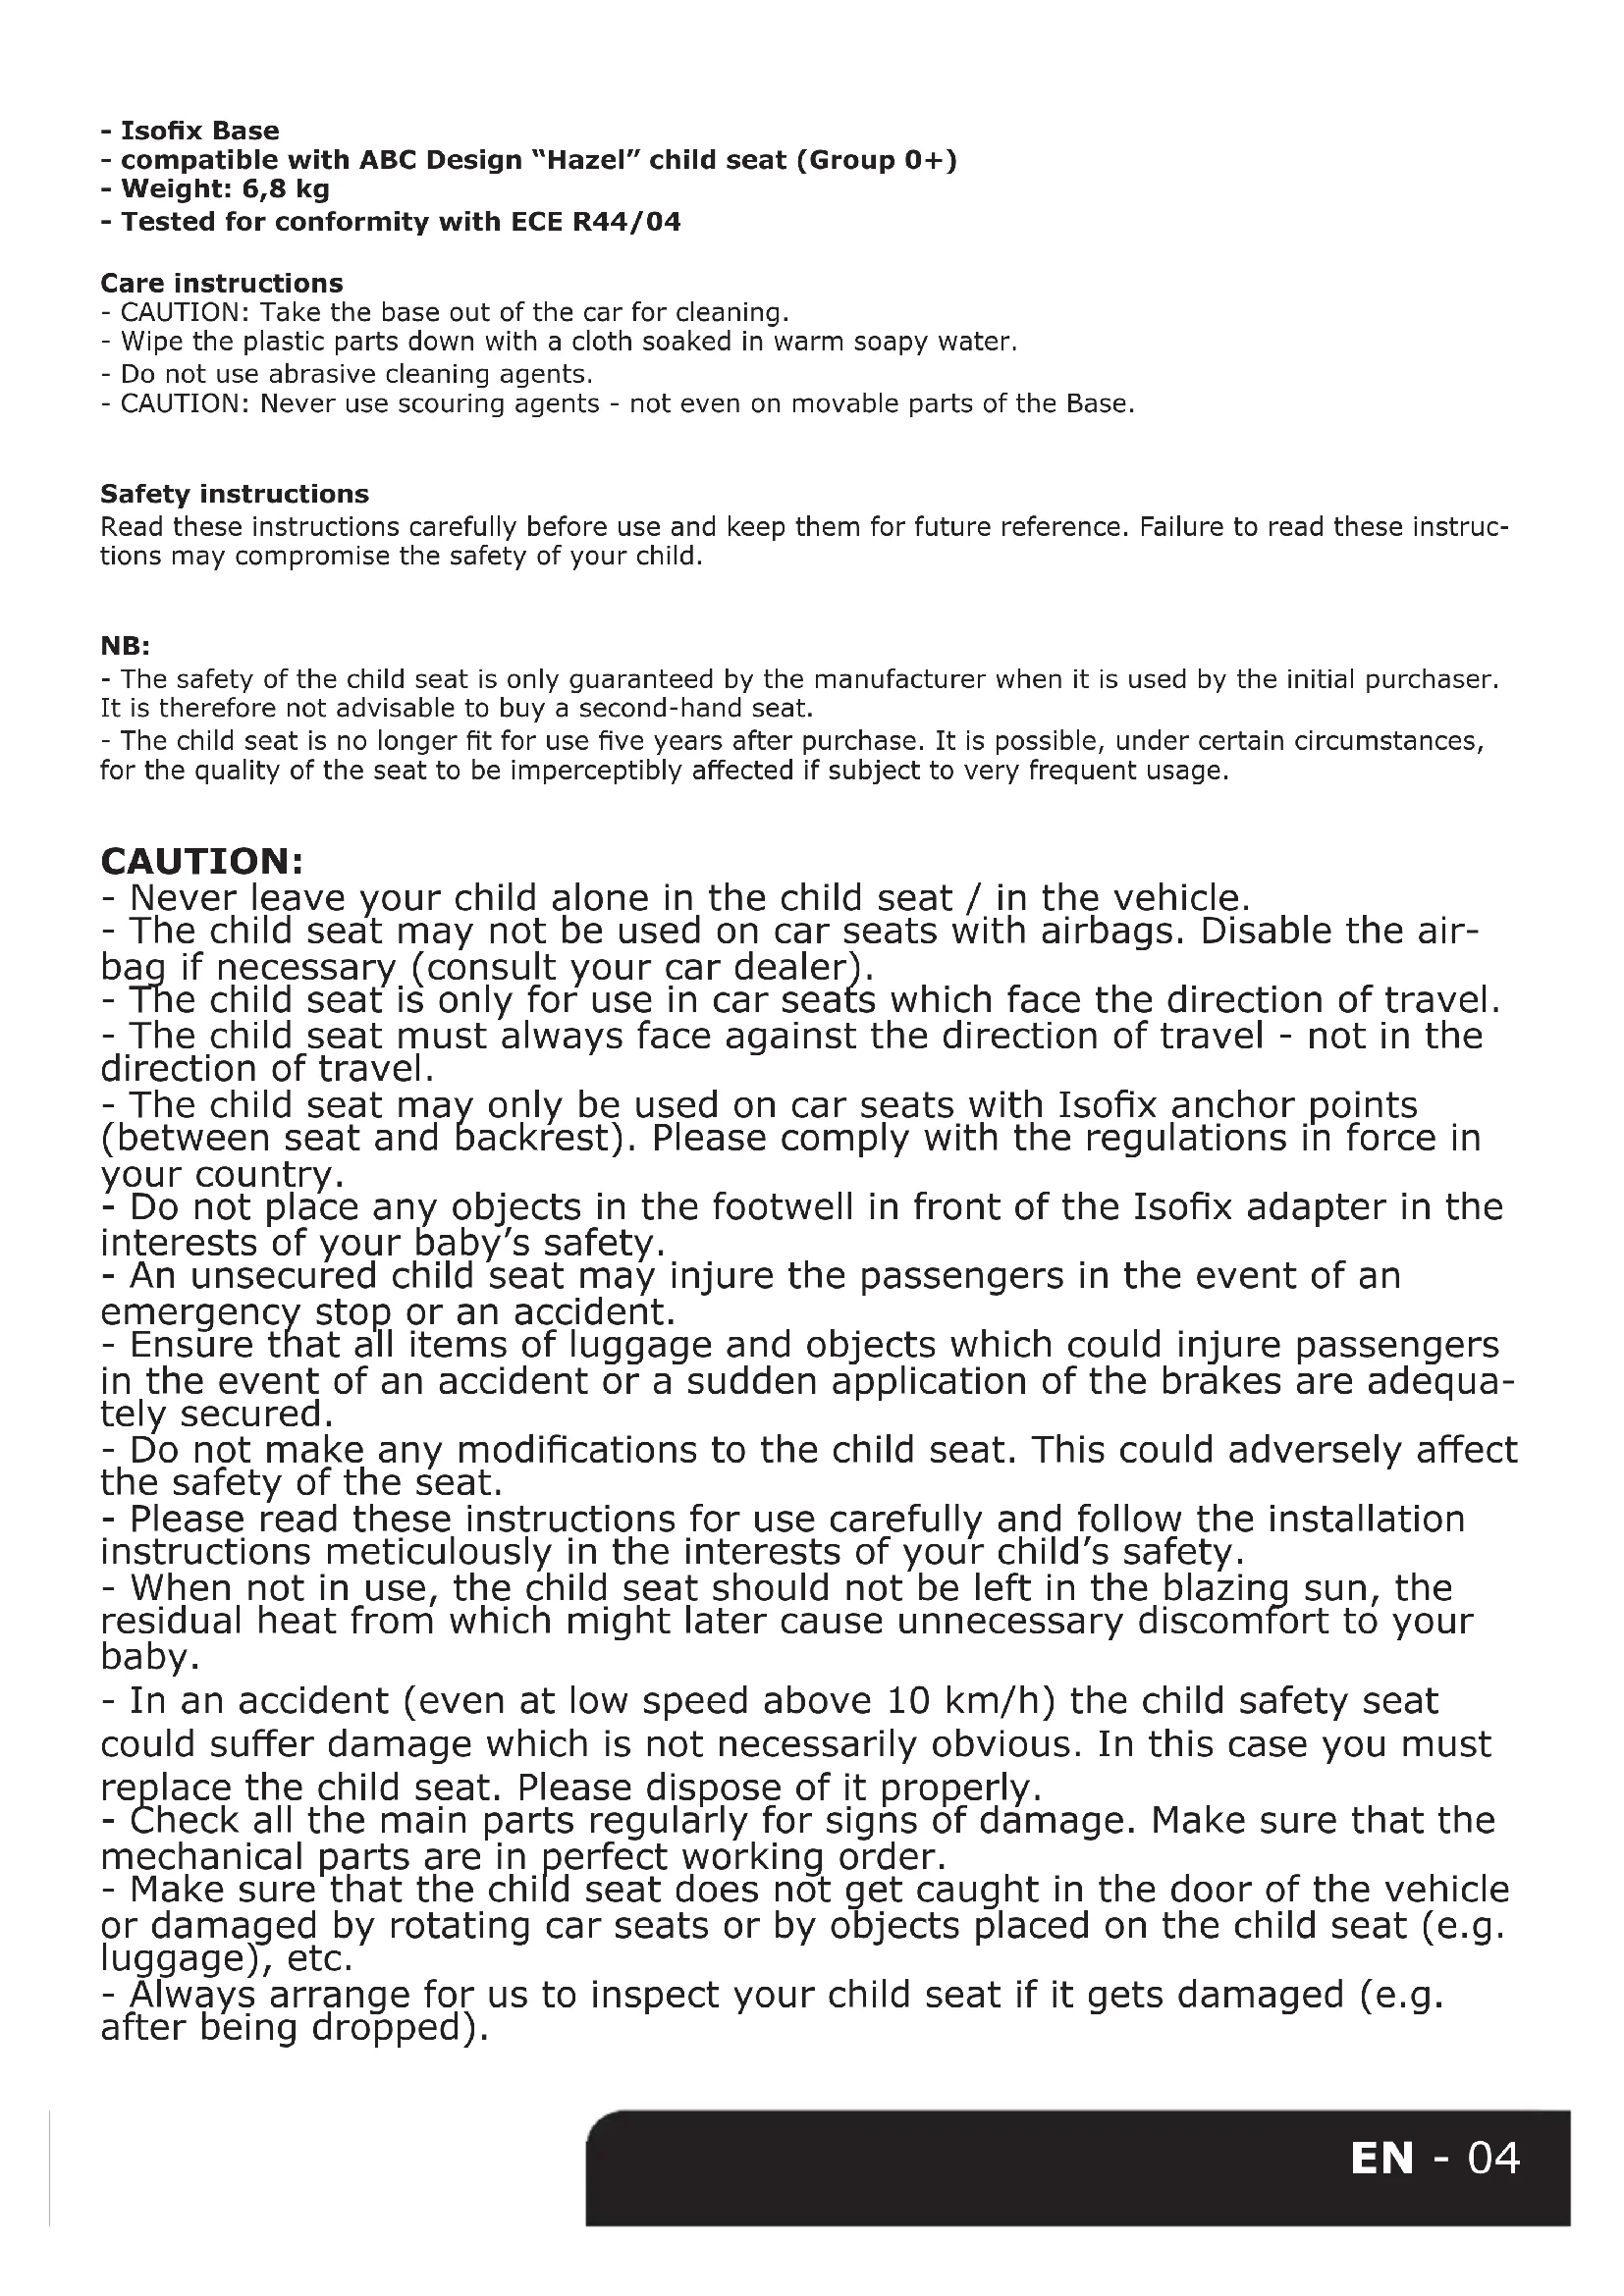
2. Assembly
a. Pull out the child seat release mechanism (9).
b. Pull the cushioning plate up (1) until it clicks into place and the green release lever (4) is sticking out.
c. Now open out the support leg (10) which is under the Base.
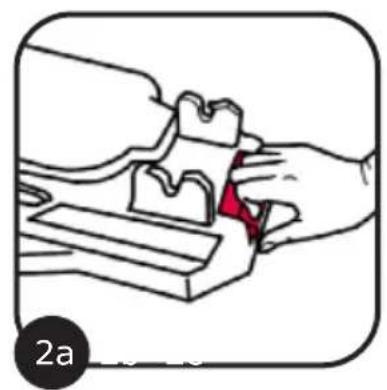
3. Installing the Base in the vehicle:
a. Pull up the Isofix attachment fitting (2).
b. Pull up the release mechanism for the attachment fitting (6). The rail with both attachment arms will now move automatically to the foremost position.
c. Pull the catch (3) on the attachment arms backwards until the colour indicator is red. This is an indication that both catches on the attachment arms are open and ready for use.
d. Take the two protective caps supplied and place them between the seat cushion and the backrest over the Isofix attachment points in your vehicle.
e. Now guide the two attachment arms through the protective caps and secure them on the two Isofix attachment points in your vehicle.
NB: Make sure that the attachment arms are correctly engaged. The green safety button must be visible on both sides.
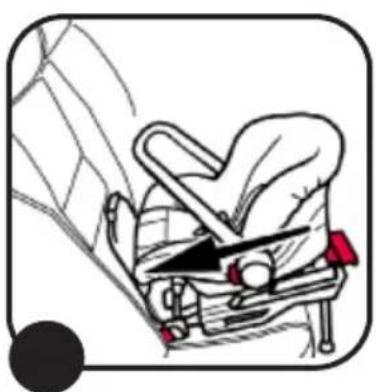
4. Installing the child seat on the Base:
a. Place the child seat on the adapter fittings (7) on the Base and push it down until it engages in position.
NB: Make sure that the child seat is correctly engaged! The colour indicator for the child seat attachment (8) must be green.
b. Now push the child seat in until it is resting on the cushioning plate.
c. Press the red adjustment button (11) on the support leg and extend it to the length required for it to sit firmly and securely on the floor of the vehicle. The colour indicator must be green.
NB: The support leg (10) must never be allowed to hang freely nor may objects be placed underneath it.
Do make sure, however, that the support leg is not lifting the Base off the seat.
5. Removing the child seat:
Pull the release lever (9) on the front of the Base and then lift the child seat up.
6. Removing the Base:
a. Pull the catch (3) on both sides until the colour indicator is red. Now you can take the Base off the Isofix fitting in your vehicle.
b. Now pull the attachment fitting to the rear. The easiest way to do this is to take hold of the plastic release mechanism for the attachment arms (5) and to pull the rail backwards.
c. Now move the attachment arms back by pressing the release mechanism (5) and folding the arms back.
d. Press the release mechanism on the cushioning plate (4) and fold it in.
e. Press the red adjustment button on the support leg and set it to the shortest possible length. Then fold in the support leg.
6. Retire a Base Isofix
Article for baby and child
Dr. Rudolf-Eberle Str. 29
D - 79774 Albbruck
Tel. +49 (0)77539393-0
Email. info@abc-design.de
www.abc-design.com