ForkLift - Bike rack Yakima - Free user manual and instructions
Find the device manual for free ForkLift Yakima in PDF.
User questions about ForkLift Yakima
0 question about this device. Answer the ones you know or ask your own.
Ask a new question about this device
Download the instructions for your Bike rack in PDF format for free! Find your manual ForkLift - Yakima and take your electronic device back in hand. On this page are published all the documents necessary for the use of your device. ForkLift by Yakima.
USER MANUAL ForkLift Yakima
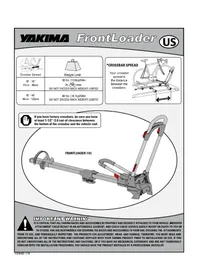
| Type of Rack | Load | Min. and Max. Crossbar Spread* | Limits |
| Round Bar Square Bar StreamLine Bar | 1 or more bikes | 16" - 42" 41cm - 107cm | 16" spread = 35 lbs. / bike 41cm spread 15.9Kg / bike |
| 3 or more bikes | 18" - 42" 46cm - 107cm | 18" spread = 40 lbs. / bike 46cm spread 15.9Kg / bike |
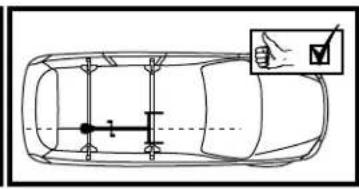
\*CROSSBAR SPREAD
Your crossbar spread is the distance between the crossbars.


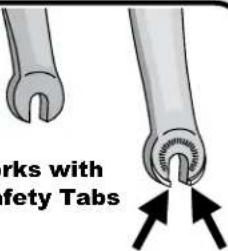
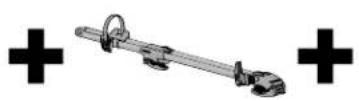
DESIGNED FOR FORKS WITH SAFETY TABS.

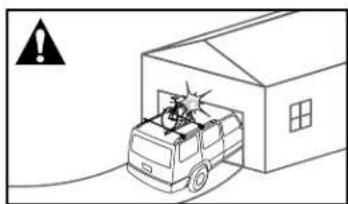
IMPORTANT WARNING
IT IS CRITICAL THAT ALL YAKIMA RACKS AND ACCESSORIES BE PROPERLY AND SECURELY ATTACHED TO YOUR VEHICLE. IMPROPER ATTACHMENT COULD RESULT IN AN AUTOMOBILE ACCIDENT, AND COULD CAUSE SERIOUS BODILY INJURY OR DEATH TO YOU OR TO OTHERS. YOU ARE RESPONSIBLE FOR SECURING THE RACKS AND ACCESSORIES TO YOUR CAR, CHECKING THE ATTACHMENTS
PRIOR TO USE, AND PERIODICALLY INSPECTING THE PRODUCTS FOR ADJUSTMENT, WEAR, AND DAMAGE. THEREFORE, YOU MUST READ AND UNDERSTAND ALL OF THE INSTRUCTIONS AND CAUTIONS SUPPLIED WITH YOUR YAKIMA PRODUCT PRIOR TO INSTALLATION OR USE. IF YOU DO NOT UNDERSTAND ALL OF THE INSTRUCTIONS AND CAUTIONS, OR IF YOU HAVE NO MECHANICAL EXPERIENCE AND ARE NOT THOROUGHLY FAMILIAR WITH THE INSTALLATION PROCEDURES, YOU SHOULD HAVE THE PRODUCT INSTALLED BY A PROFESSIONAL INSTALLER.

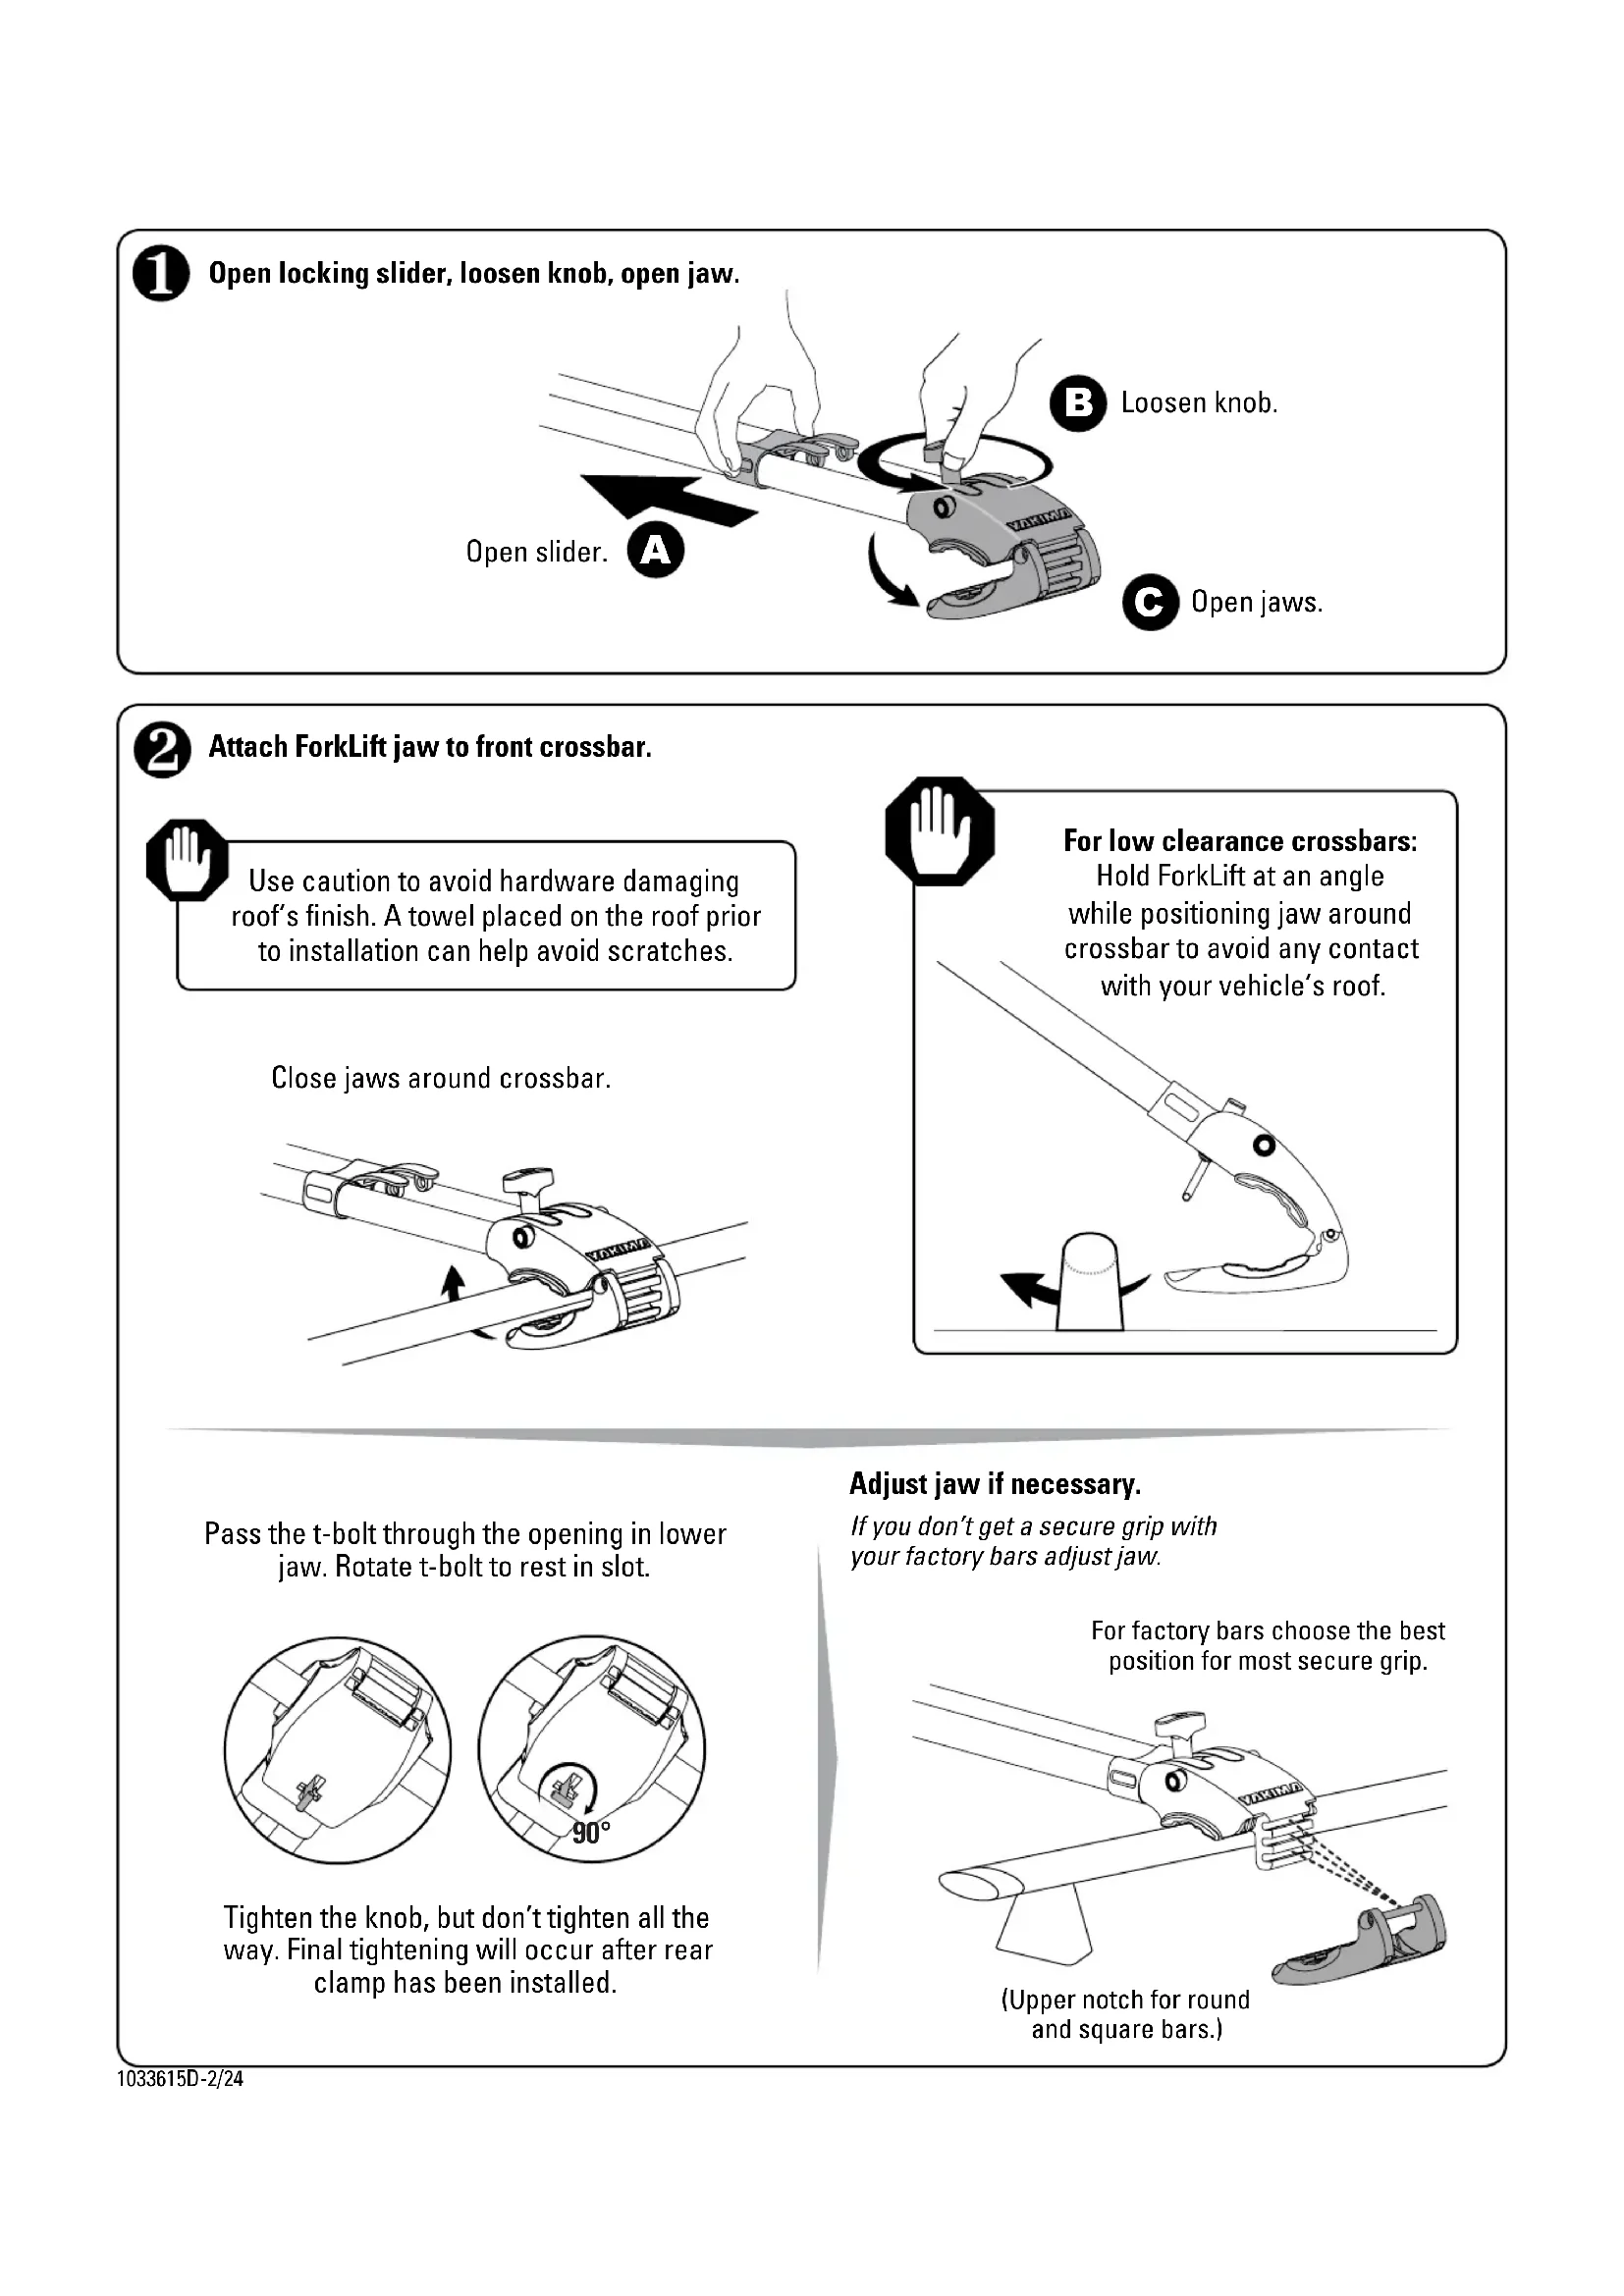
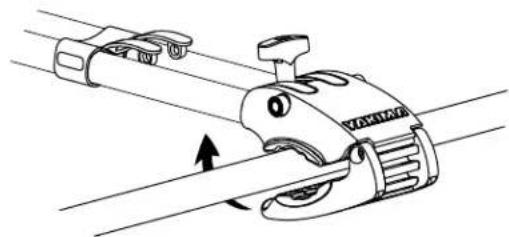
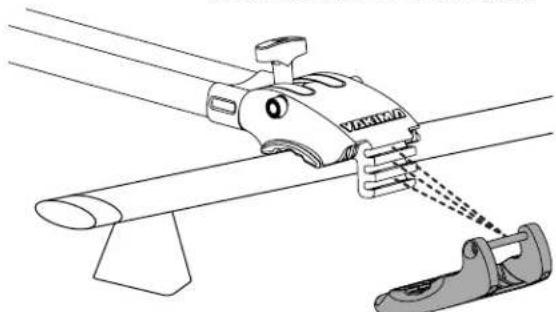
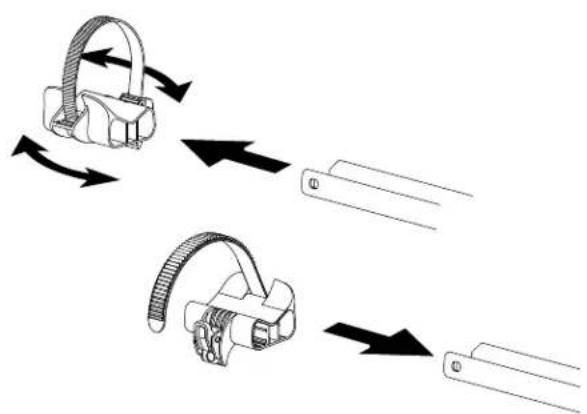
Open locking slider, loosen knob, open jaw.
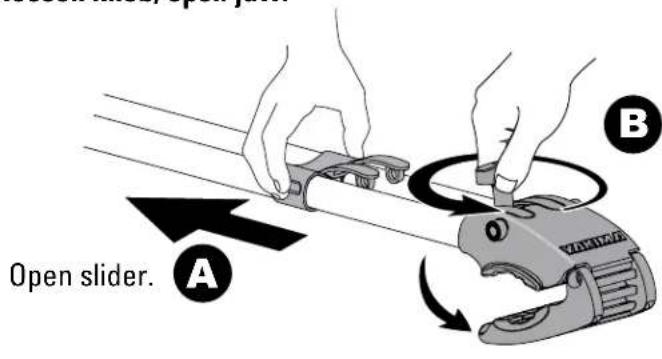
Loosen knob.

Open jaws.

Attach ForkLift jaw to front crossbar.

Use caution to avoid hardware damaging roof's finish. A towel placed on the roof prior to installation can help avoid scratches.
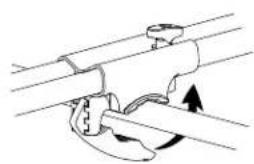
Close jaws around crossbar.

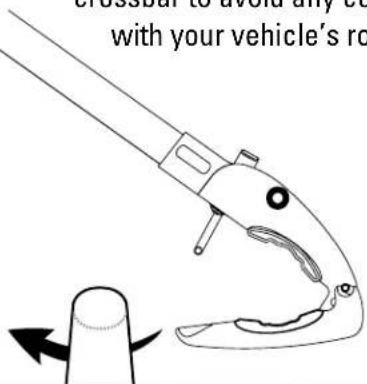
For low clearance crossbars:
Hold ForkLift at an angle while positioning jaw around crossbar to avoid any contact with your vehicle's roof.
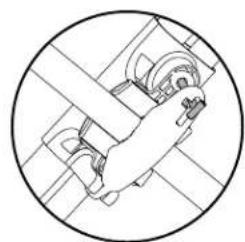
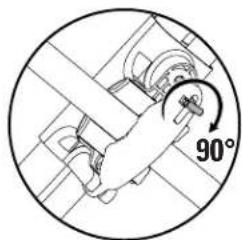
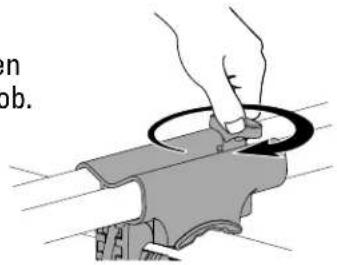
Pass the t-bolt through the opening in lower jaw. Rotate t-bolt to rest in slot.
Tighten the knob, but don't tighten all the way. Final tightening will occur after rear clamp has been installed.
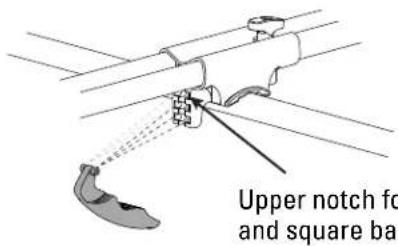
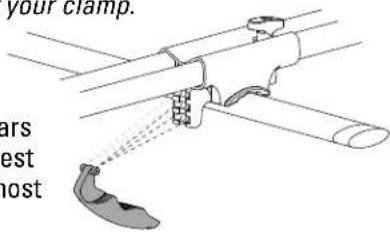
Adjust jaw if necessary.
If you don't get a secure grip with your factory bars adjust jaw.
For factory bars choose the best position for most secure grip.
(Upper notch for round and square bars.)

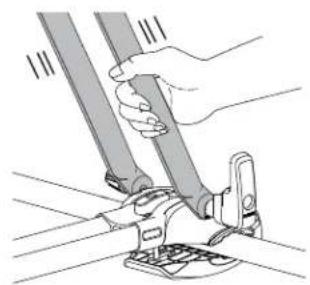
Secure rear clamp.
Close rear clamp around crossbar.
Pass the t-bolt through the opening in bail. Rotate t-bolt to rest in slot in bail.
Adjust clamp if necessary.
If you don't get a secure grip with your factory bars adjust your clamp.
For factory bars choose the best position for most secure grip.

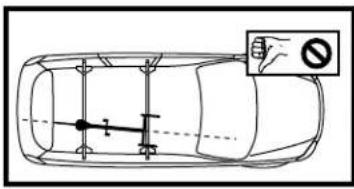
The rear clamp is configured for typical installations. In some situations adjustment may be necessary if the wheel makes contact with the rear knob, or if the wheeltray cannot reach the wheel.
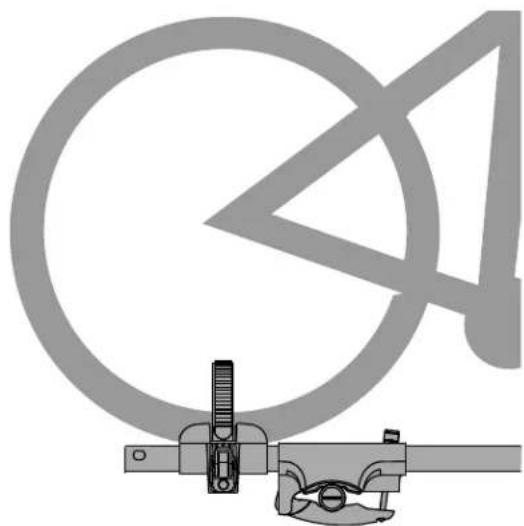
OPTION A OPTION B
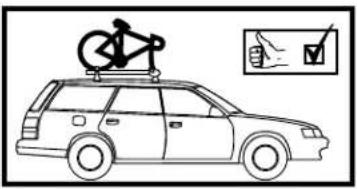
Wheel behind rear crossbar.
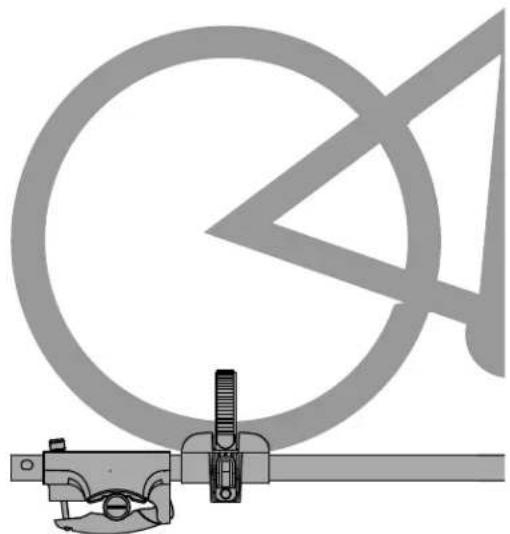
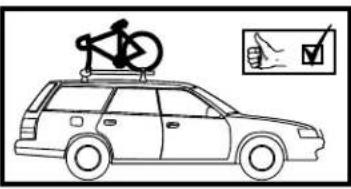
Wheel ahead of rear crossbar.
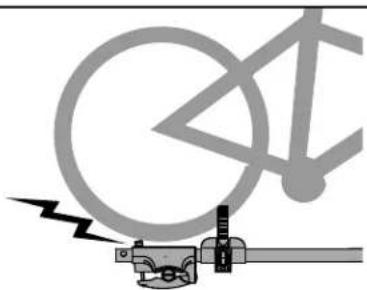
If changing the orientation of the rear clamp still results in the rear wheel contacting the knob, please contact our customer service team (888-925-4621) for a free, corrective adapter.
See next page for how-to.
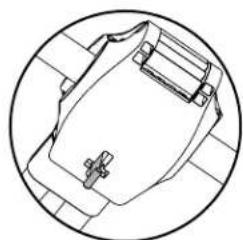
Continued from previous page...
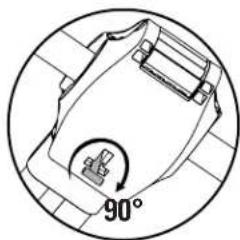
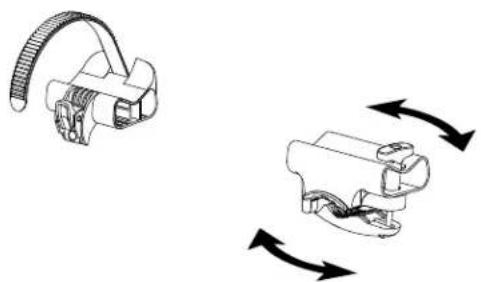
Flip orientation of rear clamp 180^ .
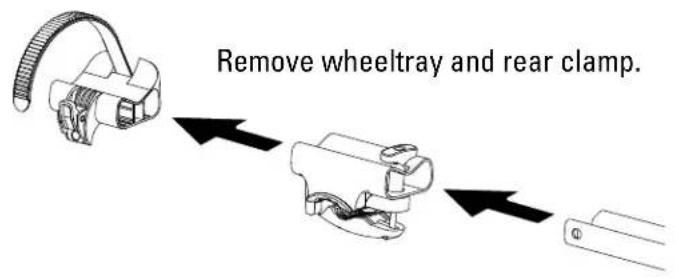
Slide wheeltray and rear clamp back onto forks.
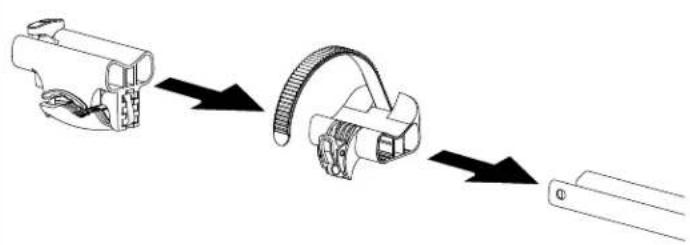
NOTE: You can flip the wheeltray or rear clamp independently as needed. For instance if you needed the buckle on the opposite side you could flip the wheeltray as shown.
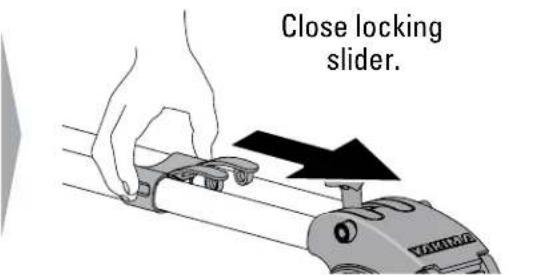
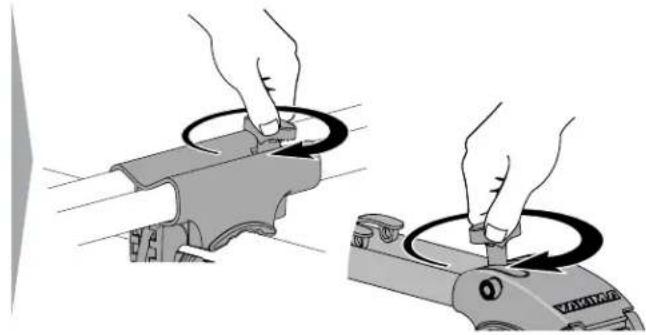
TIGHTEN DOWN KNOBS, close locking slider.
Fully tighten the rear knob.
Fully tighten the front knob.
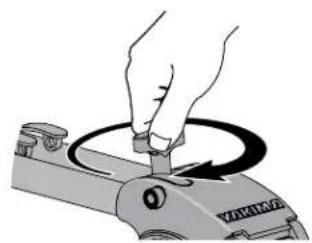
Close locking slider.
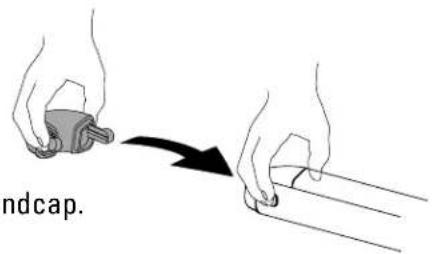
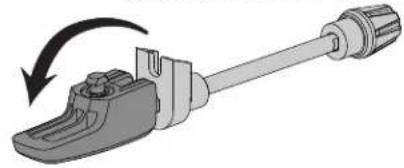
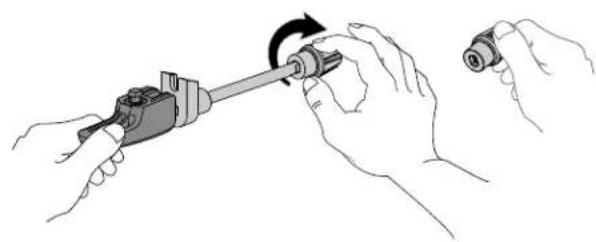
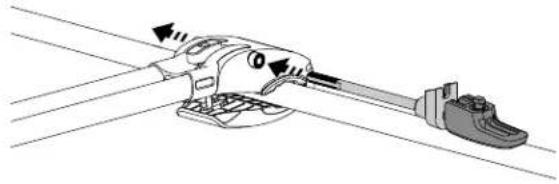
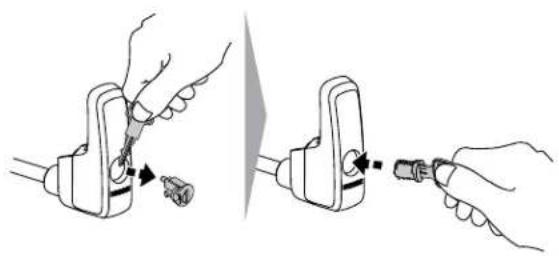
5 REMOVE THE KNOB FROM THE SKEWER.
Open the handle. Unscrew the knob.
6 INSTALL SKEWER.
Insert the shaft into the ForkLift as shown.
Skewer direction is your choice: Consider lock access.
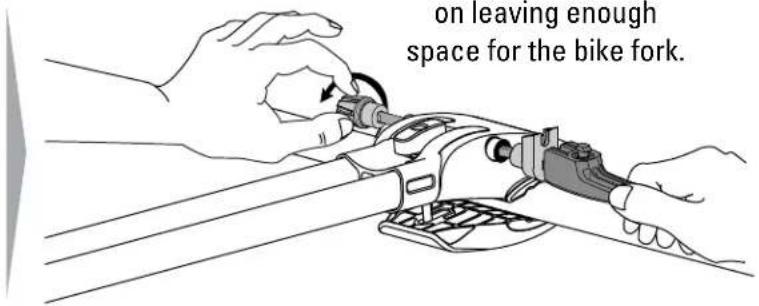
Screw the knob back on leaving enough space for the bike fork.
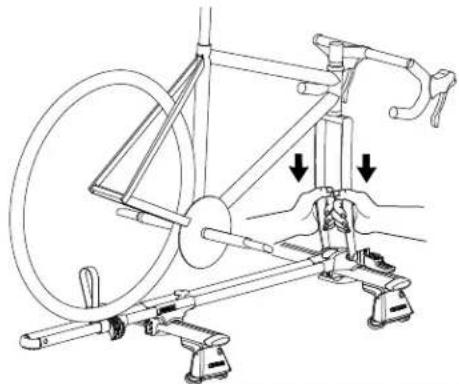
7 Remove front wheel and load your bike.
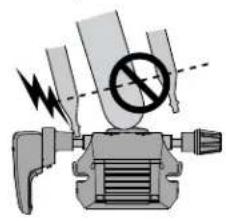
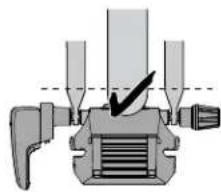
Set bicycle forks vertically onto skewer. BE SURE FORKS ARE FULLY SEATED!
Tuck wheel strap into the slot to make way for the tire.
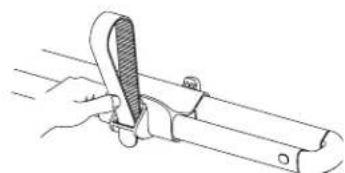
Prevent damage to your forks!
With lever open, tighten adjustment knob clockwise until the lever closes with FIRM resistance.
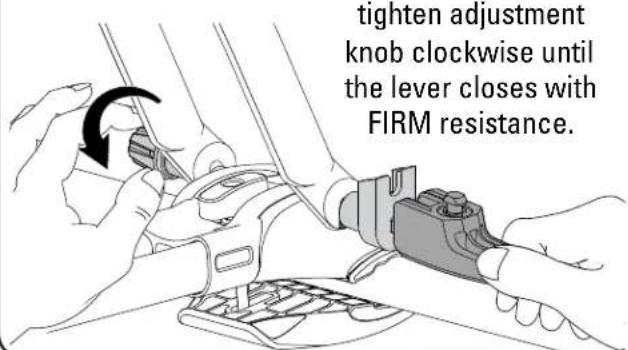
CLOSE THE LEVER. It should close with FIRM RESISTANCE against the forks.
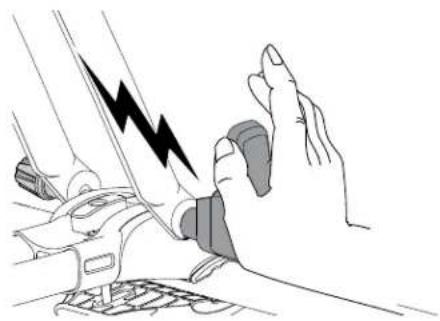

Your bike's forks are secure ONLY after the lever closes with SOLID RESISTANCE.

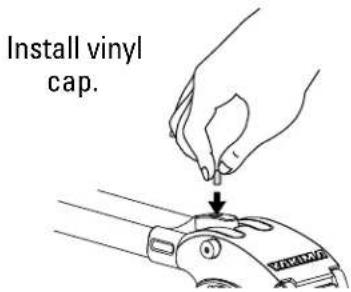
Install lock core.
If you have purchased a lock, follow lock core instructions to install.

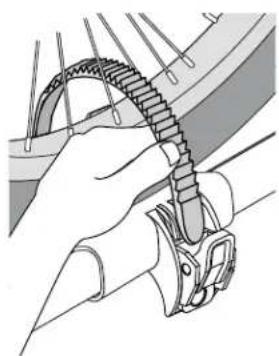
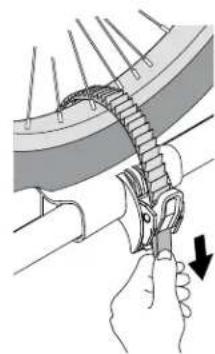
Secure rear wheel.
- Thread strap through spokes, and insert it into the slot in the wheeltray.
- Do not let strap push against valve stem.
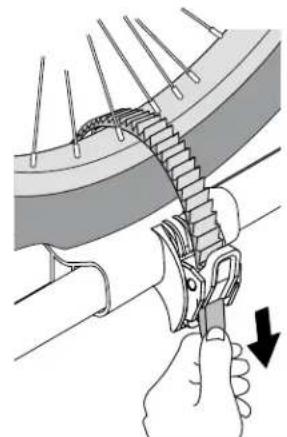
Pull hard to tighten.

Check to make sure bike is secure.
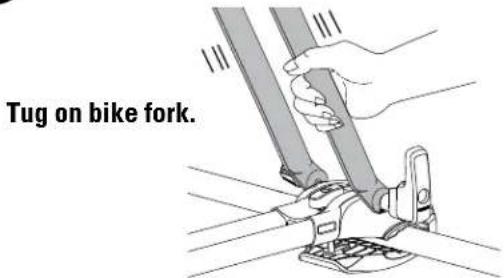

TEST YOUR INSTALLATION! If forks can move in the mount, open the lever and tighten the adjustment knob more.

BEFORE DRIVING AWAY
- CHECK REAR WHEEL.
Tighten the strap if needed.
- CHECK THAT BIKE FORK IS SECURE.
PERIODICALLY CHECK THAT KNOBS ARE ADEQUATELY TIGHTENED.

NOTE: Always check your base system to ensure crossbar stability!
LOAD LIMIT

Follow the YAKIMA Fit List or check online at Yakima.com for your rack's weight limit. Do not exceed the weight limit of your vehicle's rack.
RACK
THIS PRODUCT (7 lbs. / 3.2 kg)

LOAD (40 lbs./ 18.1Kg maximum)
Not more than 165 lbs. (75 kg) unless otherwise noted.
*Some vehicles will be rated lower than 165 lbs. (75kg)
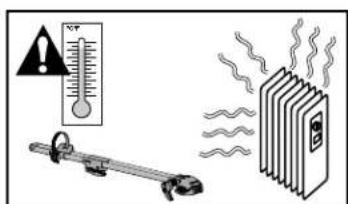
MAINTENANCE
Use non-water soluble lubricant on screws. Use a soft cloth with water and mild detergent to clean plastic parts.
WARNING

BE SURE ALL HARDWARE IS SECURED ACCORDING TO INSTRUCTIONS. ATTACHMENT HARDWARE CAN LOOSEN OVER TIME. CHECK BEFORE EACH USE, AND TIGHTEN IF NECESSARY.

READ THESE WARNINGS:
- This bike carrier is designed for bikes that use standard 100mm× 9mm quick release front hubs. Do not carry bikes with other hub standards (qr15, all thru-axles, maverick, lefty, etc.) Without approved adapters.
- Bicycle fork must be equipped with safety tabs. Removal or alteration of safety tabs will void warranty when used with this carrier.
- Failure to properly install, adjust, use, and maintain the quick release mechanism on this carrier may result in damage to the vehicle and bike as well as serious personal injury.
- Any modification to bike dropouts can cause insufficient fork mount clamping pressure and may result in damage or loss of bike.
- Do not carry bikes with disk wheels, wheels covers, baby seats, panniers, bike covers or motors.
- Do not carry tandem or recumbent bicycles.
- Off-road driving is not recommended.
- Not all forks are compatible with Yakima mounts. If your fork has a unique feature or design that prevents the mount from being used in accordance with these instructions, do not use it.
REINSTALLATION
If you remove carrier, follow instructions to reinstall. FOLLOW SAFETY CHECKS AFTER EVERY INSTALLATION.
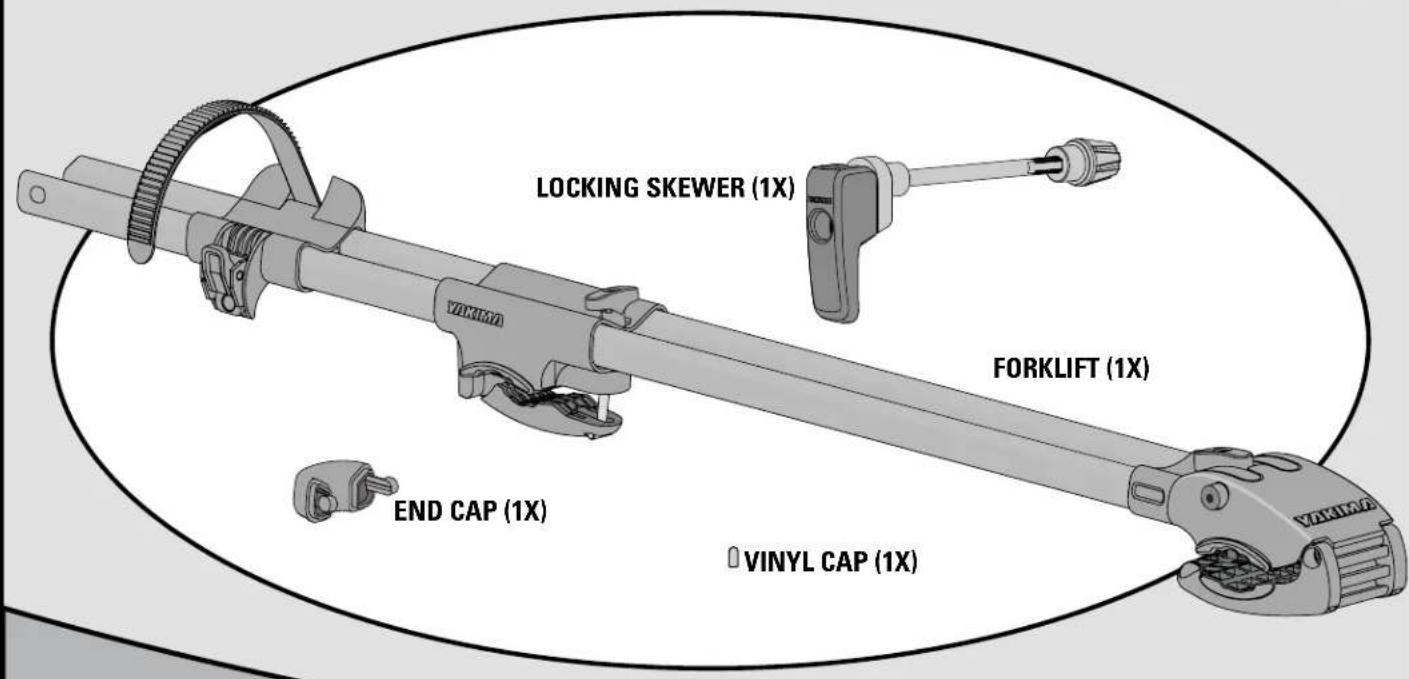
REPLACEMENT PARTS
TECHNICAL ASSISTANCE OR REPLACEMENT PARTS Contact your dealer, or visit www.yakima.com, or call (888)925-4621 Monday through Friday, 7:00 AM to 5:00 PM, PST
LIMITED LIFETIME WARRANTY

This product is covered by YAKIMA's "Love It Till You Leave It" Limited Lifetime Warranty To obtain a copy of this warranty, go online to www.yakima.com or email us at yakwarranty@yakima.com or call (888) 925-4621
KEEP THESE INSTRUCTIONS!
YAKIMA
ForkLift
FR

ESTE PRODUCTO
(7 lbs./3,2 kg)