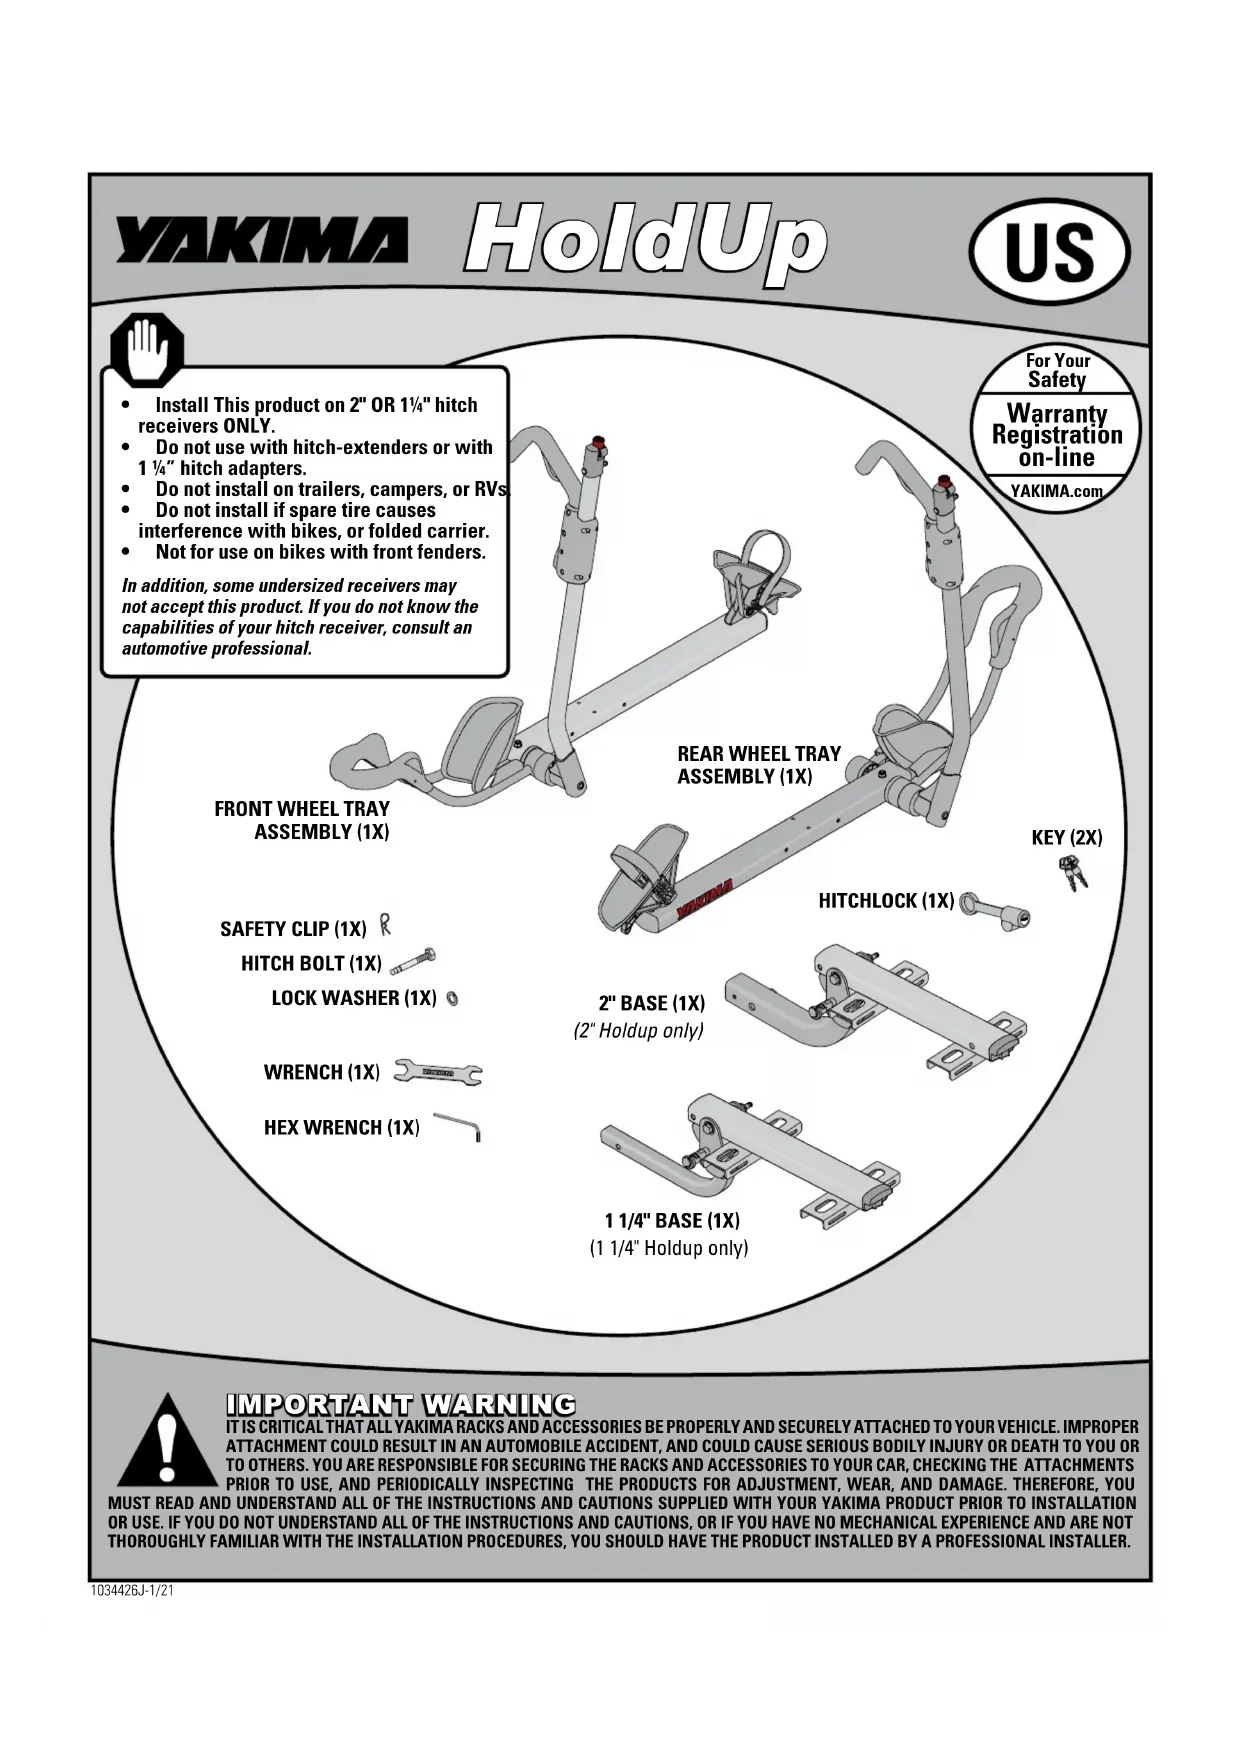
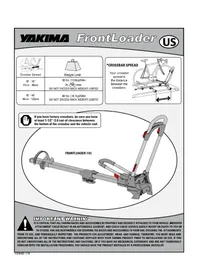
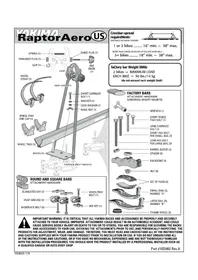
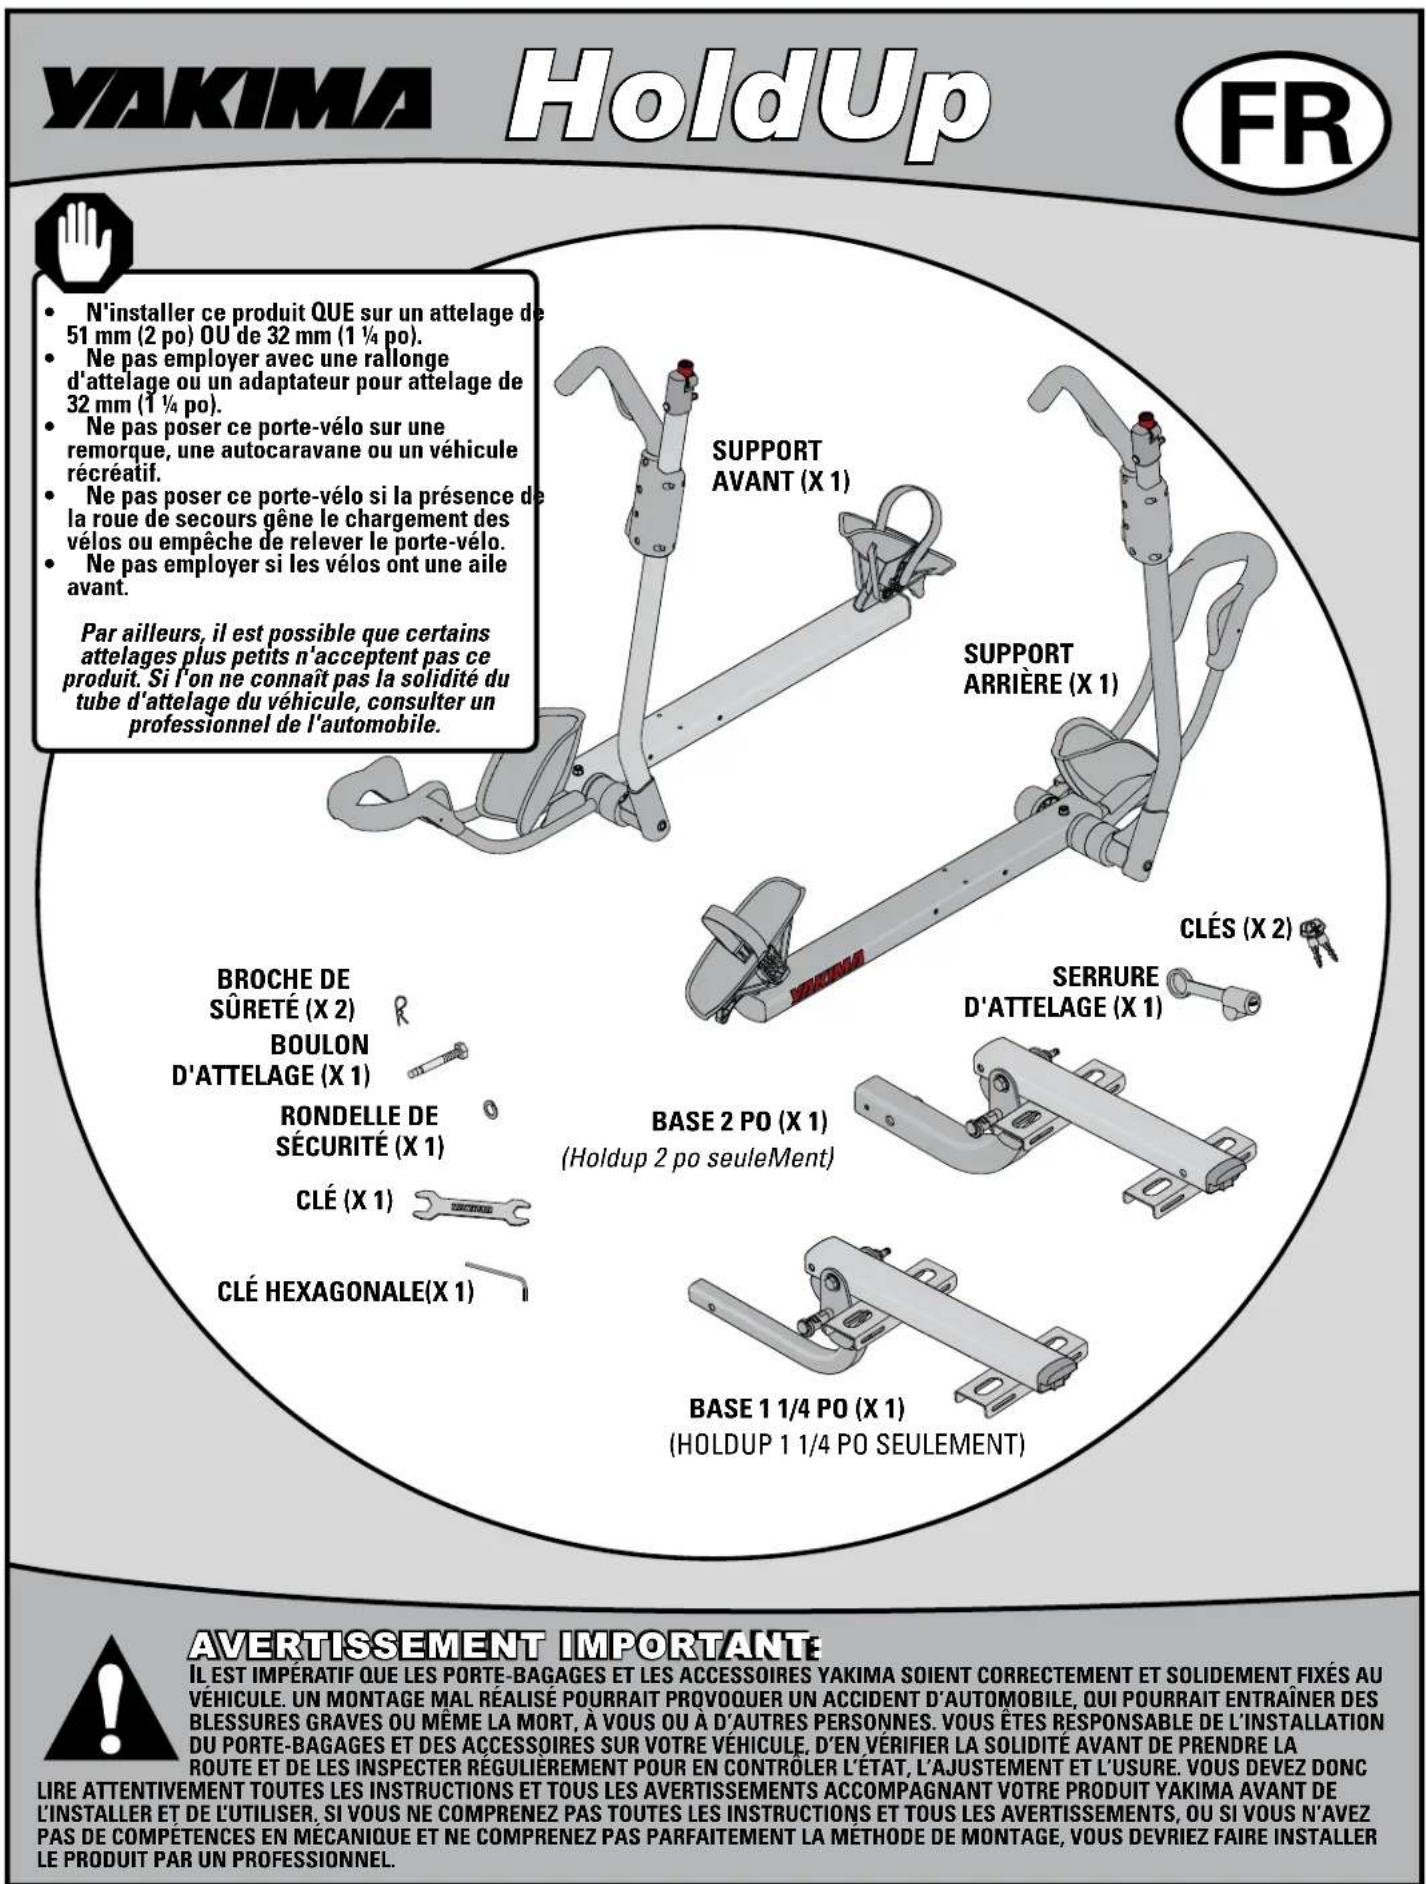
USER MANUAL HoldUp Yakima
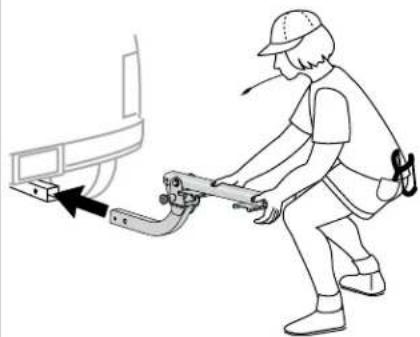
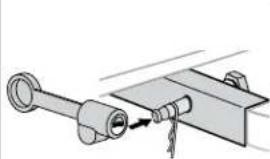
INSERT BASE INTO HITCH RECEIVER.

1
The holes in the base must align to the holes in the hitch receiver.
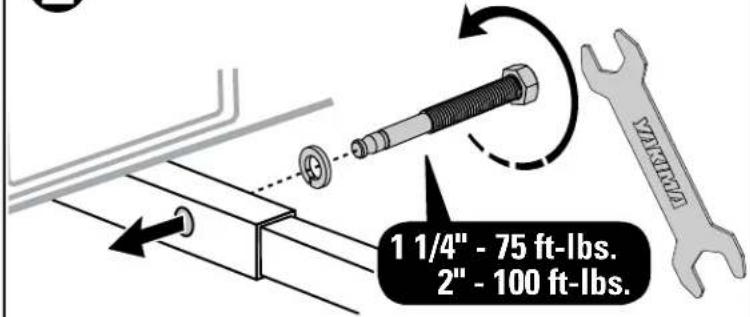
FASTEN HITCH BOLT.
2
- Insert hitch bolt and lock washer, from RIGHT TO LEFT.
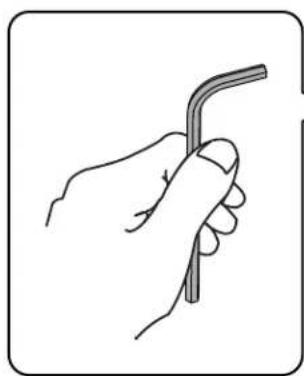
- Tighten with wrench.
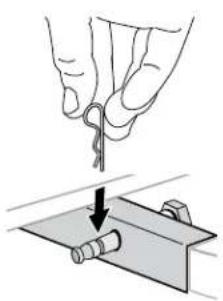
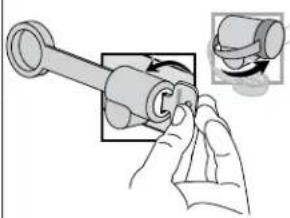
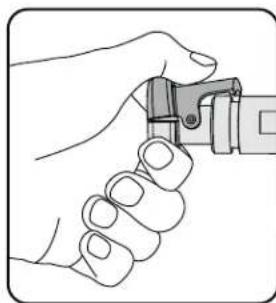
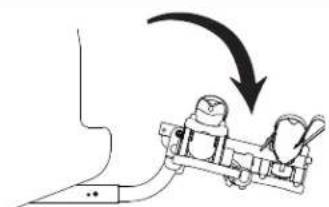
SECURE HITCH BOLT WITH SAFETY CLIP AND INSTALL HITCHLOCK.
3
4
ROTATE BASE TO UP POSITION.
- Squeeze knob to release lock.
Pull spring pin to release base.
- Lift frame.
- Release spring pin. Pin should snap into place and lock.
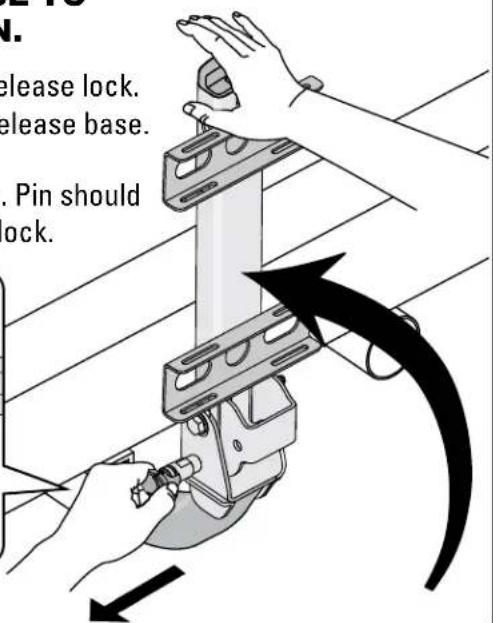
5
REMOVE FASTENERS.
The fasteners are installed in the trays for shipping purposes. Remove them to prepare for assembly.
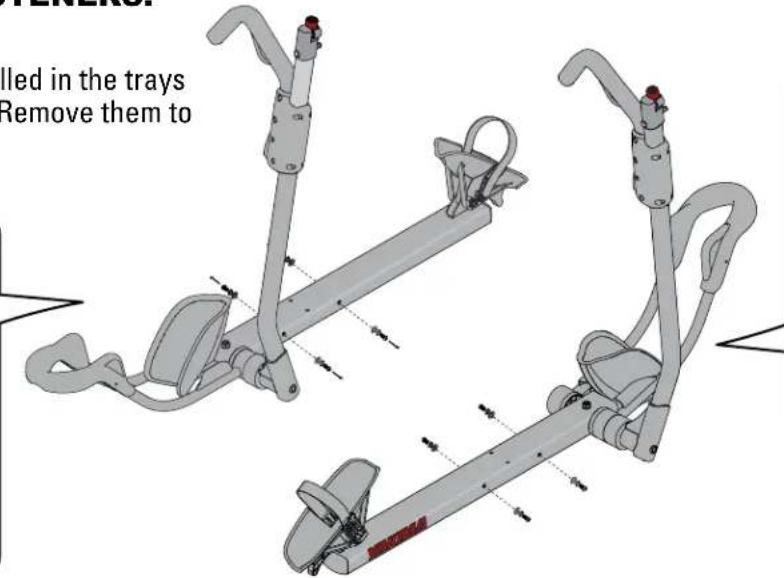


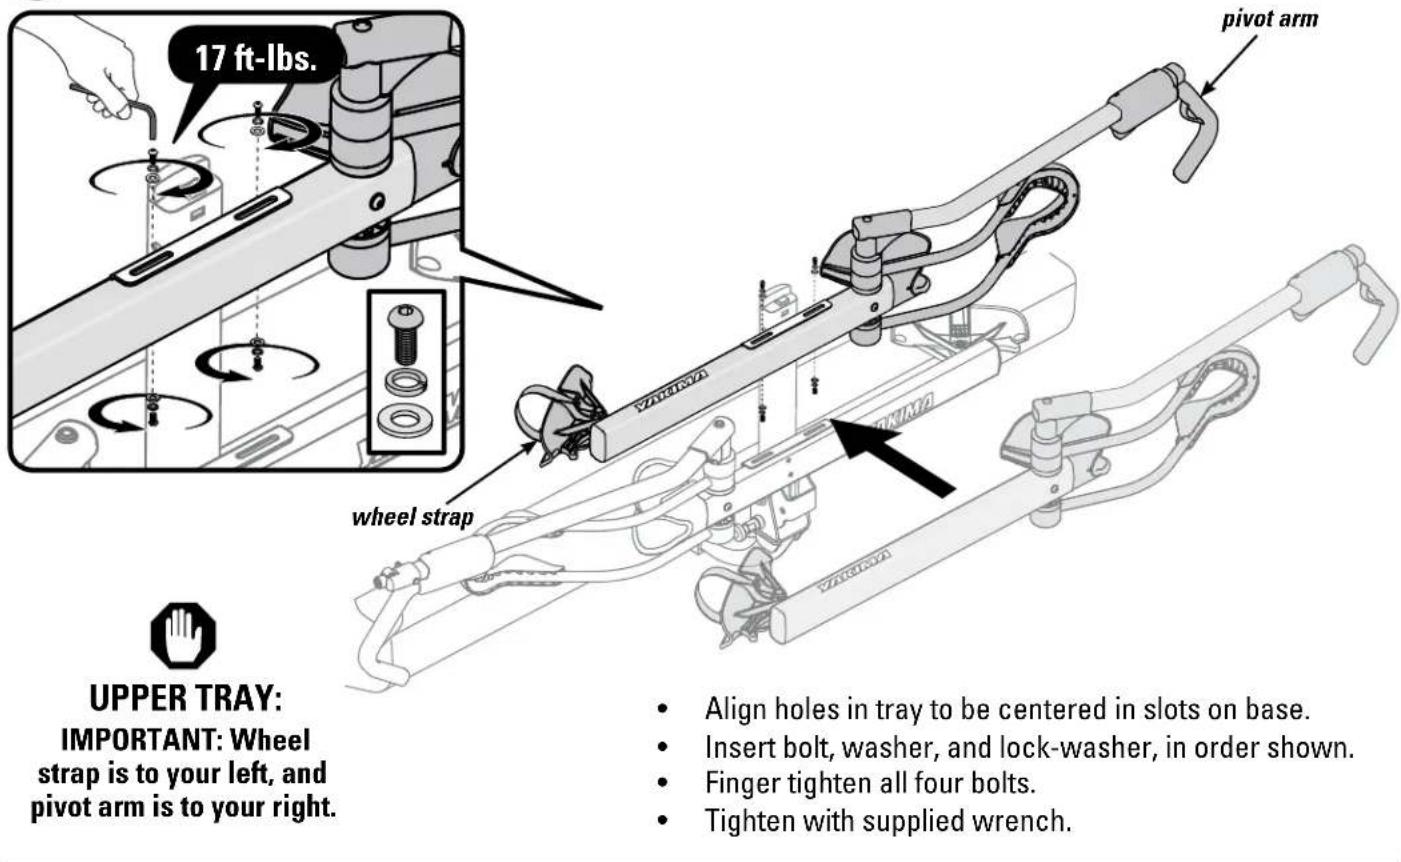
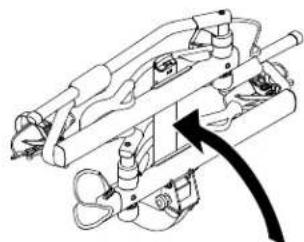
ATTACH FIRST TRAY TO BASE.
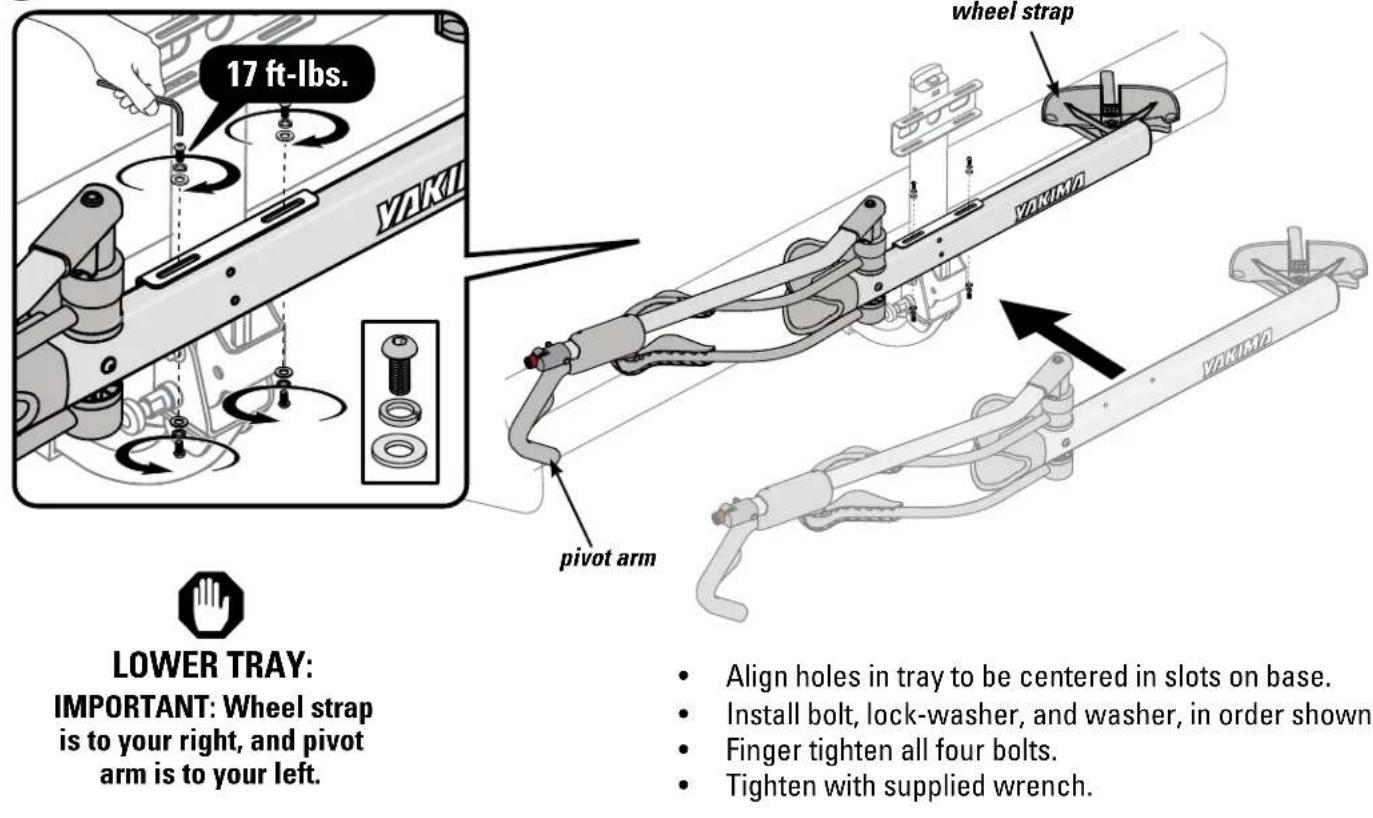

ATTACH SECOND TRAY TO BASE.

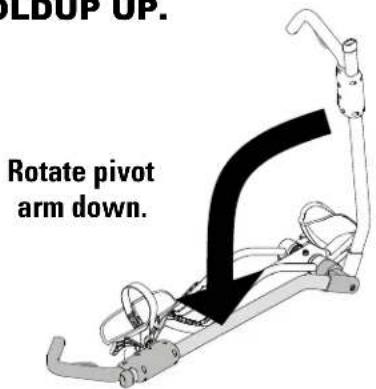
FOLD HOLDUP DOWN.
- Pull spring pin to release base.
- Fold down holdup
- Release Pin. Pin should snap into place.
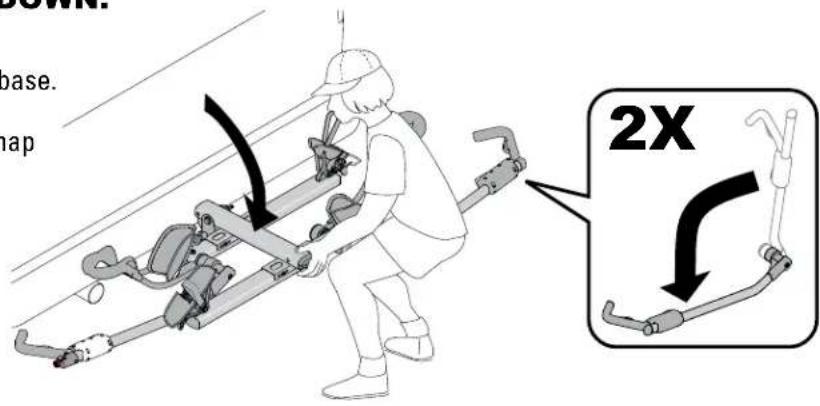
Be sure pivot arms are folded down.

Do not push arm beyond horizontal.

PREPARE FOR LOADING.
Release wheel strap by pressing the lever on the buckle.

Tuck strap into slot at rear of wheeltray.

LOAD HEAViest BIKE FIRST.


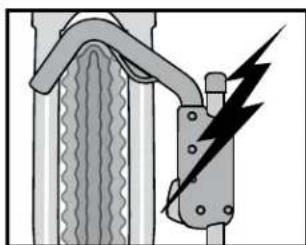
CAUTION: If any part of your bike comes in contact with the red trigger, do not use this carrier with that bike.

If a fender prevents proper placement of the wheel hook, remove the fender for proper and safe loading.
Do not install if your bike has a flat tire or has a slow leak. Lost tire pressure after install may result in an insecure load.
Note: HoldUp can fold down past horizontal to aid in loading your bikes.

Be sure to return the HoldUp to the locked horizontal position after loading.

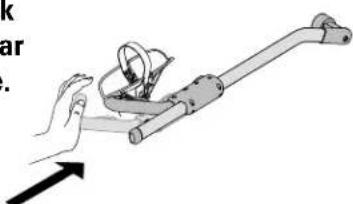
SWING PIVOT ARM INTO PLACE.
Rotate the pivot arm up until the hook rests on the bike tire 1" or less from the brakes or the fork.
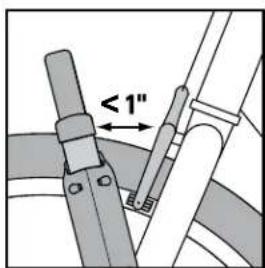

Failure to place wheel hook in the correct position can cause your bicycle to eject, and cause personal injury, property damage, or death.

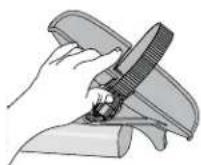
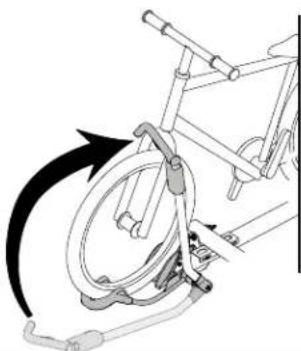
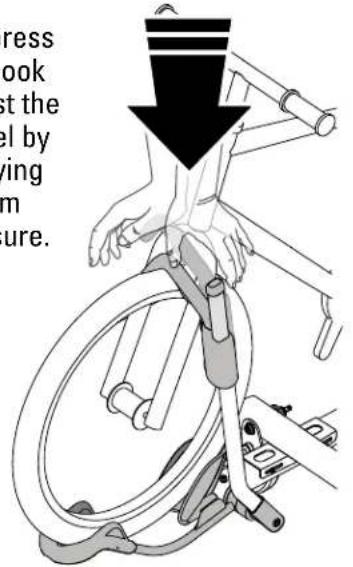
SECURE THE HOOK.
Compress the hook against the wheel by applying firm pressure.

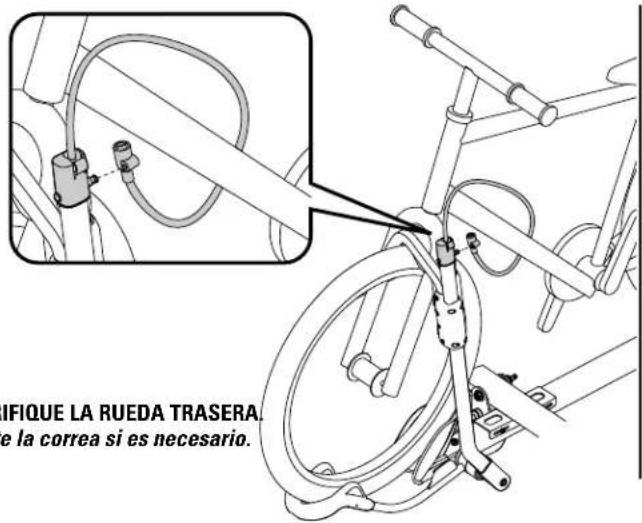
SECURE REAR WHEEL STRAP.
Feed the strap through the spokes of wheel.
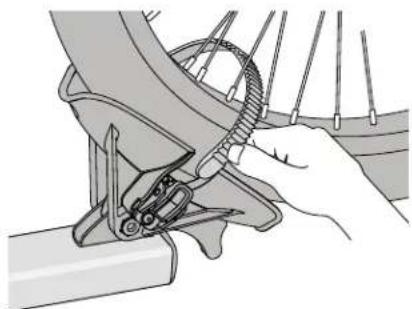
Rotate the wheel slightly, if necessary.

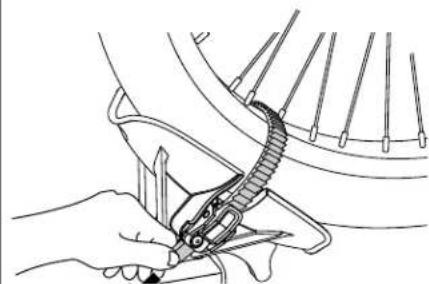
TIGHTEN REAR WHEEL STRAP.
- Thread strap through spokes and insert it into the slot in the wheeltray.
Pull hard to tighten.

LOAD SECOND BIKE (IF APPLICABLE).
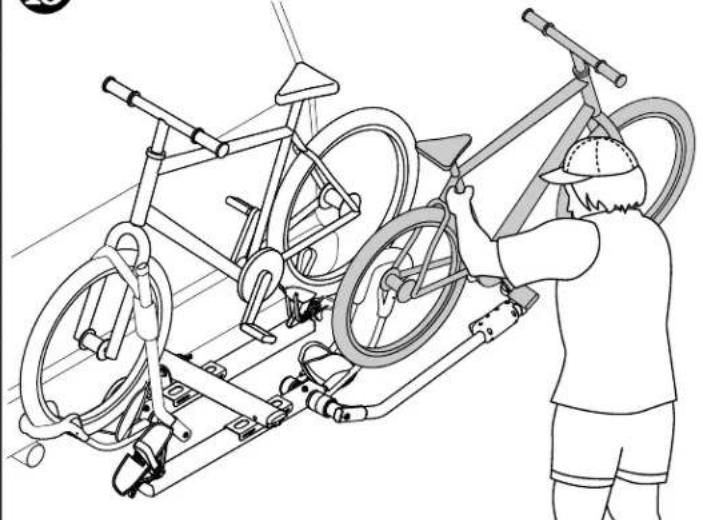
Alternate bike direction.
Refer to steps 10 through 14 to load your second bike.
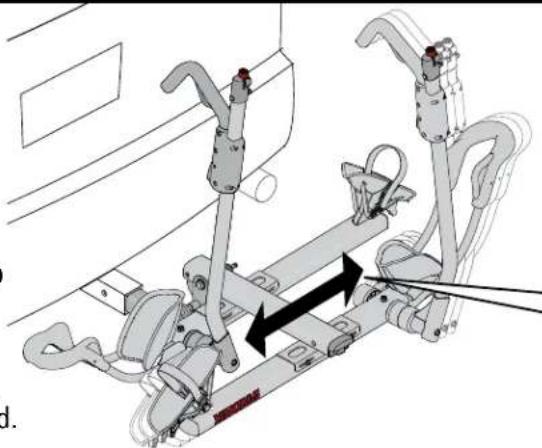
If necessary adjust tray position to avoid bike to bike interference.
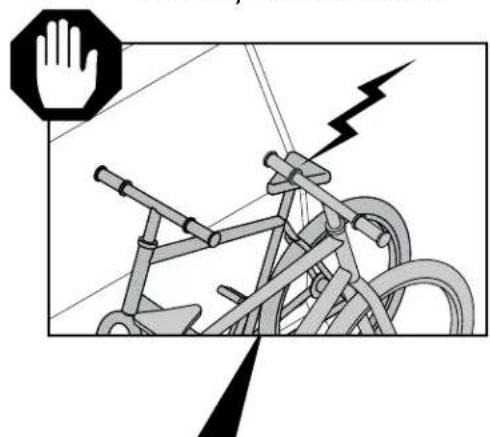
If you have bike to bike interference when loading two bikes, adjust trays as necessary to eliminate interference between bikes.
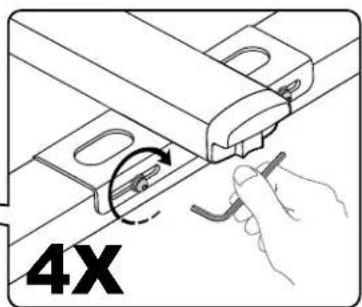
- Loosen the 4 tray bolts (do not remove bolts).
- Slide the tray left or right.
Retighten the 4 tray bolts.
Both trays can be adjusted.

ALWAYS USE INTEGRATED LOCKING CABLE WHEN TRANSPORTING BIKES.
VERIFIQUE LA RUEDA TRASERA Ajuste la correa si es necessities.
- Access locking cables at the end of each pivot arm.
- Wrap locking cable around bike frame.
- Insert the pin from the pivot arm into hole at the end of the locking cable. Lock with key.


CHECK THE INSTALLATION BEFORE DRIVING AWAY.
- PUSH HOOKS AGAINST TIRES.
- CHECK REAR WHEEL. TIGHTEN THE STRAP IF NEEDED.
BE SURE ALL HARDWARE IS SECURED ACCORDING TO INSTRUCTIONS.
- ALWAYS SECURE PIVOT ARM WHEN TRAY IS EMPTY.

SECURE PIVOT ARMS WHEN NOT IN USE. WHEN NOT CARRYING BIKES ALWAYS FOLD HOLDUP UP.
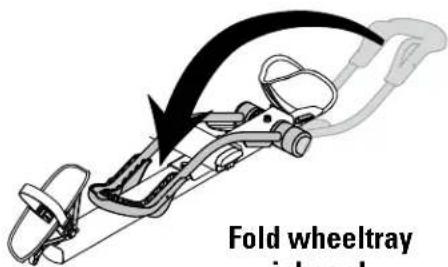
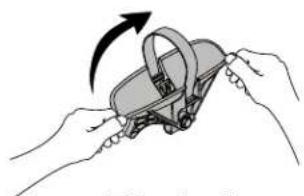
Tilt wheeltray inboard.
Slide the hook against the rear wheel cradle.
Fold up HoldUp.

READ ALL WARNINGS ON NEXT PAGE BEFORE DRIVING AWAY.
IMPORTANT LOAD LIMITS:

HITCH LOAD IS LIMITED TO 60 LBS.PER BIKE.

INSTALL THIS PRODUCT ON 2" AND 1 1/4" HITCH RECEIVERS ONLY.
- Never drive off-road with bicycles loaded.
- Do not install on trailers, campers, or RVs.
- Do not position bicycle tires near vehicle's hot exhaust.
- Do not install if spare tire causes interference with bikes or folded carrier.
BIKES:
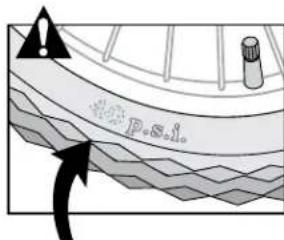
Make sure your tires are filled to recommended pressure found on the tire.
- Do not carry tandem or recumbent bikes.
- Do not transport bicycles with attached baby seats, panniers, wheel covers, full bike covers or motors.
- Do not use with a hitch-extender.
- Do not use with a 1-1/4" hitch adapter.
- Not for use on bikes with front fenders.
In addition, some undersized receivers may not accept this product. If you do not know the capabilities of your hitch receiver, consult an automotive professional.
MAINTENANCE
MAINTENANCE: Periodically use non-water soluble lubricant on moving metal parts. Use a soft cloth with water and mild detergent to clean rubber parts.

Remove this rack before entering an automatic car wash, and when not in use.
BOTTLE OPENER

Enjoy a refreshing beverage.
Your HoldUp endcap doubles as a bottle opener!

Attachment hardware can loosen over time. Check before each use, and tighten if necessary. Failure to obey load limits can result in property damage, personal injury, or death.
TECHNICAL ASSISTANCE OR REPLACEMENT PARTS: GO ONLINE: www.YAKIMA.COM Contact your dealer or call: (888) 925-4621 Monday through Friday 7:00 am to 5:00 pm PST

This product is covered by YAKIMA's
"Love It Till You Leave It" Limited Lifetime Warranty
To obtain a copy of this warranty, go online to www.yakima.com
or email us at yakwarranty@yakima.com
or call (888) 925-4621
KEEP THESE INSTRUCTIONS!
ENFILER LA BASE DANS L'ATTELAGE.