WX251 - Screwdriver WORX - Free user manual and instructions
Find the device manual for free WX251 WORX in PDF.
| Brand | Worx |
| Model | WX251 |
| Product type | Cordless screwdriver |
| Battery technology | Lithium-ion (Li-ion) |
| Battery voltage | 3.6 V |
| Battery capacity | 1300 mAh |
| No-load speed | 200 rpm |
| Max torque | 3 N·m |
| Charge time | 3 to 5 hours |
| Charger input voltage | 220-240 V~, 50/60 Hz |
| Weight | 0.3 kg |
| Sound pressure level (LpA) | 64 dB(A) |
| Sound power level (LwA) | 75 dB(A) |
| Vibration emission value (ah) | 0.63 m/s² |
| Vibration uncertainty (K) | 1.5 m/s² |
| Chuck | Magnetic bit holder |
| Rotation direction | Forward/reverse switch |
| Lighting | Integrated LED light |
| Spindle lock | Automatic (allows manual use) |
| Included accessories | Flat, cross, Phillips, square, Torx bits, long PH2 bit, magnetic tray, charger |
| Recommended use | Driving and removing screws, drilling in wood, metal and plastic |
| Maintenance | Clean with a dry cloth; do not use water or chemical cleaners |
| Warranty | Refer to the manual or retailer |
| Compliance standards | EN 55014-1, EN 55014-2, EN 60745-1, EN 60745-2-2 |
Frequently Asked Questions - WX251 WORX
User questions about WX251 WORX
0 question about this device. Answer the ones you know or ask your own.
Ask a new question about this device
Download the instructions for your Screwdriver in PDF format for free! Find your manual WX251 - WORX and take your electronic device back in hand. On this page are published all the documents necessary for the use of your device. WX251 by WORX.
USER MANUAL WX251 WORX
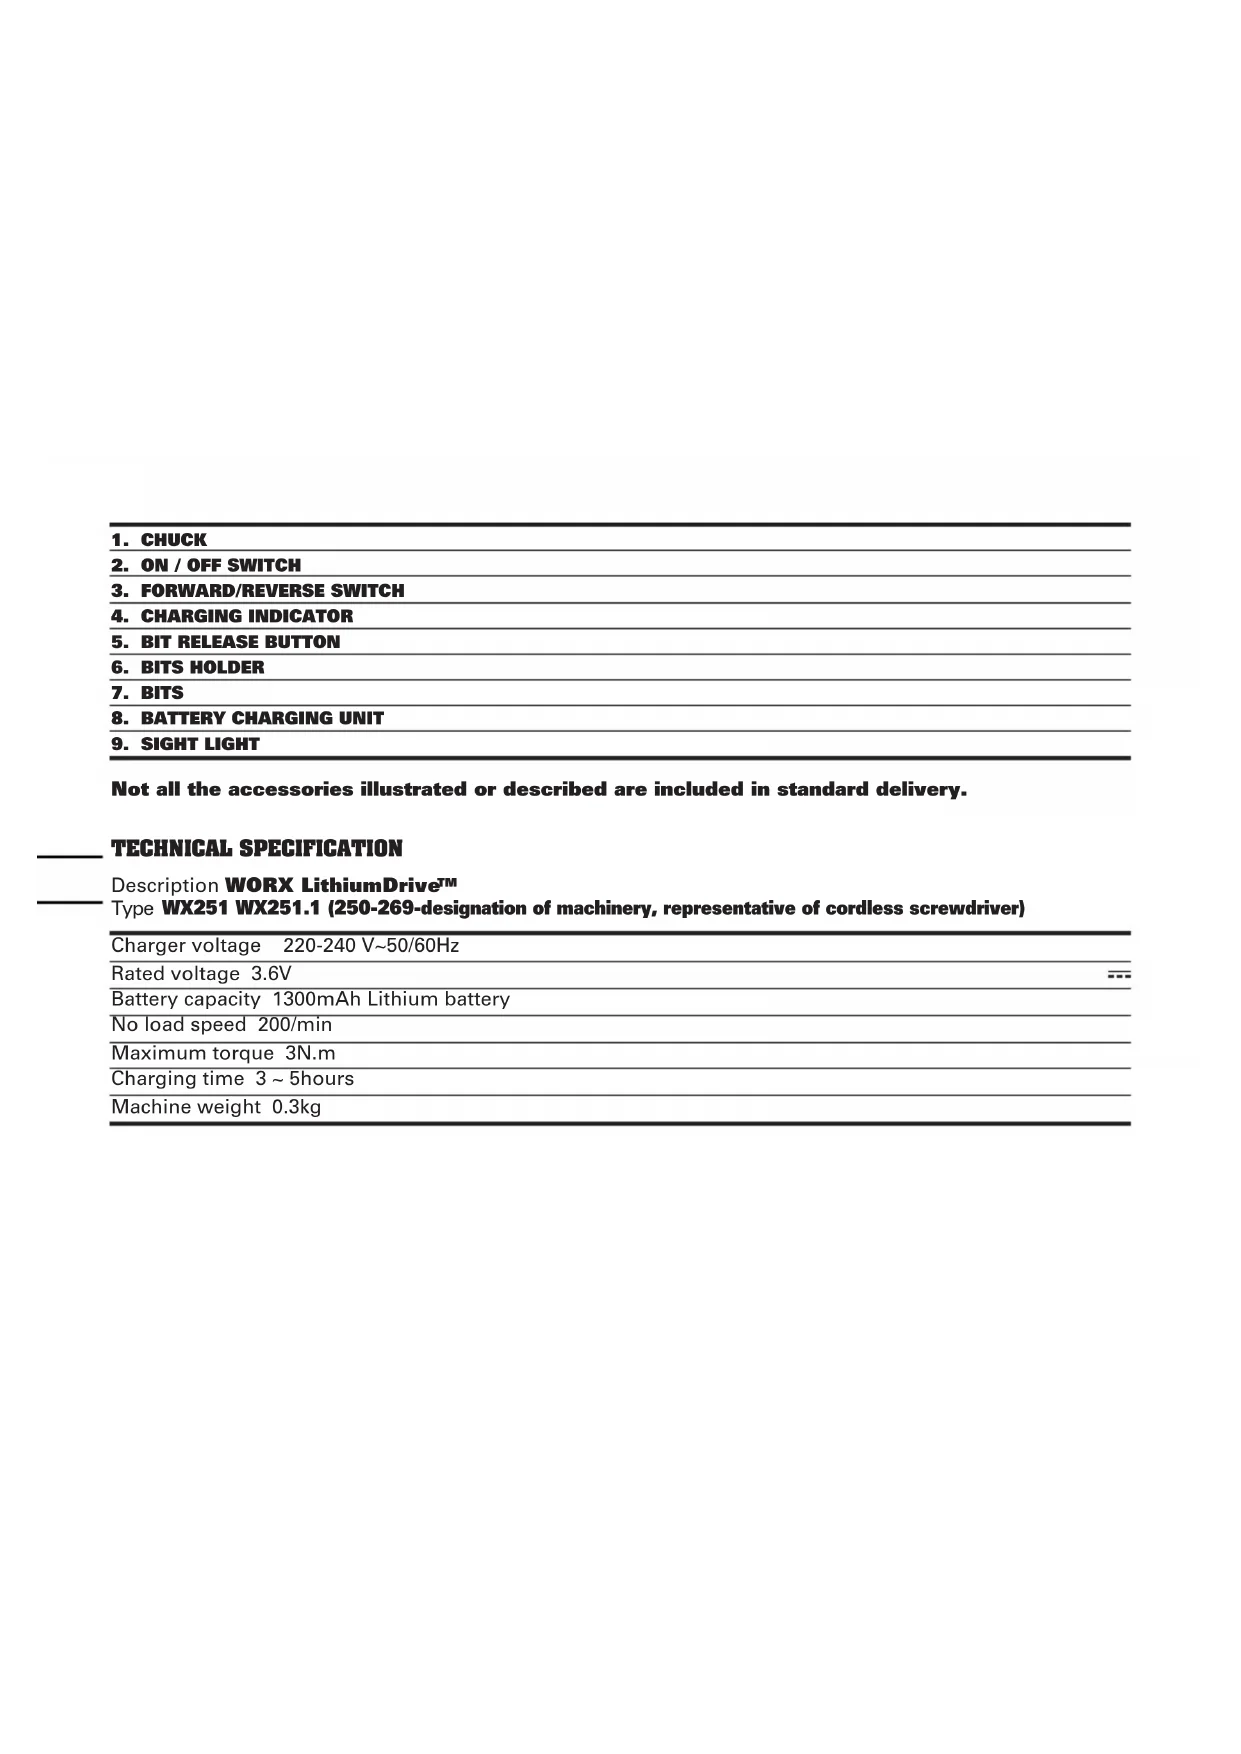
Not all the accessories illustrated or described are included in standard delivery.
TECHNICAL SPECIFICATION
Description WORX LithiumDriveTM
Type WX251 WX251.1 (250-269-designation of machinery, representative of cordless screwdriver)
| Charger voltage 220-240 V~50/60Hz |
| Rated voltage 3.6V |
| Battery capacity 1300mAh Lithium battery |
| No load speed 200/min |
| Maximum torque 3N.m |
| Charging time 3 ~ 5hours |
| Machine weight 0.3kg |
NOISE INFORMATION
| A weighted sound pressure LpA 64dB(A) |
| A weighted sound power LwA 75dB(A) |
| KpA & KwA 3.0dB(A) |
| Wear ear protection when sound pressure is over 80dB(A) |
VIBRATION INFORMATION
| Vibration total values (triax vector sum) determined according to EN 60745: | |
| Typical weighted vibration | Vibration emission value ah=0.63m/s2 |
| Uncertainty K = 1.5m/s2 | |

warning: The vibration emission value during actual use of the power tool can differ from the declared value depending on the ways in which the tool is used dependant on the following examples and other variations on how the tool is used:
How the tool is used and the materials being cut or drilled.
The tool being in good condition and well maintained.
The use the correct accessory for the tool and ensuring it is sharp and in good condition.
The tightness of the grip on the handles and if any anti vibration accessories are used.
And the tool is being used as intended by its design and these instructions.
This tool may cause hand-arm vibration syndrome if its use is not adequately managed.

warning: To be accurate, an estimation of exposure level in the actual conditions of use should also take account of all parts of the operating cycle such as the times when the tool is switched off and when it is running idle but not actually doing the job. This may significantly reduce the exposure
level over the total working period.
Helping to minimise your vibration exposure risk.
ALWAYS use sharp chisels, drills and blades.
Maintain this tool in accordance with these instructions and keep well lubricated (where appropriate).
If the tool is to be used regularly then invest in anti vibration accessories.
Avoid using tools in temperatures of 10^ or less.
Plan your work schedule to spread any high vibration tool use across a number of days.
ACCESSIONS
3-5h charger 1
Screwdriver bits 17
F lat:3,4,5,6mm 4
C ross: PZ0, PZ1, PZ2, PZ3 4
Phillips: PH0,PH1,PH2,PH3 4
quare:1,$2 2
Torx: T10, T15 2
50mm screwdriver bit: PH2 1
Magnetic bit holder 1
We recommend that you purchase your accessories from the same store that sold you the tool. Use good quality accessories marked with a well-known brand name. Choose the type according to the work you intend to undertake. Refer to the accessory packaging for further details. Store personnel can assist you and offer advice.
ADDITIONAL SAFETY INSTRUCTIONS FOR YOUR SCREWDRIVER
- Battery leakage may occur under extreme usage or temperature conditions. If battery fluid comes into contact with skin, wash with soap and water and rinse with lemon juice and vinegar. If the fluid comes into contact with the eyes, flush with water for several minutes and contact a doctor immediately.
- Never burn batteries, they can explode in a fire.
- Do not charge a leaking battery.
- Use of an attachment and charger not recommended or sold by the screwdriver manufacturer may result in a risk of fire, electric shock, or injury to persons.
- Before screwing into a wall, in case of doubt check with a metal-/voltage detector that you are not breaking into an electricity, gas or water supply lines.
- Before you lay down the Screwdriver, make sure that all moving parts have come to a stop.
- Avoid frequent stalling when screwing or drilling, as this could damage the batteries.
- Only connect the charging device to an AC supply.
- Charge Screwdriver battery only with the appropriate charging device.
- The charging device and the Screwdriver must be protected from moisture!
- Do not use the charging device outdoors.
- Do not store or use the tool and battery pack in
locations where the temperature may reach or exceed 39^ . (Such as outside sheds or metal building in summer).
- Always charge the battery pack between temperatures 2^ to 35^ . Ideal charging temperature is 18^ to 29^ .
- Do not short out the contacts of battery or charger.
- Respect the polarity ^+ / - when charging.
- Hold power tool by insulated gripping surfaces, when performing an operation where the fastener may contact hidden wiring. Fasteners contacting a "live" wire may make exposed metal parts of the power tool "live" and could give the operator an electric shock.
ADDITIONAL SAFETY INSTRUCTIONS FOR YOUR CHARGER
- Before using the tool, read the instruction book carefully.
- Charger is for indoor use only. Do not expose to rain or water.
- Do not charge non-rechargeable batteries.
- If the supply cord is damaged, it must be replaced by the manufacturer, its service agent or similarly qualified persons in order to avoid a hazard.
SYMBOLS

To reduce the risk of injury, user must read instruction manual
Warning

Wear ear protection

Wear eye protection

Wear dust mask

Indoor use only
Do not expose to rain or water
Do not burn
Do not dispose of batteries, Return exhausted batteries to your local collection.
OPERATING INSTRUCTIONS

Note: Before using the tool, read the instruction book carefully.
Intended use
The power tool is intended for driving in and loosening screws as well as for drilling in wood, metal and plastic.
1. Recharging batteries a) Charging the battery
The battery charger supplied is matched to the Li-ion battery installed in the machine. Do not use another battery charger.
The Li-ion battery is protected against deep discharging. When the battery is empty, the machine is switched off by means of a protective circuit: The tool holder no longer rotates.
In a warm environment or after heavy use, the battery pack may become too hot to permit charging. Allow time for the battery to cool down before recharging.
When the battery is charged for the first time and after prolonged storage, the battery will only accept approximately 60% charge. However, after several charge and discharge cycles the battery will accept a 100% charge.
b) Important notes for charging the battery
The battery in your new Screwdriver is not charged
when it leaves the plant. Therefore it must be charged for 3~5 hours before using the first time!
c) Charging (See Fig. A)
Plug the charger plug into a suitable power outlet, the indicator won't illuminate. Next place the screwdriver onto the battery charger, the indicator (Red) will illuminate during charging.
Let the battery charge for 3~5 hours. The battery is fully charged as soon as the indicator is no longer lit. Then unplug the charging plug from the socket and remove the screwdriver from charger, the screwdriver is ready to use.
Important: When charging, the charger and screwdriver may become warm to the touch, this is normal and does not indicate a problem.
2. Operating instructions
Inspect the screwdriver before using to ensure all parts are running smoothly and there are no abnormal sounds or sparks. Before driving fasteners, check behind walls for wire, other electrical hazards or plumbing.
3. Fitting and removing bits (See Fig. B)
To use any one of the short bits supplied, insert the bit into the chuck (1). To remove the bit, simply pull it out of the chuck (1).
4. How use the connecting bit holder (A) (See Fig. C)
To use the connecting bit holder, insert the bit (7) into it and then into the chuck (1).
5. Forward/reverse switch (See Fig. D)
For drilling and screw driving use forward rotation marked "▲" (lever is moved to the left). Only use reverse rotation marked "▶" (lever is moved to the right) to remove screws or release a jammed drill bit.

Warning:
Never change the direction of rotation when the chuck is rotating, wait until it
has stopped!
6. Fully automatic spindle locking (Auto-lock)
The screwdriver chuck (1) is locked when the on/off switch (2) is not pressed.
This enables screws to be screwed in, even when the battery is empty and allows for the machine to be used as a manual screwdriver.
Important: When using as a manual tool, do not press the On/Off switch (2). Otherwise the screwdriver can be damaged.
7. Using the sight light (9) (See Fig. E)
The sight light allows you to keep a clear view under less illuminated circumstances. To turn on the light simply press the on/off switch. When you
release the on/off switch, the light will go out.
MAINTENANCE
Your power tool requires no additional lubrication or maintenance. There is no user serviceable parts in your power tool. Never use water or chemical cleaners to clean your power tool. Wipe clean with a dry cloth. Always store your power tool in a dry place. Keep the motor ventilation slots clean. Keep all working controls free of dust. If you see some sparks flashing in the ventilation slots, this is normal and will not damage your power tool.
ENVIRONMENTAL PROTECTION

Waste electrical products should not be disposed of with household waste. Please recycle where facilities exist. Check with your authorities or retailer for recycling advice.
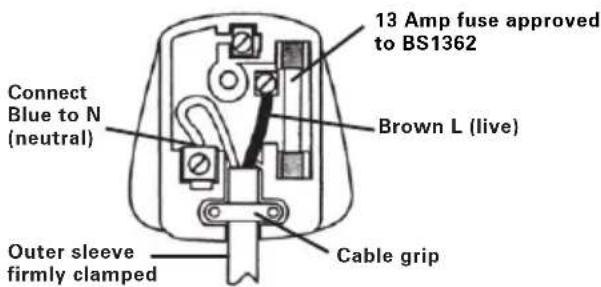
PLUG REPLACEMENT (UK & IRELAND ONLY)
If you need to replace the fitted plug then follow the instructions below.
IMPORTANT
The wires in the mains lead are colored in accordance with the following code:
Blue = Neutral
Brown = Live
As the colors of the wires in the mains lead of this appliance may not correspond with the colored markings identifying the terminals in your plug, proceed as follows. The wire which is colored blue must be connected to the terminal which is marked with N. The wire which is colored brown must be connected to the terminal which is marked with L.
Warning: Never connect live or neutral wires to the earth terminal of the plug. Only fit an approved 13ABS1363/A plug and the correct rated fuse.
Note: If a moulded plug is fitted and has to be removed take great care in disposing of the plug and severed cable, it must be destroyed to prevent engaging into a socket.
EC DECLARATION OF CONFORMITY
We,
POSITEC Germany GmbH
Declare that the product,
Description WORX LithiumDrive
TM
Type WX25
1 WX251.1 (250-269-designation of machinery, representative of cordless
screwdriver)
Function Tightening and loosening screws, nuts
Complies with the following directives,
EC Machinery directive 2006/42/EC
EC Electromagnetic compatibility directive 2004/108/EC
Standards conform to
EN 55014-1
EN 55014-2
EN 60745-1
EN 60745-2-2
The person authorized to compile the technical file,
Name Russell Nicholson
Address Positec Power Tools (Europe) Ltd, PO Box 152, Leeds, LS10 9DS, UK
Jaky

2011/11/01
Jacky Zhou
POSITEC Quality Manager
INFORMATIONS RELATIVES AU BRUIT
INFORMATIONS RELATIVES AUX VIBRATIONS
Adresse Positec Power Tools (Europe) Ltd, PO Box 152, Leeds, LS10 9DS, UK
Jaky

2011/11/01
Jacky Zhou
Responsible qualite POSITEC
B its planos: 3, 4, 5, 6 mm 4
B its em cruz: PZ0, PZ1, PZ2, PZ3 4
Phillips:PH0, PH1, PH2, PH3 4
Bits quadrados: 1,2 2
Torx: T10, T15 2
50mm "bit" de aparafusamento: PH2 1
Endereço Positec Power Tools (Europe) Ltd, PO Box 152, Leeds, LS10 9DS, UK
Jaky

2011/11/01
Jacky Zhou
Gestor de Qualidade POSITEC
- BOORKOP
- AAN/UITSCHAKELAAR
- VOORWAARTS, OMGEKEERDE DRAAI EN SLOTFUNCTIE
- LAMPJE OM AAN TE GEVEN DAT ACCUPACK OPGELADEN IS
- PAL ACCUPACK
- BITHOUDER
- SCHROEFBITS
- BATTERIJLADER
- KIJKLIGHT
50mm schroefbits: PH2
Magnetisch blad
Standards in overeenstemming met,
EN 55014-1
EN 55014-2
EN 60745-1
EN 60745-2-2
Type WX251 WX251.1 WX251 WX251.1(250-269-udpegning af maskiner, representant for Akku-boreskruemaskine)
Opladesspanding 220-240V\~50/60Hz
Batterispending 3.6V
Batterikapacitet 1300mAh Lithium batteri
Nominal frilobshastighed 200/min
Maks. drejningsmoment 3N.m
Normal opladetid 3~5time (ca.)
Maskinvaegt 0.3kg
STOJINFORMATION
Type WX251 WX251.1 WX251 WX251.1(250-269-udpegning af maskiner, representant for Akku-boreskruemaskine)
Adresse Positec Power Tools (Europe) Ltd, PO Box 152, Leeds, LS10 9DS, UK
Jaky
2011/11/01
Jacky Zhou
EMC-directivet 2004/108/EC
Adresse Positec Power Tools (Europe) Ltd, PO Box 152, Leeds, LS10 9DS, UK
Jaky

2011/11/01
Jacky Zhou
Adress Positec Power Tools (Europe) Ltd, PO Box 152, Leeds, LS10 9DS, UK

2011/11/01
Jacky Zhou
POSITEC Kvalitetsdirektor
- MANDREN
- AÇMA/KAPAMA DÜGMESİ
- ILERI GERI DONUS VE KILIT KONTROLU
- SARJ OLDU GÖSTERGE IŞIGI
- BATARYA KUTUSU MANDALI
- UCTUTACAGI
- TORNAVIDA UÇ
- PIL ŞARJ ETME ÜNTESİ
- GÖRUS IŞIGI
Ilgi Positec Power Tools (Europe) Ltd, PO Box 152, Leeds, LS10 9DS, UK
Jaky
2011/11/01
Jacky Zhou
y)ΦoPriOg (AeIe To A)
SUVDETE TO qIC TOUTO FOPTIOTn OE mia kataaann npica PEmuToc, n evoEiEN DE o avayei. EITeTA, totoTheNTote To katoaabi OTO FOPTIOTn MTATAPiac, n evoEiEN (KokkvN) 0a avayei kata n poption.
Aphote Tn mTatapia va φoptiεi yia 3~5 ωpεc. H mTatapia exi φoptiεi πλnpως μολις σβησει η ενδειξ. 'ETeITA, aTTOAVDoeTe to φic φopTIONs aTIO TIV πPiCa kai aTTOAVDoeTe TO katoaβidi aTIO to φoptiOTn. To katoaβidi eivai eToIPO yia xPon.
Ipoos: Mny aaaaetekateuovon nepiotpooqns otav to took
you've got the power
Copyright © 2012, Positec. All Rights Reserved.
2CSD05PPK11003A1