U451CH1 - Blender ROTEL - Free user manual and instructions
Find the device manual for free U451CH1 ROTEL in PDF.
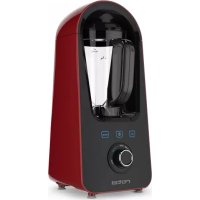
| Product type | Heating blender (Nutri Blender) |
| Brand | Rotel |
| Model | U451CH1 |
| Rated voltage | 220-240 V~ |
| Rated frequency | 50/60 Hz |
| Rated input power | 1500 W |
| Cooking power | 800 W |
| Bowl capacity (total) | 1.75 L |
| Maximum capacity for hot preparations | 1.4 L |
| Bowl material | Glass |
| Number of automatic programs | 6 |
| Programs | Vegetable/fruit juice, Soup, One pot, Plant-based milk, Baby food, Milkshake |
| Pulse/cleaning function | Yes (Pulse/Cleaning) |
| Cooking/keep warm function | Yes (Heating/Temperature) |
| Safety device | Cover lock with position detection |
| Control type | Touch control panel |
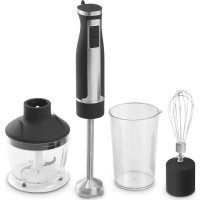
| Included accessories | Lid, cover, glass bowl, pestle (stirrer), cleaning brush, measuring cup |
| Maintenance | Clean after each use; do not immerse the motor unit; use the brush for the blades |
| Safety | Sharp blades, hot surfaces, steam |
| Warranty | Free repair for material or manufacturing defects (subject to conditions) |
| Reparability | Must be entrusted to an authorized after-sales service |
| Use | Household only |
Frequently Asked Questions - U451CH1 ROTEL
User questions about U451CH1 ROTEL
0 question about this device. Answer the ones you know or ask your own.
Ask a new question about this device
Download the instructions for your Blender in PDF format for free! Find your manual U451CH1 - ROTEL and take your electronic device back in hand. On this page are published all the documents necessary for the use of your device. U451CH1 by ROTEL.
USER MANUAL U451CH1 ROTEL
natural_image
Rotel blender with black handle and digital display, no visible text or symbols on the device itself.• GEBRAUCHSANWEISUNG
- MODE D'EMPLOI
• ISTRUZIONI PER L'USO
• INSTRUCTIONS FOR USE
CE RoHS 又

D/F/I/E
- Safety instructions....51
- Before first use .... 54
• Control Panel....55
• Using the Nutri Blender....56 - Useful tips and warning....59
- Suggestions....60
Tomato soup....60
Goulash....60
Love smoothie 61
Greeny detox....61
- Cleaning and maintenance....62
Cleaning....62
Maintenance 62
- Troubleshooting 63
- Disposal 64
D/F/I/E....65
Garantie / Garantie / Garanzia / Warranty 65
Deutsch
text_image
+ Time - + Speed - Vegetable Fruit Juice Soup One pot Nut Milk Baby Food Milkshake Pulse Cleaning Heating Temperature Start Stopnatural_image
Simple line drawing of a plate with scattered cubes (no text or symbols)
natural_image
Simple line drawing of a cylindrical object with a handle, resembling a measuring cup or container (no text or symbols)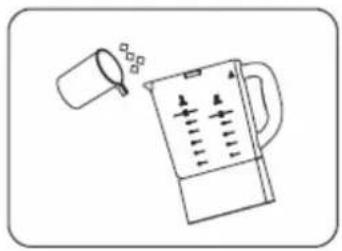
natural_image
Simple line drawing of a blender with a glass and paper, no text or symbols present4.
natural_image
Technical line drawing of a blender and its mechanical component (no text or symbols)6.
natural_image
Line drawing of a blender with a downward arrow indicating compression or disassembly (no text or symbols)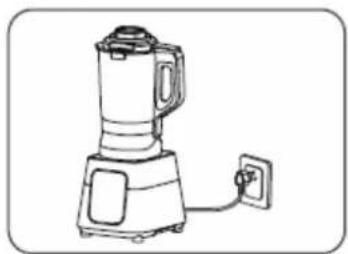
natural_image
Line drawing of a blender with a power outlet (no text or symbols)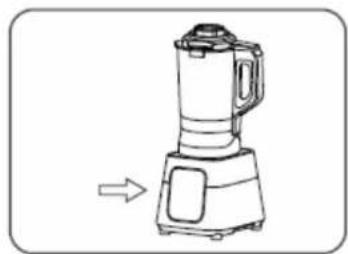
natural_image
Line drawing of a blender with an arrow indicating speed (no text or symbols)9.
text_image
Diagram of a remote control panel with labeled buttons and indicators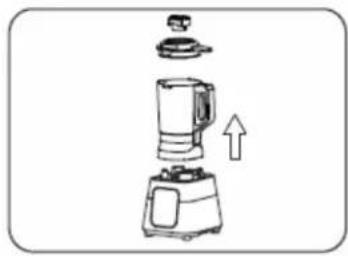
natural_image
Line drawing of a blender with an upward arrow indicating motion (no text or symbols)12.
natural_image
Simple line drawing of a container being dispensed into a portable device (no text or symbols)
natural_image
Simple line drawing of a water tap and a blender (no text or symbols)14.
natural_image
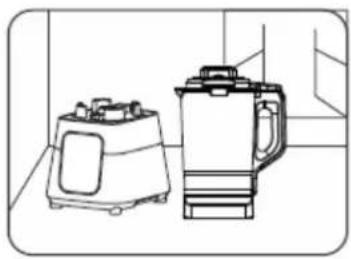
Line drawing of a toaster and blender in a kitchen setting (no text or symbols)text_image
+ Time - + Speed - Vegetable Fruit Juice Soup One pot Nut Milk Baby Food Milkshake Pulse Cleaning Heating Temperature Start Stopnatural_image
Simple line drawing of a plate with scattered square objects (no text or symbols)4.
natural_image
Simple line drawing of a cylindrical container with a handle (no text or symbols)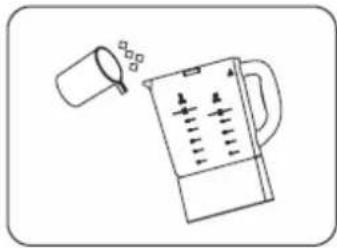
natural_image
Line drawing of a blender with a cup pouring liquid from a glass (no text or symbols)5.
bar
| Category | Value | |---|---| | Cool | 1750 | | Cold | 1690 | | | 1250 | | | 1690 | | | 750 | | | 800 | | | 1300 | | | 1400 | The values for the bars are explicitly labeled as 'Cool'. The values for the bars are labeled as 'Warm'.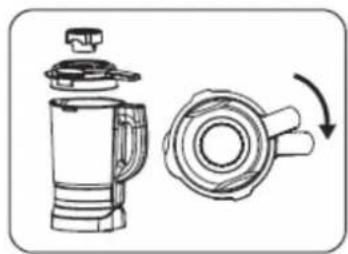
natural_image
Illustration of a blender with a side view showing the lid and handle (no text or symbols)6.
natural_image
Line drawing of a blender with a downward arrow indicating compression or shift (no text or symbols)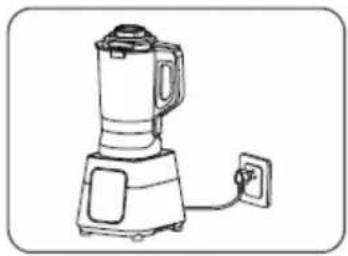
natural_image
Line drawing of a blender with a power outlet, no text or symbols present
natural_image
Line drawing of a blender with an arrow indicating direction (no text or symbols)9.
text_image
Diagram of a device control panel with labeled buttons and indicators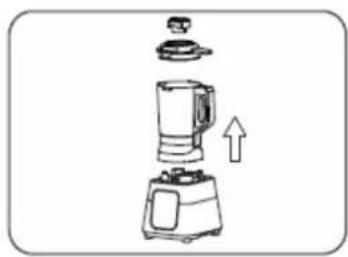
natural_image
Line drawing of a blender with an upward arrow indicating motion (no text or symbols)12.
natural_image
Line drawing of two kitchen appliances: a toaster and a kettle, shown in line style without any text or symbols.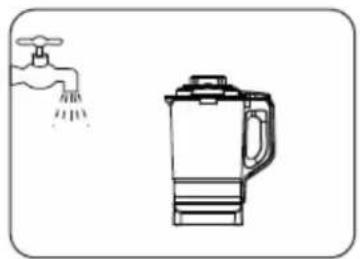
natural_image
Illustration of a faucet and a blender with water drop (no text or symbols)14.
natural_image
Simple line drawing of a container pouring liquid into a bag (no text or symbols)• CONSEILS ET MISES EN GARDE
text_image
+ Time - + Speed - Vegetable Fruit Juice Soup One pot Nut Milk Baby Food Milkshake Pulse Cleaning Heating Temperature Start Stopnatural_image
Simple line drawing of a plate with scattered cubes inside, enclosed in a rounded rectangle (no text or symbols)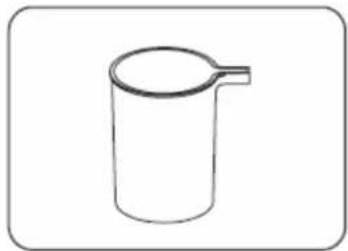
natural_image
Simple line drawing of a cylindrical object with a handle, resembling a beaker or container (no text or symbols)
natural_image
Line drawing of a blender with a glass pouring liquid from a cup (no text or symbols)4.
natural_image
Technical line drawing of a blender and washer components (no text or symbols)6.
natural_image
Line drawing of a blender with an arrow indicating compression or disassembly (no text or symbols)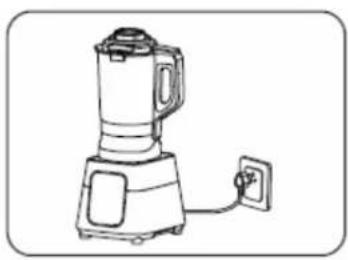
natural_image
Line drawing of a blender with a power outlet (no text or symbols)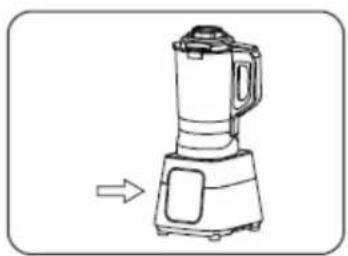
natural_image
Line drawing of a blender with an arrow indicating motion (no text or symbols)9.
text_image
Diagram of a remote control panel with labeled buttons and indicators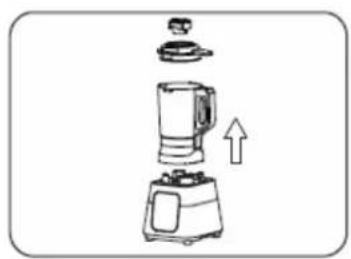
natural_image
Line drawing of a blender with an upward arrow indicating motion (no text or symbols)12.
natural_image
Simple line drawing of a container pouring liquid into a cup (no text or symbols)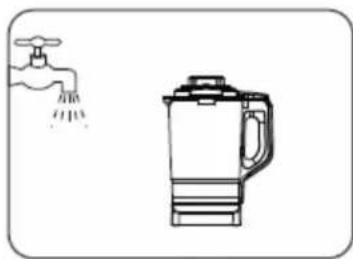
natural_image
Line drawing of a kitchen blender with a faucet and water dispenser (no text or symbols)14.
natural_image
Line drawing of two kitchen appliances: a toaster and a kettle, shown in line style without any text or symbols.• CONSIGLI E AVVERTENZE
Please read all instructions before using the device.
○ This appliance may be used by persons with limited physical, sensory or mental abilities or lack of experience and/or knowledge, if they are supervised by persons responsible for their security or if they have been instructed about the safe use of the appliance and therefore fully understand the hazards involved.
○ This appliance must not be used by children. The appliance and its power cord must be kept away from children.
○ The appliance shall always be disconnected from the mains when not in use or when left unattended, and before assembling, disassembling or cleaning. It must be unplugged by grasping the plug and never by pulling the cord.
Before plugging into a socket, it shall be ensured that the mains voltage matches the voltage specified on the rating plate of the appliance.
- The appliance shall not be operated with a damaged supply cord or plug, or after the appliance malfunctions, or has been damaged in any manner. It shall be returned to the nearest authorized service facility for examination, repair or adjustment.
- Incorrect repair attempt, assembly, or use of any accessory attachment not recommended or sold by the manufacturer may cause fire, electric shock or personal injury and will void the manufacturer's warranty.
- To avoid any hazards, the motor base of the appliance, the jug, the cord or plug shall not be immersed into water or any other fluid.
- The use of the appliance shall be avoided near sinks or other vessels containing water, and with wet hands.
○ The contact pins at the bottom of the jug shall be kept clean and dry. Any spillage of water on the connector may cause damage to the appliance.
- The appliance must be used on a flat, stable and heat-resistant surface.
○ The power cord shall not touch hot surfaces.
○ The maximum filling capacity of the jug shall not be exceeded to avoid splashing or scalding.

○ Children shall not play with the appliance.
- The appliance is not intended to be operated by means of an external timer or a separate remote control system.
○ CAUTION - HOT: Burns can occur by touching the hot surfaces of the appliance or contact with the steam. Keep hands clear off the jug cover, the feeding lid and the jug while processing hot food.
○ CAUTION:
■ Misuse of the appliance may cause injury.
■ The appliance shall not be operated without ingredients or with dry products only.
■ Care shall be taken while emptying the jug and during cleaning: the blade unit is very sharp.
■ The feeding lid shall always be set onto the jug cover before operating the appliance, to avoid liquids to be ejected.
○ This appliance is intended for household use only and shall not be used outdoors.
- BEFORE FIRST USE
- Remove all packaging materials and stickers from the appliance.
- Check that all listed parts are included. If anything is missing, please contact the after-sales service.
○ Wipe off all removable parts with a damp cloth and rinse the jug. Never use abrasive products, DO NOT IMMERSE THE MOTOR BASE OR THE JUG IN WATER.
○ Caution: the edges of the blade are very sharp, handle with care.
Place the Nutri Blender on a clean, stable and even surface. Ensure a minimum of 30 cm clearance around the appliance as it may let hot steam escape while cooking.
o Fully unwind the power cord and check for any signs of damage.
• CONTROL PANEL

text_image
+ Time - + Speed - Vegetable Fruit Juice Soup One pot Nut Milk Baby Food Milkshake Pulse Cleaning Heating Temperature Start Stop| Mode | Purposes |
| Vegetable/Fruit Juice | This programme is used to make fresh juices. No heating. |
| Soup | This programme is used to make soup, stew. |
| One pot | This programme is used to make various soup, stew or goulash. |
| Nut milk | This programme is used to make various soybean milk, nut milk and the like. |
| Baby food | This programme is used to cook baby food. |
| Milkshake | This programme is used to make various smoothies and milkshakes. No heating. |
| Pulse/Cleaning | This function can be used to make smoothies if short bursts are required, but also to clean the jug.Add fresh water into the jug and press repeatedly this button to easily clean the jug. |
| Heating/Temperature | This button is used to heat food or keep the processed food warm. |
| Start/Stop | Use this button to switch the appliance on and off or to stop the Nutri Blender during a programme. |
• USING THE NUTRI BLENDER
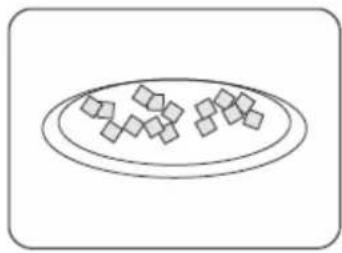
1.
Cut the food into small pieces (about 2 cm).
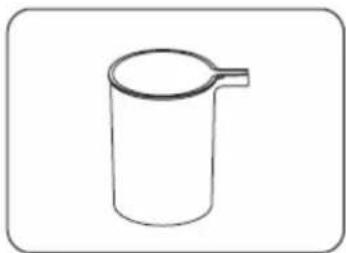
2.
Use the measuring cup to get the appropriate amount of ingredients, according to the recipe and personal taste.
3.
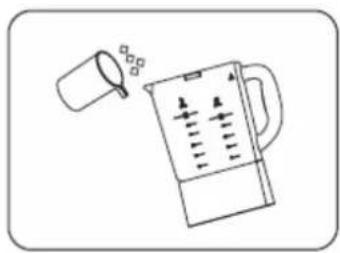
Pour the measured food into the jug.
natural_image
Simple line drawing of a plate with scattered geometric shapes inside, enclosed in a rounded rectangle (no text or symbols)4.
Add an appropriate amount of liquid to the jug.
Adjust the quantity of liquid to the recipe and personal taste but never exceed the MAX filling line.
natural_image
Simple line drawing of a cylindrical container with a handle (no text or symbols)5.
Press the jug cover onto the jug and rotate the cover clockwise. Ensure the cover is locked on the jug, lining it up with the jug handle. Note: the Nutri Blender is equipped with a safety device which prevent processing if the jug cover is not correctly mounted.
natural_image
Simple line drawing of a mixing bowl with a measuring cup and pouring liquid (no text or symbols)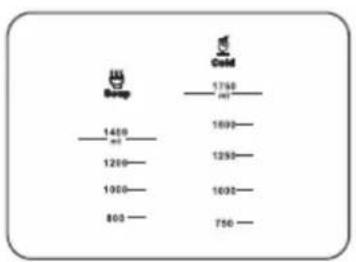
text_image
ICE Swap 1400 m3 1200 1900 800 CAI Cold 1750 m3 1690 1250 1632 750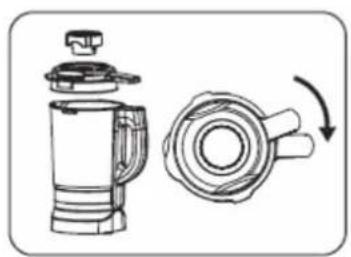
natural_image
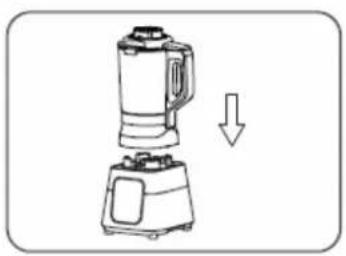
Line drawing of a blender with lid and side view showing internal components (no text or symbols)6.
Lower the jug onto the motor unit. Fit the feeding lid into the hole in the jug cover.
7.
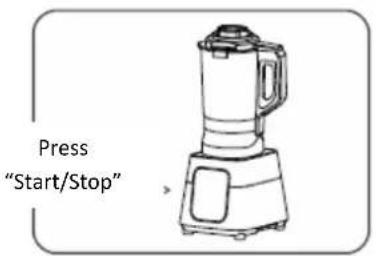
Plug the Nutri Blender in an earthed socket and push the "Start/Stop" button. The appliance will beep and the displays shows "----".
8.
Select an automatic programme or choose a manual setting.
natural_image
Illustration of a blender with a downward arrow indicating compression or shift (no text or symbols)9.
Press the "Start/Stop" button again for the appliance to start processing.

natural_image
Line drawing of a blender with a power outlet (no text or symbols)10.
When the programmed time ends, the Nutri Blender beeps three times and returns to a standby mode.

natural_image
Line drawing of a blender with an arrow indicating motion (no text or symbols)11.
Unplug the appliance, carefully remove the jug from the motor unit before opening the cover. Caution: only hold the jug by its insulated handle and beware of the released steam. Danger of scald burn!
text_image
Press "Start/Stop"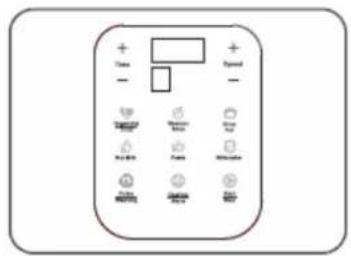
natural_image
Pure electrical circuit lines without any symbols
natural_image
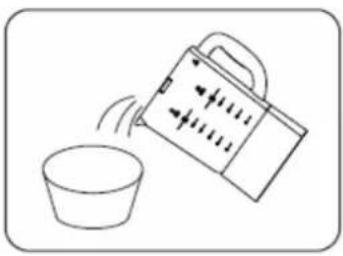
Line drawing of a blender with an upward arrow indicating motion (no text or symbols)12.
Gently pour out the contents into a serving dish and adjust seasoning.
13.
Rinse the inside of the jug and its cover under running warm water and use a damp cloth to clean the motor unit. Caution while cleaning the blades as they are very sharp. Use the provided brush if required.
natural_image
Simple line drawing of a container pouring liquid into a cup (no text or symbols)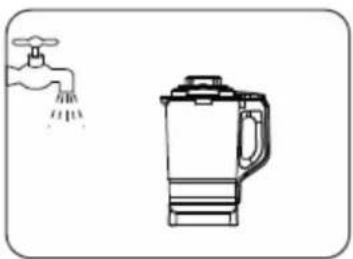
natural_image
Line drawing of a kitchen blender with a faucet and water dispenser (no text or symbols)14.
Dry the Nutri Blender carefully and store the jug and the motor unit separately in a cool and well ventilated place.
natural_image
Line drawing of two kitchen appliances: a toaster and a kettle (no text or symbols)- USEFUL TIPS AND WARNING
- Rinse or clean all ingredients before proceeding and cut them into chunks of approximately 2 centimetres.
○ Always put the solid ingredients into the jug before pouring any liquid.
Do not exceed the maximum scale marked on the jug: 1.4 litres for hot liquid, that may expand whilst cooking and 1.75 litres for cold ingredients. - Never attempt to open the jug cover while the appliance is still running.
- Do not pour hot liquids into the glass jug as it may damage it irreversibly.
Keep hands clear off the feeding lid while proceeding hot food: danger from scalding due to escaping hot steam.
Use a spatula to remove the ingredients from the wall of the jug: the cutting edges of the blade are very sharp. - Ensure the appliance is in standby mode before carefully removing the jug from the motor unit.
For best results, use when possible the functional buttons of the Nutri Blender. Otherwise, the beverages/soups may be less tasty or not cooked thoroughly.
If the wrong setting had been selected by mistake, press the "Start/Stop" button to cancel the current function. Before the countdown of the current function has started, you may directly re-select the corresponding function and press the "Start/Stop" button. If the current function has already started, stop the running programme and restart the Nutri Blender.
When making smoothies or fresh juices, remove stones or core of the fruits and vegetables before putting them into the jug. Pour an appropriate amount of water or milk before processing. Smoothies also taste better when made with chilled ingredients.
○ Avoid using the Nutri Blender to heat up thick liquids such as milk, soybean milk and porridge. The food may stick and burn onto the bottom of the jug.
When the appliance is running a heating programme, beware of the steam spraying out and of the hot water splashing out from the spout when the liquid in the jug starts boiling. Do not open the feeding lid when the Nutri Blender is working.
Do not add seasoning (such as sugar) into the jug while the Nutri Blender is heating up, to prevent it from sticking to the bottom of the jug.
Do not let your hair, a scarf or a tie amongst other things hang over the jug and never place your fingers or any other object into it whilst the appliance is in operation, to prevent you from being injured or this product from being damaged.
- SUGGESTIONS
Tomato soup
Ingredients (4 servings):
■ 4 tomatoes, diced
■ 1 tablespoon olive oil
■ 1 onion, sliced
■ 1 teaspoon sugar
■ 1 clove garlic
■ 500 ml water
■ 1 carrot, diced
- Pepper
■ 1 stock cube
■ Fresh basil or parsley
- Put all the ingredients in the jug, except the herbs. Add water without exceeding the SOUP MAX mark.
- Lock the cover onto the jug, including feeding lid and press "Start" to switch on the Nutri Blender.
- Press "Soup" and the button "Start" again, to run the automatic programme.
- Serve with fine chopped basil or parsley.
Goulash
Ingredients (4 servings):
■ 200 g onion, sliced
■ 300 g beef chuck, cut in 2 cm pieces
■ 1 tablespoon sunflower oil
■ 2 tablespoon tomato purée
■ 2 tablespoon sweet paprika
■ 1 tablespoon hot paprika
■ 1 carrot, diced
■ 2 beef stock cube
■ 3 potatoes, diced
■ 1 red pepper, diced
■ 50 g celeriac, diced
■ 1 clove garlic, chopped
■ 1 | water
■ Fresh parsley
- Put all the ingredients in the jug, except the herbs. Add water without exceeding the SOUP MAX mark.
- Lock the cover onto the jug, including feeding lid and press "Start" to switch on the Nutri Blender.
- Press "One pot" and the button "Start" again, to run the automatic programme.
- Serve with fine chopped parsley and sour cream.
Love smoothie
Ingredients (4 servings):
■ 1 small carrot, diced
■ A pinch of red chili pepper (Espelette pepper)
- ½ small-sized beetroot, cooked
■ 1 tablespoon plain yoghurt
■ 1 green apple, sliced
■ 1 tablespoon honey
■ 20 g of fresh spinach
■ 300 ml water
■ 2 tablespoon raisins
■ 150 g frozen berries
- Put all the ingredients in the jug. Add water without exceeding the COLD MAX mark.
- Lock the cover onto the jug, including feeding lid and press "Start" to switch on the Nutri Blender.
- Press "Milkshake" and the button "Start" again, to run the automatic programme.
- Pour into glasses and sprinkle with edible flowers.
Greeny detox
Ingredients (4 servings):
■ 2 carrots, diced
■ 4 oranges, peeled
■ 150 g fresh nettle
■ Juice of 2 limes
(Caution: always wear protective gloves to collect, clean and process nettle)
- 12 cucumber, peeled
■ 20 g fresh ginger, peeled
■ Fresh coriander
- Put all the ingredients in the jug, except the herbs. Add water without exceeding the COLD MAX mark.
- Lock the cover onto the jug, including feeding lid and press "Start" to switch on the Nutri Blender.
- Press "Fruit/Vegetable juice" and the button "Start" again, to run the automatic programme.
- Pour into glasses and sprinkle with fine chopped coriander.
• CLEANING AND MAINTENANCE
Cleaning
○ Always switch off and unplug the appliance before cleaning.
○ Clean all parts that came into contact with food immediately after use.
- Rinse the inside of the jug and the cover under running water. DO NOT IMMERSE THE JUG OR THE MOTOR UNIT INTO WATER. Always keep the contact pins at the bottom of the jug clean and dry. Only wipe the contact pins with a wet cloth!
If necessary, fill up the jug with 1 litre of hot water along with 2 or 3 drops of mild detergent and use the mode "Pulse/Cleaning" repeatedly to clean the jug.
○ Only clean the blades with the provided brush so as not to injure yourself.
○ Wipe the outside of the motor unit with a clean damp cloth.
Do not use any harsh or abrasive cleaners or tools that can scratch or damage the surfaces of the appliance or its accessories.
o Dry the appliance thoroughly after cleaning.
Maintenance
○ Regularly check the power cord for wear and damage, particularly where it enters the product as well as the plug.
- Check the jug cover and its sealing ring, that prevents liquid or food from escaping the jug, as it might become brittle over time. Have it replaced immediately if leakage occur.
○ Use the Nutri Blender frequently to keep its motor from moisture.
Store the appliance in a cool and dry place, out of the reach of children and preferably in its original packaging.
- TROUBLESHOOTING
- Stop using the appliance immediately and unplug the power cord if an abnormal noise, peculiar smell and smoke occur.
○ If the appliance stops running unexpectedly, make sure the power plug is plugged in properly, check if there is no power outage and if the jug is properly installed.
Please contact your local service centre if this product still fails to work after above check.
| Problem | Possible cause | Solution |
| The power indicator light does not go on | The appliance is not (properly) plugged in | Plug the appliance into the mains power supply |
| The indicator light goes on but this appliance does not work | The “Start” button has not been pushed again after the programme setting | Press the “Start/Stop” button after selecting a programme |
| The jug and the cover are not positioned or locked correctly | Reinstall the jug properly onto the motor unit and lock the cover in position | |
| A programme button does not react | The appliance could not automatically reset after a power shortage | Turn off the appliance and re-start after 3 minutes |
| The ingredients are not processed properly | The amount of liquid is not sufficient | Pour liquid to the correct level |
| The volume of ingredients is too high | Adjust recipe or proceed smaller batches | |
| E1, E2, E3, E4 | The pieces of food are too big or too hard | Disconnect from the mains, pour out the food and then cut it into smaller pieces / Reduce the quantity of ingredients processed |
| The volume of ingredients is too high | ||
| Machine failure | Please contact your local service centre | |
| The coupler surface is wet | Dry the coupler surface |
- DISPOSAL
- For proper disposal, please return device to a retailer, a service agent or Rotel AG.
European Directive 2012/19/EC concerning Waste Electrical and Electronic Equipment (WEEE) states that household appliances should not be disposed of using the normal solid urban waste cycle. Exhausted appliances should be collected separately to optimise the cost of re-using and recycling materials comprising the machine, while preventing potential damage to public health and the environment. The crossed-out wheeled bin symbol appears on all products to remind owners of the obligations regarding separate waste collection. Owners should contact their local authorities or appliance dealers for further information concerning the correct disposal of household appliances.
This appliance conforms to the following EU directives:
CE
2014/35/EU (Low Voltage Directive) 2014/30/EU (Electromagnetic Compatibility Directive)
D/F/I/E
• GARANTIE / GARANTIE / GARANZIA / WARRANTY
• 2 JAHRE GARANTIE
• 2 ANS DE GARANTIE
• 2 ANNI DI GARANZIA
• 2 YEARS WARRANTY
○ Warranty commitment
We commit ourselves to repair this device free of charge, should a failure occur within the period of warranty despite proper handling. We repair all defects caused by material or manufacturing faults. The guarantee will be fulfilled either by repairing the device or replacing the defective parts, according to our judgement. A warranty does not cover damages due to wearing parts, damages and defects caused by improper handling or maintenance (such as limescale and commercial use). It will only be granted if either the warranty card stating date of purchase, dealer's stamp and signature, or the purchase receipt is sent with the device to the relevant after-sales service (see address below). Devices shall be returned in their original packaging. Transport costs are to be borne by the purchaser. Remember to specify your address to your sending, as well as a short declaration about the failure, shall the defect not be obvious.
Servicestation:
Service après-vente: Rotel AG