
U452EU1 - Blender ROTEL - Free user manual and instructions
Find the device manual for free U452EU1 ROTEL in PDF.
| Product type | Vacuum blender |
| Brand | Rotel |
| Model | U452EU1 |
| Rated voltage | 220-240 V |
| Rated frequency | 50-60 Hz |
| Rated input power | 800 W |
| Minimum liquid capacity | 250 ml |
| Maximum capacity | Indicated by the "Max" line on the bowl |
| Main functions | Vacuum blending, AUTO function (vacuum + blend 45 s + 1 min), manual function (variable speed and pulse) |
| Vacuum system | Integrated, vacuum time 45 seconds |
| Safety | Automatic stop after 2 min 30, lid lock, very sharp blades – handle with care |
| Cleaning | Do not immerse the central unit; wipe with a damp cloth; blades are not individually removable |
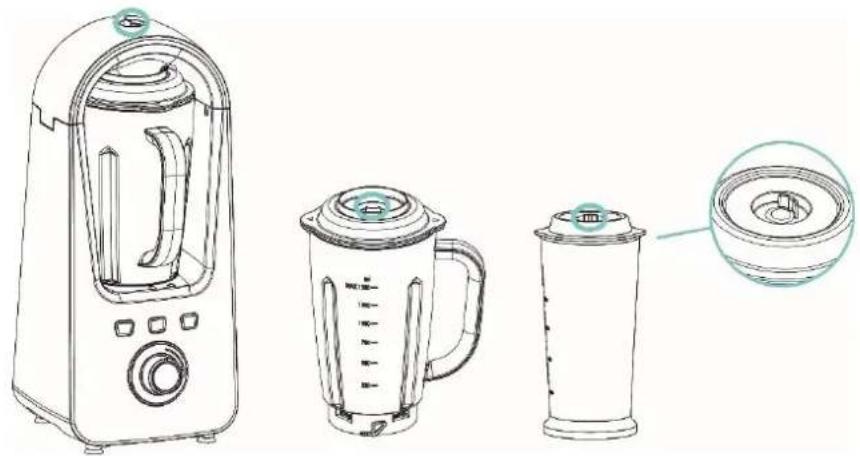
| Included accessories | Main bowl, vacuum storage bowl, lid with valve and gasket, blade disassembly tool |
| Bowl material | Plastic |
| Assembly required | Yes – assemble the blade set, lid with gaskets and valve according to instructions |
| Max continuous use | 3 minutes; let cool for 30 minutes between each cycle |
| Max ingredient temperature | 40 °C |
| Warranty | Free repair during warranty period (see conditions in the manual) |
| Compliance | CE – directives 2014/35/EU and 2014/30/EU |
Frequently Asked Questions - U452EU1 ROTEL
User questions about U452EU1 ROTEL
0 question about this device. Answer the ones you know or ask your own.
Ask a new question about this device
Download the instructions for your Blender in PDF format for free! Find your manual U452EU1 - ROTEL and take your electronic device back in hand. On this page are published all the documents necessary for the use of your device. U452EU1 by ROTEL.
USER MANUAL U452EU1 ROTEL
natural_image
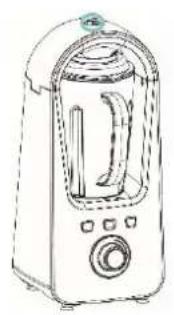
Red and black Roitel brand blender with black handle and control buttons (no visible text or symbols on device body)GEBRAUCHSANWEISUNG
- MODE D'EMPLOI
• ISTRUZIONI PER L'USO
• INSTRUCTIONS FOR USE

Deutsch
Deutsch
-
Vacuum valve
-
Blending jar lid
-
Blending jar lid pad
-
Lid filter
-
Blending jar seal
-
Blending jar
-
Blade base seal
-
Blade set
-
Vacuum valve
-
Storage jar lid
-
Lid filter
-
Storage jar seal
-
Vacuum storage jar
-
Blade disassembly tool
TECHNISCHE DATEN
- Safety instructions....45
• To assemble your vacuum blender 49
Assemble blending jar 49
- Vacuum....50
- Blending....51
AUTO function....51
Manual function....52
- Disassemble your vacuum blender .... 53
Disassembe vacuum storage jar....53
Disassembe blending jar....54
- Important .... 55
- Hints .... 55
• Care and cleaning 55
- Disposal 56
D/F/I/E....57
Garantie / Garantie / Garanzia / Warranty 57
Deutsch
natural_image
Hand holding a tool over a circular mechanical component with a blue X mark (no text or symbols)natural_image
Mechanical assembly diagram showing two views of a mechanical component with arrows indicating assembly direction (no text or symbols)natural_image
Diagram showing a wheel assembly before and after transformation, with no text or symbols present.natural_image
Technical line drawing of a mechanical component with an arrow indicating rotation (no text or symbols)natural_image
Diagram of a mechanical assembly with arrows indicating force or movement (no text or symbols)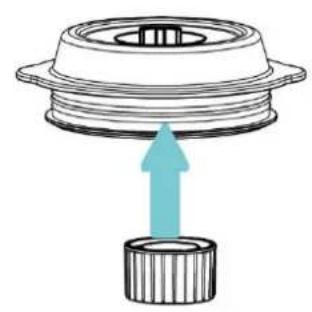
natural_image
Diagram of a mechanical component with a blue upward arrow indicating force or movement (no text or symbols present)
• VAKUUM
natural_image
Line drawing of two identical electronic devices with control knobs and a hand holding a device (no text or symbols)- MIXEN
flowchart
graph TD
    A["Kitchen with handles"] --> B["Shelter with handle"]
    B --> C["Shutter with handle"]
    C --> D["Shutter with handle"]
    D --> E["Shutter with handle"]
    E --> F["Shutter with handle"]
Automatikbetrieb
natural_image
Line drawings of kitchen appliances including a toaster, blender, and blender with no text or symbolsnatural_image
Line drawings of two household appliances: a portable device and a cylindrical container with a green lid (no text or symbols)natural_image
Diagram of a blender with a circular component being turned, showing internal structure and rotation arrow (no text or symbols)natural_image
Diagram of a device being processed from a circular component, showing the shift and rotation arrows (no text or symbols)natural_image
Hand holding a tool over a circular mechanical component with a blue X mark (no text or symbols)natural_image
Two mechanical component diagrams showing top and side views with upward arrows indicating assembly or movement (no text or symbols)natural_image
Diagram showing a wheel assembly before and after transformation, with no text or symbols present.natural_image
Diagram of a blender with a close-up view showing internal components (no text or symbols)natural_image
Diagram of a mechanical assembly with arrows indicating force or movement (no text or symbols)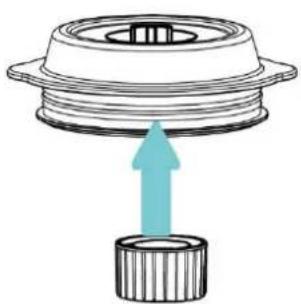
natural_image
Diagram of a mechanical component with a blue upward arrow indicating force or direction (no text or symbols)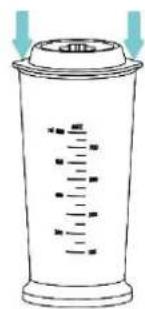
- VIDE
natural_image
Line drawing of two electronic devices with ports and a hand holding a device (no text or symbols)• MÉLANGE
flowchart
graph TD
    A["Kitchen with food being cleaned"] --> B["Hearts clean and soiling"]
    B --> C["Close-up of kitchen using a blender"]
    C --> D["Hand cleaning the kitchen with a spoon"]
    D --> E["Close-up of kitchen using a blender with a spoon"]
    E --> F["Back down in kitchen with a handle and spoon"]
Fonction AUTO
natural_image
Line drawing of a kitchen blender with three different designs (no text or symbols)natural_image
Line drawing of a mobile phone with control panel and keypad (no text or symbols)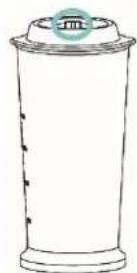
Désassembler le bol
natural_image
Line drawing of a kitchen toaster with handle and front panel (no text or symbols)
natural_image
Line drawing of a blender with a handle and a magnified inset showing the interior scene (no text or symbols)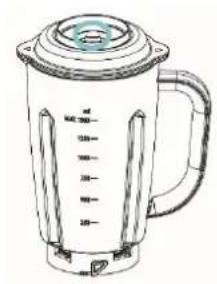
natural_image
Line drawing of a blender with lid and handle (no text or symbols)natural_image
Diagram of a blender with a magnified view showing internal components (no text or symbols)natural_image
Diagram of a device being processed from a circular component, showing the shift and rotation of the lid (no text or symbols present)natural_image
Hand holding a tool over a circular mechanical component with a blue X mark (no text or symbols)natural_image
Two mechanical components with upward arrows indicating assembly or motion, no text or symbols present.natural_image
Diagram showing a wheel assembly before and after transformation, with no text or symbols present.natural_image
Technical line drawing of a mechanical component with an arrow indicating rotation (no text or symbols present)natural_image
Diagram of a mechanical assembly with arrows indicating upward motion (no text or symbols)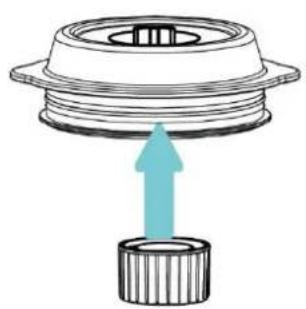
natural_image
Diagram of a mechanical component with a blue upward arrow indicating force or direction (no text or symbols)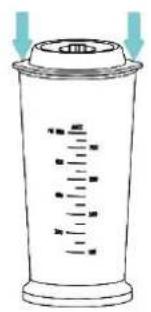
- SOTTOVUOTO
natural_image
Line drawing of a device with a handle and control panel, showing transformation from left to right (no text or symbols)- MISCELAZIONE
flowchart
graph TD
    A["Step 1: Hand tool opening, lid, brush, and blender"] --> B["Step 2: Handle holding, brush, and blender"]
    B --> C["Step 3: Hand tool pressing down, blade, and blender"]
    C --> D["Step 4: Handle holding, blade, and blender"]
    D --> E["Step 5: Handle holding, blade, and blender"]
Funzionalità AUTO
natural_image
Line drawings of kitchen appliances including a toaster, blender, and blender with no text or symbolsnatural_image
Line drawing of a handheld device with control buttons and a screen (no text or symbols)
natural_image
Line drawing of a kitchen toaster with handle and front panel (no text or symbols)
natural_image
Line drawing of a blender with handle and control panel, shown in two views: one showing hand holding blade, the other showing hand holding lid (no text or symbols)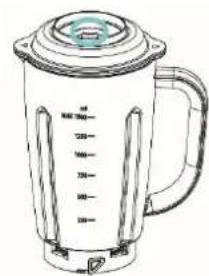
natural_image
Line drawing of a blender with control panel and lid (no text or symbols)natural_image
Diagram of a blender with a circular component being turned, showing internal structure and rotation arrow (no text or symbols)natural_image
Diagram of a device being processed from a circular component, showing the shift and rotation arrows (no text or symbols)Please read all instructions before using the device.
○ This appliance can be used by persons with reduced physical, sensory or mental capabilities or lack of experience and knowledge if they have been given supervision or instruction concerning use of the appliance in a safe way and understand the hazards involved.
○ This appliance must not be used by children. The appliance and its connecting cable must be kept away from children.
- The appliance must be disconnected from the mains during periods of no supervision and prior to assembling, disassembling or cleaning.
○ Ensure that your electricity supply is the same as that shown on the rating label on the base of the appliance.
- Read these instructions carefully and retain for future reference.
○ Remove all packaging and any labels.
- Do not use the vacuum blender continuously for more than 3 minutes.
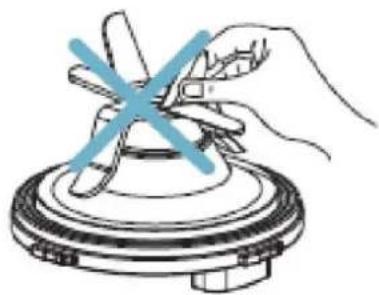
○ The blades are very sharp, handle with care. Always hold the plastic parts rather than the cutting edge when handling and cleaning.
natural_image
Hand holding a tool over a circular mechanical component with a blue X mark (no text or symbols)- Keep hands and utensils away from the blade while blending to reduce the risk of serious personal injury or damage to the vacuum blender.
○ This appliance will be damaged and may cause injury if the interlock mechanism is subjected to excessive force.
Before removing the blending jar: switch off first, wait until the blades have completely stopped.
- Do not operate any appliance with a damaged cord or plug, after a malfunction, or after dropping or damaging the appliance in any way. Return the appliance to the nearest authorised service facility for examination, repair or electrical or mechanical adjustment.
- Never allow the power unit, cord or plug to get wet.
- Do not allow excess cord to hang over the edge of a table or worktop or to touch hot surfaces.
- Never leave the appliance on unattended.
○ Misuse of your vacuum blender can result in injury.
- Never use unauthorised attachments.
- Indoor use only, do not use outdoors. The supplier will not accept any liability if the appliance is subject to improper use, or in the event of failure to comply with these instructions.
- To protect against risk of electrical shock, do not immerse the power unit in water or other liquid. Close supervision is necessary when any appliance is used by or near children.
○ Avoid contact with moving parts.
- The use of attachments not recommended or sold by the manufacturer may cause fire, electric shock or injury.
- Do not attempt to override the interlock mechanism.
- Ensure that the appliance is installed properly before operating the appliance.
- Do not modify the plug in any way.
- Please do not move the unit during operation.
- Please do not use the unit in a location that is unstable.
- Please do not put ingredients of a temperature higher than 40°C into the jars. Doing so may cause injury.
- Never perform no-load running. Please do not use the unit with ingredients amounting to less than 250 ml or exceeding the Max line.

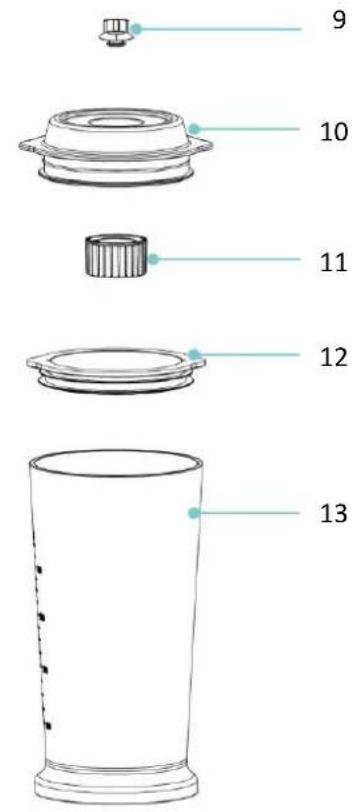
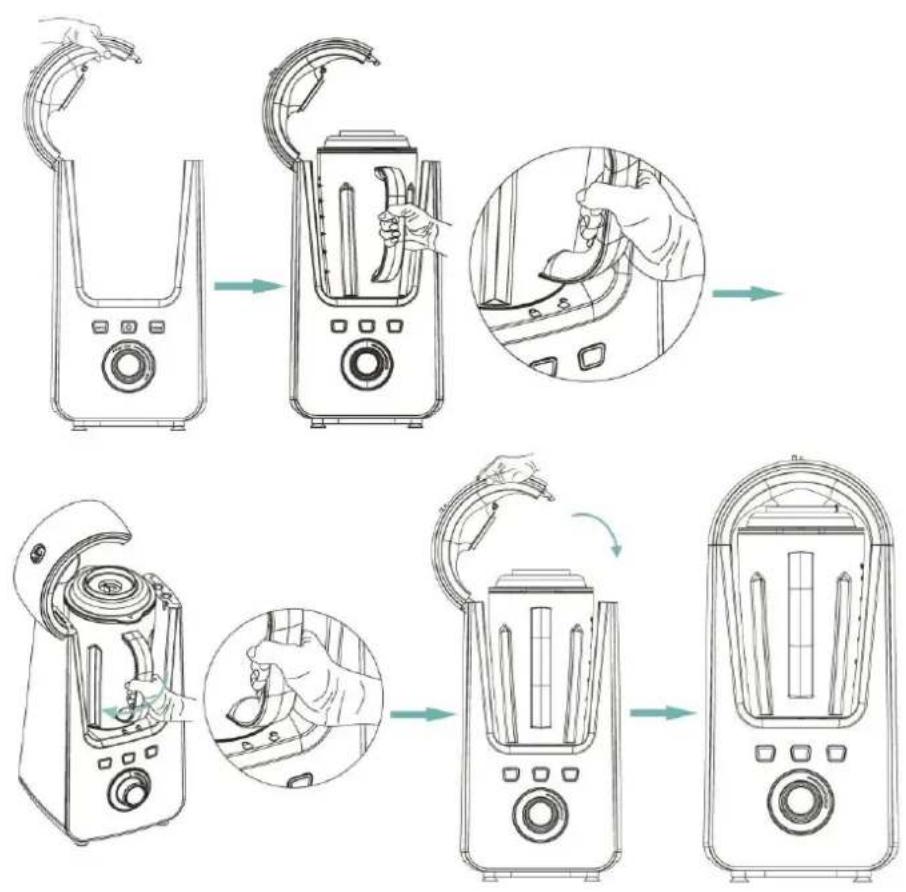
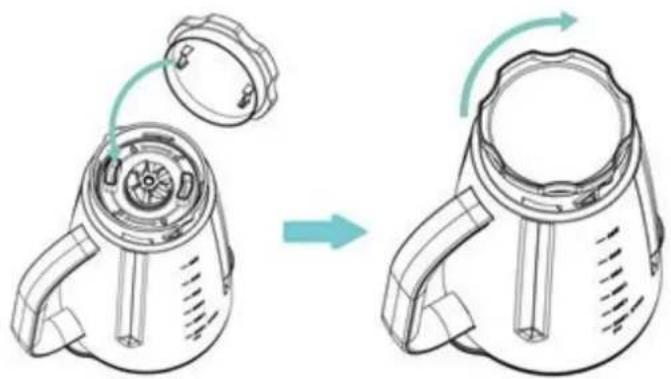
• TO ASSEMBLE YOUR VACUUM BLENDER
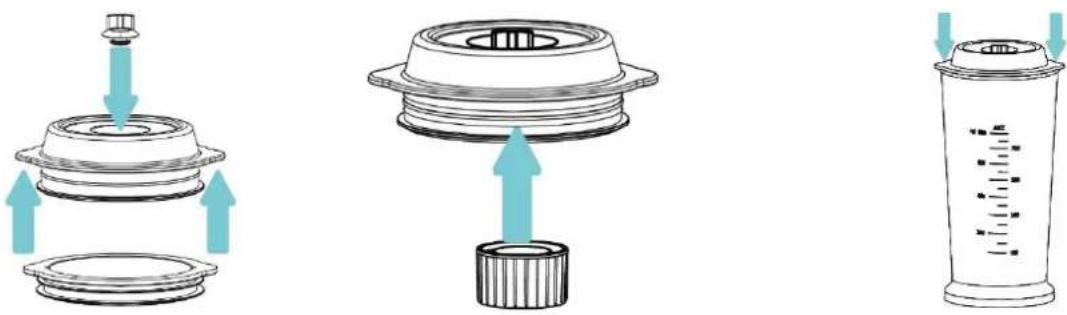
Assemble blending jar
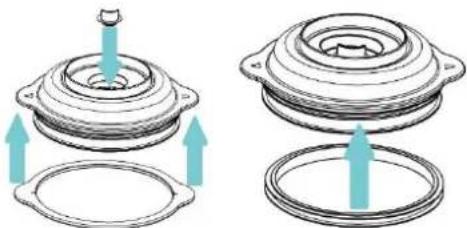
Assemble lid
- Fit the vacuum valve and blending jar lid pad to the blending jar lid first.
- Then fit the blending jar seal to the blending jar lid.
natural_image
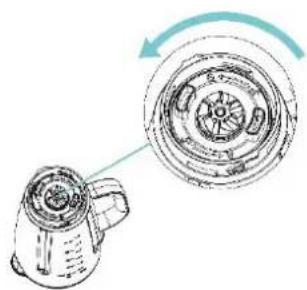
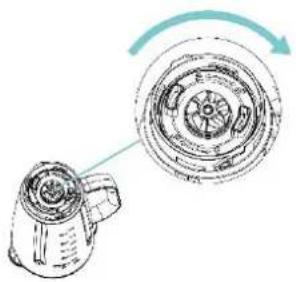
Two mechanical components with upward arrows indicating assembly or motion, no text or symbols present.- Then fit the lid filter by rotating clockwise.

natural_image
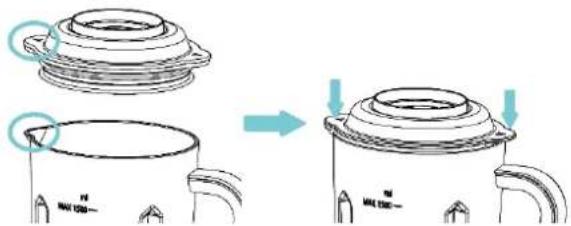
Diagram showing a wheel assembly before and after transformation, with no text or symbols present.- Press the blending jar lid down to the blending jar by aligning the lid tip with the jar spout.
Assemble blade set
- Rotate the blade set anti-clockwise and fit to the blending jar.
natural_image
Technical line drawing of a mechanical component with an arrow indicating rotation (no text or symbols)Assemble vacuum storage jar
- Fit the vacuum valve and storage jar seal to the vacuum storage jar.
- Then fit the lid filter by rotating clockwise.
- Press the storage jar lid down to the vacuum storage jar.
- VACUUM
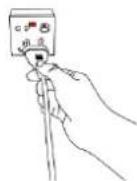
- Connect the plug to the power supply - all indicator lights flash once, then press the power button, the indicator light around the Power button lights up. You can now use the appliance.
○ Fit the vacuum storage jar in place.
- The vacuum blender has a separate vacuum function, programmed to vacuum the blending jar or vacuum storage jar.
- Press the VACUUM button and wait 45 seconds until the indicator light goes out.
NOTE: When the VACUUM program is running, pressing the AUTO button or adjusting the speed knob manually will have no effect.
- The vacuum function can be stopped by pressing the VACUUM button again.
natural_image
Line drawing of two electronic devices with control knobs and a hand holding a tool (no text or symbols)- BLENDING
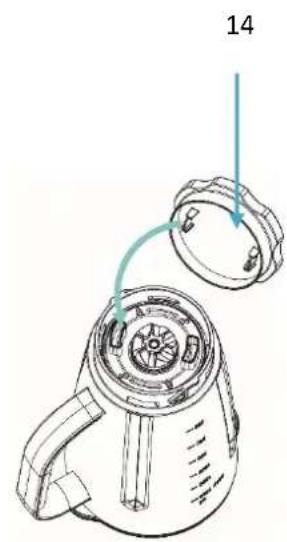
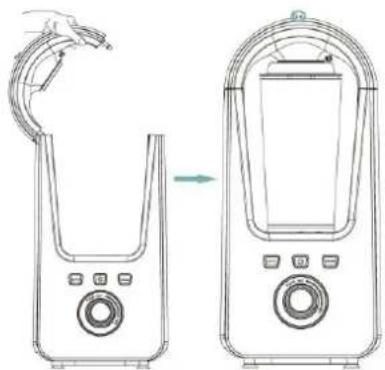
○ Fit the blending jar as per the photos below:
flowchart
graph TD
    A["Kitchen with blender"] --> B["Shelter with handles"]
    B --> C["Hand holding spoon inside fan"]
    C --> D["Shelter with handle and lid"]
    D --> E["Shelter with handle and lid being cleaned"]
    E --> F["Shelter with handle and lid removed"]
AUTO function
- The one click function is an auto feature of the vacuum blender.
- First press the power button, then press the AUTO button once, vacuum and blending will be automatically operated with a program of 45 seconds of vacuum and 1 minute of blending - you are then ready to enjoy your smoothie.
NOTE: When the AUTO program is running, adjusting the speed knob manually will have no effect. - The Auto function can be stopped by pressing the AUTO button again.
Manual function
To blend or grind to your preferred timescale, you can operate the vacuum blender manually.
- Press the VACUUM button and wait 45 seconds until the indicator light goes out.
- Rotate the speed knob anti-clockwise and release quickly to proceed with PULSE motion.
■ Dial the speed knob clockwise to adjust the speed.
NOTE: When the appliance is running at a selected speed, pressing the AUTO button will have no effect.
The appliance will stop working automatically every 2 12 minutes to ensure the safety of the user, please re-select the speed to use continuously. In any event, do not run for more than 3 minutes continuously, and allow to cool for 30 minutes.
• DISASSEMBLE YOUR VACUUM BLENDER
○ Always release the vacuum completely before opening the upper cover, blending jar lid and storage jar lid, otherwise you cannot open them.
natural_image
Line drawing of a kitchen blender with three different designs (no text or symbols)Disassembe vacuum storage jar
- If the vacuum function has been used, release the vacuum to open the upper cover.
- Remove the vacuum storage jar to store in the refrigerator or take away. If the vacuum function has been used, release the vacuum first.
natural_image
Line drawing of a vintage mobile phone with control panel and keypad (no text or symbols)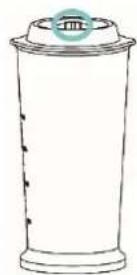
Disassembe blending jar
○ If the vacuum function has been used, release the vacuum to open the upper cover.
- Rotate the blending jar anti-clockwise to remove it.
○ If the vacuum function has been used, release the vacuum to open the blending jar lid.
natural_image
Line drawing of a kitchen toaster with handle and front panel (no text or symbols)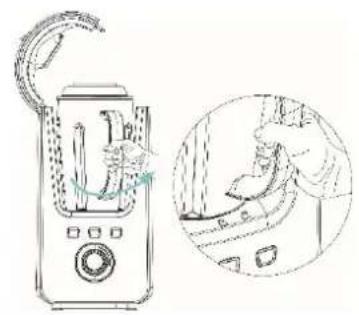
natural_image
Line drawing of a blender with a handle and a magnified inset showing the interior scene (no text or symbols)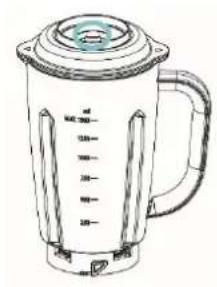
natural_image
Line drawing of a blender with control panel and lid (no text or symbols)○ Empty the blending jar, you can then disassemble the blade set.
natural_image
Diagram of a blender with a magnified view showing internal components (no text or symbols)○ A blade set disassembly tool is used for easy disassembly, it can be used as below:
natural_image
Diagram of a device being processed from a fan or lid, showing the shift and rotation of the component (no text or symbols present)- Tips: It's easier to open the blending jar lid or vacuum storage jar lid if you use one hand to release the vacuum seal and the other hand to open the lid, even if the vacuum function has not been used.
- IMPORTANT
○ If preparing food for babies or young children, always check that the ingredients are thoroughly blended before feeding.
Do not run the vacuum blender continuously for longer than 3 minutes, allow to cool for 30 minutes between each operation.
- Do not operate the vacuum blender if the blending jar is empty.
○ Always allow hot food to cool before processing.
- Do not place any part of the vacuum blender into a microwave.
- HINTS
○ If the blender is overloaded, remove some of the mixture and continue processing in several batches, otherwise you may strain the motor.
Remember that blending hard foods such as coffee beans, spices, chocolate or ice will wear the blades faster.
○ Beware of over-processing some ingredients. Stop and check the consistency frequently.
• CARE AND CLEANING
-
Caution! Danger of injury! The blades are very sharp! Do not touch the blades while cleaning to avoid injury! For safety reason, the single blades are not suitable for removal.
Caution! Danger of electric shock! Before cleaning and removing parts, switch off the electrical appliance and always remove the plug from the mains. Never immerse the appliance in water. The connector parts must not be allowed to get wet. Contact between electrical parts with moisture can cause electric shock or short circuit and damage. -
Do not use sharp detergents or metallic, abrasive objects to clean the unit as the surface of the unit or accessories might become damaged.
■ If necessary, simply wipe the main body with a dry or damp cloth.
■ Store the unit in a dry safe place out of the reach of children.
- DISPOSAL
- For proper disposal, please return device to a retailer, a service agent or Rotel AG.
European Directive 2012/19/EC concerning Waste Electrical and Electronic Equipment (WEEE) states that household appliances should not be disposed of using the normal solid urban waste cycle. Exhausted appliances should be collected separately in order to optimise the cost of re-using and recycling materials comprising the machine, while preventing potential damage to public health and the environment. The crossed-out wheeled bin symbol appears on all products to remind owners of the obligations regarding separate waste collection. Owners should contact their local authorities or appliance dealers for further information concerning the correct disposal of household appliances.
This appliance conforms to the following EU directives:
CE
2014/35/EU (Low Voltage Directive) 2014/30/EU (Electromagnetic Compatibility Directive)
D/F/I/E
• GARANTIE / GARANTIE / GARANZIA / WARRANTY
• 2 JAHRE GARANTIE
• 2 ANS DE GARANTIE
• 2 ANNI DI GARANZIA
• 2 YEARS WARRANTY
○ Warranty commitment
We commit ourselves to repair this device free of charge, should a failure occur within the period of warranty despite proper handling. We repair all defects caused by material or manufacturing faults. The guarantee will be fulfilled either by repairing the device or replacing the defective parts, according to our judgement. A warranty does not cover damages due to wearing parts, damages and defects caused by improper handling or maintenance (such as limescale and commercial use). It will only be granted if either the warranty card stating date of purchase, dealer's stamp and signature, or the purchase receipt is sent with the device to the relevant after-sales service (see address below). Devices shall be returned in their original packaging. Transport costs are to be borne by the purchaser. Remember to specify your address to your sending, as well as a short declaration about the failure, shall the defect not be obvious.
Servicestation:
Service après-vente: Rotel AG
After-sales service:
5012 Schönenwerd
E-mail: office@rotel.ch


- GEBRAUCHSANWEISUNG
- Deutsch
- TECHNISCHE DATEN
- • VAKUUM
- - MIXEN
- Automatikbetrieb
- - VIDE
- • MÉLANGE
- Fonction AUTO
- Désassembler le bol
- - SOTTOVUOTO
- - MISCELAZIONE
- Funzionalità AUTO
- • TO ASSEMBLE YOUR VACUUM BLENDER
- Assemble blending jar
- Assemble lid
- Assemble blade set
- Assemble vacuum storage jar
- - VACUUM
- - BLENDING
- AUTO function
- Manual function
- • DISASSEMBLE YOUR VACUUM BLENDER
- Disassembe vacuum storage jar
- Disassembe blending jar
- - IMPORTANT
- - HINTS
- • CARE AND CLEANING
- - DISPOSAL
- • GARANTIE / GARANTIE / GARANZIA / WARRANTY
- ○ Warranty commitment
Brand : ROTEL
Model : U452EU1
Category : Blender