
620 - Manicure and pedicure set Promed - Free user manual and instructions
Find the device manual for free 620 Promed in PDF.

| Product type | Manicure and pedicure set |
| Brand | Promed |
| Model | 620 |
| Power supply | 100-240 V~, 50/60 Hz, 800 mA (secondary 24 V= 1,250 mA) |
| Rated power | 24 V=, 1,250 mA |
| Speed range | Progressive adjustment up to 20,000 rpm |
| Rotation direction | Left and right, switchable |
| Shank diameter of attachments | 2.32 mm to 2.35 mm (standard dental size) |
| Maximum shank length | 36 mm |
| Handle weight | 75 g |
| Chuck type | Automatic quick clamp |
| Main functions | Manicure, light pedicure, nail care (gels, acrylics), callus removal, nail care |
| Control selector | All in One rotary selector: speed and rotation direction |
| Speed display | 5 LED indicators |
| Safety device | Safety Stop: automatic stop in case of overload |
| Handle maintenance | Wipe with a cloth soaked in alcohol, do not lubricate, do not wash with water |
| Disinfection of attachments | Use Promed Pure ID (ref. 330810) or Promed UC-50 (ref. 330210) |
| Available spare parts | Power supply unit (ref. 290426), handle (ref. 200601) |
| Warranty | 24 months (excluding wear parts and motor) |
| Operating temperature | +10 °C to +40 °C |
Frequently Asked Questions - 620 Promed
User questions about 620 Promed
0 question about this device. Answer the ones you know or ask your own.
Ask a new question about this device
Download the instructions for your Manicure and pedicure set in PDF format for free! Find your manual 620 - Promed and take your electronic device back in hand. On this page are published all the documents necessary for the use of your device. 620 by Promed.
USER MANUAL 620 Promed
DE US IT IT N I BL H SE H
VOR INBETRIEBNAHME
- Date: February 2014, April 2014, June 2014, July 2014
The Ground Truth image displays a single, solid horizontal line. According to Rule 2 (UNDERSCORE & LINE RULES), this is a stylistic or background line, not a placeholder underscore. Therefore, the OCR result must ignore it and output nothing or only meaningful text. The provided OCR content is "____", which consists of four underscores. This is an incorrect interpretation of the line as a placeholder, violating the rule that stylistic lines must be ignored. The OCR has hallucinated placeholder underscores where none exist in the GT. Hence, the result is inconsistent with the Ground Truth.
Board 100% of Uffmann, Limited, 2007, 100
2014.38: 1965.7.10 at end of next 1965.7.10 at 1965.7.10
v.e. 2x letters (no poly, v.e. int) Geopacan lemas/mbapata
Wing in the state of the state of the State of England, and given
the place is over a bily neopland county and may be in the
In unconsolidated yoyers, le monorsely - Impacts in Autologie et rupiah de la
of the 2016, the 2017 and 2018 were the first time of the year.
proble gout (loss) to reverted but less -as applying, trimesting by let applied
Vale is a 210% of the 35% of the 60% of the 75% of the 80% of the 90% of the 100% of the 110% of the 120% of the 130% of the 140% of the 150% of the 160% of the 170% of the 180% of the 190% of the 200% of the 210% of the 220% of the 230% of the 240% of the 250% of the 260% of the 270% of the 280% of the 290% of the 300% of the 310% of the 320% of the 330% of the 340% of the 350% of the 360% of the 370% of the 380% of the 390% of the 400% of the 410% of the 420% of the 430% of the 440% of the 450% of the 460% of the 470% of the 480% of the 490% of the 500% of the 510% of the 520% of the 530% of the 540% of the 550% of the 560% of the 570% of the 580% of the 590% of the 600% of the 610% of the 620% of the 630% of the 640% of the 650% of the 660% of the 670% of the 680% of the 690% of the 700% of the 710% of the 720% of the 730% of the 740% of the 750% of the 760% of the 770% of the 780% of the 790% of the 800% of the 810% of the 820% of the 830% of the 840% of the 850% of the 860% of the 870% of the 880% of the 890% of the 900% of the 910% of the 920% of the 930% of the 940% of the 950% of the 960% of the 970% of the 980% of the 990% of the 1000%.
The following table is provided in the image.
x
A. Power adapter
B. Power adapter plug
C. Power adapter socket
D. Grinding head holder
E. Speed controller
F. Rotation direction switch
G. Rotation speed control/rotation direction control
H. Speed indicator
I. Handpiece holder
J. Release
K. Power plug
DESCRIPTION OF THE UNIT
Please keep this user manual in a safe place!
Please read the user manual thoroughly before using the appliance for the first time.
Thank you for purchasing the Promed 620 manicure and pedicure unit. This device was especially designed and manufactured to ensure the quality of treatment and may be used by both qualified personnel and private individuals after reading these instructions. This unit is only suitable for use with manicures and gentle pedicures (e.g., removal of thickened skin and calluses, cuticle care, nail care, treatment of thickened nails, etc.). We, as the manufacturer, cannot be made liable in any way for injury or damages to people or objects that arise from failure to comply with this warning. The unit is also suitable for use in the area of nail techniques and nail design as well as the handling of all materials used in this area such as gel and acrylic.
We wish you a lot of enjoyment with your new Promed 620 unit. We would like to familiarize you with the unit in the following sections. Please read the user manual thoroughly before using the unit for the first time.
Before operating the unit for the first time, please check that all contents have been delivered and that the line voltage is correct. The supplied power adapter (A) is an electronic power supply unit intended for an operating voltage of 100 V\~ to 240 V\~. Should you require a different plug type for the operation of the device, you can purchase it from Promed. To change the plug type, press the release (J) and pull the power plug (K) from the power supply unit (A). Take the required power plug (K) and push it back into the power supply unit (A).
- The Promed 620 unit, in combination with the grinding heads designed for this unit, is ideal for manicures and gentle pedicures, and is also particularly suitable for use with nail techniques (nail design).
-
The Promed 620 unit uses a high performance motor. The electronic speed control is used to smoothly set the speed of the grinding head. The unit can rotate clockwise or counterclockwise (reversible).
-
The grinding head holder is able to fixate all commercial grinding heads with standardized dental size shafts of 2.32 to 2.35 mm (0.091 - 0.093 inches). Please use only high-quality grinding heads with a rounded shaft end and a maximal shaft length of 36 mm (1.26 inches) to guarantee the longest life possible for the grinding head holder!
- To store the handpiece (F), use only the provided handpiece holder (I).
- Always make sure that the grinding head does not come in contact with other objects when you lay the handpiece down. There is a risk of the shaft becoming compressed and asymmetrical. Asymmetry in the grinding head causes damage to the handpiece!
- Grinding head bits are available at your local specialist retailer or Promed. (www.promed.de).
INFORMATION ON THE UNIT / ACCESSORIES
OPERATING THE UNIT
- To ensure hygienic operation, the grinding heads must be disinfected after use.
- The handpiece may only be disinfected using disinfectant wipes.
• Information about suitable disinfectants and products can be obtained from Promed. For disinfection of instruments and grinding heads:
Promed Pure ID (Product No. 330810)
For disinfection of surfaces and devices:
Promed Pure FD (Product No. 330815)
For disinfection and cleaning of instruments and grinding heads: Promed UC-50 (Product No. 330210)
- If needed, the power adapter (Product No. 290426) and the handpiece (Product No. 200601) can be purchased from Promed separately.
Before you switch the unit on, you must set the rotating speed (rotary knob (G)) to zero.
The power plug is intended as a separator. Make sure that the power plug is plugged into an easily reachable wall socket.
A. Insert the power adapter (A) into the power socket and the power adapter plug (B), on the back of the device, into the provided power adapter socket (C).
B. Insert the plug of the handpiece into the socket (E) on the right side of the device.
C. Select a suitable grinding head. Insert the grinding head into the grinding head holder (D) at the front of the handpiece. The mechanism locks automatically as soon as the grinding head starts to rotate. Never use force to remove or insert a grinding head! Grinding heads with a shaft diameter of 2.32 mm to 2.35 mm (0.091 to 0.093 inches) fit exactly into the grinding head holder without you having to use excessive force.
OPERATING THE UNIT
To remove a grinding head, switch off the device with the rotation switch (G) (middle position), making sure that the rotation switch (G) clearly locks into place. Now you can remove the grinding head by simply pulling it out.
D. Control of the rotation direction and speed:
1. Selection of the rotation direction:
You make this selection by turning the rotation switch (G) to the left or right.
Counterclockwise: the device rotates backwards.
Clockwise: the device rotates forward.
2. Selection of speed:
The speed is regulated by turning the rotation switch (G) to the left or to the right. The more you turn, the higher the rotation speed. The selected speed is displayed by the speed indicator (H).
3. Indication of speed:
The speed indicator (H) is to the right of the rotation switch (G). It displays the selected speed using 5 LED lights. If all lights are flashing, the device runs at the highest speed.
E. Before the first use, make sure that you let the handpiece run for about 30 minutes at approx. 8.000 rpm (2 LED lights of the speed indicator (H) should flash). This is necessary to bed in the carbon brushes of the motor.

Note:
A different running noise between clockwise and counterclockwise rotation is normal and caused by bedding in of the carbon brushes or by running in of bearings.
OPERATING THE UNIT
SPECIAL QUALITY FEATURES
In cases of malfunctioning:
- Check that the power supply is correct.
- Check whether the handpiece is connected correctly to the unit.
- Check the response of the safety stop on the device by setting the rotation switch (G) to zero (middle position) and then starting the device again.
- If the problems have still not been solved after following these steps, please consult your service center immediately.
Quick chuck:
The quick chuck in the grinding head holder allows you to change grinding heads, easily, quickly and smoothly. The shaft locks automatically as soon as the grinding head starts to rotate.
All-in-one control knob:
For ease of use, you can regulate both direction and speed of rotation with just the one control knob.
Safety Stop:
If the device develops excessive speed and pressure during grinding, the electronics will respond by switching off the device. In this case, you must set the rotation switch (G) of the device to zero (middle position) and start the device again.
MAINTENANCE TIPS
A. Keep the inner parts of the handpiece as free as possible from dust and grinding residue.
B. Remove dirt from the outer surface of the handpiece with a cloth moistened with alcohol. Prevent moisture from entering the unit.
C. Only use grinding heads with a dental standard size of 2.32 - 2.35 mm (0.091 - 0.093 inches) and avoid using rusted or damaged grinding heads. Their false usage may lead to excessive wear and tear in the ball bearings. Adhere to the safe speed and the safety measures stipulated by the manufacturer.
D. Do not expose the handpiece to strong knocks as this may damage the ball bearings. If the handpiece should fall down, check whether the grinding head is bent. Pay closer attention to noise and/or heat generation. Send the handpiece immediately in for repair should it be damaged.

SAFETY INSTRUCTIONS
Please pay attention to the following before first time operation:
Never place the unit in direct contact with fire, gas, oxygen or hot objects such as hot plates.
Please observe the following during operation:
A. The handpiece may only be connected to the unit included in the delivery contents.
B. Grinding heads to be used:
- Standardized dental size: 2.32 - 2.35 mm / 0.091 - 0.093 inches.
- Only use centered grinding heads with a rounded shaft end.
• The use of rusted or bent grinding heads is not permitted.
C. Use the speed controller carefully.
D. Switch the unit off before you change the direction of rotation.
E. Before you switch the unit on, you must set the rotating speed (rotary knob (G)) to zero.
F. Appliance power supply: 100 V\~ or 240 V\~.
G. Switch the unit off before you change the grinding head.
H. Take every precaution possible to ensure that the unit does not fall down or get damaged in any other way.
1. If problems do arise with the handpiece, take it immediately to get it repaired.
J. Do not lubricate or wash the handpiece.
K. Do not switch the unit on while the chuck is opened.
L. Place the test grinding head in the chuck when storing the handpiece.
M. Only for home use.
N. Scrupulous supervision is required when the device is being used in the vicinity of children.
⚠ SAFETY INSTRUCTIONS

DANGER!
- Do not place the unit in direct contact with water or other fluids.
- Never place or use the unit in a wet or moist environment.
- Do not touch the unit with wet hands.
- Only operate the unit with the specified line voltage.
- It is not permitted to use the unit outdoors.

WARNING!
• Make sure that children do not play with the device.
- Never leave the unit unattended when children or inexperienced persons are in its vicinity.
- Only use the unit for the applications described in this manual.
- Only use attachments and accessories from the manufacturer.
- Never use the unit after the electrical lead has been damaged,
when the unit has fallen down or when it has come in contact with water.
- This unit is not designed to be used by people (including children) who have limited physical, sensory, or intellectual abilities or who do not have sufficient experience and/or sufficient knowledge. This does not apply if these people are supervised by a person responsible for their safety or receive instructions from them on how to use this unit.
- Never let children play with the packaging material; there is a risk of suffocation.
- An electrical appliance is not a toy. Children do not recognize the risks that could develop when using electrical appliances. Therefore, operate and store the unit out of the reach of children.
- Do not place or use the unit on hot surfaces or near naked gas flames to ensure that the casing does not melt.

SAFETY INSTRUCTIONS
- Never let the unit come into contact with water. Use a moist cloth to clean the unit. Do not use solvents.
- Never carry or pull the unit by the power cord. Use the plug to pull the power cord out of the wall socket. Do not pull on the power cord itself.
- Do not pull the power cord over sharp edges, wedge it in between objects, hang it down or position or hang it over hot objects (e.g., hot plates) or naked flames. Protect the power cord from heat or oil.
- Only use extension cords when you have satisfied yourself beforehand that they are not defect or damaged.
- If the unit's power cord should become damaged, always replace it with a new one. (Available in electrical specialist stores).
- Do not store the unit near a wash basin or bath tub as there is the danger that the unit may fall or be pulled into the wash basin or the bath tub.

- To avoid all risks of injury, blockage or damage to the unit, make sure that the unit does not come into contact with clothing, cords, shoelaces, bristles, wires, threads, etc. when in operation.

Note:
The AC adapter may become slightly warm. This does not indicate a malfunction. The device can be used easily.
SERVICE
D ISPOSAL
Your customers will definitely be expecting you to deliver a professional result. This is only possible with an appliance that is neither defect nor damaged. Therefore, take advantage of our service and have your appliance regularly examined by our specialists. Send in your appliance to Customer Service every 12 months at the latest. We can give you an estimate of the cost (total cost: 19.00 € net) that will be accounted for during the service of the device (total cost: 29.00 € net + material costs).
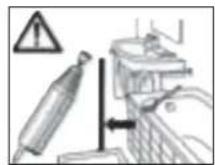
Power tools, accessories, and packaging should be recycled in an environmentally suitable manner.
Only for EU countries:
tools must be collected separately and recycled in an environmentally suitable manner.
This symbol indicates that disposal of this product in the domestic waste is not permitted within the EU. Waste devices contain valuable recyclable material that should be recycled. Recycling also prevents uncontrolled waste disposal from damaging the environment and human health. Therefore, please dispose of all waste devices in the appropriate collection systems or send the device to the place where you bought the device for disposal. They will then recycle the device.
WARRANTY
This unit has been manufactured with the utmost of care and has been examined in detail before leaving the factory. We therefore provide a warranty of 24 months after the date of purchase when presented with the warranty card issued with this appliance, in accordance with the following conditions.
- Within the warranty period, we will replace all defect parts of the appliance free of charge, including labor costs for repairs under warranty, in cases of verifiable faults in material or manufacture that have occurred with correct usage and have been identified during the warranty period.
- This warranty is void when the unit has been improperly used (e.g., connection to unsuitable sources of electricity, breakage), the unit has been tampered with (e.g., opening the unit's casing), and when spare parts have been used that have not been approved of by Promed. Parts subject to wear are exempt from the warranty. Appliance motors and mobile parts are not included in the warranty.
- The warranty period begins on the date of purchase. Warranty
claims do not affect the warranty duration. Warranty claims must be lodged within the warranty period. Claims arising after cessation of the warranty period cannot be considered.
- The warranty only comes into effect within the scope of these warranty conditions when the date of purchase has been confirmed by the stamp/ signature of the dealer on the warranty card.
- In cases of warranty or repair claims, please post the complete appliance with the completed warranty card to the customer service point responsible for you. The warranty card can be found at the end of this user manual.
- We reserve the right to make technical and optical changes as well as changes to the equipment!
- The following information is vital for problem-free processing:
- Original sales slip/receipt or dealer's stamp with the date of purchase
- Defect detected / Completed Service Repair Order (the device is attached)
- Unit name / type
AVANT LA MISE EN SERVICE
INFORMATIONS PRODUIT/ACCESSOIRES
INFORMATIONS PRODUIT/ACCESSOIRES
MISE EN SERVICE DE L'APPAREIL
Promed Pure FD (codice art. 330815)
⚠️ VEILIGHEIDSVOORSCHRIFTEN

GEVAAR!
Promed Pure FD (Apt.-N° 330815)
Promed Pure FD (art-nr 330815)
All in One vridreglage:
Symbol for protection class II appliances
The symbol corresponds to symbol 5172 of the EN 60417-1:2000 Standard. The appliance is double insulated as a protective measure. This prevents conductive parts of the appliance from becoming impaired, something that could lead to malfunctioning of the basic insulation voltage.
Symbol for Class III appliances
The symbol corresponds to the symbol 5180 of the EN 60417-1:2000 standard. The device has a protective insulation that prevents damage to conductive parts of the device, which may lead to a malfunction in the basic insulation voltage. The Class III equipment is fitted with a safety transformer and operates on safety extra-low voltage of less than 120V mm.
Symbol for WARNING! Indicates sections of the user manual that are relevant for safety!
The symbol corresponds to symbol 0434 of the DIN ISO 7000:2008 Standard. Instructions for an appliance, system or accessory that contain important information for the user that are relevant for safety.
Pay attention to the symbol for the user manual!
The symbol corresponds to the symbol 1641 in the DIN ISO 7000:2008 Standard. It is imperative that the manual be read before using the unit.
EXPLICATION DES SYMBOLES
FÖRKLARING AV SYMBOLERNA
MERKKIEN SELITYKSET
US | The unit is equipped with radio
interference suppression in accordance with
the EC Directive No. 87/308/EEC. It is
designed for operation with a line voltage of
100-240V\~, 50 / 60 Hz. CE in accordance
with EC Directive 2006/95/EEC,
2004/108/EEC, 2002/95/EEC,
1907/2006/EEC and 2005/69/EEC.
Furthermore, the device fulfills the
requirements of the standards:
EN 60335-1:2002 +A11:2004 +A1:2004
+A12:2006 + Cor.:2006 + A2:2006
+Cor.:200701 +Cor.:200702 +A13:2008
+Cor.:2009 +Cor.:2010 +A14:2010
DIN EN IEC 60335-2-23:2003 +Cor. 1:2004
+Cor. 2:2008 +A1:2008 +Cor. 3:2007;
EN 60335-2-23:2003 +A1:2008 +A11:2010
EN 55011:2007
EN 550141:2010
EN 61000-4-2:2009
EN 61000-4-4:2005
EN 61000-4-5:2007
EN 61000-4-6:2009
EN 61000-4-11:2005
Adopter:
EN 60950-1:2001
IEC 60950-1:2001+A11:2004
with CB-report
UL 60950-1:2003
CAN/CSA-C22.2 Nr.60950-1:2003
AS/NZS 60950-1:2003
2006/95/EEC, 2004/108/EEC,
2002/95/EEC, 1907/2006/EEC
et 2005/69/EEC.
CE 2006/95/EEC, 2004/108/EEC,
2002/95/EEC, 1907/2006/EEC
2005/69/EEC.
CE 2006/95/EEC, 2004/108/EEC,
2002/95/EEC, 1907/2006/EEC y
2005/69/EEC.
2006/95/ETY, 2004/108/ETY
2002/95/ETY, 1907/2006/ETY
ja 2005/69/ETY.
Manicure and pedicure unit
Speed:
Continually adjustable up
to 20.000 rpm.
Direction of rotation:
Clockwise and counterclockwise
Power supply:
100 - 240V\~, 50 Hz / 60Hz, 800mA
sec. 24V=1.250 mA
Energy consumption with zero
loading
0.27 W
Average efficiency when
operating:
83,59 % Level IV
Handpiece:
Particularly light plastic handpiece,
75 g (2.65 ounces) in weight
Plugs are available for the UK,
Australia, USA and other countries
Type d'appareil :
Only transport in the original packaging.
Transport and storage temperature: +5°C - +50°C (+41°F to +122°F)
Operating temperature: +10°C - +40°C (+50°F to +104°F)
Relative humidity: 30% to 75% non-condensing
Atmospheric pressure: 700 to 1.060 hPa
An abrupt change in temperature is to be avoided as condensation may arise in the unit. Only operate the unit after the temperature has been equalized.
US I The power supply unit complies with the Ecodesign Directive (ErP) No. 2009/125/EEC requirements for external power supply units and the requirements of phase 1 and 2 of the EC Directive 2009/125/EEC.

- VOR INBETRIEBNAHME
- DESCRIPTION OF THE UNIT
- INFORMATION ON THE UNIT / ACCESSORIES
- OPERATING THE UNIT
- Selection of the rotation direction:
- Selection of speed:
- Indication of speed:
- Note:
- SPECIAL QUALITY FEATURES
- In cases of malfunctioning:
- Quick chuck:
- All-in-one control knob:
- Safety Stop:
- MAINTENANCE TIPS
- SAFETY INSTRUCTIONS
- Please pay attention to the following before first time operation:
- Please observe the following during operation:
- ⚠ SAFETY INSTRUCTIONS
- DANGER!
- WARNING!
- SERVICE
- D ISPOSAL
- Only for EU countries:
- WARRANTY
- AVANT LA MISE EN SERVICE
- INFORMATIONS PRODUIT/ACCESSOIRES
- MISE EN SERVICE DE L'APPAREIL
- ⚠️ VEILIGHEIDSVOORSCHRIFTEN
- GEVAAR!
- All in One vridreglage:
- Symbol for protection class II appliances
- Symbol for Class III appliances
- Symbol for WARNING! Indicates sections of the user manual that are relevant for safety!
- Pay attention to the symbol for the user manual!
- EXPLICATION DES SYMBOLES
- FÖRKLARING AV SYMBOLERNA
- MERKKIEN SELITYKSET
- Speed:
- Direction of rotation:
- Power supply:
- Energy consumption with zero
- loading
- Average efficiency when
- operating:
- Handpiece:
- Type d'appareil :
Brand : Promed
Model : 620
Category : Manicure and pedicure set