
Pixma TS9551C - Printer CANON - Free user manual and instructions
Find the device manual for free Pixma TS9551C CANON in PDF.
| Product type | Multifunction inkjet printer |
| Brand | Canon |
| Model | Pixma TS9551C |
| Dimensions (approx.) | Approx. 37 x 32 x 14 cm (W x D x H) |
| Weight (approx.) | Approx. 8.2 kg |
| Power supply | 100-240 V AC, 50/60 Hz |
| Power consumption | Approx. 21 W (printing), 0.3 W (standby) |
| Main functions | Print, copy, scan, Wi-Fi, wireless printing, memory card support |
| Print resolution | Up to 4800 x 1200 dpi |
| Print speed (approx.) | 15 ipm black, 10 ipm color |
| Paper capacity | Cassette: 100 plain sheets; rear tray: 10 photo sheets |
| Supported paper types | Plain paper, photo paper, envelopes |
| Connectivity | Wi-Fi (802.11 b/g/n), USB, PictBridge (memory card) |
| Ink cartridges | 4 cartridges (black, cyan, magenta, yellow) - model PG-560/CL-561 |
| Maintenance and cleaning | Clean with a soft, dry cloth; avoid solvents. Head cleaning via software |
| Safety | Watch fingers when closing the cover; do not block ventilation openings |
| Spare parts and repairability | Replaceable ink cartridges; integrated print head; contact Canon support |
| Box contents | Printer, power cord, setup ink cartridges, CD-ROM, startup manual |
| Warranty | Standard manufacturer warranty (see manual) |
| General information | Manual in French available; compatible with Windows, macOS, iOS, Android |
Frequently Asked Questions - Pixma TS9551C CANON
User questions about Pixma TS9551C CANON
0 question about this device. Answer the ones you know or ask your own.
Ask a new question about this device
Download the instructions for your Printer in PDF format for free! Find your manual Pixma TS9551C - CANON and take your electronic device back in hand. On this page are published all the documents necessary for the use of your device. Pixma TS9551C by CANON.
USER MANUAL Pixma TS9551C CANON
Read Safety and Important Information (addendum) first.
Instructional Videos
Instructions video
Anleitungsvideos
Instructievideo's
Video informativi
Videos instruetionais
Videos instructivos
Eknaideutko bivteo
Instruktionsflmer
Instruksjonsvideoer
Instruktionsvideoer
Ohjevideot

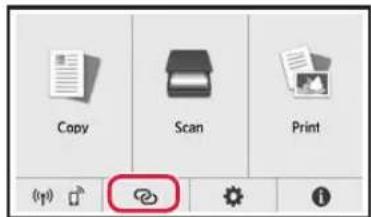
Setting up the printer

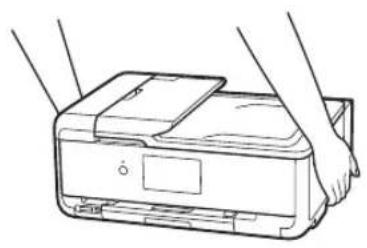
Web Setup
http://ij.start.canon

1.Box Contents

Power cord
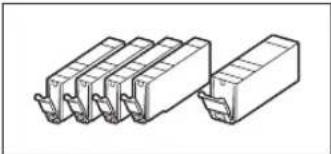
Ink tanks for setup

- Setup CD-ROM
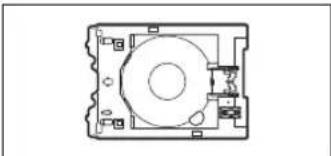
Multi-purpose tray The multi-purpose tray is attached to the underside surface of the cassette.
Safety and Important Information
Getting Started (this manual)

2. Removing Packing Materials
1 Remove and dispose of the packing materials from the device.
- Operating the printer while the orange tape and protective film are still on it causes malfunctions. Be sure to remove them.
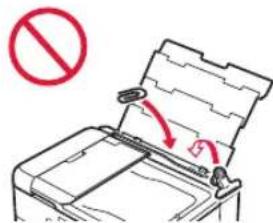
2 Open the scanning unit / cover and remove the orange tape.
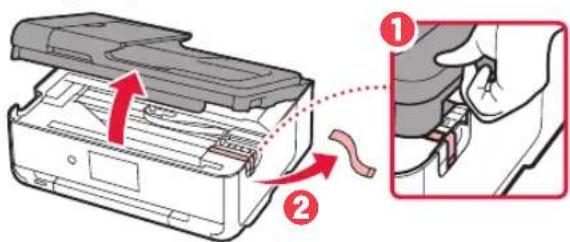
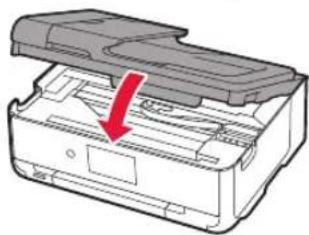
3 Close the scanning unit / cover.

Caution
Watch your fingers.
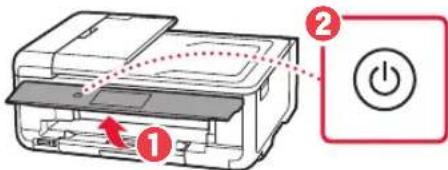
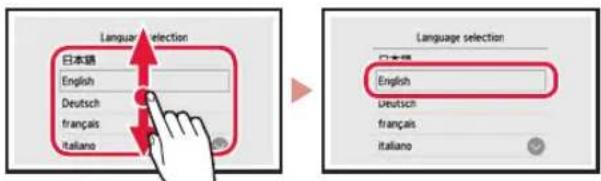
3. Turning on the Printer

1 Connect the power cord.
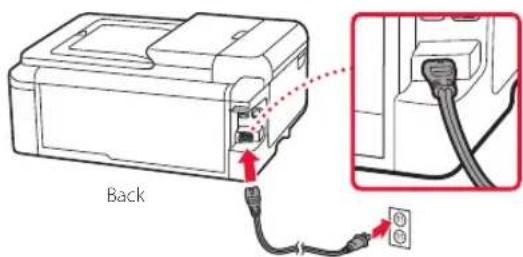

Important
At this time, do not connect any other cables.
2 Open the operation panel and press the ON button.
3 Scroll and tap to select your language, and then tap OK.
4. Installing the Ink Tanks

1 Open the scanning unit / cover.
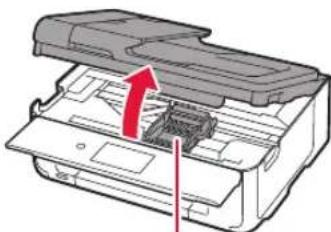

Caution
Do not touch the print head holder until it stops moving.
Setting up the printer
2 Remove the tape and film on the ink tanks.
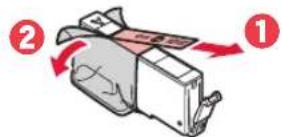
- Check that no tape is left over.
3 Slowly remove the orange cap.

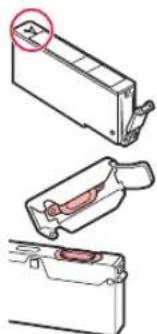
Important
-
Do not push both sides of the ink tank with the Y-shape air hole blocked.
-
Do not touch the red areas shown in the figure.
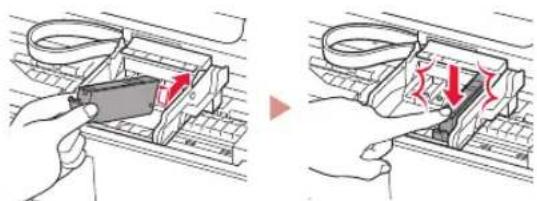
4 Install the ink tanks.
- Insert the ink tank into the print head and press it from above until it clicks.
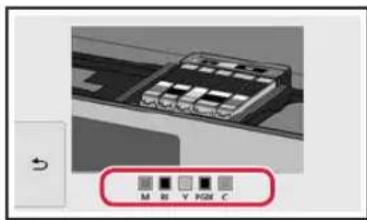
5 Make sure that the color of the ink tank you installed appears on the screen.
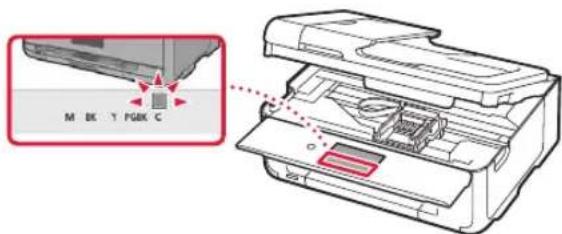
Important
If the color is not displayed on the screen even though you have installed the ink tank, the color of the ink tank may be wrong or you may have installed an ink tank, such as one with a different model number, that is not supported by this printer. Either install an ink tank for the correct color or use the provided ink tank for setup.
6 Repeat steps 2 through 5 to install all the ink tanks.
Make sure that all the colors appear.
7 Close the scanning unit / cover.
- When you close the scanning unit / cover, the internal operations start.
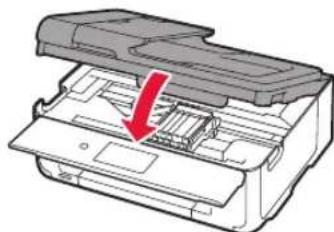
Cau
Watch your fingers.
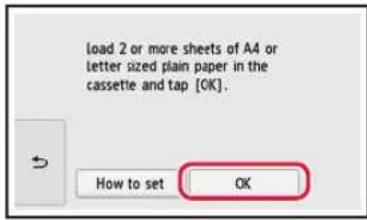
5. Loading Paper
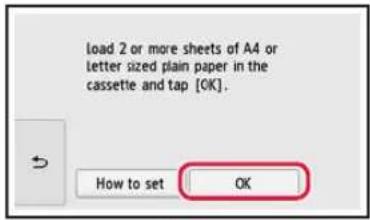
1 Tap OK.

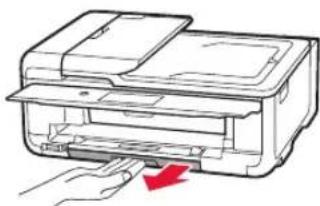
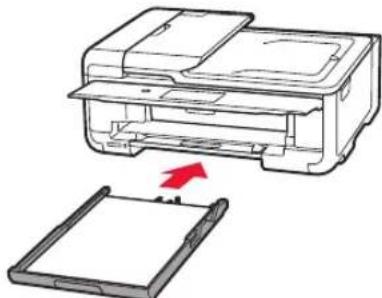
2 Pull the cassette out of the device.
3 Slide apart the paper guides.
- Slide the right paper guide to the right edge. Align the front paper guide with the LTR or A4 mark.

4 Load paper.
- Load plain LTR or A4 size paper with the print side facing down.
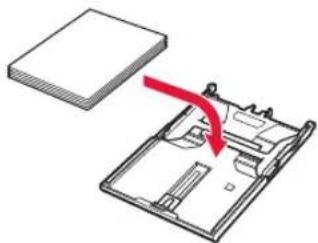
- Place the paper against the front paper guide, and align the right paper guide to the width of the paper.
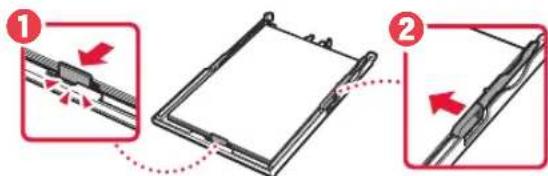
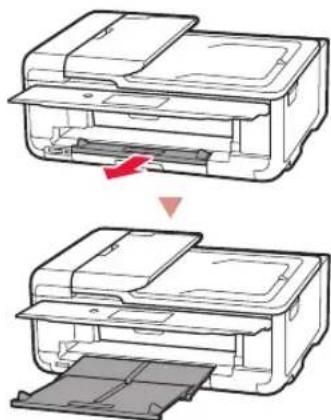
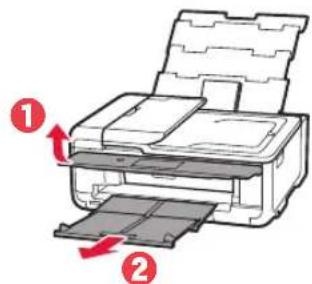
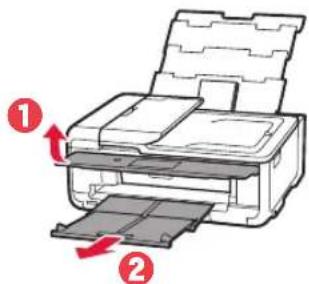
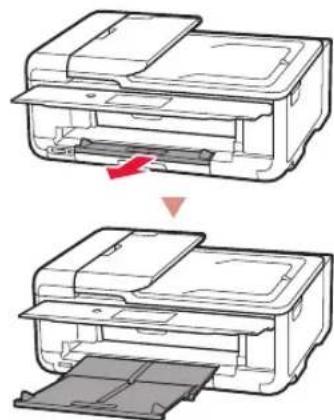
5 Load the cassette.

6 Pull out the paper output tray.
7 Tap OK.
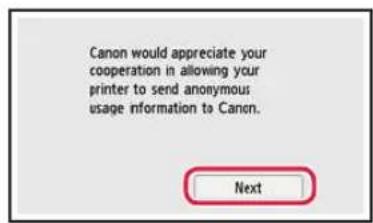
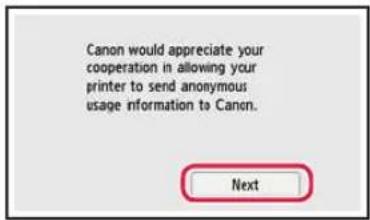
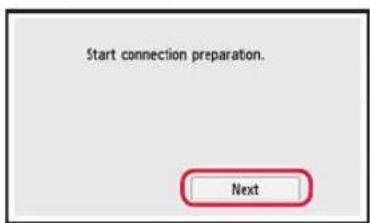
8 Tap Next.
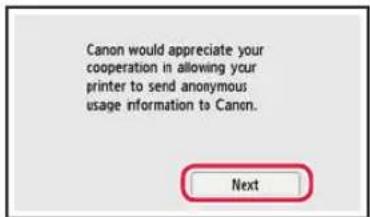
- Next, follow the onscreen instructions to continue operations. During these operations, you will need to make selections related to sending information. Read "Sending Information To Canon" in Safety and Important Information.
9 Tap Next.
Setting up the printer
6-a
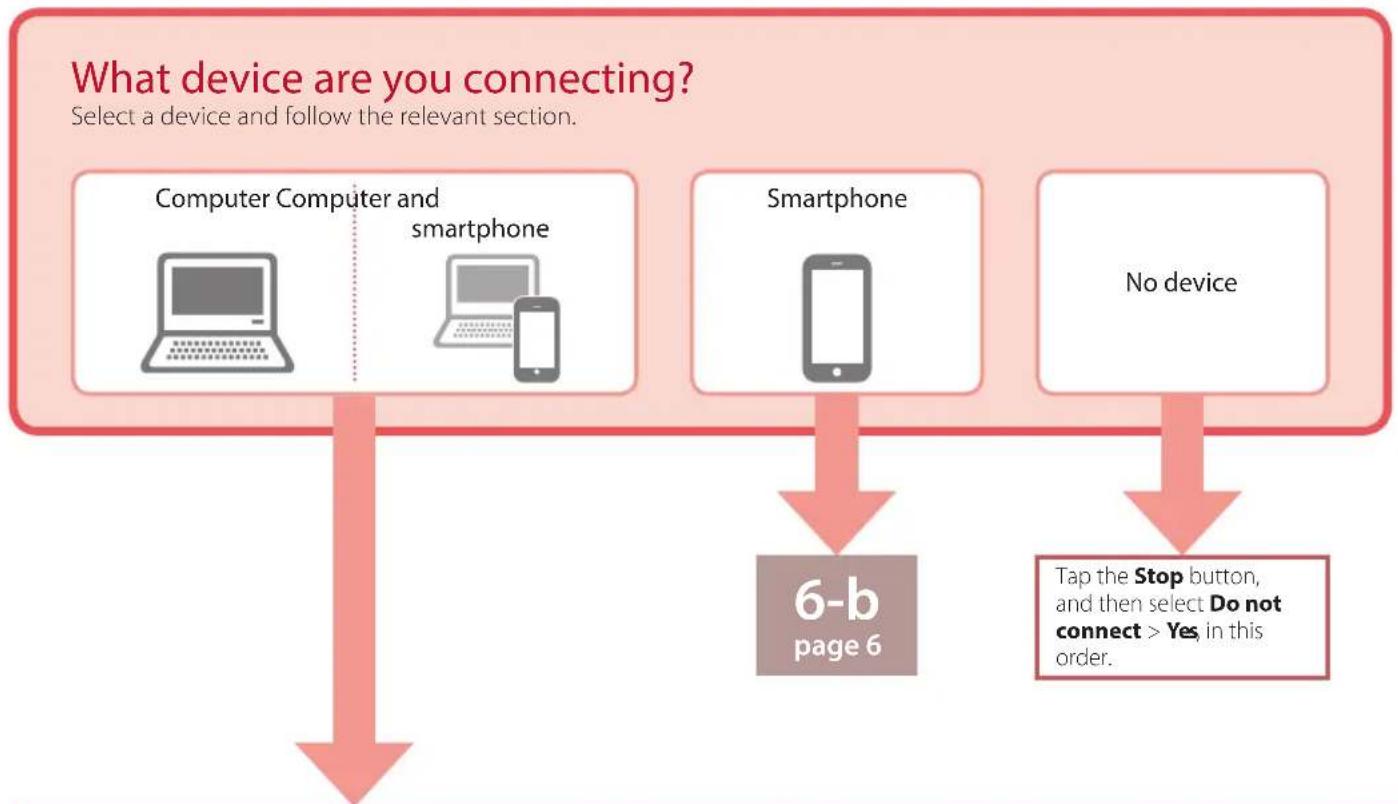
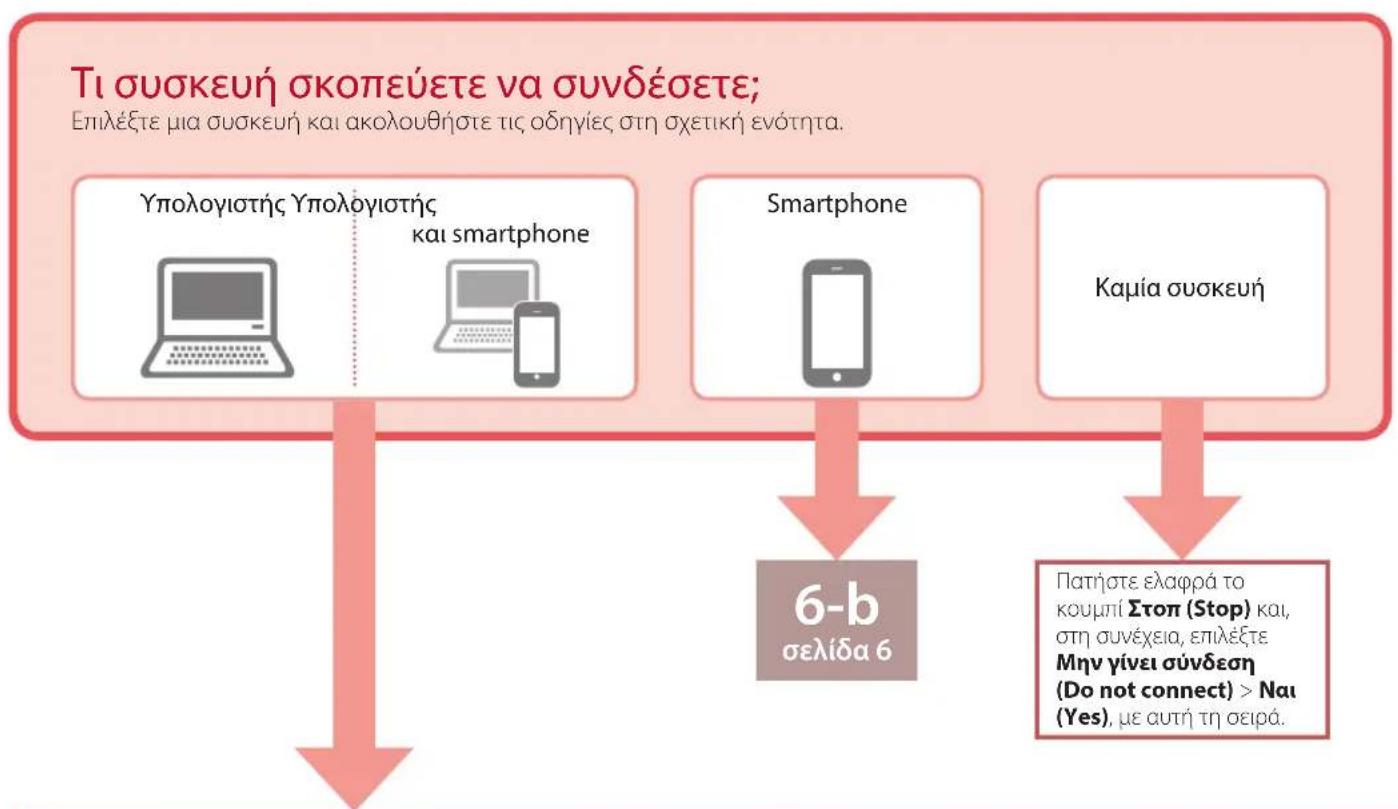
Connecting to a Computer
If you are using multiple computers, perform these steps on each computer. There are two methods, "A Online Setup" and "B ng the Setup CD-ROM (Windows Only) Provided".


Online Setup
1 Access the Canon website from a computer.

2 Select Set Up.
3 Enter your printer's model name and click Go.
4 Click Start.
5 Click If you have already prepared your printer, go to Connect.
Note When you are using a computer with Windows (except for Windows 10 S) or macOS, proceed to the next step. When you are using a computer with another OS, continue the setup by following the on-screen instructions.
6 Click Download.
The setup file is downloaded to your computer.
7 Run the downloaded file.
8 Proceed to step 9 on page 5.

Using the Setup CD-ROM (Windows Only) Provided
1 Insert the Setup CD-ROM into your computer.

2 Follow the instructions for your version of Windows.
Windows 10/Windows 8.1
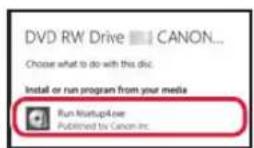
1 Click on the following message when it appears on the right-hand side of your computer screen.


Note
If the message does not appear (or is no longer visible), click the File Explorer icon in the taskbar. On the left-hand side of the window, click This PC. Double click the CD icon that is displayed on the right-hand side (when the content of the CD is displayed, and then double click Msetup4.exe). Proceed to 3.

Click Run Msetup4.exe.

3 If the User Account Control dialog box appears, click Yes.

Click Start Setup.
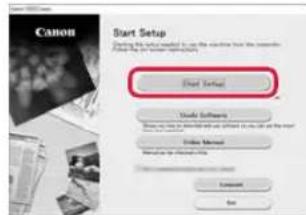
10 Follow the on-screen instructions.
These operations may take some time.
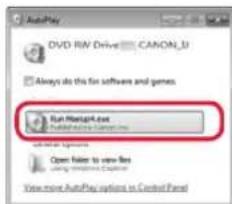
Windows 7
Click Run Msetup4.exe.
- When the AutoPlay screen appears, click Run Msetup4.exe.
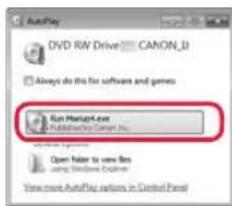

If the AutoPlay screen does not appear, in the Start menu, click Computer. On the right-hand side of the window, double click the CD icon (when the content of the CD is displayed, double click Msetup4.exe).
If the User Account Control dialog box appears, click Continue.

Proceed to step 9 below.

When the following screen appears, click Exit.
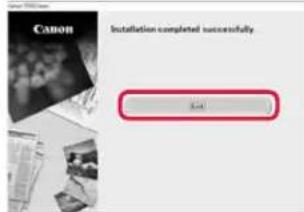
Your printer is now connected to your computer. To connect a smartphone as well, see "6-b. Connecting to a Smartphone" on page 6.
6-b
Connecting to a Smartphone
If you are using multiple smartphones, perform these steps on each smartphone.

Prepare the following before starting.
1 Enable the Wi-Fi setting on your smartphone.
2 Connect your smartphone to the wireless router (if you have a wireless router).
See your smartphone and wireless router manuals regarding these procedures for more details.
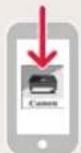
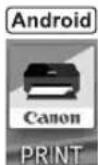
1 Install the "Canon PRINT Inkjet/SELPHY" app on your smartphone.
iOS
Search for "Canon PRINT" in the App Store.
Android
Search for "Canon PRINT" in Google Play.


Note
You can also access the Canon website by scanning the QR code shown on the right to download the app.
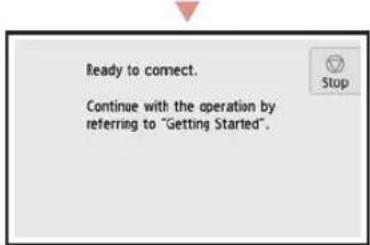
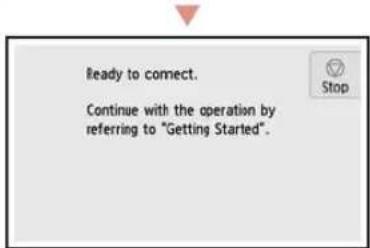
2 Check the printer's screen as you proceed through the steps.
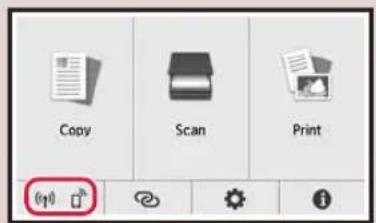
If (appars,
If does not appear,

"Ready to connect." D

Note
The printer's screen turns off when the printer is idle for 10 minutes. Tap the touch screen to turn on the screen.
If appears, The printer cannot communicate by Wi-Fi connection. For details, see "Frequently Asked Questions" at "http://ij.start.canon".

3 Open the installed app.

4 Follow the on-screen instructions to add your printer.
5 Check that the following screen appears.

Your printer is now connected to your smartphone. To print photos, see "Loading Photo Paper" on page 8.

Procedures vary for iOS and Android. Follow the instructions for your operating system.
iOS
3 Tap Settings on your smartphone's home screen, and tap Canon_ij_XXXX in the Wi-Fi settings.
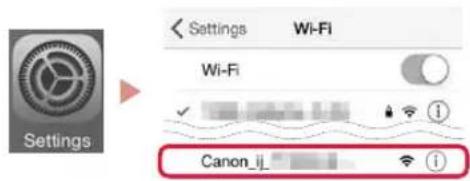
Note
If Canon_ij_XXXX does not appear, follow the procedure in E and then search for Canon_ij_XXXX again.
4 Open the installed app.
The printer is registered with the most appropriate connection method for the environment you are using.

5 Check that the following screen appears.

Your printer is now connected to your smartphone. To print photos, see "Loading Photo Paper" on page 8.

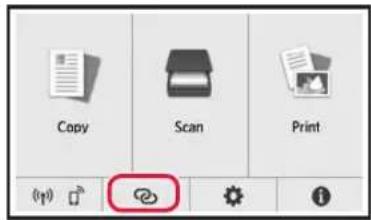
3 Tap on the printer's touch screen.
4 Press and hold the @n the HOME screen for about 3 seconds.
5 When "Follow the instructions on the computer or smartphone, etc. to perform the operation." appears, proceed to D
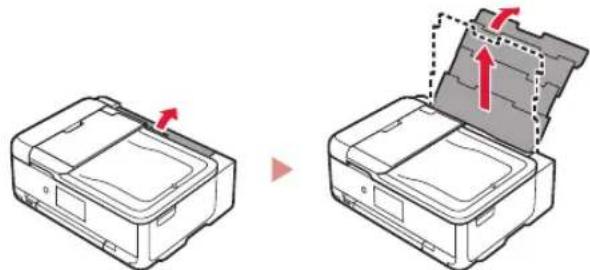
Loading Photo Paper
Photo paper can only be loaded in the rear tray.
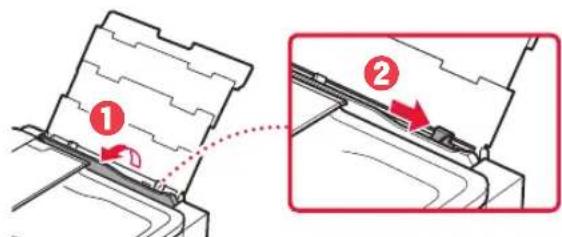
1 Open the rear tray cover and extend the paper support.
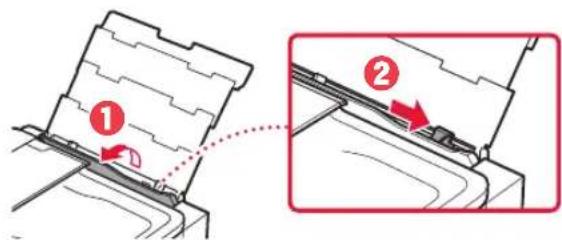
2 Open the feed slot cover and slide the right-hand side paper guide to the far right.
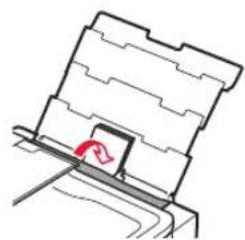
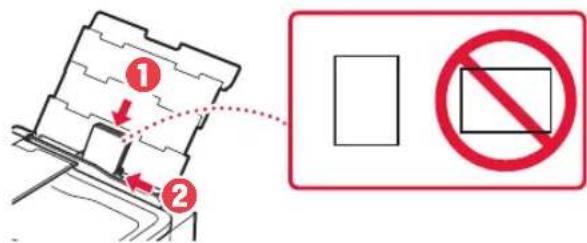
3 Load several sheets of photo paper with the print side facing up and slide the side paper guide against the edge of the paper stack.

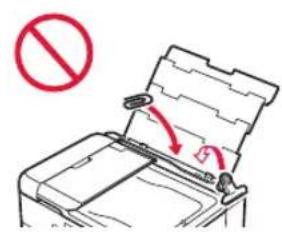
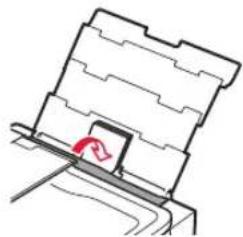
4 Close the feed slot cover.
- Follow the on-screen instructions to set information for the loaded paper.
5 Open the operation panel and pull out the paper output tray.
Printing Photos Saved on a Memory Card
1 Turn on the printer.
2 Load several sheets of photo paper.
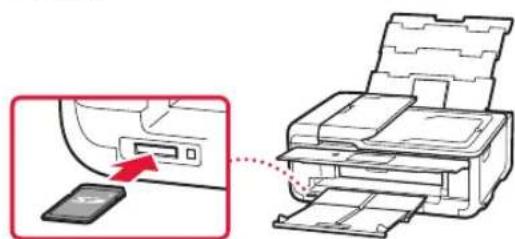
3 Insert the memory card into the card slot.
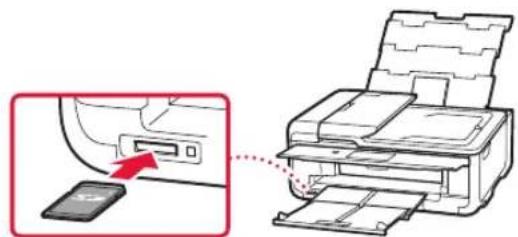
4 Flick right and left through the photos and select one.
5 Tap the Color button to start printing.
Configuration de l'imprimante
Configuration Web
http://ij.start.canon

Zoek "Canon PRINT" in Google Play.
Opmerking
8 Toccare Avanti (Next).
3 Deslize as guias do papel.
Clique em Executor Msetup4.exe (Run Msetup4.exe).
- Quando aanela Reproducao Automática (AutoPlay) for exibida, clique em Executor Msetup4.exe (Run Msetup4.exe).

Nota
8 PntnoTe Enoevo (Next).
Σtn ouvexia, akoalouhnoTe tic odnyiec otyn ofoyn yia va ouvexioete tic leitoupyiec. Kata tn diapkeia autuw taw leitoupyiwv, 0 npenei va kavete enioyec oxetikec me nvy anootoan npopopoiw. AiaBaote tvn evotnta Anootoan npopopoiw otyn Canon" otic nnnpopopiec yia tnv aoqala kai onmuavtikec nnnpopopiec.
9 NatnoTe EnoEvO (Next).
6-a
Eav to nuvua No printer has been added. Perform printer setup? dev eapaviote aouwc, meta tnv evapen tnc expapoyng, akolovtheta tn diabikacia oTo E kai emotppe otic leitoupyie tou smartphone.
4 BeBaiwOeite oTI eupaviEtaI n akolouo n oovn.

O ekTuWntc oac eivai nEvov ouvdepevoC me to smartphone oac, Tia va ekTuWoTee wToypapiec, avatpeEeTcTnv evotnta «Toioetnon foToypapikou xaploi» otn oelia 8.

3 Pntote To Eikovio ng v oovn aqnc Tou kTunwtn.
4 NtnoTe npaTeTaEva To koupi Otnv APXIKH oOvyn ia nepinou 3 u p o t a
5 Otav eupavioTei Akoouohtote TIC odnyie c otov unoloyoiotn h to smartphone kIyia va ekteleoeTc n Ieitoupyia.》,poxwpnoTe oTo D
Tonoetnon toypapikou xaptiou
To foTOypaPiko xapri uIopei va tootheTneIe IIOv otyn niow hkn.
1 AvoiTe to kalumu niow oKnc kai ekteive tnv unootnpiXapriou.

2 AvoicTe to kalumu unodoxnctpofooioac kai oupeTe to _1 o8nyo xapTou npoc ta _1 EaCto Tepua.
3 Tonoetnote nlaa quaa qwtoypapikou xaptiou e tnv nleupaektuwnc otpaumevn npoc ta naaw kai oupeTe tov naiivo odnyxaptou oynakpn tnc otoiac xaptiwv.
4 KkioTe To kaIuMa unOdoxnc TpOpoosia.
AkoouoTheTic o8nyiec otyn oovyn ia va opioet e npopopiec yia to tonoetnevo xapti.
5 AvoiTeTov nivaka aeitoupyia c kai TpaBnEe EwTn OKn Eodou xaptiou.
Ektunon wtoypaivnou exouv anoNkutei oKapta uynnc
1 EvepyonoioTeTovEKTunwth.
2 ToTOnoTeTnToE noAa a o p a i k o XapTIOU.
3 TOnoTheTne Tnv KApTa uvnnc otynu nooxn KApTaC.
Sök after "Canon PRINT" iApp Store.
Android
Sökefter"Canon PRINT"iGoogle Play.
Obs!
5 Sett inn kassetten.
6 Trekk ut papirutmatingsbrettet.
7 Trykk paa OK.
Klikk pa Kjor
Msetup4.exe
(Run Msetup4.exe)
Hvis dialogbokens Brukerkontokontroll (User Account Control) vises, klikker du pa Ja (Yes).
9
Klikk pa Kjør Msetup4.exe (Run Msetup4.exe).
Sog after "Canon PRINT" i App Store.
Android
Sog after "Canon PRINT" i Google Play.
Bemerk
Du kan ogsa abne Canon-webstedet ved at scanne QR-koden, der vises til hore, og downloade appen derfra.
