
EPB440 - Headphones LENCO - Free user manual and instructions
Find the device manual for free EPB440 LENCO in PDF.
| Product type | Wireless Bluetooth TWS earphones |
| Model | Lenco EPB-440 |
| Bluetooth version | 4.2 + BR/EDR |
| Bluetooth profiles | HFP 1.6/HSP, A2DP, AVRCP |
| Bluetooth range | 10 meters |
| Protection rating | IP67 (water and dust resistant) |
| Earphone battery | 45 mAh (per earbud) |
| Charging case battery | 850 mAh |
| Earphone battery life (music/calls) | 4 hours |
| Total battery life with case | 100 hours |
| Earphone charging time | Approximately 1 hour |
| Charger input voltage | 5 V DC |
| Transmission frequency | 2.4 - 2.48 GHz |
| Weight (estimated) | Approximately 5 g per earbud, 40 g with case |
| Main functions | Play/Pause, next/previous track, call, reject, voice assistant |
| Call control | Answer (short press), reject (long press 1 s) |
| Music control | Pause (1 press), next (2 presses), previous (3 presses) |
| Charging type | Magnetic contact charging in case, micro-USB charging for case |
| LED indication | Blue (connected, slow blinking), red (charging), alternating blue/red (pairing) |
| Included accessories | Micro-USB cable, 3 pairs of silicone ear tips (S/M/L) |
| Maintenance | Clean with a soft slightly damp cloth, no solvents |
| Safety | Do not expose to extreme heat, do not open, keep out of reach of children |
| Repairability | Only qualified personnel can repair; opening voids warranty |
| Warranty | Complies with European legislation, contact retailer for repairs |
| Marking | CE (compliant with EMC and low voltage directives) |
Frequently Asked Questions - EPB440 LENCO
User questions about EPB440 LENCO
0 question about this device. Answer the ones you know or ask your own.
Ask a new question about this device
Download the instructions for your Headphones in PDF format for free! Find your manual EPB440 - LENCO and take your electronic device back in hand. On this page are published all the documents necessary for the use of your device. EPB440 by LENCO.
USER MANUAL EPB440 LENCO
User Manual - Waterproof (IP67) TWS Bluetooth earphones with charging case
Usage of controls or adjustments or performance of procedures other than those specified herein may result in hazardous radiation exposure.
This unit should not be adjusted or repaired by anyone except qualified service personnel.
KEEP THESE INSTRUCTIONS IN MIND:
- Clean only with a slightly damp cloth.
- Install in accordance with the supplied user manual.
-
- Don't step on or pinch the power adaptor. Be very careful, particularly near the plugs and the cable's exit point. Do not place heavy items on the power adaptor, which may damage it. Keep the entire device out of children's reach! When playing with the power cable, they can seriously injure themselves.
-
- Unplug this device during lightning storms or when unused for a long period.
- Keep the device away from heat sources such as radiators, heaters, stoves, candles and other heat-generating products or naked flame.
- Avoid using the device near strong magnetic fields.
- Electrostatic discharge can disturb normal usage of this device. If so, simply reset and restart the device following the instruction manual. During file transmission, please handle with care and operate in a static-free environment.
- Warning! Never insert an object into the product through the vents or openings. High voltage flows through the product and inserting an object can cause electric shock and/or short circuit internal parts. For the same reason, do not spill water or liquid on the product.
- Although this device is manufactured with the utmost care and checked several times before leaving the factory, it is still possible that problems may occur, as with all electrical appliances. If you notice smoke, an excessive build-up of heat or any other unexpected phenomena, you should disconnect the plug from the main power socket immediately.
- This device must operate on a power source as specified on the specification label. If you are not sure of the type of power supply used in your home, consult your dealer or local power company.
-
- The socket outlet must be installed near the equipment and must be easily accessible.
-
- Do not overload ac outlets or extension cords. Overloading can cause fire or electric shock.
-
- Devices with class 1 construction should be connected to a main socket outlet with a protective earthed connection.
-
- Devices with class 2 construction do not require a earthed connection.
- Keep away from rodents. Rodents enjoy biting on power cords.
-
- Always hold the plug when pulling it out of the main supply socket. Do not pull the power cord. This can cause a short circuit.
-
Avoid placing the device on any surfaces that may be subject to vibrations or shocks.
-
To clean the device, use a soft dry cloth. Do not use solvents or petrol based fluids. To remove severe stains, you may use a damp cloth with dilute detergent.
- The supplier is not responsible for damage or lost data caused by malfunction, misuse, modification of the device or battery replacement.
- Do not interrupt the connection when the device is formatting or transferring files. Otherwise, data may be corrupted or lost.
- If the unit has USB playback function, the usb memory stick should be plugged into the unit directly. Don't use an usb extension cable because it can cause interference resulting in failing of data.
-
- To completely disconnect the power input, the mains plug of the apparatus shall be disconnected from the mains, as the disconnect device is the mains plug of apparatus.
- If the unit works with battery, Battery shall not be exposed to excessive heat such as sunshine, fire or the like.
- Attention should be drawn to the environmental aspects of battery disposal.
- The apparatus can only be used in moderate extremely cold or climates warm environments should be avoided.
- The rating label has been marked on the bottom or back panel of the apparatus.
- This device is not intended for use by people (including children) with physical, sensory or mental disabilities, or a lack of experience and knowledge, unless they're under supervision or have received instructions about the correct use of the device by the person who is responsible for their safety.
- This product is intended for non professional use only and not for commercial or industrial use.
- Make sure the unit is adjusted to a stable position. Damage caused by using this product in an unstable position or by failure to follow any other warning or precaution contained within this user manual will not be covered by warranty.
- Never remove the casing of this apparatus.
- Never place this apparatus on other electrical equipment.
- Do not use or store this product in a place where it is subject to direct sunlight, heat, excessive dust or vibration.
- Do not allow children access to plastic bags.
- Only use attachments/accessories specified by the manufacturer.
- Refer all servicing to qualified service personnel. Servicing is required when the apparatus has been damaged in any way, such as the power supply cord or the plug, does not operate normally, or has been dropped.
-
- Do not use a damaged power cord or plug or a loose outlet. Doing so may result in fire or electric shock.
- Prolonged exposure to loud sounds from personal music players may lead to temporary or permanent hearing loss.
INSTALLATION
- Unpack all parts and remove protective material.
-
- Do not connect the unit to the mains before checking the mains voltage and before all other connections have been made.
-
Those instruc on are related only to products using power cable or AC power adaptor.
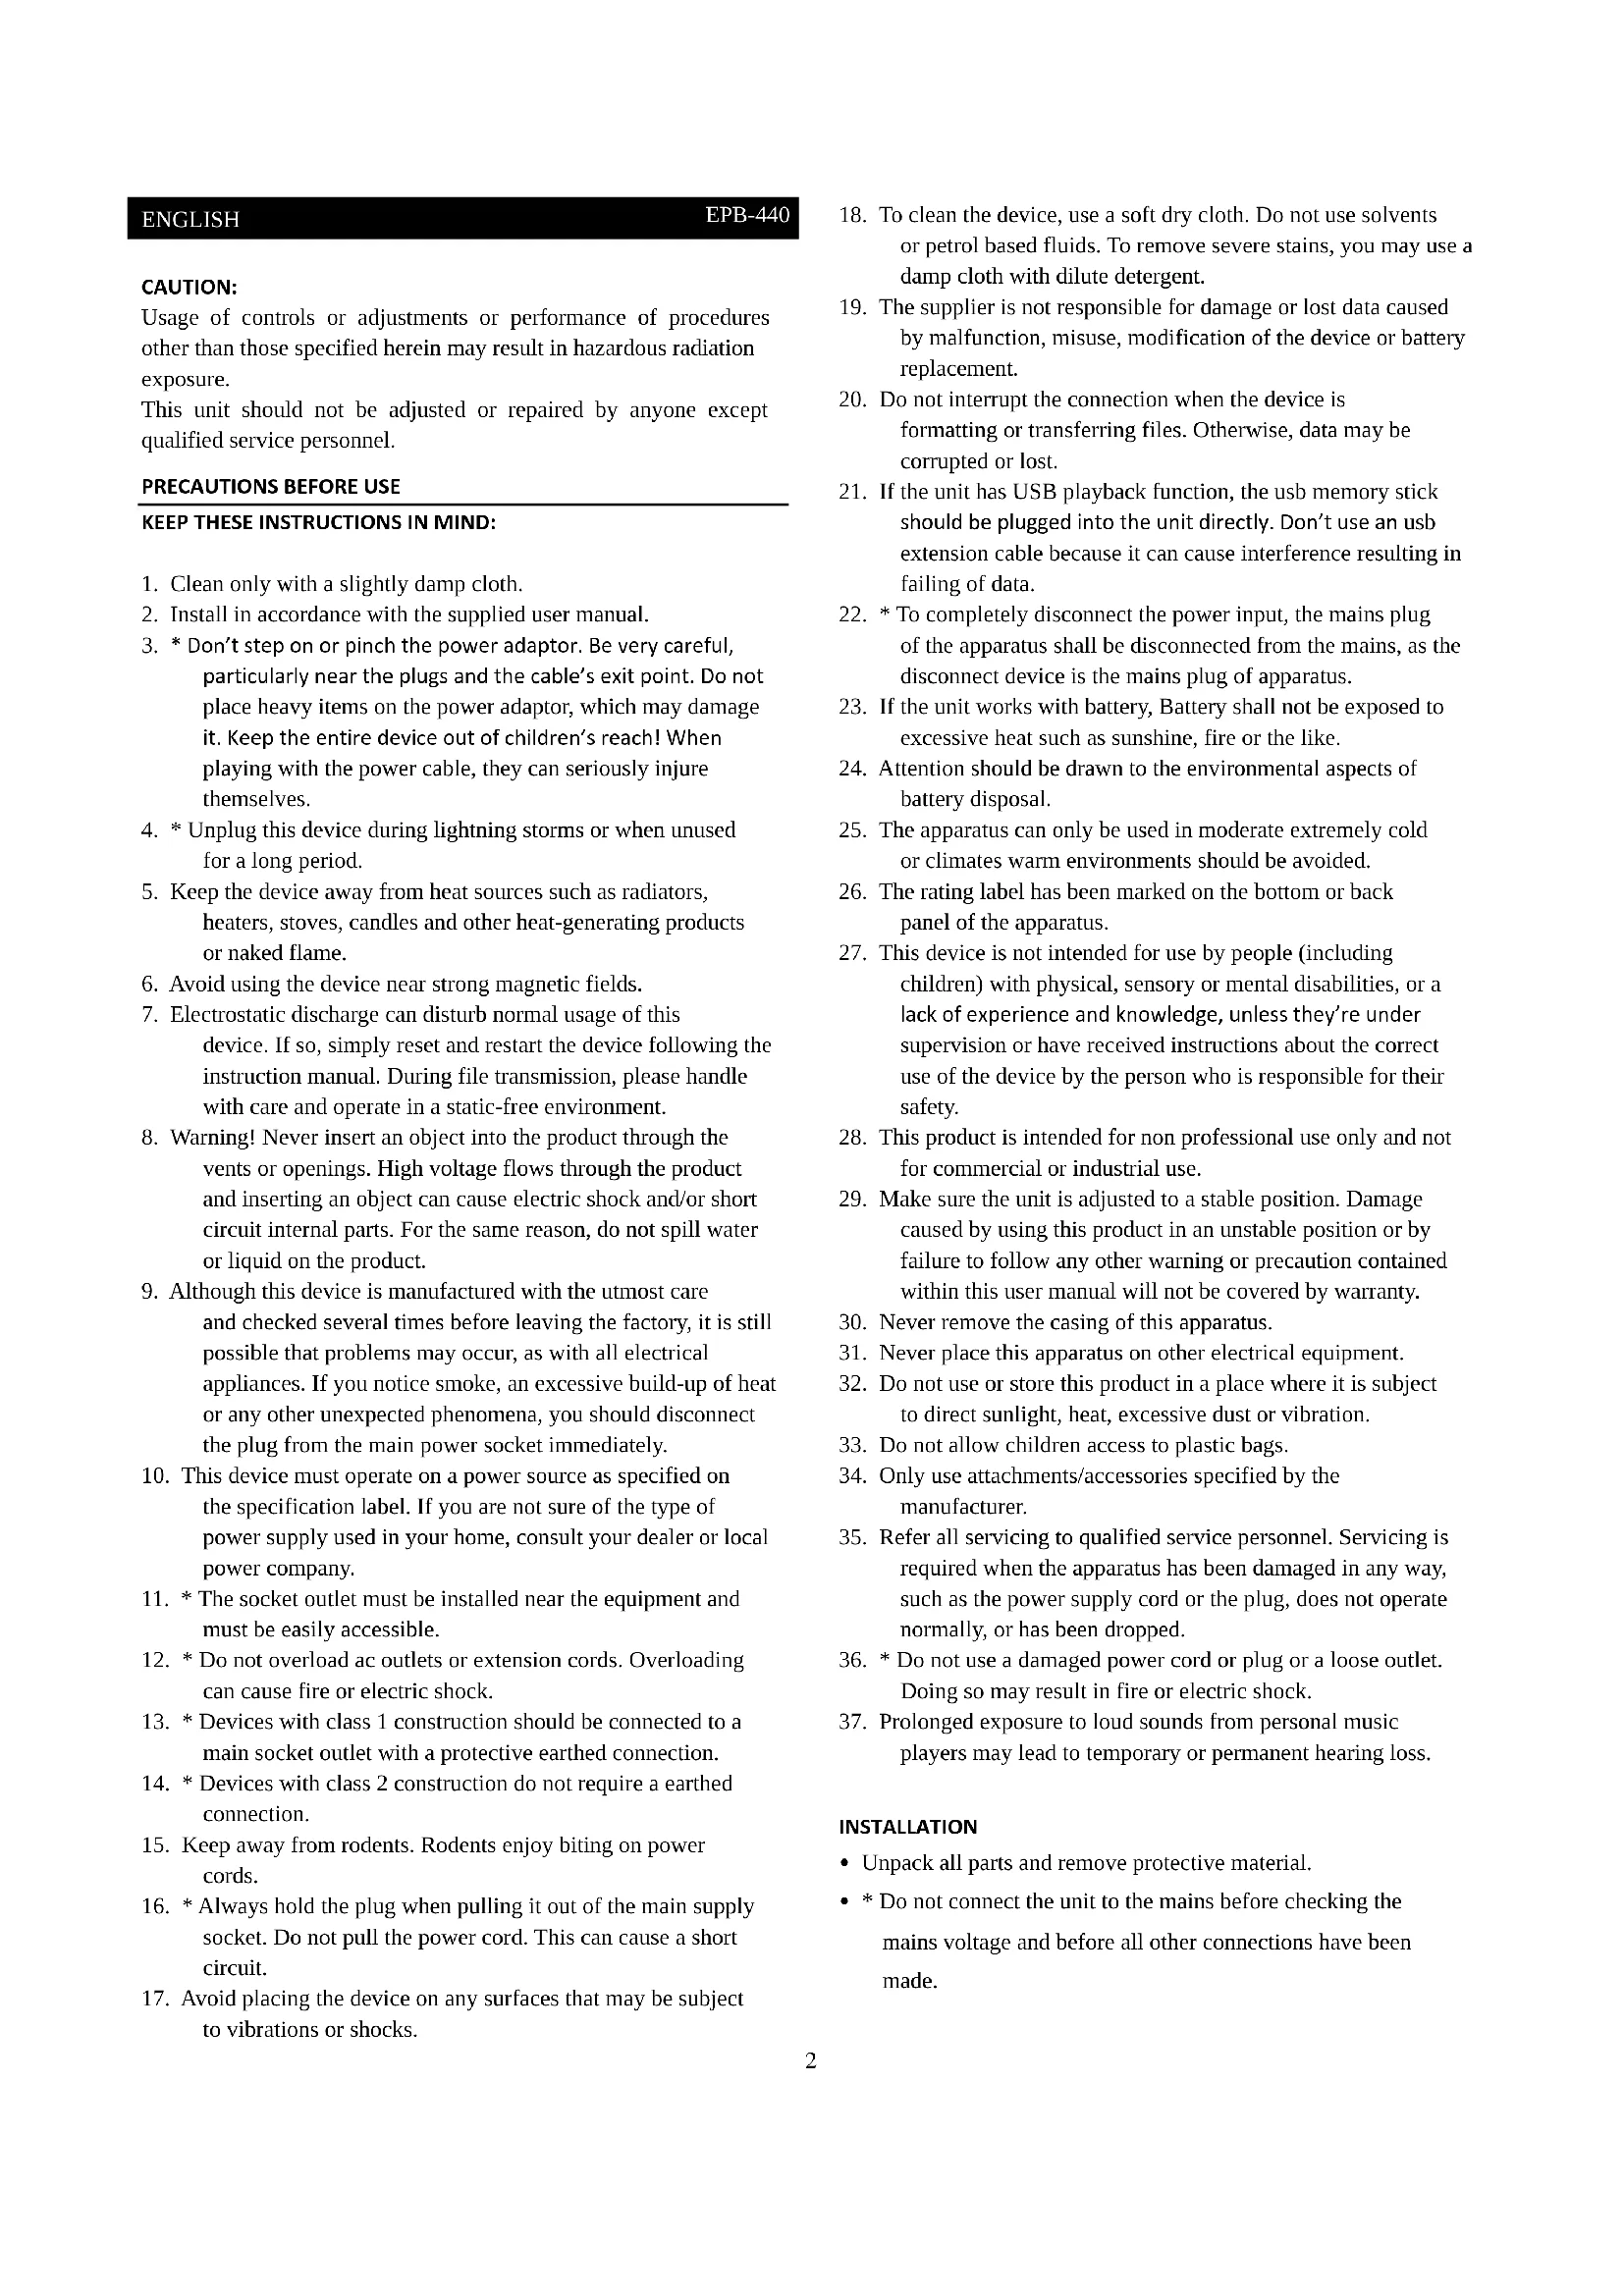
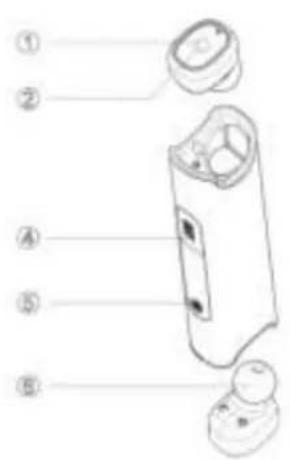
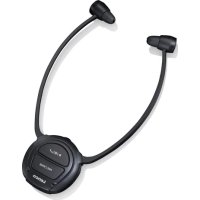
Component:
- Home-Key
- Earbuds
- LED indicator light
- Earphone Silicone
- Power supply indicator lamp
- Charging Input
- Charger output
- Conversa on Hole
- PowerKey
User manual
Power on: Long press home key un I the blue indicator light ash, then you will hear voice prompt "power on".
Power o : Long press Home-key un I the red Indicator light on 2 second, then you will hear voice prompt "power off".
Connected: Blue lights ash every 4 seconds
Coming calls: Blue lights ash quickly.
Accept call: Short press Home-key on Right earbud press key once
Reject Call: Press 1 sec. Home-key on Right earbud
Music: Press home key once is PAUSE
Press 2 mes Home key is NEXT song
Press 3 mes Home key is PREVIOUS song
Re-connec on: Auto reconnect the paired phone when turned on (some mobiles need to manual to reconnect on the phone)
Ear ps: the product is delivered with 3 pairs of ear ps.
It is very important that you select the right size of ear p ng the best your ears. Fore 2 reasons: the comfort and stability and also for the quality of the sound: if you have the right size, the sound quality will be the best: good bass and clear music. If the size is wrong, the sound could be bad, at, no bass.


$$ = L $$


$$ = M $$


$$ = S $$
Bluetooth pairing (dual headset):
- Take the 2 earbuds out of the charging case and press "R" and "L" Home-keys together for 1 second un I blue light appear on each earbud, then short red light. The blue light will shortly ashes every 4 seconds to show that the earbuds are paired together.
- First me pairing of the earbuds with your mobile phone. Long press the Home-key of the "R" earbud until blue/red lights are ashing alterna vely. Ac vate the bluetooth on your mobile phone and look for the Lenco EPB-440 device in the bluetooth device list and select it. The blue/red light on the "R" earbud will then stop ashing and your pair of earbuds are now connected with the mobile phone. In the earbuds you can ear the voice message "phone connected" and the blue led will flash every 4 seconds on each earbud while in use.
- When you want to stop listening to your earphones, just long press the right Home-key un I red led is ligh ng, then the leds will be OFF on both earbuds.
In the earbuds you can ear the voice message "power off".
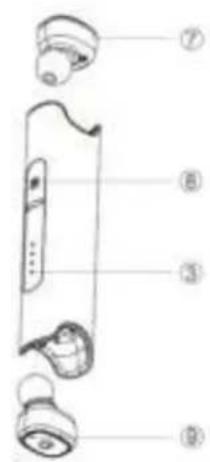
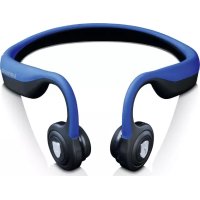
How to wear:
The "L" earbud should be put in the Left ear and the "R" earbud in the Right ear. The best posi on is to enter the earbud ver cally into the ear with the "L" and the "R" letter on top and turn each earbud towards the back direc on of the ear and try to nd the posi on where the earbud is not moving when you shake your head.
Charging the two earbuds
- Put each earbud into the charging case. The charging is done by
magne c absorp on and the earbuds will be charged
automa cally when inserted in their charging cavity. The led of each earbud will light in red when charging. If there is no red light, it probably means that the earbud is not well posi oned.
When the earbuds are charged, the leds will light blue and then go OFF.

Charging the charging case
On one side of the casing, you can find the "IN" cover. You can open this cover and connect the micro USB cable to it. At the other side of the cable you can connect the USB to a PC or to a USB-AC adaptor for charging the charging case.
Near the "IN" cover you can see 4 leds: they show the remaining power in the charging case: 4 blue leds is full, 1 blue led is low ba ery: you need to recharge!
To check the remaining power, just short press the POWER KEY, it will ac vate the blue leds.
Charging your smartphone
If really needed you can also charge your smartphone with the charging case of your EPB-440: you can connect the USB cable in the "OUT" connector of the casing and you will have maximum 850mah
of ba ery power. This is more an emergency ba ery, but can provide between 1 or 2 hours of energy.
Products Speci ca on:
Bluetooth Version: V4.2+BR/EDR
Bluetooth Pro les: HFP1.6/HSP, A2DP and AVRCP pro les.
Bluetooth transmission range: 10m
Powerbank Ba ery: 850 mAh
Earphone ba ery: 45 mAh
Earphone Total Standby me: 1000 hours
Earphone charge me: 1 hour
Earphone Non-stop talking Time: 4 hours
Earphone music listening me: 4 hours
Earphone total Talking me: 100 hours
Waterproof ra ng: IP67
Power bank input voltage: 5 V
Transmission frequency: 2.4G-2.48GHz
Guarantee
Lenco offers service and warranty in accordance to European law, which means that in case of repairs (both during and a period) you should contact your local dealer.
Important note: It is not possible to send products that need repairs to Lenco directly.
Important note: If this unit is opened or accessed by a non-o cial service center in any way, the warranty expires.
This device is not suitable for professional use. In case of professional use, all warranty obliga ons of the manufacturer will be voided.
Disclaimer
Updates to Firmware and/or hardware components are made regularly. Therefore some of the instruc on, speci ca ons and pictures in this documenta on may di er slightly from your par cular situa on. All items described in this guide for illustra on purposes only and may not apply to par cular situa on. No legal right or en tlements may be obtained from the descrip on made in this manual.
Disposal of the Old Device
This symbol indicates that the relevant electrical product or ba ery should not be
disposed of as general household waste in Europe. To ensure the correct waste treatment of the product and ba ery, please dispose them in accordance to any applicable local laws of requirement for disposal of electrical equipment or ba erys. In so doing, you will help to conserve natural resources and improve standards of environmental protec on in treatment and disposal of electrical waste (Waste Electrical and Electronic Equipment Direc ve).
CE Marking

Products with the CE marking comply with the EMC Direc ve (2014/30/EU) and the Low Voltage Direc ve (2014/35/EU) issued by the
Commission of the European Community.
Hereby, Lenco Benelux BV, Thermiekstraat 1a, 6361 HB Nuth, The Netherlands, declares that this product is in compliance with the essen al requirements.
The declara on of conformity may be consulted at techdoc@lenco.com
Service
For more informa on and helpdesk support, please visit
www.lenco.com
Lenco Benelux BV, Thermiekstraat 1a, 6361 HB, The Netherlands.
LET OP:
(Waste Electrical and Electronic Equipment Direc ve).
CE-Kennzeichen


- KEEP THESE INSTRUCTIONS IN MIND:
- INSTALLATION
- Component:
- User manual
- Bluetooth pairing (dual headset):
- How to wear:
- Charging the two earbuds
- Charging the charging case
- Charging your smartphone
- Products Speci ca on:
- Guarantee
- Disclaimer
- Disposal of the Old Device
- CE Marking
- Service
- LET OP:
- CE-Kennzeichen
Brand : LENCO
Model : EPB440
Category : Headphones