
IR6000WE - Radio Soundmaster - Free user manual and instructions
Find the device manual for free IR6000WE Soundmaster in PDF.
| Product type | Internet Multimedia Radio |
| Brand | Soundmaster |
| Model | IR6000WE |
| Power supply | Power adapter 100-240V~50/60Hz, output 12V 0A |
| Wireless network | Wi-Fi IEEE 802.11b/g/n |
| Security protocols | WEP, WPA, WPA2 |
| Audio jacks | Auxiliary input 3.5 mm, line output 3.5 mm, headphone 3.5 mm |
| Audio power | 1 x 5 W RMS |
| Main functions | Internet Radio, UPnP, DLNA, AUX, alarm, timer, equalizer |
| Display | Color screen |
| Remote control | Yes, with AAA batteries (not included) |
| Alarm | 3 independent alarms (2 absolute, 1 relative) |
| Cleaning | Dry cloth only |
| Safety | Do not open, risk of electric shock; use only in dry indoor areas |
| Repairability | Service by qualified personnel only |
| Multimedia compatibility | DLNA, UPnP, AirMusic (mobile app) |
| Equalizer | 9 presets (Normal, Flat, Jazz, Rock, etc.) + myEQ |
| Sleep timer | 15/30/60/90/120/150/180 minutes |
| Available languages | French, English, German, Spanish, etc. |
| Firmware update | Automatic via Internet (notification) |
Frequently Asked Questions - IR6000WE Soundmaster
User questions about IR6000WE Soundmaster
0 question about this device. Answer the ones you know or ask your own.
Ask a new question about this device
Download the instructions for your Radio in PDF format for free! Find your manual IR6000WE - Soundmaster and take your electronic device back in hand. On this page are published all the documents necessary for the use of your device. IR6000WE by Soundmaster.
USER MANUAL IR6000WE Soundmaster
Do not dispose of this product with the normal household waste at the end of its life cycle. Return it to a collection point for the recycling of electrical and electronic devices. This is indicated by the symbol on the product, user manual or packaging
The materials are reusable according to their markings. By reusing, recycling or other forms of utilization of old devices you make an important contribution to the protection of our environment.
Please contact your local authorities for details about collection points.
WARNING
Risk of electric shock Do not open!

Caution: To reduce the risk of electric shock, do not remove the cover (or back). There are no user serviceable parts inside. Refer servicing to qualified service personnel.

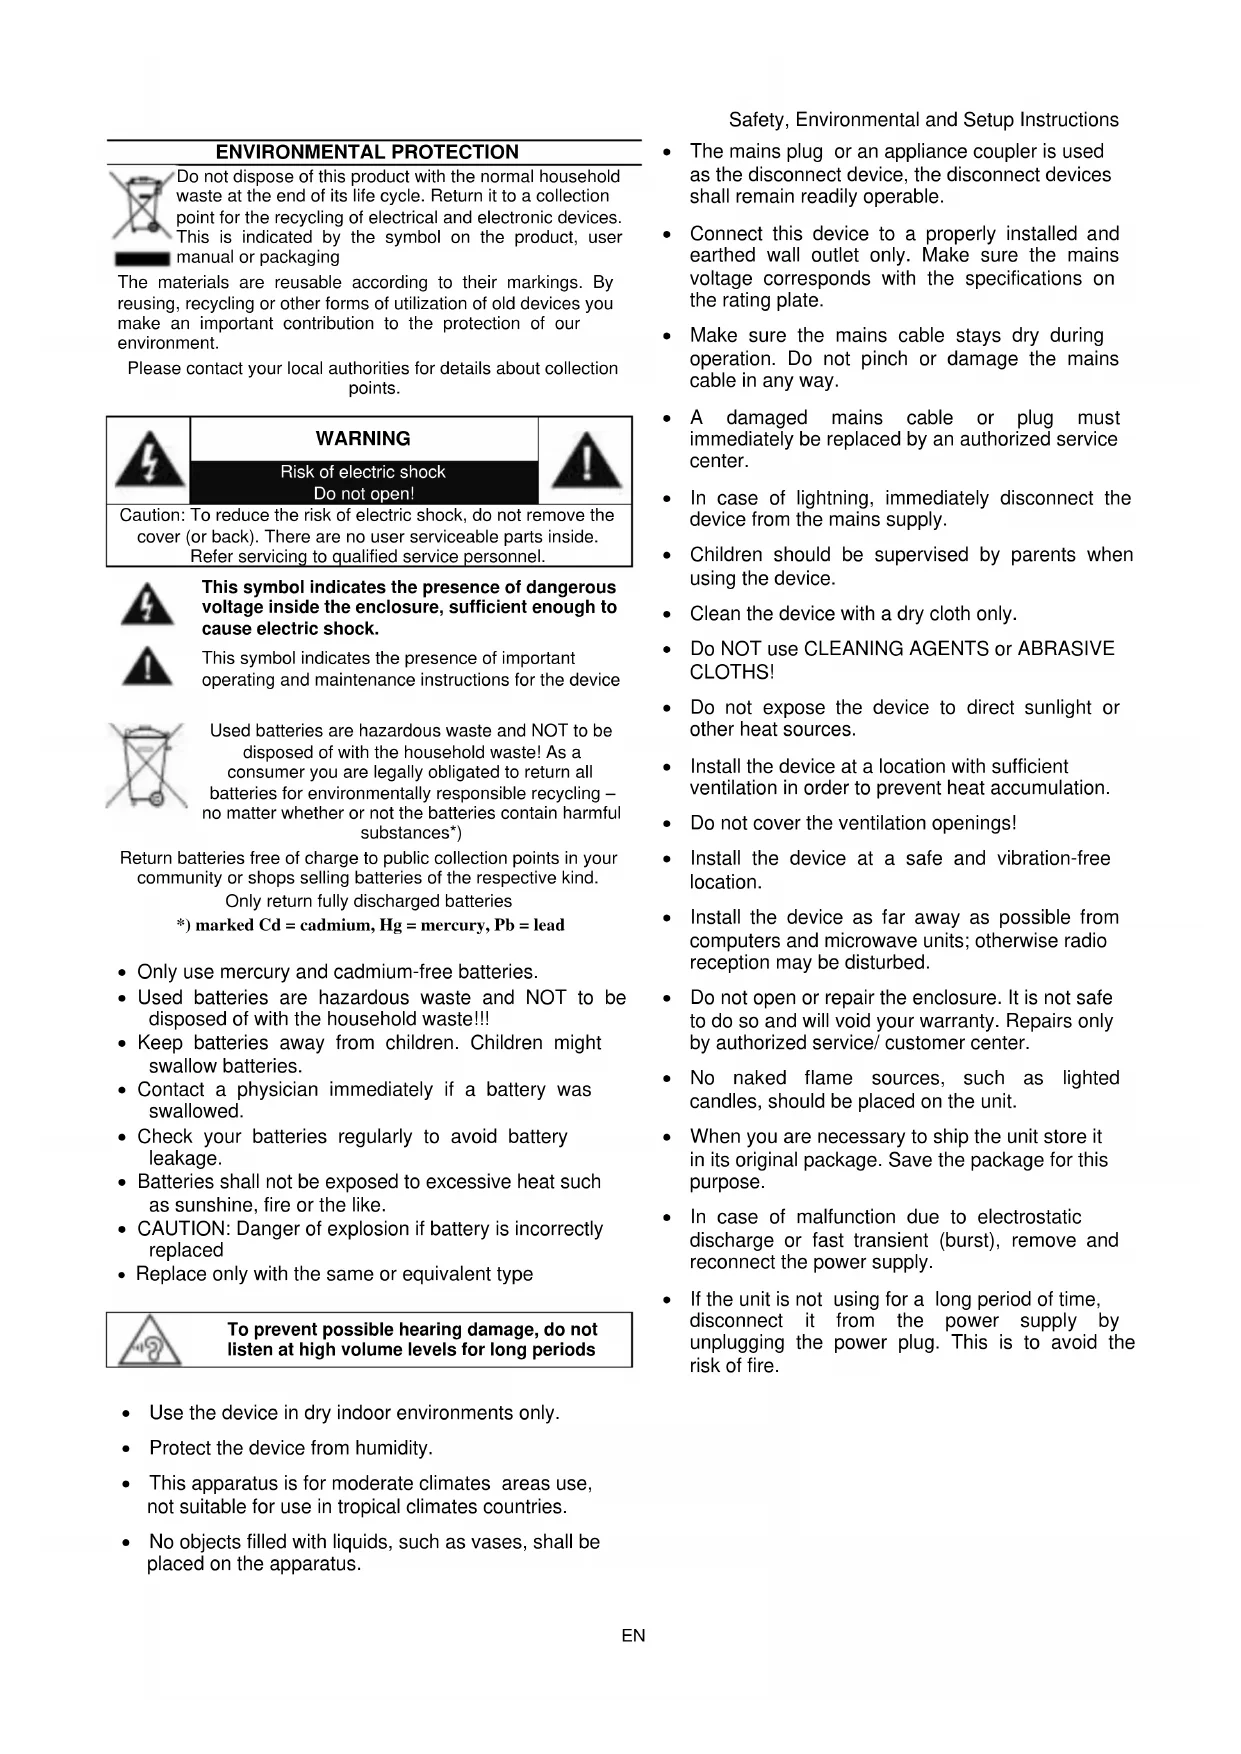
This symbol indicates the presence of dangerous voltage inside the enclosure, sufficient enough to cause electric shock.

This symbol indicates the presence of important operating and maintenance instructions for the device
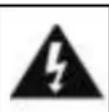
Used batteries are hazardous waste and NOT to be disposed of with the household waste! As a consumer you are legally obligated to return all batteries for environmentally responsible recycling - no matter whether or not the batteries contain harmful substances*)
Return batteries free of charge to public collection points in your community or shops selling batteries of the respective kind. Only return fully discharged batteries *) marked Cd = cadmium, Hg = mercury, Pb = lead
- Only use mercury and cadmium-free batteries.
- Used batteries are hazardous waste and NOT to be disposed of with the household waste!!!
- Keep batteries away from children. Children might swallow batteries.
- Contact a physician immediately if a battery was swallowed.
- Check your batteries regularly to avoid battery leakage.
- Batteries shall not be exposed to excessive heat such as sunshine, fire or the like.
- CAUTION: Danger of explosion if battery is incorrectly replaced
- Replace only with the same or equivalent type
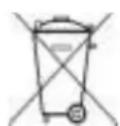
To prevent possible hearing damage, do not listen at high volume levels for long periods
- Use the device in dry indoor environments only.
- Protect the device from humidity.
- This apparatus is for moderate climates areas use, not suitable for use in tropical climates countries.
- No objects filled with liquids, such as vases, shall be placed on the apparatus.
Safety, Environmental and Setup Instructions
- The mains plug or an appliance coupler is used as the disconnect device, the disconnect devices shall remain readily operable.
- Connect this device to a properly installed and earthed wall outlet only. Make sure the mains voltage corresponds with the specifications on the rating plate.
- Make sure the mains cable stays dry during operation. Do not pinch or damage the mains cable in any way.
- A damaged mains cable or plug must immediately be replaced by an authorized service center.
- In case of lightning, immediately disconnect the device from the mains supply.
- Children should be supervised by parents when using the device.
- Clean the device with a dry cloth only.
- Do NOT use CLEANING AGENTS or ABRASIVE CLOTHS!
- Do not expose the device to direct sunlight or other heat sources.
- Install the device at a location with sufficient ventilation in order to prevent heat accumulation.
- Do not cover the ventilation openings!
- Install the device at a safe and vibration-free location.
- Install the device as far away as possible from computers and microwave units; otherwise radio reception may be disturbed.
- Do not open or repair the enclosure. It is not safe to do so and will void your warranty. Repairs only by authorized service/ customer center.
- No naked flame sources, such as lighted candles, should be placed on the unit.
- When you are necessary to ship the unit store it in its original package. Save the package for this purpose.
- In case of malfunction due to electrostatic discharge or fast transient (burst), remove and reconnect the power supply.
- If the unit is not using for a long period of time, disconnect it from the power supply by unplugging the power plug. This is to avoid the risk of fire.
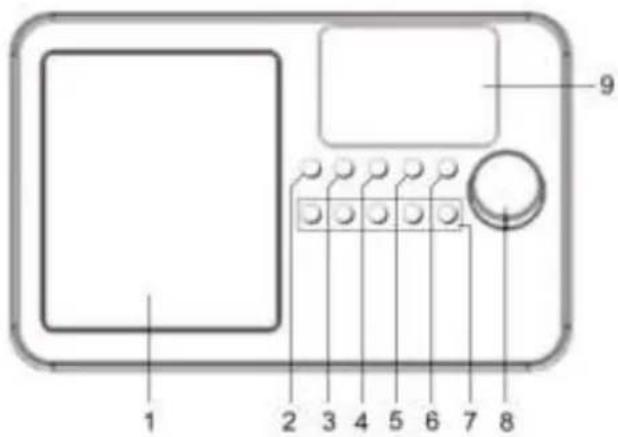
LOCATION OF CONTROLS
FRONT VIEW
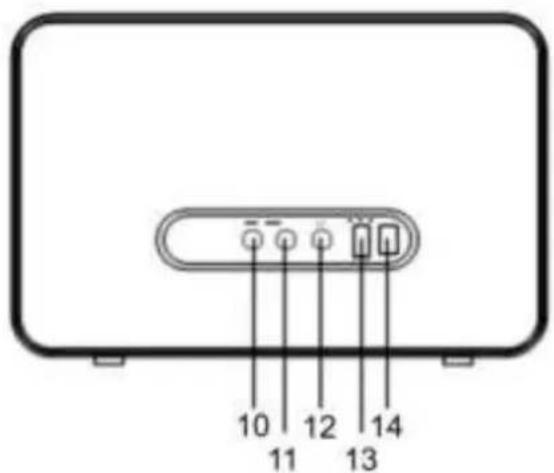
REAR VIEW
1 Speaker
Loud speaker
2 Standby/ON
Turns off all functions except the clock and alarm features.
3 Home
Press to return to the central location of the software for selection of functions while continuing to play the currently selected function.
4 Preset
Used to save and access favorite radio stations while using several different functions.
5
Back cursor used to change the displayed information back to an earlier display.
6
Forward cursor used to change the displayed information to the next display.
7 Preset stations 1...5
Used to select previously stored favorite radio stations.
8 NAVIGATE/OK VOLUME
Multifunction knob used for making selections by browsing the information displayed and pressing to confirm a selection. Controls music volume when playing music.
9 Colored Display
Color display used to display function symbols and information to enable the selection of desired features and functions
10 AUX-In
3.5mm connector for music signal from another music player's "Line Output" or "Headphone Output"
11 LINE-Out
For connecting the radio music signal to another music player's "Auxiliary Input / Line Input"
12 Headphone
3.5mm connector for "Headphones" or "Ear Buds"
13 DC Power Input
Power connector for the AC / Mains power supply adaptor Use only the supplied power supply to prevent damage to the radio or possible injury
14 ON/OFF Switch
Turns on / off power to all functions of the radio
REMOTE CONTROL
1 Mute
2 Standby/On button
3 0...9 Favorite key
4 Preset the current playing station to favorite
5 Recall the favorite list
6 Cursor up
7 Cursor left / back to previous menu
8 Cursor right
9 Cursor down
10 OK Confirm button
11 Alarm button
12 Sleep timer
13 Vol+ Volume up
14 Vol- Volume down
15 Main menu
16 Mode Switch between the functions of radio
17 EQ Equalizer
Previous station on the list / previous track on UPnP
19 Play/pause for internet radio
20 Next station on the list /
Next track on UPnP
21 Local Access the local station list (Local area set up in Configuration)
22 Info View detailed info of the radio channel or the music info under UPnP
23 Dimmer Dim down the backlight of display
- Press and slide the back cover to open the battery compartment of the remote control.
- Insert two AAA size batteries. Make sure the (+) and (-) ends of the batteries match the (+) and (-) ends indicated in the battery compartment
- Close the battery compartment cover
INSTALLATION
Before operation, please make sure that the VOLTAGE mentioned on the power supply is same as the voltage of your local area.
Use the supplied mains adaptor to connect the device to a household mains socket.
When it is the first time running the device, the system will ask you to set Language and Network configurations. You may setup the network connection immediately, or set it later. Turn "NAVIGATE/OK" to select the desired option. Press "NAVIGATE/OK" to confirm.
Network configuration
1. Normal network configuration
Select "Yes" for the normal Wireless Network Configuration: Then select the required AP by turning "NAVIGATE/OK" and confirm it by pressing "NAVIGATE/OK".
Enter WEP or WPA code to connect the WiFi network by select the correct character turning the "NAVIGATE/OK" button.
Press "> button to select the next character.
In this condition, press < button you can turn left and delete the left characters at the same time:
When the password is complete please press "NAVIGATE/OK" button to confirm.
Note: Below characters are available for the radio:
Numbers(from 0-9)
English letters(from A to Z and from a to z)
Other characters (@,!,#,$,%,&,'',+ and (,)
2. WPS PBC network configuration
Select "Yes WPS" when you would like set up with Wireless Network (WPS PBC) feature: If you are using a router with WPS button, you may set up the network connection simple via WPS function. Enter it and go to press the WPS button on your router within 120 seconds.
The connection between the router and the Radio will then be configured automatically
Select "No" when you not want to install the network at the moment.
3. No network configuration
PIs. select "No" when you don't like to configure the network connection at the moment.
Press “ ” for standby, when the actual date and time is shown the network is configuration is well done. Date and time, as well as alarms-if activated-will still are shown on the display when in standby mode.
INTERNET RADIO
Switch on “ ” and rotate “NAVIGATE/OK” to scroll through the main menu.
Press "NAVIGATE/OK" to enter sub menus or confirm settings
Press < < " to return to the previous menu.
After the connection of any station is succeeded, station information's will be shown; information content can be changed with “>” button.
Press " < " to go back to previous menu.
My Favorites
List of my favorite preset stations. It supports up to 250 favorite stations and.
To store a station to the favorites:
- Select the requested station from the station list by the Navigation wheel.
- Press “>” to open menu.
- Press "NAVIGATE/OK" to confirm "Add to My Favorite"
- Select preset number by Navigate wheel
- Confirm Preset by pressing "NAVIGATE/OK".
- You may replace the previous saved station to the new one.
If the selected station has been saved, you cannot save it again. The saved stations are showed under the My Favorites.
When My Favorites list is shown, move to your station and press "NAVIGATE/OK" to listen.
When My Favorites list is shown, press “>”, to Delete, Shift up; Shift down; Rename, or Play.
Radio Station/Music
Stations are categorized into Global Top 20, Genre and Country / Location (Australia, Canada, United Kingdom, USA). Enter to continue the subcategories and choose the station to listen.
For each station, press "NAVIGATE/OK" to play directly.
Press “>” to enter its submenu. When you choose Auto Scan, it becomes the playback of marquee of each station in the subcategory. Each station plays 30 seconds until all have played or you press “NAVIGATE/OK” to stop the marquee listening.
Press > to view the display information of the playing station.
Local Radio:
Stations are categorized to the country / location which the unit is operated.
History:
List of the ten recently listened stations.
Service:
Search radio station - enter your keyword to search radio station from the list.
Add new radio station by adding IP address, the added stations will be stored in My Favorite.
Note that the maximum character of the station name is 250.
MEDIA CENTER
Select the "UPnP" mode or "My Playlist" mode with "NAVIGATE/OK".
UPnP
If you have set up shared media, you should see the shared media from "UPnP".
If you have more than one computer sharing media, the alternatives are listed.
Select the shared media you want to play.
Select song by "NAVIGATE/OK" wheel; press "NAVIGATE/OK" to play/pause the song
Press “>” to view the playing track information on the display.
Press < ^ 一 to go back in the menu.
Note: The radio can only read the track with the file name less than 40 characters. The characters should be in European Language. If you encounter failure of reading the track under "UPnP" mode, you may try to rename the file. However, if the track is still unable to play, you can try converting the file to different formats.
My Playlist:
You can create a playlist of favorite's music from "UPnP". When you playing the music, press and hold "NAVIGATE/OK" to save it into "My Playlist".
Clear My Playlist
PIs. select this option for clearing the playlist. PIs. confirm the questions.
"My mediaU"
Display and playback your own "My mediaU" station list on the "My mediaU" server. Set your account first. To activate your own station list, follow the steps below:
Access http://www.mediayou.net/. Join my "My mediaU" membership. Login to the website;
Enter the wireless MAC addresses of Radio to the "My mediaU" website. This information can be obtained in information Center>System information>Wireless Info.
When successfully configured, you are able to save and view your own "My mediaU" station playlist(s).Username and password are not required to enter to the Radio.
If there are different accounts stored in the Radio, you can choose the one you currently use under configuration menu. On the website, you may save stations to Favorite Station, set Favorite Location / Genre and My Local City, or add stations manually. The stations can be viewed from My Media mode on the Radio.
INFORMATIONCENTER
Weather
There are weather information and forecasts for 2000 cities.
Select the country and then the city for the weather details.
Press < / > and or turn "NAVIGATE/OK" to see the weather forecasts.
The device is able to display the weather information on the standby mode. On the weather information page, press "NAVIGATE/OK" to set the city to displaying on the standby mode. Then turn on the weather display.
Financial Info
View the stock index.
System Information
View details of units and of connected network. The information includes MAC address which you are required to fill in when registration of "My mediaU" membership.
CONFIGURATION
Time Display Analog/Digital (time display)
My MediaU
When it is enabled, "My mediaU" will exist on the main menu. If various "My mediaU" accounts exist in the radio, select the default login account in here.
Network Wireless Network Configuration: The system will automatically select the required AP. Enter WEP or WPA code to connect the WiFi.
Wireless Network (WPS PBC): If you are using a router with WPS/QSS button, you may set up the network connection simple via WPS function. Enter it and go to press the WPS/QSS button on your router within 120 seconds. The connection between the router and the unit will then be configured automatically.
Manual Configuration: You can choose DHCP (which IP assigned automatically) or manually input IP address for wireless network connection. When you select manual setting for wired connection, the following have to be entered:SSID (name of access point), IP Address, subnet mask, default gateway, preferred DNS server and alternate DNS server.
Check Network When Power On: Enable/disable WiFi network. When you enable the WiFi network, the system will automatically search the available AP and select the required AP.
Date & Time Set date and time
Set time format display as 12 Hour or 24 Hour
Set date format (YYYY/MM/DD - DD/MM/YYYY - MM/DD/YYYY)
Alarm There are three independent alarms - 2 alarms of absolute time setting (Alarm1 and Alarm2) and one alarm for relative time setting (Alarm NAP).
The first two alarms are similar to the normal alarm, turn on then set the time and set it alarms Everyday, Once or every specific day of week.
Select Alarm time. Set the respective values by the reel on the device and switch to the next entry field. Confirm by pressing the reel.
Choose Sound to set the sound to Beep, Melody or Internet Radio. An alarm symbol will appear on the top of the display next to the time.
Note: When the alarm is reached the unit connects to the Internet if the set network is available. Therefore there may be some delay from the alarm to the radio play. If no network is connection can be established within one minute, the alarm will change to Melody automatically.
Press button to stop the Alarm, if other button is pressed the Alarm returns after 5 minutes.
When Alarm "NAP" is set, it alarms once in 5/10/20/30/60/90/120 minutes depending on which one you have set.
Choose Alarm Volume to configure the volume of the alarms.
Timer Countdown timer (max. 100min)
Language English/Deutsch/Espanol/Francais/Portugese/Netherlands/Italiano/Pyccknn/Svenska/Norsk/Dansk/Magyar/Cesky/Slovensky/Polski/Turkce/Suomi
Dimmer Power saving - backlight level
Turn On - backlight level
Display Color / Monochrome
Power Configure to go to standby mode automatically during in the menu or/ and Management without Wifi signal. Choose the power management timer (5/15/30mins) to set the duration of the radio to switch standby mode automatically when you are not controlling it. Choose Turn off to ignore the power management function.
Sleep Timer Turn off or set the sleep timer of 15/30/60/90/120/150/180 minutes. Once the time is set, there will be a bed icon with remaining minutes at the top right corner and the device will turn to standby then.
Buffer Configure the buffer time of the music playback, 2/4 or 8 seconds.
Weather Activate/deactivate the weather forecast for the standby display. Choose your preferred temperature unit (°F or °C) and then proceed entering your location. When activated, the weather forecast is shown in turns with the clock display on the standby screen (each 10 secs).
Local Radio Setup There is a shortcut Local Radio under Internet Radio so that you can easily go to the station list of your location. You may Manual Setup your location, or let the system Auto Detect your current location. The system detects the location according to the IP address of your connected network. Press "Local Station" to enter this local radio list directly.
Playback Setup Select the playback mode of media center - Off (no repeat or shuffle), Repeat all, Repeat one or Shuffle.
Device Default device name for DLNA is "AirMusic". You may rename it for DLNA setup on the PC or mobile. QR code for download and install "AirMusic" control App on mobile.
Equalizer Option to choose from nine different sound effects Normal / Flat / Jazz / Rock / Soundtracks / Classical / Pop / News / myEQ
Resume The system is default to resume internet radio playback if you were listening when Power On to internet radio or media center before switch off the unit. If turn this setting off, the system will remain in the main menu when switching on the unit.
Software Update
Update software. If there is an updated software version available, the system will notify you. Before starting a software upgrade, ensure that the unit is plugged into a stable mains power connection. Disconnecting power during a software update may permanently damage the unit.
Reset to Default
Restore the default settings. After the unit is reset, the system will move to language selection.
DLNA/UPNP
You may change the default DLNA name as you like. The information below is the introduction of how to setup media streaming from PC or other media server. Study the own instruction of the software or apps you use to enjoy music streaming if necessary. Make sure the music files are in the format of MP3, WMA, WAV or AAC for music streaming to the radio.
UPnP
Connect the PC to the network.
Ensure the Radio is powered on and connected to the same network.
Open the UPnP platform Windows Media Player (11 or later). Alternatively, other platforms or server such as Windows Media Connect may be used.
Allow to share your media to Radio.
Add the audio files and folders you want to share with radio to the media library.
You may also enjoy the streaming music from other music server, such as smart phone (Android platform).
Connect the mobile to the network
Search and install media sharing apps from Google Play.
Add the audio files from your mobile you want to share.
After setup the shared server, choose the music and control playback on the Radio.
DLNA
Besides UPnP, radio supports DLNA function; you share the music files from PC or Android mobile, and you use your PC, Android mobile or iPhone /iPad to control music playback on the Radio. (It is not required to control each playback on the Radio.)
The PC system requirement for DLNA is "Windows 7" and "Windows Media Player 12". Setup as below:
First, share the media on your PC to Radio.
Control Panel > Network and Internet > Network and Sharing Center > Change Advanced Sharing Settings > Media streaming options
Open Windows Media Player to enable allows remote control of my Player.
Right click any music in the library and choose Play to Radio.
There will be a window for controlling music playback on Radio.
You may search and install any free or commercial DLNA apps from "Google Play" or "Apple Store" if you are using Android mobile, tablet or iPhone / iPad. It is suggested to use "Bubble UPnP", "Twonky Beam" on Android mobile, tablet or "Twonky Beam" on iPhone /iPad. Some apps may not support streaming music from iPhone /iPod but iPhone/iPod could still be used to control streaming music from other servers.Procedures for playing shared music on the app are as follows:
Select Radio as the player. Some apps may allow playing the music to multi players at the same time.
Select music server and choose the music. Some app can create a playlist if you choose several music.
Please note: When using DLNA music streaming function on IR6000, you can only control the volume and standby via the unit. It is restricted to control the other functions. Stop DLNA on PC, mobile or tablet before you resume IR6000's own control.
AIR MUSIC APP
You can scan under Configuration / Device / Air Music control APP QR code for installing application from Apple store or .from Google play store.
With this application it is possible to control the IR6000 by mobile phone or tablet.
AUX (Line input)
Aux in mode plays audio from an external source such as an MP3 player.
To play audio with Aux in mode: Turn the volume low on both the Radio and if adjustable, the audio source device.
Connect the external audio source to the AUX IN 3.5mm stereo socket.
Either press "MODE" until the display, shows "AUX IN" or select "AUX" in under Main menu.
Adjust the volume of the Radio (and, if necessary, the audio source device) as required.
LINE OUT
You can connect an external device e.g. amplifier on the 3.5mm Line out socket. For comfortable listening the audio signal should be controlled on the external device.
HEADPHONE
To listen to music privately, use headphones with a 3.5 stereo jack plug and connect it to the headphones socket. The speakers will then be muted.

To prevent possible hearing damage, do not listen at high volume levels for long periods.
TECHNICAL SPECIFICATION
Power supply
: Use only the supplied power adapter
Power input
:100-240V\~50/60Hz
Power output
:12V-F.0A

Wireless Network
: IEEE802.11b/g/n
Security Protocol
: WEP / WPA / WPA2
Audio sockets
: 3.5mm earphone jack, 3.5mm Aux-In jack, 3.5mm Line-Out jack
Audio power output
:1x5WRMS
IMPORTER
8 NAVIGATE/OK VOLUME
1. Normale networkconfiguration
*) markerade Cd = kadmium, Hg = kvicksilver, Pb = bly
Update software. If there is an updated software version available, the system will notify you. Before starting a software upgrade, ensure that the unit is plugged into a stable mains power connection. Disconnecting power during a software update may permanently damage the unit.
Asterstall till
To listen to music privately, use headphones with a 3.5 stereo jack plug and connect it to the headphones socket. The speakers will then be muted.

To prevent possible hearing damage, do not listen at high volume levels for long periods.
TECHNICAL SPECIFICATION
Strömförsörjning
Hereby, Wörlein GmbH declares that this device is in compliance with the essential requirements and other relevant provisions of Directive 2014/53/EU.
A copy of the Declara on of Conformity may be obtained at the following loca on:
Wörlein GmbH, Gewerbestrasse 12, D 90556 Cadolzburg, Germany
Email: info@woerlein.com
Tel.: +49 9103 71 67 0
