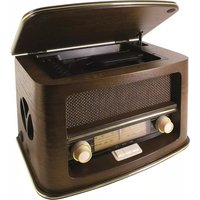
NR975 - Radio Soundmaster - Free user manual and instructions
Find the device manual for free NR975 Soundmaster in PDF.


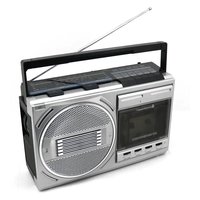
| Product Type | Radio |
| Brand | Soundmaster |
| Model | NR975 |
| Frequency Bands | AM, FM |
| Tuning Type | Analog (dial) |
| Power Source | 4 x AA batteries (not included) or AC adapter (DC 6V, center positive) |
| Dimensions (W x H x D) | Approx. 200 x 120 x 60 mm |
| Weight | Approx. 400 g (without batteries) |
| Antenna | Telescopic rod for FM; built-in ferrite for AM |
| Audio Output | Built-in speaker (mono) |
| Headphone Jack | 3.5 mm stereo |
| Volume Control | Rotary knob |
| Power Indicator | LED when on |
| Case Material | Plastic |
| Color | Black / Silver |
| Cleaning Instructions | Wipe with a soft, dry cloth. Do not use liquid cleaners. |
| Safety Warnings | Keep away from moisture and heat sources. Do not disassemble. |
| Spare Parts Availability | Contact Soundmaster customer service for AC adapter or antenna. |
Frequently Asked Questions - NR975 Soundmaster
User questions about NR975 Soundmaster
0 question about this device. Answer the ones you know or ask your own.
Ask a new question about this device
Download the instructions for your Radio in PDF format for free! Find your manual NR975 - Soundmaster and take your electronic device back in hand. On this page are published all the documents necessary for the use of your device. NR975 by Soundmaster.
USER MANUAL NR975 Soundmaster
natural_image
Vintage wooden radio with open lid and gold-colored buttons, no visible text or symbolsDEUTSCH
ENGLISH
FRANÇAIS
NEDERLANDS
ESPAÑOL
PORTUGUÊS
CE
ENVIRONMENTAL PROTECTION
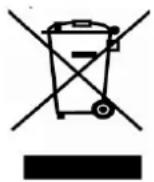
Do not dispose of this product with the normal household waste at the end of its life cycle. Return it to a collection point for the recycling of electrical and electronic devices. This is indicated by the symbol on the product, user manual or packaging.
The materials are reusable according to their markings. By reusing, recycling or other forms of utilization of old devices you make an important contribution to the protection of our environment.
Please contact your local authorities for details about collection points.
CLASS 1 LASER PRODUCT KLASSE 1 LASER PRODUKT LUOKAN 1 LASER LAITE KLASS 1 LASER APPARAT PRODUCTO LASER CLASE 1
CAUTION - INVISIBLE LASER RADIATION WHEN OPENING THE COVER OR PRESSING THE SAFETY INTERLOCK. AVOID EXPOSURE TO THE LASER BEAM.

WARNING
Risk of electric shock Do not open!

Caution: To reduce the risk of electric shock, do not remove the cover (or back). There are no user serviceable parts inside. Refer servicing to qualified service personnel.

This symbol indicates the presence of dangerous voltage inside the enclosure, sufficient enough to cause electric shock.

This symbol indicates the presence of important operating and maintenance instructions for the device.
Safety, Environmental and Setup Instructions
- Use the device in dry indoor environments only.
- Protect the device from humidity.
- Do not open the device. RISK OF ELECTRIC SHOCK! Refer opening and servicing to qualified personnel.
- Connect this device to a properly installed and earthed wall outlet only. Make sure the mains voltage corresponds with the specifications on the rating plate.
• Make sure the mains cable stays dry during operation. Do not pinch or damage the mains cable in any way. - A damaged mains cable or plug must immediately be replaced by an authorized service center.
• In case of lightning, immediately disconnect the device from the mains supply. - Children should be supervised by parents when using the device.
- Clean the device with a dry cloth only.
Do NOT use CLEANING AGENTS or ABRASIVE CLOTHS!
- Do not expose the device to direct sunlight or other heat sources.
• Install the device at a location with sufficient ventilation in order to prevent heat accumulation. - Do not cover the ventilation openings!
• Install the device at a safe and vibration-free location. - Install the device as far away as possible from computers and microwave units; otherwise radio reception may be disturbed.
- Do not open or repair the enclosure. It is not safe to do so and will void your warranty. Repairs only by authorized service/ customer center.
- The device is equipped with a "Class 1 Laser". Avoid exposure to the laser beam as this could cause eye injuries.
- Only use mercury and cadmium-free batteries.
- Used batteries are hazardous waste and NOT to be disposed of with the household waste!!! Return the batteries to your dealer or to collection points in your community.
- Keep batteries away from children. Children might swallow batteries. Contact a physician immediately if a battery was swallowed.
- Check your batteries regularly to avoid battery leakage.

Used batteries are hazardous waste and NOT to be disposed of with the household waste! As a consumer you are legally obligated to return all batteries for environmentally responsible recycling – no matter whether or not the batteries contain harmful substances*).
Return batteries free of charge to public collection points in your community or to shops selling batteries of the respective kind.
Only return fully discharged batteries.
*) marked Cd = cadmium, Hg = mercury, Pb = lead
PREPARATION FOR USE
UNPACKING AND SET UP
- Carefully remove the unit from the display carton and remove all packing materials from the unit.
• Unwind the AC power cord and extend it to its full length.
• Unwind the UKW Antenna wire and extend it to its full length. - Place the unit on a stable, level surface, convenient to an AC outlet, out of direct sunlight, and away from sources of excess heat, dust, moisture,
humidity or strong magnetic fields.
- Open the CD door. Lift the CD diskette cover, remove the transit card which was used to secure the laser during shipment and dispose of this card.
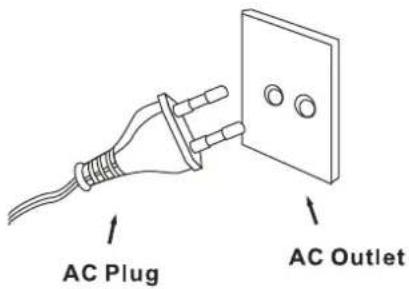
• Connect the plug to your AC outlet.
natural_image
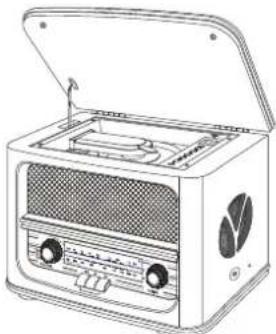
Line drawing of a vintage radio with open lid and internal components (no text or symbols)POWER SOURCE
This system is designed to operate on normal 230V 50Hz AC only. Attempting to operate this system from any other power source may cause damage to the system and such damage is not covered by your warranty.
NOTE:
You will note that this system is equipped with a polarized AC power plug. If this plug does not fit into your existing AC outlet, you probably have an outdated non-polarized AC outlet. You should have your outlet changed by a qualified licensed electrician.
IMPORTANT: Raising And Lowering The CD Door
- To open the lid, raise it as far as it will go until the lid support bracket 'locks' into the open position.
- To close the lid, lift it upward slightly until the lid support bracket 'unlocks' and then gently lower the lid.
TO AVOID DAMAGING THE CABINET OR THE LID, NEVER FORCE THE LID CLOSED. ALWAYS RAISE THE LID TO RELEASE THE LID SUPPORT BRACKET.

PROTECT YOUR FURNITURE
This model is equipped with non-skid rubber 'feet' to prevent the product from moving when you operate the controls. These 'feet' are made from non-migrating rubber material specially formulated to avoid leaving any marks or stains on your furniture. However certain types of oil based furniture polished, wood preservatives, or cleaning sprays may cause the rubber 'feet' to soften, and leave marks or a rubber residue on the furniture. To prevent any damage to your furniture we strongly recommend that you purchase small self-adhesive felt pads, available at hardware stores and home improvement centres everywhere, and apply these pads to the bottom of the rubber 'feet' before you place the product on fine wooden furniture.
LOCATION OF CONTROLS AND INDICATORS
FRONT PANEL

1.) MW Tuning Dial Scale.
2.) UKW Tuning Dial Scale.
3.) VOLUME Control.
4.) CD Door Support Bracket.
5.) CD Door.
6.) CD Tray.
7.) CD Control Buttons.
8.) Speakers.
9.) POWER ON/OFF BUTTON.
10.) PHONES JACK
11.) Function Buttons (AM/FM/CD)
TOP VIEW (CD PLAYER)

12.) UKW ST. Indicator.
13.) TUNING Control.
14.) PROGRAM Indicator.
15.) CD Track Number Display.
16.) REPEAT/ALL Button.
17.) PROGRAM Button.
18.) B.SKIP Button.
19.) F.SKIP Button.
20.) PLAY/PAUSE Button.
21.) STOP Button.
22.) CD Diskette Cover Lifter.
BACK PANEL

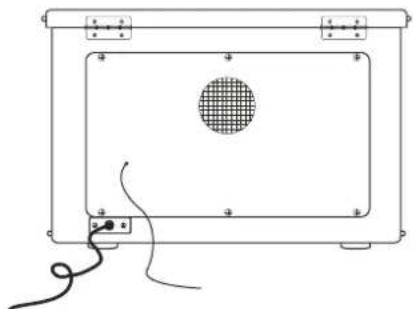
23.) AC Power Cord.
24.) FM Antenna.
OPERATING INSTRUCTIONS
Listening To The Radio
1.) Press the Power button 1 secondat the side of the cabinet, and set the volume to the lower level. The tuning backlight comes 'on'.
2.) Press the function buttons (MW/UKW) for the desired band, MW or UKW.
3.) Rotate the TUNING control to tune to the desired radio station. If you tune to anUKWStereo station, the UKW ST. indicator comes 'on'.
4.) Adjust the VOLUME control as desired.
5.) When you have finished listening, press and hold the Power button 3 seconds to turn off the unit. The Tuning Dial light goes 'Off'.
Antenna Information
MW- The MW bar antenna is inside the cabinet. If MW reception is unsatisfactory try repositioning the cabinet slightly until the internal antenna is picking up the strongest signal.

natural_image
Line drawing of a vintage portable radio with two circular arrows indicating rotation (no text or symbols)UKW UKMe wire antenna is located on the back cabinet. If necessary adjust the position and direction of this antenna until you find the position that provides the best reception.
natural_image
Pure technical line drawing of a rectangular device with internal grid pattern and cable (no text or symbols)Playing Compact Discs
NOTE: Although this CD player can read CD-R,CD-RW discs in addition to normal CD, however, the playability of CD-R/RW discs may be affected by the type of software that was used to create the discs, as well as the quality and condition of the blank media you are using. 100% playability cannot be guaranteed. This is not an indication of a problem with the player.
1.) Press the Power button 1 secondat the side of the cabinet, and set the volume to the lower level. The tuning backlight comes 'on'.
2.) Press the function buttons ( CD ) for the CD function. The CD track number display comes 'On'.
3.) Place your disc on the CD spindle with the printed label side facing up and lower the CD diskette cover.
4.) The disc will spin for a few seconds while the player reads the disc at the read time, the discs will automatically playback and the display shows the playing track number.
Note: You may leave the CD door open during playback if you wish, but we recommend closing the door again for better sound and also to prevent excess dust from accumulating on the CD spindle.


5.) Adjust the VOLUME control as desired.
Playback will continue until the end of disc. When the disc ends the display shows the total number of tracks on the disc. You may also stop playback at any time by pressing the STOP button.
Pause Control
In play mode, press the PLAY/PAUSE button once. Pause playback but the disc continues to spin and the display flashes. Press the PLAY/PAUSE button once more to cancel pause and resume playback. The display stops flashing.

Skipping Tracks And High Speed Music Search
During CD/R-RW Playback, repeatedly press the F. SKIP (Forward Skip) or B. SKIP (Back Skip) button to select the desired track or desired passage of the track.
Repeat Playback
This feature allows you to continuously repeat a single track or the entire disc.
To Repeat A Single Track
Press the REPEAT/ALL button once. The Repeat indicator flashes. Press the B. SKIP or F. SKIP button to select the desired track, then press the PLAY/PAUSE button to begin repeat playback of the selected track.

To Repeat The Entire Disc
Press the REPEAT/ALL button twice. The repeat indicator remains 'On'.
Press the PLAY/PAUSE button to begin repeat playback of the entire disc.

To cancel repeat playback press the REPEAT/ALL button until the repeat Indicator goes 'Off'. Repeat playback is also cancelled by pressing the STOP button or setting the function selector to the MW or UKW position.
Programmed Playback
This feature allows you to program of the CD 20 tracks on a disc for playback in any desired order..
Note: You can program tracks while a disc is stopped.
1.) Press the PROGRAM button to enter the Program Mode. The Program number briefly shows '01', the Program indicator flashes.

2.) Press the F. SKIP or B. SKIP button to select the first track number you wish to enter in the program memory. Example: Track Number '8'.

3.) When the desired track number appears on the display, press the PROGRAM button again to memorize the track.

4.) Repeat steps 2–3, select a different track number each time until you have entered up to CD 20 tracks in the program memory.
Note: You may program the same track number to play multiple times in the program sequence if desired.
5.) Press the PLAY/PAUSE button to begin programmed playback. The PROGRAM indicator stops flashing and remains 'On'. Playback will begin with the first track you have programmed and will continue until the last programmed track has been played.


- ENVIRONMENTAL PROTECTION
- CAUTION - INVISIBLE LASER RADIATION WHEN OPENING THE COVER OR PRESSING THE SAFETY INTERLOCK. AVOID EXPOSURE TO THE LASER BEAM.
- WARNING
- Safety, Environmental and Setup Instructions
- PREPARATION FOR USE
- UNPACKING AND SET UP
- POWER SOURCE
- NOTE:
- IMPORTANT: Raising And Lowering The CD Door
- PROTECT YOUR FURNITURE
- LOCATION OF CONTROLS AND INDICATORS
- OPERATING INSTRUCTIONS
- Listening To The Radio
- Antenna Information
- Playing Compact Discs
- Pause Control
- Skipping Tracks And High Speed Music Search
- Repeat Playback
- To Repeat A Single Track
- To Repeat The Entire Disc
- Programmed Playback
Brand : Soundmaster
Model : NR975
Category : Radio