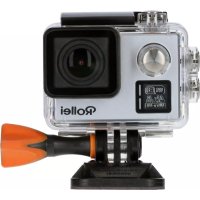
Actioncam 530 - Camcorder ROLLEI - Free user manual and instructions
Find the device manual for free Actioncam 530 ROLLEI in PDF.



| Product type | Action camera |
| Brand | Rollei |
| Model | Actioncam 530 |
| Sensor | CMOS 1/2.3", 14 effective megapixels |
| Lens | Fixed focal length 3.06 mm, aperture F2.8, 166° angle |
| Display | LCD 2" (960 x 240 pixels) |
| Max video resolution | 4K (3840x2160) at 30 fps |
| Max photo resolution | 14 MP (4320x3240) |
| Image stabilization | Yes (EIS, enable/disable) |
| WiFi | Yes (SSID: AC530, password: 1234567890) |
| Remote control | Yes (range 8 m, pairing via menu) |
| External memory | Micro SDHC up to 64 GB (not included) |
| Power supply | Li-ion battery 1050 mAh (rechargeable via USB) |
| Dimensions | 61 x 42 x 23 mm (33 mm with lens) |
| Weight | 78.5 g (with battery) |
| Interfaces | USB 2.0 (charge/data), HDMI (1080p output) |
| Special functions | Time-lapse, burst (up to 30 fps), motion detection, loop recording |
| Included accessories | Waterproof housing, remote control, battery, USB cable |
| Safety | Do not expose to magnetic fields, high temperatures, drops |
| Maintenance | Clean with a soft dry cloth; store in a cool, dry place |
Frequently Asked Questions - Actioncam 530 ROLLEI
User questions about Actioncam 530 ROLLEI
0 question about this device. Answer the ones you know or ask your own.
Ask a new question about this device
Download the instructions for your Camcorder in PDF format for free! Find your manual Actioncam 530 - ROLLEI and take your electronic device back in hand. On this page are published all the documents necessary for the use of your device. Actioncam 530 by ROLLEI.
USER MANUAL Actioncam 530 ROLLEI
- This is a high-precision product, please don't let it fall or crash. The camera is only protected inside the underwater case.
- Please do not expose the unit to strong magnetic objects, such as magnetic fields or electric motors.
3.Never place the product to high temperatures and direct sunlight. - Please choose branded microSD cards. Neutral cards are not guaranteed to work normally.
- Please do not place micro SD cards near strong magnetic objects to avoid loss of data.
- While it is charging, keep the product out of children's reach.
- Keep the devices in cool, dry, and insulated places.
Preface
This product is a high-definition digital motion video recording device. It has a variety of industry-leading features, including: digital video recording, photo shooting, audio recording, outdoor sports, deep-water probing, serial photo, etc., allowing you to film at anytime, anywhere.
Product Features
- Full high definition screen that displays fascinating recorded videos
2.14-megapixel photo shooting
3.Wireless WiFi transmission
4.HDMI HD output, supports FPV mode
5.Support storage cards up to 64GB maximum
6.Multiple video recording formats:4K/2.7K/1080P/720P
7.Support MOV video recording format
8.Support Remote control function
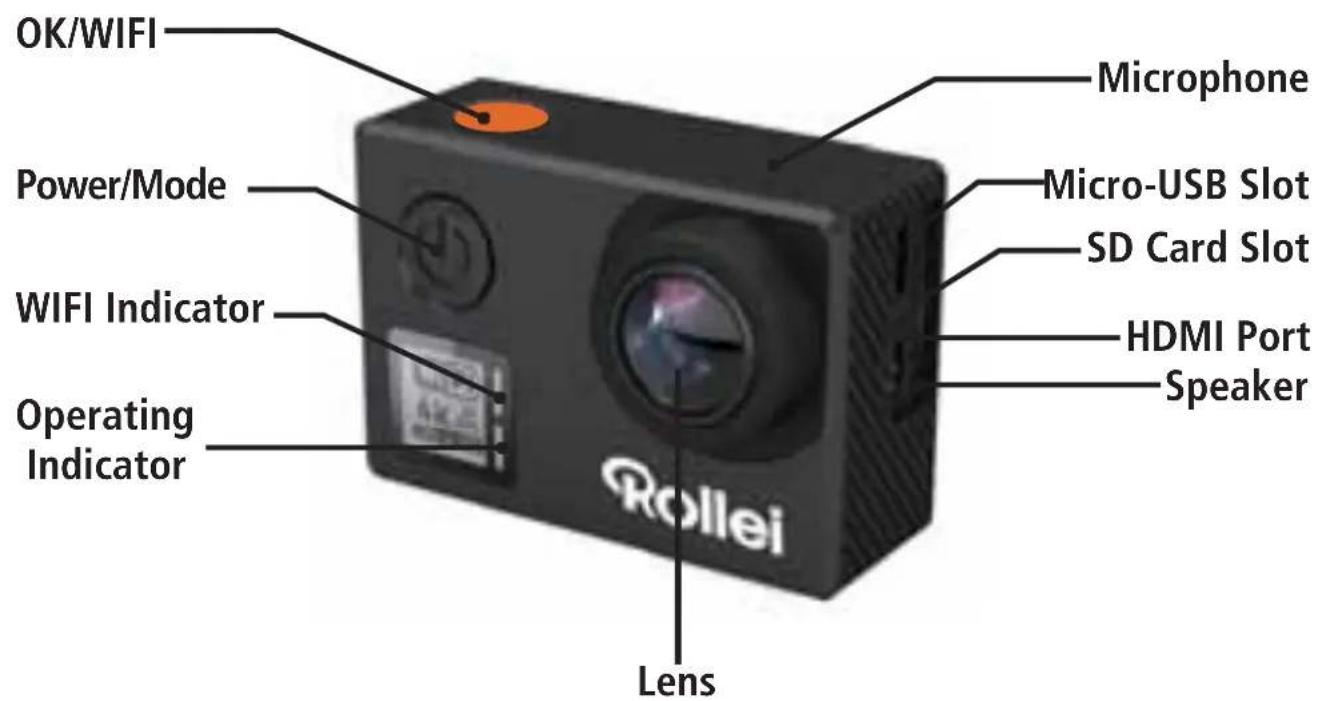
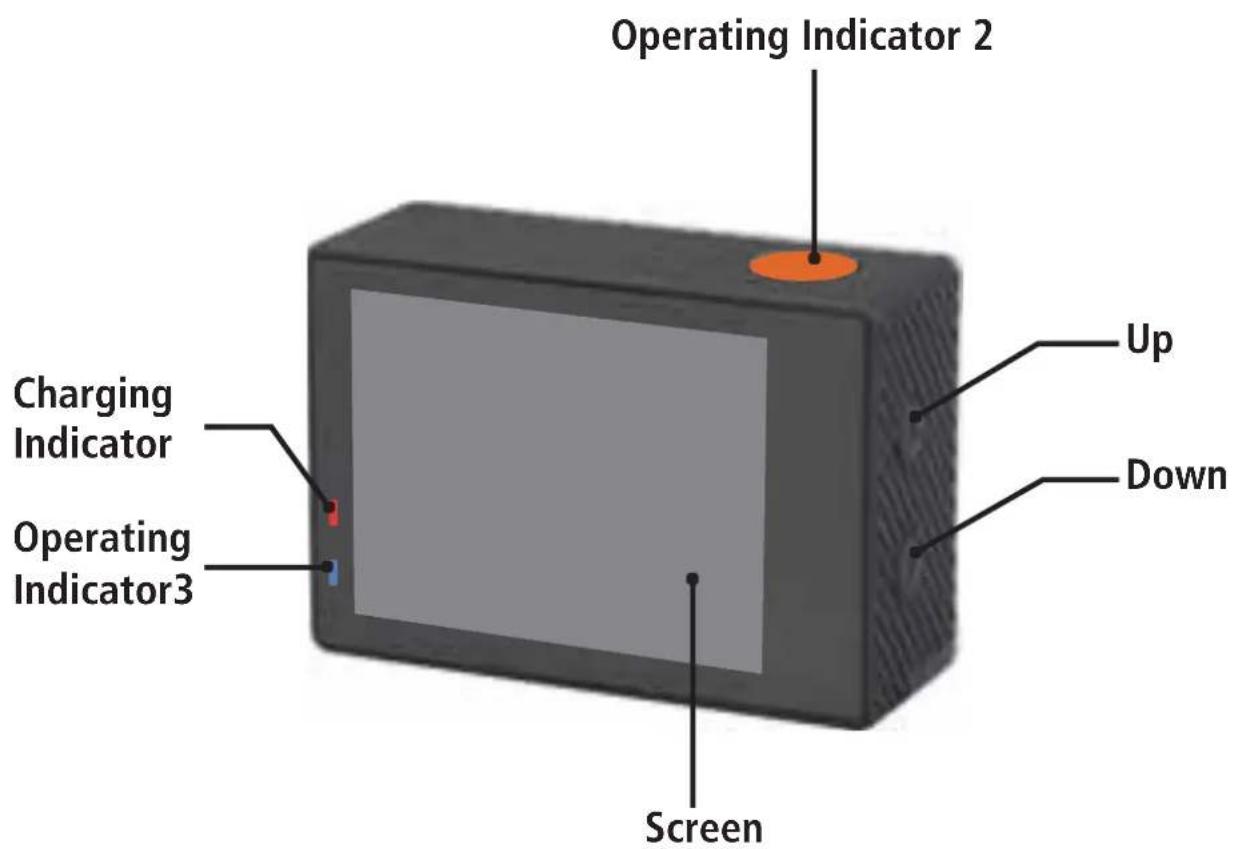
Product Discription
Waterproof Case Description
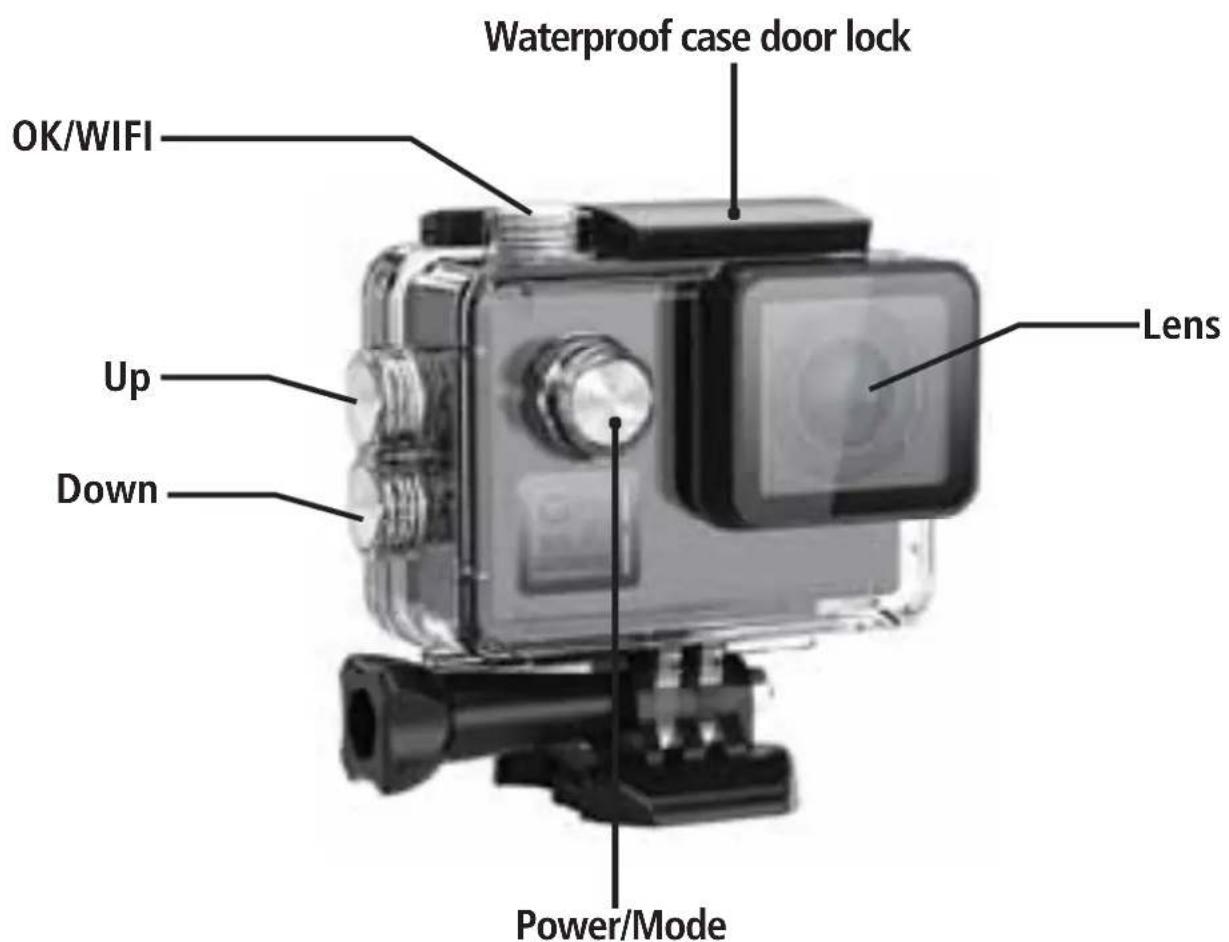
Operation
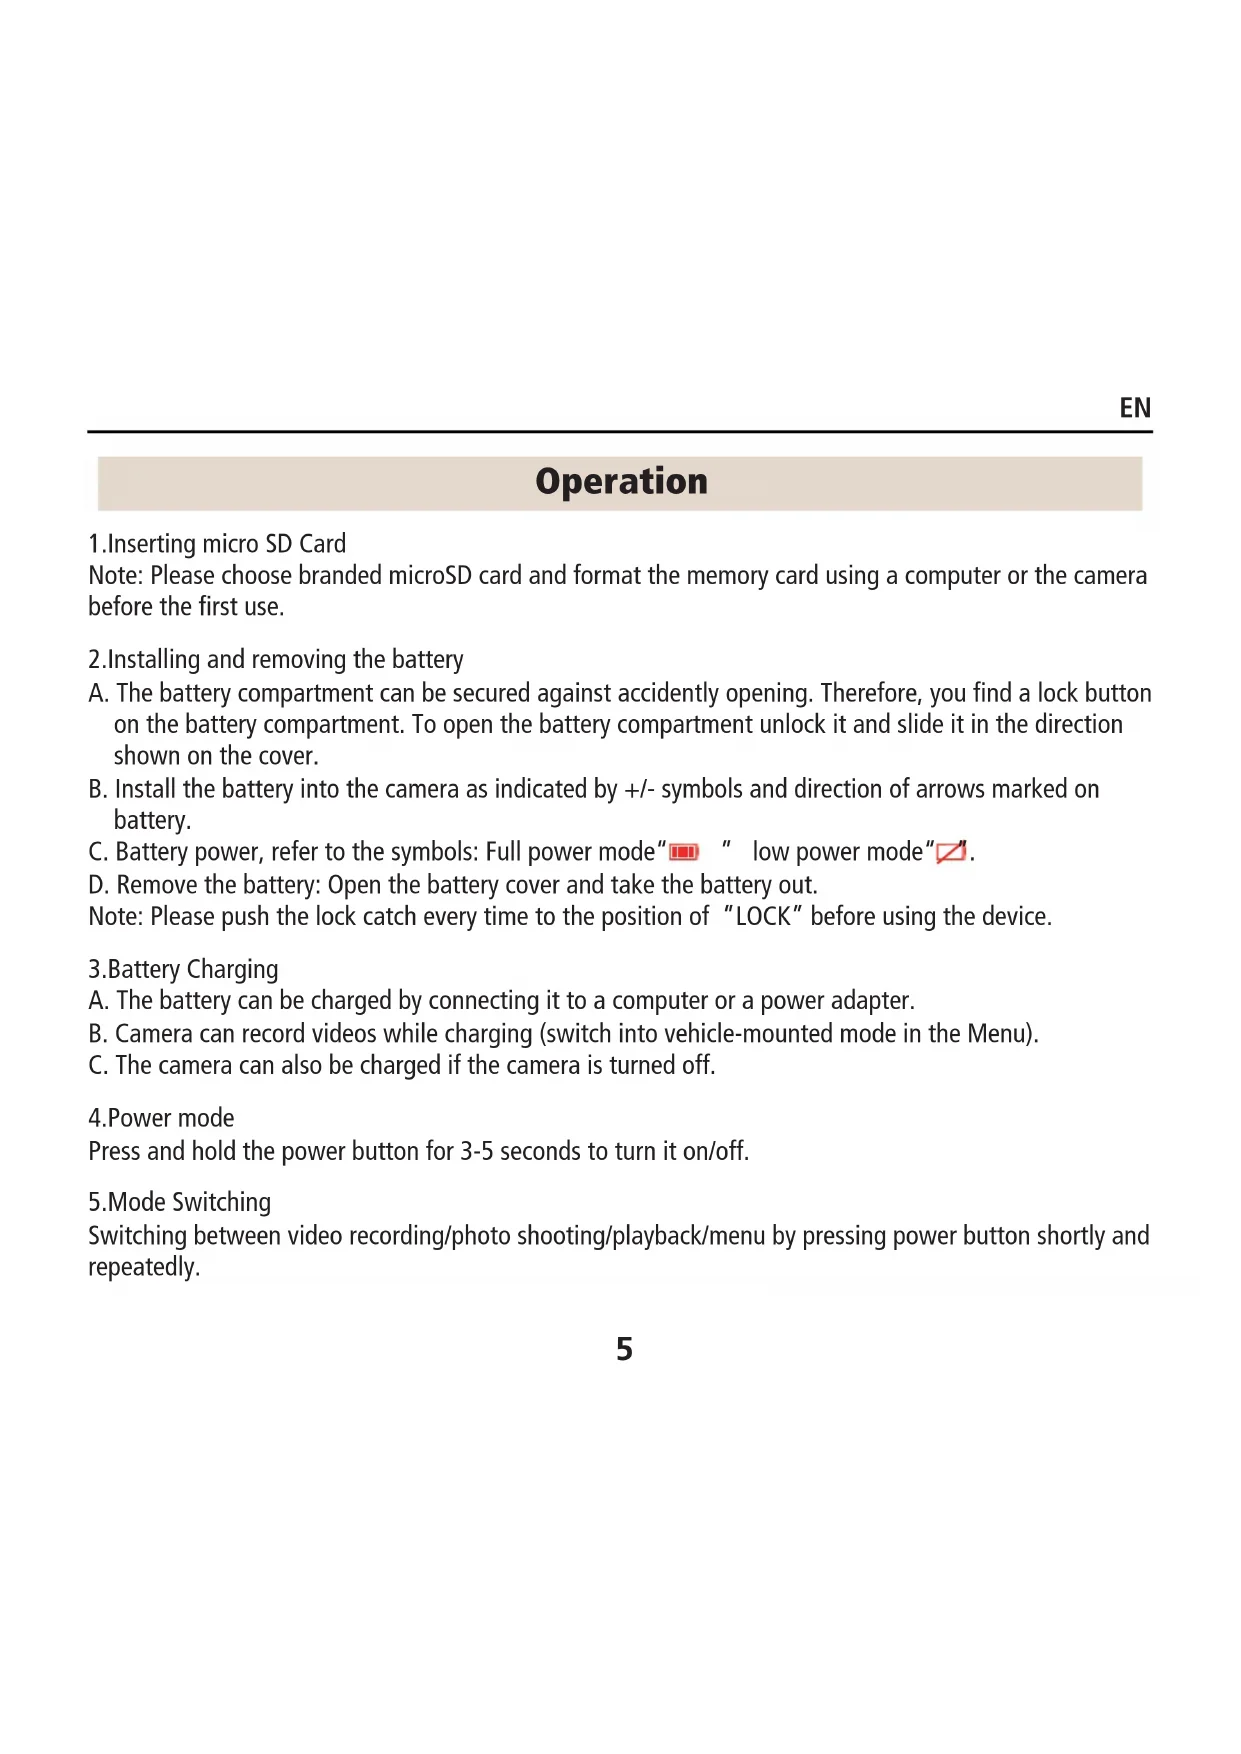
1.Inserting micro SD Card
Note: Please choose branded microSD card and format the memory card using a computer or the camera before the first use.
2.Installing and removing the battery
A. The battery compartment can be secured against accidently opening. Therefore, you find a lock button on the battery compartment. To open the battery compartment unlock it and slide it in the direction shown on the cover.
B. Install the battery into the camera as indicated by +/- symbols and direction of arrows marked on battery.
C. Battery power, refer to the symbols: Full power mode " " low power mode" ".
D. Remove the battery: Open the battery cover and take the battery out.
Note: Please push the lock catch every time to the position of "LOCK" before using the device.
3.Battery Charging
A. The battery can be charged by connecting it to a computer or a power adapter.
B. Camera can record videos while charging (switch into vehicle-mounted mode in the Menu).
C. The camera can also be charged if the camera is turned off.
4.Power mode
Press and hold the power button for 3-5 seconds to turn it on/off.
5.Mode Switching
Switching between video recording/photo shooting/playback/menu by pressing power button shortly and repeatedly.
6.WiFi Control
Before using the WiFi Control function, please install the app "Rollei 530-630" to your smartphone or tablet PC. After turning the camera on, press the WiFi button for 2 seconds and turn on/off the WiFi function. If WiFi is turned on the WiFi symbol will be shown on the display. If WiFi is turned on, the camera will reset. WiFi icon becomes green after resetting and waiting for 5 seconds (this expresses that WiFi can be connected normally now).
Open the WiFi connection at your mobile phone to search for the camera device: AC530 from the available wireless networks. (Password is1234567890).
3.Start the "Rollei 530-630" software.
7. Remote Control
Start the camera and go to the "Setting Menu". Select "Remote control Pair" and press "OK". The camera will display "Remote control Pair Start". At the same time, press any key on the remote control and blue light will start flashing. On the camera screen appears "Pair" and after approximately 20 seconds "remote control Pair Success!", will be displayed on the screen. That means, the connection is successfully done and the camera turns back to normal mode.
8. How to record videos and configure recording setting
8-1. Video Recording
Switch to recording mode and there will be an icon in the upper left corner of the screen.
Press OK to start recording and the icon will start to flash. Press "OK" again to stop recording and the icon will disappear.
8-2. Photo Shooting & Setting
Switch the camera on and press "Mode" to select "Photo shooting Mode". The icon in the upper left corner of the screen shows, that the camera is in the photo shooting mode. Press "OK" to take photos.
8-3. Burst Mode & Setting
Switch the camera on and press "Mode" to select "Burst shooting Mode". The icon in the upper left corner of the screen shows, that the camera is in the Burst photo shooting mode. Press "OK" to take photos.
8-4. File Storage & Playing
Switch the camera to the "Playback Mode" ("") is shown on the top left corner of video preview mode, and " ") is shown on the top left corner of photo preview mode.), select files by using the UP and DOWN arrows, then replay and stop videos or review photos by pressing the shooting button. You can also replay by mobile phones via WiFi.
Note: In case, the camera freezes during use, remove and reinsert the battery.
| Specifications | ||
| Image Sensor | Type | 1/2.3" CMOS 14MP |
| Effective Pixels | Approx. 14Mega Pixels (4320 * 3240) | |
| Approx. 14.24 Mega PixelsOutput Pixels | ||
| Lens | Focal Length | Lens f= 3.06mm |
| F No. | F= 2.8 | |
| F.O.V(D) | 166°(H=120° V=89°) | |
| LCD Display | 2" 960*240 dots matrix TFT LCD | |
| Viewfinder | Optical Viewfinder | No |
| Focusing | Type | Fixed |
| Esposizione | Control Programmed AE | |
| Compensation | ± 2EV (0,33 EV) -2,0 / -1,0 / + 0,0 / + 1,0 / 2,0 | |
| ISO Equivalent | Auto, 100, 200, 400, 800, 1600 | |
| LED Modes | No | |
| White Balance | Auto /Daylight / Shade/Tungsten Light / Fluorescent/Underwater | |
EN
| Video resolution | 4K / 30P | 4K 3840x2160 P30 2.7K 2704x1520 P30 1080P: 1920x1080 P60/P30 720P: 1280x720 P120/P60/P30 |
| Audio Mic and Speaker (Mono) equipped | ||
| Image Stabilization | On/Off | |
| Remote control | Remote control distance is about 8 meters | |
| Remote control pairing | Select Remote Pair | |
| media | Internal memory: no internal memory External memory: supporting micro SDHC cards up to 64GB | |
| Video encoder | H.264 | |
| Image Size 14MP | 14M (4320x3240) 10M (4320x2430) 8M (3840x2160) 5M (2592x1944) 2M (1920x1080) | |
| Video Output | HDMI: Support 1920x1080 P60, output With CEC Composite: NTSC/PAL | |
| Time Lapse Function | OFF / 3 Seconds / 5 Seconds / 10 Seconds / 30 Seconds / 60 Seconds | |
| Photo Functions | Self Timer: OFF / 3 Seconds / 5 Seconds / 10 Seconds / 30 Seconds / 60 Seconds Burst Rate: OFF / 3 P/s / 7 P/s / 15 P/s /30P/s Time Lapse Photo Interval: OFF / 3 Seconds / 5 Seconds / 10 Seconds / 30 Seconds Time Lapse photo shooting time: 5Min/10Min/15Min/20Min | |
| Default Mode | Video | |
| EIS On / OFF | ||
| Motion Detection | Off / Low / Medium / High | |
| Loop Record | OFF / 2 Min. / 3 Min. / 5 Min. | |
| TV Mode | NTSC / PAL | |
| Light Freq. | 50HZ / 60HZ | |
| Screen_Off | OFF / 30 Seconds / 1 Min. / 2Min | |
| WiFi LED ON | / OFF | |
| Sharpness Strong / Normal / Soft | ||
| Scene Mode | Normal / Flashi/Night/Sports/Landscape/Portrait/Sunset | |
| ISO Auto / 100 / 200 / 400 / 800 / 1600 | ||
| EV: 0.0 EV: -2.0 / -1.0 / +0.0 / +1.0 / +2.0 | ||
| Time Setup | set-up time | |
| Date Format | Y/M/D,D/M/Y,M/D/Y | |
| Wi-Fi ON / OFF | ||
| WiFi SSID AC530 | ||
| WiFi Password | 1234567890 | |
| Format YES/NO | ||
| Default Setting | YES/NO | |
| Version AC530 V1.0 | ||
| Interface USB 2.0 : Recharging/File Transfer | ||
| Power Source | Li-ion rechargeable Battery 1050mAh | |
| Dimensions (W*H*D) | L: 61mm, W:42mm, H:23 mm(with lens part will be 33mm) | |
| Weight about 78.5g (with battery) | ||
| Support | Mass Storage Driver Windows XP (Service pack 2) or later Mac OS X 10.5.11 or later | |
| System Requirements | ||
| For Windows | *PC with processor better than Pentium 4 3.2GHz *Windows XP (Service pack 2) or later *Minimum 1 GB System RAM *Minimum 256 MB RAM Video Card *USB port, CD-ROM drive *1024*768 pixels, 32-bit color display compatible monitor | |
Disposal



Dispose of packaging: For disposal, separate packaging into different types. Cardboard and board must be disposed of as paper and foil must be recycled.
Disposal of Waste Electrical and Electronic Equipment and/or Battery by users in private households in the European Union.
This symbol on the product or on the packaging indicates that this cannot be disposed of as a household waste. You must dispose of your waste equipment and/or battery by handling it over to the applicable take-back scheme for the recycling of electrical and electronic equipment and/or battery. For more information about recycling of this equipment and/or battery, please contact your city office, the shop where you purchased the equipment or your household waste disposal service. The recycling of materials will help to conserve natural resources and ensure that it is recycled in a manner that protects human health and environment.
Battery warning
- Never dismantle, crush, or pierce the battery, or allow the battery to short-circuit. Do not expose battery being placed in high temperature environment, if battery leaks or bulges, stop continue to use.
- Always charge using the charger. Risk of explosion if battery is replaced by an incorrect type.
- Keep the battery out of reach of children.
- Batteries may explode if exposed to naked fire. Never dispose of batteries in a fire.
- Disposed of used batteries observing local regulations.
- Before disposing the device, please remove the battery.
Conformity
The Manufacturer hereby declares that the CE marking was applied to the Rollei Actioncam 530 in accordance with the basic requirements and other relevant provisions of the following CE Directives:
2011/65/EC RoHs Directive
2014/30/EU EMC Directive
2014/35/EU LVD Directive
2012/19/EC WEEE Directive
2014/53/EU RED-Directive

The EC Declaration of Conformity can be requested from the address specified on the Warranty card.
Warning
Switch to recording mode and there will be an icon in the upper left corner of the screen.
Press OK to start recording and the icon will start to flash. Press "OK" again to stop recording and the icon will disappear.
8-2. Photo Shooting & Setting
Switch the camera on and press "Mode" to select "Photo shooting Mode". The icon in the upper left corner of the screen shows, that the camera is in the photo shooting mode. Press "OK" to take photos.
8-3. Burst Mode & Setting
Switch the camera on and press "Mode" to select "Burst shooting Mode". The icon in the upper left corner of the screen shows, that the camera is in the Burst photo shooting mode. Press "OK" to take photos.
8-4. File Storage & Playing
8-2. Photo Shooting & Setting




- Preface
- Product Features
- Product Discription
- Waterproof Case Description
- Operation
- 6.WiFi Control
- Remote Control
- How to record videos and configure recording setting
- 8-1. Video Recording
- 8-2. Photo Shooting & Setting
- 8-3. Burst Mode & Setting
- 8-4. File Storage & Playing
- Disposal
- Disposal of Waste Electrical and Electronic Equipment and/or Battery by users in private households in the European Union.
- Battery warning
- Conformity
- Warning
Brand : ROLLEI
Model : Actioncam 530
Category : Camcorder