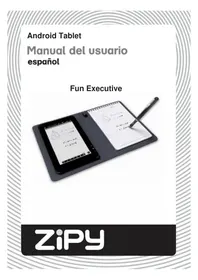
Fun University - Tablet Zipy - Free user manual and instructions
Find the device manual for free Fun University Zipy in PDF.



User questions about Fun University Zipy
0 question about this device. Answer the ones you know or ask your own.
Ask a new question about this device
Download the instructions for your Tablet in PDF format for free! Find your manual Fun University - Zipy and take your electronic device back in hand. On this page are published all the documents necessary for the use of your device. Fun University by Zipy.
USER MANUAL Fun University Zipy
Personalizarlapantalladeinicio
Supportd'applicationstierces
consultez la section "Gestion des applications").
Tierce maintenance applicative
- Donotsubjectthedevicetosevereimpactordropitfromheights.
- Donotusethedeviceminextremehotorcold,dustyordampconditions.Donot exposeittodirectsunlight.
- Avoidusingthedeviceinerstrongmagneticfields.
- Keepthedevicewayfromwaterandotherliquids. Intheeventthatwateror otherliquidsenterthedevic, powerofftheproductimmediatelyandcleanthe device.
- Donotusechemicalstoccleanthedevicinordertoavoidcorrosion.Cleanit withadrycloth.
- Wearenotresponsiblefordamageorlostdatacausedbymalfunction,misuse, modificationofthedevicerebatteryreplacement.
- Donotattemptdisassemble,repairormodifytheproduct. Thiswill invalidate thewarranty.
- Ifthedevicewillnotbeusedforanextendedperiodoftime,pleasecharge the batteryatleastoncepermonthtomaintainbatterylife.
- Chargethebatteryif:
a)Thebatterylevelicondisplays
(Anemptybattery)
b)Thedevicepowersoffautomaticallywhenstarted.
c) Thereisnoresponsewhenpressingkeyswithkeysunlockedandbattery full.
- Whenthedevicewisbeingformattedortransferringafile,donotinterruptthe connection. Otherwise,datamaybecorruptedoflost.
- WhenthedeviceisusedasaportableHD,pleaseuseonlyhypertheinstructions. Otherwise,permanentdatalosscouldoccur.
- Pleaseuseandinstalldatausingtheattachments/accessoriesprovidedandonly accordingtothemanufacturer'sinstruction.
- Pleaserefertotheinformationonthebottomofthedeviceforelectricaland safetyinformationbeforeinstallingdataoroperatingthedevice.
- Toreducetheriskoffirelectricshock, donotexposethisdevicetorainormoisture. The devices should not be exposed to drippingorsplashing. Never placeobjectsfilledwithliquids, such as vases, onthe device.
- Thereisdangerofexplosionifthebatteryisreplacedincorrectly.Replaceonly withthesameorequivalenttype.
- Thebattery(batteryorbatteriesorbatterypack)shouldnotbeexposedto excessiveheatsuchassunlight,fireorthelike.
- Pleasefollowresponsibleproceduresforbatterydisposal.
-
Ifthepoweradaptorisdisconnectedfromthedevicethedevicewillremain operableaslongasthebatteryhasssufficientcharge.
-
ThepoweradaptorisaCLASSIIapparatuswithdoubleinsulation,andno externalgroundisprovided.
- Safetysymbolexplanation:
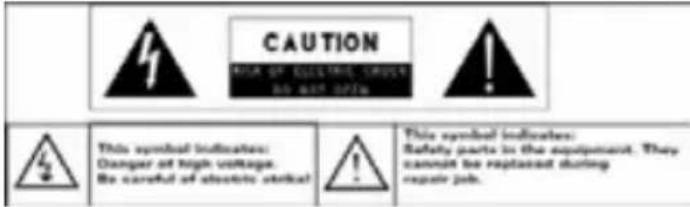
- Thelightningflashwitharrowssymbolwithinanequilateraltriangleis intendedtoalerttheusertothepresenceofnon-insulated"dangerous voltage"withintheproduct'senclosurethatmaybeofsufficientmagnitude toconstituteariskofelectricshock.
-Toreducetheriskofelecricshock,donotremovethecover(orback)asthere arenouser-serviceablepartsinside.Referservicingtoqualifiedpersonnel. - Theexclamationpointwithinanequilateraltri angleisintendedtoalertthe usertothepresenceofimportantoperatingandmaintenanceinstructionsin theliteratureaccompanyingthedevic.

CorrectDisposalofthisproduct. Thismarkingindicates that this product should not be disposed of with other householdwaste in the EU. To prevent possible harmtotheenvironmental health from uncontrolled waste disposal,recycleitresponsibly to promote the sustainability of material resources. Todispose of your used device, please usethereturn and collection systems available in your area or contact the retailer where the product was purchased. Theyc antakethisproductforsafe environmental recycling.
- Donotleavethedevicemoninaconfinedspacesuchasabookcaseorsimilar. Theventilationsshouldnotbeimpededbycoveringtheventilationopeningswith itemsssuchasnewspaper,table-cloths,curtains,etc.
Noopenflames,suchaslightedcandles,shouldbeplacedonthedevice. - Usethedeviceminmoderateclimates.
ListeningCautions
- Donotlistentoyouearphonesorheadphonesatahighvolume.Hearingexpert adviceagainstcontinuousextendedplay.
- Excessive volume through earphones and headphones can cause hearing loss.
Ifyouexperiencearinginginyourears,reducevolumeordiscontinueuse. -
Donotusewhileoperatingamotorizedvehicle.Itmaycreateattraffichazard andisillegalmanyareas.
-
You should use extreme cautionortemporarily discontinueuseinpotentially hazardoussituationscreatedbyobstructedhearing.
Evenifourheadphonesorearphonesaretheopen-airtypedesignedtoletyou hearoutsidesounds,don'tturnupthevolumesohighthatyoucan'thearwhat's aroundyou.
Soundcanbedeceiving.Overtimeyourhearing"comfortlevel"adaptstohigher volumes of sound. What sounds "normal" can actually be loud and harmful to yourhearing.Guardagainstthisbysettingthevolumeofyourdeviceatasafe levelBEFOREyourhearingadaps.
Toestablishhasafevolumelevel:
a.Startyourvolumecontrollalowsetting.
b. Slowly increasethesounduntilyoucanhearitcomfortablyandclearly, andwithoutdistortion.Onceyouhaveestablishedacomf ortablesound level. leaveithere.
This manual may not reflect your actual device's operation. All information is subject to changewithout priornotification. Please follow your actual device's operational procedures.
Table of Content
Safety Precautions. 1
Listening Cautions 2
Feature Summary. 5
Accessories 5
Buttons & Ports 5
Charging Battery. 6
Transferring Files 6
Turning On/Off 7
Home Screen. 7
Accessing Internet 9
Reading E-Books 11
Playing Music 15
Playing Video 18
Viewing Photos 19
Take Handwritten Notes 20
File Explorer 24
Voice Recording 26
Sending/receiving E-mails 26
Manage Third-party Applications 28
Managing Tasks. 29
System Settings 29
Troubleshooting 30
Specifications 31
FeatureSummary
7.0"TouchScreen
Touchorslide your fingeronthescreen, thescreen responds instantly.
Wi-FiConnectivity
With the latest Wi-Fi technology, this device can connect you to the Internet wherever you are.
InkCompatibility
With the built-in ultrasound and infrared technologies and a digital pen, you can take handwritten notesordrawingsonthedevic.
Third-partyApplicationSupport
Withthebuilt-inAndroid OS, you can install largenumberofthird-party applications in the device.
Built-inG-sensor
Thescreenchangestolandscapeorportraitautomaticallywhenthedevicerotates.
Entertainment
Youcanenjoymusic,movies,picturesande-bookswiththeMobileTablet.
Accessories
-
USBCable
InkRefill
Notebook -
PowerAdaptor
-
UserManual
-
RefillExtractor
PenBatteries(2)
Buttons&Ports
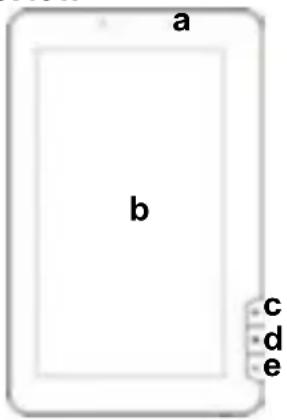
FrontView
TopView
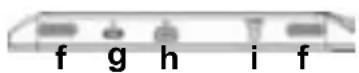
a.ChargelIndicator
b触摸Screen
c.Home-GototheHomeScreen.
d.Menu-Displaymenuoptions.
e.ESC-Returntothepreviousscreenordirectory.
f.Built-inSpeakers
g.PowerButton-pressandholdtoturnonoroff thedevice;brieflypressstoturnthescreenonoroff.
h.USBPort-connectstoacomputerthroughthe USBcable.
i.DC-INport-connectstoanystandardelectric sourcethroughtheprovidedAC adaptor.
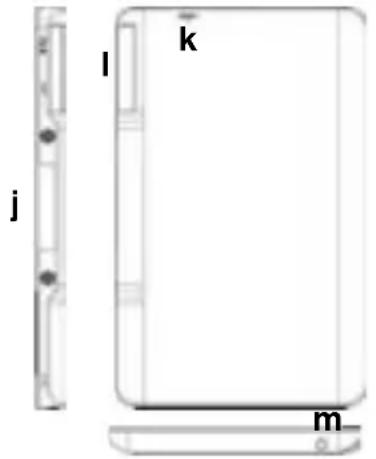
Rear View
j.Ultrasound and Infrared Sensor - capture handwritten notes or drawings.
k Reset pin hole - reset your device if the device freezes.
I.SD Card Slot - accommodates SD memory card.
m.Earphone Port - connects to stereo earphones.
Charging Battery
The device has a built-in rechargeable battery. No extra battery installation is required. Just charge the device when it indicates low battery.
You are strongly recommended to charge the battery immediately when the device indicates the battery is lower than 15% .
To charge the battery, connect the device to any standard wall outlet via the DC-IN port through the power adaptor. It takes about 5 hours to fully charge the battery.
Note:
a. You can operate the device even when it is being charged. But for extended battery life, it is suggested NOT to use the device when it is charging.
b. It is recommended to charge the battery before you use the device for the first time.
c. For maximum performance, lithium-ion batteries need to be used often. If you don't use the device often, be sure to recharge the battery at least once per month.
Transferring Files
Before reading or playing files, you need to transfer media files from a computer to the device.
(1) Connect the device to a computer with the supplied USB cable.
(2) Once connected, two removable disk drives will show on your computer. One represents the internal memory of the device, and the other represents the memory card inserted into the device. Now you can copy files from or to these disk drives just as you would on your hard drive.
(3) Once the data transfer completes, drag from the top bar downwards to display the USB notification message as shown.
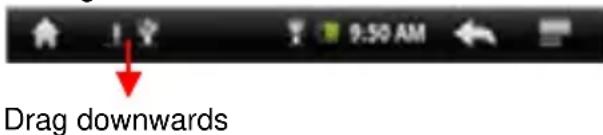
(4) Choose "Turn off USB Storage" and then tap "Turn Off" to disconnect the device from computer.
(5) Disconnect the device from the PC safely.
a) Left-click the icon at the right bottom corner of the computer desktop.
b) Click the pop-up mini-window message of "Stop the USB Mass Storage Device - Drive (X)."
c)Disconnect the device from the computer.
Note: The pre-installed applications and Android OS occupy a considerable part of capacity - nearly more than 1GB, it is normal that you see huge difference between available memory space and total capacity.
Turning On/Off
To turn on the device, press and hold the Power button on the unit until you see the boot-up screen then release. It may take a few minutes to start up the system, please wait before you proceed.

To turn off the device, press and hold the Power button until you see the option "Power Off", tap on "Power Off" and then tap on "OK".
Tip: This device will sleep with the screen off if it stays inactive for a few seconds. You can briefly press the Power button to turn on the screen and wake it up.
Home Screen
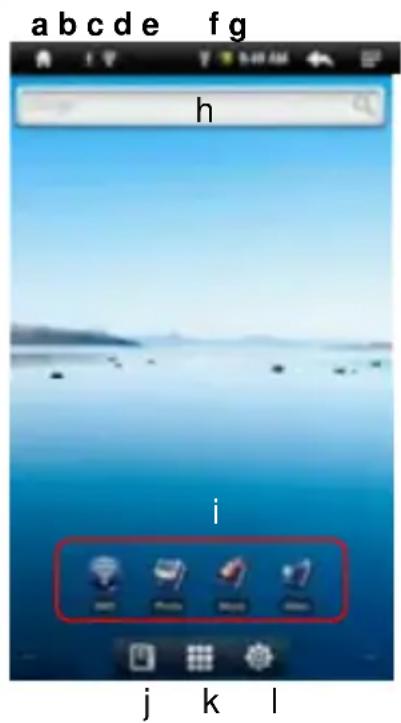
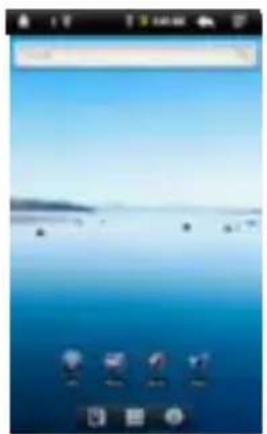
a. Home: Go back to the Home Screen wherever you are in the interface.
b. Memory Card/USB connection indicator
c. WiFi Connection indicator
d. Battery Level
e. Current Time
f. Return: Return to the previous directory.
g. Menu: Tap to display an overlay setting menu.
h. Quick Internet Search - You can input anything you wish you search on the searching Bar ( required WIFI connection)
i. Default shortcut - WiFi, Photo Viewer, Music Player, Video Player
j. E- Reader - Shortcut to E-Reader Page.
k. Applications - Shortcut to Application Page.
I. System - Shortcut to System Setting
HowtousetheTouchScreen
- Whenwatchingavideoorlisteningtomusic, youcantaptheprogressionbartogodirectlytoadifferent locationinthevideoorsong.
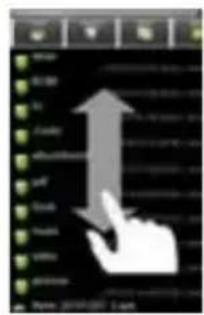
- Inthefileexplorer(File,Music,Video,Photo,etc.),you can dragyourfingerupanddowntoscritthefilelistupanddown.
CustomizetheHomeScreen
You can customize the Home Screen by adding/removing shortcuts and widgets, changingthewallpaper.
- ToaddaHomeScreenitem(shortcuts, widgets, foldersetc.), tapontheMenuicon andthenselect“Add”. You canalsoholdyourfingeronthescreenandthen chooseanitemfromthelist.
- YoucanaddafolderontothefHomeScreenbyholdingyourfingeronthescreen and thenchooseFolders NewFolder. Youcandragshortcutsorwidgetstothefolder. Torenamethefolder, a)naptoopenthefolder, b)holdyourfingeronthetitlebarof theopenedfolderuntiltheRenamewindowpopsup, c)inputfoldername.
- TomoveaHomeScreenItem, holdyourfingerontoituntilitishighlighted, thendrag ittothedesiredlocation, and releaseit.
- To remove a Home Screen item, hold your finger onto it until it is highlighted, drag it to the recycle bin which turns from the Application Tab, and then release your finger.
- Tochangethewalkpaper,fromtheHomeScreen,tapontheMenuicon,alistof optionsappears.Tapon"Wallpaper"andthenchooseapictureasthedeskelp wallpaper.
- TochangetheSystemSettings,fromtheHomeScreen,tapontheMenuicon, andthentapon"Settings".Chooseacategory:"Wireless&Networks", "Sound& Display", "Date & Time", etc. For more information on the different settings, see the SystemSettingssection.
DisplayallApplications
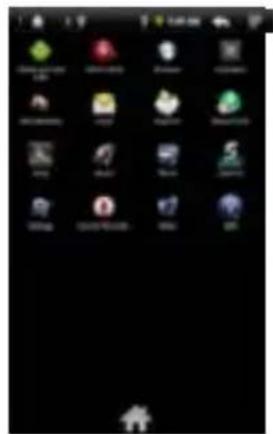
Thedevicesupportsmostofpopularthird-partyapplications.lthasmanyuseful applicationspre-installed,suchasmusicplayer,videoplayer,photoviewer,alarm clock,calculator,etc.Furthermore,youcanaddmoreapplicationstothedeviceyinstalling themmanually.
Todisplayallapplicationsinstalledonyourdevice,taptheApplicationTab

AccessingInternet
Your Tablet features built-in Wi-Fi technology that allows you to access Internet. First of all, you need to configure a Wi-Fi network. For the Wi-Fi configuration proceduretowork,youneedtobeinaWi-Fizonethatwillallowyoutoconnecttoit. EverytimeyourTableisinrangeofanetworkthatyouhavealreadyconfiguredonce, itwillattempttomakeaconnection.
MakingWIFIConnection
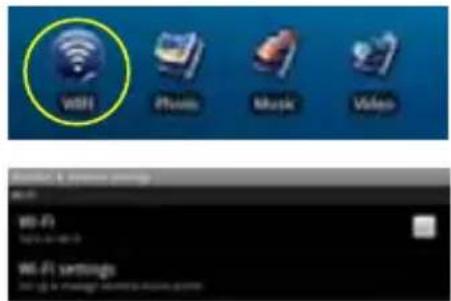
(1)IntheHomescreen,tapontheWiFiicon.
(2) Tap on the "Wi-Fi" setting to turn on the Wi-Fi.
(3)Tapthe"Wi-Fisittings",yourTabletwillscan automaticallyforavailableWiFinetworksand displaythem.Thelistofavailablenetworks showsallthewirelessnetworksinrangeofyourdevice.
Note:
a) The availablenetworklistisconstantlyrefresheshadautomatically.
b) Whenthe Wi-Fiisenabled, your Tabletwill connect automatically to your configured networks when they are in range.
c) If your Tablet finds a network that has never been configured, it will display a notification icon.
(4) Tap on the network you want to connect to, enter the required network information (password) and thentapon "Connect". Your Tablet will now attempt to establish a connection that Wi-Fi hot spot with then network parameters you entered. If the connection is successful, themessageConnectedtoXXXwill appear under the WIFI setting.
AdvancedConnection
- TomanuallyscanforavailableWi-Finetetworks, in the "Wi-Fisettings" screen, tap the Menuicon and thentap "Scan."
- IftheWi-Finetetworkyouwanttoconnecttodoesnotappearinthelist, scrolldown the screen, andthentap“AddaWi-Finetetwork.”Entertherequiredinformation, and
thentap"Save."
- TosetupIPaddressmanually,taptheMenuicon,tap“Advanced”andtheninput allrequirednetworkparameters(“Regulatorydomain,”“IPaddress,”etc).Youcan obtaintheseparatemersfromthenetworkadministrator.
LaunchingtheWebbrowser
TaptheApplicationsicontodisplayallapplications,andthentaptheBrowsericon tolaunchtheWebbrowser.
Ifyouarealreadyconnectedtoanetwork,theWebbrowserwillsimplyopenandyoucan
startbrowsingtheWeb.Toaccessanewwebsite,taptheMenuicon

todisplaythe
menu,andthenselect"Go"toinputanotheraddress.
Note: Not all wireless networks offer access to the Internet. Some Wi-Fi networks only link several computerstogether, without any Internet connection.
UsingtheVirtualKeyboard
Tappingonanytextinputfieldcanopenthevirtualboard.Withthevirtualkeyboard, youcanenterawebsiteaddressoranytextrequired.
Indications
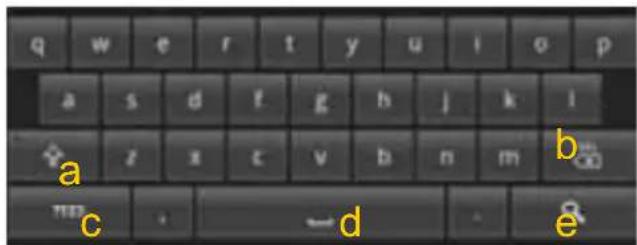
a.CapsLock
b.Backspace.
c.NumberandCharacters /LetterKeyboardSwito
d.Space
e.Enter
SelectingInputMethod
If you have installed more than one input method in this device, you can select one method by a) holding the button until the Android keyboard settings appear; b) choosing "InputMethod" and then choosing your desired one.
UsingtheWebBrowser
- Youcansrollthescreenupanddownbytappingonthepageanddraggingitupordown(becarefulnottotapalinkuntilyouareready!).
Toopenalink,simplytapit. - Youcanopenseveralwebpagesatatime,viewthemallatonceonthescreen, andthentaponeofthemtoviewitinfullscreen.
- Togobacktothepreviouspagethatyoubrowsed,taptheBackicon.
- Todisplaytheavailablemenuitems,tapthemenuicon.
- TogobackdirectlytotheHomescreen,taptheHomeicon.
-
Dependingwhereyouareinthewebbrowser,holdingdownnonanitemwillgive youaccesstomoreoptions.
-
To fill in a text field, tap in the field, then use the virtual keyboard to type in the required text.
Web Browser Menu Items
When you are viewing a page, you can tap the menu icon to display the menu items.
| New window | Allows you to open new windows. |
| Bookmarks | Will open the "Bookmarks" manager. You will see three tabs: "Bookmarks," "Most visited," and "History." "Bookmarks" shows you a list of bookmarks. Just tap one of them to open it in the current window. Holding down a bookmark will give you access to several options (you will be able to edit it, rename it, delete it, etc.). You can also use the Menu icon which will allow you to bookmark the last-viewed page. "Most visited" and "History" allow you to access your "Most visited" sites and your visit history. In the "History" tab, the Menu icon allows you to clear the history. |
| Refresh/ Stop | "Stop" will stop loading the web page, if it is currently loading. "Refresh" will refresh the current web page, if it has stopped loading. |
| Windows | When you have several windows currently opened, tap "Windows" to displaythemallatonceonthescreen. Justtaponeofthesmallwindows toviewitinfullscreen,ortapthe Closeiconinthesmallwindowtoclose the window. |
| Forward | Will go to the next page that you browsed. |
| More | Willgiveyouaccessstootheroptions ("Findonpage","Selecttext","Page info," "Downloads," "Settings" etc.). |
Reading E-Books
Start Reading
(1) In the Home Screen, tap the E-book Reader shortcut to enter the e-book reader mode.
(2) Tap an e-book to start reading immediately.
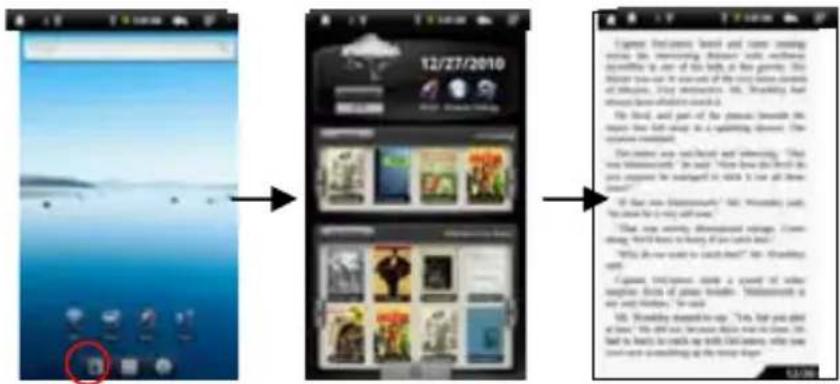
Tip: Tapping on the Left Arrow or Right Arrow can scroll left or right though the e-books.
Note:
a. Make sure your e-books are in format of PDF, EPUB, TXT, FB2, RTF or PDB supported by the device.
b. E-book cover will show as defaulted cover by the device if the e-book has no cover data. That's why you see some e-book covers are the same.
History and My Library
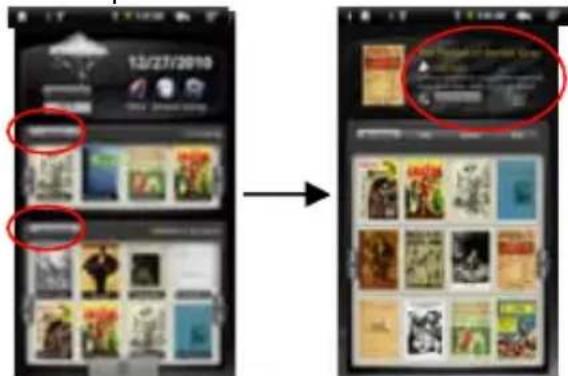
You can tap "History" to view your reading history or tap "My Library" to enter the e-book library. "History" shows all of the e-books that you have read by date. "My Library" shows all of e-books stored in the device.
View e-book Information
In the history or e-book library, you can view information about an e-book before you start reading it. Tap an e-book, and the book name; author or publication year of the e-book should display at the top screen.
Sort e-books
In the history or e-book library, you can sort e-books by title, author or file size by tapping on Title, Author or Size.

Start Reading
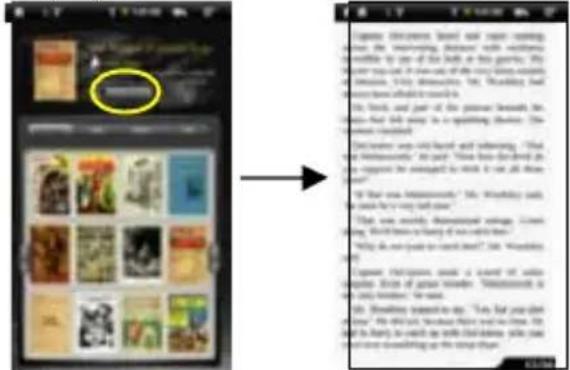
To start reading an e-book, tap "Continue Read".
Page Up/Down
When you are reading the e-book, you can slide your finger on the screen left and right OR press the PREVIOUS/NEXT buttons on the device to page up or down.
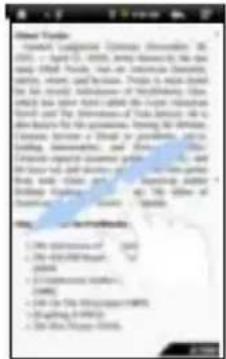
Increase Font Size
(1) When you are reading, tap the Menu icon to display e-book settings.
(2)Tap "Font Size" to adjust the font size.
(3) Tap a size that you want, and then tap "OK" to confirm.
Jump to a Page
You can directly go to a page that you have specified.
(1) When you are reading, tap the Menu icon to display e-book settings.
(2)Tap "Go to".
(3) Tap the page number input field to display the virtual keyboard.
(4) Tap the numbers to input the page number.
(5)Once you finish inputting the page number, tap "OK" to jump to the specified page.
Use Bookmarks
You can add, delete or load bookmarks on the page.
(1) When you are reading, tap the Menu icon to display e-book settings.
(2) Tap "Bookmarks" to display a bookmark menu. Use the menu to add, delete or display bookmarks.
ShowOutlineofthee-book
You can view the outline of the e-book and then choose your desired chapter or sectiontread.
(1) When you are reading, tap on the Menu icon to display book settings.
(2) Tap on "TOC" to display the outline of the e-book, and then tap the chapter that you wanttread.
DownloadebookswiththeAdobeDigitalEdition
Once you have purchased一本书 online, you need to transfer them to your Tablet using the Adobe Digital Editions software which allows you to view and manage e-books protected by DRM license.
To transfer DRM-protected e-books,
- Access the website http://www.adobe.com/products/digital Editions/, and then installtheAdobeDigitalEditionsoffowlingtheinstructionsonline.
- Authorization your computer with your Adobe Dand Password.
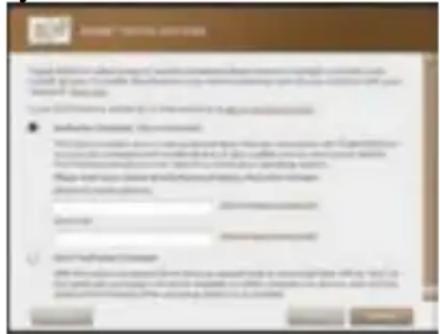
3 Activate your Tablet.
ConnectyourTabletocomputerwiththeUSBcableandstartuptheAdobeDigital Editions.Click"AuthorizationDevice"toauthorizeyourTablet.
TheAdobeIDcanbeusedonlyforsixtimes.Itshouldexpireafter6triesofauthorizingdevice. Later,youneedtoledethexpiredIDbypressingCTRL+SHIFT+Donthecomputer keyboardorusingtheEraseActivationRecordsettingonthedevicandthengetanewone
- ThedevicerememberstheepbooksdownloadedwiththelatestAdobeIDonly,andwilloverwrite theeBooksdownloadedwiththepreviousAdobeID.
- DownloadDRM-protectedPDFfiletoyourcomputer.
Access the Internet and search fore-books, choose your favorite books and download them. If thee-bookis protected by DRM, you should be prompted by DRM license information. Click "Open" to start downloading the DRM-protectede-book.
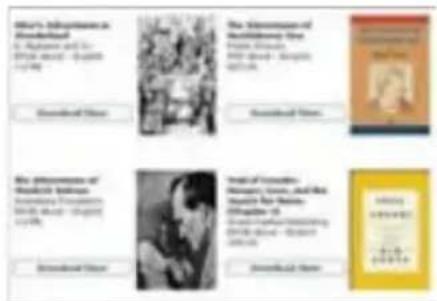
- Click "Purchase", and then you should see your downloaded e-book at the right panel of the Adobe Digital Editions user interface.
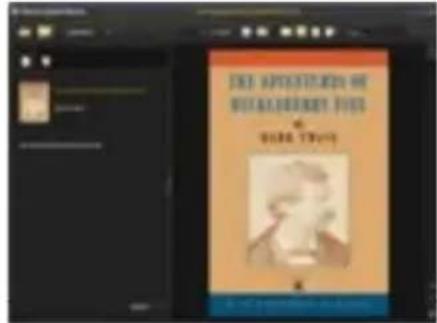
- Connect your Tablet to the computer with the USB cable, and the Adobe Digital Editions should recognize your Tablet.
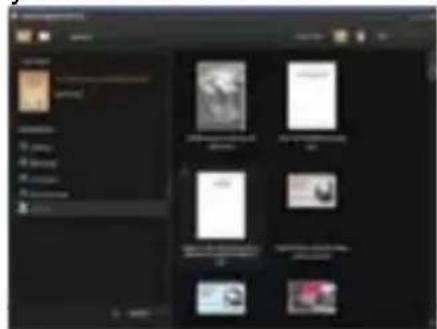
- Click "Purchase" to see your downloaded e-book and then drag it to your Tablet.
Playing Music
In the Home Screen, tap the Music icon to enter the music player mode. Optionally, you can tap the Applications shortcut to display all applications and then tap the Music icon to enter the music mode.
Music Library
You should enter the music library once you start the music player. The Music Library shows your music files sorted by categories (Artist, Album, Genre, etc.) if your music files contain these song information tags. If some of your music files do not contain information tags, they will be classified as (Unknown) in the Music Library. When new music is copied to the device, the Music Library will be updated automatically.
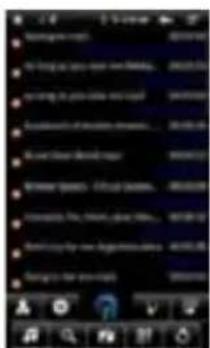
-
You can drag your finger up and down on the file list to scroll through the list.
-
Tap a track to play a track.
To return to the Home Screen, tap

Music Library Menu
Once you enter the music library, you should see the toolbar at the bottom of the screen. Tap and hold your finger on the icon and you should see its name.
| All Music | List all music files. |
| Internet Search | Allows you tosearchfor aspecific song onthe Internet byenteringafewlettersorawordanddownloadthesong from the Internet. |
| Artist | List music files by artist. |
| Album | List music files by album. |
| Genre | List music files by genre. |
| Playlist | Display playlists. |
| Directory Browsing | Navigate through music files and folders stored in the internal memory and memory card. |
| Enter Play Interface | Go to the Now Playing screen. |
| Return | Return to Home Screen. |
Search for Tracks
You can search for tracks in the internal memory or memory card by inputting a few key words.
(1)In the music library, tap the Directory Browsing icon in the menu.
(2) Choose the memory where you want to search for tracks.
(3) Tap the Search icon , and then input a few key words of the track.
(4)Tap to start searching. The track should be listed if found.
Sort Tracks/Folders
You can sort all tracks/folders by their leading letters in order from A to Z, the creation time of the track/folder, the file size or the file type.
(1)In the music library, tap the Directory Browsing icon in the menu.
(2) Choose the memory device to be sorted.
(3) Tap the Sort icon (by file size) / (by file type) / (by leading letter) / (by creation time) to sort the tracks/folders stored in the selected memory device.
Set EQ Mode Manually
When you are listening to the music, tap the Menu icon which allows you to customize your equalizer setting. This device features a 7-band equalizer.
(1) Select a band and then drag your finger up/ down on the band to change the gain level for the frequency range.
(2)Tap "Save Effect" to confirm or tap to return.
Playback Screen
- Slideyourfingervertically onthescreenorrollthe SCROLL button to browse through the music list.
- Tap on the track or press the SCROLL button to play it.
To pause/resume the song, tap on the Pause Play icon.
To play the previous/next song, tap on / - Youcantapontheprogressionbartogodirectlytoadifferent location in the song. You can also drag the cursor in the progression bar to another location in the song.
- Tap on / to adjust the volume.
To change the EQ mode, tap on "EQ".
To play the specified section from A to B, tap on "A-B". - To change the repeat mode, tap on
To add current track to playlist, tap on
To display lyric/ID3 information, tap on
To define the equalizer mode manually, tap on - Tapping continuously on the ID3 information tag will search for the information about the track from the Internet.
To go back to the music library, tap on - To go back directly to the Home screen, tap on the Home icon or Return icon.
Playlist
A playlist is a list of audio tracks that the music player will automatically play one after
the other. On your Tablet, you can play, create and edit as many playlists as you want.
Create a Playlist
(1) While you are in the music list, select the Playlist menu item "a playlist panel will open. You can now start modifying the playlist.
(2) Tap on the New Playlist icon to create a new playlist.
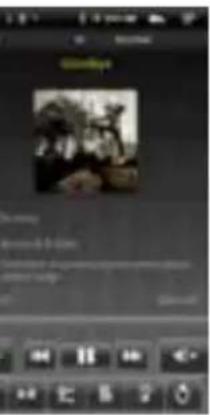
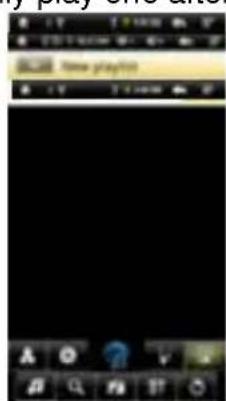
(3) Tap on the Edit icon beside the playlist name to add songs to the playlist.
(4) Tap on the songs you would like to add to your playlist. A check mark “√”should appearbeforethesongifselected.
(5)Whenyouaresatisfiedwithyournewplaylist,taponthe" playlist.
Edita Playlist
Youcanaddtracktoordeetetrackfromtheplaylist.
(1)IntheMusicLibrary,taponthePlaylisticon
todisplaytheplaylists.
(2)Taponthe
iconbesidetheplaylistthatyouwanttoedit.Youcannowadd eletetracksfromtheplaylist.
(3)Taponthesongsyouwouldliketoaddordelete,achheckmarkshouldappearor disappearbeforethesong.Tthesongwithcheckmarkwillbeaddedtotheplaylist, whilethesongwithoutcheckmarkwillbedeletedfromtheplaylist.
(4)Whenyouaresatisfiedwithyourplaylist,taponthe
icontosavetheplaylist.
Deletea Playlist
Todeleteanexistinggallery,
(1)IntheMusicLibrary,taponthePlaylisticon
todisplaytheplaylists.
(2)Taponthe iconbesidetheplaylistthatyouwanttod delete,andthentheplaylist willbedeleted.
Note: You cannot delete the Recently Played playlists since a track is playing.
PlayingaPlaylist
(1)IntheMusicLibrary,taponthePlaylisticontodisplaytheplaylists.
(2)Taponaplaylisttoopenit.Apanelshowingthecontentsoftheplaylistwillopen.
(3)Taponthefirstitemintheplaylisttostartplayingfromthefirsttrack.
PlayingVideo
Tap on the Application Tab to display all applications, and then select "Video Player" toenterthevideomode.
NavigatethroughVideoFiles
You should see the videologist when you enter the videoplayer.
- Youcandragyourfingerupanddownnonthevideolisttoscrolthevideolistupand down.
Taponavideotostartplaying. - YoucangobackdirectlytotheHomescreenbytappingontheReturniconor Homeicon

Playback Screen
- Taponthe /icon to pause/resumethe video,
- Tap on “ ” to display the menu items.
- Tap on the progression bar to go directly to a different location in the video. You canalsouse your fingertodragthecursorintheprogression bar to another location in the video.
- Tap on / to adjust the volume.
- Tap on "W" to set a bookmark at the current spot in the video. Please note only one bookmark can be set for one video, and the new bookmark should cover the old one. To resume playing avideofromthe bookmark, go to the Home Screen, enter the VideoPlayer, and taponthebookmarked video. You should be prompted to "Playfrom beginning" and "Playfrom bookmark". Select "Playfrom bookmark". Indefault, the video plays from beginning. Remove the bookmark, tapon "W" to display the menu, and then choose "DeleteBookmark".
- Tap on to adjust the brightness of screen.
- Tap on / to play the previous or next video.
- Tap on to change the aspect ratio of screen.
- Tap on to stop playing and return the video list.
VideoPlayback Settings
Tap on the icon to display the video settings.
| Play from beginning(this will delete bookmark) | Delete bookmark and play from beginning. |
| DeleteBookmark | Delete the video bookmark. |
| Help | Get instructions on playing video. |
| Play Mode | Single – plays the current video and then stops after playing. Repeat One – Repeat the current video. Repeat All – Repeat all videos. Return |
| Return | Exit from the menu. |
Viewing Photos
Tap on the Application Tab to display all applications, and then select "Photo Browser" to enter the photo mode.
Photo Thumbsils
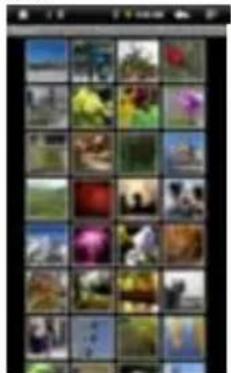
The first screen of the Photo mode shows all the photos and sub folders located in your
Tablet or memory card in thumbnails.
To view a photo, tap on its thumbnail to open it. If a photo is in a subfolder, open the subfolder, and you will see your photo.
Viewing Photo
When you are viewing picture, you can tap on the screen to show a floating toolbar atthebottom of the screen.
- Tostart/pauseasideshowhow,tapontheSlideshowhow icon
To display theprevious/next picture, tap on the left / right arrow beside the picture.
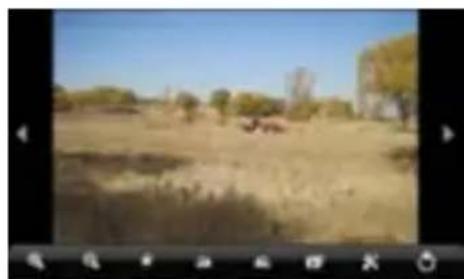
To rotate the picture 90^ counterclockwise, tap on the Rotate Left icon To rotate the picture 90^ clockwise, tap on the Rotate Right icon
- To magnify the current picture, tap on the Zoom In icon. When the picture is enlarged, you can drag the picture vertically or horizontally to move the picture. To decrease the picture size, tap on the Zoom Out icon.
- To set brightness of the screen, tap on
- To display the available menu items, tap on the Setting icon.
- To go back to the photo browser, tap on the Back icon
Take Handwritten Notes
The Tablet consists of a digital pen and a built-in receiving unit which combines ultrasound and infrared technologies to enable an accurate tracking and positioning system that tracks the movement of the pen tip on any surface and converts the movement into a vector image of the user's handwriting, so that you can write notes or make drawings directly on the device.
Installing Pen Batteries
a. Remove the battery compartment cover.
b. Install two SR41 batteries, with the positive poles facing up as shown (Use the enclosed SR41 batteries).
c. Replace battery compartment cover.

WARNING:
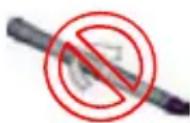
Do not attempt to open the pen. This may cause the pen to malfunction.
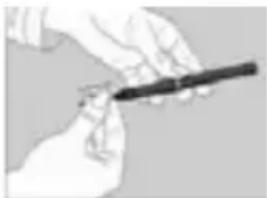
Installing Ink Refill
1.Slide the new refill into the tip of the pen.
2.Gently press the new refill until it is lodged securely in place.
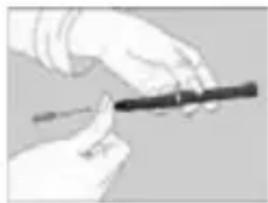
Note: Be sure to use the provided ink refill or refill with similar standard.
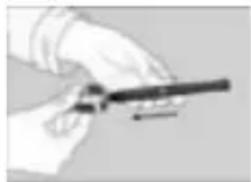
To replace the ink refill,
1.Detach the cap from the digital pen.
2. Clamp the ink refill with the refill extractor. Hold the pen firmly, and apply pressure with the extractor against it.
3.Pull the used refill out.
Writing Correctly
When you pick up the pen, find a position that is comfortable for you. Hold the pen firmly and write normally.
When you are writing with the pen, make sure its inclination to the paper surface is between 45^ and 90^ .
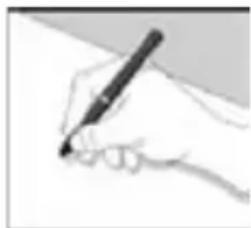
Note: Be careful to hold the pen in a way that does not block the signals sent from the tip of the pen to the Tablet.
Create New Note
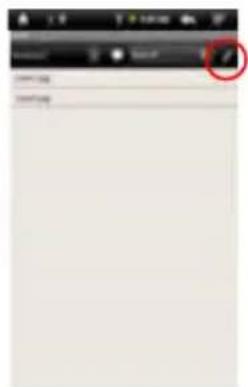
(1) Choose the iNote icon

from applications to run the application.
(2)Tap the Pen icon
to open the drawing board and start drawing or writing.
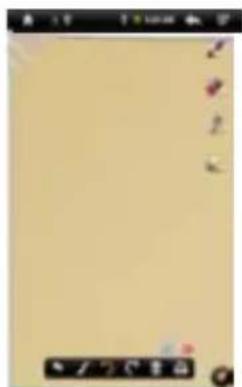
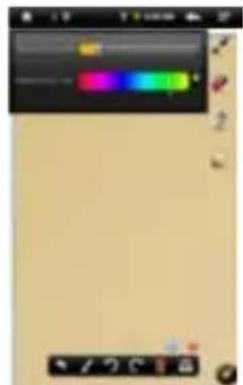
(3) Tap the Pen icon, and then set up the pen width and color.
(4)Lay out the Tablet flat on the surface, pick up the pen and find a position that is comfortable for you, and then start writing on the notepad. Also, you can slide your finger on the screen to make drawings. Be careful NOT to block signals sent from the tip of the pen to the Tablet.
Tapping can undo or redo the drawing.
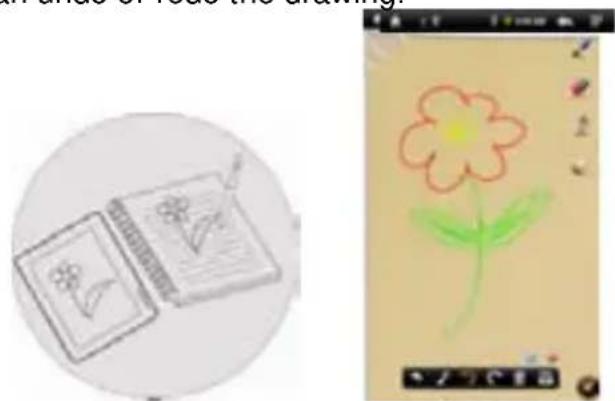
(5)After you have done, click to exit and save your note. Select "SD Card" to save your note to memory card or select "Internal Memory" to save your note the internal memory of the device.
View Note
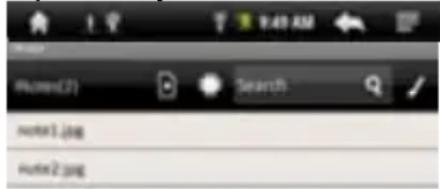
You should see a list of notes when you start up the iNote application.
You can tap a note to view it.
To view notes stored in the memory card, tap
Toviewnotesstoredintheinternalmemory,tap.

SearchforNote
Tosearchforanotebyitsname, inputthekeywordssinthe"Search"filed.
Add/DeleteNote
You can work on multiple pictures/notes at the same time.
-
ClicktheAddicontoopehanewpageforanotherpicture. Youcanaddupto5 pages.
-
When multiple pages are opening, you can click the white dot to go to the correspondingpage.
-
Todeleteonepage,clicktheMinusicon.

ChangePenWidth/Color
Beforeyoustartdrawing,youcanchangethepenwidththorpencolorbytappingthe penicon ,slidingthedoticontoadjusttthewidthhandselectingacolorfromthe colormapatrix.
EraseSketches
Youcanerasetheshketchesyouhaveadded.
(1)Selectthe"Eraser"tool

(2)Useyourfingertowipethelocationyouwanttoerase,oruseyourDigitalPento hovertothelocationandtheneraseit.
ClearSketches
Youcanclearallsketchesfromthepalettebyclickingtheicon.

ChangeBackground
You can change the background of the palette.
(1)Selectthe

icon.
(2)ClicktheLeftandRightArrowtochangethebackground.
Hide/DisplaytheToolbar
You can hideordisplaythetools (Pen, Eraser and ColorPickeretc.) by clicking the icon.
SaveNote
Whenyouaresatisfiedwithyourpicture,youcanclicktheiconand choose savepicture"tosavethepicture.
Annotate/Sketch on Picture
You can edit an existing picture by adding annotations or sketching on the picture.
(1)Make sure you have notes or pictures in the "iNote" folder. You can check it using the Explorer. If not, create or transfer pictures/notes to the folder (see "Transfer Notes" section as below).
Note: a. Pictures must be in format of JPG, BMP, GIF and PNG; b. Picture resolution should not exceed 778*1102.
(2)Click the Open icon on the bottom toolbar.
(3) Choose memory device by tapping A list of notes and drawings should display.
(4) Choose a note or drawing file from the list and open it.
(5)Tap the Pen icon , and then sketch on the picture or add annotations.
(6)After you have done, click to exit and save the picture.
Transfer Notes
Your notes are saved as JPEG files to the iNote folder. You can locate the folder with the Explorer. You can transfer these notes to or from your computer.
(1)Connect your device to computer through USB cable.
(2)Locate the removable disk drive for the device and double click to open it.
(3)Double click the "iNote" folder.
(4)Copy notes from the "iNote" folder from or to your computer.
Send Note
You can send your pictures or notes with your friends by e-mail.
(1)After you finished your picture, click the icon.
(2)Input the e-mail address you'd like to send to.
(3)Click“Send”
Note: Be sure to turn on the Wi-Fi and open your e-mail box before you send picture.
File Explorer
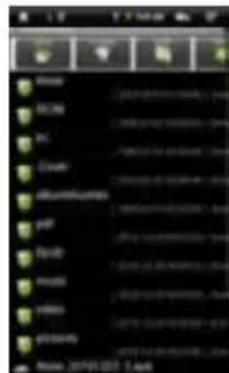
The file browser gives you the possibility to navigate the file system of your Tablet internal memory and memory card. Tap on the Application Tab to display all applications, and then select "Explorer" to enter the file explorer mode.
Navigate through Files and Folders
- You can drag your finger up and down to scroll the file list up and down.
To open a file or folder, tap on the file/folder. - Tap on the menu icon, you can manage the applications (see details in the "Manage Application" section).
- You can go back or forward one level in the interface by tapping on the Back icon

or Next icon

- You can go back one level in the directory by tapping on the LevelUp button.
- Wherever you are in the interface, you can go back directly to the Home screen by tapping on the Return icon or Home icon
- Tap on the Home icon to go to the root directory.
Using the Toolbar
You can use the toolbar to navigate through your device's internal memory/ memory card, delete or copy files.
Tapping on the grey area can hide/display the toolb

| Home | Go to the Home Screen. |
| LevelUp | Go back one level in the directory. |
| Multi | Select more than one file together. |
| Editor | Copy, delete, move, paste or rename the file or folder. |
| Back | Go back one level in the interface. |
| Next | Go forward one level in the interface. |
Copy/Move Files and Folders
(1) In the file list, scroll up and down by sliding your finger to select the file/folder that you want to copy or move.
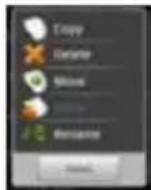
(2) Hold your tap on the selected file/folder until a pop-up menu appears.
(3) Select "Copy" or "Move" from the pop-up menu.
(4) Navigate to the location where you wish to copy or move the file/folder to.
(5) Select the Editor icon from the toolbar and then choose "Paste".
Delete Files and Folders
(1) In the file list, scroll up and down the list by sliding finger to select the file/folder that you want to delete.
(2)Hold your tap on the selected file/folder until a pop-up menu appears.
(3)Select "Delete" from the pop-up menu, then select "Delete" to confirm or "Cancel" to quit.
Rename Files and Folders
(1)In the file list, scroll up and down the list by sliding finger to select the file/folder that
youwanttorename.
(2)Hold your tap on the selected file/folder until a pop-up menu appears.
(3)Select"Rename"fromthepop-upmenu.
(4)Tap on the inputting field to display the virtual keyboard, and then choose letters from the virtual keyboard torenamethefile/folders.
(5)Tapon"OK"toconfirmthenewname.
SelectMultipleItems
You can select more than one file or fold together.
(1)Inthetoptoolbar,tapontheMultiicon"

(2) Tap the files/folders you want to choose. The file/folder name turns red when selected. Tappingitagaincancancelthiselection. Onceyoufinishedselection, you can delete, copy or move the selected files together by tapping on the Editor icon
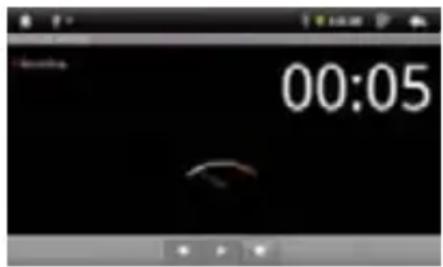
VoiceRecording
Record
(1)IntheHomeScreen,tapontheApplication Taptorevealallapplications.
(2)Taponthe"SoundRecorder"icontoenter therecordermode.
(3)Taponthe" ”icontostartrecording.
(4)Taponthe" "icontostoprecording.
(5)Tap topreviewtherecordingifyouwantto.
(6)Tapon"Usethisrecording"andthenusetheAudioPlayertoplaytherecording.Todiscardthererecording,tapon"Discard".
(7)Tapon togobacktotheHomeScreen.
Sending/receivingE-mails
ThisdevicehasanE-mailapplicationpre-installed.Youcansendorreceivee-mails fromtheInternetatanytimewiththisdevice.MakesureyouhaveanInternet connectionbeforeusingtheemailservice.
IntheHomeScreen,taptheApplicationsshortcuttodisplayallapplicationsandthen taptheEmailicontolaunchthee-mailapplication.
SetupEmailAccount
FirstyouneedtosetupanE-mailaccountforreceivingorsendingemails.
(1)StartuptheemailapplicationbytappingtheEmailapplicationiconandyou are promptedtosetupanaccount.
(2) Input your email address and login password. You can set the account as default byselectingtheoption"Sendemailfromthisaccountbydefault".
(3)Tap"ManualSetup"tosettheemailserverinformation.
(4) Choose the server type from POP3, IMAP or Exchange for incoming emails. To know what type of your emailserveris,you can consult the service provider, network administratororsearchforinformationinthelInternet.Input required information(server,portetc.).
(5) Choose the server type for outgoing emails, and input required server information.
(6) Click "Next" to continue. Your Tablet will check the server settings. When it prompts you that "Youraccounttsetup, and emailisonitsway", youraccounttsetup successfully.
(7)Inputyournameandthentapon“Done”tofinish.
Note: If you have more than one account, every time when you start up the email application, you enterthedefaultemailaccount.
ManageAccounts
You can setup more than one account and manage these accounts by checking information about the account, adding another account or deleting an account.
AddanotherAccount
Followingthesestepstoaddanotheraccountifyouwant.
(1)LaunchtheemailapplicationandthentapontheMenuicon menuitem.Choose"Accounts"todisplayaccounts.

todisplaythe
(2)TapontheMenuicon account".

todisplaythemenuitem,andthenchoose“Add
(3) Follow the steps of setting up a Email Account to add an account.
DeleteanEmailAccount
(1) When you are in the email box, tap on the Menu icon to display the menu items.
(2) Tap on "Accounts" to display all email accounts.
(3) Hold your tap on the account that you want to delete until a menu pop up.
(4)Tapon"RemoveAccount", andthentapon"OK"toconfirm.
ChecktheAccountSetting
(1)Whenyouareintheemailbox,tapontheMenuicontodisplaythemenu items.
(2)Tapon"Accounts"todisplayallemailaccounts.
(3)Holdyourtapontheaccountthatyouwanttocheckuntilamenupopup.
(4) Tap "Accountsettings", and then you should see all setting information about the account. You can edit the settings as you want.
View Emails
You should enter your mailbox when you start up the email application.
- In the mailbox, you can slide your finger up and down to scroll through the email list.
- Tap on an email to open it.
- Holding your tap on the email can display a menu. With the menu, you can open, reply, forward or delete the email.
Email Menu Items
In the email list, tap on the Menu icon to display the menu.
| Refresh Refresh the | emails. |
| Compose | Compose a new email. |
| Folders | Go back to email box. |
| Accounts | View all email accounts. |
| Account Settings | Check your account settings. |
Manage Third-party Applications
Your Tablet provides support to many useful third-party applications. You can purchase the applications to add more functions to your device. They are available online at the Internet or directly on your product.
Pre-installed Applications
The device has pre-installed applications when it was manufactured. You can see them by tapping Application Tab. They are video player, audio player, photo browser, alarm clock, calculator etc.
Install Applications
You can install applications manually following these steps:
(1) Download the installation file from your computer or directly from the application library (e.g. SLIDE ME) or Internet. Make sure the file is in format of .apk which is supported by your Tablet system.
(2) Connect your Tablet to computer with the USB cable.
(3) Copy the installation file to your Tablet.
(4) Disconnect your Tablet form the computer.
(5) Turn on your Tablet and enter the file explorer mode with the Explorer.
(6) Locate the installation file and open it.
(7) Follow the on-screen instructions to install the application.
(8) Once the application is installed successfully, you can find it in the application tab.
Uninstall Applications
(1) Tap the Settings shortcut in the Home Screen to display all system settings.
(2) Select "Applications".
(3)Select"ManageApplications".
(4)Tabontheapplicationthatyouwanttouninstall.
(5) Tab on "Uninstall" to uninstall the application.
Note:
- Youcannotinstallthepre-installedapplications.
- Duetohardwareorsoftwareincompatibility, someoftheapplicationsdevelopedforAndroid mobilemightnotrunproperlyinthe Tablet.Pleaseconsulttherespectivesoftwaredeveloperfor furtherinformation.
ManagingTasks
YourTablecanhandlemultipletasksatthesametime.Forexample,youcanview photoswhilelisteningtomusic.Multitaskingishelpfulbutinefficientifttoomanytasks arerunning.Inordertosavesystemmemoryandenhancesystemperformance,you canendsometasksthatyoudon'tusefornow.
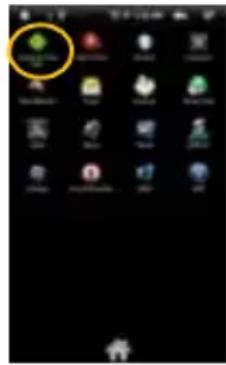
(1)Tap"AdvancedTaskKiller"application.
(2)Tapthetaskthatyouwanttoend.
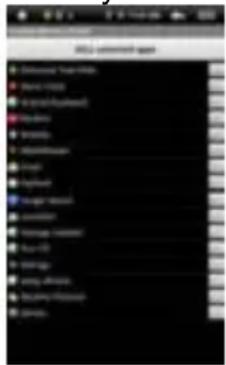
(3)Tap"KILLselectedapps"toendthetask.
SystemSettings
In the Home screen, tap "Settings" and choose a category: "Wireless & Networks," "Sound&Display," "Date&Time," etc.
- Whenadownarrowappearsontherightofaparameter, this meansthatthis setting includes sub-parameters. Tapittodisplaythelistofsub-parameters.
- Whenacheckboxappearsontherightofaparameter,tapittoenableordisable thisoption.
- Whenitispossible,youcanuseyourfingertoscrolthiscreenupandddownto revealsettingsthatyoudon'tinitiallysee.
- Whenyouhavefinishedadjustingyoursettings,taptheBackicontogobak tothelistofsettings,ortaptheHomeicon togodirectlytotheHomescreen. YoursettingsaresAVEDinstantly.
| Wireless& networks | Wi-Fi-taponthislinetoenableordisabletheWi-Ficonnection. Wi-Fisettings-allowsyoutosetupandmanageyourWi-Fi networks. |
| Sound&DisplaySound | Sound&DisplaySound: |
| Media volume -Sets the volume for music and videos. You can alsoadjustthesoundbyusingtheVolumebuttons, onthetopof thedevice. Notification Ringtone -Set your default notification ringtone. Audible selection -enables/disables the touch screen click sound. SD card notifications -Disable SD card notification sounds. Displaysettings: Orientation - switch the screen orientation automatically when the devicerotates. Animation -enables/disables the display of animations when openingandclosingapplications. Brightness-allowsyoutoadjustthebrightnessofthescreen. Screen timeout -allows you to adjust the delay before the screen automaticallyturnsoftandlocksitself.Toturnthescreenbackon, pressthePowerbuttononce,andpressitagaintounlockthe screen. | |
| Location & Security | ThisscreengivesyouthepossibilitytoallowcertainAndroid TM applicationstodetermineyourcurrentlocation.Youcanalsodefine asscreenunlockpatternandothersecurityparameters. |
| Applications | ThisscreenallowsyoutomanageyourAndroid TM applications. Youcanviewinformationaboutalltheapplicationsinstalledon yourdevice. |
| PrivacyThissetting | allowsyoubackuporrestoryoursystemsettingsor data. |
| SDcard& deviceStorage | Thissettingallowsyouun-mounttheSDcardorcheckSDcardand internalstoragespace. |
| USB Mode Select | EnableordisabletheUSBhostfunctionwhichallowsyoutomount USBflashdrive. |
| Language & keyboard | Setyourpreferredlanguageandregion,andconfiguretextsettings for fasterandmoreaccuratetextinput. |
| Date & Time | This setting allows you set up the date, time, time zone and formats. |
| Touch Panel calibration | Ifthetouch-screenisnotrespondingproperly,usethissettingand followtheinstructionsonthescreen. |
| Update Media Library | UpdatethemedialibraryofyourTabletmanually. |
| Eraseactivation record | UsedtoeraserecordofDRMactivations. |
| AboutDevice | DisplayinformationaboutyourTabletsystem. |
Troubleshooting
Resetthisdevice
- In the event that the device freezes, you can force the device to shut down by holding the Power button for 15 seconds.
- IfthePowerbuttondoesnotresetyourdevice,usethe"pinholereset"button, locatedonthebackthedevic.
Touch-screenProblems
If the touch-screen is not responding properly, try using the "Touch-Screen Calibration" settingsscreen.
Specifications
| ItemDescription | ||
| CPU | BasedonARM926EJ(CPU+DPS)MainCPUfrequency:600MHzAuxiliaryCPUFrequency(DSPdigitalcommandcontrol):560MHz | |
| Built-inoperatingsystemAndroid | oidOS2.1 | |
| HardwareIBMPCorcompatible | ePC,Note-bookorMacintoshwithUSBport | |
| InternalMemory | 4GB(256MB for apps installation, 1.2GB for internal system use) or above | |
| MemoryCardtypeSDcard:1GB | GB,2GB,4GB(SDHC),8GB(SDHC) | |
| OperationSystemWindows2 | 000/XP/Vista.windows7andMACOS10.4orabove | |
| USBInterfaceUSB2.0Highspeed | ||
| OutputPort3.5mearphone | port,built-inspeakers | |
| Interface | USB2.0Highspeed | |
| SD(compatibleSDHC) | ||
| 3.5mmEarphone | ||
| ConnectionAgreementWiFi | 802.11b/g)/3G(optional) | |
| G-sensor360 rotation | ||
| E-Book | FileFormat | PDF/EPUB/TXT/FB2 |
| Coding | PDF/EPUBFormat:.Open;AdobeDRM(ForLicense) | |
| Format | TXT/FB2/PDB/RTFFormat:.Open | |
| PhotoFormat | JPEG(Baseline): 8000*8000 (Max) | |
| BMP | ||
| GIF(Static) | ||
| Audio | FileFormat | MP3/WMA/WAV/OGG/FLAC/APE/AAC |
| Coding | MP3 (MPEG1/2/2.5AudioLayer1/2/3) 8~48KHZ/8~320Kbps,CBR andVBR | |
| Format | WMA (Version 4, 4.1, 7, 8, 9): 8~48KHZ/8~320Kbps | |
| WAV (MS-ADPCM,IMA-ADPCM,PCM): 8~48KHZ | ||
| OGG (Q1-Q10): 8~48KHZ | ||
| FLAC (Q1-Q10): 8~48KHZ | ||
| APE (Version 3.95,3.97,3.98,3.99,normal and fast): 8~48KHZ | ||
| AAC(ADIF,ATDSHeaderAAC-LCandAAC-HE): 8~48KHZ | ||
| Video | File Format | AVI, 3GP, MP4, RM, RMVB, FLV, MKV, MOV, WMV |
| Coding | AVI (MPEG4 | |
| Format | ASP/XVID/DIVX3/4/5) | |
| AudioCodec:MP1/MP2/MP3/AC3/AAC | ||
| MPEG4(XVID/DIVX3/4/5:1280*720/25F PS(Max) | ||
| H.264:1280*720/25FPS(Max.) | ||
| H.263:640*480/25FPS(Max.) | ||
| RM/RMVB(Real video 8/9/10) | Audio Codec:MP2/MP3/AC3/AAC/AMR | ||
| 1280*720/25FPSMax ) | |||
| FLV(SorensonH.263, H.264) | AudioCodecMP3/AAC | ||
| H.263:720*480/25FPS(Max.) | |||
| H.264:1280*720/25FPS(Max.) | |||
| MKV(H.264/MPEG4 ASP/XVID/DIVX3/4/5) | AudioCodecMP3/AAC | ||
| MPEG4/XVID/DIVX3/4/5: 1280*720/25FPS(Max) | |||
| H.264:1280*720/25FPS(Max.) | |||
| MOV(MPEG4,H.264, H.263) | AudioCodecMP1/MP2/MP3/AC3/AAC | ||
| MPEG4:1280*720/25FPS(Max.) | |||
| H.264:1280*720/25FPS(Max.) | |||
| WMVWMVv9:1280*720/25FPS(Max.) | |||
| BatteryChargeTimeAbout5Hours | |||
| BatteryLife | About9hoursofmusicplayback; About6hoursofvideoplayback; About6hoursofwebbrowsing. | ||
| Display7.0-inchTFTLCD,Touchpad(resistivetouchpad),800X480pixels. | |||
| SNR80dBabove | |||
| FrequencyResponse Range | 20Hz-20KHz | ||
| PowerSupply | Rechargeable lithium-ionpolymerbattery; ACAdapter:ACInput100-240V50/60Hz,DCOutput5V/2A | ||
| StorageTemp.-20~+65 | °C °C | ||
| AmbientTemp.0~+50 | °C °C | ||
| OperationRelative Humidity | 20%~90%(40)°C | ||
| StorageRelativeHumidity20%~93%(40) °C | |||
INGLÉS / ENGLISH
AID WARRANTY CONDITIONS EN
AID, in compliance with the Customer Protection Law (Ley 23/2003, July 10th, of Warranty in the Sale of Consumer Goods, BOE no. 165, 11/07/2003), offers Direct Warranty to Spain and Portugal customers for all our brands' products: ZIPY, MUSE, NEW ONE, AC-RAYAN, TNB, BARKAN, BRASFORMA, THE COMPLEMENTS, and GO BY ZIPY, under the following conditions:
A - Our products have a two year warranty. During the first year original defects that may be detected are repaired. In those cases stipulated by law, the buyer will be entitled to the replacement of the device by a new one, provided that the defects are not due to the negligence or exclusive fault of the buyer in handling the device. During the second year the buyer will need to prove that the malfunctioning of the device is due to a manufacturing defect. In both cases the warranty will apply provided that:
- The product has been used for its destined purpose alone.
- It was not opened, manipulated or altered in any way by someone other than the Official Technical Service.
- It has not undergone shock, flood, overheating, electric overcharge or any other external circumstance that may constitute a possible reason of INVALIDATING the warranty.
- The product will be returned to AID in proper packaging together with the receipt where the brand and type of product, the date of the purchase, the name and address of the shop that sold it and the reason for the malfunctioning should be clearly stated.
Any of the following circumstances invalidates the present warranty:
- Breaking the ports, the screen or the glass.
- Loss of liquid from the screen.
- Wearing out, obvious marks of incorrect manipulation, inappropriate use, ill-treatment, shock, falls, dirt, and so on.
- The data contained in the products are under no circumstances covered by any warranty whatsoever, nor are they to be considered during the physical repairing process of the products. AID guarantees absolute confidentiality of the data.
5.AIdoesnotcovertheincorrectconfigurationorinstallationofthesoftware/hardwareonthepartoftheclient,neitherasacomponentnorasaperipheric,includedprives/controllersincluded.
6. The legislation on guarantees sets certain limits. "the guarantee does not cover additional componentssuchasbatteries,noranyelementsthataresubjectto maintenanceduetoitsusesuchasearphones".Theseaccessorieshavea6 monthsguarantee.
7. Waterproofbagshavea48-hourtrialperiod, such as indicated on the product itself, therefore oncethistimeperiodiselapsed they will no longer be recovered by any guarantee.
8. Finalusersdonotneedtosendusthedevicereaccessories, especially if they are not the original ones, sinceewillnotbeheldresponsibleforthem.
CASES:
- If the product is outour guarantee, the AID technical department will facilitate a budget for therepairby faxore-mail. Said budget will need to be authorized in writing, sealed and signed, and the user will have access to the repair fee as well as the freight.
2.Ifthebudgetisnotacceptedadiagnosisfeewillbecharged.(6 €) - Repairshavea90daysguarantee, provided that the breakdown is underthesame concept and in the case of budgeted breakdown alone.
B-AllthefreightcostsfortheproductwillbecoveredbyAlDusingonlythe transportationcompanydesignebayAlDfollowingtheauthorizationprocedure.
Theexpensesderivedfromincorrectorunjustifiedreturnsonthepartoftheclientwill becoveredbytheclientalone.
C-Anyincidencedetectedatthemomentofthereceptionofthem erchandismust beimmediatelynotifiedattheAIDPost-SalesDepartment: maria@accessosdigital.com incompliancewithArticle366fromtheCodeof Commerce,AIDwillnotconsidercomplaintsaboutbreakages,shocksorabsenceof boxesorpieces24hoursafterthedeliveryofthemerchandise.
InthecaseofshipmentsoriginatedinCanarias, CeutaandMelilla, AlDwillnotpaythe customstaxnoranykindofreibursableexpenses.
DECLARATION OF CONFORMITY
ACCESORIOS INTELIGENTES DIGITAL S.A.
C/CARPINTEROS, 6, OF-13 VILLAVICIOSA DE ODON. 28670 MADRID
We declare under our sole responsibility that the product:
MID WIFI:ZIPYUNIVERSITY which belongs to the brandZipy,made in China

2200

Conforms with the requirements of the Directives below by compliance with the following standards listed:
EN55022:2006+A1:2007
EN55013:2001+A1:2003+A2:2006
EN61000-3-2:2006+A1:2009+A2:209
EN61000-3-3:2008
EN55024:1998+A1:2001+A2:2003
EN55020:2007
EN300 328 V1,7,1:2006
EN301-489-1 V1,8,1:2008
EN301-489-7 V1,3,1:2005
EN301-489-24 V1,5,1:2010
EN62311:2008
EN60950-1:2006+A11:2009
In accordance with the provisions of the Directive 99/05/EC, European Parliament and Council on March 9, 1999, transposed into Spanish legislation by Royal Decree 1890/2000, of November 20, 2000.
Place and date of issue:
Madrid, April 13th 2011
Signed by: Miguel Fauro


Waste management for all of your containers and domestic packagings that you deposit in the recycling bin
Do not deposit the device or the battery in the bin. Please, put it in a recycling bin or carry it to your local nearby store