
EY37A1 - Air blower PANASONIC - Free user manual and instructions
Find the device manual for free EY37A1 PANASONIC in PDF.
| Product Type | Cordless Air Blower |
| Brand | Panasonic |
| Model | EY37A1 |
| Voltage | DC 14.4 V / 18 V (depending on battery used) |
| Air Volume | 0~2.6 m³/min (14.4 V) / 0~3.0 m³/min (18 V) |
| Blowing Speed | 60 m/s (14.4 V) / 70 m/s (18 V) |
| Dimensions (L × W × H) | 369 mm × 213 mm × 148 mm |
| Weight (main unit) | 1.2 kg |
| Battery Type | Cordless Li-ion Battery |
| Compatible Batteries | EY9L41, EY9L42, EY9L44, EY9L45, EY9L50, EY9L51 |
| Charger | Dedicated charger (not included) |
| Runtime | Variable depending on battery |
| Noise Level | See included sheet |
| Vibrations | See included sheet |
| Included Accessories | Blower Nozzle |
| Main Functions | Variable speed trigger, motor brake, battery protection |
| Maintenance and Cleaning | Clean with a dry, clean cloth; do not use water or solvent |
| Safety | Not waterproof; do not use in wet conditions; short-circuit protection |
| Spare Parts / Repairability | Contact a Panasonic authorized service center |
| Warranty | Refer to the included warranty card |
Frequently Asked Questions - EY37A1 PANASONIC
User questions about EY37A1 PANASONIC
0 question about this device. Answer the ones you know or ask your own.
Ask a new question about this device
Download the instructions for your Air blower in PDF format for free! Find your manual EY37A1 - PANASONIC and take your electronic device back in hand. On this page are published all the documents necessary for the use of your device. EY37A1 by PANASONIC.
USER MANUAL EY37A1 PANASONIC
Note: Battery pack and charger are not included in this kit.
- Do not use any other battery pack besides as shown in the Specifications.
CAUTION
-
This blower is not waterproof.
-
Do not use it in damp or wet locations.
- Do not expose it to rain or snow.
- Do not wash it in water.
-
Keep it in a safe, dry, and clean area when it is not in use.
-
Do not throw the battery pack into a fire. This can cause an explosion.
To reduce the risk of injury, user must read and understand instruction manual.
WARNING (Li-ion Batt
- Do not use other than the Panasonic battery packs that are designed for use with this rechargeable tool.
- Do not dispose of the battery pack in a fire, or expose it to excessive heat.
- Do not drive the likes of nails into the battery pack, subject it to shocks, dismantle it, or attempt to modify it.
- Do not allow metal objects to touch the battery pack terminals.
- Do not carry or store the battery pack in the same container as nails or similar metal objects.
- Do not charge the battery pack in a high-temperature location, such as next to a fire or in direct sunlight. Otherwise, the battery may overheat, catch fire, or explode.
- Never use other than the dedicated charger to charge the battery pack. Otherwise, the battery may leak, overheat, or explode.
After removing the battery pack from the tool or the charger, always reattach the pack cover. Otherwise, the battery contacts could be shorted, leading to a risk of fire.
II. ASSEMBLY
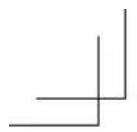
- To attach the nozzle: (Fig.1)
① Fit the projection portion to the notch and attach the nozzle.
②Turn it clockwise.
- To connect the battery pack: (Fig.2) Align the highlighted marker points and attach battery pack.
- Slide the battery pack until it locks into position.
- To remove the battery pack: Push the button and slide the battery pack forward.
III. OPERATION
- The wind power increases with the amount of depression of the trigger.
- The brake operates when the trigger is released and the motor stops immediately.
CAUTION:
- When operating the tool by depressing the trigger, there may be a momentary lag before rotation starts. This does not signal a malfunction.
- This lag occurs as the tool's circuitry starts up when the trigger is pulled for the first time after installing a new battery pack or after the tool has not been used for at least 1 minute. Rotation will start without any lag during second and subsequent operations.
- Read the instruction manual of the charger to charge the battery pack, and how to handle battery pack.
IV. MAINTENANCE
- Use only a dry, soft cloth for wiping the unit. Do not use a damp cloth, thinner, benzine, or other volatile solvents for cleaning.
- In the event that the inside of the tool or battery pack is exposed to water, drain and allow to dry as soon as possible.
- Carefully remove any dust or iron filings that collect inside the tool. If you experience any problems operating the tool, please contact your nearest authorised service center.
- To make any adjustments, changing accessory, or storing the blower, remove battery pack from the blower.
V. ACCESSORIES
Battery Pack
See the Specification.
Battery Charger
- For inquiries please contact an authorized dealer.
NOTE: Battery pack and charger are not included in this kit.
[Battery Pack]
For Appropriate Use of Battery Pack
- For optimum battery life, store the Li-ion battery pack following use without charging it.
- When charging the battery pack, confirm that the terminals on the battery charger are free of foreign substances such as dust and water etc. Clean the terminals before charging the battery pack if any foreign substances are found on the terminals.
-
The life of the battery pack terminals may be affected by foreign substances such as dust and water etc. during operation.
-
When battery pack is not in use, keep it away from other metal objects like: paper clips, coins, keys, nails, screws, or other small metal objects that can make a connection from one terminal to another.
- Shorting the battery terminals together may cause sparks, burns or a fire.
- When operating the battery pack, make sure the work place is well ventilated.
Battery Pack Life
The rechargeable batteries have a limited life. If the operation time becomes extremely short after recharging, replace the battery pack with a new one.
Battery Recycling
NOTE:
For environmental protection and recycling of materials, be sure that it is disposed of at an officially assigned location, if there is one in your country.

Recommendations for use
Be sure to use the Pack cover
- When the battery pack is not being used, store the battery in a way that foreign substances such as dust and water etc. do not contaminate the terminals. Be sure to attach the battery pack cover to protect the battery terminals.
- When charging the battery pack, confirm that the terminals on the battery charger are free of foreign substances such as dust and water etc. Clean the terminals before charging the battery pack if any foreign substances are found on the terminals.
The life of the battery pack terminals may be affected by foreign substances such as dust and water etc. during operation.

CAUTION: To protect the motor or battery, be sure to note the following when carrying out operation.
- If the battery becomes hot, the protection function will be activated and the battery will stop operating.
For safe use
- The battery pack is designed to be installed by proceeding two steps for safety. Make sure the battery pack is installed properly to the main unit before use.
- If the battery pack is not connected firmly when the switch is switched on, the main unit will not rotate normally. Connect the battery pack into the body of the tool until the red or yellow label disappears.
[Battery Charger] Charging
![PANASONIC EY37A1 - [Battery Charger] Charging - 1](/content/2026/03/454649/images/4c1edd4a1b1517756a7b3f1a65e0183c6911873c9b5948c8115f20d9680214ac.jpg)
CAUTION:
The charger is designed to operate on standard domestic electrical power only as stated in the rating plate. Charge only on the voltage indicated on the rating plate of unit. e.g.230v / 50Hz.
- Do not attempt to use it on any other voltage or frequency rating!
- Do not use power source from an engine generator.
- If the temperature of the battery pack falls approximately below -10^ ( 14^ ), charging will automatically stop to prevent degradation of the battery.
- The ambient temperature range is between 0^ (32^) and 40^ (104^) . If the battery pack is used when the battery temperature is below 0^ (32^) , the tool may fail to function properly.
- When charging a cool battery pack (below 0^ (32^) ) in a warm place, leave the battery pack at the place and wait for more than one hour to warm up the battery to the level of the ambient temperature.
Cool down the charger when charging more than two battery packs consecutively.
- Do not insert your fingers into contact hole, when holding charger or any other occasions.

CAUTION:
To prevent the risk of fire or damage to the battery charger.
- Do not cover vent holes on the charger and the battery pack.
- Unplug the charger when not in use.
NOTE:
Your battery pack is not fully charged at the time of purchase. Be sure to charge the battery before use.
How to charge
- Plug the charger into the AC outlet.
NOTE:
Sparks may be produced when the plug is inserted into the AC power supply, but this is not a problem in terms of safety.
- Connect the battery pack firmly into the charger.
-
During charging, the charging lamp will be illuminated. When charging is completed, an internal electronic switch will automatically be triggered to prevent overcharging.
-
Charging will not start if the battery pack is warm (for example, immediately after heavy-duty operation). The orange standby lamp will be flashing until the battery cools down. Charging will then begin automatically.
-
The charge lamp (green) will flash slowly once the battery is approximately 80% charged.
- When charging is completed, the charging lamp in green color will turn off.
-
If the temperature of the battery pack is 0^ or less, charging takes longer to fully charge the battery pack than the standard charging time. Even when the battery is fully charged, it will have approximately 50% of the power of a fully charged battery at normal operating temperature.
-
Consult an authorized dealer if the charging lamp (green) does not turn off.
-
If a fully charged battery pack is connected into the charger again, the charging lamp lights up. After several minutes, the charging lamp in green color will turn off.
LAMP INDICATIONS

VI. SPECIFICATIONS
| Model no. EY37A1 | ||||
| Voltage DC 14.4 V DC 18 V | ||||
| Air volume 0~2.6 m 3/min. 0~3.0 m | 3/min. | |||
| Wind speed 60 m/s 70 m/s | ||||
| Size | 370 mm × 213 mm × 148 mm(14 9/16" × 8 3/8" × 5 13/16") | |||
| Weight 1.2 kg (main unit only) | ||||
| Battery packs | Li-ion battery packs | |||
| EY9L41 EY9L42 EY9L44 EY9L45 EY9L50 EY9L51 | ||||
| Battery voltage | DC 14.4 V DC 18 V | |||
| Noise,Vibration | See the included sheet | |||
NOTE: This chart may include models that are not available in your area. Please refer to the latest general catalogue.
NOTE: For the dealer name and address, please see the included warranty card.
Information for Users on Collection and Disposal of Old Equipment and used Batteries
These symbols on the products, packaging, and/or accompanying documents mean that used electrical and electronic products and batteries should not be mixed with general household waste.
For proper treatment, recovery and recycling of old products and used batteries, please take them to applicable collection points, in accordance with your national legislation and the Directives 2002/96/EC and 2006/66/ EC.
By disposing of these products and batteries correctly, you will help to save valuable resources and prevent any potential negative effects on human health and the environment which could otherwise arise from inappropriate waste handling.
For more information about collection and recycling of old products and batteries, please contact your local municipality, your waste disposal service or the point of sale where you purchased the items.
Penalties may be applicable for incorrect disposal of this waste, in accordance with national legislation.
For business users in the European Union
If you wish to discard electrical and electronic equipment, please contact your dealer or supplier for further information.
[Information on Disposal in other Countries outside the European Union]
These symbols are only valid in the European Union. If you wish to discard these items, please contact your local authorities or dealer and ask for the correct method of disposal.
ONLY FOR U.K.
ELECTRICAL PLUG INFORMATION
FOR YOUR SAFETY PLEASE READ THE FOLLOWING TEXT CAREFULLY
This appliance is supplied with a moulded three pin mains plug for your safety and convenience.
A 5 amp fuse is fitted in this plug.
Should the fuse need to be replaced please ensure that the replacement fuse has a rating of 5 amp and that it is approved by ASTA or BSI to BS1362.
Check for the ASTA mark or the BSI mark on the body of the fuse.
If the plug contains a removable fuse cover you must ensure that it is refitted when the fuse is replaced.
If you lose the fuse cover the plug must not be used until a replacement cover is obtained.
A replacement fuse cover can be purchased from your local Panasonic Dealer.
IF THE FITTED MOULDED PLUG IS UNSUITABLE FOR THE SOCKET OUTLET IN YOUR HOME THEN THE FUSE SHOULD BE REMOVED AND THE PLUG CUT OFF AND DISPOSED OF SAFELY. THERE IS A DANGER OF SEVERE ELECTRICAL SHOCK IF THE CUT OFF PLUG IS INSERTED INTO ANY 13 AMP SOCKET.
If a new plug is to be fitted please observe the wiring code as shown below.
If in any doubt please consult a qualified electrician.
IMPORTANT:
The wires in this mains lead are coloured in accordance with the fol
lowing code:
Blue: Neutral
Brown: Live
As the colours of the wire in the mains lead of this appliance may not correspond with the coloured markings identifying the terminals in your plug, proceed as follows.
The wire which is coloured BLUE must be connected to the terminal in the plug which is marked with the letter N or coloured BLACK.
The wire which is coloured BROWN must be connected to the terminal in the plug which is marked with the letter L or coloured RED.
Under no circumstances should either of these wires be connected to the earth terminal of the three pin plug, marked with the letter E or the Earth Symbol 1一
How to replace the fuse: Open the fuse compartment with a screwdriver and replace the fuse and fuse cover if it is removable.

This apparatus was produced to BS800.
WAARSCHUWING (Li-ion accu)
Panasonic Testing Center
Winsberging 15,
22525 Hamburg,
Germany


Panasonic Corporation
1006,Kadoma,Osaka 571-8501,Japan
http://panasonic.net
EN. GR. FR. IT. ND. ES. DN. SW. NR. FN
EY971037A11 2013 09 Printed in China
- CAUTION
- WARNING (Li-ion Batt
- ASSEMBLY
- OPERATION
- CAUTION:
- MAINTENANCE
- ACCESSORIES
- Battery Pack
- Battery Charger
- [Battery Pack]
- For Appropriate Use of Battery Pack
- Battery Pack Life
- Battery Recycling
- NOTE:
- Be sure to use the Pack cover
- For safe use
- [Battery Charger] Charging
- How to charge
- LAMP INDICATIONS
- SPECIFICATIONS
- Information for Users on Collection and Disposal of Old Equipment and used Batteries
- For business users in the European Union
- [Information on Disposal in other Countries outside the European Union]
- ONLY FOR U.K.
- ELECTRICAL PLUG INFORMATION
- FOR YOUR SAFETY PLEASE READ THE FOLLOWING TEXT CAREFULLY
- IMPORTANT:
- WAARSCHUWING (Li-ion accu)
Brand : PANASONIC
Model : EY37A1
Category : Air blower