
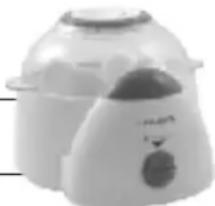
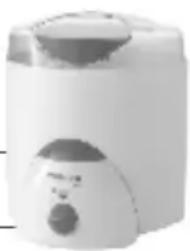
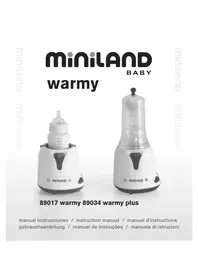
89033 Super 3 Deco - Bottle warmer Miniland - Free user manual and instructions
Find the device manual for free 89033 Super 3 Deco Miniland in PDF.
| Product type | Bottle warmer, sterilizer and steamer |
| Brand | Miniland |
| Model | 89033 Super 3 Deco |
| Power supply | 230 V ~ 50/60 Hz |
| Power | 300 W |
| Sterilization capacity | Approximately 90 ml of water per cycle |
| Bottle warming capacity | Up to 330 ml (standard or wide-neck bottle) |
| Number of eggs cooked | Up to 4 eggs |
| Materials | Stainless steel (heating bowl), plastic (tank, baskets) |
| Main functions | Bottle warming, sterilization, steam cooking (vegetables, eggs) |
| Automatic shut-off | Yes, at end of cycle |
| Indicator light | Yes, indicates power on |
| Safety | Automatic shut-off, do not move during use, hot surfaces |
| Maintenance and cleaning | Tank, lid and basket dishwasher safe or washable with soapy water; console cleaned with a damp cloth |
| Descaling | Use diluted vinegar (1:4) or descaling product; let it sit for 30 min |
| Spare parts and repairability | No user-serviceable parts; do not disassemble |
| General information | Indoor household use only; keep instructions |
Frequently Asked Questions - 89033 Super 3 Deco Miniland
User questions about 89033 Super 3 Deco Miniland
0 question about this device. Answer the ones you know or ask your own.
Ask a new question about this device
Download the instructions for your Bottle warmer in PDF format for free! Find your manual 89033 Super 3 Deco - Miniland and take your electronic device back in hand. On this page are published all the documents necessary for the use of your device. 89033 Super 3 Deco by Miniland.
USER MANUAL 89033 Super 3 Deco Miniland
- Read all instructions carefully before using your sterilizer.
- Ensure that the supply voltage marked on the appliance corresponds with your mains supply.
- If there is any visible damage to the appliance, the plug or to the supply cord, disconnect the appliance immediately and do not use it.
- Do not allow children to touch or use the appliance. The heating bowl becomes very hot and the steam can cause severe scalding.
- Do not move the appliance when it is in use or contains hot liquids.
- Do not touch the hot surfaces.
- Do not place the appliance on or near hot surfaces, in a heated oven or near a gas or electric heater.
- Unplug the appliance from the power supply before cleaning or storage.
- Do not immerse the supply cord, plug or base unit in water or any other liquid.
· This appliance does not contain any user serviceable parts inside. Do not dismantle.
· This appliance is for indoor household use only. Do not use outdoors.
SAVE THESE INSTRUCTIONS FOR FUTURE REFERENCE.
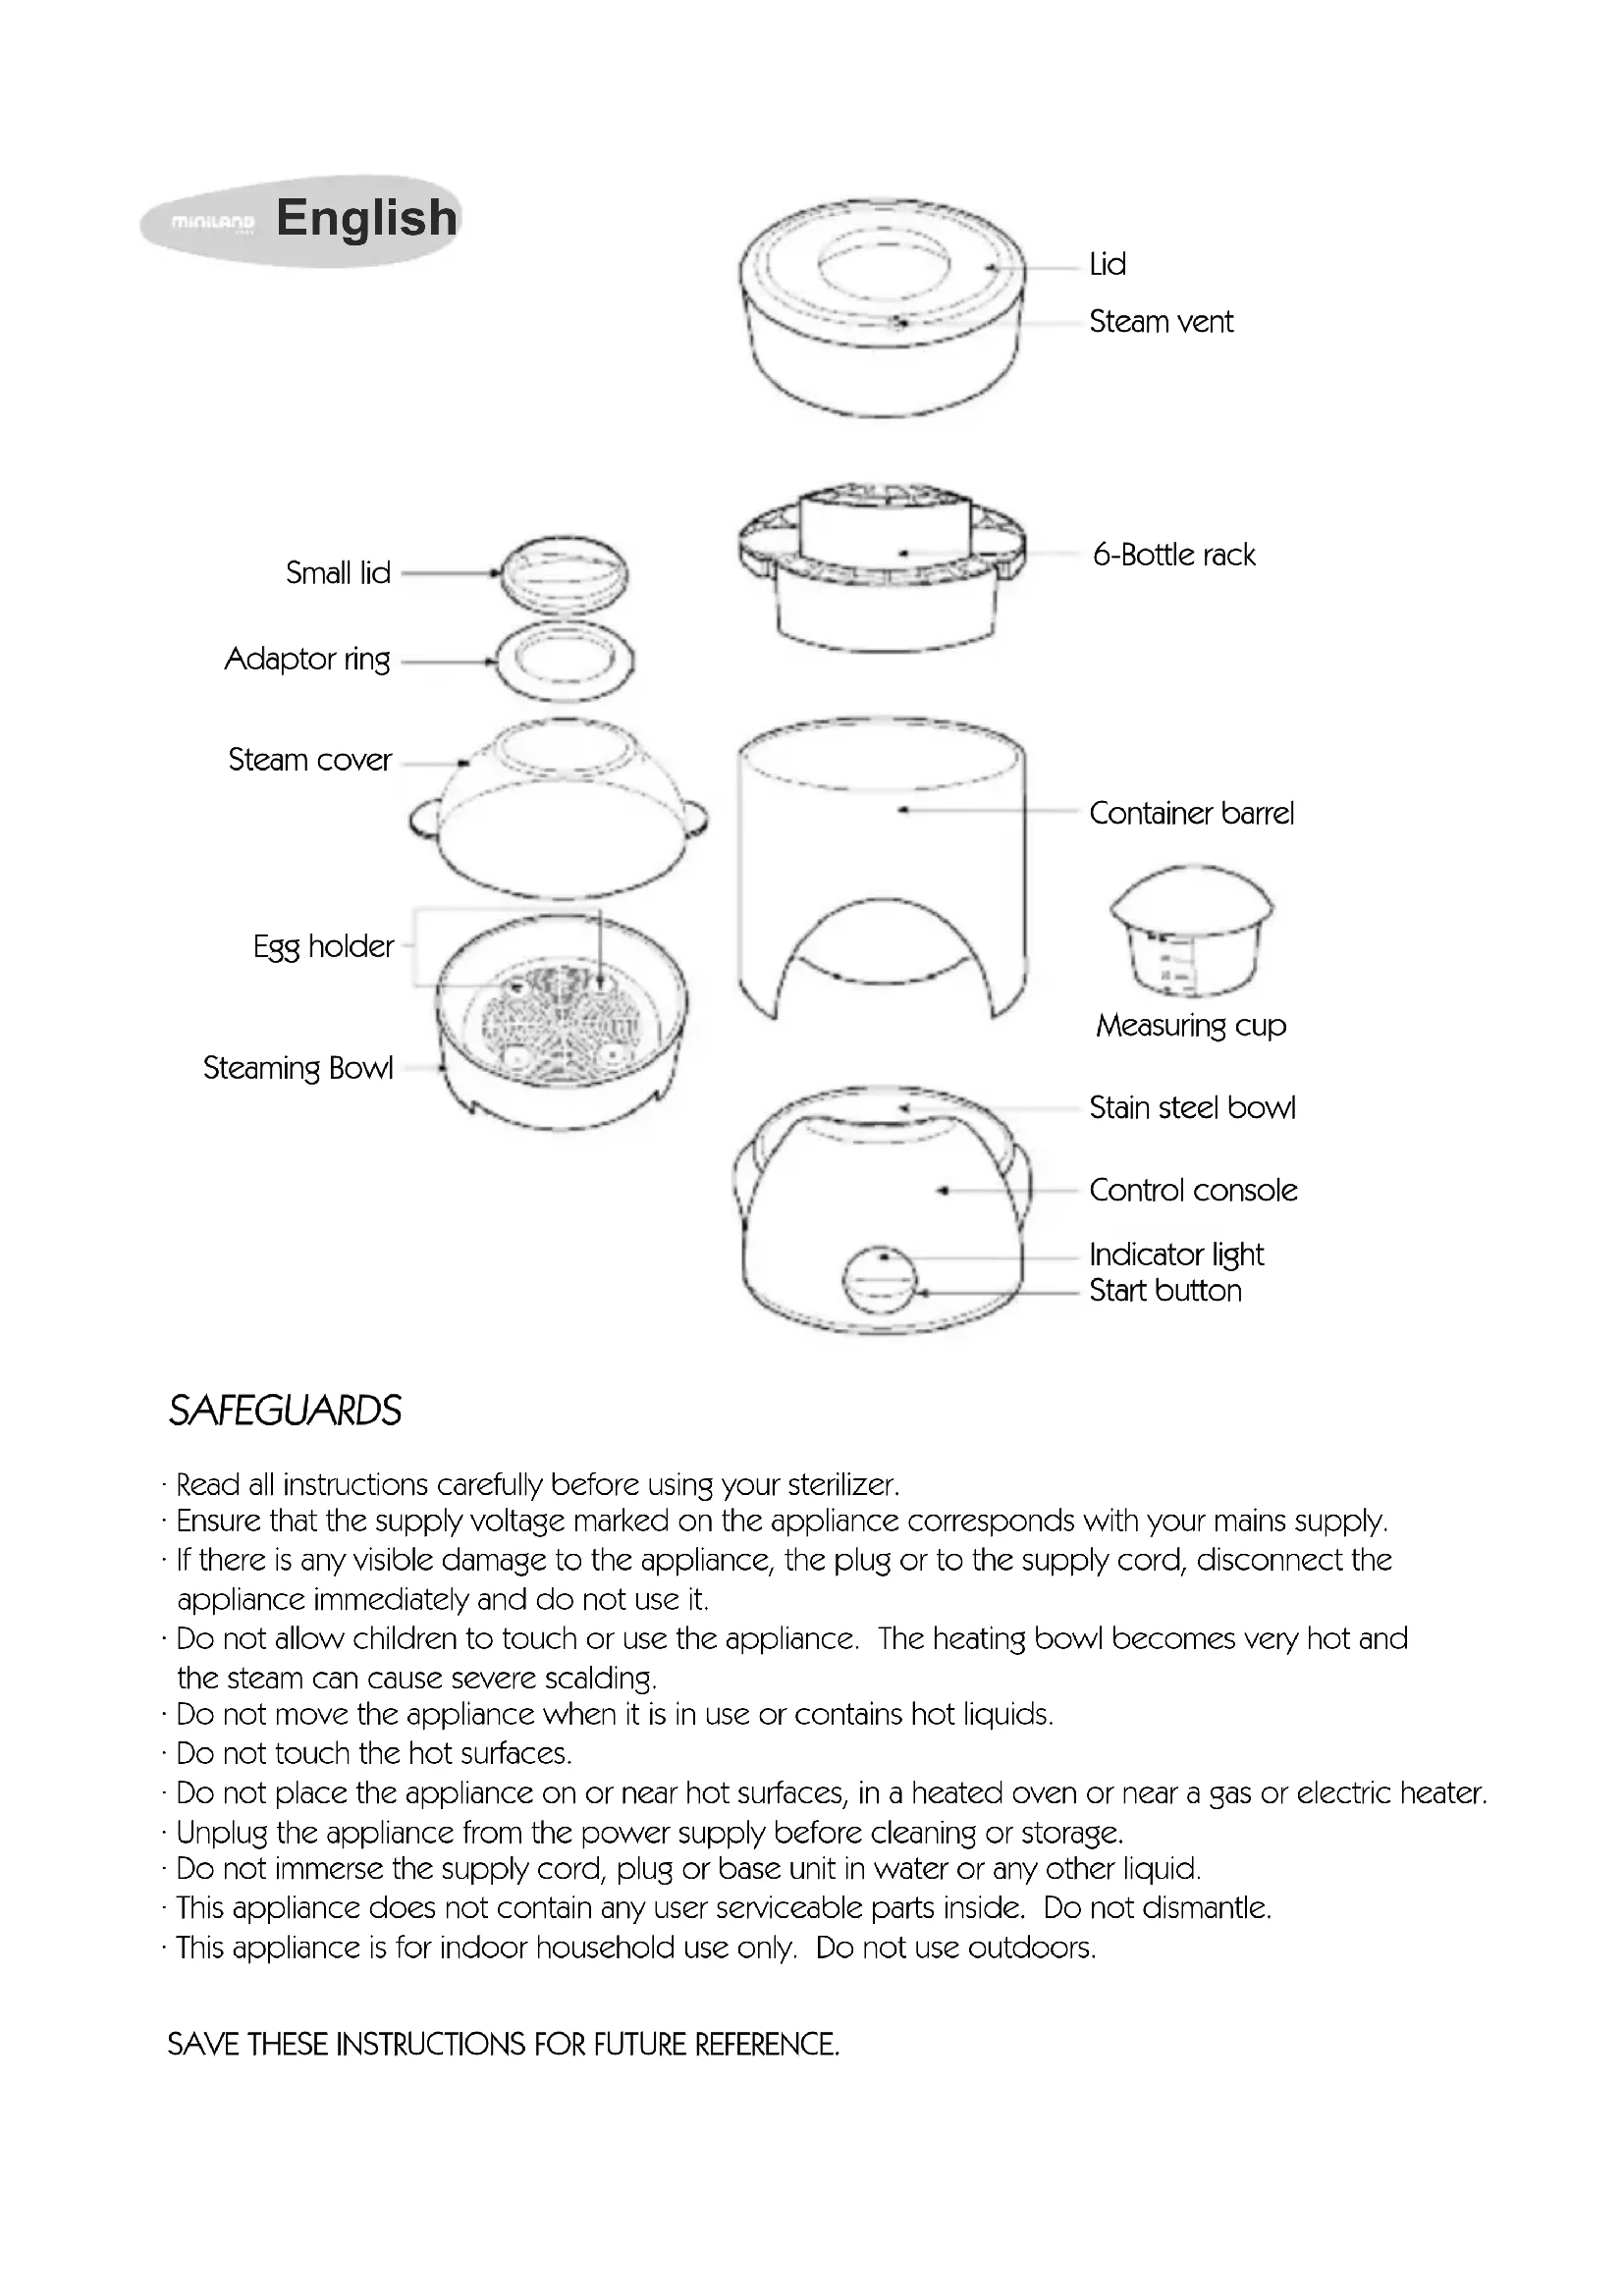
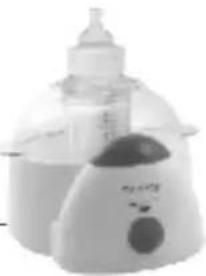
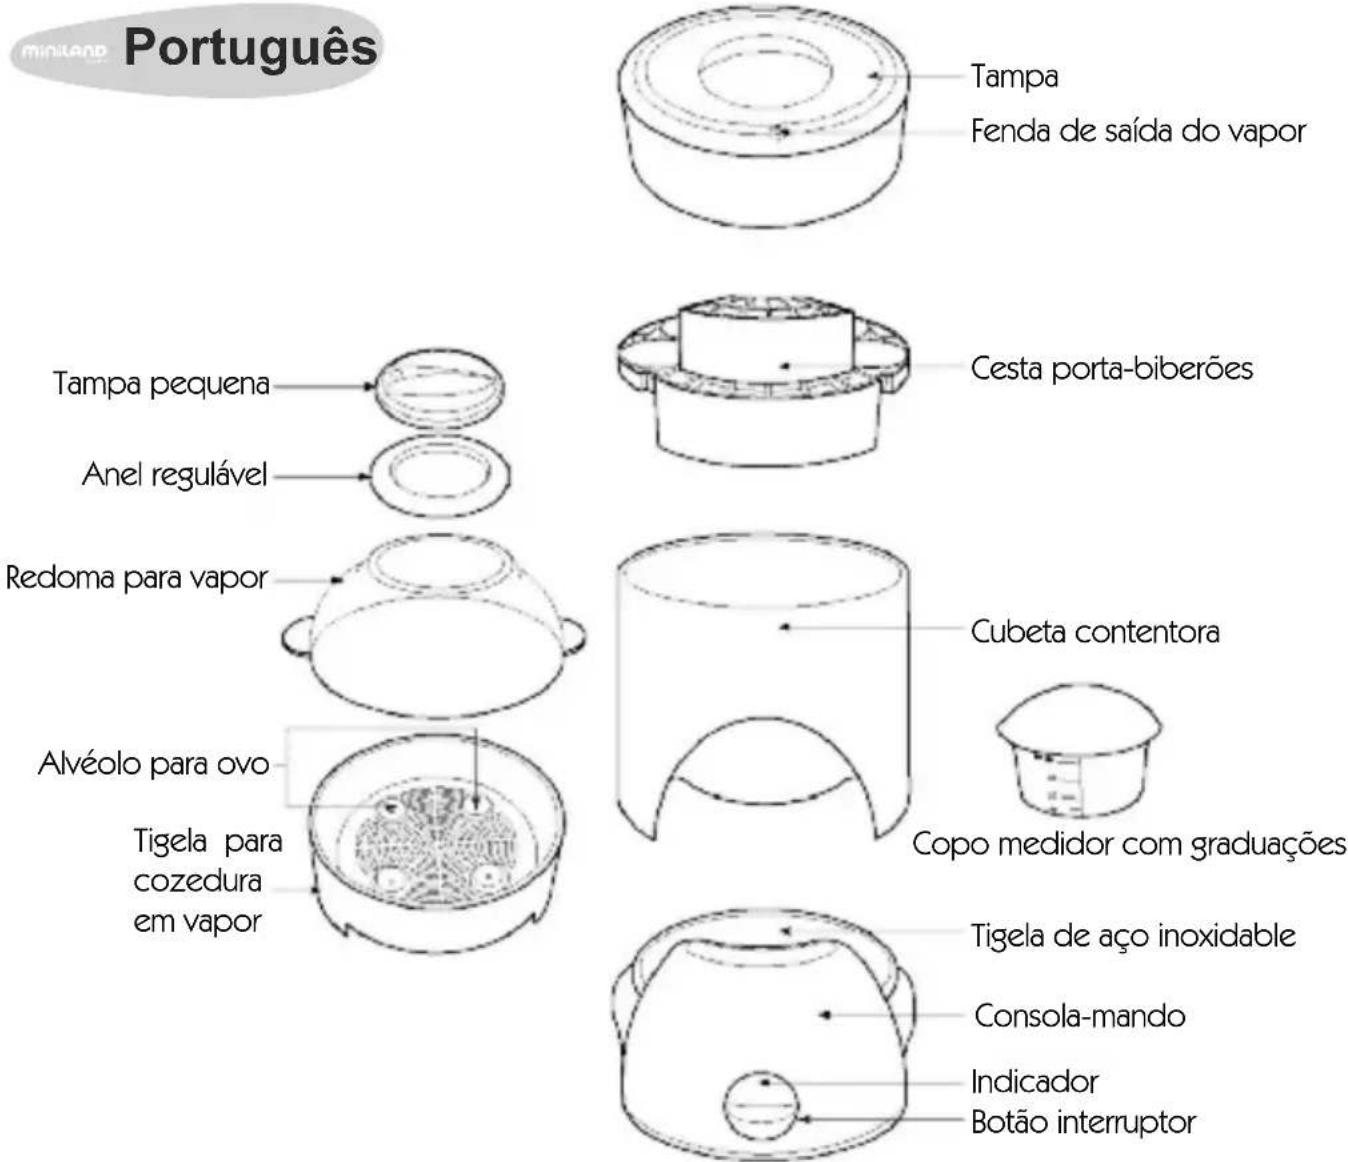
Bottle Warming:
-
You can use the steaming part to warm a bottle.
-
Take out the small lid of the steaming part. Place the bottle on the steaming bowl.
-
For standard bottle, let the adaptor ring on the cover for better warming. For wide neck bottle, please take out the adaptor ring.
-
Add water into the steel bowl of the console by the measuring cup. Please refer to the table below for the water amount for different bottles:
| 240ml bottle 330ml bottle | ||
| From fridge temp | 21 ml | 24 ml |
| From room temp | 17 ml | 20 ml |
- Final temperature of bottle content may vary due to different room temperature, size of bottles or shape of bottle. If you found the temperature of the bottle content is too low, you can add more water next time. If it is too hot, add less water.
- Plug the appliance into the power supply socket.
- Press the start button to begin the warming cycle.
8 . The indicator light and the heater will turn off automatically when the warning cycle is complete - WARNING: To avoid burning your baby, test the temperature of the bottle content, by dropping a few drops on the back of your hand, every time before you feed the baby.
Bottle Sterilization:
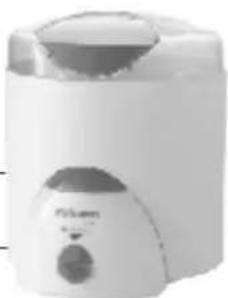
Before placing items in the appliance for sterilization it is important that all bottles, teats and accessories are empty and that they are cleaned and fully rinsed in fresh water.
- Place the sterilizer on a flat surface where it is out of reach of children and it will not be knocked or moved during operation.
- Remove the container and lid from the sterilizer pedestal.
- Remove the lid and place the rinsed bottles with their opening facing downward in the bottle rack.
- Lay teats and other accessories in the accessory rack with their opening facing downwards.
- Replace the lid.
-
Remove the measuring cup from the control console and fill it with an approximate 90ml of fresh water and pour it into the steel bowl.
-
Place the loaded container barrel securely on the pedestal ensuring that the circular slot on the underside of the container fits snugly and securely over the edge of the steel bowl.
- Plug the appliance into the power supply socket.
- Press the start button to begin the sterilization cycle.
IMPORTANT. Beware of hot steam from the steam vent.
- The indicator light and the heater will turn off automatically when sterilization is complete. It is advisable to allow a few minutes for the appliance and its contents to cool before opening the lid. The bottles and other accessories can then be removed.
IMPORTANT. Always allow the sterilizer to cool for at least 20 minutes before the next sterilization.
Food Steaming:
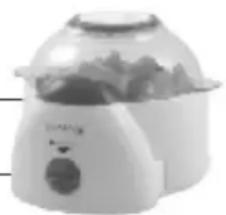
- Take out the top part of the sterilizer including container barrel, rack and lid.
- You can adjust the steaming time for adjusting the amount of water added into the steel bowl. Less water added, shorter steaming time.
- Put Steaming part on the control console.
- Put the food (e.g. vegetable) to be steamed into the steam basket and replace the lid and cover.
- Remove the measuring cup from the control console and fill it with an approximate 90ml of fresh water and pour it into the steel bowl. This is enough for around 15-minute steaming.
- Plug the appliance into the power supply socket.
- Press the start button to begin the boiling cycle.
- The indicator light and the heater will turn off automatically when boiling is complete.
Egg boiler:
- The steaming parts can cook eggs as well.
- Place the eggs (maximum 4 eggs) on the round egg holder in the steaming bowl.
- Add water into the steel bowl of the console. For well cook eggs, add 2 measuring cups (90ml) of water. For half boiled egg, add 1 measuring cup (45ml) of water.
- Plug the appliance into the power supply socket.
- Press the start button to begin the boiling cycle.
- The indicator light and the heater will turn off automatically when the boiling cycle is complete.
WARNING: The lid and content of the steaming part are hot after the steaming/cooking/warming cycles. Let them cool for a few minutes before taking the content out. Handle with care.
CLEANING INSTRUCTIONS
Always unplug your sterilizer before cleaning.
- Do not immerse or clean the base, the supply cord or the plug in water or other liquids.
- Use a soft damp cloth to clean the control console.
- The container barrel, lid and bottle rack are all dishwasher safe and they can be cleaned in hot soapy water.
Mineral residue, particularly in hard water areas, may deposit on the heating bowl after a few sterilization cycles. To avoid scale build up, wipe the surfaces with a soft moist cloth after each operation. Deposits can be removed with scale removers or by leaving 30ml water and vinegar solution (1 part vinegar to 4 parts water) on the heating bowl for approximately 30 minutes. The bowl should then be wiped clean with a clean, dry cloth. Some discoloration spots may remain after cleaning with a vinegar solution, but these are harmless.
- Do not use abrasives or solvents for cleaning; they may damage the appliance and the surface of the heating bowl.
Electrical Rating
Supply voltage: 230VAC 50/60Hz
Wattage: 300W
WARNING: This appliance must be earthed.
ADVERTÉNCIA
CtepnIIN3aTOp 6yTbIIOK
Ipepa3meenuem npedmetOB yctpoNCTBO dla Ctepniln3aunn Baxho, TTo6bI BCE 6yTbIOUckn, COCKN IN dpyrne akceccyapbl 6bln NyctbIMN IN PpOMblIMN B uHcTOB OBe.
- Pa3mecntte ctepniln3atop Ha nlocko NOBepxHocTn, BHe DoCraeMOCTn DeTei, oBeCneYbTe yCTOuHBOCTb np6opa n B npoucece 3Kcnpnyataun.
- CHIMNTE KOPNYC C KpbIshKOc 6a3bl.
- CHIMITE KpbIUKy I NOMeCTNTE YnCTbIe 6ytbIKN B NOCTaBky dJIg 6ytbIOK rOpIbIiKaMn BHIN3.
- ПложиTe COCKи IpyrHe npHaIeXHocTn B OTdJIeHne IЯ akceCCayPoB, BHN3 OTKpbITbIMN YaCTaMn.
- 3akpoTe KpbIshky.
-
Bo3bMnte MepHbI CtaKaHcN K 3aNoHnTe ero np6In3nteJbHo 90 mI yncToB OdbI, BblneTe BOy B CtaJIbHyIO YaUy.
-
IomeCTIte 3aRpyKeHHbIKoHTeHep Ha OCHOBaHHe, y6eINBUncB, YTO KpyROBoJ KeIo6 Ha HIXKHeJyactn KOHTeHepa PLoTHO pa3MeUen Ha KpaX CtaJIbHOuAsn.
8.ПодклочиустpoьстBOКрозтkeпитаня. - Haxmnte KhoNky "Iyck", yTo6bHaayaTb uNKl cTeepnIn3aun.
BAxHO. OnacaiTecb ropyeo npa n3 napOBoro OTBepCTnA.
- CBeTOBoi INHdIKaTOp I HaRpeBaTeIb aBTOMaTHUeCKN BblKJIIOuATcra, KOrDa npOcecc CTepnIN3aun 3aBepuNTcra.
KeIaTeIbHO BbIXDaTb HeCKoJIbKO MmHyT nepei OTKpbITnEM KpbIuKn, YTObI yCTpoIcTBO n erO coDePxIMoe HEMHOrO OCTblIN. TeNepb 6yTbIkn u akceccyapbl MOxHO BblHyTb.
BAxHO. Bcerda daBaIte cTePNn3aTOpy OCTbITb B TeueHne He MeHee 20 MmHyT do 3aNycka cnedyuioero npoucecca cTepnn3aun.
DECLARATION OF CONFORMITY
miniLAND
BABY
Miniland S.A. P.Ind. La Marjal I C/ La Patronal 8-10.03430 ONIL (Alicante) SPAIN Technical support: +34 966 557 775 · www.baby.com · miniland@miniland.esminiland
We declare under our own responsibility that the product:
super 3 deco · Miniland Baby · 89033 · Miniland, S.A.
to which this declaration refers conforms with the relevant standards or other standardising documents:
- Electrical safety (Standard 2006/95/EC):
- EN 50366:2003+A1 Household and similar electrical appliances.
Electromagnetic fields. Methods for evaluation and measurement - EN 60335-1:2002 +A1:2004 + A11:2004 + A12:2006 + A2:2006 + A13:2008
Household and similar electrical appliances. Safety - Part 1: General requirements - EN 60335-2-15:2002 +A1:2005 Household and similar electrical appliances. Safety.
Part 2: Particular requirements for appliances for heating liquids - EN 50366:2003 +A1:2006 Household and similar electrical appliances.
Electromagnetic fields. Methods for evaluation and measurement
EMC (directive 2004/108/EC): - EN 55014-1:2006 Electromagnetic compatibility. Requirements for household appliances, electric tools and similar apparatus. Emission
- EN 55014-2:1997+A1 Electromagnetic compatibility. Requirements for household appliances, electric tools and similar apparatus. Immunity. Product family standard
- EN 61000-3-3:2006 Electromagnetic compatibility (EMC). Limits. Limitation of voltage changes, voltage fluctuations and flicker in public low-voltage supply systems, for equipment with rated current $3L 16 A per phase and not subject to conditional connection
- EN 61000-3-2:2006 Electromagnetic compatibility (EMC). Limits. Limits for harmonic current emissions (equipment input current ≤ 16 A per phase)
ZEK 01.2-08/12.08 - Restriction of Hazardous Substances (RoHS) Directive 2002/95/EC
REACH (Registration, Evaluation, Authorization and Restriction of Chemical substances) Regulation (EC) No 1907/2006 - Waste Electrical and Electronic Equipment (WEEE) Directive 2002/96/EC
Miniland, S.A.
P.P. José Verdu Francés
Onil, Alicante, Spain.
8th March 2012
miniland
BABY
Miniland S.A. P.Ind. La Marjal I C/ La Patronal 8-10
03430 ONIL (Alicante) SPAIN
Technical support: +34 966 557 775
Fax +34 965 565 454
www.minilandbaby.com · miniland@miniland.es
© Miniland, S.A. 2009
Made in China. Keep this information.
Selective pick-up. Protect the environment.

- Bottle Warming:
- Bottle Sterilization:
- Food Steaming:
- Egg boiler:
- CLEANING INSTRUCTIONS
- ADVERTÉNCIA
- CtepnIIN3aTOp 6yTbIIOK
- DECLARATION OF CONFORMITY
- miniLAND
- We declare under our own responsibility that the product:
- to which this declaration refers conforms with the relevant standards or other standardising documents:
- BABY
Brand : Miniland
Model : 89033 Super 3 Deco
Category : Bottle warmer