
89034 Warmy Plus - Bottle warmer Miniland - Free user manual and instructions
Find the device manual for free 89034 Warmy Plus Miniland in PDF.
| Product type | Bottle warmer and baby food jar warmer |
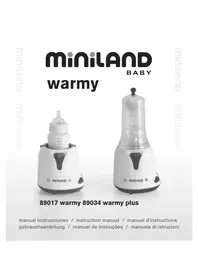
| Brand | Miniland |
| Model | 89034 Warmy Plus |
| Home power supply | 220/230 V ~ 50 Hz |
| Car power supply | 12 V DC (via cigarette lighter adapter) |
| Home power | 320 W |
| Car power | 100 W |
| Bottle capacity | Up to 330 ml |
| Jar capacity | Up to 250 g |
| Included accessories | Adjustable ring, graduated measuring cup, cigarette lighter adapter, bottle basket, jar basket, steam cover |
| Main functions | Quick heating, automatic shut-off, audible signal, steam sterilization |
| Safety | Flat surface required, keep out of reach of children, do not immerse, do not move when hot, automatic shut-off at end of cycle |
| Cleaning | Exterior and interior with a damp cloth, accessories dishwasher-safe (top rack) |
| Descaling | Mix 100 ml hot water + 100 ml white vinegar, let sit 30 min, rinse |
| Car use | Engine running, do not use while driving, specific adapter |
| Sterilization | Add 50 ml water, place bottle upside down, use steam cover, automatic cycle |
| Additional information | Made in China, conforms to European standards |
Frequently Asked Questions - 89034 Warmy Plus Miniland
User questions about 89034 Warmy Plus Miniland
0 question about this device. Answer the ones you know or ask your own.
Ask a new question about this device
Download the instructions for your Bottle warmer in PDF format for free! Find your manual 89034 Warmy Plus - Miniland and take your electronic device back in hand. On this page are published all the documents necessary for the use of your device. 89034 Warmy Plus by Miniland.
USER MANUAL 89034 Warmy Plus Miniland
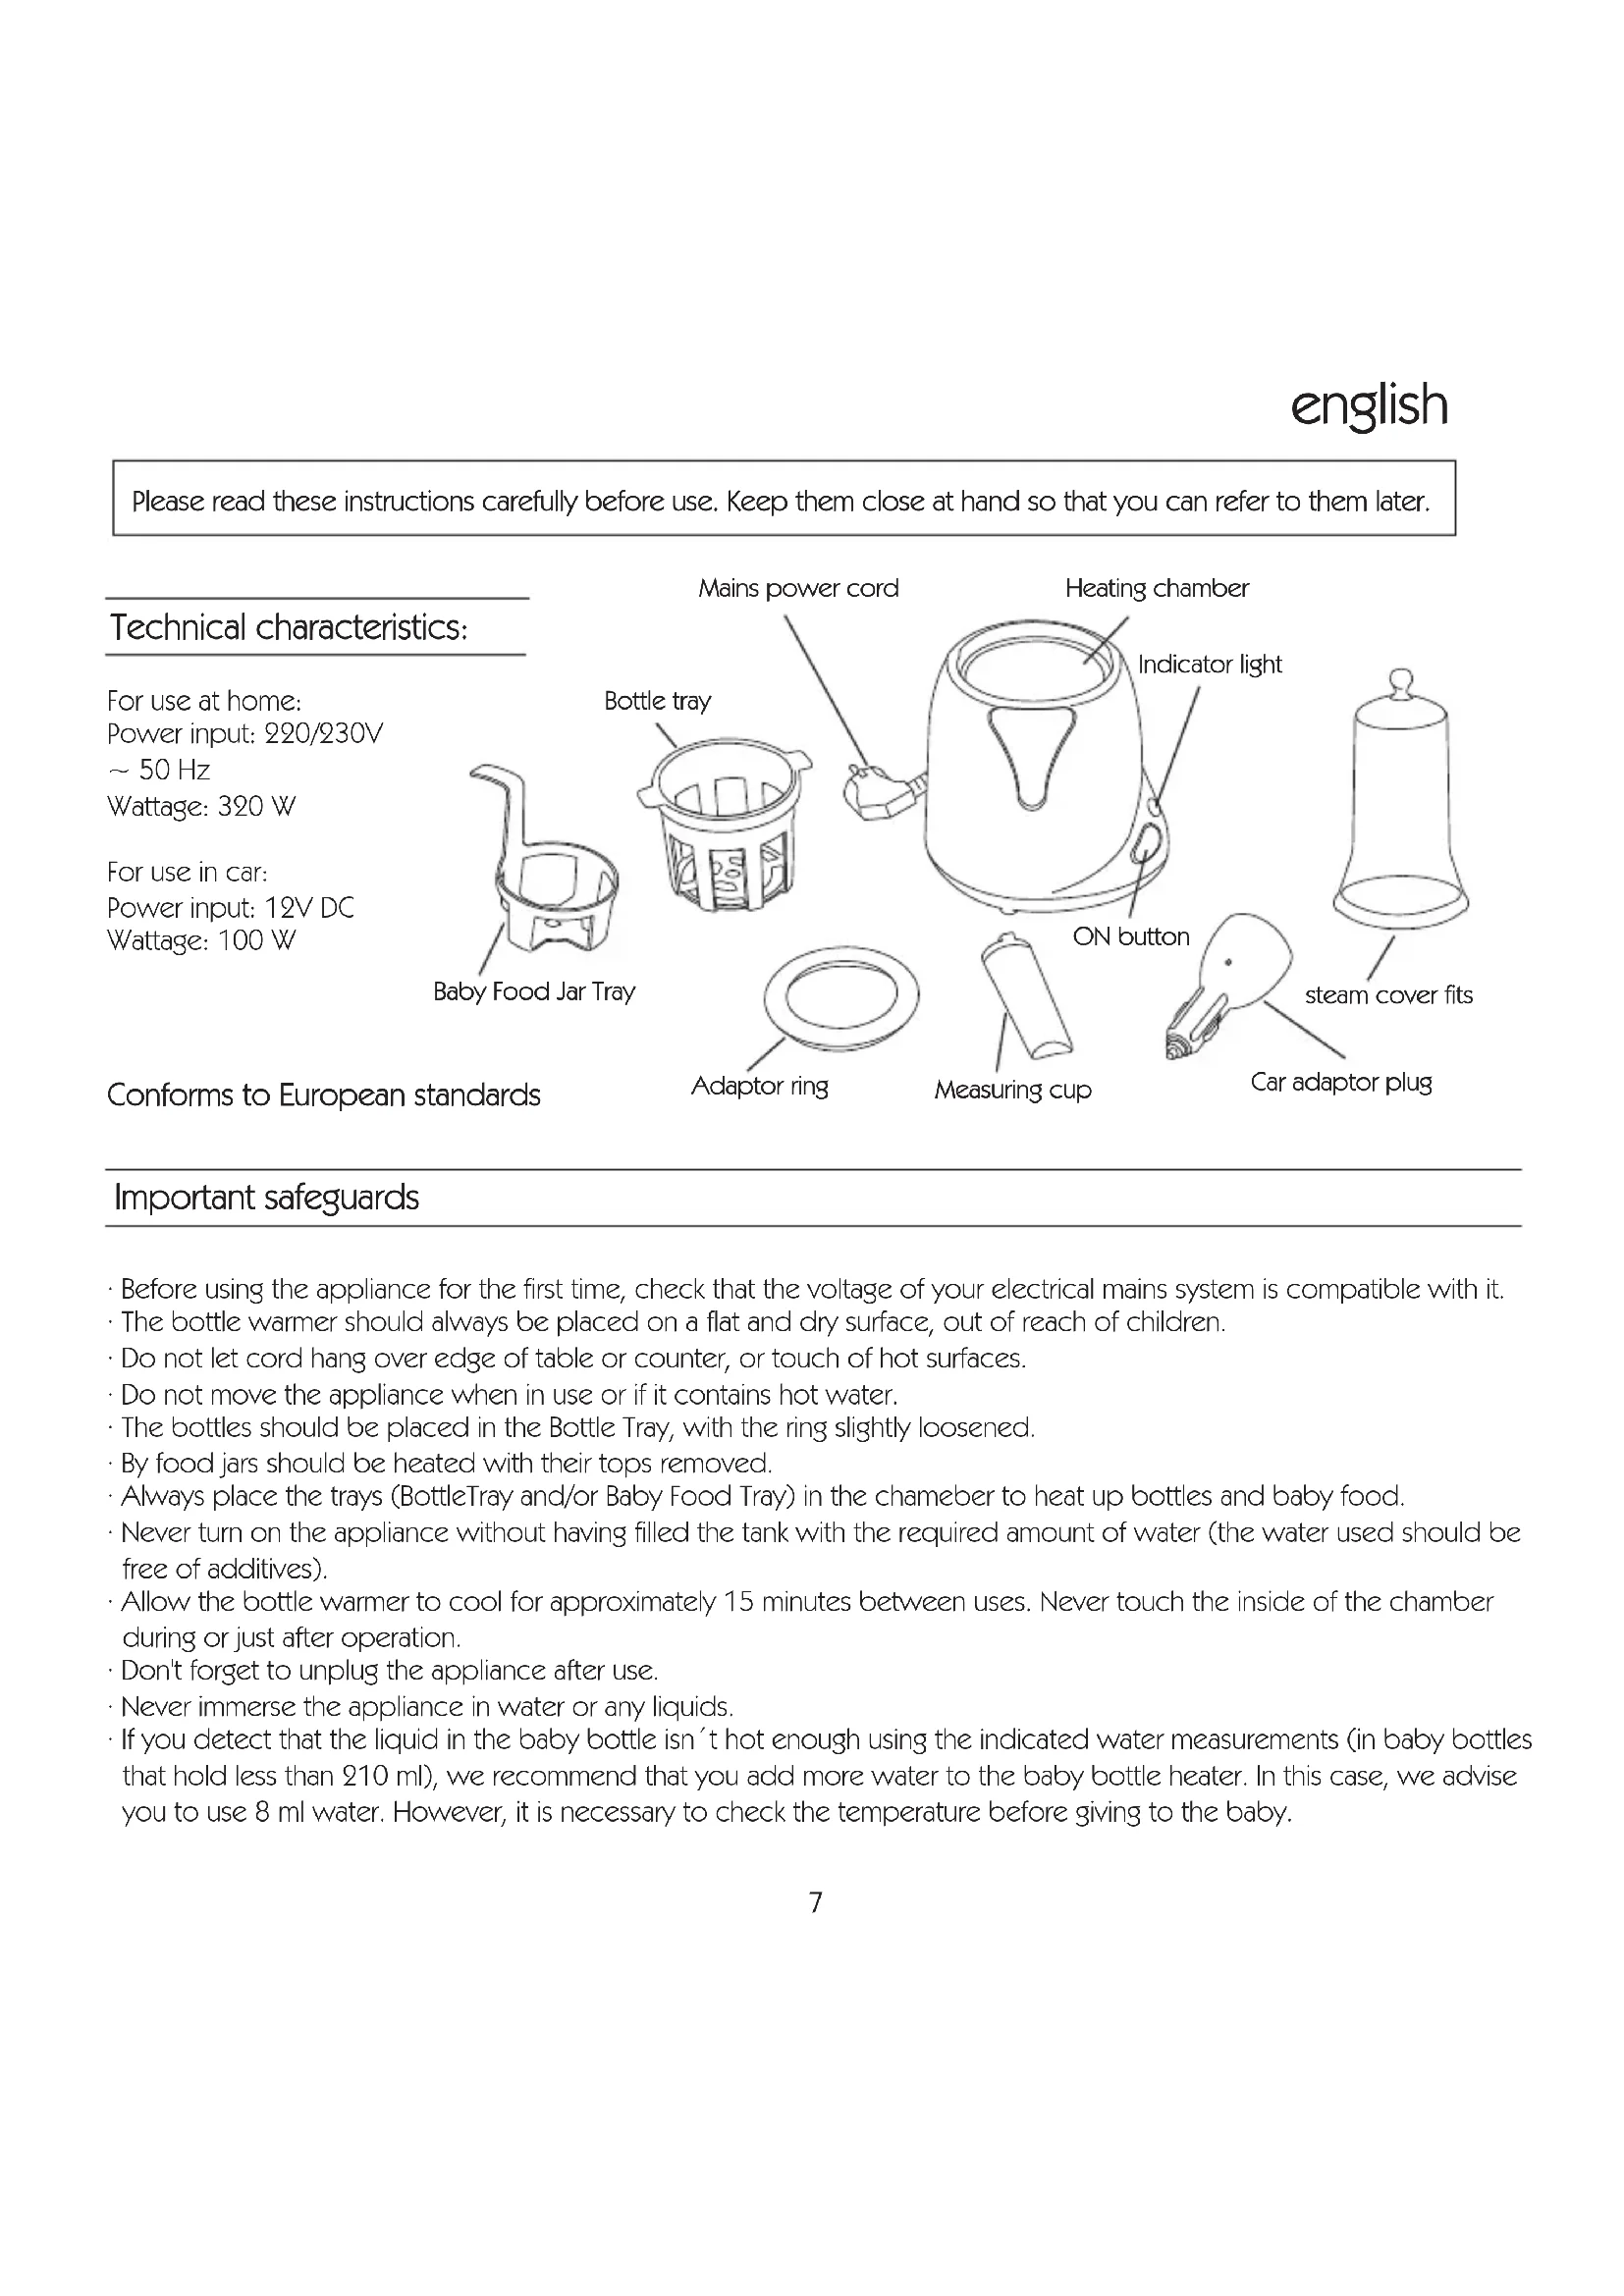
Please read these instructions carefully before use. Keep them close at hand so that you can refer to them later.
Technical characteristics:
For use at home:
Power input: 220/230V
50Hz
Wattage: 320 W
For use in car:
Power input: 12V DC
Wattage: 100 W
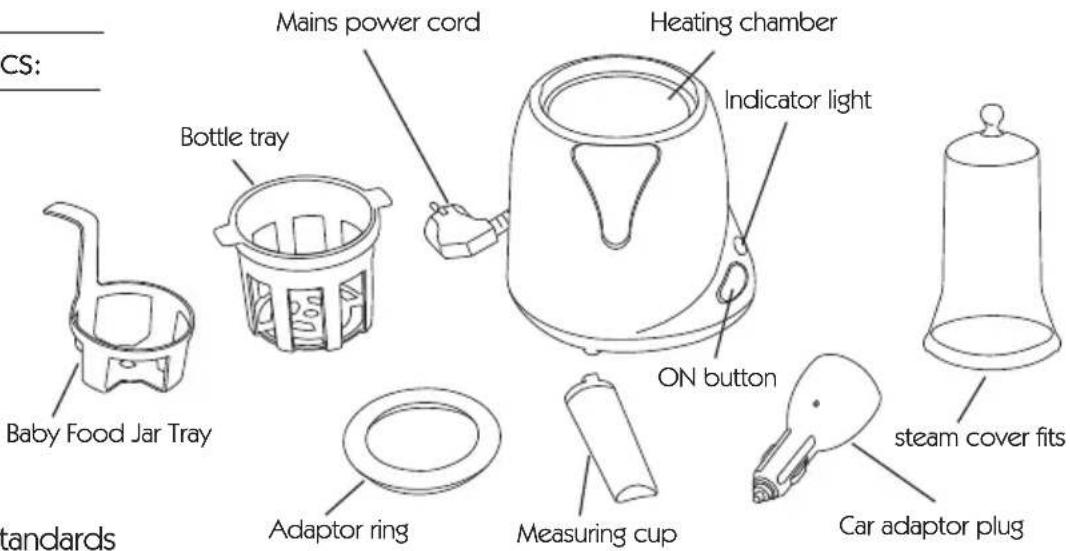
Conforms to European standards
Important safeguards
- Before using the appliance for the first time, check that the voltage of your electrical mains system is compatible with it.
The bottle warmer should always be placed on a flat and dry surface, out of reach of children. - Do not let cord hang over edge of table or counter, or touch of hot surfaces.
- Do not move the appliance when in use or if it contains hot water.
The bottles should be placed in the Bottle Tray, with the ring slightly loosened. - By food jars should be heated with their tops removed.
Always place the trays (BottleTray and/or Baby Food Tray) in the chameber to heat up bottles and baby food. - Never turn on the appliance without having filled the tank with the required amount of water (the water used should be free of additives).
- Allow the bottle warmer to cool for approximately 15 minutes between uses. Never touch the inside of the chamber during or just after operation.
- Don't forget to unplug the appliance after use.
- Never immerse the appliance in water or any liquids.
If you detect that the liquid in the baby bottle isn't hot enough using the indicated water measurements (in baby bottles that hold less than 210ml ), we recommend that you add more water to the baby bottle heater. In this case, we advise you to use 8 ml water. However, it is necessary to check the temperature before giving to the baby.
This appliance is not intended for use by persons (including children) with reduced physical. Sensory or mental capabilities, or lack of experience and knowledge, unless they have been given supervision or instruction concerning use of the appliance by a person responsible for their safety.
Children should be supervised to ensure that they do not play with the appliance.
If the supply cord is damaged, it must be replaced by the manufacturer, its service agent or similarly qualified persons in order to avoid a hazard.
The food should not be heated for too long.
For using in car:
- Never use the bottle warmer while the vehicle is in motion. Leave your engine running when using the bottle warmer to avoid draining your battery.
The car adapter cord is specially designed for this bottle warmer: never use it with other appliances.
Regularly check that the cigarette lighter socket in your car. Clean it if necessary.
If you have just used your car's cigarette lighter, allow it to cool for five minutes in the open position before plugging in with the bottle warmer.
When using the bottle warmer at home:
| AMOUNT OF CONTENT IN BOTTLE | Amount of water (ml) to be put in the measuring cup for BW for bottle content in room temperature (20°C) | Amount of water (ml) to be put in the measuring cup for BW for bottle content in fridge temperature (4°C) |
| 60 ml | 5 | 7 |
| 90 ml | 6.5 | 7.5 |
| 120 ml | 7 | 8 |
| 150 ml | 7.5 | 8.5 |
| 180 ml | 7.5 | 9 |
| 210 ml | 8 | 9 |
| 240 ml | 8 | 9.5 |
| 270 ml | 8 | 10 |
| 300 ml | 8 | 11 |
| 330 ml | 8.5 | 11 |
| Amount of water (ml) to be put in the measuring cup for baby jar in room temperature (20°C) | Amount of water (ml) to be put in the measuring cup for baby jar in fridge temperature (4°C) | |
| 120 g | 9 | 15 |
| 200 g | 18 | 23 |
| 250 g | 20 | 30 |
When using the bottle warmer in car:
| AMOUNT OF CONTENT IN BOTTLE | Quantity of water to be put in the measuring cup |
| 60 ml | 2 |
| 90 ml | 3 |
| 120 ml | 3 |
| 150 ml | 3 |
| 180 ml | 3 |
| 210 ml | 3.5 |
| 240 ml | 3.5 |
| 270 ml | 4 |
| 300 ml | 4.5 |
| 330 ml | 4.5 |
| BABY JAR | Amount of water (ml) to be put in measuring cup for small jar in room temperature (20°C) |
| 120 g | 7 |
| 200 g | 10 |
| 250 g | 12 |

If you detect that the liquid in the baby bottle isn't hot enough using the indicated water measurements (in baby bottles that hold less than 210ml ), we recommend that you add more water to the baby bottle heater. In this case, we advise you to use 8 ml water. However, it is necessary to check the temperature before giving to the baby.
OPERATING INSTRUCTIONS:
For using at home:
1- Place the Bottle Warmer on a flat and stable surface. Be sure the warmer and the cord are out of the reach of children.
2- Plug the power cord into wall outlet. You can see the indicator light illuminates in green color.
3- Fill the measuring cup with water, following the instructions shown above, then pour the water into the heating chamber. Your can then place the cup back to the holder.
4- Place the bottle tray into the heating chamber.
5- Place the bottle into the bottle tray. If you are using standard/small bottle, place the adaptor ring around the bottle for better warming result.
6- For warming baby food jar, remove the lid and place the jar in the Food Jar Tray and then put into the heating chamber. Please note the bottle tray should be placed inside the heating chamber first.
7- Press the ON button to start warming cycle. The indicator light illuminates in red color. CAUTION! The steam given off during the warming cycle is very hot. Keeps your hand off the appliance when operation.
8- When the heating cycle finished, bottle warmer will switch off automatically. At the same time, there will be a "beeping" sound to remind you the bottle is done.
9- Then you can take out the bottle. For baby food jar, use the handle of Food Jar Tray to take it out.
10- You can then unplug the unit.
For using in car:
1- Stop the car / vehicle and keep the engine running.
2- Place the Bottle Warmer on a flat and stable surface inside your car and vehicle. Connect the Car Adaptor Plug on to the power cord of the bottle warmer.
3- Plug the Car Adaptor Plug into the cigarette socket. You can see the indicator light illuminates in green color.
4- Fill the measuring cup with water, following the instructions shown above, then pour the water into the heating chamber. Your can then place the cup back to the holder.
Warning:
For bottle: tighten the ring and shake well to mix up the contents. Pour a few drops of liquid on the back of your hand to check the temperature before feeding.
For baby food jar: stir the contents and check the temperature before feeding.
Make sure that the appliance is cool before cleaning it or storage.
Cleaning the bottle warmer:
Always unplug the appliance and wait until it is cool before cleaning it.
- Use a damp cloth to clean the inside and outside of the unit.
- Never immerse the unit in water for washing.
- Do not use abrasive products to clean.
- Adapter ring, trays and measuring cup can be washed using a sponge with soap and water or can be cleaned in the dishwasher in the top tray.
Dscaling the tank:
According to the quality of the water used, a limescale deposit can build up on the bottom of the heating chamber over time. You should regularly descale your bottle warmer by pouring a mixture of 100ml of hot water + 100 ml of white vinegar into the heating chamber.
Leave this to act for approximately 30 minutes before emptying the chamber and wipe with a damp cloth.
Do not use detergent to clean the unit.
BOTTLE WARMER
Sterilizing Instructions
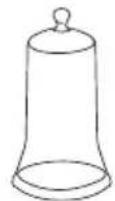
steam cover fits
- Place the bottle warmer on a flat surface where it is out of reach of children and it will not be knocked or moved during operation. Before placing items in the appliance it is important that the bottle is empty, cleaned and fully rinsed in fresh water.
- Remove the bottle tray.
- Pour 50ml of water into the heating chamber by using the measuring cup. You can then place the cup back to the holder.
- Place the empty milk bottle upside down on the heating chamber.
- Place the steam cover securely on the unit ensuring that the 2 wings of steam cover fits snugly onto the slots of the unit.
- Plug the power cord into wall outlet. You can see the indicator light illuminates in green color.
- Press the ON button to begin the sterilization cycle. The indicator light illuminates in red color. CAUTION! The steam given off during the sterilization cycle is very hot. Keep your hand off the appliance when operation.
- When the sterilization cycle finished, the bottle warmer will finished automatically. At the same time, there will be a "beeping" sound to remind you the bottle is done.
- You can then remove the steam cover, taking care to allow the milk bottle to cool for a moment. Then you can take out the bottle
- You can then unplug the unit.
Caracteristicas techniques:
Selective pick-up. Protect the environment.
Brand : Miniland
Model : 89034 Warmy Plus
Category : Bottle warmer