
APFM700W - Crepe maker BESTRON - Free user manual and instructions
Find the device manual for free APFM700W BESTRON in PDF.
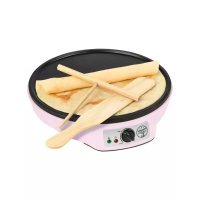
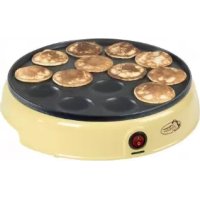
| Product Type | Crepe maker (poffertjes maker) |
| Brand | Bestron |
| Model | APFM700W |
| Power supply | 220-240 V ~ 50/60 Hz |
| Power | 1200 W |
| Plate material | Non-stick coating |
| Diameter of cavities | Approximately 3 cm |
| Indicator lights | On/off (red) and ready (green) |
| Switch type | On/off with red indicator |
| Main functions | Cooking poffertjes, mini pancakes |
| Cleaning | Damp cloth; do not immerse or put in dishwasher |
| Plate maintenance | Do not use metal objects or scouring powder |
| Safety | Do not use outdoors; keep out of reach of children under 8 years |
| Warranty | 60 months (5 years) |
| Included accessories | Sauce pan |
| Usage | Household use only |
| First use | Clean the plate; slight smoke may occur (normal) |
| Manual available | French and several other languages (PDF) |
Frequently Asked Questions - APFM700W BESTRON
User questions about APFM700W BESTRON
0 question about this device. Answer the ones you know or ask your own.
Ask a new question about this device
Download the instructions for your Crepe maker in PDF format for free! Find your manual APFM700W - BESTRON and take your electronic device back in hand. On this page are published all the documents necessary for the use of your device. APFM700W by BESTRON.
USER MANUAL APFM700W BESTRON
APFM700W INSTRUCTION MANUAL

Bedienungsanleitung

PykoBOdCTBO nO 3KcnIyatauN

Handleiding

Instrukcja obslugi

Kullanim klavuzu

Instruction manual

- Directive Basse tension
2014/35/EU
- Directive RoHS
2011/65/EU

R. Neyman
Contrôle qualité
WAT U MOET WETEN OVER DIT APPARAAT
WERKING - Poffertjes bakken
Traditioneel Poffertjesrecept
Ingredients
Congratulations with the purchase of this Bestron product. These instructions tell you how the product works and how to use it. Read the instructions carefully before you start using the appliance. Only use the appliance in the manner described in the instructions. Keep these instructions in a safe place for future reference.
Defects:
If the appliance is defective, do not try to repair it yourself. Always have a qualified mechanic carry out any repairs.
Children:
- This appliance may be used by children over the age of 8 years old and persons with reduced physical, sensory or mental capabilities or lack of experience and know-how, but only if supervised or if they have been instructed on how to use the appliance safely and are aware of its potential dangers.
- Children are not allowed to clean and maintain the appliance, except if they are over the age of 8 years old and supervised.
- Keep the appliance and the cable out of reach of children under the age of 8 years old.
- Keep an eye on children to ensure that they do not play with the appliance.
WHAT YOU SHOULD KNOW ABOUT ELECTRICAL APPLIANCES
- Check that the mains voltage corresponds with that shown on the rating plate of an electrical appliance before you use it.
- Check that the socket to which you connect the electrical appliance is earthed.
- Always install electrical appliances on a stable and level surface where it cannot fall over.
- Certain parts of an electrical appliance may become warm or sometimes hot. Do not touch them as you may burn yourself.
- Make sure your hands are dry when you touch an electrical appliance, a cord or a plug.
- Electrical appliances must be able to lose their heat to avoid fire hazards. Therefore, make sure that the appliance has sufficient clearance around it and that it does not come into contact with flammable materials. Electrical appliances must never be covered.
- Make sure that electrical appliances, cords or plugs do not come into contact with water.
- Never immerse electrical appliances, cords or plugs in water or any other liquid.
- Do not touch electrical appliances if they have fallen in the water. Immediately pull the plug out of the socket. Stop using the appliance.
- Make sure that electrical appliances, cords and plugs do not come into contact with heat sources, such as a hot hob or open fire.
- Never let cords hang over the edge of the sink, a worktop or a table.
- Always remove plug from the socket when you are not using the electrical appliance.
- Remove the plug from the socket by pulling the plug itself and not the cord.
- Regularly check if the cord of the electrical appliance is not damaged. Do not use the electrical appliance if the cord shows signs of damage. If the cord is damaged, it should be replaced by the manufacturer, a technical service provider or a person with an equivalent qualification, to avoid any danger.
- The appliance may not be switched on with the aid of an external time switch, or by a separate system with remote control.
WHAT YOU SHOULD KNOW ABOUT THIS APPLIANCE
- Never use the appliance outdoors.
- Never use the appliance in damp or wet locations.
- Thoroughly clean the appliance after use (see Cleaning and Maintenance).
THE ENVIRONMENT
- Dispose of packaging material such as plastic and cardboard boxes in the designated containers.
Do not dispose of this product as normal domestic waste at the end of its life, but hand it in at a collection point for the reuse of electric and electronic equipment. Look for the symbol on the product, the user instructions or the packaging showing the type of waste.
- The materials can be used as indicated. By helping us reuse and process the materials or otherwise recycle the old equipment, you will be making an important contribution towards the protection of the environment.
- Your municipality can tell you where to find the designated waste collection point in your neighbourhood.
CE DECLARATION OF CONFORMITY
This product conforms to the requirements of the following European Directives on safety:
EMC
Directive
2014/30/EU
- Low Voltage Directive
2014/35/EU
2011/65/EU

R. Neyman
Quality control
OPERATION - General
The appliance is intended only for domestic use, not for professional use.
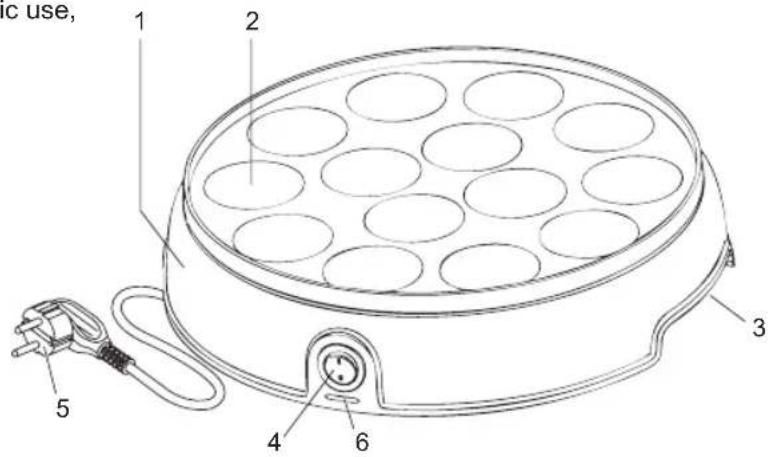
- Housing
- Baking plate
- Handle
- On/Off switch with indicator light (red)
- Power cord and plug
- Ready-to-use light (green)
OPERATION - Before first use
Clean the baking plate before using the appliance for the first time (see 'Cleaning and maintenance'). The appliance may emit a little smoke and a characteristic smell when you switch it on for the first time. This is normal, and will soon stop. Make sure the appliance has sufficient ventilation. During use the heating element will switch on and off to keep the temperature of the baking plate constant. The green ready-to-use light will also turn on and off. This does not indicate a defect.
ATTENTION: Keep house birds away from the appliance when it is in use. Fumes released from the non-stick coating are harmful to birds.
OPERATION - Baking Dutch Poffertjes
- Grease the baking plate with a little oil or butter.
- Put the plug into the wall socket.
- Switch on the appliance by pressing the On/Off switch. The red and green indicator lights will illumilate.
- Wait until the heating plate has heated up sufficiently and the green ready-to-use light has extinguished. The heating element will keep the baking plate at the correct temperature.
- Pour the Dutch Poffertjes batter into the indentations in the baking plate. Pour quickly; this will be easiest when you use a squeeze-bottle, gravy spoon, or jug.
- Carefully turn the Dutch Poffertjes over using a fork or a shish kebab skewer once the top surface becomes dry. The Dutch Poffertjes are ready once both sides turn golden-brown. The baking time will range between about 3 and 5 minutes, depending on the type of batter and your personal preference, etc.
- Remove the Dutch Poffertjes from the baking plate using a fork or shish kebab skewer and serve on a plate.
- Once you have finished baking switch off the baking plate with the On/Off switch.
- Remove the plug from the wall socket, and allow the appliance to cool.
CLEANING AND MAINTENANCE
- Remove the plug from the wall socket, and allow the appliance to cool down completely.
- Clean the baking plate after each use. Use a damp cloth to clean the plate, and dry it thoroughly.
- Clean the housing with a damp cloth, if necessary with an additional couple of drops of washing-up liquid. Remove the washing-up solution from the appliance with a damp cloth, and then dry thoroughly.
- Wrap the power cord around the lugs on the base of the housing, and store the appliance.
ATTENTION:
- Never use metal implements or scourers to clean the baking plate. Be careful when using metal objects to turn the Dutch Poffertjes or remove them from the baking plate; these could damage the non-stick coating on the baking plate.
- Never immerse the appliance, plug or power cord in water. Never put the appliance in a dishwasher.
- Never use corrosive or scouring cleaning agents or sharp objects (such as knives or hard brushes) to clean the appliance.
WARRANTY CONDITIONS
Bestron offers a 60-month warranty on this equipment against defects resulting from manufacturing and/or material errors, subject to the following conditions.
- No labour or material costs will be charged during this warranty period.
- Any repairs carried out under the warranty will not extend the warranty period.
- Faulty parts, or in the event of exchange, the faulty equipment itself, will automatically become the property of Bestron.
- The warranty is valid for the first buyer only and is non-transferable.
- The warranty is not valid for damage caused by:
Accidents
- Improper use
- Wear and tear
Neglect
- Faulty installation
- Connection to a different mains voltage than indicated on the type plate
- Unauthorised changes
- Repairs carried out by unqualified third parties
- Use in violation with the applicable statutory, technical or safety standards
-
Careless transport without suitable packaging or other protection
-
Warranty cannot be claimed:
-
For damage during transport
-
If the serial number of the appliance is removed or changed
-
Items excluded from warranty are:
Cords
Lamps
Glass parts
- The warranty does not entitle the purchaser to compensation for any damage other than replacement or repair of the faulty parts. Bestron cannot in any event be held liable for any indirect or consequential losses caused by or in relation to the equipment it has provided.
- Claims under a warranty may only be submitted to your (online) retailer or directly to the Bestron Service Department. Never send items without being asked to. We may refuse the parcel and you will be liable for the costs. Contact us first and we tell you how the appliance should be packaged and sent. Each claim under a warranty must be accompanied by the relevant receipt.
SERVICE
If an unexpected problem occurs, please contact the BESTRON service department: www.bestron.com/service
SUGGESTIONS FOR DUTCH POFFERTJES RECIPES
Dutch Poffertjes are baked in a special Dutch Poffertjes pan, a pan with indentations of a diameter of about 3 cm. Your Bestron Dutch Poffertjes Maker bakes delicious Dutch Poffertjes – and is ideal for use in every kitchen!
Traditional Dutch Poffertjes
Ingredients
125gflour
- 125 g buckwheat flour
(You can also use ordinary flour instead of buckwheat flour; however, you will then miss a little of the characteristic flavour of Dutch Poffertjes!)
1 egg
250 ml milk
- approx. 250 ml water
- 15 g fresh yeast (1 sachet of dry yeast)
- 50 g molten butter
- salt (when using butter without salt)
Preparation
Dissolve the yeast in 3 tablespoons of lukewarm milk. Mix the flour with the buckwheat flour. Prepare a smooth batter from the flour, yeast, milk and water (the batter should not run easily from the spoon, but may not be too thick; adjust the quantity of water as required). Stir the salt, molten butter and beaten egg through the batter. The batter should be lukewarm. Set the batter, covered with a moist tea towel, in a warm place (next to a radiator, in the sun, or in an oven at 50^ ) and allow it to rise for at least 30 minutes.
Baking
Heat the Dutch Poffertjes Maker, and grease the indentations with a little butter. Quickly pour a little batter into each indentation. This will be easiest when you use a squeezebebottle with a reasonably-sized opening, a gravy spoon, or a jug. Turn the
Dutch Poffertjes over using a fork or a shish kebab skewer once the top surface becomes dry. The Dutch Poffertjes should be baked golden-brown on both sides. Put the Dutch Poffertjes on a plate, and repeat for the other Dutch Poffertjes. Dutch Poffertjes are eaten whilst they are hot, with a curl of butter and covered by a thick layer of castor sugar (plus a few drops of liqueur for really mouth-watering Dutch Poffertjes).
Ham/cheese Dutch Poffertjes
Ingredients
125gflour
- 125 g buckwheat flour
(You can also use ordinary flour instead of buckwheat flour; however, you will then miss a little of the characteristic flavour of Dutch Poffertjes!)
-
1 egg
-
250 ml milk
- approx. 250 ml water
- 15 g fresh yeast (1 sachet of dry yeast)
- 50g molten butter
- salt (when using butter without salt)
100 g ham
20 sprigs chives
100 g grated cheese
Preparation
Dissolve the yeast in 3 tablespoons of lukewarm milk. Mix the flour with the buckwheat flour. Prepare a smooth batter from the flour, yeast, milk and water (the batter should not run easily from the spoon, but may not be too thick; adjust the quantity of water as required). Stir the salt, molten butter and beaten egg through the batter. The batter should be lukewarm. Set the batter, covered with a moist tea towel, in a warm place (next to a radiator, in the sun, or in an oven at 50^ ) and allow it to rise for at least 30 minutes. Chop the ham very finely. Also chop the chives very finely.
Baking
Pour the batter into a bowl or dish and stir in the ham, chives and half of the cheese. Heat the Dutch Poffertjes Maker, and grease the indentations with a little butter. Pour the batter into the indentations using a gravy spoon. Bake the Dutch Poffertjes until the top surface is almost dry. Turn the Dutch Poffertjes over using a fork or a shish kebab skewer once the top surface becomes dry. The Dutch Poffertjes should be baked golden-brown on both sides. Put the Dutch Poffertjes on a plate, and repeat for the other Dutch Poffertjes. Sprinkle the rest of the cheese over them, and top with a pat of butter!
Neapolitan Dutch Poffertjes
Ingredients
125gflour
125 g buckwheat flour
(You can also use ordinary flour instead of buckwheat flour; however, you will then miss a little of the characteristic flavour of Dutch Poffertjes!)
1 egg
- 250 ml milk
- approx. 250 ml water
- 15 g fresh yeast (1 sachet of dry yeast)
- 50 g molten butter
- salt (when using butter without salt)
100 g mortadella
- 2 tablespoons finely-chopped basil
1 tablespoons olive oil
Preparation
Dissolve the yeast in 3 tablespoons of lukewarm milk. Mix the flour with the buckwheat flour. Prepare a smooth batter from the flour, yeast, milk and water (the batter should not run easily from the spoon, but may not be too thick; adjust the quantity of water as required). Stir the salt, molten butter and beaten egg
through the batter. The batter should be lukewarm. Set the batter, covered with a moist tea towel, in a warm place (next to a radiator, in the sun, or in an oven at 50^ ) and allow it to rise for at least 30 minutes. Prepare the filling by cutting the mortadella very finely, and mix it through the basil. Fry the mortadella briefly in a little olive oil.
Baking
Heat the Dutch Poffertjes Maker, and grease the indentations with a little butter. Put 12 a tablespoon of filling in each indentation, and cover with a layer of batter. This will be easiest when you use a squeeze-bottle with a reasonably-sized opening, a gravy spoon, or a jug. Turn the Dutch Poffertjes over using a fork or a shish kebab skewer once the top surface becomes dry. The Dutch Poffertjes should be baked goldenbrown on both sides. Put the Dutch Poffertjes on a plate, and repeat for the other Dutch Poffertjes. Eat the Dutch Poffertjes whilst they are hot; serve with a curl of butter.
Dutch Poffertjes with ice cream and hot cherries
Ingredients
125gflour
125g buckwheat flour
(You can also use ordinary flour instead of buckwheat flour; however, you will then miss a little of the characteristic flavour of Dutch Poffertjes!)
1 egg
250 ml milk
- approx. 250 ml water
- 15 g fresh yeast (1 sachet of dry yeast)
- 50g molten butter
- salt (when using butter without salt)
1 jar seedless cherries in syrup (350g)
1/2 dl red port
1 cinnamon stick
- 2 tablespoons binder
4 scoops ice cream
Preparation
Dissolve the yeast in 3 tablespoons of lukewarm milk. Mix the flour with the buckwheat flour. Prepare a smooth batter from the flour, yeast, milk and water (the batter should not run easily from the spoon, but may not be too thick; adjust the quantity of water as required). Stir the salt, molten butter and beaten egg through the batter. The batter should be lukewarm. Set the batter, covered with a moist tea towel, in a warm place (next to a radiator, in the sun, or in an oven at 50^ ) and allow it to rise for at least 30 minutes. Whilst the batter is rising allow the cherries to drain in a sieve, catching the juice. Add the port and cinnamon stick to the cherry sauce, and heat in a sauce pan. Allow the sauce to simmer for about 15 minutes. Take the cinnamon stick out of the sauce, and add the cherries. Sprinkle the binder into the sauce, and stir whilst the sauce thickens.
Baking
Heat the Dutch Poffertjes Maker, and grease the indentations with a little butter. Quickly pour a little
matter into each indentation. This will be easiest when you use a squeezebottle with a reasonably-sized opening, a gravity spoon, or a jug. Turn the Dutch Poffertjes over using a fork or a shish kebab skewer once the top surface becomes dry. The Dutch Poffertjes should be baked golden-brown on both sides. Put the Dutch Poffertjes on a plate, and repeat for the other Dutch Poffertjes. Eat the Dutch Poffertjes whilst they are hot; pour the hot cherry sauce over them, with a scoop of ice cream in the centre.
Rum Dutch Poffertjes
Ingredients
125gflour
- 125 g buckwheat flour
(You can also use ordinary flour instead of buckwheat flour; however, you will then miss a little of the characteristic flavour of Dutch Poffertjes!)
1 egg
250 ml milk
- approx. 250 ml water
- 15 g fresh yeast (1 sachet of dry yeast)
- 50 g molten butter
- salt (when using butter without salt)
1 teaspoon cinnamon
- 50 g raisins
1 tablespoon rum
- 6 ginger corns
Preparation
Dissolve the yeast in 3 tablespoons of lukewarm milk. Mix the flour with the buckwheat flour. Prepare a smooth batter from the flour, yeast, milk and water (the batter should not run easily from the spoon, but may not be too thick; adjust the quantity of water as required). Stir the salt, molten butter, cinnamon and beaten egg through the batter. The batter should be lukewarm. Set the batter, covered with a moist tea towel, in a warm place (next to a radiator, in the sun, or in an oven at 50^ ) and allow it to rise for at least 30 minutes. Allow the raisins to soak in the rum. Chop the ginger crims finely, and mix them through the soaked raisins.
Baking
Heat the Dutch Poffertjes Maker, and grease the indentations with a little butter. Quickly pour a little batter into each indentation (do not fill the indentations completely). Add a little of the raisin/ginger mixture, and cover with a thin layer of batter. This will be easiest when you use a squeeze-bottle with a reasonably-sized opening, a gravy spoon, or a jug. Turn the Dutch Poffertjes over using a fork or a shish kebab skewer once the top surface becomes dry. The Dutch Poffertjes should be baked golden-brown on both sides. Put the Dutch Poffertjes on a plate, and repeat for the other Dutch Poffertjes. Dutch Poffertjes are eaten whilst they are hot, with a curl of butter and covered by a thick layer of castor sugar (plus a few drops of rum liqueur for really mouth-watering Dutch Poffertjes).
COMPLIMENT!
R. Neyman Quality control
KEZELEs -Altalanos
CE DECLARATION OF CONFORMITY
3KcPJIyATAU.ObuNE CBEDEHnA
3To yctpoiCTBO npedHa3haeHo TOJIbKO IJRA DOMaHHeRo, a He dIpyoPeCCNOHaJIbHO rCNoJIb3OBAHHr.

- Kopnyc
2.Формадявileny - Puyka
- NepekKIOUaTeJIb BKNIOUeHnB-BbIKIOUeHnco CBETOBbIM INHdNKATOpOM KpacHOuBETA
- Hyp nHaHn BnIka
- CBETOBOINHIMKATOP IOTOBHOCTN KNCIOJIb3OBAHnIO 3eJIeHOrO CBETA
3KcIpyATAUJ.NPEEDNEPBbIMNCIOJIb3OBAHHEM
Ipepe nepbim nCnoB3OBaHnem ouHCTne fOpmy dnn BblneuKn (cm. pa3deJ «Ounctka nTexHueckoe o6cnyKbAHnE»).Pn npEBOM BKIOUeHN yCTPOINCTBa n3 Hrero MOKeT BbIXODNTb HEMHO DbIMa NcXoNDtB xapaKTEpHbI 3anax. 3TO HopMaJIbHO n Ckopo ppeKaITcra. Y6eDInTeCb, yTO yCTPOINCTBO IMeET DOCTaOHTHyIO BeHTNIAHIO. Bo Bpemn cNoB3OBaHnHaRpeBaTeJIbHbI 3JeMeHT TO BkIOUaEcTc, TO BbIKIOUaEcTc, yTO6bI NOdEPKBAbT NoCToHHyTo TempeaTyPf oOpMbI dnn BblneuKn. 3eNeHbI CBeTOBOI INDnKaTOP rOTOBHOCTN K IcNoB3OBaHnO TaKke To BkIOUaEcTc, To BbIKIOUaEcTc. 3TO He npn3HaK HeNCnPabHOCTN.
BHIMAHHE! PnHcnoJIb3OBAHH yCTpoIeCTBa DEpKInTe DOMaunx nTnC NOaJIbSe OT Hero. Napbl, NcXoJUeOT aHTnnpurapHOrO NOKpbITnA, BpeHbI dNn PTnC.
3KcIpyATAU. BblneKAHNE TOLJIAHIDCKNX NOΦΦEPTbEc (MHNBJIINHQUKOB)
- Bbl mokeTe cma3aTb fOpMy IINB bIneUKN He6OJIbUIM KOJInueCTBOM pAcTIteJIbHOrO INIcINBOUHO RAMa.
- BCTaBbTe BnIKy B HAcTeHHHyIO pO3eTKy.
- BkIIOHTe yCTPOINCTBO, HaxaB nepeKIOUATEb BKIOUHeHn-BbIKIOUeHn. 3aTOpTcKpachbN 3eJIeHbIN CBETOBbI INDUKaTOPbl.
- IoOxDnte, noka fOpMa He Harpeetcdo Heo6xoDMOn TEMnepaTpybl, Hne Norachet 3eJeHbIN CBeTOBO INDnKATOP rOTOBHOCTN KNCNoB3OBAHNIO.HarpeBaTeJIbHbIN 3JeMeHT NOdEpxkmbaET TEMnepaTpy fOpMbI dnn BbIneUKN Ha Heo6xoDMOM ypOBHe.
- 3anonHnTe yrrny6neHnBΦopme TecOM nIra rnonaHcknx nopeptbc. 3anonHnTe kak moKHO 6bictpee. IpOSe Bcero 3TO cdeNaTb C NOMoUbIO r6KOJI pAACTIKOB0B 6yTBInKN, NOKKN dIg NOINBBI INN KpykN.
- Octopoxho nepeBepHnte roNnHaDckne nooepptbc BNko, KOrda IVBepxHra NOBepxHOCTb cTaHET cyXo. KaT OJbKO o6e CTOpOHbI CTAHyT 30NoTNCTo-KOpNHBeBMn — rOJIaHaDCKne nooepptbc rTOBObl. BpemBaInekAHn 6ydt CoCTabNt b OT 3 Do 5 MNHyT B 3aBnCmOcTN OT TUNa Tecta n Baunx JInhbx npednoHTEHn I.T.D.
- ɪəBnɛknte rɔŋlaHdckne nɒΦΦeptbεc n3 φopMbɪ ἀπη BBɪneʊ C NOMOʊbɪ BUNI Kɪ N BblINOKNTe Ix HɑrapeŋkY.
- Cpa3y Je IO OKOHuaHn BBIneKn BbIKNoHTe yCTpOCTBO C NOMoUbIO IpeekNtOaTeJI BAIIHOeHnBAIKNoHcEHn.
- BbHbTe Bnky n3 HacTeHHoH po3eKn n daTne ycTpoNCTby ocTbITb.
OuHCTKA IN TEXHNUECKOE OBCJNYKBAHNE
- BbHbTe Bnky n3 HacteHHo p03eTKn I daIte yCTpoCTBy NOHOCbIO OCTbITb.
- OuHuaTb foOpMy IJI BIneueKn CneIyET nocne KaXdOrO ee IcNoIb3OBaHn. IcNoJIb3yra BnaXHyIO TkaHb, OYNCHTte foOpMy N TuaTeJIbHO ee BBICYWNTe.
- Ouchnte Kopnyc BnaXHO TpAknO, ecn Heo6xOIMO, DoabBte HeckoJbKnx Kanenb MoUero cpeDCTBa.YdaHNTe MOOee CpeDCTBO C yCTPOINCTBa BnaXHO TpAknO n TuaTeNBo BVicyHIne erO.
- O6epHnTe 5Hyp nHTaHnB BOKpyr BbICTyNoB B OCHOBaHN KOpnyCa N NOMEcTnte yCTpOJCTBO B MecTo erO xpaHeHn.
BHIMAHNE!
HnKoIa He nCnoJIb3yIte MetaIIInueckne HnCTpyMeHTbl IIN MeTAlInueckne MoaJIKN DnA UcTKn 0opMbI dIe BbIeueKn. ByIbTe ocToPOxHbI npu IcNoIb3ObaHN MeTaJIInuecknx PpeIMeTOB dIg nepeBopaHBAHNA INI IN3BNeueHn rOIJaHdCKNX noΦΦepTBec N3 0pMbI dN BbIeueKn, NOCKOJIbKy OH MOrTy NOBpeDITb ee aHTnnpnrapHoe nOKpbItne.
HnKoIa He norpykaTe yCTpoNCTBO, eTo shyP nHTAHn IIN BUNKy B BOy. HnKoIa He MoTcYCTPOINCTBO B NOCyDOMOeHON MaHNHe.
- Hnkorda He nCnoIb3yIte dIra OUcTKn npnbopa Koppo3nOHHO-aKTNBHbe IIN oBe3xnpBaIOuIe YnCTaIue CpeDCTBa, INN OCTpbIe PpeDMetbl (HaNPIMep, HOXn INJ XeCTKne 5eTKN).
UCIOBNA TAPAHNTHNO OBCJYKUBAHN
KomnaHnBestron npimHeT CneDyUOune ycNoBra paaHTnHoro o6CnyKbAHnra: rapaTHn DeIcTByeT B OTHoWeHHn HeNCnpaBHOCTe, Bo3NkUnx BCJeDCTBne pa6pnuHoro 6paKa n(UN) DepeKTOB IcNoJIb3OBAHHbIX B np6ope MaTePnaJIOB B TeueHne 60 MecaeB co DnI npno6peTeHHn.
- B bIeHa3BaHHbI nepnoI paOoee Bpemn I nCNoIb3OBaHHbIe IyCTpaHeHn HEnCnpaBHOCTMaTePnAbI npEOCTaBnIOrTc 6ecnnaTHO.
- PemOH, npOn3BeHbB B TeueHne rapaHTnHoro cPoka, He npOndeBaet rapaHTnHbCpOK.
3.Бракованье DeTajn nIIN, npN 3aMeHe, HncnpaBbI np6Op, aBTOMaTHueckn nepexoJrВ co6CTBeHHOcTB KOMpaHbN Bestron. - TapaHTnHoe o6cnyKbAHne npImeHareTcToIbKO K nepBOMy NOKyNaTeJIIO H He NOpJExJTpeJaYe.
-
RaapantnHoe 06cIyKbAHne He npImeHReTcB Clyuae yuepe6a, Bo3HKwero BCJeDCTBne cJeDyUOxnpuHH:
-
Hecuacthblcnya
- HehaJIeXaIee IcNoIb3ObaHne
- V3HOC
Xanathoe OTHOWeHne - Henadnekaa yctahOBka
-
POKHIOHHe K cTeN C HApJxHHeM, OTnUaOuMcR OT Tuna HApJxHHeHry, yKa3aHHOro Ha TINOBO Ta6NJyKe
-
PpOu3BOJbHaj MoDnΦnKaUa
- PemOH, BbIOnHeHHbI He npOceCCnHaJIbHbIMN JInCaM
- IcnoIb3OBAHne np60pa B HApuSeHne DeiCTBHyIOx 3aKoHOdaTeJIbHbIX N TexHnuecknx npedncaHn n Hopm 6e3OnacHOCTn
-
TpaHcnpTIpOBka 6e3 NaJIeJkaIe yIaKOBKn IIN dpyrNx CpeICTB 3aIITbI
-
Noknyatelb He MoKet Tpe6oBaT rapaHTnHoro 06cnykBaHnB B Cnyae:
-Поврждени BO ВремпеpeвбкИ
- YdaJIeHne nIII n3MeHeHne cepNIHorO Homepa np6opa.
7.ИckJIIOUeHnIЯIraPauHTnHOrOobCJyXuBaHnIa
-
Lhpybl
JaMnbl
CTeKJIaHHbIe DeTaII -
TapaHTnHoe 6cnyxHBaHne He BkTIOyaeT Bo3MeUeHNr BO3MOXHO rO uep6a, 3a NCKNHOeHNm 3aMeHbI nPi peMoHTa HncnPabHbIX DeTanei. KomnaHra Bestron He Hecet OTBeTCTBeHHOCTH 3a BO3MOXbI INocJIeDyUoIu yUePb NII dpyIne IocNeIDTBn, BO3HKnUe B CBr3N NII B OTOHOeHN C NOCTABJIeHHbIM KOMNaHne Bestron obOpdyOBaHem.
-
3aBKn Ha rapaHTnHoe o6cnykBaHne npHHMaOTc TOnbKO uepe3 (Be6)-MaRa3HN HIn HeNOCpeDCTBeHHo B ceHTpe o6cnykBaHn KOMNaHm Bestron. Ho He cNeyEt npocTo OTnpabTb HenCnpaBHy npi6Op. NocbIka MoKet 6bITb He npHraTa, IN B 3tOM cNyae BCE pacxOdbI BydyT BbICTaBHeB Bam. CoBeTyem Chayana CB83aTbcr C Hamn N BbIaCHntb, KaKM O6pa3OM cNeyET ynaKOBaTb N OTpABuTb pni6Op. JIO6oe Tpe6oBaHne rapaHTnHO o6cnykBaHne HaJInexKNT COIpopoBDnTB KOJIeN KACCBOrO YeKa.
OBCJNYKINBAHNE
EcnB03HnKaet HeucnpaBHOCTb, CBxNTEcB C OTJeIOM 6CnyKuBaHna KIneHTOB BESTRON: www.bestron.com/service
PECNTbI PnIROTOBJIENRA TOnJIAHDCKNX NOpΦEPTbc
TolnaDckne nooepptbc BnneKaHcB CneMaNbHOI
fOpme CyynbEnHMn DnAmETpOM OkNo 3 cm.Baue
ycTpOcBo Bestron Dutch Poffertjes Maker BIneKaet
BkyBte Iore NaDckne Nooepptbc NnDaanbHo NOxOHT
dNnNCIOJIb3OBAHn Ha KaKdo KxHe!
TpaHIOHbIe ronnahdckne nooepptbc
HrpeDneHTbI
125MMyKU
125 r rpeuHEBOy MykN (Bb TaKke MoKeTe IcNoIb3OBAbT b ObiHyIO Myky BMeCTO rpeuHEBOH, HO TOrJa He CMOKeTe OUYTNb B NOHOM Mepe xapaKTEPHORo Bkyca rOJIaHaDCKNx NooΦeptBeC!)
1a
250 MIMOJOKa
- npn6J.250 mN BOdJI
- 15 r cbexnx dpoxkne (1 naKeTnK cyxnx dpoxkne)
- 50 r pacnnaBneHHoro macna
- coNb (npn nCNOJb3OBAHm Macna 6e3 coN)
PnroTOBJIeHne
Pactbopnte DpOxKn B 3 cTOnOBbIX NOKkax MOnoka KOMHaTHoN TEMpepaTybl. CmeaHte MyKy C rpeueHeBoi MYko. PIOrTOBtBe OndOpOHOe TcTeo H3 MyK, DpOxKeen, MOnoka N BOdy (TEcTe HO dONKHO NEKO OTdEJIaTBcR OT NOXK, HO OHo HE MOKET 6bITb CNIuKOM TOCTbIM, OTperyInpyuYte KOINueCTBO BOdy KaK 3TO He0bXoDmO). IepemewaIte CONb, pacnnaBneHoe MacNo n B3bntoe RnC Bo Tecte. Tecto DOxKHO 6bITb KOMHaTHoN TEMpepaTybl. IomeCTte TcTe, HAKpbIeOE BNAxHbIM qAHybIM N0IoTeHcEM, B TENIOe MeCTe (pAIDom CpaNaTOpOM, Ha CoINHc EINB DxyOBKY npn TEMpepaType 50^ ) and Te emy NoHNHTcb Ha IPOTJKeHHN KAK MINHMYM 30 MNHT.
BbinekaHne
HarpeTe yctpoCTBO nI npiroTOBHeHnroNnHaDCKnx
noΦpeptbcc n CMAkBe Te rny6HeHn He6oNBuIM
KoJIueCTOB Macna. BicIcPo 3aeneTHe6oNBuOe
KOINIECTBO Tecta B KAKdoe YrLy6HeHne. IpOSe BCero
3To CdeJaT C NOMoubIO Rn6KO INaCTNKOB 6yTBJKN C
OTBepCTNe NDOxOraJeRO pa3Mepa, NOKKn DnI NOINBBI
mN Kpykk. IpeBepHnTe rONNAHDckne NoΦpeptbc
BNIKo Hn BEpTeNoDM RAaUbika, KOrDa INX BepxHnA
NOBEPXHOCTb CTahET cyXoI.
fONIAHNCKne NOΦpeptboc DOONKbH bInEkaTbcn DO
30NOTCtO-KOpunHEBOrO cBeta C Obex CTopoH. IOnOKnTe
rONIAHNCKne NOΦpeptbc HA TaPeJky I NOBTopnte Bblwe
yKa3aHHbe DeiCTBnD nIpyHX nopCn rONNAHDcknx
NoΦpeptbc. fONIAHNCKne NOΦpeptbc EJAT, NOK OHI
Ropnye, NOINIB INx CNINBOchBM MACCNOM I NOKpbIB TOIcTBIM
CNoem caxapHO nYdpBI (nOobabv Ha HNX HeCKOBKO
KanEnb JInkepa dnn noNcyHn HactoJeero AnenNTTHORO
rONIAHNCKoro noΦpeptbc).
TonnHaNckne noΦΦeptbcc BcTeHnHO nncbipom
HnRpeDneHTbI
125rmykN
125 r rpeHcBMyK
(BbI TaKKe MoXeTe NcONJIb3OBA Tb ObblHyIO MyKy BMeCTo rpeHBeBO, HO TOrJa He CMOXeTe OuTyNTb B NOHOM Mepe XapakTepHoro BKyCa rONJaHdCKNX NoΦΦePtBec!)
1 RIMUO
250 Mm MoJOKa
- pπ6JI. 250 mN BɔdBi
- 15 r cbexnx dpoxxkei (1 naKeTnK cyxnx dpoxxkei)
- 50 r paçnnabneHHoro Macna
- coIb (npn nCnoJIb3OBAHm MaCna 6e3 coJIH)
100BETUHbI
20 BetoeyIyka-cBnyeta
100 r tepToro cbipa
PnroToBneHne
Pactbopnte dpoxxn B 3 cTOnOBbIX NOxKax MOnoka KOMHatho TEMepaTypb. CMeuaTe Mykyc rpeueHeBoi MYKo. IIOrTOBbTe OndOpOHOe TcTo hMky, DPOxKei, MOnOKa N BOdy (TECTO He DOJXHO JERKO OTDeJIaTbcra OT IOKKN, HO OHO HE MOKET bIb CNIuKOM TOCTbIM, OTPeryuynpyte KOINueCTBO BOdy KaK 3TO HeO6XoDmIo). NepemeauTe cIb, pacnnabNeHoe Macno n B3bntoe raio B Tecte. Tecto DOJXHO 6bITb KOMHatho TEMnpaTypb. Iomectne Tecto, HAKpItoe BNaXhBIM qAHbIM NOJOTeHcEM, B TENIOE MecTe (pRdOM CpaadinTopom, HA CoHNue INN B dYxOBKY npr TemepaTypb. I daJIte Emy noNDHTcbra Ha pOraTaeKHeHH KAK MHnHMym 30 MNHT. INMeIbYtce Oeyb MeNKo BetHy. TaKke MeNKo HApexbTe JyK.
BbinekaHne
BbIeTe TcTo B Mncky nnn yauy, nepemeWaeTc BcTHNOH, LyKOM nNoBnHO npiroTOBHeHOrO cbpa. HarpeTe yCTPOIcTBo DnI npriTOBNeHr rONlaHdCKxN noΦpeptbc cMcxkBe Yrny6bneHr He60JIbIM KOnueCTbOM Macna. 3aIeTe TcTo B rYy6bneHr c NOMoubIO NoKKn dNn OndnBB. BBykeAte rONlaHdCKne noΦpeptbc Do TEX nop, noka nx BepXnra NOBepXHOCTb NOUTn HBeBOCXHT. PepeBepHnte RoJNAHdCKne noΦpeptbc BNKOHN BepTeNOM dNn WAslbka, KOrda INx BepXnra NOBepXHOCTb CTAHeT cyXOH. RoJNAHdCKne noΦpeptbc DOJNXBI BBykeKaTbCdoOBp3OBAHnA 301OTnCTo-KOpuHEBoN KOPOUKn CObENxC CTOpOH. IOnoXtRE rONLAHdCKne noΦpeptbc HOpKecBaHa TapeNKu NOBTOPNE BbIe Yka3AHbIe DeIeCTNB dNn dpyRnx Nopun rONlaHdCKnx noΦpeptbc. NocBnTEHX OCTabWeC JaCTbIO CBpa IN NOLOXnTE HABePx Kycouek Macna!
HeanonntaHckne roJnHaDckne nooepTbeC
HnrpeDneHTbl
125rmykn
125 r rpeuheBOy MykN
(BbI TakKe MoXeTe NcONb3OBAbT O6bUHyIO MyKy BMeCTo rpeHBeBO, HO TOrDa He CMOXeTe OuTyNTb B NoHOB Mepe XapakTePHoro BKyCa roJIaHaDcknx NocΦepeTbcC!)
1 RNUO
250MIMONOKA
- npn6J.250 Mm BOdBi
- 15 r cBexnx DpOxxKe (1 naKeTnK cyxNx DpOxxKe)
- 50 r paçnnabneHHoro macna
- COJIb (πρι ΚΙΝΟЛБΑθΗΠ MaCηa 6e3 COJIH)
100 mopTaJeIbI (NTaIbHckoB BapeHOKoN6acbl)
- 2 CTOJIOBbIe IOKKMeNko Hape3aHHoro 6a3nIMKa
1 cTOnOBaJIOXKa OINUBKOBOrMaCna
PnroTOBJIeHne
PacTBOPHTe DpOxKn B 3 CToNObbIX NOKkax MoIoka KOMHATHOH TEMNEpatybl. CMeaAte Myky C rpeueHeBOI MYKOI. POnrTOBtE OdnOpOHOE TcTe O3 MyK, DpOxKeI, MOnOka N BObl (TEcTO He DOJIHKHO JERKO OTdEnrTbCg OTLOKKN, HO OHO HE MOKET 6bITb CJINuKOM TOJCTbIM, OTPeyInpyuTE KOJIuCeTBO BoBl kAc 3To Heo6XoDmO). IpeMeaHTe CoB, pacIIaBNeHoe MaCIO N B3bNToe RnO B TcTe. TcTe DOJIHKo 6bITb KOMHATHOH TEMNEpatybl. YCTAHOBtE TcTe, NOKpbTBe BNAKHbIM qaHbIM NOJOTeHcEM, B TENlOE MeCTO (PraDM CpaHaTOpOM, Ha COJHcE INB DYXOBKY pRi TEMNEpatyE 50^) n daTe EMy POJHrTBcH A pOToRAKeHH KAK MNHMym 30 MNHyT.
IIOROTOBbTe HaunHky, OueHb MeJIko pa3pe3a8 MOpTaJeNny HnepeMeuBaBae ee C 6a3nNkOM. CnerKa o6kapbTe MOpTaJeNBy B HeoBbWOM KOINueCTBe ONNBKOBOrO MaCna.
BbinekaHne
HarpeTe yctpoCTBO nnpiroTOBHeHn rOlnaHdcknx noΦeptbEc n CmakxBe YeIyIbHeHn He6oNbUIM KOInueCTbOM Macna. IIOXKeTte 2 CTOnOBoI IOKnHaunHKn B KAnDoE yIyIbHeHne N NOkPoTe cNoem TeCTa. IpOuse BCero 3To CdeNaTc B NOMouBIO rNkoN pNactIKoBOB 6BytJKN C OTBepCTnEM NOxDoxJaWe Opa3MepA, NOKKn IaN DNOJIINBbl INI KpyKKn. IpepeBepHTre rONnAIDCKne NOΦeptbEc BNIOKn ININ BEpTeNoM dNlaWbIka, KOrDa IN X BePxAH NOBepxHOCTb CtaHET cyXoN. FOnlAnDcKne NOΦeptbEc DOJNXBI BbIeKaTbC4 Do 30IoNTcTO-KOpHHeBOrO CBeta C oEHX CTOPOH. IIOXKeTte rONnAIDCKne NOΦeptbEc HA TapeJIky IN NOBtOpTE BbIe Yka3AHHbIe DeNCTBnA Dn DpyRnx NOPuN rONnAIDCKnx NOΦeptbEc. FOnlAnDcKne NOΦeptbEc CJeNyEt cEcb TropaHMMn IN ONDaBaTb C 3aBNTKOM CJINBOUHO macna.
TolnaDckne noΦΦeptbεc C MOpoxeHbIM I ropayen BnshEn
HrpeDneHTbI
125MVK
125 r rpeuheboMykn
(BbI TakKe MoKTe IcONJb3OBAbT ObiHyIO MyKy BMeCTo rpeHBeB, HO TOrDa He CMOKeTe OUyTNb B NOHOM Mepe xapakTePHoro BkyCa roJIaHaDcknx Nocpeptbc!)
1YIMUO
250 MIMOJOKa
- npn6J. 250 mN BODJI
- 15 r cbeKnx dpoKkei (1 naKeTnK cynx dpoKkei)
- 50 r pacnnnaBneHHoro macna
- coIb (npi nCIOJIb3OBAHm Macna 6e3 coIN)
16aHouka Bmweh 6e3 KoctoyeB Cnpone (350r)
- 50 Mm Kpachoro nopTBeHa
1 naJouka KopuB
2 cTOnOBbIe IooKn C8yIoueero NIIueBOrO npOdykTa
4JIOXeUMOPOXeHO
PnroToBneHne
Pactbopnte npokn B 3 cTOnOBbIX NOKkax MONOKa KOMHATHO TEMNepaTpybl. CMeWae T MyKc rpeyHeBOI MYKo. PIOrTOBte OndOpOHOe Tecto H3 MyK, dpoXKei, MONOKa H BObl (TECTO HE DOJNKHO JERKO OTDeJIaTBcR OT NOKK, HO OHO He MOKET 6bITb CNIuKOM TOJCTbIM, OTpyUnpyTe KOINueCTBO BObl KA K3TO He06xOIM). NpeMeMaayTe CoNB, paCnnabNeHoe MaCNO to B3bNtOE AYIO B Tecte.TECTO DOJNKHO 6bITb KOMHATHO TEMNepaTpybl. IOMecHTne Tecto, HAKpblTOE BnAaXHbIM CaHbIM NOIOTeHM, B TEINIOe MecTe (PraDM CpaDnAtOPOM, HA CoINHc NeIN B DxyOBky npI TemNepaType 50^) and Te EMy NOHrTaCBsHa IpOTJKeHN KAK MINHMym 30 MNHT. Noka TECTO pACTeT, BUNHMAOKeT CTEKAIBTO, nponNTbBaCb COKOM. DoabBeT NoPTBeH IN NaIOUky KopuCb B BNuHEBbI COYC, IN HarpeTe erO B KAcTpJe. DaIte CoCy To NOKInTe Ha MeDnEHOM ORHe OKONO 15 MNHT. Bo3bMITE NaIOUky KopuCb M3 COyCA IN DoobABTe BUNHIO.HacBnTe CB3yUoUsn NIIeBOI npOdyKT B COYC IN peMeMaaiTe, YTObIcoyc 3arycten.
BbinekaHne
HarpeTe yctpoCTBO DnI npiroTOBneHn rOnnHaDcknx NooepbEs CMAKbTe yry6neHn HebONbIM KOINueCTBOM Macna. BbIcTPO 3aneIte HebONbOe KOINueCTBO Tecta B KAnDoE yRy6neHn. PpOSe BCero 3TO CENaTb C NMOUbIO HN6KOII NaCTNKOB OBytJIKN C OTBepCTNeM NOxOJaIero pa3Mepa, IooKn I nI IOINBBI
IIN KpyKNI. IpeBepHnTe roJIaHdCKne noΦpeptbEc BUNKO INN BEpTeIOM dIg IuaIbIka, KOrda INx BEPxHra NOBepXHOCTb CTahET cyoI. TOnlaHdCKne noΦpeptbEc DOJIKHbI BIneKaTbCn DO Obpa3OBAHn 30ONTOCTO-KOpHHeBOI KOpOKN CObENCTOPOH. IOnOKnTE roJANHDCKne noΦpeptbEc H TaPeIky n IOBtOpNTe BIIwe Yka3AHhIE DeiCTBnD IpyrN XnpuN roJANDAcknx noΦpeptbEc. TOnlaHdCKne noΦpeptbEc cNe dyET eCTb RopYIMN, NIOINB INX RopRyIM BINUHeBBIM COYCOM INIOJOKNB NO CEHTpy loKeey MOpOKeHoRo.
TonnnaHckne noΦΦeptbcc c pomom
HrpeMeHTbI
125rmykn
125 r rpeuhebo Mykn
(Bb taKxe moXeTe nCOnIb3OBA Tb obBHyIO MyKy BMeCTOrpeHBeBO, HO TOrDa He CMOXeTe OuyTnTB NONHO MepeXapakTePHoro BkyCa rONJaHdCKnx NooΦeptBec!)
1
250 Mm MoJoka
- npn6J.250 MJI BOBJI
- 15 r cbeKnx npoxkKe (1 naketn cynx npoxkKe)
- 50 r pacnnabneHHoro macna
- COJIb (npi nCNoIb3OBAHm Macna 6e3 CoIN)
1yaHnnoKKa KopuB
- 50 r n3Homa
1 cTOnOBa JIOXka POMA
- 6 JIOMTNKOB MMOpra
PnroToBnene
Pactbopnte npoxkB 3 cTOnOBbIX loxxkax MOnoka KOMhATHoH TemnepaTypbI. CmeuaTe Myky c rpeueHeBOy myKo. PNOrTOBte OndOpOHOte TcTo n3 MyK, pOxKKe, MONOKA u BODJI (TEcTO HE DOJXHO JERKO OTENPAbCtOTXKN, HO OHo HE MoKet BoBb CnUWko TomCTbIM, OTpyuNPuyTe KOJIneCTBO BoDJI KAK 3TO HeOBXoHMo). NpeMeuAte C TeCTOM CoJIb, paCNlABNeHHoMaNo, KOPuY u B36HTOE RaIO. TeCTO DOJXHO 6bITb KOMHaTHoH TemnepaTypbI. NoCTaBBTe TcTe, HApKbIToe BnAXHBIM qAHbIM NpONTeHcEM, B TEINoE MeCTO (pRdOM C paNaTopOM, Ha COJHcE INN B DxyOBKy npu TemnepaType 50^) u daTe emy POJHbTe HA IpOTraKeHN kAk MNHMym 30 MmHT. POnBObIte N3KMy IpONiTatcbPOMOM MeNKo HApexbTe JOMTNIK Nm6bpri NpeMeuaTe INC pONNTAHbIM POMOM N3OMOM.
BbinekaHne
HarpeTe yCTpOCTBO DnI npiroTOBneHn rONnHdcknx noΦeptbEs CmXkBe Tgny6bnHn HEBOnbIM KOINcTbOM Macna. BbICrpo 3aneIte He6onbIooe KOINcCTBO TcTa B KaKdoe YrN6bHeHne (He 3aONnHnTe yIy6bnHe N OINHOCTbIO).DobABBe THEMHOrO CMECN I30Ma nIMbIPn, HAKPOTE TOHNM CNOEm TcTa. POnOE BCero 3TO CENaTb C NOMOuBIO Rn6KO NnAChTKOBoB 6BytIKnC OTBepCTHE NOxODaIeO Ro pAmE, JOnKNNI N OIN KpyKnn. NepeBepHIne ToJNAHDCKne NoΦeptbc BUNKo INN BepTeNOM DnI 7aUbIka, KOrDa INX BepXHnAR NOBEXHOCTB CTahET cyXo. FOnNAHDCKne NoΦeptbc DOJNKbI BByNEKaTbCS DO 30NtOCTORo-KOpNUHEBOr QBaTe a CObExN CTOPOH.NOnOXNTE ToJNAHDCKne NoΦeptbc HA TaPeNky INOBTOPITE BIIwe YkAsAHhle DeiCTBnDn ApyNX NOPuIN ToJNAHDCKNS NoΦeptbc.FOnIAHDCKne NoΦeptbc CNeDeYEt ECTb TROPuMM, NOnNB INxCINBOHbIM MaCnOM IN NOKPBIB TOnCTbM CNOEM CaxapHOH Nydpbl (N Do6aBnB Ha HIX HECKONBKO KanEnb POM-JINKepa DnI NOJUYEHN HAcTOruXn AnInNTHBx FOJIANHDCKNX noΦeptbc).
TEBRIKLER!
CE DECLARATION OF CONFORMITY
NEED HELP? CHAT WITH US! WHATSAPP CUSTOMER SERVICE

BESTRON.COM/WHATSAPP
- APFM700W INSTRUCTION MANUAL
- WAT U MOET WETEN OVER DIT APPARAAT
- WERKING - Poffertjes bakken
- Traditioneel Poffertjesrecept
- Ingredients
- Defects:
- Children:
- WHAT YOU SHOULD KNOW ABOUT ELECTRICAL APPLIANCES
- WHAT YOU SHOULD KNOW ABOUT THIS APPLIANCE
- THE ENVIRONMENT
- CE DECLARATION OF CONFORMITY
- OPERATION - General
- OPERATION - Before first use
- OPERATION - Baking Dutch Poffertjes
- CLEANING AND MAINTENANCE
- ATTENTION:
- WARRANTY CONDITIONS
- SERVICE
- SUGGESTIONS FOR DUTCH POFFERTJES RECIPES
- Traditional Dutch Poffertjes
- Preparation
- Baking
- Ham/cheese Dutch Poffertjes
- Neapolitan Dutch Poffertjes
- Dutch Poffertjes with ice cream and hot cherries
- Rum Dutch Poffertjes
- COMPLIMENT!
- KEZELEs -Altalanos
- 3KcPJIyATAU.ObuNE CBEDEHnA
- 3KcIpyATAUJ.NPEEDNEPBbIMNCIOJIb3OBAHHEM
- 3KcIpyATAU. BblneKAHNE TOLJIAHIDCKNX NOΦΦEPTbEc (MHNBJIINHQUKOB)
- OuHCTKA IN TEXHNUECKOE OBCJNYKBAHNE
- BHIMAHNE!
- UCIOBNA TAPAHNTHNO OBCJYKUBAHN
- OBCJNYKINBAHNE
- PECNTbI PnIROTOBJIENRA TOnJIAHDCKNX NOpΦEPTbc
- TpaHIOHbIe ronnahdckne nooepptbc
- HrpeDneHTbI
- PnroTOBJIeHne
- BbinekaHne
- TonnHaNckne noΦΦeptbcc BcTeHnHO nncbipom
- HnRpeDneHTbI
- PnroToBneHne
- HeanonntaHckne roJnHaDckne nooepTbeC
- HnrpeDneHTbl
- TolnaDckne noΦΦeptbεc C MOpoxeHbIM I ropayen BnshEn
- TonnnaHckne noΦΦeptbcc c pomom
- HrpeMeHTbI
- PnroToBnene
- TEBRIKLER!
Brand : BESTRON
Model : APFM700W
Category : Crepe maker