Z31339 - Pressure washer FLORABEST - Free user manual and instructions
Find the device manual for free Z31339 FLORABEST in PDF.
| Product type | Manual pressure sprayer |
| Brand | Florabest |
| Model | Z31339 |
| Tank capacity | 5 litres (useful) / 6.25 litres (total) |
| Max. operating pressure | 2.5 bar |
| Flow rate | 0.5 L/min |
| Dimensions (diameter x height) | approx. 170 mm x 460 mm |
| Weight (empty) | approx. 1.0 kg |
| Tank material | Polyethylene |
| Injection tube material | Brass |
| Injection tube length | approx. 500 mm |
| Spray nozzle | Adjustable (wide or narrow cone) |
| Safety valve | Yes, opens automatically at approx. 2.3 bar |
| Pressure gauge | Integrated for pressure control |
| Carrying strap | Yes, adjustable |
| Filter | Yes, on the riser tube |
| Intended use | Water, mild pH-neutral cleaning product |
| Storage temperature range | 0 °C to 40 °C |
| Frost protection | Yes, store frost-free |
| Maintenance | Cleaning after each use, greasing the sealing ring |
| Spare parts available | Yes, parts list in the manual |
Frequently Asked Questions - Z31339 FLORABEST
User questions about Z31339 FLORABEST
0 question about this device. Answer the ones you know or ask your own.
Ask a new question about this device
Download the instructions for your Pressure washer in PDF format for free! Find your manual Z31339 - FLORABEST and take your electronic device back in hand. On this page are published all the documents necessary for the use of your device. Z31339 by FLORABEST.
USER MANUAL Z31339 FLORABEST
Pressure spraying device 5 litre
Painesumutin 5 I
Tryckspruta 5 I
Tryksprojte 5 I
Pulvérisateur 5l
Druksproeier 5l
Drucksprüher 5l
Operating instructions and safety notes
Before using for the first time, please read the instructions carefully and store with the pressure spraying device! When passing on the pressure spraying device, ensure that the instructions are passed on as well.
Description of parts
Osat
Explanation of the symbols on the device Page 5
Intended use Page 5
Parts description/Scope of delivery 6
Technical data.. Page 6
Safety Page 6
Features of the safety notes . Page 6
General safety notes.. 6
Safety valve Page 7
Operation Page 7
Check safe function . Page 7
Check functionality Page 8
Checking of dosage . Page 8
Initial operation Page 8
Mounting the spray lance . Page 9
Generating operating pressure 9
Spraying 9
Setting the spray nozzle . Page 10
Releasing residual pressure . 10
Disposing of residual amounts . Page 10
Maintenance and cleaning Page 10
Greasing the sealing ring of the pump . Page 10
Cleaning the pressure spraying device 10
Cleaning the spraying hose and pipe . Page 10
Cleaning the valve . 11
Storing the pressure spraying device.. 11
Troubleshooting Page 11
Disposal Page 14
Repair/replacement parts list
Introduction
These operating instructions will help you to use your pressure spraying device properly, safety and economically. Every person who uses, cleans or disposes of this pressure spraying device must have taken note of the contents of these operating instructions. These operating instructions are a component of the pressure spraying device. Please always store these instructions with the pressure spraying device. When passing on the pressure spraying device, ensure that the instructions are passed on as well.
- Explanation of the symbols on the device:

Do not leave the pressure spraying device standing in the sun. There is a risk of explosion!

Do not spray into naked flames!

Keep away from naked flames and heat sources. Seal containers securely. Store in a fireproof way! Do not use easily flammable fluids!

Do not use corrosive substances!
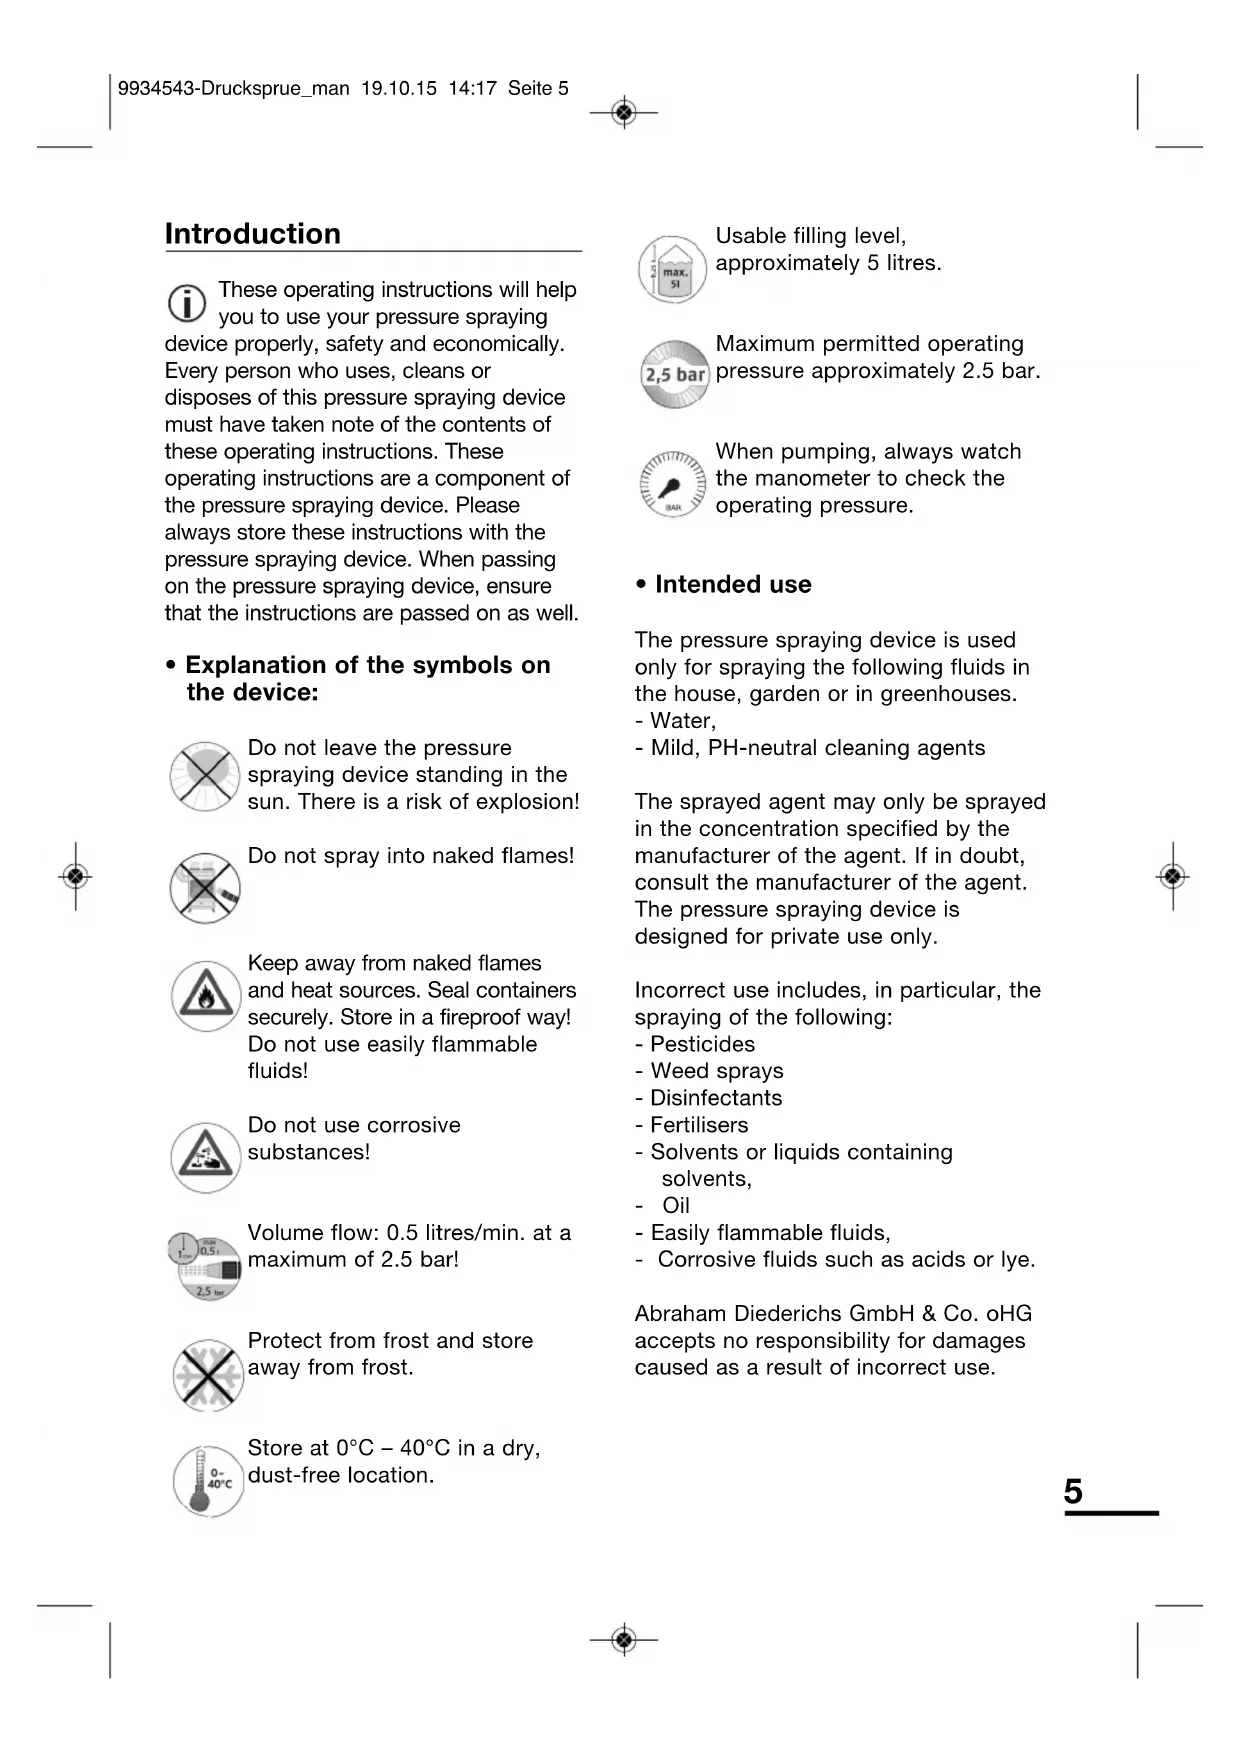
Volume flow: 0.5 litres/min. at a maximum of 2.5 bar!

Protect from frost and store away from frost.
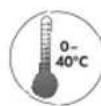
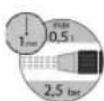
Store at 0^ - 40^ in a dry, dust-free location.

Usable filling level, approximately 5 litres.

Maximum permitted operating pressure approximately 2.5 bar.

When pumping, always watch the manometer to check the operating pressure.
- Intended use
The pressure spraying device is used only for spraying the following fluids in the house, garden or in greenhouses.
Water,
- Mild, PH-neutral cleaning agents
The sprayed agent may only be sprayed in the concentration specified by the manufacturer of the agent. If in doubt, consult the manufacturer of the agent. The pressure spraying device is designed for private use only.
Incorrect use includes, in particular, the spraying of the following:
- Pesticides
- Weed sprays
- Disinfectants
- Fertilisers
-
Solvents or liquids containing solvents,
-
Oil
- Easily flammable fluids,
- Corrosive fluids such as acids or lye.
Abraham Diederichs GmbH & Co. oHG accepts no responsibility for damages caused as a result of incorrect use.
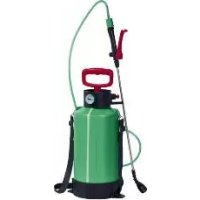
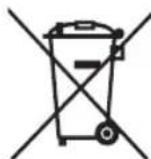
- Parts description/scope of delivery (Figure 1)
1 Handle of spray pipe
2 Trigger lever
3 Handle of pump
4 Safety valve
5 Carry strap, adjustable
6 Container
7 Spray nozzle, adjustable and can be set
8 Spray pipe
9 Spray hose
10 Screw cap, valve spring
11 Pipe
12 Filter
13 Manometer
- Technical data
Dimensions of tank
(0× H) approximately 170~mm× 460~mm
Weight when empty
approximately 1.0 kg
Length of spray pipe
approximately 500 mm
Filling level max. 5 litres
Total contents
approximately 6.25 litres
Permitted operating
pressure approximately 2.5 bar
Usage temperature 0 - 40°C
Tank material polyethylene
Material of spray pipe brass
Carry method to the side with
carry strap
Volume flow
(1/min.) maximum 0.5
Output quantity 0.5 litres/min
Safety
- Features of the safety notes
All safety note in these operating instructions are formed in accordance with the same pattern. On the left, there is a danger symbol. On the right, a signal word that identifies the severity of the risk. Underneath, there is a description of the source of the risk and notes identifying how this risk can be avoided.

WARNING!
Notes with the word WARNING!
warn of risks which may result in serious or fatal injuries.

CAUTION!
Notes with the word CAUTION! warn of risks which may result in light to medium severity injuries.
CAUTION!
Notes with the word CAUTION! without a symbol warn of risks that may result in property or environmental damages.

- General safety notes
When using the pressure spraying device, take note of and observe all warnings and notes given in these instructions.

Avoiding explosion risk
-
Do not leave the pressure spraying device standing in the sun. There is a risk of explosion.
-
Do not exceed the maximum permitted operating pressure of 2.5 bar.
-
Never open the pressure sprayer when it is under pressure.
Avoiding injury risks
- Keep packaging and protective film away from children. There is a risk of suffocation.
- This device is not designed to be used by persons (including children) with reduced physical, sensory or mental capacities, with a lack of experience and/or without the appropriate knowledge, unless they are supervised by someone who is responsible for their safety or have been instructed by such a person with regard to how the device is to be operated. Children must be supervised to ensure that they do not play with the device.
- There is a risk of injuries to skin caused by contact with the spray. When spraying, wear suitable protective clothing, clothes and breathing masks.
- Never spray onto people, animals, electrical devices and electrical power lines.
- Never spray into the wind.
- Never start a visibly damaged pressure spraying device.
- Do not make repairs or changes to the pressure spraying device.
- Never stop the safety valve functioning.
- Store the pressure spraying device in a location that cannot be accessed by children.
- Release any residual pressure in the tank after use. To do this, pull the safety valve button up until you can no longer hear a fizzing sound, or remove the pump from the tank by carefully unscrewing the handle.
After each use, wash hands and face thoroughly.
Avoiding faulty operation
- Operate and move the pressure spraying device only in a vertical position. This is the only way to ensure perfect functionality.
- Never store fluids in the tank. These may block the system as they dry and result in damages to the pressure spraying device.
- Safety valve
WARNING! Injuries are possible as a result of changes made to the safety valve. Do not make changes to the safety valve. The safety valve prevents too much pressure being built up in the tank, which may lead to explosion. Each time, before opening the tank, release the residual pressure in the tank by pulling on the safety valve.
Operation
The pump is used to create overpressure in the tank. The overpressure pushes the spray out of the tank to the nozzle. You can set the spray jet.
- Check safe function
CAUTION! Injuries may be caused by a damaged pressure spraying device.
- Do not use the pressure spraying device if the following checks cannot be completed.
Check your pressure spraying device before each use for visible damages and safe functionality. To do this, carry out the following checks:
Check the pressure spraying device for visible damages
- Check the tank (6) for visible damages.
- Check the spray hose (9) for visible damages.
- Check the carry strap (5) for visible damages.
Check connections
- Check the hose connections for firm seating.
- Check the pipe connections for firm seating.
- Check the sealing of device parts including the safety valve at the maximum permitted pressure
Checking the functionality of the safety valve
- Checking the functionality
- Pump the pressure spraying device. Then, check all device parts and connections to ensure they are sealed. No air may escape. Place the pressure spraying device in a vertical position and pull the safety valve (4) up as far as it will go. The pressure must escape audibly. The safety valve opens automatically at approximately 2.3 bar.
- Unscrew the cap nut from the handle (1). Insert the spray pipe (8) as far as it will go into the handle.
- Tighten the cap nut.
- Fill the pressure spraying device up to the maximum mark with water to test the functionality of all device parts: To do this, follow the instructions under "Initial operation".
- Check whether all parts work.
- Checking the dosage
- Fill the device up to the maximum mark with water and pump until the permitted operating pressure has been achieved (approximately 20-25 strokes), check by watching the manometer display.
- When checking, make sure that the nozzle creates an even spray fan.
The output quantity should be 0.5 litres per minutes. - This amount used in reference to the concentration specified by the manufacturer specifies the time that you will need to cover a certain area.
- Initial operation
CAUTION! Injuries may be caused by residual pressure in the tank.
To release the residual pressure from the tank (6) pull the safety valve (4) up until the fizzing stops.
CAUTION! Injuries may be caused by the spray used.
- Wear suitable protective clothing, gloves and breathing mask. If in doubt, consult the manufacturer of the spray.
- Follow the instructions of the spray manufacturer.
- If necessary, request the safety datasheets for chemical substances and the preparations thereof from the spray manufacturer.
- Prepare the spray in a separate container. Follow the instructions of the spray manufacturer.
- Only make up as much spray fluid as you require.
- To unscrew the pump from the tank (6), undo the handle (3) by rotating anti-clockwise.
- Pull the pump out of the tank (6).
- Use a strainer when filling.
- Fill in such a way that no fluid is able to escape or spray back at you.
- Fill a maximum of 5 litres of fluid into the tank.
- Replace the pump back in the tank (see Figure A)
- To screw the pump into the tank, turn the handle clockwise as far as it will go.
- Mounting the spray lance
- Undo the screw connection on the handle (1) by turning anti-clockwise.
- Insert the spray pipe (8) as far as it will go into the handle.
- Close the screw connection by turning clockwise.
- Only tighten the screw connection hand-tight. Do not use tools since the screw connection may otherwise become damaged.
- Generating operating pressure
- Secure the pressure spraying device during pumping to prevent it from slipping.
WARNING! Risk of explosion due to too high a pressure in the pressure sprayer device. Pump the pressure sprayer device at most until the permitted operating pressure of 2.5 bar has been achieved (approximately 20-25 strokes), check by watching the manometer display.
- Push the handle of the pump (3) down.
- Turn the handle anti-clockwise as far as it will go.
-
Pull the handle up and pump the tank (6) using up and down motions of the handle, at most, until the permitted operating pressure of 2.5 bar is achieved (approximately 20-25 strokes). (see Figure B).
-
This should always been checked during pumping by using the manometer.
- Push the handle down into the cut-outs
- Turn the handle clockwise as far as it will go. The handle is locked.
- Spraying
CAUTION! Injuries may be caused by the spray used.
- Wear suitable protective clothing, gloves and breathing mask.
- Follow the instructions of the spray manufacturer.
Make sure that the pressure spraying device is always in a vertical position. This is the only way to ensure perfect functionality.
- Hang the pressure spraying device using the carry strap (5) over your shoulder.
- You can also hold the pressure spraying device by the handle of the pump (3).
Make sure you are not spraying into the wind. - Hold the spray pipe firmly by the handle (1) and direct the spray nozzle (7), for example, onto a plant.
The optimum distance between the nozzle and the target with associated working width (spray mist approximately 0.5m spray jet approximately 1 m - Press the trigger lever (2). Spraying begins.
- Release the trigger lever. The spraying process ends.
If the pressure in the tank (6) is no longer sufficient for spraying, pump the tank again until the maximum permitted operating pressure of 2.5 bar has been achieved.
- Setting the spray nozzle
The front section of the spray nozzle (7) can be adjusted.
- Disposing of residual fluids
- To generate a wider spray zone, turn the front section of the spray nozzle clockwise as far as it will go.
To create a concentrated jet, turn the front section of the spray nozzle a quarter turn anti-clockwise. - Releasing residual pressure
- In order to release the residual pressure in the tank (6) pull the safety valve (4) up until you can no longer hear fizzing. Or release the pump from the tank by carefully turning the handle (3).
CAUTION! Risk of injury due to skin contact with residual fluids in the tank. Wear suitable protective clothing, gloves and breathing mask.
Once you have released the residual pressure, you can dispose of any remaining fluid (0.1 to a maximum of 0.25 litres) left in the tank (6).
- To unscrew the pump from the tank, undo the handle (3) by rotating anticlockwise.
- Pull the pump from the tank (6) and hold the hose with the pressed trigger lever facing upwards so that all residual fluids can flow out of the hose and pipe into the tank.
CAUTION! Property and environmental damages may be caused by incorrect disposal of residual fluids.
- Dispose of the residual fluid in accordance with the specifications of the spray manufacturer or the locally applicable regulations.
- Then clean the pressure spraying device after each use.
Maintenance and cleaning
Greasing the sealing ring of the pump
To grease the sealing ring of the pump, proceed as follows:
- Undo the cap nut under the handle of the pump (3).
Pull the handle of the pump up and out. The sealing ring is attached to the piston. - Grease the sealing ring with grease.
- Insert the handle.
- Turn the cap nut until hand-tight.
- Cleaning the pressure spraying device
Clean the pressure spraying device after each use, but particularly, prior to storing.
- Unscrew the spray nozzle (7).
- Clean the spray nozzle under running water.
To clean a blocked spray nozzle, poke a needle/pin into the spray nozzle. - Fill the pressure spraying device with water and, if necessary, a cleaning agent and spray until the tank is empty.
- Clean the surfaces with a damp cloth.
- Never blow out the nozzles or other small parts with your mouth.
- Cleaning the spray hose and pipe
To clean the parts, proceed as follows:
- Undo the cap nut of the spray hose (9) on the tank.
Pull the pipe (11) out of the tank (6). - Clean the spray hose, the pipe (11) and the filter (12) under running water.
After cleaning, insert the pipe back into the intended opening of the tank.
- Turn the cap nut until hand-tight.
- Cleaning the valve
- If required, remove the screw cap (10) of the valve spring, remove the spring, clean and replace. Tighten the screw cap hand-tight.
- Storing the pressure spraying device
- Before you store the pressure spraying device, clean it.
- Remove any residual fluids/spray from the tank and the pipes.
- Allow all parts to dry well
- Store the pressure spraying device at 0^ - 40^ in a dry, dust-free location.
- Protect the pressure spraying device from frost and store away from frost.
Troubleshooting
If the measures listed below are not successful, contact the manufacturer.
= Fault
= Potential causes
= Remedies
No pressure is established in the tank.
The pump is not firmly screwed into place.
Screw the pump firmly into place.
The sealing ring of the pump has not been greased.
Grease the sealing ring of the pump.
Spray nozzle does not spray.
No pressure present.
Generate pressure using the pump.
The spray nozzle is blocked.
Clean the spray nozzle.
No spray in the tank.
Fill with spray.
Filter (12) is blocked.
Clean the filter.
Disposal
Inquire in your town or community administration about recycling options or the environmentally friendly, correct disposal of the pressure sprayer device.

Dispose of the device and any packaging materials in accordance with the locally applicable regulations.

Florabest pressure spraying device 5 litres
Repair/replacement parts list
Year of construction: 2016
Insertion: 06/2016
Description of parts
1 Handle of spray pipe
2 Trigger lever
3 Handle of pump
5 Carry strap, adjustable
6 Tan k
7 Spray nozzle, adjustable and can be set
8 Spray pipe
9 Spray hose
10 Screw cap, valve spring
11 Pipe
12 Filter
13 Manometer
To order repair/replacement parts, please contact the customer service centre details in the service section.
Johdanto Sivu 15
service 0 - 40^
Matériau du
Reservoirmaterial polyethyleen
Material van de
sproebuis Messing