Apex - Deep fryer UFESA - Free user manual and instructions
Find the device manual for free Apex UFESA in PDF.
| Product type | Air fryer |
| Brand | UFESA |
| Model | Apex |
| Power supply | 220-240 V ~ 50/60 Hz |
| Power | 1500 W |
| Capacity | 4.5 L |
| Temperature range | 80 °C to 200 °C |
| Timer | Up to 60 minutes |
| Preset programs | Fries, chicken, steak, fish, cupcakes, etc. |
| Special functions | Delayed start (0.5 h to 24 h), pause, manual mode |
| Control panel | LED touch display |
| Material | ABS plastic, stainless steel basket |
| Dimensions (approx.) | 30 x 25 x 30 cm |
| Weight (approx.) | 4 kg |
| Basket cleaning | Dishwasher safe (top rack) |
| Exterior cleaning | Damp cloth |
| Safety | Auto shut-off, overheat protection, cool-touch handle |
| Included accessories | Basket, drip tray, instruction manual |
| Warranty | 2 years |
Frequently Asked Questions - Apex UFESA
User questions about Apex UFESA
0 question about this device. Answer the ones you know or ask your own.
Ask a new question about this device
Download the instructions for your Deep fryer in PDF format for free! Find your manual Apex - UFESA and take your electronic device back in hand. On this page are published all the documents necessary for the use of your device. Apex by UFESA.
USER MANUAL Apex UFESA
WE WOULD LIKE TO THANKS YOUR FOR CHOOSING UFESA, WE WISH THE PRODUCT PERFORMS TO YOUR SATISFACTION AND PLEASURE.
WARNING
PLEASE READ THE INSTRUCTIONS FOR USE CAREFULLY PRIOR TO USING THE PRODUCT. STORE THESE IN A SAFE PLACE FOR FUTURE REFERENCE.
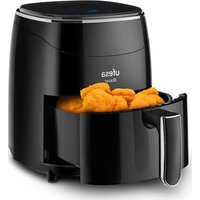
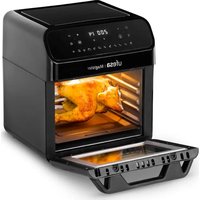
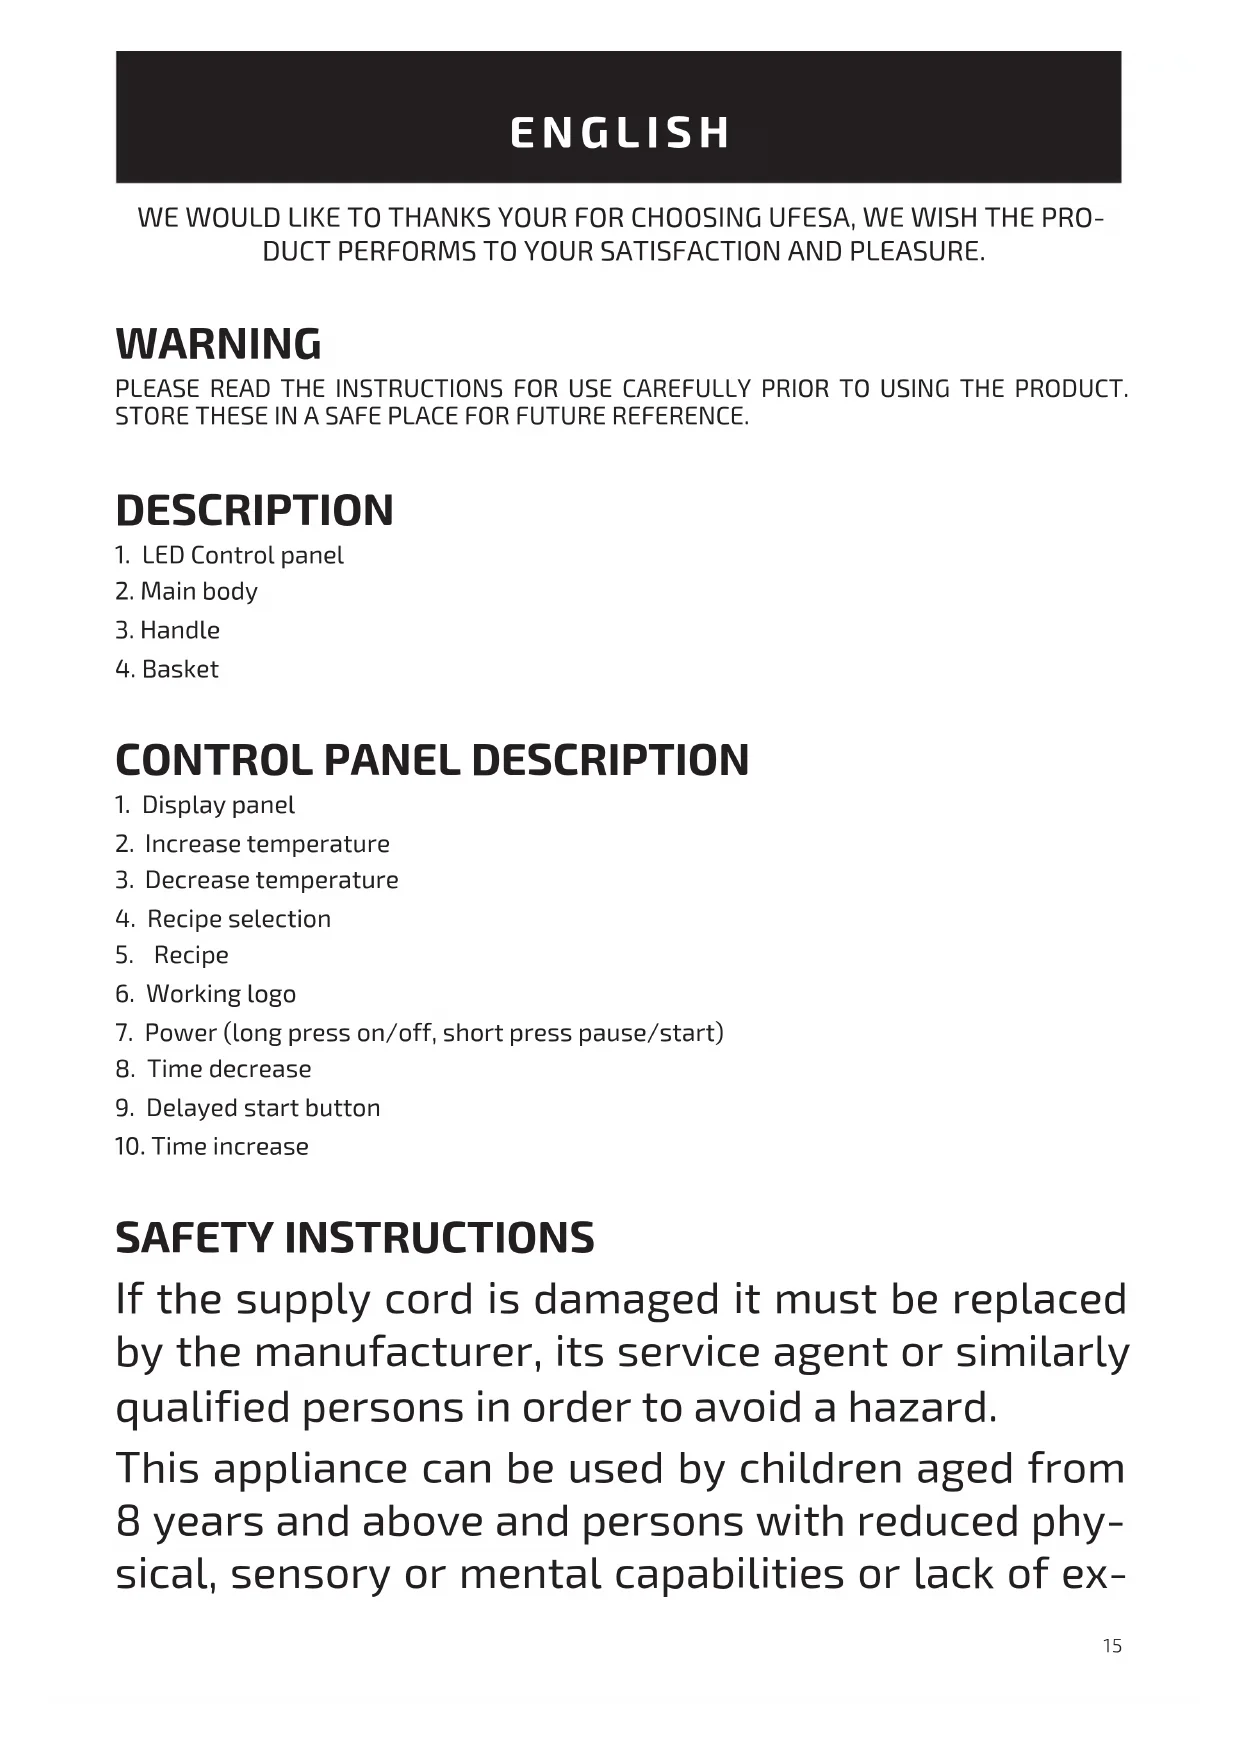
DESCRIPTION
- LED Control panel
- Main body
- Handle
- Basket
CONTROL PANEL DESCRIPTION
- Display panel
- Increase temperature
- Decrease temperature
- Recipe selection
- Recipe
- Working logo
- Power (long press on/off, short press pause/start)
- Time decrease
- Delayed start button
- Time increase
SAFETY INSTRUCTIONS
If the supply cord is damaged it must be replaced by the manufacturer, its service agent or similarly qualified persons in order to avoid a hazard.
This appliance can be used by children aged from 8 years and above and persons with reduced physical, sensory or mental capabilities or lack of ex
experience and knowledge if they have been given supervision or instruction concerning use of the appliance in a safe way and understand the hazards involved. Children shall not play with the appliance. Cleaning and user maintenance shall not be made by children unless they are older than 8 and supervised.
Keep the appliance and its cord out of reach of children less than 8 years.
Appliances are not intended to be operated by means of an external timer or separate remote-control system.
Disconnect the appliance when it is not in use and before cleaning it. Let it cool before putting on, taking off parts and cleaning it
Do not submerge the appliance in water or any other liquid.
This appliance is intended for use at a maximum altitude of 2000m above sea level.
IMPORTANT WARNINGS
This appliance is designed exclusively for domestic use, in no case should be a commercial or industrial use.
Any incorrect use or improper handling of the product shall render the warranty null and void.
Prior to plugging in the product, check that your mains voltage is the same as the one indicated on the product label.
Place the appliance on a flat even surface
The mains connection cable must not be tangled or wrapped around the product during use.
Do not use the device, or connect and disconnect to the supply mains with the hands and/
or feet wet. Do not pull on the connection cord in order to unplug it or use it as a handle
IMPORTANT. When operating this Air Fryer, keep at least ten centimeters of free space on all sides of the oven to allow for adequate air circulation.
DO NOT place your Air Fryer under cupboards, blinds or curtains. Risk of overheating / fire.
Do not cover any part of the Fryer with a cloth or similar, it will cause overheating. Risk of fire.
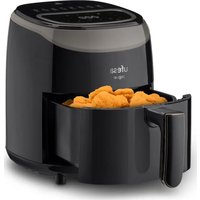
This is an AIR FRYER. It requires very little oil to cook. Do not fill the pot with oil or fat as this may cause a fire hazard.
Do not use any accessories other than manufacturer recommended accessories in this Air Fryer.
Always wear protective, insulated oven gloves when inserting or removing items from the hot Air Fryer.
The appliance must be used on a level, stable heat-resistant surface. The first time you use your Air Fryer there may be a slight odor or a small amount of smoke given off. This is normal and is just the manufacturing residues burning off.
Always place the ingredients to be fried in the basket to prevent it from coming into contact with the heating elements.
Unplug the product immediately from the mains in the event of any breakdown or damage and contact an official technical support service. In order to prevent any risk of danger, do not open the device. Only qualified technical personnel from the brand's Official technical support service may carry out repairs or procedures on the device.
B&B TRENDS SL. disclaims all liability for damages that may occur to people, animals or objects, for the non-observation of these warnings.
BEFORE ITS FIRST USE
- Remove all packing materials and stickers from the inside and outside of the Air Fryer. Gently wipe down exterior with a damp cloth or paper towel.
WARNING: Never immerse the Air Fryer or its plug in water or any other liquids. - Pull the basket handle to remove the basket from the Air Fryer. Use the tray handle, in the center of the tray, to remove the tray. Use a sponge and warm, soapy water to wash the inside and outside of the basket and tray. The basket and the tray are top-rack dishwasher safe.
- WARNING: Do not use abrasive cleaning agents or scouring pads.
- Dry thoroughly.
HOW TO USE
- Connect the mains plug to an earthed wall socket.
- Carefully pull the basket out of the Airfryer
- Put the ingredients into the basket.
- Slide the basket back to the Airfryer. Never use the basket without the food tray on it.
WARNING: Do not touch the basket during and sometime after use as it gets very hot. Only
hold the basket by the handle.
- Press shortly the power standby button to turn on the air fryer.
Using the pre-set programmes:
With the air fryer switched on, press the menu button (M) to switch between the different programmes. Each time you press the menu button (M), the mode is selected from left to right. Press the power button to select the desired mode and start cooking. Each mode has an assigned time and temperature. To change these you can press the +/- time and +/- temperature buttons before pressing the power button.
Manual Mode:
-
Press the temperature control touch button to the required temperature.
-
Press the timer touch button to the required preparation time, press shortly the power standby touch button to start cooking, the working logo lights and rotates.
1) The fan indicator light (outside white lamp) lights and rotates;
2) The heat indicator light (center red lamp) lights when the temperature didn't reach the setting temperature or the temperature come down;
3) The air fryer stops heating and the heat indicator light (centre red lamp) goes off when the temperature reached the setting temperature.
4) The heat indicator light will go on and go off several times during frying.
- Add 3 minutes to the preparation time when the appliance is cold, or you can also let the appliance preheat without any ingredients inside approx. 4 minutes.
- Some ingredients require shaking halfway through the preparation time. To shake or turn over the ingredients, pull the basket out of the appliance by the handle and shake it or turn over the ingredients by fork (or tongs). Then put the basket back into the Airfryer.
- When you hear the timer bell, the set preparation time has elapsed. Pull the basket out of the appliance and place it on a heat-resistant surface. Check if the ingredients are ready. If the ingredients are not ready yet, simply slide the basket back into the appliance and set the timer to a few extra minutes.
- To remove the ingredients, pull the basket out of the Airfryer. The basket and the ingredients are hot. You can use a fork (or tongs) to take out the ingredients. To remove large or fragile ingredients, use a pair of tongs to lift the ingredients out of the tank. Empty the basket into a bowl or onto a plate.
- To program a delayed start, once the time and temperature have been set, press the delayed start button (9) and select the desired time with the +/- time buttons. Press the power button to confirm. Delayed start can be set from 0.5h to 24h.
MAIN COOKING RECIPES
This table below helps you to select the basic settings for the ingredients you want to prepare.
NOTE: Keep in mind that these settings are indications. As ingredients differ in origin, size, shape as well as brand, we cannot guarantee the best setting for your ingredients.
| Ingredients | Default time (mins) | Temp (oC) Remark | |
| Frozen chips 12-20 | 200 Shake | ||
| Home-made chips 18-30 | 0 180 Add 1/2 spoon of oil, shake | ||
| Breadcrumbed cheese snacks | 8-15 190 | ||
| Chicken nuggets 10-15 | 200 | ||
| Chicken fillet 18-25 | 200 Turn over if needed | ||
| Drumsticks 18-22 180 | 0 Turn over if needed | ||
| Beef steak 8-15 180 | Turn over if needed | ||
| Pork chops 10-20 180 | 0 Turn over if needed | ||
| Hamburger | 7-14 | 180 | Add 1/2 spoon of oil |
| Frozen fish fingers | 6-12 200 Add 1/2 spoon of oil | ||
| Cup cake | 15-18 200 |
Note: This table is only a guide and does not contain exact recipes.
Note: Use extreme caution while handling hot food in fryer basket. Excess oil will drip into basket when preparing greasy foods. Empty the basket after every use.
COOKING TIPS
- Almost any food that is traditionally cooked in the oven can be air fried.
- Foods cook best and most evenly when they are of similar size and thickness.
- Smaller pieces of food require less cooking time than larger pieces.
- For best results in the shortest amount of time, air fry food in small batches. Avoid stacking or layering when possible.
- Most prepackaged foods do not need to be tossed in oil before air frying. Most already contain oil and other ingredients that enhance browning and crispiness
- Frozen appetizers air fry very well. For best results, arrange them on the tray in a single layer.
- If layering foods, be sure to shake the basket halfway through (or flip food) to promote even cooking.
- Toss foods you are preparing from scratch, such as French fries or other vegetables, with a small amount of oil to promote browning and crispiness.
- When air frying fresh vegetables, make sure to pat them dry completely before tossing with oil and air frying to ensure maximum crispiness.
- Air fryers are great for reheating food, including pizza. To reheat your food, set the temperature to 150^ for up to 10 minutes.
CLEANING AND MAINTENANCE
- Ensure the Air Fryer is unplugged and cool before cleaning.
- Once the Air Fryer and basket are cool, remove the basket from the Air Fryer (if it is not already removed). Use the tray handle to remove tray. Use a sponge and warm, soapy water to wash the inside and outside of the basket and tray.
Warning: Do not use abrasive cleaning agents or scouring pads.
- The basket and the tray are top-rack dishwasher safe.
Gently wipe down exterior with a damp cloth or paper towel. - Never immerse the Air Fryer or its plug in water or any other liquid.
- Dry all parts thoroughly before storage.
- Store the Air Fryer in a cool, dry place.
PRODUCT DISPOSAL
This product complies with European Directive 2012/19/EU on electrical and electronic devices, known as WEEE (Waste Electrical and Electronic Equipment), provides the legal framework applicable in the European Union for the disposal and reuse of waste electronic and electrical devices. Do not dispose of this product in the bin, instead going to the electrical and electronic waste collection center closest to your home.
NOUS VOUS REMERCIONS D'AVoir CHOISI UFESA, NOUS SOUHAITONS QUE CE PRODUIT VOUS APPORTE SATISFACTION ET VOUS FASSE PLAISIR.
AVERTISSEMENT
VEUILLEZ LIRE ATTENTIVEMENT LE MODE D'EMPLOI AVANT D'UTILISER LE PRODUIT. VEUILLEZ CONSERVER CE DOCUMENT DANS UN ENDROIT SÜR POUR UN USAGE ULTERIEUR.
DESCRIPTION
MHCTPYKÇUŞ 3A BE30PACHOCT
Ako 3axpaHbauT Ka6e e nobpeDeH, TOn Tpr6Ba da 6bJe 3aMeHen OT npOn3BODnteIa, HerOBn cepBn3eH npedCTabNTeI nn Iuca C nOdo6Ha KBaIIΦnKauzia, 3a Da Ce n36erHe onaCHOCT.
To3n ypei moKe da ce n3noJ3Ba OT deua Ha n Hau 8 roDHH n ot Iuca c HamaJIeHn fN3nueckn,
ceH3OpHn IJIyUmCTBBeHn CnoC6HOCTn IJIy CJIINcA Ha ONIT N 3HaHnIy, aKO nM e OCSrpyeHn Hau3Op IJIy INCHTpUKcHn OTHOCHO n3POn3BaHeTo Ha ypeDa nO 6e3OpacEHn HauHH n aKO pa3bupaT CBbP3aHnTe C TOBa OnaChOCTn. He nO3BoJbAite Ha deca Da cN InrgpaT cypeDa. POniCtBaHeto n PoDprbJkKaTa He Tp8Ba Da Ce n3BbPbBAT OT deca, OCBeH aKO He ca Naad 8 roDHHn i Ca nOd Hau3Op.
PanaTe ypeDa n HeroBnKabeN n3BbH Docera Ha deUa,HeNaBbRshn8 roDnHn.
YpeiTe He ca npedBndeHn da pa60T C BbHsEh TaMep nll camocTojTeHa cnCTema 3a DnCTaHcNoHeN KOHTpOJ.
Izhkijoyete ypeda, KOrato He ce noJ3Ba n npdei da ro nouchntte. OcTabete ro da ce oxlaadn npdei da ro crlo6nte, pa3rlo6nte nll nouchntte.
He notanayte ypeda BbB BOda nIydpura TeuHocT. To3n ypeJe npedHa3NaueH 3a n3noJ3BaHe Ha makcmaJHa HAdMopcka BncoUHa oT 2000 M naMopCKOTO paBnIe.
BAXHNI PEPDyPExKdEHN
YpeT e npedHa3Hauen cmo 3a domaunho nol3BaHe n B HnKaKbB CnyaH He Tp6Ba da ce n3no3Ba B TbproBcKa nn npomuIeHa cpea.
Bcya HnnpabInHa ynoTpe6a nn He npabInHo 6opabeHe cypeda ue nnapabn rapaHnraMy HeBaIiHa.
Ipei Da BkIoUHTe ypeia, npOBepTe daHmpeXOBOTo HAnpeXeHne e CbOTo KaTO nocOueHTo Ha etNKeTa Ha ypeia.
Noctabete ypeHa ha paBaHa, rnaKa nobbpxHOCT
KabelT 3a CBp3BaHe KbM MpeKaTa He Tpa6Ba Da ce 3anlta nn yBnBa OKoNo ypeDa no Bpeme Ha ynotpe6a.
He n3noJ3BaIte yctpoiCTBOTo H He ro BkIIOUBAIte N n3KIOUBAIte OT 3axpaHbaaTaMpexka c MoKpn Pbue n/nnn Kpaka. He nbpnaTe 3axpaHbaun Ka6e, 3a da ro n3KIOUHTe nn 3a da ro n3noJ3BaTe KaTO pkoXbATKa
BAxHO. Korato pa6oTnTe cTo3n ypei 3a roTbeHe c ropeu Bb3dyx, octaBeTe nohe deCet caHTmEtpa Cbo6oJHo npoctpaHCTBO OT BCnUKN CTpaHn Ha cyphata, 3a da OcnIpynte aDeKBaTHa cnPKylaun Ha Bb3dyxa.
HE noctabnTe Baun ype3a roTbeHe c ropeu Bb3dyx noD ukafoBe, oOpn nn 3aBeCn. Pnck ot nperepaBane / nojap.
He nokpnbaiTe hkoaracT ha ebp ppaibpa C Kbpna nn noo6en Maepnai, Toba ue do nperepahe. Pnck ot noxap.
ToBa e YPeI 3A rOTBEHE C rOPEU Bb3dYX. 3a rOTBeHe ce n3nCKBa MHOrO MaNko Ma3HnHa. He nBnHeTe TeHJKePaTa c OIIIO nIIIM Ma3HnHa, Tb' KaTO TOBa MoKe da npuHn H noKap.
He n3noI3BaIe HnkaKbN aKceCoapn, pa3nnuHn OT Te3n, npenopbuaHn OT npOn3BODntTeHa To3n ypeD 3a rotBeHecropeu Bb3dyx.
Bunharu Hocete 3aunTHn, n3oJupaHn pbkabuuz 3a yrho, koraTo noCTaBte nn n3BaXdATE npOdyKTn OT ropeunypeD 3a rotBeHe c ropeU Bb3dyx.
UpeBbT Tp6Ba Da ce n3no3Ba Ha paBHa, Cta6nHa TOIIOyCTOuHbNa NOBbpxHOCT. Bb3MOxHo e da nMa Cna6a Mnpu3Ma nn MaNko KOINueCTBO dIM NbpBnA rT, KOrato n3No3BaTe BaShn AyeD 3a roTBHe c ropeu Bb3dYx, ToBa e HopMaHnO, TbN KaTo npOn3BOdCTBeHnTe OCTaTbCn N3raprT.
Bunaru noctabraye czbctabknte 3a npjxhe B kowhnuata, 3a da npedotbpatnte kohtakc C harpebaTeHNHte enemHTN.
I3KIOUeTe ypeDa He3a6abH0 OT eJekTpueckata MpeJa B clyuayHa NoBpeDa n Ce CbByKeTe C OfUnaHa CnyX6a 3a TexHnuecka NOpdpBXkka. 3a Da npedotBpaTne PnCK OT onaCHOCT, He OTbapYte ypeDa.Camo KBaIIΦnucpan TExHnueckn nepcoHaI OT OfUnaHaTa CnyX6a 3a TexHnuecka NOpdpBXkka 3a CbOTBeTHaTa TbproBcKa MapKa MOxe Da I3BbPwBa peMOHT IIN IpOueDypN NO UcTPOICTBOTO.
B&B TRENDS SL. He hocn OTROBOPHOCT 3a 5eTN, npuHHeHn OT Xopa, JHBOTHN nI npedMeTn npn HeCnA3BaHeTo Ha Te3n npedynpeKdEHHa.
ПРЕДИ ПьРВОHAЧАнHATA YNOTPEBA
- Otcpahe Te BCnKo OnaKOBbHm MaTePnaI N CTKeepo T BbTpEeHaTa N BbHsHaTa CtpaHa Ha ypeDa 3a roTbeHe c ropeu Bb3dyx. BHImaTeIHO n36bpwe Te BbHsHaTa qact C BlaJxHa KbpNa IyN KyXHeHcKa XapTna.
ПЕДУПЕЖДEHWE: НИКORA He notаЯTe урета 3a roTbeHe c ropeц Bb3dUx BbB BODa nIи dpyrTeuHocTn.
2.ИЗдьрайтepькoxBatkataHaКошицata,3aДаИЗвадпe КошицатoуpeDA3 a rotbehe c ropeu Bb3duyx.I3noJ3BaIte pькoxBatkataHa TabuKata 3a neueHe b ceHTbpa HaTabuKata,3aДaЯИЗвадпe.I3noJ3BaIte r6a nToTnla canyHeHaBoDa,3aДaИЗmIETe BbTpewHataиВbHshHata cTpahHa KaoshuZaTa n TabuKata.Koшицatu n TabuKata ca NOxODAUz 3a MneHe Ha rophOTO HIBO CBDOMNJaMaSHHa.
- ПЕДУПЕЖДEHWE: He n3noJ3BaIte abpa3nBn nouchTbaun npenapatn nIn DOMaKINHcKa TeI.
- NocyuweTe uateHNo.
KAKДАИЗПОЛ3BATE
- Cbpxkete uencela Ha 3axpaHbaHeTo KbM 3a3eMeH CteHeH KOHTAKT.
- BhimataHno n3dbpnaIte Koohnucata oT ypeDa 3a roTbeHe c ropeu Bb3dyx
- NocTaBete CbCTaBKnTe B KOnHncaTa.
- Пьзhte Кошицата образно в урета 3a rotbehe с ropeц вьздух. НкORA He n3noI3BaIte KowHnCata 6e3 Tabata 3a xpaHa Bbpxy Heя.
IPEyPExEHE: He doKocBaTe KoHncaTa no BpeMe n cne ynoTpe6a, Tb' KaTo CTaba MHoro ropeu. dpbXte KoHncaTa camo 3a pbkoxbatkata.
5. Hatnchete 3a kpatko 6ytoHa 3a pejkm 3a rotOBHOCT, 3a da BkIIOHTe ypeDa 3a rotBeHe C ropeu Bb3dYx.
I3noI3BaHe Ha npedBapnteHNo 3aadaene HnporpaMn:
OCHOBHn IOTBAPCKN PEcENTN
TaN TAbNcA NO-DOy BN NOMa Da n36epTe OCHOBHnTe HAcTpoN 3a CbCTaBKnTe, KOINTO NCKATE Da npuROTBnTE.
3A6ELEKKA: Имайтпраздн, чу тeзи Habстpoи Кс синдкатиВи. Тьй кato CBCTaBКITE ce pa3nuehabT no npOn3xOД, pa3Mep, Форma, KaKTo n Марka, He MoJem da rapaHTnpaMe Na- do6paTа Habстpoиka 3a BaWnte CbCTabKN.
IpeDynpexdEHe: He n3noJ3BaIte a6pa3nBn noocTbaun npenapatn nn doMaKInHcKa TeI.
KoHncaTa n TabuKaTa ca noXoJz 3a MneHe Ha rOpHTo HnBO B cbDomnHa MaunHa.
- BHIMATEIHO n36bpoTe BbHHaTa yacT cBna KbpNa nn KyxHeHcKa xapTnA.
- Hnkora He notanay Te ype da 3a roTbeHe c ropeu Bb3dyx BbB BOda nn npyra Teuhoct.
- Póndcywete ŠaTeHNo BCnUKN qactn npdeN cxbpaHeHne.
- CbxaHЯBaIte ypeDa 3a roTBeHe c ropeu Bb3dUnx Ha xlaAno n cyxo macto.
aalalalalalalalalalalalalalalalalal
Jus 1000000000000000000000000000000000000000000
a a a a a a a a a a a a a a a a a a a a a a a a a
jaiall ylll aluysy jayil nglyo jayy jayy jayy jayy jayy jayy jayy jayy jayy jayy jayy jayy jayy jayy jayy jayy jayy jayy jayy jayy jayy jayy jayy jayy jayy jayy jayy jayy jayy jayy jayy jayy jayy jayy
aill 5al laii jie jj jial bai .5
Laaa oooalol
aill j 100 (M) aill j 100 (M).
a111jde b20all j0j00-/-+
g
aill 1i i 1
aaiial a jyai
.7
8
Jaa Jaa
(1
a j 1 1 1 1 1 1 1 1 1 1 1 1 1 1 1 1 1 1 1 1 1 1 1 1 1 1 1 1
(3)
(3
a1 = 70,2b1 = 43,b2 = 58,b_3 = - 35
4
4 1 1 1 1 1 1 1 1 1 1 1 1 1 1 1 1 1 1 1 1 1 1 1 1 1 1 1 1 1 1 1 1 1 1 1 1 1
山
10
aai aai ai aai (aiai) (aiai)
Laa gaii. 8jall jiae gae iqao jialgai aalll aaii .
yj 1000 1000
y
12
time. aclw 24 J! aclw 0.5 no o s y t b u w d j k g .u w aal j j e b
a
a yaa aai gill cllgall aall lal 1e ool jgll lde
y ayjll aoll llis, kall, pall, jaii y ciu sal ckiy 12a la cldy 0d jclj
daiSao 1
p 1
Jaaia 1
J 1
a1j1 j1 j1 g
.
2000 1 1 1 1 1 1
.
a
gaiia gale 4y jiall gaii y ci yjai jiaai gina jia jia jia jia
jue chua chu ic jzll
p 1
aas 1
J 10 10 10
y
y j 1 1 1 1 1 1 1 1 1 1 1 1 1 1 1 1 1 1 1 1
y
aill xall aaiinll as jay gaoal cliall ciae y
aill aegll xalee ae y j 1j 1ie a jall aegll n jll c jlae 1g lal
a 1
aill Cllal 1jai jai jai jai jai jai jai
(cill /ci:all caiy 0 yaoa o jial bioll (aiy /jiaiill ayb o jial biell)
8
j1b1c0w1jj.9
cagd 10
aXuJl cLj
i j 1
S OBC = S COD + S_ BOC
i 8 n JbJn
a a a a a a a a a a a a a a a a a
B&B TRENDS, SL. guarantees compliance of this product, for the use for which it is, during the period established by the legislation in force in the country of sale. In the case of breakdown during the term of this warranty, users are entitled to repair or else the replacement of the product at no charge if the former is unavailable, unless one of these options proves impossible to fulfil or is disproportionate. In this case, you can then opt for a reduction in price or cancellation of the sale, which must be dealt with directly with the sales vendor. This also covers replacement of spare parts provided that the product has been used according to the recommendations specified in this manual for both cases, and has not been tampered with by any third party that is not authorised by B & B TRENDS, SL. The warranty will not cover any parts subject to wear and tear. This warranty does not affect your rights as a consumer in accordance with the provisions in Directive 1999/44/EC for member states of the European Union.
USE OF WARRANTY
Customers must contact a B&B TRENS, SL., authorised Technical Service for repair of the product. Since any tampering of the same by anyone not authorised by B&B TRENS, SL., or the careless or improper use of the same shall render this warranty null and void.
You must keep the purchase invoice, receipt or delivery docket in order to exercise your warranty rights.
For technical service and after-sales care outside the Spanish territory, please submit your query to the point of sale where you purchased the item.