302744 - Weather Station Bearware - Free user manual and instructions
Find the device manual for free 302744 Bearware in PDF.

| Technical Features | Bearware 302744 Weather Station with digital display, temperature and humidity sensor, weather forecasts, clock and alarm. |
|---|---|
| Usage | Ideal for monitoring indoor and outdoor weather conditions, allowing you to plan your activities based on the forecasts. |
| Maintenance and Repair | Regularly clean the screen with a soft cloth. Replace batteries when the display becomes weak. |
| Safety | Avoid exposure to water and extreme temperatures. Do not disassemble the device. |
| General Information | Check battery compatibility before purchase. 2-year warranty against manufacturing defects. |
Frequently Asked Questions - 302744 Bearware
User questions about 302744 Bearware
0 question about this device. Answer the ones you know or ask your own.
Ask a new question about this device
Download the instructions for your Weather Station in PDF format for free! Find your manual 302744 - Bearware and take your electronic device back in hand. On this page are published all the documents necessary for the use of your device. 302744 by Bearware.
USER MANUAL 302744 Bearware
Thank you for choosing a BEARWARE product. Please read the following user manual carefully to get the most from the product you have purchased. Before using the delivered product, check that it is complete, faultless and undamaged.
1. Scope of delivery
- Weather station
- User manual
2. Technical data
| Power supply | ·Main unit: Three 1.5V AAA batteries or alternatively 1 DC 4.5 V min. 150 mA power adapter with coaxial connector (3.5 mm / 1.25 mm) // Polarity: ----(o--- + ·Sensor: Two 1.5V AAA batteries |
| Temperature range | ·Main unit: 0°C to 50°C ·Sensor: -20°C to +50°C |
| External sensor protection class | IPX4 |
| Features | ·DCF signal ·Date display ·Alarm function (alarm) ·Indoor and outdoor temperature ·Outdoor sensor ·Temperature display ·Temperature alarm ·Humidity display ·Weather forecast pictogram ·Snooze function ·12/24-hours display ·Weather trend display |

3. Additional information about this device
Do not use this device if it is damaged. Do not expose the base station to moisture and direct sunlight.
Before using the product, ensure that the available supply voltage corresponds to the operating voltage indicated on the specification plate.
Before using the product, ensure that the cables are not damaged.
The device has to be connected to an easily accessible socket so that it can be disconnected in case of an emergency.
This product is suitable for use only with a 4.5V DC mains adapter. Please refer to the technical data under point 2 for the polarity and connector size.
This device is intended only for private use and not for medical purposes or for public information.

Caution!
Keep the batteries and the device out of reach of children. Batteries contain harmful acids. Weak batteries should be replaced as soon as possible to prevent leakage! Never use new and old batteries or batteries of different types together. Never throw batteries into the fire and do not short-circuit them. Do not recharge the batteries and do not take them apart. There is a risk of explosion!
4. Product details
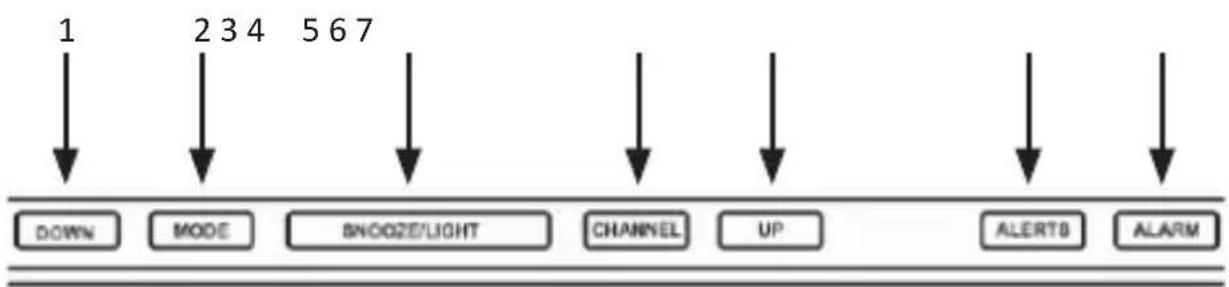
| No. Key | |
| 1 DOWN | |
| 2 MODE | |
| 3 SNOOZE/LIGHT | |
| 4 CHANNEL | |
| 5 | UP |
| 6 ALERTS | |
| 7 ALARM |
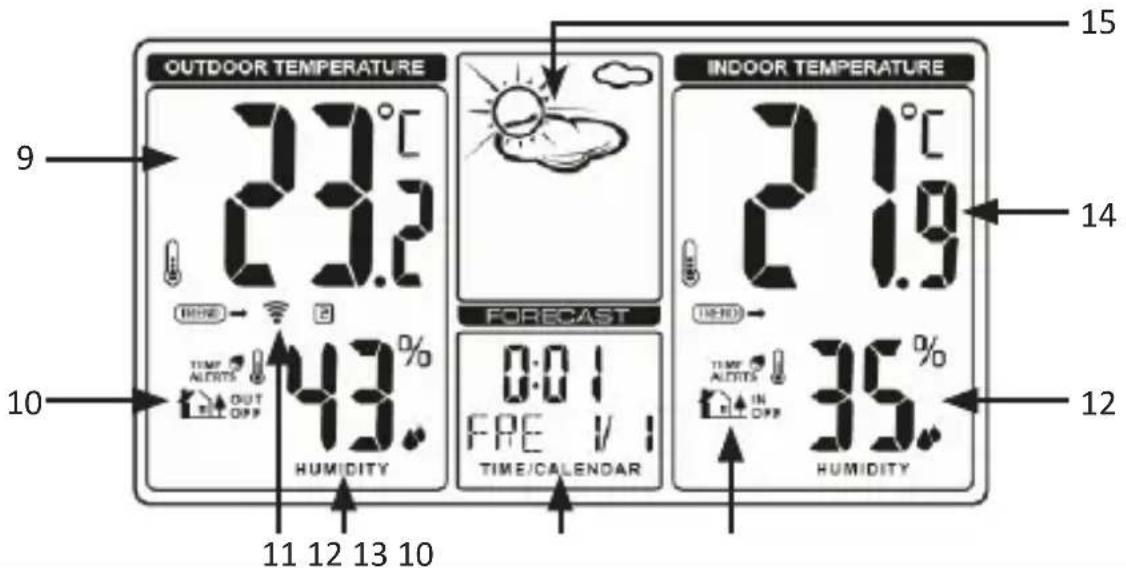
| No. Description | |
| 9 Outdoor temperature | |
| 10 Temperature alarm | |
| 11 Outdoor sensor channel/outdoor sensor scanning | |
| 12 | Humidity display |
| 13 Calendar (month/day) | |
| 14 Indoor temperature | |
| 15 Weather pictograms |
5. Commissioning
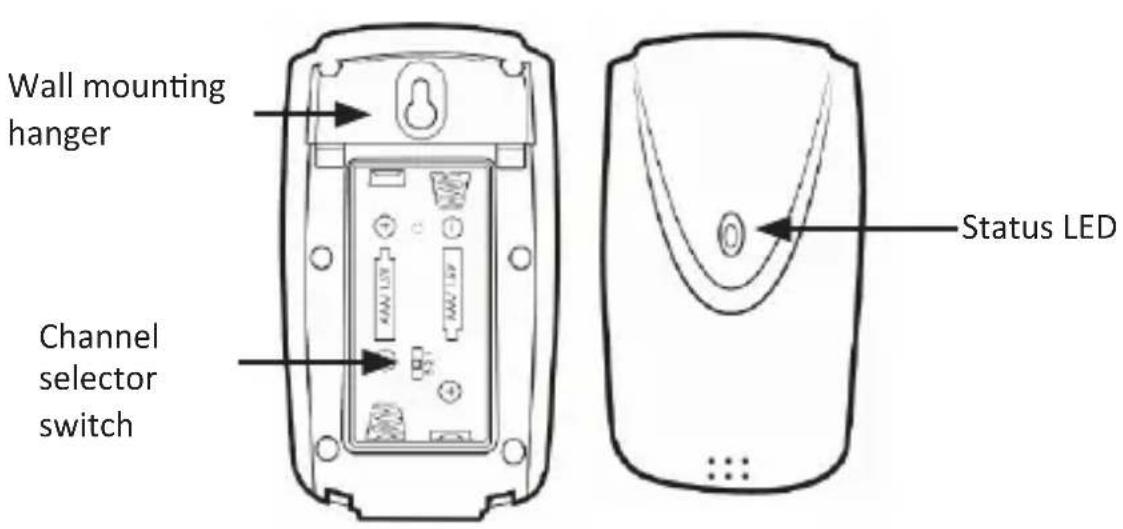
Take the product out of the package and remove all the packaging material. Open the battery compartment of the outdoor sensor and insert two 1.5V AAA batteries. Then open the battery compartment on the back of the main unit and insert three 1.5V AAA batteries. Alternatively, you can use a 4.5V / 150mA DC coaxial power adapter. Details about the polarity and the connector type when using a separate power adapter is given in the table on page 2. For this purpose, plug the mains adapter into a properly installed socket and then connect it to the coaxial connector of the main unit.

Note: If you want to use the device with batteries, then the backlight is not permanently switched on. The backlight is permanently switched on when operating with a power adapter.
The weather station then attempts to connect with the outdoor sensor. Make sure that both devices are within each other's range. The connection symbol "flashes in the "Outdoor temperature display" of the main unit. If the main unit cannot establish a connection with the outdoor sensor within 2 minutes, then it stops searching. The connection icon stops flashing and the temperature display shows "-°C" and "-%" on the display.
If a connection cannot be established, then this could be, for example, due to thick walls, or to a long distance of the sensor from the main unit. In this case, position on the sensor and the main unit closer to each other. To restart scanning, press and hold the "CHANNEL" button on the top of the main unit for 3 seconds until the connection symbol in the display starts flashing. The weather station will now automatically receive a DCF signal, regardless of whether the external sensor is detected or not. The "B" symbol starts flashing in the time display. This means that the DCF signal has begun to receive the time.
6. DCF signal
The DCF signal is a time signal which is sent out by one of the most accurate clocks in the world. It is located near Frankfurt am Main. Under ideal conditions, your weather station can receive the signal from a distance of up to 1500km .
If the weather station has detected the signal, then it displays the current Central European Time, the date, and the day of the week depending on the basic settings. The DCF symbol " is then shown on the display.
Once the attempt to receive a signal fails, the weather station stops scanning after about 5 minutes. The DCF symbol disappears from the display.
Re-activate the search by pressing the "DOWN" button for about 3 seconds until the DCF symbol is shown in the display. Alternatively, you can set the time manually. For more information in this regard, see the "Basic Settings" section.
7. Display
Time display:
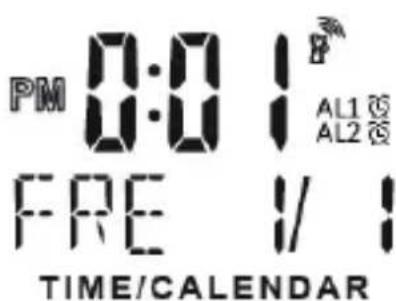
The time can be displayed either in 12 or 24-hour format by pressing the "DOWN" button in time mode. "PM" appears before the time if the 12-hour format is active.
Date and day:
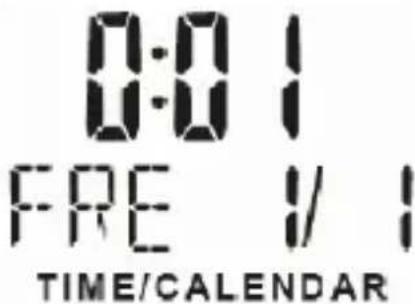
The weather station has a date and day display. The date is displayed in the right section and the day in the left section. The pre-configured language is German. If you want to change the language, please refer to the section on "Basic settings" for more details.
DCF symbol:

The radio tower symbol indicates that the DCF signal has been successfully received. The weather station synchronises the time every night. The symbol begins flashing during synchronisation. If the time has been successfully received, then the symbol glows continuously until the next synchronisation.
Weather pictograms:

The currently determined weather conditions are shown in the display of the weather station.
Trend display:

The trend display changes every hour, increasing or decreasing if the air pressure changes by at least 2hPa (= 0.06inHg) in the measurement duration.
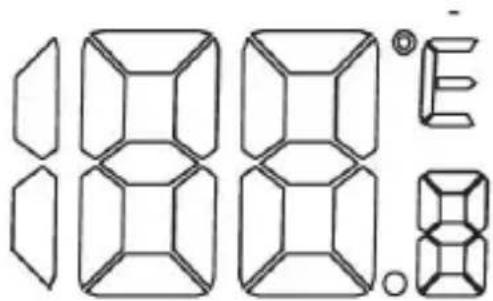
Indoor temperature display:
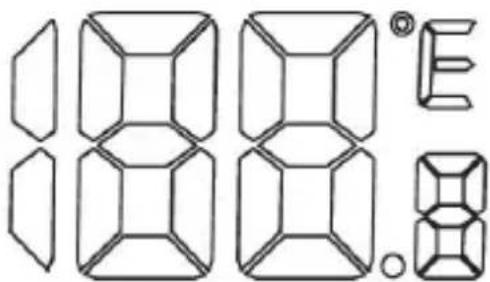
The indoor temperature is measured by the base station and is shown to an accuracy of one tenth of a degree. The configured temperature unit is displayed to the right of the measured value. The temperature unit can be changed between ^ C and ^ F . To do this, press the "UP" button on the top of the weather station.
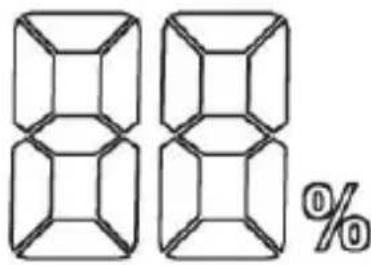
Humidity:
This display shows the current air humidity experienced by the weather station.
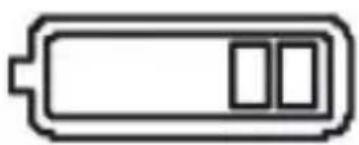
Low battery:
If the battery symbol appears, then the inserted batteries are discharged and should be replaced with new batteries as soon as possible. This applies to the outdoor sensor as well as to the base station.
Outdoor temperature display:
The outdoor temperature is measured by the outdoor sensor and shown to an accuracy of one tenth of a degree. The configured temperature unit is shown to the right of the measured value. The temperature unit can be changed between ^ C and ^ F . To do this, press the "UP" button on the top of the weather station.
Channel display

The weather station receives the signal of the outdoor sensor automatically after all settings have been configured. You can switch between the different channels using the "CHANNEL" button. The channels of the outdoor sensor can be selected on the device directly using a toggle switch.
Temperature alarm
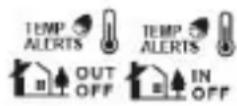
With the temperature alarm, the base station will emit an alarm sound if the sensor measures anything outside this temperature range. The status of the indoor and outdoor alarms is displayed using these icons.
8. Basic settings:
Note: Pressing the large "SNOOZE/LIGHT" button at the top of the housing switches the backlight on. When the "SNOOZE/LIGHT" button is pressed

several times, the backlight is dimmed. Please note that the base station does not respond to 2 buttons at the same time. Therefore, it is advisable to press just one button at a time.
Press and hold the "MODE" button for about 5 seconds to configure the basic settings. With the "UP" and "DOWN" buttons, you can change the values accordingly.
By briefly pressing the "MODE" button in the time settings, you can confirm the entry and proceed to the next option. In this way, you can change and customise the following settings in the sequence mentioned below:
- Time zone - Note: If you set the time zone, for example, to +01 and the weather station is actuated using the DCF-signal, then the clock displays one hour later than the DCF-signal.
- Hour
- Minute
Year
Month
Day - Language setting - To set the day on the display. The following codes can be configured and selected using the "UP" and "DOWN" buttons: GER (German), DAN (Danish), SPA (Spanish), DUT (Dutch), FRE (French), ITA (Italian), ENG (English)
8.1 Temperature alarm
You have the option to define a temperature range for both the indoor and the outdoor sensor. With the temperature alarm, the base station will emit an alarm sound if the sensor measures anything outside this temperature range.
Press and hold the "ALERT" button at the top of the base station for about 3 seconds. The temperature display starts flashing. The following symbol starts glowing: "Hi".
Then press the "UP" or the "DOWN" button to select the maximum temperature of the desired range. Confirm the value by pressing the "ALERT" button. The "Low" symbol starts flashing in the temperature display. By pressing the "UP" and "DOWN" buttons, you can now select the minimum value of the desired temperature range. Confirm again by pressing the "ALERT" button. The temperature alarm is now ready for use.
Press the "DOWN" button to enable/disable the temperature alarm. When the temperature alarm is enabled, a bell icon appears in the display next to the corresponding symbol.
If the outdoor sensor now measures a temperature outside the previously set range, an alarm is emitted for about one minute from the base station. This alarm can be muted by pressing a button on the weather station. The temperature which triggered the alarm will flash in the display. Press the "ALERT" button to switch the alarm off.
9. Alarm setting
The weather station can store up to 2 alarm settings, which can be turned on and off separately.
Setting the alarm
Press the "MODE" button to access the alarm settings. The alarm time is now displayed instead of the time. Press and then hold the "Mode" button until the corresponding alarm time starts flashing. You can make the desired settings using the "UP" and "DOWN" buttons. Then press the "Mode" button again to save the alarm setting.
Enabling the alarm
Press the "ALAR" button in time mode. An alarm icon is then displayed next to the time. This means that the alarm is enabled. To disable alarm 1 and to enable alarm 2, press the "ALAR" button again. Pressing the "ALAR" button again enables alarm 1 and alarm 2. Both alarm symbols are shown in the display.
Both are disabled by pressing the "ALARM" button again. The symbols disappear from the display.
Switching off the alarm
When the alarm is activated at the configured time, the backlight also turns on automatically. The alarm is active for 2 minutes before it turns off automatically.
Press the "SNOOZE/LIGHT" button to cancel the alarm. If a snooze symbol is shown on the display, this means that the snooze function is activated and the alarm will go off again in 5 minutes.
Press any button to switch off the alarm.
10. Additional settings
DCF signal
The base station synchronises the internal clock every night with the DCF signal. To receive the DCF signal manually, press and hold the "DOWN" button for 3 seconds, until the following symbol appears in the display and flashes:
When the signal is received successfully, the symbol will glow continuously. If the signal is not received, the symbol disappears.
Receiving the signal external sensor
The outdoor sensor sends a signal twice a minute, which is automatically received by the base station. You can also manually enable the signal reception. To do this, press and hold the "CHANNEL" button for about 3 seconds until the channel symbol ("") starts flashing. Once the signal has been successfully received, the animation of the symbol disappears and the received temperature and humidity is shown on the display of the weather station.

Caution!
11. Safety instructions and disclaimer
Never try to open the device to repair or make modifications. Avoid contact with the mains voltage. Do not short-circuit the product. The device is not waterproof, therefore please use it only in dry surroundings. Protect it from high humidity, water and snow. Do not expose the device to high temperatures.
Do not expose the device to sudden changes in temperature or strong vibrations, as this could damage the electronic components. Check the device for any damage before using it. The device should not be used if it was subject to impact or has been damaged in some other manner. Please comply with the local regulations and restrictions. Do not use the device for purposes other than those described in the user manual. This product is not a toy. Keep it out of the reach of children or mentally disabled persons. Any repair or modifications to the device, which are not carried out by the original supplier, will void any warranty and guarantee claims. The device should be used only by persons who have read and understood this user manual. The specifications of the device may be changed without prior notification.

12. Disposal instructions
In line with the European WEEE directive, electrical and electronic devices should not be disposed of along with domestic waste. Their components have to be separately sent for recycling or disposal, because improper disposal of toxic and dangerous components may permanently damage the environment. According to the electrical and electronic equipment act (ElektroG), you are obliged (as a consumer) to return (free of charge) all electrical and electronic devices to the manufacturer, the point of sale, or public collection points at the end of their service life. The relevant local laws regulate the details in this regard. The symbol displayed on the product, in the user manual or/and on the packaging refers to these regulations. With this manner of sorting, recycling and disposal of used devices, you make an important contribution towards protecting our environment.

13. Instructions for battery disposal
In conjunction with the sale of batteries along with the supply of devices that include batteries, the supplier is obliged to point out the following to the customer: The customer is legally obliged to return used batteries. He can return used batteries which the supplier offers or has offered as new batteries in his assortment free of charge to the supplier's dispatch warehouse (shipping address). The symbols shown on the batteries mean the following: Pb = battery contains more than 0.004 percent lead by weight, Cd = battery contains more than 0.002 percent cadmium by weight, Hg = battery contains more than 0.0005 percent mercury by weight.

The symbol of the crossed-out dustbin means that the battery must not be disposed of in household waste.

WEEE directive 2012/19/EU
WEEE Register no.: DE 67896761
WD Plus GmbH hereby certifies that the appliance 302744/20181205FZ008 complies with the fundamental requirements and all other relevant stipulations. A complete conformity statement can be obtained from: WD Plus GmbH, Wohlenbergstraße 16, 30179 Hanover