
HVC676451DA - Vacuum Cleaner HISENSE - Free user manual and instructions
Find the device manual for free HVC676451DA HISENSE in PDF.
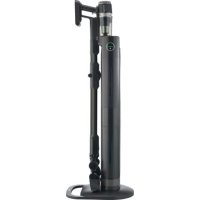



| Product type | Cordless stick vacuum with multifunction station |
| Brand | Hisense |
| Model | HVC676451DA |
| Use | Household, dry dust vacuuming |
| Power supply | Integrated rechargeable battery |
| Battery runtime | Up to 60 min (low speed), 20 min (medium), 13 min (max) |
| Number of speeds | 3 (low, med, max) |
| Dust emptying system | Automatic dustbin emptying via the multifunction station (microfiltration bag) |
| Included brush types | Motorized floor brush, motorized textile nozzle, 2-in-1 nozzle, crevice tool |
| Filtration | Microfiltration bags and removable and washable filter |
| Multifunction station | Automatically charges and empties the dustbin |
| Maintenance | Empty the dustbin, clean or replace the filter every 6 months, clean the brush |
| Safety | Do not immerse, do not vacuum liquids or incandescent objects |
| Battery warranty | 12 months |
| Included accessories | 2 microfiltration bags, 2-in-1 nozzle, crevice tool, motorized floor brush, motorized textile nozzle, hose, multifunction station |
| Repairability | Spare parts available (bags, filters, brushes) |
Frequently Asked Questions - HVC676451DA HISENSE
User questions about HVC676451DA HISENSE
0 question about this device. Answer the ones you know or ask your own.
Ask a new question about this device
Download the instructions for your Vacuum Cleaner in PDF format for free! Find your manual HVC676451DA - HISENSE and take your electronic device back in hand. On this page are published all the documents necessary for the use of your device. HVC676451DA by HISENSE.
USER MANUAL HVC676451DA HISENSE
When using the vacuum cleaner always observe the following basic safety precautions: Carefully read this instruction manual and only use the appliance in accordance with the instructions herein. Before using the appliance for the first time, remove all protective film or plastics. Never leave the appliance unattended during use. Before using the appliance, carefully assemble all of its parts. Only use the appliance indoors and in dry areas. Only use the appliance with the parts recommended by the manufacturer. Do not use the appliance if it has been dropped, if it is damaged, if it has been kept outdoors, or if it has been dropped or immersed in a liquid. Regular cleaning can extend the appliance's useful life. Make sure your hair, loose parts of your garments, fingers or other parts of the body do not come into contact with the vents or moving parts of the appliance. The appliance complies with all required standards regarding electricity, and radio interference regulations. The appliance is not intended to be used by children and persons with impaired physical or mental abilities. This appliance may be used by children aged 8 years and more, and by persons with reduced physical, sensory or mental capabilities or lack of experience and knowledge, if they are supervised during the use of the appliance or if they have been provided relevant instructions regarding the use of the appliance in a safe way, and they understand the hazards involved. Keep children under supervision while they are using the appliance and make sure they do not play with it. Children should not perform any cleaning or maintenance tasks on the appliance, unless they are older than 8 years, and they do so under supervision. Switch off the appliance after use.
Danger
Do not immerse the appliance, the charging base or the multipurpose station in water or any other liquid, and do not rinse it under running water.
Special warnings
The intelligent multipurpose station comes with a built-in charging cable. Before connecting the intelligent multipurpose station to the power mains, check whether the indicated voltage corresponds to the voltage of the local power mains. Do not use a damaged vacuum cleaner or a damaged intelligent multipurpose station. If the intelligent multipurpose station is damaged, only have it replaced with an original spare part in order to avoid a hazard. A transformer is installed in the intelligent multipurpose station. It is prohibited to remove the adapter and replace it with another adapter, since a hazardous situation might occur. Do not pull the cable of the intelligent multipurpose station and do not connect it to adapters or extension cords to avoid damage. The intelligent multipurpose station is only intended to be used with this type of vacuum cleaner, so do not use it for any other purposes. Never use the intelligent multipurpose station without first installing the bag and the filter. Disconnect the intelligent multipurpose station from the mains socket before cleaning the station. Only charge the vacuum cleaner using the intelligent multipurpose station. The vacuum cleaner cannot be turned on while it is charging on the intelligent multipurpose station. Never use the vacuum cleaner without filters or an installed filter unit. The exhaust air outlets must not be blocked during vacuuming. Only use the vacuum cleaner at home and indoors. Make sure that the suction openings are open and that air can flow through them, which will ensure
optimum and smooth suction power of the appliance. Regular cleaning of the open parts of the suction hose and removal of dust, hair, or anything else that could clog the air flow is highly recommended. Never use the vacuum cleaner to clean burning particles or debris, cigarette butts, matches, liquids (e.g. water, carpet foam), or sharp, pointy objects (glass debris, etc.). Never bring the suction hose or the open part of the appliance close to your face or to your body. Never use the vacuum cleaner to vacuum construction materials (such as fine sand, lime, cement dust, toner dust, etc.). This may cause damage to the appliance.
Problems and solutions
| Problem | Possible reason | Solution |
| Not working. | The battery is dead. The handy VC is not assembled correctly. | Charge. Assemble the handy VC correctly. |
| Suction power has decreased. | The dust cup is full. Block in filter. Block in the air inlet tunnel or on the roller of electrical brush. | Pour out the dust. Clean or change filter. Clean the electrical brush. |
| The VC is not charging. | The charger is not connected on socket. The connector of charger is not connected to the hole of base body. The handy VC is not assembled to the body. | Connect the charger on socket. Connect the charger with base body of VC. Assemble the handy VC on body. |
| Use very short time after charging. | Not enough charging time. The battery is aging. | Charge according to instruction. Change the battery. |
Environment

Do not throw away the appliance with the normal household waste at the end of its life. Hand it in at an official collection point for recycling. By doing this, you help to preserve the environment.
This appliance is marked according to the European directive 2012/19/EU on Waste Electrical and Electronic Equipment (WEEE). This guideline is the frame of a European-wide validity of return and recycling on Waste Electrical and Electronic Equipment.
Guarantee & service
If you need information or if you have a problem, please contact the Hisense Customer Care Centre in your country (the phone number is in the worldwide guarantee leaflet). If there is no Customer Care Centre in your country, go to your local Hisense dealer or contact the Service department of Hisense domestic appliances.
Note: The warranty on the battery of vacuum cleaner is 12 months.
For personal use only!
For easier transport, some appliance parts are packed separately and safely placed in the main packaging unit. Before first use, read and follow the instructions for assembly and safe use. The appliance is intended for dry vacuuming in a domestic environment.

PARTS
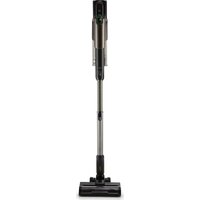
1 Housing with the motor, battery and dust container 2 Suction hose 3 Motorised floor brush 4 2-in-1 nozzle 5 Longer narrow nozzle 6 Motorised nozzle for vacuuming textile surfaces 7 2x microfilter bag 8 Intelligent multipurpose station

INSTALLATION
Vacuum cleaner: Connect the upper part of the hose to the motor unit and the lower part to the floor brush. The installation is correct when the appliance is firmly fixed all the way to the grooves (you hear a slight click at all settings). Due to its shape, the vacuum cleaner is not self-standing.
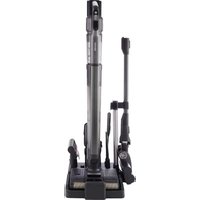
Intelligent multipurpose stand with accessories: Assemble it according to the illustrated instructions. A bag is stored in the upper compartment. A space for two smaller attachments and for the motorised nozzle for vacuuming textile surfaces is provided in the lower compartment. Place the vacuum cleaner on the multipurpose station. Keep the intelligent multipurpose station at least 1 m away from any heating bodies.

USE
Brushes and nozzles fit both the hose and the motor unit. By pressing the button on the brushes and nozzles, you can freely switch between them, as they are intended for various uses:
- The flexible hose is useful for vacuuming under sofas, cabinets, etc. The hose can be folded by pressing on the button on the hose. If you wish to unfold it again, simply stretch it until it snaps in place.
- The floor brush is used to vacuum all floor surfaces (vacuuming dry floor surfaces). Do not try to vacuum high fibre carpets as they may become entangled in the roller brushes and damage the vacuum cleaner. The textile surface nozzle comes in handy when vacuuming pet hair, sofas, beds, etc. The narrow nozzle is intended for vacuuming narrow hard-to-reach parts (corners, sofas, cobwebs, behind radiators...).
- Nozzle with bristles (for frames, drawers...).
The intelligent multipurpose station can serve as a storage space for additional equipment, emptying the dust container, and charging the vacuum cleaner. When you place the vacuum cleaner on the intelligent multipurpose station, the vacuum cleaner lights up after a couple of seconds and empties the dust container. The lower part of the lid opens and empties. The entire process takes a maximum of 3-5 seconds (the green light is illuminated). If you wish to perform additional cleaning of the container, press and hold the on/off button on the screen for a couple of seconds and the process will repeat itself. After the process is over, the vacuum cleaner charging process will begin. If the lower lid of the container does not close automatically, close it as you take the vacuum cleaner off the station. If the lid of the dust bag space is not closed enough, the red light will start flashing.
CHARGING
The intelligent multipurpose station comes with a built-in charging cable. Connect it to the mains, at least 1 m away from any heating surfaces. Make sure that the cable is plugged directly into the mains, and do not use distributors and extension cords. The intelligent multipurpose station is only tailored for this model and cannot be combined with other models that do not have the same design. During charging, the battery percentage will appear on the vacuum cleaner display unit. The appliance cannot be switched on while charging.

OPERATION
1 On/off button. 2 The digital display shows several different functions of use:
Battery icon: battery charge in % - Crossed-out roller icon: when this icon is illuminated, a foreign body needs to be removed from the brush. Full container icon: the container needs to be emptied out. - Speed control knob and display icons: you can adjust the suction power with the knob. The vacuum cleaner has three suction speeds. You can choose between three different speeds (max (up to 13 minutes), med (up to 20 minutes), min (up to 60 minutes)).

DISPOSAL OF THE APPLIANCE
If you want to replace the appliance or no longer need it, you should also think about protecting the environment.
The battery must be removed before disposing of the vacuum cleaner. To safely remove the battery, make sure that the battery is completely discharged. If the appliance does not have a removable battery, follow the instructions given in the booklet with figures.

DUST CONTAINER AND FILTERS
1 Dust container and filters
Intelligent multipurpose station: The upper portion has a space for the bag where the dust from the container is collected. Pull the bag out of the grooves and throw it in the trash. Additional bags are enclosed to the kit. If you run out of bags, the bag code is written on the inside; you can use it to purchase the bags in the store or order them online. The filter, which you can also replace as necessary, is located in the same part on the bottom.
Vacuum cleaner: remove the hose from the motor unit. To clean the dust container, push the button on the side of the motor unit. The pin releases the container. First, lift the dust container at the bottom of the container and then remove it from the motor unit at an angle. Pull the rim with the filter out of the container. Turn the filter to the left in order to safely remove it from the rim. The container, sleeve and filter can be wiped, shaken or rinsed with lukewarm water, but be careful, as improper handling can damage parts of the vacuum cleaner. Ensure that all parts are completely dry before reinstalling the container back onto the appliance. To install the inner parts of the container, reassemble the vacuum cleaner correctly, following the disassembly steps in the reverse order. Make sure that, when installing the dust container, you first install the container on the top part where a small pin is prepared for this purpose; after that, attach the container back to the motor unit at an angle. Never vacuum without the dust filter inserted.
2 Replacing the filter
If you notice that the filter is damaged, replace it immediately. With regular use, we recommend replacing the filter every 6 months to ensure the longest life of the vacuum cleaner.
General notes
If you need to replace the filter or have a need for it, you must also think about protecting the environment.
Before performing vacuuming, the battery must be removed. For safe removal, make sure it is fully discharged. If the battery is replaceable, follow the instructions given in the booklet with illustrations.

DUST CONTAINER AND FILTER
1 Dust container and filters
Intelligent multifunctional station: In the upper part there is space for the bag, where the dust from the container collects. Remove the bag from the holders and empty it into the bin. Additional bags are included in the kit. If the bags run out, the bag's collar is marked on the outside; you can use it to order bags in stores or to order them online. The filter, which you can replace if necessary, is located in the same part of the bottom.
Dust container: It must be emptied from the motorized brush. To empty the dust container, press the release button on the motorized brush. The filter releases the container. First, lift the dust container from the floor of the compartment, then remove the motorized brush by pulling it out with the filter from the compartment. Close the filter cover to remove it safely. The container, compartment, and filter can be washed, rinsed, or wiped with clean water, but be careful, as incorrect handling may damage parts of the dust container. Make sure all parts are completely dry before placing the container back upside down. Empty the dust container properly by turning the inner parts of the container, following the arrows for reassembly in reverse order. Make sure that when you install the dust container, you first install the container in the upper part, where the small filter for the cyclone is located; then attach the container firmly to the motorized brush under the floor. Never operate the vacuum cleaner without the dust filter installed.
2 Cleaning the filter
If you notice that the filter is damaged, replace it immediately. With regular use, we recommend changing the filter every 6 months to ensure the best performance of the vacuum cleaner.
3 General safety rules
When using the appliance, always follow the safety rules below: Carefully read all instructions and use the appliance in accordance with the instructions contained in this manual. // Before first use of the appliance, remove all protective films or packaging. // Never leave the appliance running unattended. // Before using the appliance, turn it off and use it in dry places. // Use the appliance only with parts recommended by the manufacturer. // Do not use the appliance if it has been dropped, damaged, stored outdoors, or has come into contact with liquids. // Regular cleaning will help extend the service life of the appliance. // Do not allow contact of hair, loose clothing parts, fingers, and other body parts with the openings or moving parts of the appliance. // The appliance complies with all necessary standards for electrical safety and radio interference. // The appliance is not intended for use by persons with reduced physical or mental capabilities. This appliance can be used by children aged 8 years and older, as well as persons with reduced physical, sensory, or mental capabilities if they are supervised or have received instructions regarding safe use and understand the associated dangers. Children must not play with the appliance. Do not allow children to clean or maintain the appliance unless they are over 8 years old and are supervised. // Unplug the appliance after use.
Danger!
Do not immerse the appliance, the charging station, or the multi-function station in water or any other liquid, and do not rinse them under running water.
Special precautions
The intelligent multifunctional station is equipped with a built-in charging cable. Before connecting the intelligent multifunctional station to the power supply, make sure that the specified voltage matches the voltage of the power supply. Do not use the vacuum or the intelligent multifunctional station if they are damaged. To avoid danger, if the intelligent multifunctional station is damaged, replace it only with an original station. The intelligent multifunctional station contains a transformer. Do not use adapters or replace it with another adapter, as this may lead to unsafe situations. To avoid damage, do not pull the cable of the intelligent multifunctional station and do not disconnect it from adapters or sockets. The intelligent multifunctional station is designed for use only with this type of vacuum, so do not use it for other devices. Never use the intelligent multifunctional station without first installing the bag and filter. Before cleaning, disconnect the intelligent multifunctional station from the
power supply. Charge the vacuum only with the intelligent multifunctional station. The vacuum cannot be turned on while it is charging and the intelligent multifunctional station is connected. Never use the vacuum without filters or without a installed filter block. During cleaning, do not close the outlet openings of the vacuum. The vacuum can be used only indoors or inside premises. To ensure optimal suction and ease of use, make sure that the air inlet openings are open for air passage. It is recommended to regularly clean the open parts of the vacuum and remove hair, lint, and other objects that may obstruct the air flow. Never use the vacuum for cleaning liquids, wet dirt, ashes, sharp objects (such as glass fragments) or hot objects. Never immerse the vacuum or its open parts in water or other liquids. Never use the vacuum for cleaning construction materials (such as plaster dust, lime, cement dust, toner particles, etc.). This may lead to damage to the device.
Malfunctions and their elimination
1 Container, bag, and filters
Intelligent multifunctional station. In the upper part there is a compartment for the bag, in which dust from the container is collected. Remove and empty the bag from the holders and throw it into the trash. The kit includes additional bags. If the bags are used up, there is a bag compartment inside the compartment; use it to purchase bags in the store or to order online. At the bottom of this compartment there is a filter that can be replaced if necessary.
Remove the hose from the motor unit. To remove the dust container, press the button on the side of the motor unit. The container will unclip. Lift the container from below, then tilt it and remove it from the motor unit. Take the filter out of the container. Turn the filter to the left to safely remove it from the frame. The container, the cyclone, and the filter can be washed and rinsed under warm water. Do this carefully, as otherwise the parts could be damaged. Before reassembling the vacuum cleaner, let the parts dry completely. Install the parts in the container and correctly reassemble the vacuum cleaner, following the disassembly steps in reverse order. When installing the dust container, first place the top part at an angle into the slot on the motor unit, then insert the bottom part. Do not use the vacuum cleaner without the filter installed.
2 Replacing the filter
If you notice that the filter is damaged, replace the filter. With normal use of the vacuum cleaner, it is recommended to change the filter every 6 months to ensure a long service life of the vacuum cleaner.
Troubleshooting
Do not use the ladder in place of scaffolding or as a support for work platforms. Use the ladder only for its intended purpose. Before use, inspect the ladder for damage, missing parts, and wear. Do not use a ladder that is damaged or has missing parts. Do not use the ladder outdoors in wet or windy conditions. Use the ladder only on a stable, level surface. Do not use the ladder if it is bent, deformed, cracked, or has been exposed to fire. Do not attempt to straighten a bent ladder. This could weaken it. Do not use the ladder near sharp edges, abrasive surfaces, or heat sources. Use the ladder only in accordance with the manufacturer's instructions and all applicable safety standards. Do not use the ladder as a bridge or for any purpose other than climbing. Do not allow children to use the ladder without adult supervision. Children should be supervised to ensure they do not play with the ladder. After use, store the ladder properly.
Safety
Do not immerse the ladder, the guardrail, or the functional parts in water or any other liquid; wipe it with a damp cloth.
Maintenance
Intellectual and functional station must be installed by a qualified electrician. // The intellectual and functional station must be connected to the correct voltage, current, and frequency as specified. // If the transformer or the intellectual and functional station is damaged, contact the manufacturer for repair. // The intellectual and functional station transformer is original. For repair, use only original spare parts and do not modify it with other parts. // Do not connect the intellectual and functional station to cables or connectors that are not approved. // The intellectual and functional station transformer is intended for use only with the specified device; do not use it for any other purpose. // Do not use the intellectual and functional station in damp, wet, or dusty conditions.
The intellectual and functional station must be installed and operated correctly. // Use the transformer only with the intellectual and functional station. // Use the transformer only with the intellectual and functional station. // Use the transformer only with the intellectual and functional station. // Do not use the transformer without proper grounding. // The transformer must be kept away from heat sources. // The transformer is intended for indoor use only. // To prevent damage to the copy, keep the original and the copy away from direct sunlight and heat. // Do not expose the copy to moisture, extreme temperatures, or other harmful conditions. // Do not use the transformer for cleaning with liquids or sprays. // Do not cover the copy or the original with opaque materials. // Do not use the transformer for cleaning with abrasive materials (such as sandpaper, steel wool, etc.). This may damage the surface.
Accessories
| Акayльк | ыктумал себ abi | Жою |
| Аспал жуMbIC жасамады. | АккуларTop толыктай разрданfasн. | АккуларTopы 3араздань3. |
| Кол copfbicbI дурьс opHaылмafн. | Кол copfbicbI дурьс калfaиb3. | |
| Сору Куаты Төмeн. | Шан жинаftыш толын калfasн. | Шан жинаftыш тазалы3. |
| сузrici biteлгн. | сузriciн тазалы3н hemece ybICTbIPbIHb3. | |
| Aya 6еретин тутik hemece aihaын тураын шетka biteлгн. | Турбоштканы тазалы3. | |
| Аспал зараздалмады. | АккуларTop розтka-fa кocылmafah. | АккуларTopы розтka-fa калfaиb3. |
| АккуларTop shaнсорfbii устаындыfa аылларfa калhanбafan. | АккуларTopы shaнсорfbii устаынla жалfaиb3. | |
| Кол copfbicbI opHaылмafn. | Кол copfbicbI opHaылb3. | |
| Заядаганн кeий шансорfbii оte кыcke уakыт жуMbIC жасады. | Шансорfbii кjetkinikti узak, заядалмafan. | АккуларTopы hyckaylbika сайес Заядаганы aybICTbIPbIHb3. |
| АккуларTop озihin, pecypcisн тaybicahn. | АккуларTopы aybICTbIPbIHb3. |
Correct disposal
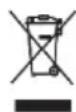
This product is marked with the symbol of a crossed-out wheeled bin. It indicates that the product must not be disposed of with household waste. The product must be disposed of at an appropriate collection point for recycling of electrical and electronic equipment.
This appliance contains electrical and electronic components and must be disposed of separately from normal household waste. It is subject to the European Directive 2012/19/EU (WEEE). This directive sets requirements for the collection, treatment, and recycling of waste electrical and electronic equipment in all EU member states.
Service and support
The warranty card is the main document for the authorized service centers. For authorized service centers, see the warranty card and the Hisense.com website.
Battery: The battery lasts 12 months.
Do not use the device for other purposes!
Do not place the device on unstable surfaces or surfaces that are not properly supported. // Keep the device away from direct sunlight and heat sources. // The device is designed for indoor use only.
COMPONENTS
1 Body with power button, battery and user manual 2 Screen 3 Power cord with plug 4 1-2 connectors 5 USB connector 6 Connector for cleaning cloth 7 Micro-USB connector 8 Intelligent docking station

ASSEMBLY
Charging: Connect the power cord to the power button, then plug it into a wall outlet. If the device is turned on (the screen is on), charging will start automatically. Do not leave the device unattended while charging.
Accessories with intelligent docking station: Connect them to the device. // Store in a dry place. // Connect the power cord to the connector and the textile cleaning cloth to the connector. // Place the device on the intelligent docking station. // Do not place the intelligent docking station near heat sources or in direct sunlight.

OPERATION
The buttons and connectors are located on the device and on the power button. // To quickly clean the buttons and connectors, use a dry cloth:
- Use a damp cloth to clean the screen, case, etc. // Use a dry cloth to clean the screen. // If the screen is dirty, wipe it with a soft cloth.
- Use the cleaning cloth to clean all surfaces (except the screen, which should be cleaned with a dry cloth). Do not use the cloth to clean the power cord, as this may damage the cord's insulation and cause a short circuit.
- Use the connector for cleaning cloth to clean the cloth, and use it to clean the screen, keyboard, etc.
- Use the connector to clean the cloth and to clean the device (e.g., dust, dirt, etc.).
- The control panel (temperature, humidity in the control panel is analyzed...). The intellectual control station automatically detects faults, and the shutdown process is carried out. The shutdown process is initiated after the last section of the intellectual control station is turned off, and the shutdown indicator channel is activated. The shutdown process is carried out for 3-5 seconds (according to the indicator channel). // If you need to restart the shutdown process, press the emergency stop button, then the shutdown process will be repeated. // After the process is completed, the shutdown process begins. If the temperature controller does not automatically turn off, it will be turned off when the shutdown station is removed. If the shutdown button is not pressed, the indicator light will start flashing.
SHUTDOWN
The intellectual control station is connected to the shutdown cable. // It is placed at least 1 meter away from the operating area. // When connecting the cable, follow the instructions and warnings. // The intellectual control station is designed only for this model and its structure is different from other models, so it cannot be used for other purposes. // During shutdown, the battery charge indicator is displayed on the panel. // It is not possible to shut down during operation.

PLAN
1 Emergency stop button 2 Sanitary inspection of the first tube φ function is required:
- Battery sign: battery charge-discharge
- Surface temperature sign: this symbol indicates that the surface may be hot. Empty container sign: the container must be cleaned.
- Original accessories and spare parts: Use only original accessories and spare parts. // The device has three copies (20 minutes each), min (60 minutes each)

SPARE PARTS
If you need to replace the spare part or if it is damaged, contact the manufacturer.
The device must be disconnected from the power supply before removing the battery. // To remove the battery, it must be fully discharged. If the battery is not fully discharged, follow the instructions provided in the manual.

PLAN AND SPECIFICATIONS
1 Plan and specifications
Intellectual functions of the station: When the door is opened, the container is initially empty. The counting readings are taken, and the contents are checked. The container is then closed. If your container is one class, you can either take it with you or leave it there, as indicated on the article label. // In case of need, you can use the auxiliary output, which is located on the left side of the door.
Transporter: Remove the transport lock. // To remove the transport lock, press the lock button and pull it out. Then remove the container from the transport bracket. // After removing the transport lock, you can then remove the transport lock. // If there is a liquid in the container, pour it out. // To pour out the liquid, tilt the container. // The transport lock, along with the liquid, can be removed by pulling or with water, but be careful not to damage the transporter components. // When placing the container back, ensure that the locking mechanism is correctly engaged. // To install the two components of the transport lock, follow the instructions in the correct order. // When installing the transport lock, first ensure that the container is placed in the correct position on the transport bracket; then remove the container from the transport lock and pull it out. // If the liquid is not installed, the transporter is not operational.
2 Liquid removal
If the liquid is not drained, remove it quickly. During operation, the transporter may need to be serviced, so the liquid should be drained as soon as possible.
AVHENDING AV APPARATET
MANUEL D'INSTRUCTIONS FR
- DANGER
- SPECIAL WARNINGS
- ENVIRONMENT
- GUARANTEE & SERVICE
- PARTS
- INSTALLATION
- USE
- CHARGING
- OPERATION
- DISPOSAL OF THE APPLIANCE
- DUST CONTAINER AND FILTERS
- REPLACING THE FILTER
- GENERAL NOTES
- DUST CONTAINER AND FILTER
- GENERAL SAFETY RULES
- SPECIAL PRECAUTIONS
- TROUBLESHOOTING
- SAFETY
- MAINTENANCE
- CORRECT DISPOSAL
- SERVICE AND SUPPORT
- COMPONENTS
- ASSEMBLY
- SHUTDOWN
- PLAN
- SPARE PARTS
- PLAN AND SPECIFICATIONS
- AVHENDING AV APPARATET
- MANUEL D'INSTRUCTIONS FR
Brand : HISENSE
Model : HVC676451DA
Category : Vacuum Cleaner