MSFL150 - Solar panel Mestic - Free user manual and instructions
Find the device manual for free MSFL150 Mestic in PDF.
| Product type | Photovoltaic solar panel |
| Brand | Mestic |
| Model | MSFL150 |
| Category | Solar panel |
| Maximum power (Pmax) | 150 W |
| Voltage at maximum power (Vmpp) | 19.5 V |
| Current at maximum power (Impp) | 7.69 A |
| Open circuit voltage (Voc) | 23.4 V |
| Short circuit current (Isc) | 8.37 A |
| Cell type | Monocrystalline PERC |
| Connector type | MC4 cables |
| Junction box | Integrated |
| Recommended use | Battery charging via charge controller |
| Installation method | Mounting by holes or adhesive (UV glue) |
| Multiple connection 12 V | Parallel |
| Multiple connection 24 V | Series |
| Maintenance | Clean with water and mild detergent (50%) |
| Precautions | Do not step on, do not disassemble, use insulated tools |
| Recycling | Compliant with WEEE directive (2012/19/EU) |
| Certifications | CE (EMC and low voltage) |
| Included accessories | MC4 cables |
Frequently Asked Questions - MSFL150 Mestic
User questions about MSFL150 Mestic
0 question about this device. Answer the ones you know or ask your own.
Ask a new question about this device
Download the instructions for your Solar panel in PDF format for free! Find your manual MSFL150 - Mestic and take your electronic device back in hand. On this page are published all the documents necessary for the use of your device. MSFL150 by Mestic.
USER MANUAL MSFL150 Mestic
natural_image
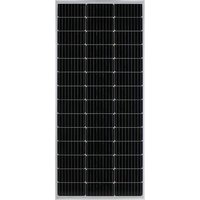
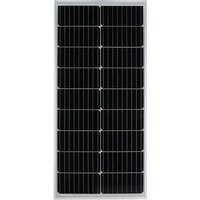
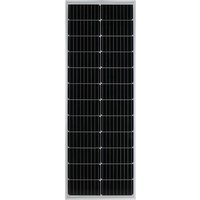
Close-up of a black rectangular solar panel with grid lines and two metal rings attached (no text or symbols visible)Gebruiksaanwijzing NL User instructions EN Bedienungsanleitung DE Mode d'emploi FR
Instrucciones de uso ES Istruzioni per l'uso IT Betjeningsvejledning DK
Bruksanvisning SE Bruksanvisning NO


FR
text_image
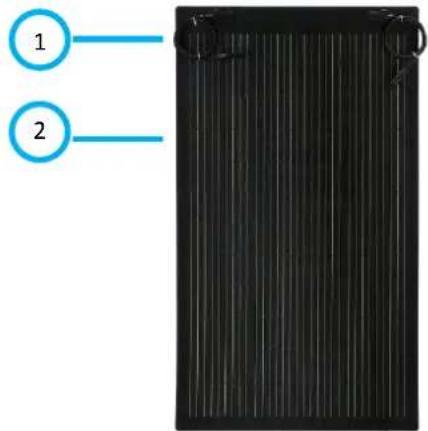
Diagram showing connection between a solar panel, battery, and lamp with labeled terminals and connections
text_image
12VParallel:
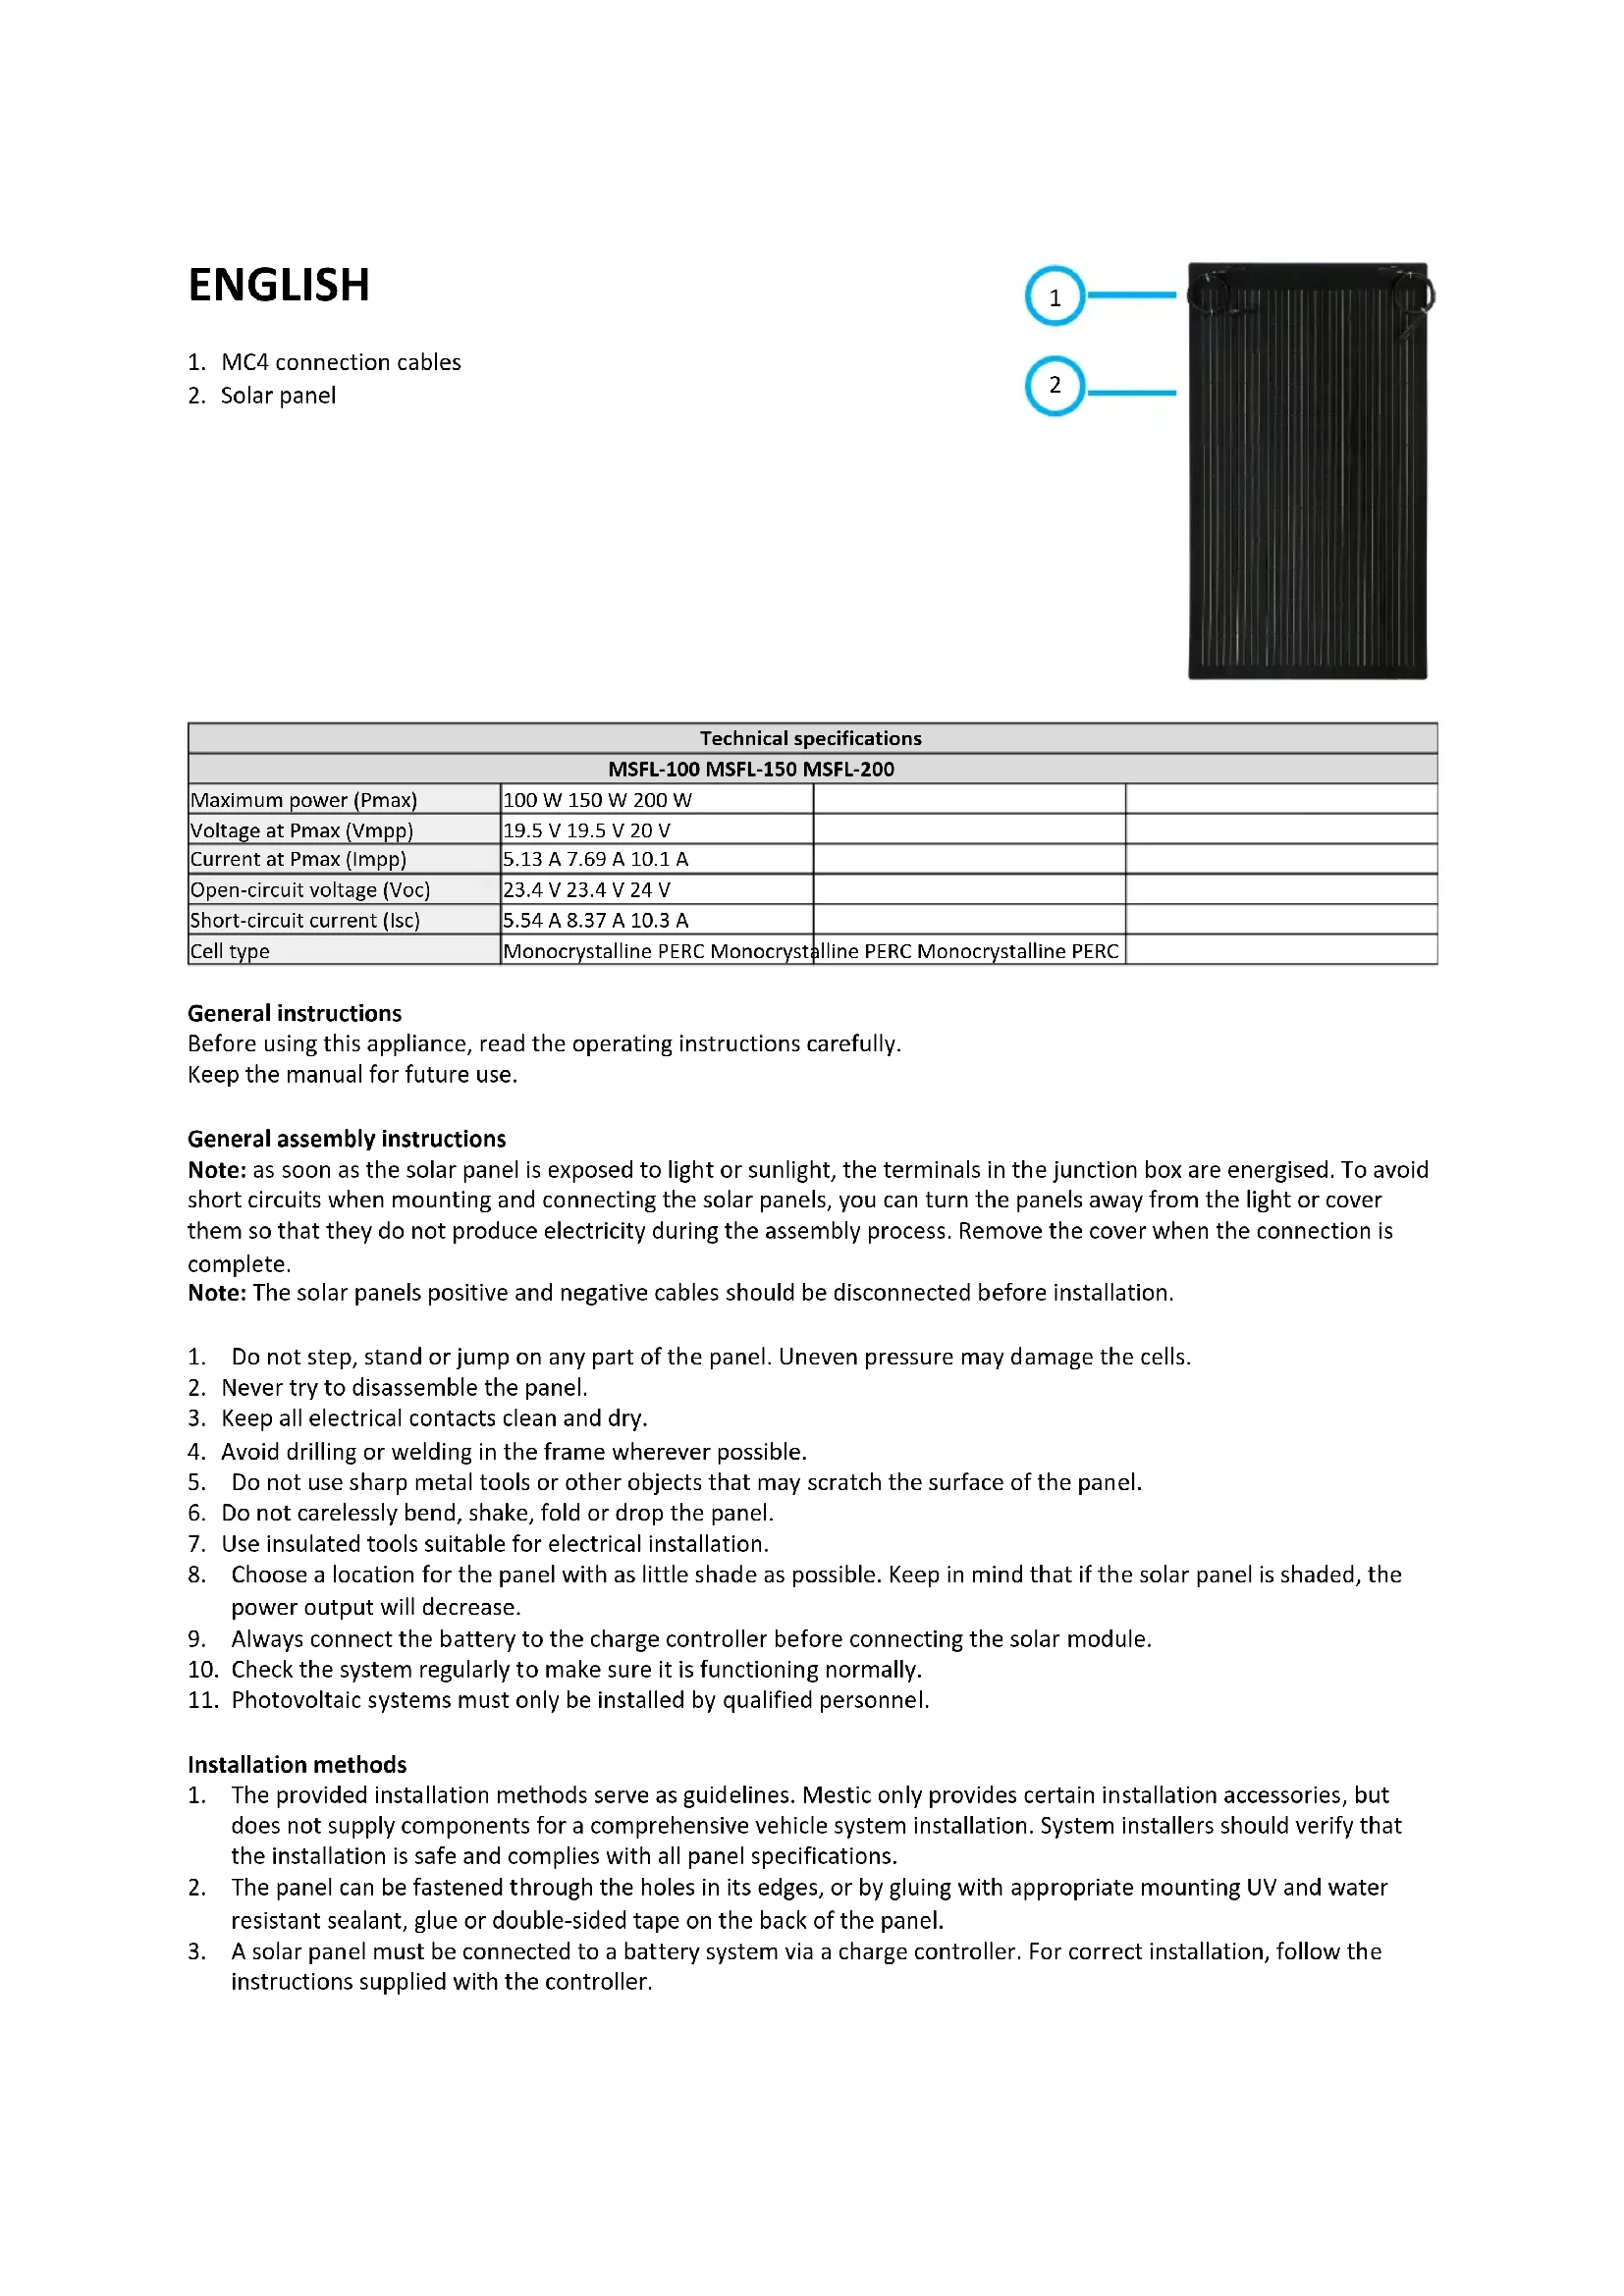
- MC4 connection cables
- Solar panel
text_image
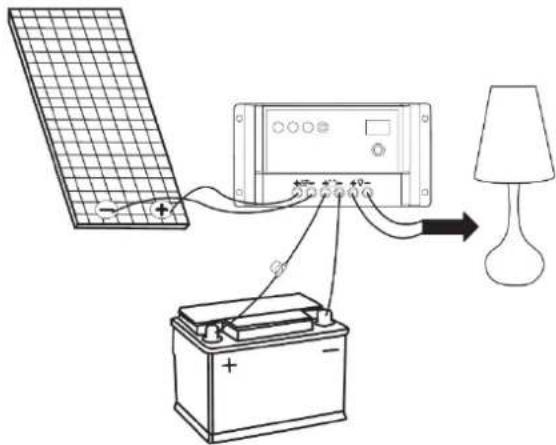
1 2| Technical specifications | |||
| MSFL-100 MSFL-150 MSFL-200 | |||
| Maximum power (Pmax) | 100 W 150 W 200 W | ||
| Voltage at Pmax (Vmpp) | 19.5 V 19.5 V 20 V | ||
| Current at Pmax (Impp) | 5.13 A 7.69 A 10.1 A | ||
| Open-circuit voltage (Voc) | 23.4 V 23.4 V 24 V | ||
| Short-circuit current (Isc) | 5.54 A 8.37 A 10.3 A | ||
| Cell type | Monocrystalline PERC Monocrystalline PERC Monocrystalline PERC | ||
General instructions
Before using this appliance, read the operating instructions carefully. Keep the manual for future use.
General assembly instructions
Note: as soon as the solar panel is exposed to light or sunlight, the terminals in the junction box are energised. To avoid short circuits when mounting and connecting the solar panels, you can turn the panels away from the light or cover them so that they do not produce electricity during the assembly process. Remove the cover when the connection is complete.
Note: The solar panels positive and negative cables should be disconnected before installation.
- Do not step, stand or jump on any part of the panel. Uneven pressure may damage the cells.
- Never try to disassemble the panel.
- Keep all electrical contacts clean and dry.
- Avoid drilling or welding in the frame wherever possible.
- Do not use sharp metal tools or other objects that may scratch the surface of the panel.
- Do not carelessly bend, shake, fold or drop the panel.
- Use insulated tools suitable for electrical installation.
- Choose a location for the panel with as little shade as possible. Keep in mind that if the solar panel is shaded, the power output will decrease.
- Always connect the battery to the charge controller before connecting the solar module.
- Check the system regularly to make sure it is functioning normally.
- Photovoltaic systems must only be installed by qualified personnel.
Installation methods
- The provided installation methods serve as guidelines. Mestic only provides certain installation accessories, but does not supply components for a comprehensive vehicle system installation. System installers should verify that the installation is safe and complies with all panel specifications.
- The panel can be fastened through the holes in its edges, or by gluing with appropriate mounting UV and water resistant sealant, glue or double-sided tape on the back of the panel.
- A solar panel must be connected to a battery system via a charge controller. For correct installation, follow the instructions supplied with the controller.
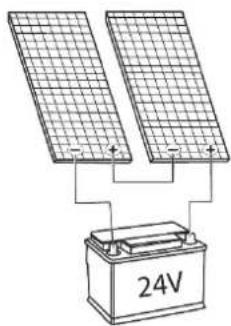
Series and parallel connection
If more than one panel is used, they can be connected either in series or in parallel.
text_image
Diagram showing connection between solar panel, battery, and lamp with labeled components
text_image
12VParallel:
To connect 2 solar panels in a 12 V system, connect the panels in parallel by connecting the plus to the plus and the minus to the minus.

text_image
24VSeries:
To connect 2 solar panels in a 24 V system, connect the panels in series by connecting the plus of one panel to the minus of the next panel.
Maintenance
- Generally, normal rainfall and wind are enough to keep the module clean. If necessary, you can clean the surface with a soft cloth with a mild detergent and 50% water.
- Inspect electrical connections regularly, to make sure they are clean, secure and undamaged.

Recycling
This product bears the selective sorting symbol for waste electrical and electronic equipment. This means that this product must be handled pursuant to European Directive (2012/19/EU) in order to be recycled or dismantled to minimize its impact on the environment. For further information, please contact your local or regional authorities. Electronic products not included in the selective sorting process are potentially dangerous for the environment and human heath due to the presence of hazardous substances.
Declaration of conformity
Hereby Gimeg Nederland B.V. declares that the device MSFL-100/-150/-200, applies all basic requirements and other relevant regulations listed in the European directive for electromagnetic compatibility (2014/30/EU) and low voltage directive (2014/35/EU). If you require a full declaration of conformity, you can contact the address listed on the backside of this manual.
DEUTSCH
Merkmale
text_image
Diagram showing connection between a solar panel, battery, and lamp with labeled terminals and connections
text_image
12VParallelschaltung:
text_image
Diagram showing connection between a solar panel, battery, and lamp with labeled components and connections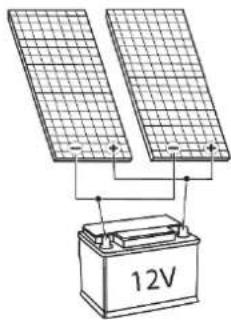
text_image
12VParallèle :
text_image
Diagram showing connection between solar panel, battery, and lamp with labeled components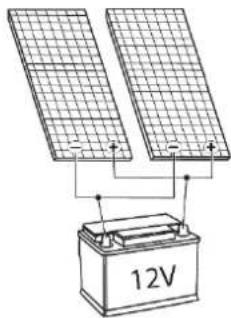
text_image
12VEn paralelo:
text_image
Diagram showing connection between a solar panel, battery, and lamp with labeled terminals and connections
text_image
12VIn parallelo:
text_image
Diagram showing connection between solar panel, battery, and lamp with labeled components
text_image
12VParallelt:
For at forbinde 2 solcellepaneler i et 12 V-system skal du forbinde panelerne parallelt ved at forbinde plus til plus og minus til minus.
text_image
24VSerie:
text_image
Diagram showing connection between solar panel, battery, and lamp with labeled components
text_image
12VParallel:
text_image
Diagram showing connection between solar panel, battery, and lamp with labeled components
text_image
12VParallel: