BM 2 - Bread maker STEBA - Free user manual and instructions
Find the device manual for free BM 2 STEBA in PDF.
| Features | Details |
|---|---|
| Product type | Bread machine |
| Pan capacity | 1 kg |
| Baking programs | 12 different programs |
| Kneading function | Yes, with multiple speeds |
| Display | LCD screen |
| Timer | Delayed start function up to 15 hours |
| Included accessories | Spoon, measuring cup, kneading hook |
| Cleaning | Non-stick pan, easy to clean |
| Safety | Overheat protection system |
| Dimensions | Approximately 30 x 25 x 30 cm |
| Weight | Approximately 3.5 kg |
| Power supply | 220-240 V, 50 Hz |
Frequently Asked Questions - BM 2 STEBA
User questions about BM 2 STEBA
0 question about this device. Answer the ones you know or ask your own.
Ask a new question about this device
Download the instructions for your Bread maker in PDF format for free! Find your manual BM 2 - STEBA and take your electronic device back in hand. On this page are published all the documents necessary for the use of your device. BM 2 by STEBA.
USER MANUAL BM 2 STEBA
text_image
Stebn® 320 320 17: 18:00 17: 18:00 17: 18:00 17: 18:00 17: 18:00 17: 18:00 17: 18:00 17: 18:00 17: 18:00 17: 18:00 17: 18:45 17: 18:45 17: 18:45 17: 18:45 17: 18:45 17: 18:45 17: 18:45 17: 18:45 17: 18:45 17: 18:45 17: 18:46 17: 18:46 17: 18:46 17: 18:46 17: 18:46 17: 18:46 17: 18:46 17: 18:46 17: 18:46 17: 18:46 17: 18:47 17: 18:47 17: 18:47 17: 18:47 17: 18:47 17: 18:47 17: 18:47 17: 18:47 17: 18:47 17: 18:47 17: 18:48 17: 18:48 17: 18:48 17: 18:48 17: 18:48 17: 18:48 17: 18:48 17: 18:48 17: 18:48 17: 18:49 17: 18:49 17: 18:49 17: 18:49 17: 18:49 17: 18:49 17: 18:49 17: 18:49 17: 18:50 17: 18:50 17: 18:50 17: 18:50 17: 18:50 17: 18:50 17: 18:50 17: 18:50 STEBN® 320220-240 V\~; 50/60 Hz; 600 W
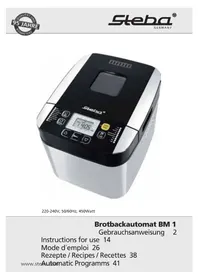
Brotbackautomat
BM 2
Instructions for use 19
Mode d'emploi 36
natural_image
Diagram of a mechanical assembly with a container and two connected components (no text or symbols)This appliance is for private and indoor use only and must not be used commercially. Please read the instruction manual carefully and keep it at a safe place. When the appliance is given to another person the instruction manual should be passed to that person, too. Only use the appliance as described in the instruction manual and pay attention to the safety information. No liability for damages or accidents will be accepted, which are caused by not paying attention to the instruction manual. Remove all packaging and sticker. Wash up all parts carefully (see cleaning).
Safety information
Hot surface! There is danger of burning when touching the surface during operation. Set the back of the device with a distance of 10cm to the kitchen wall.
- Connect and operate the appliance in accordance with the specifications shown on the rating label.
- Do not use if the plug cord is damaged. Verify before every use.
- Do not plug with wet hands.
- Connect the power plug to a properly installed and easily accessible socket only.
- To unplug the power plug, always pull the plug – not the cable.
- Plug off the appliance after each use or in case of failure.
- Do not pull at the cord. Don't pull it over edges and don't bend it too much.
- Keep the cord away from hot parts.
The appliance can be used by children aged 8 and above and persons with limited physical, sensory or mental capabilities or lack of experience/knowledge, provided that are supervised or have been provided with instruction in the safe use of the appliance and have understood the resulting dangers. Children must not use the packaging as a toy. Cleaning and user maintenance must not be carried out by children unless they are 8 years or older and are supervised.

- Children under the age of 8 must be kept away from the appliance and the connecting cable.
- Children should be supervised to ensure that they do not play with the appliance or packaging material (e.g. Plastic Bags).
- The appliance must not be operated using a timer or a separate remote system!
- Never leave the appliance unattended when in use.
- Do not leave the appliance outdoors or in a damp area.
- Never place anything on top of the device and do not cover the ventilation slots.
- Never immerse the unit in water.
- Leave a space of about 10cm around the device.
- Never use the device after a malfunction, e.g. if it felt down or has been damaged in any other manner.
- The manufacturer is not liable for damage which is occurring due to the usage of the appliance in a different way as described or a mistake in the handling has been made.
- To prevent injury, repairs such as replacing a damaged cord, should only be carried out by a customer service. Only original spare parts have to be used.
- The device gets hot, only transport after it cooled down.
- Only use the device as described in this manual.
- You must not put any materials such as paper, cardboard, plastic etc. into the appliance.
- This appliance is intended to be used in household and similar applications such as:
o staff kitchen areas in shops, offices and others working environments
o by clients in hotels, motels and other residential type environments
o bed and breakfast type environments.
- Before initial use: clean all parts – except the heating elements - carefully and leave to dry. Heat up the device for about 15 min. to eliminate the smell of newness.
Attention! Device gets hot. Danger of burns! Do not place the appliance on a sensitive surface (e.g. painted furniture) and keep a distance of at least 70cm to le materials.
- During operation steam emerge. Keep hands and face away.
- If an extension cable is used, it has to have a cross-section of 1,5mm^2 . A cable drum must always be unwound.
- If a GS-tested 16 A multi-pin extension is used, it may not be charged with more than 3680 watts due to fire hazard.
- Make sure that children do not tease the cable or that a trip hazard occurs.
- The device must always be disconnected from the power supply if it is not supervised and before assembling, disassembling or cleaning.
- Hygiene: Please always clean the device to avoid bacteria and mould formation.
Cleaning
- Attention! Pull the plug before cleaning and allow the device to cool down.
- Never immerse the unit into water.
- Clean all internal metal parts and the housing with a damp cloth and soapy water. Let everything dry well.
- Clean the bread pan with a soft damp cloth. Do not use harsh or abrasive cleaners, chemical cleaners or solvents, abrasive scouring pads or metal implements.
Workplace
Important:
Never place this device on or next to hot surfaces (e.g. hot stoves). Only use it on a even, stable and a heat resisting surface. It is important that no inflammable items are near to the device. Do not place the device on the edge of the table so that it cannot be touched by children or fall down when touched.
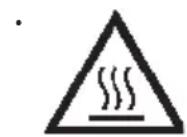
- Lid
- Window
- Panel
- Ventilation slots
- Baking pan
- Baking chamber
- Housing
- Measuring cup
- Measuring spoon
- Hook
- Kneading paddle
Bread Making Ingredients
Flour
The type of the flour indicates the amount of mineral nutrients.
- Type 405: Plain flour (All-purpose flour) for cake, bread etc.
- Type 1050: Bread flour has a high content of gluten. As the gluten content is higher than normal flour, it can be used for making bread in large sizes.
- Whole Wheat flour: Whole grain flour has no type number and is ground from whole grains. Whole wheat flour is heavier and contains more nutrients than common flour. The bread made by whole wheat flour is usually small in size. So many recipes usually combine the whole wheat flour and bread flour to achieve the best result.
- Corn flour and oatmeal flour: Corn flour and oatmeal flours are ground from corn and oatmeal separately. They are the additive ingredients for making rough bread, which is used for enhancing the flavour and texture of the bread.
Sugar
Sugar is a very important ingredient, which increases the sweet taste and colour of the bread. Sugar is also considered as nourishment for the yeast. White sugar is largely used but brown sugar, powdered sugar or cotton sugar may be used for special dietary requirements.
Yeast
Yeast must be stored in the refrigerator, as the fungus in it will be killed at high temperatures. Before using it check the production date and storage life of your yeast.
Refrigerate it as soon as possible after each use. Usually the main cause of bread failing to rise is bad yeast. The method described below will check whether your yeast is fresh and active.
- Pour 1/2 cup warm water (45-50°C) into a measuring cup.
- Put 1 tsp. white sugar into the cup and stir, then sprinkle 2 tsp. of yeast over the water.
- Place the measuring cup in a warm place for about 10 minutes. Do not stir the water.
- The froth that appears should come up to 1 cup worth. Otherwise the yeast is dead or inactive.
Salt
Salt is necessary to improve the flavour and crust colour of the bread. Salt can also stop the yeast from working. Never use too much salt in a recipe.
Eggs
Eggs can improve bread texture and make the bread more nourishing and larger in size. The egg must be added and mixed in evenly.
Grease, butter and vegetable oil
Grease can make bread soft but can reduce storage life. Butter should be melted or chopped into small pieces before using.
Baking powder
Baking powder is used for rising the ultra-fast bread and cakes, as it does not need time to rise and instead produces air. The air will form to soften the texture of the bread or cakes.
Water and other liquids
Water is an essential ingredient for making bread. Generally speaking, the water temperature should be between 20°C and 25°C for the best results. The water may be replaced with fresh milk which will enhance the breads' flavour and improve crust colour.
Making Bread
-
Open the lid and remove the bread pan with a rotary move to the left. Always remove the bread pan from the bread maker before adding ingredients to ensure they are not spilt into the baking chamber and the heating element.
-
Insert the kneading paddle. It is important that the kneading paddle is properly inserted on the shaft in the base of the bread pan. If the paddle is not inserted correctly the ingredients may not be mixed and kneaded properly.
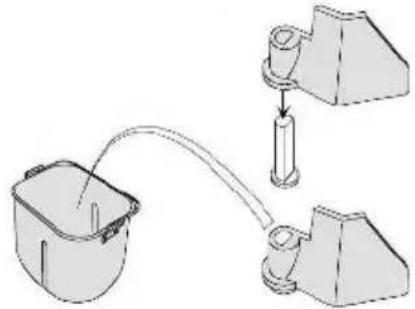
natural_image
Diagram of a mechanical device with a bucket and two connected components (no text or symbols)- Add ingredients to the bread pan. It is IMPORTANT that the ingredients are added in the correct order and that the ingredients are measured and weighed accurately or the dough may not mix correctly or rise sufficiently. All ingredients should be at room temperature 20 - 25^ C .
Ingredients should be added in the following order:
- Liquid ingredients
- Dry ingredients
- Yeast
NOTE! Mound the flour into the pan, make a small hollow in the centre and place the yeast there. If the yeast contacts the water before the kneading, the bread may not rise well. Therefore, always add yeast last!
Getting started

text_image
WEIGHT COLOUR UNLOCK / LOCK TIME - BAKE IMIX TIME + HOME MADE I HOME MADE II PAUSE START STOP
Connect the device, a signal sounds and the display lights up: Time 3:20 with program "1", 750 g

- Program button
o Select the desired program 1 to 16.
- Weight:
o Select the desired bread weight 500g, 750g or 1000g.
. Colour:
o Select the desired degree of browning light, medium or dark.
- Start / Stop:
o The device starts to work and the time runs out.
o To cancel a program, press and hold the button for 3 seconds. The device switches back to the starting mode.
- Pre-Set timer:
o With this button you can choose the time when the bread should be ready. E.g. "10:30" - in 10 hours and 30 minutes.
o Select the program, weight and degree of browning and then press "TIME" to set the pre-set time. Use the +/- buttons to select the desired pre-set time.
o Start the device. After the selected time, the bread is ready.
o ⚠️ If the pre-set time is used, no perishable food should be used in the device!
- Keeping warm:
o After each baking process, the device automatically switches to keeping warm for 1 hour. Keeping warm can be interrupted at any time with "Stop".
Child lock:
o Press the buttons "Weight" and "Colour" together for 3 seconds in order to lock the device.
o For unlock, press the two buttons again.
Programs
| Program-Number | Name Description | Description |
| 1 Basic Basic | program for almost all bread recipes that are mainly baked with bread flour. | |
| 2 French For | bread with fine flour, little sugar and fat.Crunchy crust and soft interior. | |
| 3 Whole Wheat | heat For bread with a high proportion of wheat, rye, oats, etc. Long preheating time for bread with a thick crust. | |
| 4 Sweet For | bread with a high percentage of sugar and fat.The breads are better browned. | |
| 5 Ultra-Fast | Super-fast baking time. | |
| 6 Gluten Free | For gluten free bread, needs more time to absorb liquids | |
| 7 Quick Shortened | baking time compared to the basic program. | |
| 8 Cake For | baking cakes. | |
| 9 Knead For | kneading doughs. | |
| 10 Dough For | making dough. | |
| 11 Pasta Dough For making various types of dough. | ||
| 12 | Yoghurt | For making yoghurt. |
| 13 | Jam | For making jams. |
| 14 Bake For | baking ready-made dough. The baking time can be chosen individually. | |
| 15 + 16 | Home Made I + II | Program with individual value settings. |
| 17 | IMIX | For kneading doughs. |
- An acoustic signal can be heard after the program has ended or the food has been kept warm. Then switch off the device.
- Note:
o A low temperature of the food (flour, water, etc.) and a low ambient temperature affect fermentation. The dough becomes top-fermented if the ambient temperature is too high.
o The recommended ambient temperature is between 15 and 34 °C.
Setting range for
Home Made programs 15 + 16
Select program 15 or 16, weight and degree of browning and then press "Home Made" to select the respective process and change it with the "Timer" button.
The set values are saved and can be called up again and again.
Home Made I
| Process Default setting in minutes Modifiable scope in minutes | ||
| Pre-heat 0 0 – 20 | ||
| Knead 1 15 0 – 30 | ||
| Rest 1 3 0 – 30 | ||
| Knead 2 20 0 – 30 | ||
| Rest 2 10 0 – 30 | ||
| Knead 3 0 0 – 25 | ||
| Ferment 1 42 0 – 60 | ||
| Ferment 2 40 0 – 60 | ||
| Ferment 3 0 0 – 60 | ||
| Bake 50 0 – 80 | ||
| Keeping warm 60 0 – 60 | ||
| Pre-set time | 0 15 hours | |
Home Made II
| Process Default setting in minutes Modifiable scope in minutes | ||
| Pre-heat 0 0 – 20 | ||
| Knead 1 10 0 – 30 | ||
| Rest 1 2 0 – 30 | ||
| Knead 2 5 0 – 30 | ||
| Rest 2 3 0 – 30 | ||
| Knead 3 10 0 – 25 | ||
| Ferment 1 40 0 – 60 | ||
| Ferment 2 40 0 – 60 | ||
| Ferment 3 0 0 – 60 | ||
| Bake 50 0 – 80 | ||
| Keeping warm 60 0 – 60 | ||
| Pre-set time | 0 15 hours | |
Power failure backup system
The bread maker is equipped with a power failure backup system or memory. If the power system is interrupted during the course of bread making, the process of making bread will be continued automatically within 10 minutes, even without pressing the "Start/Stop" button. If the interruption time exceeds 10 minutes, the memory cannot be kept and you have to restart the program. If the dough has not entered the rising phase when the power supply breaks off, you can press the "Start/Stop" button directly to continue the program from the beginning.
After the bread is baked
When the baking is complete, 10 beeps will sound to alert you that the bread is ready, the unit will automatically switch to keeping warm mode.
Important: The bread maker has an automatic "Keep warm" setting that will keep your bread warm for up to 1 hour. Press the "Start/Stop" button for 3 seconds to cancel the "Keep warm" setting.

Use oven mitts to carefully lift the pan by its handle out of the bread maker! Turn the pan upside down and gently shake it until the bread comes out. The bread pan has a non-stick coated finish so that the bread should come out
easily.
Do not use metal utensils to remove bread as they may scratch the non-stick coating. If the kneading paddle is stuck in the bread, pull it out with the hook.
Recipes
Ingredients should be added in the following order:
Liquid ingredients
Dry ingredients
Yeast
The recipes are guidelines and should be adapted to your own taste.
Rye Mixed Bread, Program 1 Basic
| 750 g | |
| Water 270 ml | |
| Honey 1 tsp | |
| Salt 2 tsp | |
| Oil 1 tsp | |
| Rye flour 95 g | |
| Grainy rye flour 95 g | |
| Wheat flour 220 g | |
| Bread seasoning 2 tsp | |
| Dry yeast 6 g | |
| Leaven extract 12 g |
Rye Mixed Bread with buttermilk, Program 1 Basic
| 750 g | |
| Buttermilk 500 ml | |
| Salt 13 g | |
| Rye flour 200 g | |
| Wheat flour 300 g | |
| Bread seasoning 1 tsp | |
| Dry yeast 6 g | |
| Leaven extract 75 g |
White Bread, Program 2 French
| 750 g | |
| Water 310 ml | |
| Salt 15 g | |
| Sugar 1 tsp | |
| Oil 2 tsp | |
| Wheat flour 500 g | |
| Dry yeast 6 g |
Whole Grain Bread, Program 3 Whole Wheat
| 750 g | |
| Buttermilk 500 ml | |
| Maple syrup | 30 g |
| Salt 12 g | |
| Rye flour 125 g | |
| Grainy wheat flour | 125 g |
| Spelt flour | 250 g |
| Linseed | 40 g |
| Sesame | 60 g |
| Sunflower seed | 75 g |
| Dry yeast 3 pack |
Bread with raisins, Program 4 Sweet
| 750 g | |
| Milk | 200 ml |
| Butter, melted | 80 g |
| Salt 1 tsp | |
| Sugar 75 g | |
| Egg 1 | |
| Wheat flour 450 g | |
| Dry yeast 1 pack | |
| Raisins | 100 g |
Gluten-free Bread, Program 6 Gluten Free
| 750 g | |
| Water 150 ml | |
| Milk 150 ml | |
| Salt 1 tsp | |
| Sugar 2 tsp | |
| Gluten-free flour 400 g | |
| Dry yeast 1 pack | |
| Butter 40 g | |
| Bread seasoning |
Spelt Bread with Zucchini and Walnuts, Program 7 Quick
| 750 g | |
| Buttermilk 325 ml | |
| Salt 12 g | |
| Sugar 1 tsp | |
| Olive oil 40 g | |
| Spelt flour 450 g | |
| Zucchini, rasped 100 g | |
| Dry yeast 1 pack | |
| Bread seasoning 1 tsp | |
| Herb mix 2 tsp | |
| Walnuts, chopped 80 g |
Cake, Program 8 Cake
| 750 g | |
| Milk 4 tbsp | |
| Eggs | 2 |
| Sugar 140 g | |
| Butter, melted | 140 g |
| Wheat flour | 300 g |
| Salt | |
| Vanilla-sugar | 1 pack |
| Lemon aroma | 5 drops |
| Baking powder | 1 pack |
Onion Tart Dough, Program 10 Dough
| Water 300 ml | |
| Salt 2 tsp | |
| Oil | 1 tbsp |
| Sugar | 1 tsp |
| Wheat flour | 500 g |
| Dry yeast 1 pack |
Yoghurt, Program 12 Yoghurt
| Milk | 1000 ml |
| Plain yoghurt | 150 ml |
Bake, Program 14 Bake
Basic setting time: 30 minutes, adjustable range 10 minutes to 1:30 hours Basic temperature setting: 150°C (medium), adjustable range via degree of browning 100°C (light), 150°C (medium), 200°C (dark)
Multi-Grain Bread, Program 15 Home Made
| 750 g | |
| Water 350 ml | |
| Shortening | 1 - 2 tbsp |
| Salt 10 g | |
| Sugar | 5 g |
| Malt powder | 15 g |
| Whole grain wheat flour | 500 g |
| Linseed | 2 tbsp |
| Sesame | 2 tbsp |
| Sunflower seed | 2 tbsp |
| Bread seasoning 1 tsp | |
| Dry yeast | 1 pack |
Kneading, Program 17 IMIX
Basic setting time: 20 minutes, adjustable range 20 minutes to 30 minutes
Troubleshooting
Dear Client,
Thank you for buying this STEBA product. The following table will help you with problems that may occur when using your device. For many problems there is a simple solution, because not everything that appears like a malfunction must be serious. Please check the following list before contacting our customer service.
| Problem Cause Solution | ||
| Bread collapses when baked | ·Dough rose unevenly and or too quickly, due to:·Excess moisture·Too much liquid or too much yeast was used·High humidity and / or heat | ·Only use flour that is stored in an airtight container·Measure all liquids using measuring cups·Dough will rise too quickly and unevenly during hot and/or humid days |
| Heavy, dense texture | ·Too much flour or not enough liquid·Too much fruits, whole grain or other added ingredients | ·Adjust liquid amount·Adjust the amount of ingredients used |
| Open, coarse or holey texture | ·Too much water was used·Salt omitted·Overheated liquid was used | ·Adjust liquid amount.·Add salt·Change liquid or cool down to room temperature. |
| The bottom and the sides are covered with too much flour. | ·Strong glutinosity ingredients in bread such as butter and bananas etc.·You have used too much flour or not enough liquid. | ·Do not add strong glutinosity ingredients·Check the recipe and measure the right quantity |
| The bread is too dark | ·You are using too much sugar·You chose the wrong crust color. | ·Press the “Start/ Stop” button to interrupt the program 5-10 minutes ahead of intended finishing time.Before removing the bread you should keep the bread in bread pan for about 20 minutes with lid closed. |
| Smoke emitted from chamber or steam vent | ·You might have spilled ingredients onto the heating element. | ·Remove these ingredients after the device cooled down. |
| Bread bottom crust is too thick | ·The bread is kept warm for a long time | ·Take bread out soon without keeping it warm. |
| The ingredients arepoorly stirred andbaked | selected an improper programThe lid was opened several times during operationStir resistance is too large so the kneader cannot rotate and stir properly. | Select the proper programDo not open the lidCheck the kneader, and then operate without load.If the problem is not fixed, contact the authorized service center. |
| It is very difficult to take bread out | Kneader adheres tightly to the shaft in bread pan | After taking the bread out, put hot water into the bread pan and let the kneader soak for around 10 minutes, then take it out and clean. |
| The display shows“HHH” after you have pressed the “Start/Stop” button | The temperature in bread maker is too high | Press the “Start/Stop” button and unplug bread maker. Allow the appliance to cool. |
| The motor noise is heard but the dough is not stirred | Bread pan is fixed improperly or dough is too much | Check whether the bread pan is fixed properly, as well as the recipe |
| The dough rose too high. | Too much yeastForgot to add the salt. | Try using less yeast |
| The bread did not rise enough. | No or too less yeastYeast may have a poor activity as water temperature is too high or yeast is mixed together with saltThe environment temperature is lower. | Check the amount and quality of yeast,increase the environment temperature |
| Bread size is so large as to push cover | The amount of yeast, flour or water is excessiveThe temperature in the room is too high. | Reduce the amount of ingredients according to the instructions. |
| Error code H:HH | Temperature in the device to hight | Stop programLet device cool down und restart after 10 to 15 minutes |
| Error code E:E0 | · Temperature sensor not connected | · Stop program and pull the plug · Contact the service |
Correct Disposal of this product

This marking indicates that this product should not be disposed with other household wastes throughout the EU. To prevent possible harm to the environment or human health from uncontrolled waste disposal, recycle it responsibly to promote the sustainable reuse of material resources. To return your used device, please use the return and collection systems or contact the retailer where the product was purchased. They can take this product for environmental safe recycling.
Packaging disposal: Do not throw away the package materials. Please put it in the recycling bin.


Gift box: Paper, should be put to the old paper collection point. Plastic packaging material and foils should be collected in the special collection containers.
Service and Repair:
If the appliance must be repaired, please get in touch with your trader or with the manufacturer:
natural_image
Diagram of a mechanical device with a bucket and two connected components (no text or symbols)Pain blanc, programme 2 French
Pain aux raisins, programme 4 Sweet
Pain sans gluten, programme 6 Gluten Free
| 750 g | |
| Eau 150 ml | |
| Lait 150 ml | |
| Sel 1 CC | |
| Sucre 2 CC | |
| Farine sans gluten 400 g | |
| Levure sèche 1 sachet | |
| Beurre 40 g | |
| Épices è pain |
Yaourt, programme 12 Yoghurt
| Lait 1000 ml | |
| Yaourt nature | 150 ml |
natural_image
Diagram of a mechanical device with a bucket and two connected parts, no text or symbols presentWit Brood, Programma 2 French
| 750 g | |
| Water 310 ml | |
| Zout 15 g | |
| Suiker | 1 tsp |
| Olie | 2 tsp |
| Tarwemeel 500 g | |
| Droog gist 6 g |
Volkorenbrood,
Programma 3 Whole Wheat
Yoghurt, Programma 12 Yoghurt
| Melk 1000 ml | |
| Normale yoghurt | 150 ml |
natural_image
Diagram of a mechanical assembly with two components and a connecting rod (no text or labels)Strømafbrydelses backup system
Program 6 Gluten Free
Kage, Program 8 Cake
| 750 g | |
| Mælk 4 spsk. | |
| Ægs | 2 |
| Sukker 140 g | |
| Smør, smeltet | 140 g |
| Hvedemel | 300 g |
| Salt | |
| Vanilje-Sukker | 1 pakker |
| Citron aroma | 5 drops |
| Bagepulver | 1 pakker |
Løgtæerte dej, Program 10 Dough
| Vand 300 ml | |
| Salt 2 tske | |
| Olie | 1 spsk. |
| Sukker 1 tske | |
| Hvedemel | 500 g |
| Tør gær 1 pakker |
Yoghurt, Program 12 Yoghurt
| Mælk 1000 ml | |
| Alm. yoghurt | 150 ml |
Bag, Program 14
Standard tidsindstilling: 30 min, justerbar fra 10 min til 1:30 timer. Standard temp. indstilling: 150c (medium) justerbar bruning 100c (lys) 150c (medium) 200c (mørk)
Flerkorns brød,
Program 15 Home Made
| 750 g | |
| Vand 350 ml | |
| Forkorter | 1 - 2 spsk. |
| Salt 10 g | |
| Sukker 5 g | |
| Malt pulver | 15 g |
| Fuldkorns hvedemel | 500 g |
| Hørfrø | 2 spsk. |
| Sesam | 2 spsk. |
| Solsikker frø 2 spsk. | |
| Brød krydderi 1 tske | |
| Tør gær 1 pakker |
Æltning, Program 17 IMIX
Standard tidsindstilling, 20 min, justerbar mellem 20 til 30 min.
Fejlfinding
Kære kunde,
natural_image
Diagram showing a container connected to two mechanical components via a pipe (no text or symbols)Vitt bröd, program 2 French
Kakor, program 8 Cake
| 750 g | |
| Mjölk | 4 msk |
| Ägg | 2 |
| Socker 140 g | |
| Smält smör | 140 g |
| Vetemjöl | 300 g |
| Salt | |
| Vaniljsocker | 1 paket |
| Citronarom | 5 droppar |
| Bakpulver | 1 paket |
Deg till lökkaka, program 10 Dough
Yoghurt, program 12 yogurt
| Mjölk | 1000 ml |
| Naturyoghurt | 150 ml |