Lark 150 - Microphone Hollyland - Free user manual and instructions
Find the device manual for free Lark 150 Hollyland in PDF.
Frequently Asked Questions - Lark 150 Hollyland
User questions about Lark 150 Hollyland
0 question about this device. Answer the ones you know or ask your own.
Ask a new question about this device
Download the instructions for your Microphone in PDF format for free! Find your manual Lark 150 - Hollyland and take your electronic device back in hand. On this page are published all the documents necessary for the use of your device. Lark 150 by Hollyland.
USER MANUAL Lark 150 Hollyland
Powered by Hollyland
User Manual 1
一 14
PykoBoIDCTBO noIb3OBaTeJIa 40
Benutzerhandbuch 53
Thank you for purchasing Hollyland LARK 150 wireless microphone. Please read this instruction carefully before using the product. Wish you have a pleasant experience.
KEY FEATURES
- 5ms Latency with up to 100m Range
- 2 TX & 1 RX Combo1TX & 1RX (or 2TX & 1RX) Combo Supported
2.4GHz Digital Wireless Transmission with Clear Sound Under Any Conditions - Mini Size with Lightweight, 2 Colors Options
Professional-Grade Sound Quality
Built-In Lithium Batteries, with an Ultra Long Run Time
21-Stage Digital Gain Adjustment - Contact Charging Case
In-Built Mic and LavMic Switching Automatically - Multiple Systems Using in One Location


PACKING LIST
PACKING LIST OF TWO TRANSMITTERS AND ONE RECEIVER
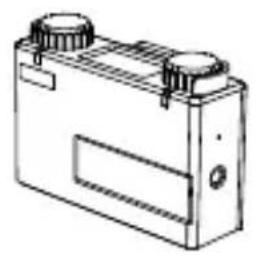
① Charging Case x1
② Transmitter x2
③ Receiver x1
④ Furry Windshield x2
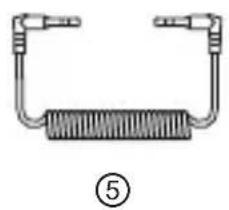
⑤ 3.5mm TRS Patch Cable x1
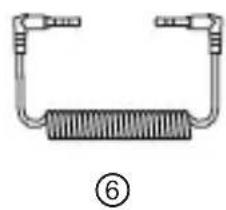
⑥ 3.5mm TRS to TRRS Patch Cable x1
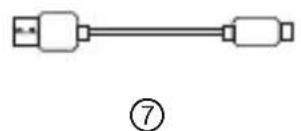
⑦ USB Type-A to Type-C Cable x1
⑧ Lavalier Microphone x2
⑨ User Guide x1
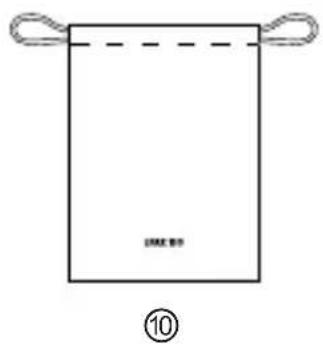
Storage Bag x1
PACKING LIST OF ONE TRANSMITTERS AND ONE RECEIVER (LARK 150 SOLO)
① Charging Case x1
② Transmitter x1
③ Receiver x1
④ Furry Windshield x1
⑤ 3.5mm TRS Patch Cable x1
⑥ 3.5mm TRS to TRRS Patch Cable x1
⑦ USB Type-A to Type-C Cable x1
⑧ Lavalier Microphone x1
⑨ User Guide x1
Storage Bag x1
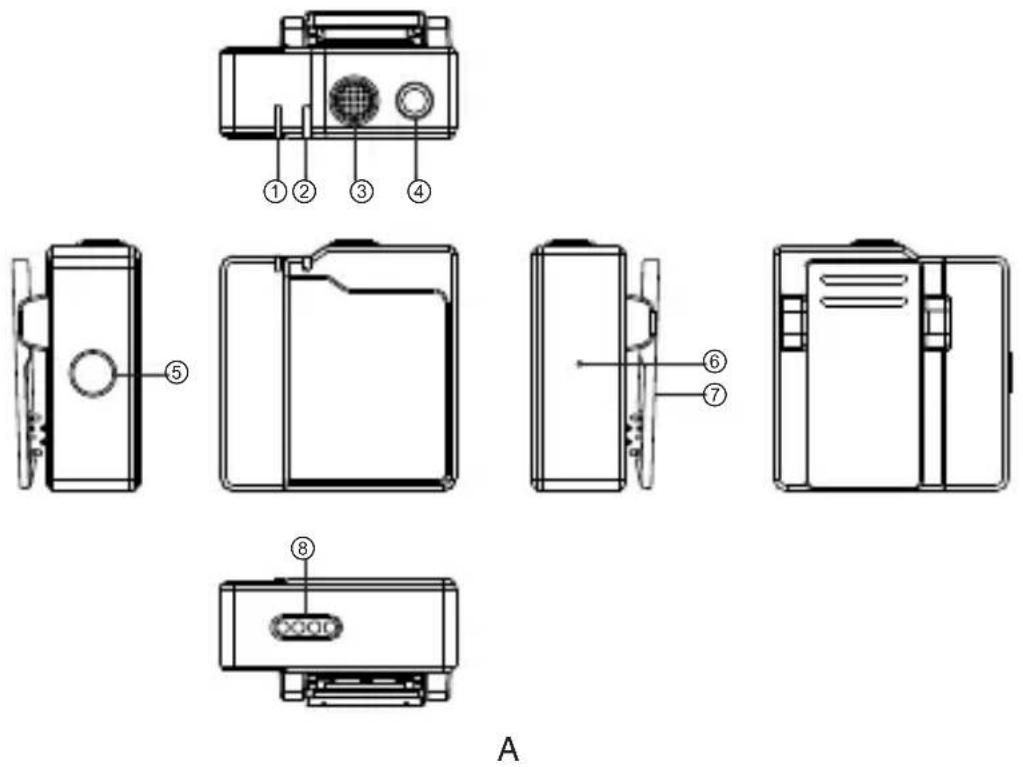
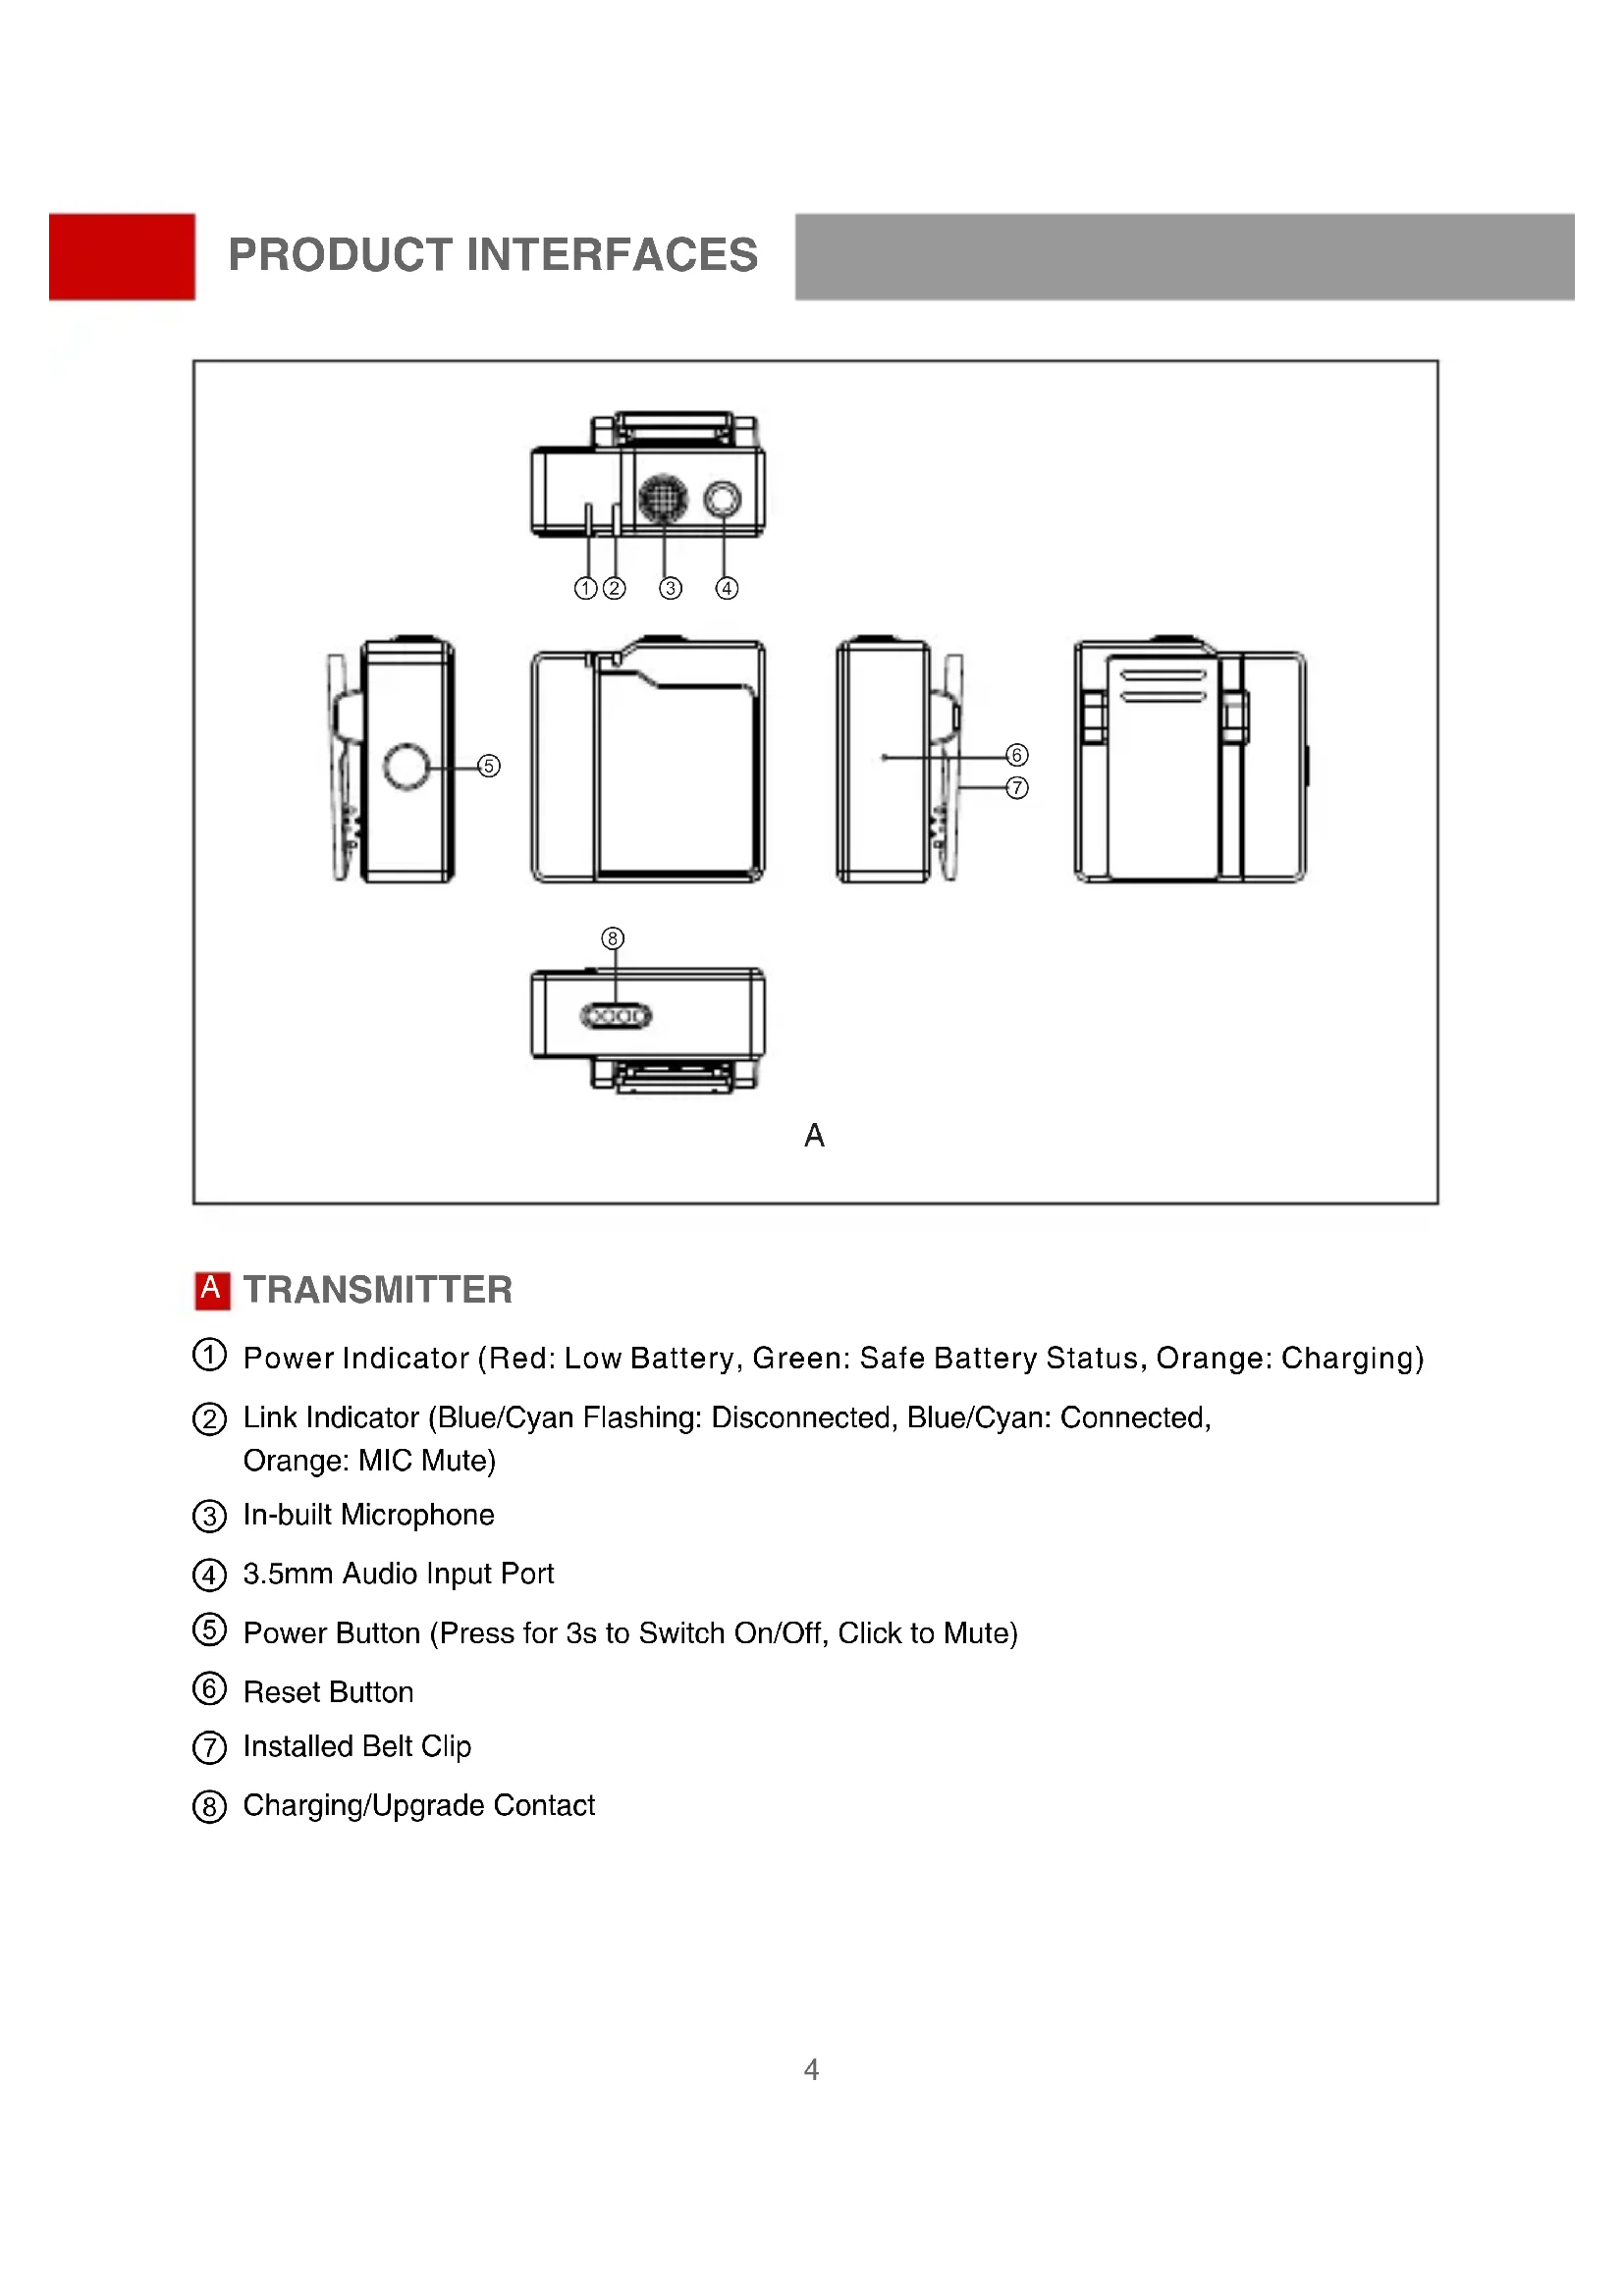
TRANSMITTER
① Power Indicator (Red: Low Battery, Green: Safe Battery Status, Orange: Charging)
② Link Indicator (Blue/Cyan Flashing: Disconnected, Blue/Cyan: Connected, Orange: MIC Mute)
③ In-built Microphone
④ 3.5mm Audio Input Port
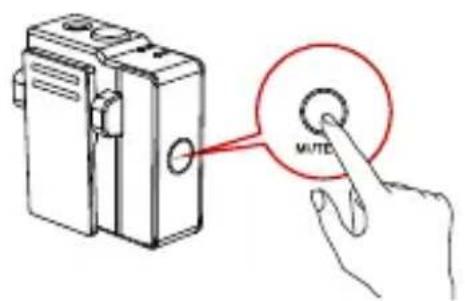
⑤ Power Button (Press for 3s to Switch On/Off, Click to Mute)
⑥ Reset Button
⑦ Installed Belt Clip
(8) Charging/Upgrade Contact
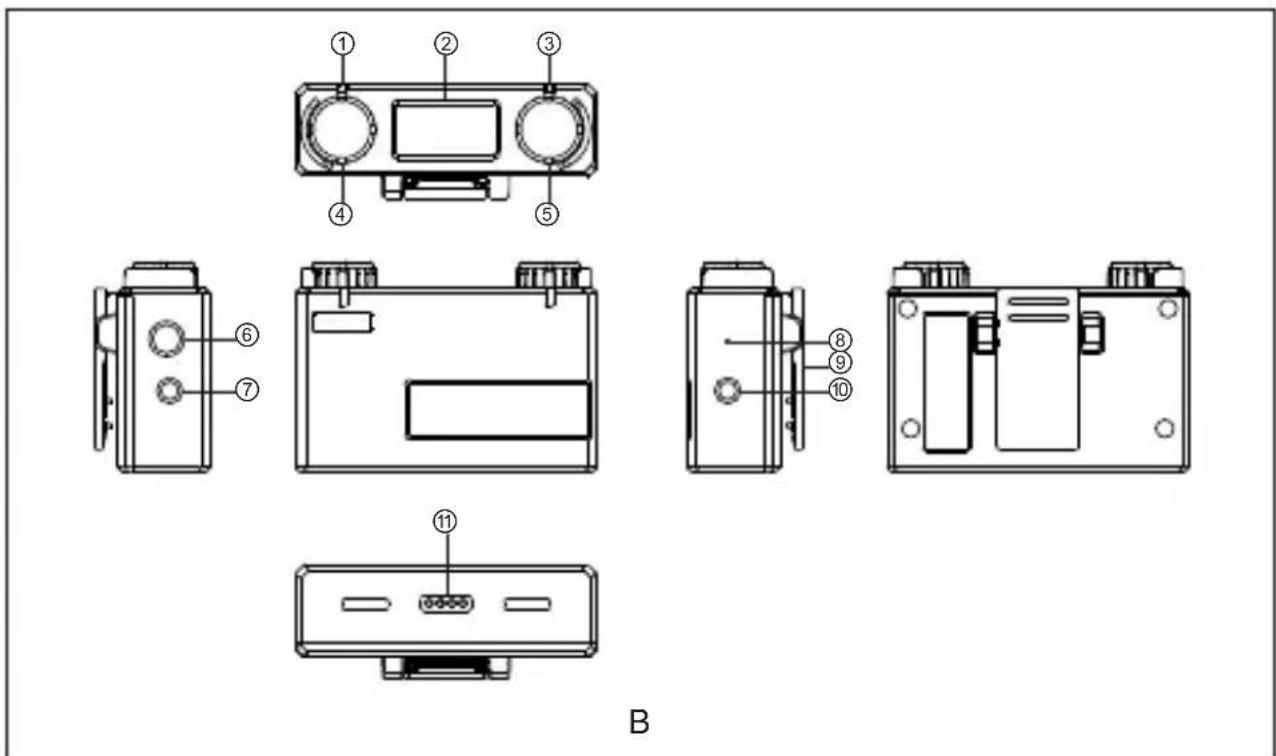
RECEIVER
① Link Indicator (Left Channel)
② Display Screen
③ Link Indicator (Right Channel)
④ Volume Knob(Left Channel):Adjust the Volume of the Left TX /Recording Mode Switch Button: Press to Switch the Recording Mode /Left TX Mute Button: Click to Mute the Left TX
⑤ Volume Knob (Right Channel): Adjust the Volume of the Right TX /Recording Mode Switch Button: Press to Switch the Recording Mode /Right TX Mute Button: Click to Mute the Right TX
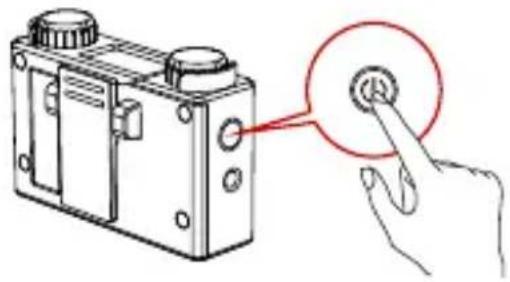
⑥ Power Button (Press for 3s to Switch On/Off)
⑦ 3.5mm Headphone Monitoring Port
⑧ Reset Button
Belt Clip
3.5mm Audio Output Port
Charging/Upgrade Contact
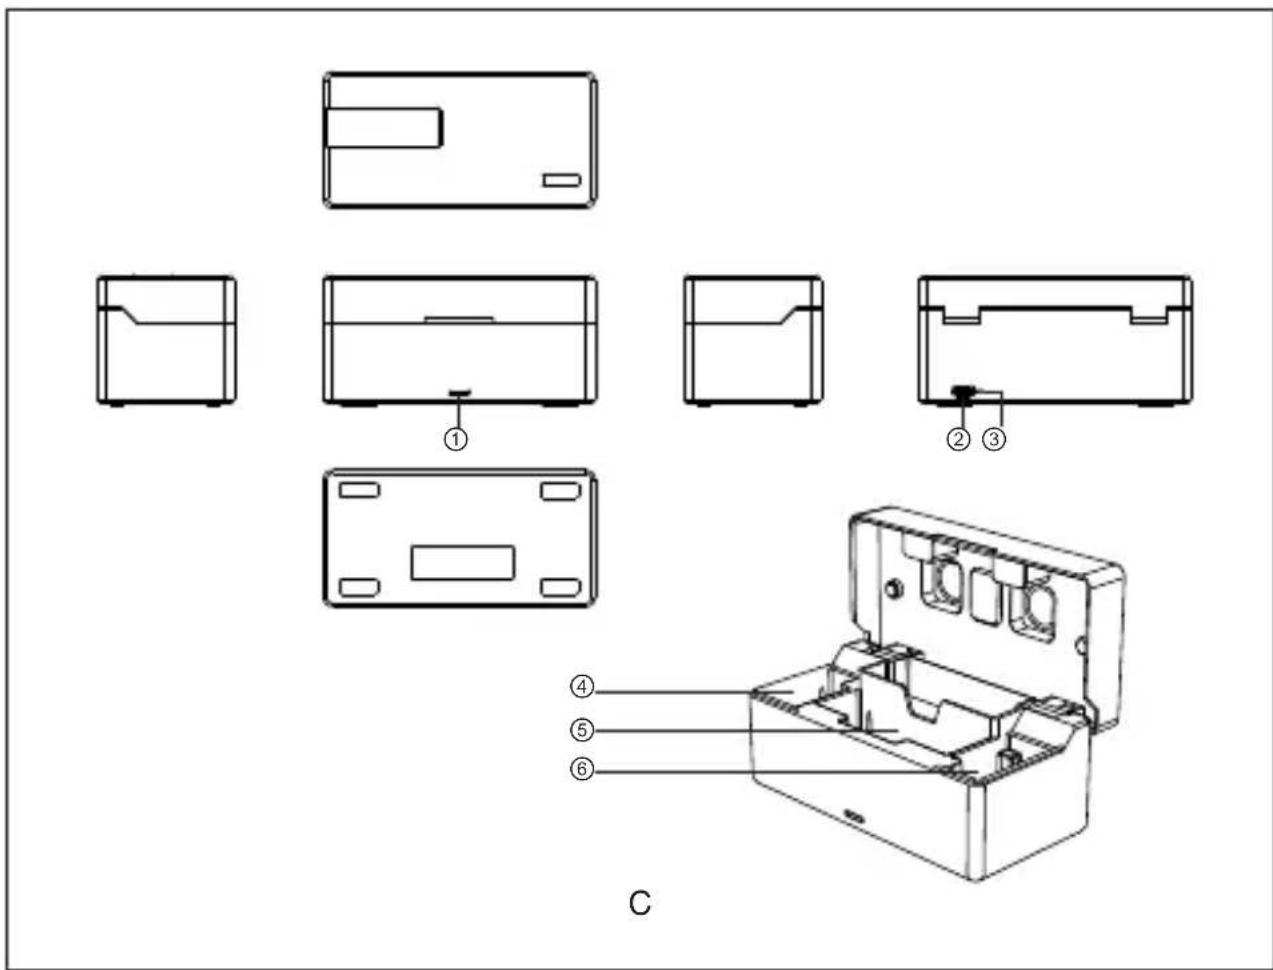
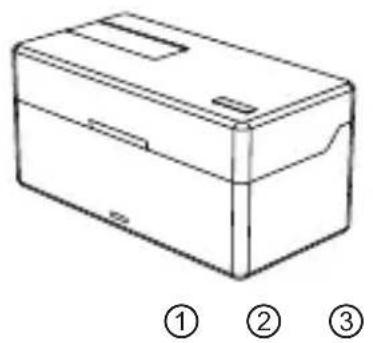
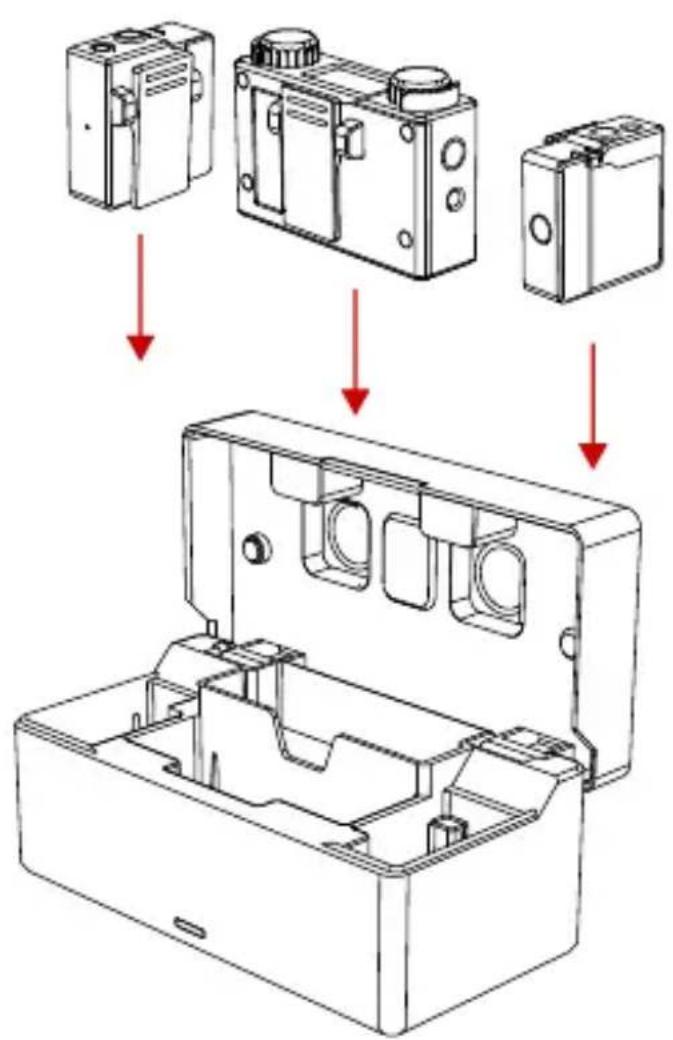
CHARGING CASE
① Power Indicator (Red: Low Battery, Green: Safe Battery Status, Orange: Charging)
② USB Type-C Port for Charging
③ Reset Button
④ TX Charging Slot
(5) RX Charging Slot
⑥ TX Charging Slot
①
(3)


(2)

(4)
① Press Power Button of TX/RX for 3s to switch on.
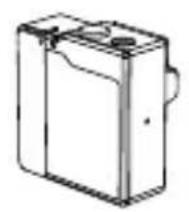
② Install TX as Figure2.
③ Install RX on the Camera.
④ Connect the 3.5mm Audio output port of RX with 3.5mm Audio input port of the camera by 3.5mm TRS cable.
⑤ Set camera's recording volume to minimum and RX's output volume level in middle to ensure the best recording effect.
A

B
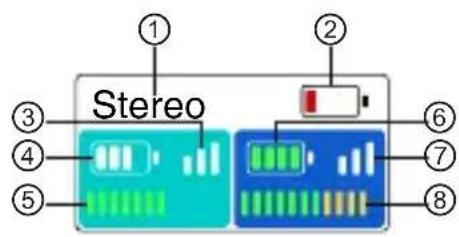
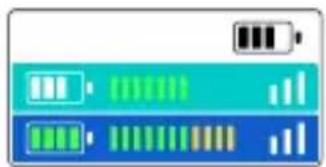
DISPLAY OF RX
① Current Recording Mode of RX
② RX Battery Status
③ Cyan TX Signal Strength Status
(4) Cyan TX Battery Status
(5) Cyan TX Input Volume Status
(6) Blue TX Battery Status
⑦ Blue TX Signal Strength Status
(8) Blue TX Input Volume Status
The TX color displayed on main display screen of RX relates to the channel switch and recording mode, the indicators of RX represents the corresponding TX
DISPLAY OF RX CHARGING CASE
① Identification of Charging Case
② Charging Case Battery Status (Orange:Charging,Green:Full-Charged)
③ Left TX Battery Status (Orange: Charging, Green: Full-Charged)
RX Battery Status (Orange: Charging, Green: Full-Charged)
⑤ Right TX Battery Status (Orange: Charging, Green: Full-Charged)
①
(1) PAIRING
1.Put TX and RX into the charging case at the same time, the unpaired devices will be paired automatically.
2.Display "√" when pair successfully.
3.Display "X" when pair failed.

(2)
(2) CHARGING
- It means low battery when the power indicator or the battery icon of RX display screen is red.
2.TX and RX will be charged when placed into charging case.
3.The indicator of TX will display orange when charging and go out after 15s. After placed into the charging case, TX, RX and charging case's current battery status will be displayed on the screen of RX.
4.When TX and RX are fully charged, the devices will automatically enter sleep mode. - When taking out or putting in TX or TX, the device will automatically wake up and start up.
- The indicator of charging case will display red and stop charging TX or RX when the battery energy is less than 10% .
(3)
(4)
(5)

OPERATING GUIDENCE
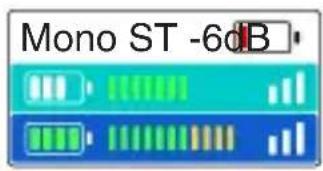
③ Mono Mode
- After taking out, start up and successfully paired TX and RX.
2.Long press left button for 3s to recording mode. Switch successful when the screen displayed "Mono". - At this time RX switched to mono mode, both left and right channel outputs two audios of TX.
- Volume of TX corresponds the indicator could be adjustable at this time by knob.
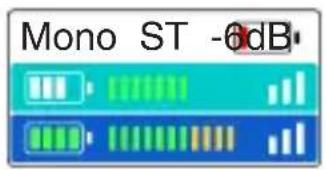
④ Safety Track Mode
- After taking out, start up and successfully paired TX and RX.
2.Long press left button for 3s to recording mode. Switch successful when the screen displayed "ST". - At this time RX switched to ST mode, both left and right channels output two audios of TX, but the sound of right channel is 6dB less than left channel, in order to make sure one of the channels is in the safe output volume.
- Volume of TX corresponds the indicator could be adjustable at this time by the knob.
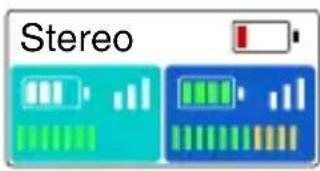
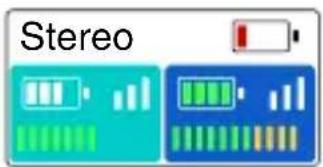
⑤ Stereo Mode(Supported by 2 TX and 1 RX Set)
- After taking out, start up and successfully paired TX and RX.
2.Long press left button/right button for 3s to recording mode. Switch successful when the screen displayed "Stereo". - At this time RX switched to Stereo mode. Left side of display screen corresponds to left channel output, right side of display screen corresponds to right channel output.
4.Left knob controls output volume of left TX which corresponds left channel, right knob controls output volume of right TX which corresponds right channel.
⑥ Auto Sleep Mode
If TX and RX are not placed in the charging case and not connected, TX/RX will automatically enter low-power consumption sleep mode after 5 minutes without any action. Press the power button to awake and power on.
| Interfaces | TX: 3.5mm Audio Input Port Charging/Upgrading Contacts RX: 3.5 mm TRS Output Interface 3.5mm Headset Interface Charging/Upgrading Contacts Charging Case: USB Type-C Interface |
| Wireless Mode | Frequency :2.4GHz AFH Power: 10dBm MAX Modulation: GFSK |
| Built-In Mic | Polar Pattern: Omnidirectional Frequency Response: 20Hz~20KHz |
| Lavalier Mic | Polar Pattern: Omnidirectional Frequency Response: 20Hz~20KHz |
| Reference Audio Input Level | -65 dBV |
| Maximum Input Sound Pressure Level | 100dB SPL (1KHz@1m) |
| Dynamic Range | 100 dBA |
| Polar Pattern | Omnidirectional |
| Audio Output Level Change Range | 21-State: 45dB |
| Transmission Latency | 5ms |
| Battery Mode | TX: 200mAh (0.76Wh) RX: 530mAh (1.96Wh) Charging Case: 3350mAh (12.16Wh) |
| Battery Life | TX: 4h RX: 7.5h Charging Case: About 2.5 times (Charge 2 TX and 1 RX at the Same Time in Full Charged States) |
| Charging Time@25℃ | TX: 45mins RX: 65mins Charging Case: 2.5h (Charge TX/RX first, then charge the charging case) |
| Firmware Upgrade Method | PC |
| Dimensions | TX: (L*W*H) 37*37*17.5mm RX: (L*W*H) 67*41*20.5mm Charging Case: (L*W*H) 121*61*43.5mm |
| Weight | TX: 20.5g RX: 51g Charging Case: 227.5g |
SUPPORT
If encounter any problems in using the product or need any help, please follow these ways to get more technical support:
Hollyland Products User Group
HollylandTech
HollylandTech
support@hollyland-tech.com
www.hollyland-tech.com
Hollyland Products User Group
HollylandTech
HollylandTech
support@hollyland-tech.com
www.hollyland-tech.com
Prefácio
Hollyland Products User Group
HollylandTech
HollylandTech
support@hollyland-tech.com
www.hollyland-tech.com
PpeinscIOBne
YnakoBOUHbIe NcTbI n3dEJIa c 1 nepeDaTuHKOM n 1 npneMHNKOM (Lark 150 Solo)
① Bokc dIy xpaHeHHx1
② IpeepaTuk TX X1
③ PnpemHKRX x1
④ Betpo3aunTHnaHacaKa X1
⑤ Aynokabc3,5TRSHa3,5TRS x1
⑥ Aynokabelb 3.5 dans npeo6pa30BaHnna n3 TRS B TRRS x1
⑦ Ka6eIb USB Type-A Ha Type-C X1
⑧ BceHappaBJIeHHa neTJnUka x1
⑨ Ing nonb3ObaTeIa X1
CymkaДлЯхpaHeHnBaEeIe X1
A OCHOBHOI INTEPpeic npneMHnka
① Tekyünn pexm 3anncn RX
② TekyünyoBénb 3apraRX
③ Tekyzaa MouHoctb 6ecnpoBODHO CnHaJa 3eJehHoro TX
④ TekyünyoBéHb 3apra da 3eJenHoro TX
⑤ TeKyuzaBxOHaHa rPOMKOCTb 3eJenHoro TX
⑥ Tekyünn ypoBemb 3neKtpo3apra da cHero TX
⑦ Tekyzaa MouHoctb 6ecnpoBODHO rHaJa 3eHeHHoro TX
⑧ Tekyuza BxOHa rPOMKocTb CnHero TX LBeT TX, OTo6paKaembI Ha rJaBHom nHTeppeCe RX, oTHocNTcK peXmU nepeKJIoueHna KaHaIOB mMKUnpoBaHn. INoJKeHne TX coOTBeTCTBye t HndkaTopy RX.
B OCHOBHOI HHTeppeic 6okca IJxpanenr RX
① 3нakи Bnytpn 6okca ДяхpaHeHЯ
② TekyünyoBHe b 3neKtpo3apraJa rUkKa dJa XpaHEna (opaHKeBb: 3apAka, 3eHbI: NOHOCtBu 3apJKeH)
③ Tekyün ypoBeHb 3JIeKtpo3apraJa neBoro TX (opaHxVeBb: 3apAka, 3eJeHbI: nonHOocTbHO 3apXKeH)
④ Tekyünyo ypoBeHb 3JIeKtpo3apJa npaBOrO RX (opaHKeBbI: 3apJaKa, 3eJHbI: nonHOCTbIO 3apJKeH)
⑤ Tekyün ypoBHe h 3neKtpo3apraJa npaBoro TX (opahXeBbI: 3apAka, 3eHbI: nonHOCTbIO 3apAkeH)

①
① CoprajexeHne
1.Пометente TX / RX в从业人员храеня одноюгамеону, И несоюоженисту abTomатUCEК coeINHЯТС.
2.3HaK OTo6paKaetc npu ycneuHOM cOprrKeHHN.
3.3HaK «X» oTo6paKaTc npn c6oe copjxKeHna.
PykoBoDcTBo nO 3KcPnIyaTaun

(2)
② 3apяdka
1.Korda INDnkaTop 6aTapeN TX KpacbI N 3HaOcK 6aTapeN Ha rIaBHOM INTEpeCe RX KpacbI, 3TO O3Haayet, YTO 6aTapey pa3pJxeha.
2.TX n RX aBtOMaTnueckn 3apjxaiOTcB 6okce dIy xpaHeHna.
3.Индikatop 6atapen TX ropnt opahxkeBbIM CBeTom BO BpeM 3apdkn n ABToMaTnueckn rachet uepe3 15 cekyHd.Iocne nomeuHn ero B 6okc dIy xpaHeHn B OCHOBHom INTepeiCe RX oTo6pKaet B peaIbHOM BpeMeHn ypoBeHb 6atapen TX, RX n 6okca dIy xpaHeHn.
4.Korda TX n RX B 6okce dny xpaheHna 3apjKeHbI, yCTpoiCTBO aBTOMaTnueckn nepeiTeB cnaui pexm dny 3HeprocbepxeHna.
5.BbHbTe yctpoiCTBa TX n RX, yctpoiCTBO aBtOMaTnueckn aKTINBnpyetcny 3arpy3ntc.
6.Korda 6atape8 6okca nna xpaehnra coctabnaret mehee 10% ,nHdkatop 6okca nna xpaehnra ropnt kpacnbim, npn 3tOM 3apndka TX n RX npekpaaetcra.
(3)
(4)
(5)
PykoBoDcTBo nO 3KcPnyaTaun
Hollyland Products User Group
HollylandTech
HollylandTech
support@hollyland-tech.com
www.hollyland-tech.com
Vorwort
Hollyland Products User Group
HollylandTech
HollylandTech
support@hollyland-tech.com
www.hollyland-tech.com
Avant-propos
Hollyland Products User Group
HollylandTech
HollylandTech
support@hollyland-tech.com
www.hollyland-tech.com

Hollyland Products User Group
HollylandTech
HollylandTech
support@hollyland-tech.com
www.hollyland-tech.com
SHENZHEN HOLLYLAND TECHNOLOGY CO., LTD